Table of Contents
Advertisement
Quick Links
Advertisement
Table of Contents

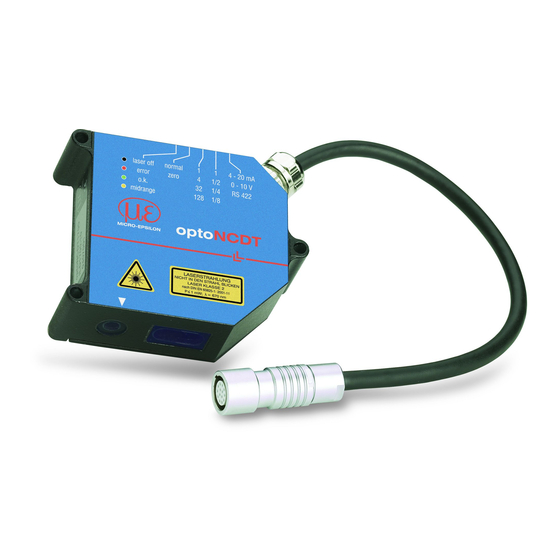
Related Manuals for MICRO-EPSILON ILD1700


Summary of Contents for MICRO-EPSILON ILD1700
- Page 1 User manual for the ILD1700 Tool Version 1.4...
-
Page 2: Table Of Contents
RANSFER ONFIGURATION 4.1.9 S ..................11 ENSOR ALLBACK 5 DATA ACQUISITION PROGRAM ...............12 Configuration...................12 5.1.1 C ................12 ONNECTION ETTINGS 5.1.2 Y-A ...............13 CALING ROPERTIES Data Acquisition ................13 5.2.1 M .................13 EASUREMENT ROPERTIES 5.2.2 A ................13 ROPERTIES ___________________________________________________________________________ Micro-Epsilon X9751137-A01 Page 2... - Page 3 ILD1700 Tool Data Storage ...................14 5.3.1 D ................14 XPORT ROPERTIES Distance View ..................14 5.4.1 D ....................14 ISTANCE 5.4.2 S ....................14 TATISTICS 5.4.3 L ................14 IMIT UTPUT ROPERTIES 5.4.4 F ................15 REEZE AVIGATION 5.4.5 F1/F2 U ...................16 PPER LIMIT 5.4.6 F2/F1 L ..................16...
-
Page 4: Software Installation
Start the executable ILD1700 Tool SetupV1.40.exe and follow the instructions (see Fig. 1 Software Installation). Fig. 1 Software Installation 2.3 Start the application To start the ILD1700 Tool double click on the desktop icon ILD1700 Tool or use the ILD1700 Tool icon of the start menu. ___________________________________________________________________________ Micro-Epsilon... -
Page 5: Main Menu
ILD1700 Tool 3 Main Menu The ILD1700 Tool starts with the main page (see Fig. 2 Main Menu). The button Start Sensor Configuration switches to the ILD1700 set-up page, the button Start Data Acquisition switches to a page for ILD1700 data acquisition and storage. -
Page 6: Menu Bar
Opens the sensor/controller operation manual. That manual usually is available in English and German and will be displayed according to the currently selected application language. 3.4.4.2 About ILD1700 Tool… Shows a picture with the version Information of this application on it. ___________________________________________________________________________... -
Page 7: Sensor Configuration
3.4.4.3 Help (F1) Opens this document. 4 Sensor Configuration 4.1 Configuration Shows the parameters that affect the sensor/controller (see Fig. 3 ILD1700 Sensor Configuration). Fig. 3 ILD1700 Sensor Configuration 4.1.1 Connection Setting The COM port the ILD1700 controller is connected to. Supported port numbers are COM1 to COM16. -
Page 8: Sensor Parameters
‘0..10V’ activate the analog data output (pin 13). The limit outputs (pin 7 and 8) work in analog mode only. 4.1.2.4 Synchronization Determines the synchronization method with other ILD1700 sensors. The modes ‘Slave’ and ‘Master Sync. Alt.’ affect the data rate. See the sensor manual for more on that. -
Page 9: Additional Parameters
ILD1700 Tool program, see section ‘Switch Output’ parameter ‘Master Value’. This has an effect on the analog and digital data outputs. Mastering works much as common calibration does. A reference target of known distance is measured by the sensor (that distance is sent to the sensor as parameter ‘Master Value’). -
Page 10: Sensor Information
Load Configuration From Sensor: Reads the current settings from the sensor, e.g. sample rate, switch mode… and shows them in the ILD1700 Sensor Configuration dialog. Write Configuration To Sensor: The parameters of the sensor can be either set up by using the enabled input fields or loaded from a configuration file (see 4.1.7). -
Page 11: Sensor Fallback
ILD1700 Tool 4.1.9 Sensor Fallback Reset To Factory Settings: Overwrites the parameters stored in the sensor with the default parameters. For example sets the baud rate to 115200. Reboot Sensor: Keeps the parameters but restarts the sensor as if it was turned off and on again. -
Page 12: Data Acquisition Program
This measurement program requires a COM port with settings: 115200, 8, n, 5.1.1.1 COM Number of the COM port the ILD1700 sensor is connected to (see 4.1.1). 5.1.1.2 Block size Determines the number of values to read at once. A smaller block size reduces the reaction time (here: display refresh) but increases the system load. -
Page 13: Y-Axis Scaling Properties
ILD1700 Tool 5.1.2 Y-Axis Scaling Properties This mode automatically adjusts the y-scale of the display to zoom in on the measured values as close as possible. In manual mode the value range can be set by entering the min. and max. -
Page 14: Data Storage
ILD1700 Tool 5.2.2.1 Set Zero Takes the current measurement value as reference point and sets it to zero; i.e. subtracts the value that was measured as the button was pressed from the subsequent measurements. 5.2.2.2 Reset Undoes the set zero operation and shows the value the sensor puts out. -
Page 15: Ode N Avigation
ILD1700 Tool the configuration sub program, where they can be stored and transferred to the sensor. 5.4.3.1 Activate switch sim. Enables the input elements for the switch limits and shows the two LEDs, which indicate the state of the limit outputs F1 and F2. -
Page 16: Pper Limit
ILD1700 Tool 5.4.4.6 Clear buffer This button can be used to empty all data buffers and switch into live mode. 5.4.5 F1/F2 Upper limit This LED displays the state of the output for the upper limit. A red LED indicates the upper limit is violated and the corresponding limit output is set to high. - Page 17 ILD1700 Tool ___________________________________________________________________________ Micro-Epsilon Page 17...
Need help?
Do you have a question about the ILD1700 and is the answer not in the manual?
Questions and answers