Table of Contents
Advertisement
Quick Links
Advertisement
Table of Contents

Related Manuals for HEIDENHAIN QUADRA-CHEK ND 1100


Summary of Contents for HEIDENHAIN QUADRA-CHEK ND 1100
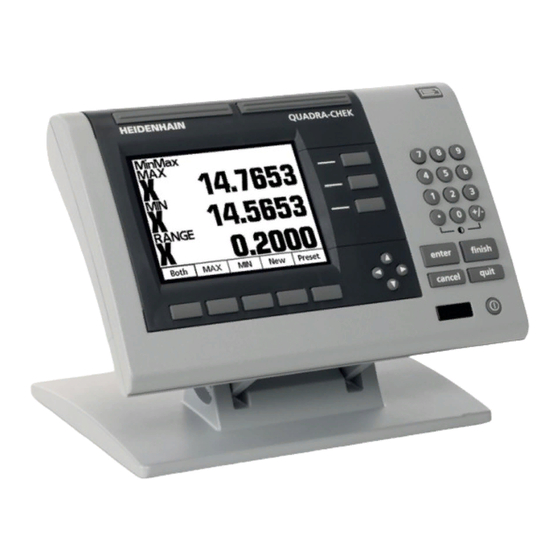
- Page 1 ND 1100 QUADRA-CHEK Operating Instructions Evaluation Unit English (en) 05/2018...
-
Page 2: Table Of Contents
Basic operation..........................39 Preparing to measure........................47 Measuring............................53 Printing data........................... 57 10 External operation.......................... 59 11 Setup..............................71 12 Service and maintenance......................107 13 What to do if..........................111 14 Removal and disposal........................115 15 Specifications..........................117 HEIDENHAIN | ND 1100 | Operating Instructions | 05/2018... - Page 3 Symbols on the product......................21 2.6.3 Electrical safety instructions....................22 Transport and storage........................23 Overview............................... 24 Unpacking............................. 24 Items supplied and accessories......................24 In case of damage in transit.......................25 Repackaging and storage........................25 HEIDENHAIN | ND 1100 | Operating Instructions | 05/2018...
- Page 4 Connecting an RJ45 cable........................37 5.10 Connecting the line voltage........................37 Basic operation..........................39 Overview............................... 40 Panel key descriptions......................... 40 Power-on the device..........................42 Power-off the device..........................42 Display and soft key layout........................ 42 Menus..............................43 HEIDENHAIN | ND 1100 | Operating Instructions | 05/2018...
- Page 5 Printing data............................58 10 External operation.......................... 59 10.1 External operation..........................60 10.1.1 Key emulation commands....................... 60 10.1.2 Unit control commands......................64 10.2 Data output formats..........................68 10.2.1 Send............................68 10.2.2 Position.............................69 10.2.3 Print Edges..........................69 HEIDENHAIN | ND 1100 | Operating Instructions | 05/2018...
- Page 6 11.16 Adjusting key repeat rate........................104 11.17 Setting the time and date........................ 105 11.18 Saving a settings file......................... 106 12 Service and maintenance......................107 12.1 Overview............................. 108 12.2 Cleaning...............................108 12.3 Maintenance schedule........................108 12.4 Resuming operation...........................109 HEIDENHAIN | ND 1100 | Operating Instructions | 05/2018...
- Page 7 13.1 Error messages........................... 112 13.2 Encoder errors............................ 114 14 Removal and disposal........................115 14.1 Overview............................. 116 14.2 Removal...............................116 14.3 Disposal............................... 116 15 Specifications..........................117 15.1 Product data............................118 15.2 Product dimensions........................... 119 HEIDENHAIN | ND 1100 | Operating Instructions | 05/2018...
-
Page 9: Fundamentals
Fundamentals... -
Page 10: About These Instructions
If the part number and indexes match, the documentation is valid If the part number and indexes do not match so that the documentation is not valid, you will find the current documentation for the product at www.heidenhain.de. HEIDENHAIN | ND 1100 | Operating Instructions | 05/2018... -
Page 11: Notes On Reading The Documentation
Would you like any changes, or have you found any errors? We are continuously striving to improve our documentation for you. Please help us by sending your requests to the following e-mail address: userdoc@heidenhain.de HEIDENHAIN | ND 1100 | Operating Instructions | 05/2018... -
Page 12: Storage And Distribution Of The Documentation
These instructions must be read and observed by every person who performs any of the following tasks: Mounting Installation Commissioning Setup, programming and operation Service, cleaning and maintenance Troubleshooting Removal and disposal HEIDENHAIN | ND 1100 | Operating Instructions | 05/2018... -
Page 13: Notes In This Documentation
NOTICE indicates danger to material or data. If you do not follow the avoidance Notice instructions, the hazard could result in things other than personal injury, like property damage. HEIDENHAIN | ND 1100 | Operating Instructions | 05/2018... - Page 14 The behavior of the function depends on the configurable machine settings The book symbol represents a cross reference to external documentation, e.g. the documentation of your machine tool builder or other supplier. HEIDENHAIN | ND 1100 | Operating Instructions | 05/2018...
-
Page 15: Symbols And Fonts Used For Marking Text
Linear error correction Segmented linear error correction Bold Identifies menus, screens, displays, keys, and soft keys Example: Press the Menu soft key Press the Setup soft key The Setup menu is displayed. HEIDENHAIN | ND 1100 | Operating Instructions | 05/2018... -
Page 17: Safety
Safety... -
Page 18: General Safety Precautions
In particular, the product must not be used in the following applications: Use and storage outside the specifications Outdoor use Use in potentially explosive atmospheres Use of the product as part of a safety function HEIDENHAIN | ND 1100 | Operating Instructions | 05/2018... -
Page 19: Personnel Qualification
Electrical specialists have been specially trained for the environment they work in. Electrical specialists must comply with the provisions of the applicable legal regulations on accident prevention. HEIDENHAIN | ND 1100 | Operating Instructions | 05/2018... -
Page 20: Obligations Of The Operating Company
The specific safety precautions required for the individual activities to be performed on the product are indicated in the respective sections of these instructions. HEIDENHAIN | ND 1100 | Operating Instructions | 05/2018... -
Page 21: Symbols In The Instructions
Symbol Meaning Observe the safety precautions regarding electricity and power connection before you connect the product Earth (ground) terminal as per IEC 60417 - 5017 . Observe the information on installation. HEIDENHAIN | ND 1100 | Operating Instructions | 05/2018... -
Page 22: Electrical Safety Instructions
Damage to internal parts of the product! Opening the product will result in forfeiture of warranty and guarantee. Never open the housing Only the product manufacturer is permitted to access the inside of the product HEIDENHAIN | ND 1100 | Operating Instructions | 05/2018... -
Page 23: Transport And Storage
Transport and storage... -
Page 24: Overview
Stand or mounting adapter Installation instructions Addendum (optional) Further information: "Notes on reading the documentation", Page 11 Accessories The following items are optionally available and can be ordered from HEIDENHAIN as additional accessories: Accessories Part number Stand 382892-02 For table top use. The product can be tilted forward or backward by up to 20°. -
Page 25: In Case Of Damage In Transit
Ship the product without accessories, without measuring devices and without peripherals Storage of the product Package the product as described above Observe the specified ambient conditions Inspect the product for damage after any transport or longer storage times HEIDENHAIN | ND 1100 | Operating Instructions | 05/2018... -
Page 27: Mounting
Mounting... -
Page 28: Overview
Attach the unit to the stand as shown in the diagram above Partially tighten the cap and shoulder screw Adjust the device to the desired tilt position Completely tighten the cap and shoulder screws HEIDENHAIN | ND 1100 | Operating Instructions | 05/2018... -
Page 29: Mounting And Location On A Benchtop
Mounting on an arm To mount the product on an arm: Secure the Mounting adapter to the product Bolt the adapter and product to the arm as shown in the diagram above HEIDENHAIN | ND 1100 | Operating Instructions | 05/2018... -
Page 30: Mounting A Cover
Remove the adhesive strip protectors from the adhesive tabs Place the cover over the product Fold the adhesive tabs toward the product Press the adhesive tabs against the product securing the tabs to the product HEIDENHAIN | ND 1100 | Operating Instructions | 05/2018... -
Page 31: Installation
Installation... -
Page 32: Overview
Wear a grounded ESD wristband when handling product connections NOTICE Incorrect pin assignment! This may cause product malfunctions or damage to the product. Only assign pins or wires that are used HEIDENHAIN | ND 1100 | Operating Instructions | 05/2018... -
Page 33: Product Overview
Touch probe connector Earth (ground) terminal Not supported Measurement axis connectors RS-232 serial port connector Side panel Speaker or headset connector USB Type A connector RJ45 foot switch and remote keypad connector HEIDENHAIN | ND 1100 | Operating Instructions | 05/2018... -
Page 34: Connecting Encoders
"Product overview", Page 33 If the cable connectors include mounting screws, do not overtighten them X, Y, Z, Q connector pin assignments TTL 1 V Sensor Sensor HEIDENHAIN | ND 1100 | Operating Instructions | 05/2018... -
Page 35: Connecting A Touch Probe
LED - LED + In - In + HEIDENHAIN universal touch probe LED + DC 12 V DC 15 V DC 5 V 3/7/9/ 12/14 S+ I(2) S+ I(1) LED - HEIDENHAIN | ND 1100 | Operating Instructions | 05/2018... -
Page 36: Connecting An Rs-232 Cable
Insert the USB drive into the respective connection on the side panel Further information: "Product overview", Page 33 USB connector pin assignments USB Type A +5 V Data (-) Data (+) Data GND HEIDENHAIN | ND 1100 | Operating Instructions | 05/2018... -
Page 37: Connecting An Rj45 Cable
Use a power cable that meets the requirements to connect the power connection to a 3-wire grounded power outlet Further information: "Product overview", Page 33 HEIDENHAIN | ND 1100 | Operating Instructions | 05/2018... -
Page 39: Basic Operation
Basic operation... -
Page 40: Overview
Panel key descriptions enter finish cancel quit Wide keys Display Soft keys Axis keys Arrow keys Print key Numeric keys Command keys Display on and off key HEIDENHAIN | ND 1100 | Operating Instructions | 05/2018... - Page 41 - used to abandon the current task and return to the DRO screen The display power key is used to turn the display off without Display turning the product off. power key HEIDENHAIN | ND 1100 | Operating Instructions | 05/2018...
-
Page 42: Power-On The Device
The product displays information in one of two operating modes: DRO mode displays current positions of axes Setup mode displays installation and setup menus Soft keys change to support activities shown on the display. HEIDENHAIN | ND 1100 | Operating Instructions | 05/2018... -
Page 43: Menus
Press the Menu soft key to access the Setup and Extra menus Preset Press the Preset soft key to preset a datum Menus The following menus provide access to setup menus, measurement operations, and data transmission functions: Setup Extra HEIDENHAIN | ND 1100 | Operating Instructions | 05/2018... - Page 44 Press the Setup soft key Further information: "Setup menu", Page 73 Access to Setup menu configuration data fields is password restricted to supervisors and other technically qualified personnel. Configuration mistakes can result in measurement errors. HEIDENHAIN | ND 1100 | Operating Instructions | 05/2018...
- Page 45 Turns the Print On Edge function on or off. POE 0/1 +- Axis Reverses the axis count direction. FastOut Sets the product to RS-232 data streaming mode. HEIDENHAIN | ND 1100 | Operating Instructions | 05/2018...
- Page 46 Sends the maximum value of a MinMax measurement to a computer or a serial printer via the RS-232 port SendRange Sends the range value of a MinMax measurement to a comput- er or a serial printer via the RS-232 port HEIDENHAIN | ND 1100 | Operating Instructions | 05/2018...
-
Page 47: Preparing To Measure
Preparing to measure... -
Page 48: Preparing To Measure
Establishing a machine zero with encoder reference marks To establish a repeatable machine zero with encoder reference marks: Move the stage to have encoder reference mark crossings recognized on each axis HEIDENHAIN | ND 1100 | Operating Instructions | 05/2018... -
Page 49: Adjusting The Display Contrast
Press the +/- key to decrease the contrast Selecting a unit of linear measure To select a unit of linear measure: Press the MM/IN soft key to toggle between millimeters and inches HEIDENHAIN | ND 1100 | Operating Instructions | 05/2018... -
Page 50: Selecting A Unit Of Angular Measure
Press the ABS/INC soft key, if necessary, to select INC in the lower left corner of the display Press the axes keys to zero-out the measurement axes on the DRO screen HEIDENHAIN | ND 1100 | Operating Instructions | 05/2018... -
Page 51: Presetting Datums
Select the axes you wish to preset by pressing the desired axis key(s) An axis will be underlined Enter the preset coordinate for the datum using the numeric keypad Press the enter key HEIDENHAIN | ND 1100 | Operating Instructions | 05/2018... -
Page 53: Measuring
Measuring... -
Page 54: Overview
The measurement results will be displayed on the DRO screen and can be output to a printer or a computer Further information: "Printing data", Page 58 Further information: "External operation", Page 60 Repeat for each axis of measurement HEIDENHAIN | ND 1100 | Operating Instructions | 05/2018... -
Page 55: Minmax Measurements
"Printing data", Page 58 Further information: Further information: "External operation", Page 60 Press finish to end the MinMax measurement session and return to the DRO screen HEIDENHAIN | ND 1100 | Operating Instructions | 05/2018... -
Page 57: Printing Data
Printing data... -
Page 58: Printing Data
"Configuring the RS-232 port", Page 101 To print data: Press the Print key A Hot Key can be configured to print data by mapping it to the Print key. "Assigning hot keys", Page 95 Further information: HEIDENHAIN | ND 1100 | Operating Instructions | 05/2018... -
Page 59: External Operation
External operation... -
Page 60: External Operation
Remote keypad commands are only available if a remote keypad is attached. Example To emulate pressing the Print button: Type at the command line @PRINT Press the Enter key on the computer keyboard HEIDENHAIN | ND 1100 | Operating Instructions | 05/2018... - Page 61 @W1<CR> @w1<CR> Wide 2 @WIDE2<CR> KEY 2 <CR> @W2<CR> @w2<CR> Axis 1 @AXIS1<CR> KEY 3<CR> @D1<CR> @d1<CR> Axis 2 @AXIS2<CR> KEY 4<CR> @D2<CR> @d2<CR> Axis 3 @AXIS3<CR> KEY 5<CR> @D3<CR> @d3<CR> HEIDENHAIN | ND 1100 | Operating Instructions | 05/2018...
- Page 62 Remote keypad 3 @REMOTE3<CR> KEY 49<CR> @R3<CR> @r3<CR> Remote keypad 4 @REMOTE4<CR> KEY 50<CR> @R4<CR> @r4<CR> Remote keypad 5 @REMOTE5<CR> KEY 51<CR> @R5<CR> @r5<CR> Remote keypad 6 @REMOTE6<CR> KEY 52<CR> @R6<CR> @r6<CR> HEIDENHAIN | ND 1100 | Operating Instructions | 05/2018...
- Page 63 @REMOTE+<CR> KEY 57<CR> @R+<CR> @r+<CR> Remote keypad +/- @REMOTE-<CR> KEY 57<CR> @R-<CR> @r-<CR> Remote keypad enter @REMOTE ENTER<CR> KEY 58<CR> @RE<CR> @re<CR> Remote keypad finish @REMOTE FINISH<CR> KEY 59<CR> @RF<CR> @rf<CR> HEIDENHAIN | ND 1100 | Operating Instructions | 05/2018...
-
Page 64: Unit Control Commands
VALUE Returns the product name. NAME? Sets the contrast of the display. CONTRAST <value> can be any number in the range from 0 to VALUE 255. HEIDENHAIN | ND 1100 | Operating Instructions | 05/2018... - Page 65 2 = serial 1 = analog 3 = serial 2 Returns the current options enabled on the unit as OPTIONS? a number. Returns a number which represents the unit's MODE? measurement mode. HEIDENHAIN | ND 1100 | Operating Instructions | 05/2018...
- Page 66 Prints the DRO value of the axis. PRINT <axis> The value is preceded by the axis label and followed by the units label (mm or in). can be one of the following: AXIS HEIDENHAIN | ND 1100 | Operating Instructions | 05/2018...
- Page 67 3 Day of the month - 0 is the first and 30 is the 31st 4 Hours - Valid values are from 0 to 23 in 24-hour format. 5 Minutes 6 Seconds HEIDENHAIN | ND 1100 | Operating Instructions | 05/2018...
-
Page 68: Data Output Formats
5 Decimal point 6 0 to 6 places after the decimal point 7 Space 8 2 characters for units: in for Inch and mm for Millimeters 9 Carriage return 10 Line Feed HEIDENHAIN | ND 1100 | Operating Instructions | 05/2018... -
Page 69: Position
10 Line Feed 10.2.3 Print Edges The Print Edges format outputs data in a format defined in the Print Edges parameter of the Print menu. Further information: "Formatting printed data ", Page 97 HEIDENHAIN | ND 1100 | Operating Instructions | 05/2018... -
Page 71: Setup
Setup... -
Page 72: Software Setup
The data-backup battery is changed The data and settings are cleared by maintenance personnel Parameters are changed using the Setup menu screens Certain software upgrades are performed Previously saved settings files are loaded HEIDENHAIN | ND 1100 | Operating Instructions | 05/2018... -
Page 73: Setup Menu
Press the finish key to save an entry and return to the Setup menu Press the finish key again to return to the DRO screen HEIDENHAIN | ND 1100 | Operating Instructions | 05/2018... -
Page 74: Setup Order
Set key repeat delay Clock Set the time and date Setup configurations can be saved on a USB drive. Further information: "Saving a settings file", Page 106. Menu Saving settings Supervisor Save settings files HEIDENHAIN | ND 1100 | Operating Instructions | 05/2018... -
Page 75: Selecting A Language And Viewing Product Information
Press the Yes soft key Press the finish key The language selection is saved and the display returns to the Setup menu. The graphical user interface is displayed in the new language. HEIDENHAIN | ND 1100 | Operating Instructions | 05/2018... -
Page 76: Entering The Supervisor Password And Startup Zero
To require a machine zero on startup: Highlight the Startup Zero parameter Press the Yes soft key Press the finish key The parameters are saved and the Setup menu is displayed HEIDENHAIN | ND 1100 | Operating Instructions | 05/2018... -
Page 77: Loading A Settings File And Startup Screen
To load a startup screen: Press the Startup soft key Follow the instructions shown on the display Press the finish key The parameters are saved and the Setup menu is displayed HEIDENHAIN | ND 1100 | Operating Instructions | 05/2018... -
Page 78: Configuring Encoders
External 0 and Slew Limit apply to encoder configuration. "Adjusting key repeat rate", Page 104 for Key Further information: Delay field information Further information: "Setting the audio volume", Page 103 for Volume field information HEIDENHAIN | ND 1100 | Operating Instructions | 05/2018... - Page 79 Highlight the Slew Limit field Enter the slew rate limit (increments of resolution per second) Press the finish key The parameters are saved and the Setup menu is displayed HEIDENHAIN | ND 1100 | Operating Instructions | 05/2018...
-
Page 80: Encoders Menu
When Rad/Dia is active the Rad or Dia soft key will be added to the bottom of the DRO display "Selecting radius or diameter measurement", Page 50 Further information: Highlight the Res field Enter the encoder resolution in the units shown in the Units parameter HEIDENHAIN | ND 1100 | Operating Instructions | 05/2018... - Page 81 Highlight the Ref Marks parameter Press the List soft key Highlight the desired encoder reference mark type Type options: ABS HH (absolute HEIDENHAIN) MANUAL NONE MS20 ABS AC (absolute Acu-Rite) Press the enter key HEIDENHAIN | ND 1100 | Operating Instructions | 05/2018...
- Page 82 Press the DEC or INC soft key to select a label for the axis Highlight the Units parameter Press a soft key to select the unit of measure Units options: Press the finish key The parameters are saved and the Setup menu is displayed HEIDENHAIN | ND 1100 | Operating Instructions | 05/2018...
-
Page 83: Calibrating Stage Squareness
Press the Teach soft key to begin the squareness calibration Follow the instructions shown on the display to complete the calibration Press the finish key The parameters are saved and the Setup menu is displayed HEIDENHAIN | ND 1100 | Operating Instructions | 05/2018... -
Page 84: Correcting For Errors
The correction starting point is mapped to the axis machine zero in addition to MZ Offset. A repeatable machine zero, established by crossing reference marks or defining a manual hard-stop, must be present prior to performing SLEC procedures. HEIDENHAIN | ND 1100 | Operating Instructions | 05/2018... -
Page 85: Linear Error Correction (Lec)
Perform a single measurement of the entire range of motion using the standard artifact Make a note of the result Use an artifact that allows measurements of as much of the axis range of motion as possible. HEIDENHAIN | ND 1100 | Operating Instructions | 05/2018... - Page 86 The standard and observed values for axes should be 1.000 when no LEC correction is applied. Perform LEC on other axes if desired Press the finish key The parameters are saved and the Setup menu is displayed HEIDENHAIN | ND 1100 | Operating Instructions | 05/2018...
-
Page 87: Segmented Linear Error Correction (Slec)
Press the finish key to return to the DRO screen Press the Menu soft key Press the Extra soft key Highlight the Cl Datums option Press the enter key to clear all existing datums HEIDENHAIN | ND 1100 | Operating Instructions | 05/2018... - Page 88 Setup | Correcting for errors Position the standard artifact along the measurement axis Align the artifact as closely as possible to the axis Zero axes on the datum of the standard HEIDENHAIN | ND 1100 | Operating Instructions | 05/2018...
- Page 89 Press the Axis key to zero the axis at the zero position of the standard Highlight the SLEC menu Highlight the SLEC Axis parameter Press a soft key to select the axis for correction Highlight the MZ Offset field Press the Teach soft key HEIDENHAIN | ND 1100 | Operating Instructions | 05/2018...
- Page 90 Highlight the Observed field Press the Teach soft key The system will automatically populate the value measured at the end of the segment. In the example the Observed value at Station 4 is 40.000. HEIDENHAIN | ND 1100 | Operating Instructions | 05/2018...
- Page 91 Highlight the Enabled field for each axis Press the On soft key to activate SLEC for each axis Press the finish key The parameters are saved and the Setup menu is displayed HEIDENHAIN | ND 1100 | Operating Instructions | 05/2018...
-
Page 92: Scaling Measurements
Press the No soft key to disable scale factor Press the Yes soft key to enable scale factor Press the finish key The parameters are saved and the Setup menu is displayed HEIDENHAIN | ND 1100 | Operating Instructions | 05/2018... -
Page 93: Formatting The Display
- angular unit of measure set to decimal degrees - angular unit of measure set to degrees, minutes, seconds Last - angular unit of measure set to the last unit of measure used before the product was powered-off HEIDENHAIN | ND 1100 | Operating Instructions | 05/2018... - Page 94 The positions of other axes are automatically updated when the position of an axis is changed in the Display As field. Press the finish key The parameters are saved and the Setup menu is displayed HEIDENHAIN | ND 1100 | Operating Instructions | 05/2018...
-
Page 95: Assigning Hot Keys
- switches located on the foot switch - wide keys Wide Highlight a specific key or switch Press a soft key to select a function type to assign Funtion options: None Special Highlight the specific function HEIDENHAIN | ND 1100 | Operating Instructions | 05/2018... - Page 96 SendRange computer or serial printer via the RS-232 port. Press the enter key to complete the assignment Press the finish key The parameters are saved and the Setup menu is displayed HEIDENHAIN | ND 1100 | Operating Instructions | 05/2018...
-
Page 97: Formatting Printed Data
Press the Yes or No soft key to enable or disable a Form Feed at the end of data sent to a computer or printer Highlight the Print Edges parameter Press the List soft key Use the up and down arrow keys to select a Print Edges format HEIDENHAIN | ND 1100 | Operating Instructions | 05/2018... - Page 98 Q = 25.401 Printed: +0001245-0030506+0000010+0025401+0000013 MORA-C Each axis is printed as 7 digits without a decimal point. Data: X = 1.245 Y = -30.506 Z = 0.010 Q = 25.401 Printed: +0001245-0030506+0000010+0025401+0000017 HEIDENHAIN | ND 1100 | Operating Instructions | 05/2018...
- Page 99 Printed: N1Xfffffbf0Y10aZfa0I FAROCont Each axis value is multiplied by 2000, converted to a long, and print- ed in hexadecimal. Data: X = -0.520 Y = 0.133 Z = 2.000 Printed: N1Xfffffbf0Y10aZfa0 HEIDENHAIN | ND 1100 | Operating Instructions | 05/2018...
- Page 100 Highlight the Invert Probe parameter Press the Yes or No soft key to enable or disable inverting the probe Press the finish key The parameters are saved and the Setup menu is displayed HEIDENHAIN | ND 1100 | Operating Instructions | 05/2018...
-
Page 101: Configuring The Rs-232 Port
Print key is pressed XYZ: Sends the current axis position data to the serial port in both a column and a row when the Print key is pressed. HEIDENHAIN | ND 1100 | Operating Instructions | 05/2018... - Page 102 Enter any delays in milliseconds that might be required to optimize RS-232 communication negotiations with external devices Press the finish key The parameters are saved and the Setup menu is displayed HEIDENHAIN | ND 1100 | Operating Instructions | 05/2018...
-
Page 103: Setting The Audio Volume
Enter a value from 0 to 10 A value of 0 will silence alerts. Alert volume increases from 1 to 10. Press the finish key The parameters are saved and the Setup menu is displayed HEIDENHAIN | ND 1100 | Operating Instructions | 05/2018... -
Page 104: Adjusting Key Repeat Rate
Enter a value between 5 and 25 Enter a small value for fast repetition or a large value for slow repetition. Press the finish key The parameters are saved and the Setup menu is displayed HEIDENHAIN | ND 1100 | Operating Instructions | 05/2018... -
Page 105: Setting The Time And Date
Highlight the Time Format parameter Press a soft key to select the 12 hour or 24 hour time format Press the finish key The parameters are saved and the Setup menu is displayed HEIDENHAIN | ND 1100 | Operating Instructions | 05/2018... -
Page 106: Saving A Settings File
Highlight the Password field Enter the password Press the Save soft key Follow the instructions displayed on the screen Press the finish key The parameters are saved and the Setup menu is displayed HEIDENHAIN | ND 1100 | Operating Instructions | 05/2018... -
Page 107: Service And Maintenance
Service and maintenance... -
Page 108: Overview
Do not operate or repair the product if damaged Replace defective products immediately or contact an authorized service agency The following steps are only to be performed by electrical specialists. "Personnel qualification", Page 19 Further information: HEIDENHAIN | ND 1100 | Operating Instructions | 05/2018... -
Page 109: Resuming Operation
When connecting the peripheral devices (e.g. encoders), the operating company must ensure safe resumption of operation and assign authorized and appropriately qualified personnel to the task. "Obligations of the operating company", Page 20 Further information: HEIDENHAIN | ND 1100 | Operating Instructions | 05/2018... -
Page 111: What To Do If
What to do if... -
Page 112: Error Messages
The printer is out of The printer is out of Load paper into the print- paper. Please load and paper. er and continue printing. then press OK to contin- HEIDENHAIN | ND 1100 | Operating Instructions | 05/2018... - Page 113 USB Check the file. flash drive. The settings.bin file The settings cannot be Check the USB drive. cannot be opened. opened on the USB Check the file. flash drive. HEIDENHAIN | ND 1100 | Operating Instructions | 05/2018...
-
Page 114: Encoder Errors
Restrict stage velocity. If the velocity required for error- ty too high free operation is slow, recalibrate the reader head. Faulty encoder input Repair or replace the encoder cable or seek the assis- connection tance of your encoder distributor. HEIDENHAIN | ND 1100 | Operating Instructions | 05/2018... -
Page 115: Removal And Disposal
Removal and disposal... -
Page 116: Overview
Forward the product and the backup battery to recycling in accordance with the applicable local disposal regulations If you have any questions about the disposal of the product, please contact a HEIDENHAIN service agency HEIDENHAIN | ND 1100 | Operating Instructions | 05/2018... -
Page 117: Specifications
Specifications... -
Page 118: Product Data
General information Directives EMC Directive 2014/30/EU Low Voltage Directive 2014/35/EU Polution degree Protection EN 60529 IP 00 Front panel: IP 40 Weight With stand: 4.8 kg With mounting adapter: 2.0 kg HEIDENHAIN | ND 1100 | Operating Instructions | 05/2018... -
Page 119: Product Dimensions
Specifications | Product dimensions 15.2 Product dimensions All dimensions in the drawing are in millimeters. HEIDENHAIN | ND 1100 | Operating Instructions | 05/2018... - Page 120 DR. JOHANNES HEIDENHAIN GmbH Dr.-Johannes-Heidenhain-Straße 5 83301 Traunreut, Germany +49 8669 31-0 +49 8669 32-5061 E-mail: info@heidenhain.de Technical support +49 8669 32-1000 Measuring systems +49 8669 31-3104 E-mail: service.ms-support@heidenhain.de NC support +49 8669 31-3101 E-mail: service.nc-support@heidenhain.de NC programming ...
Need help?
Do you have a question about the QUADRA-CHEK ND 1100 and is the answer not in the manual?
Questions and answers