Table of Contents
Advertisement
Quick Links
Advertisement
Table of Contents

Related Manuals for Kedacom IPC4X2 Series


Summary of Contents for Kedacom IPC4X2 Series
- Page 1 KEDACOM User Manual for HD Mini Dome Camera V2.1 (December, 2020)
- Page 2 Trademarks ® ® ® , Kedacom , TrueSens , and NexVision are registered trademarks of Suzhou Keda Technology Co., Ltd. in China and various other countries. All other trademarks mentioned in this document are the property of their respective holders.
- Page 3 Target Audience Administrators and Operators of Video Surveillance Products Document Version V2.1 Applicable Models IPC4X2 series Software Version V7R3B3 Related Document Quick Start Guide Convention Icon/Sign Convention Notes and warning: necessary supplement of operations Menu, e.g. Drag to Zoom “”...
- Page 4 7. Indoor Dome Camera cannot be installed at rainy or wet places. If the Indoor Dome Camera has a connecting rod on the bracket, make sure there is no hole on the rod to avoid water. 8. Outdoor Dome Camera must be completely sealed to avoid dampness. Make sure there is no hole on the connecting rod of bracket to avoid water.
-
Page 5: Table Of Contents
HD Mini Dome Camera User Manual Contents Product Brief ............................3 Startup..............................4 Activate Camera ..........................4 Configure Network Parameters ....................... 6 Login and Log Out of the Web Client ....................7 Password Reset ..........................9 Main Interface ..........................10 Basic Functions ............................ - Page 6 HD Mini Dome Camera User Manual 5.3.4 Video Info Overlay ........................48 Audio .............................. 49 5.4.1 Audio Encoding ........................49 5.4.2 Audio Decoding ........................50 PTZ ..............................50 5.5.1 Basic Configuration ......................... 51 5.5.2 Guard Tour ..........................52 5.5.3 Preset Position ........................53 5.5.4 Restricted Patrol ........................
-
Page 7: Product Brief
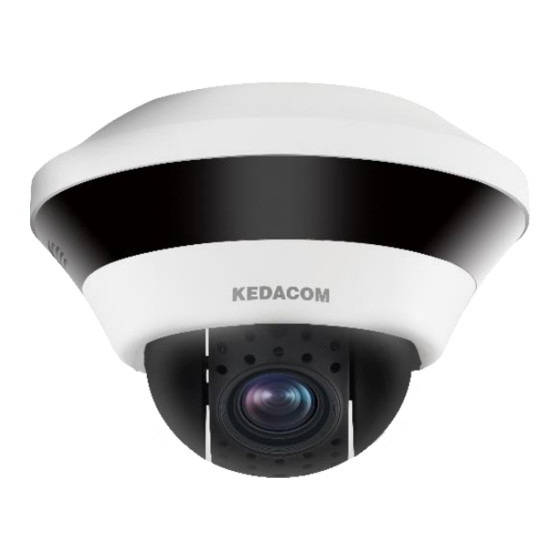
1. Product Brief IPC4X2 series are HD mini dome cameras for indoor installation. Small in size and designed with dome structure, it supports multiple installation methods; it supports 5 times and 12 times zooming to satisfy different field angles and distances;... -
Page 8: Startup
There are 2 methods to activate the camera: though IPCSearch or through browser. Activate through IPCSearch Download IPCSearch from our website (address: https://www.kedacom.com/cn/softtools/index.jhtml), and install it according to the prompts. After finishing installation, run IPCsearch and the system will search the cameras in LAN and display the list as shown below. - Page 9 HD Mini Dome Camera User Manual Note: When there are more than one non-activated devices, select the device and click “Batch processing”. On the popup interface, set admin user’s password and the email address to claiming password. Click “Activate” and wait for rebooting. Picture 2-2 Batch Processing ...
-
Page 10: Configure Network Parameters
HD Mini Dome Camera User Manual To ensure the safety of device on internet, it is strongly recommended that you set a strong password composed of at least 2 kinds of the following, numbers, upper-case letters, lower-case letters or specific symbols with length of 8 to 16 characters. ... -
Page 11: Login And Log Out Of The Web Client
HD Mini Dome Camera User Manual Picture 2-5 Camera Reboot Note: For more network parameters of the camera, login to the web client and configure. Please refer to chapter 4 for details. 2.3 Login and Log Out of the Web Client ... - Page 12 HD Mini Dome Camera User Manual Picture 2-7 Web Client Interface Note: After login to the web client successfully for the first time, it will pop up the quick setting interface. Click “Quick Setting” to perform simple settings to the camera. User can go to Settings > Local Setting and unselect “Enable Configuration Guide”, or select “No Prompt”...
-
Page 13: Password Reset
HD Mini Dome Camera User Manual Picture 2-9 Quick setting Log Out Click the icon at the top right corner of the interface to log out of the web client. Help Click the icon at the top right corner of the interface to view the help file. 2.4 Password Reset If user enters a wrong username or password for 6 times, the camera IP will be locked up for 10 minutes, during which user cannot login to this camera. -
Page 14: Main Interface
HD Mini Dome Camera User Manual Picture 2-11 Password Reset Login to the email address to get a security code and fill in “Command” blank in Picture 2-10 and click “OK”. Please remember the new password on the popup window and click “OK”. The device will reboot. 2.5 Main Interface On the main interface of the client, you can view live video, playback video records, manage snapshots and configure settings. -
Page 15: Basic Functions
HD Mini Dome Camera User Manual 3. Basic Functions By web client, user can not only view live video, but also perform local snapshot and recording, configure alarm linkage and etc. Some models may not support some of the following functions. Please subject to actual devices and the client. - Page 16 HD Mini Dome Camera User Manual Picture 3-2 PTZ Control Icon Note The 8 direction buttons control the pan and tilt rotation of the PTZ. Click them to adjust the direction of image; Click and the camera will patrol in pan; click again to stop. Step length adjustment button, the step length means the rotation speed of the image on each click of the direction button.
-
Page 17: Preset
HD Mini Dome Camera User Manual *Light on/off button, click to enable IR light detection. When the light condition turns dark, enable the IR light for lighting. Click to disable IR light, and even the light condition turns dark, the IR light will not be on. 3.1.2 Preset Click... -
Page 18: Image Adjustment
HD Mini Dome Camera User Manual Preset No. Function Preset No. Function Auto Flip Return to Zero Position 35~38 Patrol Scanning 1~4 Day Mode Night Mode 41~44 Mixed Scanning 1~4 One-Click Patrol Auto Night Cut Configure Manually Restricted Confirm Manually Patrol Restricted Patrol Remote Reboot... -
Page 19: Live View Setting
HD Mini Dome Camera User Manual Effect Parameters: Load preset image effects according to actual request. Configure in Settings > Camera > Image. Please refer to chapter 5.1.11 for details. 3.1.5 Live View Setting Aspect Ratio Icon Function It means the live view window displays image in standard screen ratio 4:3. -
Page 20: Playback
HD Mini Dome Camera User Manual snapshot or local snapshot. The former means the camera captures an image and sends it to local client; the latter means the web client captures an image and saves it locally. Start/ Stop recording, click this button to start recording and click again to stop recording. - Page 21 HD Mini Dome Camera User Manual Picture 3-5 Playback Operation steps: Select recording duration from the calendar. If there is background color on a date, it means there is recording on that day. Click "Search" and the video will be displayed directly in the timeline on the right (the highlight parts on the timeline).
-
Page 22: Snapshot
HD Mini Dome Camera User Manual Decelerate playing speed; click the icon to decelerate the speed of playing the video, one-click to decelerate by 1/2x and one more click by 1/4x, max by 1/8x. Accelerate playing speed; click the icon to accelerate the speed of playing the video, one-click to accelerate by one time, max 8 times. -
Page 23: Local Setting
HD Mini Dome Camera User Manual Snapshot search and download steps: Select required picture type(s) on the left checkboxes; Select duration of snapshots from "Time". If selecting "Custom", specify the Start Time and End Time; Click "Search" and the search result will show on the right list, from which you can see picture ID and snapshot time;... - Page 24 HD Mini Dome Camera User Manual Decoded Process Mode: Select the process mode after decoding, options including "Default" and "Brightness Enhance". Enable Image Noise Reduction: Image noise reduction is decoding noise reduction. Select this option to enable image noise reduction and it only changes the viewing effect of current user.
- Page 25 HD Mini Dome Camera User Manual Camera Snapshot Save Path: Configure the local save path for snapshots downloaded from "Snapshot" interface. Click the button of "View" to customize the save path. Click “Opendir” to open the folder where the recordings are saved currently. Note: ...
-
Page 26: Network
HD Mini Dome Camera User Manual Network Go to Settings > Network to configure IP and Port, Access Protocol and Other Protocols. 4.1 IP and Port 4.1.1 Go to Settings > Network > IP and Port > LAN and configure network parameters, including IP address, subnet mask, default gateway and etc. -
Page 27: Port
HD Mini Dome Camera User Manual Note: The larger the MTU is, the higher the communication efficiency will be and the longer the transmission latency will be. Please enter according to actual conditions. DNS Server Setting When camera accesses to external platform in form of domain name, user needs to configure the right DNS server. -
Page 28: Access Protocol
HD Mini Dome Camera User Manual Note: Multicast is a method of data packet transmission. The source host can send the data packets to every host in the group by sending a datagram only. It also depends on the group relationship maintenance and selection by the router. -
Page 29: Onvif
HD Mini Dome Camera User Manual Go to Settings > Network > Access Protocol > VSIP; Picture 4-4 VSIP Input VMS IP address or domain name in "VMS Address"; Input "VMS Port Number", 5510 by default; Input "Camera UUID" and "Camera Password". Camera UUID is distributed by back-end platform and the password needs no edition as it requires no verification;... -
Page 30: Sip
HD Mini Dome Camera User Manual Picture 4-5 ONVIF Select “Enable”. Afterwards, the device will generate a server address (URL) automatically, default port number being 80; Set authentication method for ONVIF login. When selecting "N/A", user can login freely; when selecting "WS-Username token", user needs to verify username and password before login;... -
Page 31: Viid
HD Mini Dome Camera User Manual Picture 4-6 SIP 4.2.4 *VIID The camera can upload the captured snapshots to VIID platform for future data analysis and comparison. Configuration steps are as follows: Go to Settings > Network > Access Protocol > VIID. -
Page 32: Other Protocol
HD Mini Dome Camera User Manual Picture 4-7 VIID Select “Enable” to enable VIID access. Enter VIID platform ID in “Network Access ID”. Enter VIID platform IP address and port number in “VIID Address” and “VIID Port”. Enter VIID platform user name and password in “User Name” and “Password”. Heartbeat time is used to detect abnormal disconnection of TCP. -
Page 33: Ftp
HD Mini Dome Camera User Manual Picture 4-8 DDNS Select "Enable"; Select DDNS Server type from the dropdown list, options including “ORAY”, “DYNDS” and “NOIP”. When selecting “DYNDS” or “NOIP”, the domain name should be filled; Enter username and password according to the selected DDNS server; Click "Save"... -
Page 34: Pppoe
Click "Save" to validate setting. It will show dynamic IP after dialing succeeds. 4.3.4 K-SNMP K-SNMP means KEDACOM private network management protocol. Configuration steps are as follows: Go to Settings > Network > Other Protocols > K-SNMP; Picture 4-11 K-SNMP... -
Page 35: Qos
HD Mini Dome Camera User Manual Configure "CPU Utilization Threshold", "Memory Utilization Threshold" and "Packet Loss Rate Threshold". The default values are all 100, ranging 1 ~ 100; Click "Save" to validate setting. 4.3.5 802.1X 802.1X is a port based network access control protocol. User can select "Protocol Type" manually to control if the device connected to the LAN can access to the LAN, which will support the requirements of network authentication, charging, safety and management well. -
Page 36: Upnp
HD Mini Dome Camera User Manual Note: There are 64 DSCP priority levels (0-63), which identify different priority levels of packets, 0 with the lowest priority and 63 with the highest. Select and keep packets according to their priority levels. Different levels occupy different bandwidths with different packet loss rates during network congestion, thus the quality of service is ensured. -
Page 37: Smtp
HD Mini Dome Camera User Manual management system for monitoring devices connected to the network for any management concerns. Configuration steps are as follows: Go to Settings > Network > Other Protocols > SNMP; Picture 4-15 SNMP Select “SNMP Version” to enable SNMP; Enter "Read community"... - Page 38 HD Mini Dome Camera User Manual Picture 4-16 SMTP Input SMTP server IP address and port number, which ranges 1 ~ 65535, 25 by default; Input "Sender" and "Sender Address"; optionally select "Server Authentication" and input correct user name and password; Input email topic;...
-
Page 39: Camera
HD Mini Dome Camera User Manual Camera Go to Settings > Camera to configure camera parameters, including Image, OSD, Video, Audio and PTZ interfaces. 5.1 Image Go to Settings > Camera > Image, and configure image adjustment, exposure, focus and etc. Picture 5-1 Image 5.1.1 Image Adjustment... -
Page 40: Exposure
HD Mini Dome Camera User Manual Tilt Scanning Panoramic Scanning 102~105 Patrol Scanning 5~8 5.1.2 Exposure Picture 5-2 Exposure Gain: A higher gain will make the image look brighter. However, meanwhile there will be more noise points on the image. Auto mode is suggested. ... -
Page 41: Focus
HD Mini Dome Camera User Manual 5.1.3 Focus Focusing is the process of controlling a beam of light or particle flow and trying to gather it to a point. It is necessary to form images. Adjustment of focus mode will help obtaining optimum and clear target images. -
Page 42: Night Cut
HD Mini Dome Camera User Manual If the camera works under light which provides fixed light condition, select according to actual environment. Fluorescent Lamp: for color temperature of 6500K. Incandescent Lamp: for color temperature of 3000K. Warm Light: for color temperature of 4000K. ... -
Page 43: Image Enhancement
HD Mini Dome Camera User Manual Latency: When it detects the light brightness in the environment meets the night cut condition and lasts for a period of time longer than the preset latency, the camera will trigger night cut automatically. The range of it is 5s ~ 120s. ... - Page 44 HD Mini Dome Camera User Manual Picture 5-8 Image Enhancement 2D Noise Reduction: You can select "Enable" or "Disable". After enabling, you can drag the slide bar to adjust 2D noise reduction level. 3D Noise Reduction: You can select "Enable" or "Disable". After enabling, you can drag the slide bar to adjust 3D noise reduction level.
-
Page 45: Image Stabilization
HD Mini Dome Camera User Manual *Distortion Correction: It is disabled by default. When the radian of camera lens is too large and the image is distorted, enable this function to correct the image and reduce image distortion. Enabling this function will cause some loss of the image. 5.1.8 Image Stabilization When the camera is installed in unstable environment, enable image stabilization to... -
Page 46: Effect Parameters
HD Mini Dome Camera User Manual Mirror Mode: When camera is installed upside-down, correct the image upright by this function without re-installing the camera. Disable: default option, image will not rotate. Left and Right: image will be reversed horizontally but the vertical is the same. ... -
Page 47: Osd
HD Mini Dome Camera User Manual Picture 5-14 Auto mode Standard Mode: Select “Standard Mode” and all parameters will restore to defaults. Indoor Mode: Select “Indoor Mode” and the image brightness and noise reduction will become more suitable to indoor environment. ... - Page 48 HD Mini Dome Camera User Manual Configure format. Click “Advanced” to set “Format”, “Font” and “Margin”; In format, you can set "Time Format", "Display time in 2 lines" and "Alarm in front of tag"; In font, you can set font "Type", "Size" and "Color"; ...
-
Page 49: Video
HD Mini Dome Camera User Manual Edit OSD positions: select the OSD in the window with mouse and drag to change its position. The dark blue box and the light blue box (displayed in full screen by default) can move freely in the yellow box and they can even overlap with each other. - Page 50 HD Mini Dome Camera User Manual Multi-Stream: It means the same video source is encoded in several streams with different resolutions. This parameter can be configured according to actual request and the setting will be validated after reboot. Stream Type: Configure the resolution and bitrate of main or secondary stream.
-
Page 51: Roi
HD Mini Dome Camera User Manual 5.3.2 ROI means Region of Interest. The camera only encodes specific area of interest to improve image quality of this area while at the cost of decreasing the image quality outside this area. It not only ensures the image quality of ROI area, but also reduces the bit rate. -
Page 52: Video Info Overlay
HD Mini Dome Camera User Manual Adjust PTZ control if necessary to select the scene; Select “Mask Area” from the dropdown list; Select “Enable” to enable privacy mask; Click “Edit”, and the image is divided into 16 columns and 12 rows of small squares. Click any square and drag an area toward lower right, then this area is the privacy mask detection area. -
Page 53: Audio
HD Mini Dome Camera User Manual Picture 5-22 Video info overlay GPS: Select it to show camera coordinates in the image. Lens Direction: Select it to display lens direction on live view interface. Basic Intelligent Feature: After configuring intelligent functions (on the interface of Settings >... -
Page 54: Audio Decoding
HD Mini Dome Camera User Manual Sampling Rate: It means the sampling times to sound signals by the audio-recording device in 1 second. The higher the sampling rate is, the more real and natural the sound reproduction will be. ... -
Page 55: Basic Configuration
HD Mini Dome Camera User Manual 5.5.1 Basic Configuration Go to Settings > Camera > PTZ > Basic Config, and configure basic parameters of the PTZ, as shown in the following picture. Picture 5-25 Basic Configuration Basic Config PT Version: Display the version of current PT. -
Page 56: Guard Tour
HD Mini Dome Camera User Manual According to PT position”, the PT position will show on the live view interface in PT position format. Tilt Angle Range: Configure the PT scanning range in tilt, i.e. the PT rotation angle range in tilt. Note: The tilt angle range of different PTZ cameras differs. -
Page 57: Preset Position
HD Mini Dome Camera User Manual Picture 5-26 Guard Tour Select “Enable”; Select a mode from the dropdown list of “Guard Tour”; Pan Mode: Camera rotates in pan direction from 0° to 360° automatically. The Waiting Time is configurable. ... -
Page 58: Restricted Patrol
HD Mini Dome Camera User Manual Picture 5-27 Preset Adjust PTZ to expected position, and configure the focal length, aperture and etc.; Select Preset No. from the drop-down list and input Preset Name; Click “Set” to finish preset setting. User can set different preset positions; Click “Load”... -
Page 59: Path Mode
HD Mini Dome Camera User Manual 5.5.5 Path Mode Path Mode means the camera patrols around all the valid presets on a path. After enabling this function, click any button on PTZ control to disable it. Currently, the camera supports 8 paths and the maximum allowed number of patrol spots on each path is 32 which can be selected from the 512 presets. -
Page 60: Scheduled Task
HD Mini Dome Camera User Manual Go to Settings > Camera > PTZ > Mixed Mode; Picture 5-31 Mixed mode Select mixed patrol path from the dropdown list of “Patrol Path”; Click “Start Recording” and adjust PTZ to record PTZ rotation speed, increment and zooming operations. -
Page 61: Positioning
HD Mini Dome Camera User Manual Enter “Task Recovery Time” (5~720s). Take 5s as example, if user performs other PTZ operations during the task, camera will recover the scheduled task in 5 seconds. Configure scheduled tasks and arming durations: the default task durations are 24 hours displaying in blue bar, or user can define durations up to request. - Page 62 HD Mini Dome Camera User Manual Picture 5-34 Positioning Configuration steps are as follows: Zero Correction When the PTZ position fails to synchronize with the positioning or user wants it to return to the zero position, zero correction can be performed. After zero correction, camera will return to the mechanical zero position automatically.
-
Page 63: Event
HD Mini Dome Camera User Manual Event 6.1 Intelligent Function Go to Settings > Event > Intelligent Function, and configure the intelligent functions of the camera. The intelligent functions of a camera include motion detection, video blocked, guard line and etc. In this chapter, we will introduce the configuration steps of each event one by one. - Page 64 HD Mini Dome Camera User Manual Picture 6-1 Motion detection Select “Enable”; Adjust the surveillance scene through the PTZ; Set motion detection area, the default being full area detection. Click “Clear All” and then “Edit” and the image will be divided into 16 columns and 12 lines of small squares.
- Page 65 HD Mini Dome Camera User Manual Click “Edit” to configure PTZ linkage (if the device supports). On the popup window, configure the detection time and position when PTZ rotation stops; Picture 6-2 PTZ linkage Select linkage type(s), which is/are the alarm output method(s) when motion detection triggers an alarm;...
-
Page 66: Video Blocked
HD Mini Dome Camera User Manual Delete duration: click "Delete All" above the timeline to delete all the durations. Select any duration and click "Delete" on the popup window or above the timeline to delete the duration. Note: Select any duration with a mouse, and drag the blue bar on the timeline as a whole without changing the length of recording duration. - Page 67 HD Mini Dome Camera User Manual Select “Enable”; Adjust the surveillance scene through the PTZ; Set video blocked area, the default being full area detection. Click “Clear All” and then “Edit” and the image will be divided into 16 columns and 12 lines of small squares.
-
Page 68: Guard Line
HD Mini Dome Camera User Manual Note: Select any duration with a mouse, and drag the blue bar on the timeline as a whole without changing the length of recording duration. Click "Save" to validate settings. 6.1.3 Guard Line Guard line is to trigger an alarm once the camera detects any object entering the guard line in the set direction. - Page 69 HD Mini Dome Camera User Manual Adjust the surveillance scene through the PTZ; Select a number from the dropdown list of Guard Area, which can be set one by one and takes effect after each time of saving. It supports max 4 guard lines; Select a direction from the dropdown list of Guard Line Direction, options including "A->", "B->"...
-
Page 70: Entry Guard Area
HD Mini Dome Camera User Manual Select the timeline of any day and delete the default blue bar. Left click on the mouse and drag on the timeline from left to right to form a blue bar, above which it shows the start time and end time. ... - Page 71 HD Mini Dome Camera User Manual Picture 6-8 Entry guard area Select "Enable"; Adjust the surveillance scene through the PTZ; Select a number from the dropdown list of Guard Area and user can set only one area at one time. After saving it, user can set another and max 4 guard areas can be set;...
- Page 72 HD Mini Dome Camera User Manual Area Setting: to set guard area. Click “Edit” and click mouse to draw a closed area made up of 3 to 6 points in the scene. Right click or click the starting or ending point to close the area.
-
Page 73: Exit Guard Area
HD Mini Dome Camera User Manual 6.1.5 Exit Guard Area The function is to detect if there is anything leaving the set guard area, and the camera will judge if it is necessary to trigger an alarm. Configuration steps are as follows: Go to Settings >... - Page 74 HD Mini Dome Camera User Manual Target Filter: to set target area. Click “Edit” and drag the mouse in the scene to draw a rectangle. Click “Stop” after finishing and drag the slide bar of “Max and Min Target Ratio” (1% by default). Moving objects over max or below min will not trigger an alarm when they enter the guard area(s);...
-
Page 75: Enter Guard Area
HD Mini Dome Camera User Manual Note: Select any duration with a mouse, and drag the blue bar on the timeline as a whole without changing the length of recording duration. 10) Click "Save" to validate settings. 6.1.6 Enter Guard Area The function is to detect if there is anything entering the set guard area and staying for a period of time reaching the set threshold. - Page 76 HD Mini Dome Camera User Manual Select “Enable”; Adjust the surveillance scene through the PTZ; Select a number from the dropdown list of Guard Area and user can set only one area at one time. After saving it, user can set another and max 4 areas can be set; Target Filter: to set target area.
-
Page 77: Object Left
HD Mini Dome Camera User Manual Select the timeline of any day and delete the default blue bar. Left click on the mouse and drag on the timeline from left to right to form a blue bar, above which it shows the start time and end time. ... - Page 78 HD Mini Dome Camera User Manual Picture 6-14 Object Left Select “Enable”; Adjust the surveillance scene through the PTZ; Select a number from the dropdown list of Guard Area and user can set only one area at one time. After saving it, user can set another and max 4 areas can be set; Target Filter: to set target area.
- Page 79 HD Mini Dome Camera User Manual Area Setting: to set guard area. Click “Edit” and click mouse to draw a closed area made up of 3 to 6 points in the scene. Right click or click the starting or end point to close the area.
-
Page 80: Object Removal
HD Mini Dome Camera User Manual Note: Select any duration with a mouse, and drag the blue bar on the timeline as a whole without changing the length of recording duration. 11) Click "Save" to validate settings. 6.1.8 *Object Removal The function is to detect if there is any object disappearing from the set guard area reaching the set time threshold. - Page 81 HD Mini Dome Camera User Manual Adjust the surveillance scene through the PTZ; Select a number from the dropdown list of Guard Area and user can set only one area at one time. After saving it, user can set another and max 4 areas can be set; Target Filter: to set target area.
-
Page 82: Gathering
HD Mini Dome Camera User Manual Copy duration: click the copy icon behind the timeline and copy the durations on the day to one or several other days. Delete duration: click "Delete All" above the timeline to delete all the durations. Select any duration and click "Delete"... - Page 83 HD Mini Dome Camera User Manual Picture 6-18 Gathering Select “Enable”; Adjust the surveillance scene through the PTZ; Select a number from the dropdown list of Guard Area and user can set only one area at one time. After saving it, user can set another and max 4 areas can be set; Drag the slide bar of "Ratio"...
-
Page 84: Audio Surge
HD Mini Dome Camera User Manual Set arming duration: the default is 24 hours displaying in blue bar, or user can customize durations. The maximum allowed number of durations is 10 on one day and different durations cannot overlap with each other; Picture 6-19 Arming durations ... - Page 85 HD Mini Dome Camera User Manual Picture 6-20 Audio surge Select “Enable”; Drag the slide bar of Voice Intensity Threshold to adjust the detection sensitivity to voice mutation. The higher the Voice Intensity Threshold is, the more sensitive it is to Voice Mutation and the more easier it is to trigger an alarm;...
-
Page 86: Face Detection
HD Mini Dome Camera User Manual Picture 6-21 Arming durations Set duration: configure arming durations according to actual requirements. Click the blue bar to pop up a window for editing the accurate start time and end time; click "Save" to validate setting. ... -
Page 87: Auto Human Tracking
HD Mini Dome Camera User Manual Picture 6-22 Face detection Select “Enable”; Adjust the surveillance scene through the PTZ; Click "Save" to validate settings. 6.1.12 *Auto Human Tracking Auto human tracking is to detect if there is any person moving in the image conforming to the set target and the camera will judge by the result if it’s necessary to track the person. - Page 88 HD Mini Dome Camera User Manual Picture 6-23 Auto human tracking Select “Enable”; Adjust the surveillance scene through the PTZ, or set and load presets; On the dropdown list of “Tracking Mode”, select “Auto” or “Smart tracing”; Note: If selecting “Smart tracing”, on “Motion Detection” and “Guard Line” interfaces, select “Smart tracking”...
- Page 89 HD Mini Dome Camera User Manual Area Setting: to set tracking area. Click “Edit” and click mouse to draw a closed area made up of 3 to 6 points in the scene. Right click or click the starting or end point to close the area.
-
Page 90: Alarm Input
HD Mini Dome Camera User Manual Delete duration: click "Delete All" above the timeline to delete all the durations. Select any duration and click "Delete" on the popup window or above the timeline to delete the duration. Note: Select any duration with a mouse, and drag the blue bar on the timeline as a whole without changing the length of recording duration. - Page 91 HD Mini Dome Camera User Manual Select a number from the dropdown list of Alarm Input ID; Note: Alarm input ID corresponds to the tags on the buttcock line. Please refer to the Quick Start Guide for details. Enter alarm name, i.e. the name of alarm input device such as “front door smoke-detector”; Select alarm type from the dropdown list.
-
Page 92: Alarm Output
HD Mini Dome Camera User Manual Delete duration: click "Delete All" above the timeline to delete all the durations. Select any duration and click "Delete" on the popup window or above the timeline to delete the duration. Note: Select any duration with a mouse, and drag the blue bar on the timeline as a whole without changing the length of recording duration If user sets several alarm input ports, select “All”... - Page 93 HD Mini Dome Camera User Manual Picture 6-28 Abnormality Linkage Select "Enable"; Select an option from the dropdown list of Abnormality Type; Note: Disk Full: when the disk storage is insufficient. Disk Error: when the disk cannot be recognized. ...
-
Page 94: Storage
Laser Thermal Optical PTZ Camera User Manual Storage 7.1 Storage Management Go to Settings > Storage > Storage Management to configure strategy for disk full, view storage device list, format the storage card, and configure the save path for snapshots. Note: When the camera is installed with a storage card and works normally, you can configure scheduled recording and scheduled snapshot. -
Page 95: Recording
Laser Thermal Optical PTZ Camera User Manual Progress: show the percentage of the formatting progress of the storage card. Select the disk and click "Formatting" to format the selected disk. Snapshot: Configure the save path for the snapshots. According to actual requirements, select "Local storage"... - Page 96 Laser Thermal Optical PTZ Camera User Manual Picture 7-2 Scheduled recording Select "Enable" to enable Scheduled Recording; Set arming duration: the default is 24 hours displaying in blue bar, or user can customize durations. The maximum allowed number of durations is 4 on one day and different durations cannot overlap with each other;...
-
Page 97: Snapshot
Laser Thermal Optical PTZ Camera User Manual Click any duration and there will be small white squares on the 2 ends of it. Put the mouse on any whit square, left-click and drag the edit the start time and end time. - Page 98 Laser Thermal Optical PTZ Camera User Manual Picture 7-4 Scheduled snapshot Configure scheduled snapshot: Select “Enable” enable scheduled snapshot; Snapshot Type: select “According to the time” or “According to the number”; Time Interval: select the interval between snapshots; Configure durations for scheduled recording. The default setting is 24 hours in bright blue bar, or you can customize the durations;...
- Page 99 Laser Thermal Optical PTZ Camera User Manual Delete duration: click "Delete All" above the timeline to delete all the durations. Select any duration and click "Delete" on the popup window or above the timeline to delete the duration. Note: Select any duration with a mouse, and drag the blue bar on the timeline as a whole without changing the length of recording duration.
-
Page 100: System
Laser Thermal Optical PTZ Camera User Manual System 8.1 Device Info Go to Settings > System > Device Info. Device info includes device name, device model, device serial No. and etc. User can customize device name and select “Set as OSD text”. Device name doesn’t support specific symbols. - Page 101 Laser Thermal Optical PTZ Camera User Manual Note: Anonymous user has the authorization of live view only. Add user: Click “Add”, and enter user name and password on the popup interface. Select user type from the dropdown list, and assign operation rights to newly added user from the Authorization List.
-
Page 102: Rtsp Authorization
Laser Thermal Optical PTZ Camera User Manual Picture 8-4 Modify user Delete user: Select user and click “Delete” to delete the user. Picture 8-5 Delete user Attention: “admin” user cannot be deleted, nor its username be modified. 8.2.2 RTSP Authorization Go to Settings >... -
Page 103: Ip Filter
Laser Thermal Optical PTZ Camera User Manual 8.2.3 IP Filter By setting IP filter, user can manage access limitation to the web client. Configuration steps are as follows: Go to Settings > System > User Security > IP Filter; Picture 8-7 IP Filter Select IP filter from the dropdown list up to request, options including “Disable”, “Black List”... -
Page 104: Time
Laser Thermal Optical PTZ Camera User Manual Enable SSH Login: Select the checkbox to enable SSH login, which means SSH service is enabled and you can login by SSH mode. Usually it's unnecessary to enable when the camera works normally. ... -
Page 105: Serial Port
HD Mini Dome Camera User Manual Set device time zone and device time: Click "Manual Setting", select time zone and set time on the popup interface. You can select "Synchronize time with PC" and click "Save" to validate setting. Picture 8-10 Manual setting of time ... -
Page 106: Log
HD Mini Dome Camera User Manual Picture 8-11 Serial port 8.5 Log Go to Settings > System > Log to manage logs and view system health and service status. 8.5.1 Logs Go to Settings > System > Log > Logs, and select "Enable Log Record" to enable log record. Then you can search, view and download logs by request. -
Page 107: System Health
HD Mini Dome Camera User Manual 8.5.2 System Health Go to Settings > System > Log > System Health, and select a duration from the dropdown list to view the camera health status in this duration. Click “Details” behind each item to view the detailed logs of each item. - Page 108 HD Mini Dome Camera User Manual Auto Maintenance: Select "Enable", and configure Maintenance Cycle and Maintenance Time. Click "Save" to validate setting. PT Maintenance: including restore default PT settings, PT upgrade and PT maintenance. Restore Default PT Settings: Restore PT settings to factory default. ...
- Page 109 HD Mini Dome Camera User Manual Picture 8-15 Advanced configuration VSIP Protocol Compatibility: select the OSD picture obtaining method for the camera when configuring OSD through VSIP; generate a new OSD picture through text and location, and change OSD font, Black or Song; or use the OSD picture sent by VSIP directly. ...
-
Page 110: Network Test
HD Mini Dome Camera User Manual Working Mode: configure the stream working mode. It takes effect after reboot. Audio Noise Reduction: configure “Collect Audio Stream” and “Decode Audio Stream”. Options including “Close”, “Low”, “Middle” and “High”; enabling this function will occupy some system resources. - Page 111 HD Mini Dome Camera User Manual Picture 8-18 Lifetime...
-
Page 112: Appendix: Glossary Of Terms
HD Mini Dome Camera User Manual Appendix: Glossary of Terms Term Explanation High Definition QXGA Resolution of 2048*1536 pixels (4:3) UXGA Resolution of 1600*1200 pixels (4:3) 1080P Resolution of 1920*1080 pixels (16:9) 720P Resolution of 1280*720 pixels (16:9) Resolution of 352*288 pixels QCIF Resolution of 176*144 pixels Personal Computer...
Need help?
Do you have a question about the IPC4X2 Series and is the answer not in the manual?
Questions and answers