Table of Contents
Advertisement
Quick Links
Advertisement
Table of Contents

Related Manuals for Kedacom IPC981


Summary of Contents for Kedacom IPC981
- Page 1 Vehicle Panoramic Speed Dome Quick Start Guide...
- Page 3 ® ® ® , Kedacom , TrueSens , , and NexVision are registered trademarks of Suzhou Keda Technology Co., Ltd. in China and various other countries. All other trademarks mentioned in this document are the property of their respective holders.
-
Page 4: Safety Instruction
I Preface Thank you for purchasing our product. If there is any question, please do not hesitate to contact us. These instructions are intended to ensure that the user can use the product correctly to avoid danger or property loss. Please read this Guide carefully before using the product, and keep it properly for future reference. -
Page 5: Daily Maintenance
The device can be used only after being activated through IPCSearch, which can be obtained from https://www.kedacom.com/en/downs/index.jhtml. During the activation, please fill a valid email address for re-enabling the default password. A user password must include two or more combinations of digits, case-sensitive letters, and special characters. - Page 6 6. Height Warning The device is 412.5 mm high. When driving a vehicle with the device loaded into height-restricted places or on height-restricted roads, you must ensure that the total height of the vehicle and device is 2-2.2 m lower than the upper height limit.
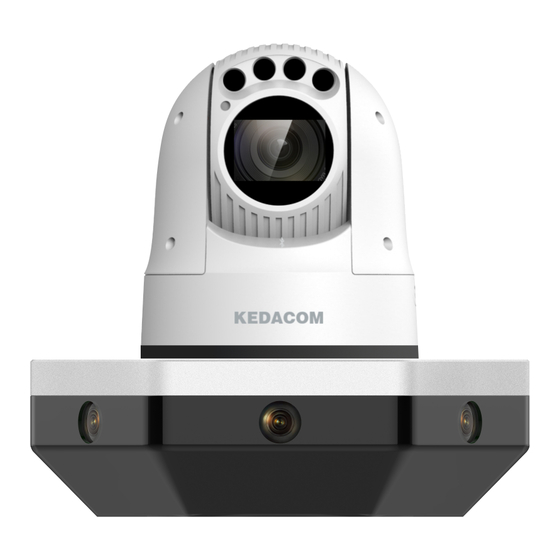
- Page 7 Components IR light Tilting part Close-up lens Panning part Fixed-focus lens*6 Installation direction marker Car mount Installation hole*4 Safety rope TF card SIM card Buttcock lines External Wi-Fi antenna*2 The external Wi-Fi antennas come with the device and they can be used only when the Wi-Fi Antenna 【NOTE】...
- Page 8 Buttcock Lines The buttcock lines have a female aviation plug on one end. RJ-45 network port RS-485 CAR_ACC CAR_ON LINE_IN LINE_OUT Power+ Power- Label Color Description RJ-45 network RJ-45 network port, supporting 10/100/100 Mbps adaptive port RS485 A RS-485 serial port A, used to communicate with third-party devices RS485 B CAR_ACC Used to connect to the ACC in the fuse box of the car...
- Page 9 If you do not want to mount the device on a vehicle, you should connect the Power + and CAR_ACC 【NOTE】 lines to the anode of a power cable and connect the Power - line to the cathode of the power cable, as shown in the following figure.
-
Page 10: Installation
IV Installation 1. Installing a SIM Card 1) Ensure that the device is powered off. 2) Make sure your SIM card is a Nano SIM card. 3) Unscrew the two screws on the SIM card cover and take off the cover. 4) Locate the upper SIM card slot and get ready a SIM card eject tool. - Page 11 2. Installing a TF Card 1) Ensure that the device is powered off. 2) Get ready a TF card. The recommended card vendors are SONY, Kingston, SanDisk, and Transcend. You can also buy our custom TF cards. At most two 512 GB TF cards can be installed. 3) Unscrew the two screws on the TF card cover and take off the cover.
-
Page 12: Installing The Device
3. Installing the Device Preparations: 1) Before mounting the device on a vehicle, users need to prepare a roof rack. 2) Before the installation, check the heights of all the parts to be installed together with the device. This is to ensure that the device can be installed high enough to prevent the six fixed-focus lenses from being blocked in sight. - Page 13 Fasten the roof rack to the car roof with fastening metal belts or roof rack clamps. It is recommended that this step be performed by professionals. The fastening metal belts or roof rack clamps cannot be extremely tightened. Otherwise, they may be damaged by great pulling force when you are driving on bumpy roads.
- Page 14 Install the device onto the roof rack by inserting four M8 bolts through the upper installation holes on the shock-absorbing washer and tightening four nuts over the bolts. Note that the arrow on the installation direction marker should face the same direction as the car head. Four nuts should be tightened over the bolts.
-
Page 15: Minimum Pc Requirements
V Log In to the NVR Web or vClient The following activation steps are performed on a computer connected to the device using a network cable. 1. Minimum PC Requirements Processor: Intel® Core™ i5-7500 or later Graphics card: Intel® HD Graphics 630 or later RAM memory: 8 GB or greater Operating system: Windows 7 or later Browser: recommended: IE kernel browsers (without IE kernel browsers, some functions may fail.) - Page 16 You need to activate and use the device through the NVR Web since the device has 6 lenses, which 【NOTE】 form 3 channels. 3. Change the Device IP Address On the IPCSearch, select the device and click Modify Params to configure network parameters. To assign the device a static IP address, check Custom device address (Close DHCP) and configure the parameters below.
- Page 17 2) After login, download and install the add-on. You should close your browser during the installation. 3) Re-log in to the NVR Web. After this, you can view videos. Options on the NVR Web vary according to the device model. For details about the NVR Web, see the 【NOTE】...
- Page 18 Search for the device on the WLAN network list of the tablet. The SSID format of the device is "device model-serial number". For example, IPC981-T230- NIR0146205728. You can also go to the NVR Web (Settings > Network > IP and Port > Wi-Fi) to query the device's SSID.
- Page 19 【NOTE】 Some part in the preceding figure is intentionally blurred. 8) Tap OK. And then, go back to the login dialog box, enter a username and a password of an NVR Web account, and tap LOG IN. After this, you can view live videos from the device. For more operations, see the user manual of the vClient.
- Page 20 Appendix Wiring Name Description Connector Connect the female aviation plug to the connector receptacle, and twist the receptacle waterproof cap on the connector receptacle to prevent water seepage. Buttcock lines Connect some buttcock lines to the battery and fuse box of the car. Wi-Fi antennas Connect them to the device and stick the other ends to the center console of the car.
- Page 21 Please stick to the following rules for wiring inside the car: You should tuck away the wires (including excess ones) under the car headliner, dashboard, center console, and parts alike. You can also run the wiring inside the weather sealing or side trim. In a word, all the wires should be stashed away to prevent them from interfering with driving.
-
Page 22: What Is Not Covered By This Warranty
Kedacom hardware. Manufacturers, suppliers, or publishers, other than Kedacom, may provide their own warranties to you but Kedacom, in so far as permitted by law, provides their products "AS IS". Software distributed by Kedacom with or without the Kedacom brand (including, but not limited to system software) is not covered by this warranty. -
Page 23: How To Obtain Warranty Service
If during the Warranty Period, you submit a valid claim to Kedacom or an authorized Kedacom agent, Kedacom will, at its option, (i) repair the Kedacom Product using new or previously used parts that are equivalent to new in performance and reliability, or (ii) exchange the Kedacom Product for a refund of your purchase price. - Page 24 05.03.801043 (V1.2) 20201222...
Need help?
Do you have a question about the IPC981 and is the answer not in the manual?
Questions and answers