Table of Contents
Advertisement
Quick Links
Advertisement
Table of Contents

Subscribe to Our Youtube Channel
Related Manuals for Kedacom IPC4X1 Series


Summary of Contents for Kedacom IPC4X1 Series
- Page 1 KEDACOM User Manual for HD High Speed Dome Camera V3 (Feb., 2018)
- Page 2 Trademark Kedacom™ and are trademarks of Suzhou Keda Technology Co., Ltd. in China and various other countries. All other trademarks mentioned in this document are the property of their respective holders. Suzhou Keda Technology Co., Ltd. 131 Jinshan Road New District, Suzhou, 215011 People's Republic of China http://www.kedacom.com/en...
- Page 3 Target Audience Administrators and Operators of Video Surveillance Products Document Version Version 03 Applicable Models IPC4X1 series IPC4X5 series LC4X5 series Related Document Quick Start Guide Convention Icon Convention Notes warning: necessary supplement of operations Sign Convention Menu, e.g. Drag to Zoom Connector between menus of >...
- Page 4 6. Do not expose the camera in the environment not defined in the Manual. Maintenance and fee due to exposure of product in the wrong conditions will be user’s responsibility. 7. Indoor Dome Camera cannot be installed at rainy or wet places. If the Indoor Dome Camera has a connecting rod on the bracket, make sure there is no hole on the rod to avoid water.
-
Page 5: Table Of Contents
High Speed Dome Camera User Manual Contents Product Brief ............................3 Appearance ............................4 Startup..............................6 Client Installation Conditions ......................6 Initial Configuration .......................... 6 3.2.1 Modify Parameter ........................6 3.2.2 Login Web Client ........................8 3.2.3 Login to the Web Client Interface .................... 10 Product Functions .......................... - Page 6 High Speed Dome Camera User Manual Snapshot ............................34 Playback ............................34 4.6.1 Playback ..........................35 4.6.2 Download ..........................35 Upgrade ............................35 4.7.1 Firmware Upgrade ........................35 4.7.2 Web Client Upgrade ........................ 36 4.7.3 Restoration ..........................37 Settings ..............................39 Network Access ..........................
-
Page 7: Product Brief
High Speed Dome Camera User Manual 1. Product Brief High Speed Dome Camera (hereinafter referred to as Camera) is remote HD IP Camera based on IP network technology. It encodes and transmits HD video. Also, it can be deployed at any point of a surveillance network and transmits videos via public or private IP network. -
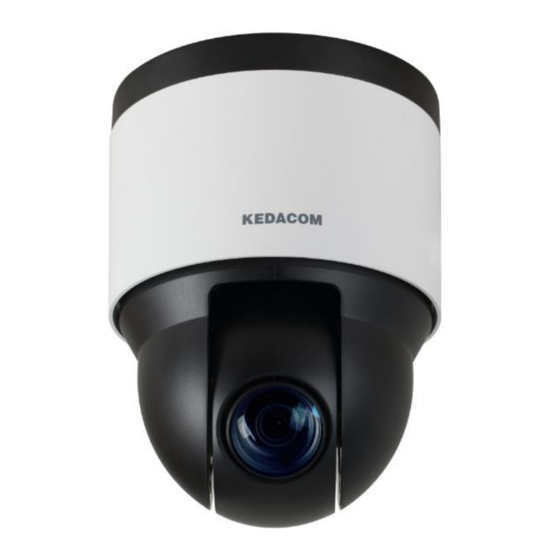
Page 8: Appearance
High Speed Dome Camera User Manual 2. Appearance Picture 2-1 Outdoor speed dome camera Picture 2-2 Indoor speed dome camera Picture 2-3 IR high speed dome camera... - Page 9 High Speed Dome Camera User Manual Picture 2-4 Starlight IR dome camera...
-
Page 10: Startup
High Speed Dome Camera User Manual 3. Startup Device installation and wiring can be referred to in the Quick Start Guide. 3.1 Client Installation Conditions Operating System: Windows XP or newer versions Browser: IE7.0 or later versions, Firefox, Google Chrome (41 and below versions) ... - Page 11 High Speed Dome Camera User Manual Picture 3-2 Activate camera 4) Select a camera to be configured, click “Modify Params” or right click the mouse. Interface is shown in Picture 3-3. Modify parameters and fill admin user name (admin) and the password set when activating the device.
-
Page 12: Login Web Client
High Speed Dome Camera User Manual 5) Click “OK” and in the popup window click “OK”. Wait for rebooting. Picture 3-4 Reboot device 3.2.2 Login Web Client After modification, the device will reboot automatically and please wait patiently. After reboot, the button will be enabled again. - Page 13 High Speed Dome Camera User Manual Picture 3-6 First login through web client If user enters a wrong user name or password for 3 times, the camera IP will be locked up for 10 minutes, during which user cannot login to this camera. If user forgets the password, reset the password.
-
Page 14: Login To The Web Client Interface
High Speed Dome Camera User Manual 3.2.3 Login to the Web Client Interface Enter user name and password: when login successfully for the first time, download and install the plug-in. Close browser when installing. After finishing, double-click the device in IPCSearch to open browser and enter user name and password. -
Page 15: Product Functions
High Speed Dome Camera User Manual 4. Product Functions By web client, user can not only view live video, but also perform local snapshot and recording, and set alarm linkage. Note: Disabled button in the web client means the model doesn’t support the function. Function with * in this Manual means only some models support this function. - Page 16 High Speed Dome Camera User Manual Recording Click this button to start recording and click again to stop recording. Recording is saved on local PC. User can set recording file saving size and saving path in Settings > Local Setting. Picture 4-2 Snapshot and recording setting EPTZ Click this button to enable the e-PTZ function.
-
Page 17: Image Adjustment
High Speed Dome Camera User Manual Click this button to display full screen. Double click or press Esc to exit. 4.1.2 Image Adjustment 4.1.2.1 Focus The function of focusing is to make image clear. In the interface of Live View, click (Focus Near), (Focus Far) or (Auto Focus). - Page 18 High Speed Dome Camera User Manual Increase Gain Camera gain means photo-sensibility, the sensitivity level of a sensor to light. A high gain requires less light exposure for low light condition. Note: However, the higher the gain is, the more noise points there will be and the worse the image will be.
- Page 19 High Speed Dome Camera User Manual Go to Settings > Camera > Image > Night Cut, select night cut mode. Select Day from the dropdown list of Night Cut mode and disable IR lamp (only some models support), and the image will become colored. Night Select Night from the dropdown list of Night Cut mode and enable IR lamp (only some models support), and the image will become black and white.
-
Page 20: Auxiliary Function
High Speed Dome Camera User Manual Select BNC output mode from the dropdown list of BNC output, options including PAL (25 frames) and NTSC (30 frames). Picture 4-3 Rotate and BNC 4.1.3 Auxiliary Function Wiper Wiper is used to clean the glass dome. In the PTZ control part of the Live View interface, Click enable wiper and click again to disable it. -
Page 21: Preset Position
High Speed Dome Camera User Manual Note: The pan range of IPC421-B230-H0 is 0~358˚. The PTZ holder will stop rotation when reaching its pan limits. Please strictly follow the Quick Start Guide during installation. The functions of preset position loading and path patrol won’t be affected. 4.2.1 Preset Position Preset position includes information of PT position and lens focal length. -
Page 22: Restricted Patrol
High Speed Dome Camera User Manual Random Mode Camera patrols automatically and randomly in pan direction. The Waiting Time is 1 minute by default (configurable). Panoramic Mode Camera patrols panoramically from -15° to 90° in tilt direction and from 0° to 360° in pan direction. The Waiting Time is 1 minute by default (configurable). -
Page 23: Path Mode
High Speed Dome Camera User Manual 2) Check “Manually Restricted Patrol” or “Auto Restricted Patrol”, adjust the PTZ to a proper position and set it as the Left Restriction. Adjust the PTZ again to another position and set it as the Right Restriction. -
Page 24: Scheduled Task
High Speed Dome Camera User Manual Picture 4-9 Mixed mode Setting steps: Go to Settings > Camera > PTZ > Mixed Mode. Select Mixed Mode from the dropdown list. Click “Start Recording” and adjust PTZ, then it will record PTZ rotation speed, increment and zooming operations. Click “Stop Recording” to stop recording. Each path can record for at most 10 minutes. -
Page 25: Positioning
High Speed Dome Camera User Manual 4.2.7 Positioning Go to Settings > Camera > PTZ > Positioning. Zero Correction When the PTZ position fails to synchronize with the positioning or user wants it to return to the zero position, zero correction can be performed. After zero correction, camera will return to the mechanical zero position automatically. -
Page 26: Motion Detection
High Speed Dome Camera User Manual Alarm linkage reaction includes Alarm Text Overlay, Snapshot or triggering alarm output device (such as alarm bell). Explanations are as follows: Acoustic Alarm: when an alarm is triggered, generate sound alarming (it requires the IP camera to connect with an audio output device). - Page 27 High Speed Dome Camera User Manual Picture 4-13 Motion Detection Motion detection supports full area detection and max 4 user-defined areas. The default is full area detection. Go to Settings > Event > Intelligent Function > Motion Detection, and check “Enable”. Click “Clear All”...
-
Page 28: Tampering
High Speed Dome Camera User Manual Drag the slide bar to adjust Sensitivity. Set PTZ linkage. Click “Edit” and a window of PTZ linkage will pop up. User can set PTZ Rotation Stops Detection time. For example, if it is set 10s, when the PTZ rotation stops for 10s, motion detection will start and will stop when the PTZ is rotating. -
Page 29: Guard Line
High Speed Dome Camera User Manual Picture 4-15 Tampering 4.3.3 Guard Line Enable this function in the interface to detect specific area at real time. Once any object enters the guard line, an alarm will be triggered. Go to Settings > Event > Intelligent Function > Guard Line and configure. - Page 30 High Speed Dome Camera User Manual Picture 4-16 Guard Line Setting steps: Check “Enable”; Select a number from the dropdown list of Guard Line and once only one number is allowed. After saving it, user can set another and max 4 guard lines can be set;...
-
Page 31: Enter Guard Area
High Speed Dome Camera User Manual Select a direction from the dropdown list of Guard Line Direction, “A”, “B” or “A&&B”. Take “A” as an example, when selecting this direction, only when objects move from A to B the system will detect it and trigger an alarm;... -
Page 32: Exit Guard Area
High Speed Dome Camera User Manual Picture 4-17 Enter guard area 4.3.5 Exit Guard Area Enable this function in the interface to detect specific area at real time. Once any moving object leaves the area, an alarm will be triggered. Go to Settings >... -
Page 33: Object Left
High Speed Dome Camera User Manual 4.3.6 Object Left Enable this function in the interface to detect specific area at real time. When any object is left in the area, an alarm will be triggered. Go to Settings > Event > Intelligent Function > Object Left and configure. Setting steps can be referred to in Enter Guard Area. -
Page 34: Abnormality Linkage
High Speed Dome Camera User Manual Enter alarm name. If the alarm input device is always disabled, which means the circuit is usually open, user must select “Always Disabled” from the dropdown list of Alarm Type. If the alarm input device is always enabled, which means the circuit is usually loop, user must select “Always Enabled”... -
Page 35: Video Parameters
High Speed Dome Camera User Manual Check Linkage Type. Click “Save”. Picture 4-19 Abnormality linkage Note: Abnormalities of disk full and disk error are prompted in live view window in the format of icons, which display in the same line of system time. 4.4 Video Parameters 4.4.1 Video Encoding... -
Page 36: Roi
High Speed Dome Camera User Manual Note: When selecting different resolutions for the video, suggest user choose corresponding bitrate upper threshold. The relationship is shown below: Average Bitrate/ Kbps Resolution (suggested) 4096*2160 6144 2592*1944 5120 1920*1080 4096 4.4.2 Only encode specific area to ensure normal surveillance and constant resolution of the specific area under poor network. -
Page 37: Video Info Overlay
High Speed Dome Camera User Manual Picture 4-22 Privacy Mask The image is divided into 16 columns and 12 rows of small squares. The max supported number of Privacy Mask area is 4. Setting steps for privacy mask areas: Go to Settings > Camera > Video > Privacy Mask, and check “Enable”. Click “Edit”, and the image is divided into 16 columns and 12 rows of small squares. -
Page 38: Snapshot
High Speed Dome Camera User Manual Picture 4-23 Video info overlay 4.5 Snapshot Click “Snapshot” on the menu bar to enter snapshot management interface. User can view or download snapshots in SD card (An SD card must be inserted in the camera). Operation steps: Search snapshots: search snapshots in accordance with the duration and format from the SD card. -
Page 39: Playback
High Speed Dome Camera User Manual Picture 4-24 Recording Note: After setting “Code Stream Format” as PS (GB28181), the video encoding format is H.264 only. 4.6.1 Playback Select recording duration from the calendar. If there is background color on a date, it means there is recording on that day. Select duration of the date and the video will be displayed directly in the window on the right. -
Page 40: Web Client Upgrade
High Speed Dome Camera User Manual Picture 4-25 Firmware Upgrade Click “Upgrade” and open local upgrade file (<*.pkg> format). During upgrading, please do nothing but waiting. After upgrading, if it is necessary to upgrade the web client, the system will prompt to download the plug-in. -
Page 41: Restoration
High Speed Dome Camera User Manual Picture 4-26 Download Plug-in Method 2 After firmware upgrade, please re-login web client. The page will prompt to download a new plug-in control. After downloading, the upgrade is completed. Re-login to enter the latest web client. Note: For detailed operations on the web client, please refer to the “Help”... - Page 42 High Speed Dome Camera User Manual Picture 4-27 Restoration...
-
Page 43: Settings
High Speed Dome Camera User Manual 5. Settings Some models may not support some of the functions stated below. User operation is subject to the actual models and clients. 5.1 Network Access The Initial Configuration part has introduced how to modify parameters via IPCSearch to make camera access to network. -
Page 44: Pppoe
High Speed Dome Camera User Manual After enabling positioning, device geographic coordinates will display on the screen. Details of enabling OSD can be referred to in the part of Text Overlay. Picture 5-2 Positioning 5.1.3 PPPoE Go to Settings > Network > Other Protocols > PPP E, as shown in the picture. -
Page 45: User Security
High Speed Dome Camera User Manual 5.3 User Security 5.3.1 User Management Go to Settings > System > User Security > User. Add: Click “Add”, and enter “User Name” and “Password” in the popup interface. Select user type from the dropdown list of “User Type”, and assign operation authority to newly added user from the “Authorization List”. -
Page 46: Security Service
High Speed Dome Camera User Manual Modify: Select the IP address from the list and click “Modify” to modify the IP address, and click “Confirm”. Delete: Select the IP address from the list and click “Delete”. Click “Delete All” to clear all the IP addresses. 5.3.3 Security Service Go to Settings >... - Page 47 High Speed Dome Camera User Manual Check the options in “Content” and preview the result in the window below. For example, if user checks “Time”, time will be displayed in the window. Load font: Click “Load” to load “Default Font” or other fonts. Then edit content and position according to the above steps.
-
Page 48: Appendix: Glossary Of Terms
6. Appendix: Glossary of Terms 1080p Resolution of 1920*1080 pixels (16:9) 720p Resolution of 1280*720 pixels (16:9) QXGA Resolution of 2048*1536 pixels (4:3) UXGA Resolution of 1600*1200 pixels (4:3) Resolution of 352*288 pixels QCIF Resolution of 176*144 pixels High-definition Network Address Translation DHCP Dynamic Host Configuration Protocol DDNS...
Need help?
Do you have a question about the IPC4X1 Series and is the answer not in the manual?
Questions and answers