Advertisement
Quick Links
Advertisement

Subscribe to Our Youtube Channel
Related Manuals for Kedacom IPC2860-HN-PIR15


Summary of Contents for Kedacom IPC2860-HN-PIR15
- Page 1 鱼眼高清网络摄像机 Fisheye IP Camera 快速安装指南 Quick Start Guide...
- Page 3 一前言 感谢您购买我司产品,如对本公司产品有疑问或需要,请随时和我们联系。 此内容(手册)的目的是确保用户正确使用本产品,以避免危险或财产损失。在使用产品之前,请 认真阅读此手册并妥善保存以备日后参考。如果用户因没有按照以下安全说明,致使设备不能正常 使用或损坏等情况,我司恕不负责,感谢您的配合。 二安全使用注意事项 1.电源要求 Ÿ 请在安装使用设备过程中,严格遵守当地各项电气安全规定。 Ÿ 请使用满足安全电压要求的电源,在设备运行之前检查供电电源是否正确。 Ÿ 请在安装配线时装入易于使用的断电设备,以便必要时进行紧急断电。请保护电源软线免受踩踏 或紧压,特别是在插头、电源插座和从装置引出的接点处。 Ÿ 请在断电状态下连接电源、告警、音频、RS485等线缆,严禁在设备上电的情况下连线。 2.使用环境要求 Ÿ 请勿将摄像机对准强光(如灯光照明、太阳光等处)聚焦,否则容易引起过亮或漏光现象 (这 并非摄像机故障) 也将影响摄像机寿命。 Ÿ 请在允许的湿度和温度范围内运输、使用和存储设备。 Ÿ 请勿将设备置于潮湿、多尘、极热、极冷、强电磁辐射或照明条件不稳定等场所。 Ÿ 请勿让任何液体流入设备,以免内部元件受损。 Ÿ 请勿阻挡设备附近的通风口,以免热量积蓄。 Ÿ 请在运送设备时,重新以出厂时的包装进行包装,或用同等品质的材质包装。 Ÿ 请勿在运输、存储及安装过程中重压、剧烈震动、浸泡设备。 工作环境 工作电源 DC12V±10%/POE,1.5A 温度 -40℃ ~ +7 0℃ 湿度...
- Page 4 3.日常维护与保养 Ÿ 请勿直接触碰设备发热部件,以免烫伤。 Ÿ 镜头沾染灰尘或油脂时,用棉布或镜头清洁布擦拭。若遇污垢难以清除,蘸上少量镜片清洁液, 自镜头中心向外旋转轻轻擦拭,直到干净为止。禁止使用有机溶剂(苯、酒精等)对镜头和护罩 前脸进行除尘、清洁。 Ÿ 请不要以任何方式拆卸或修改产品。(对未经认可的修改或维修导致的问题,本公司不承担任何 责任)。 Ÿ 如果设备工作不正常,请联系经销商或最近的服务中心。 4.特别声明 Ÿ 本手册中的图示仅供参考,产品请以实物为准。 Ÿ 我们尽最大努力来保证本手册信息的正确性,如因升级等原因发生信息修改,恕不另行通知。 Ÿ 本手册能作为多个型号产品的使用指导,但不一一列举每个产品的使用情况,请您根据实际产 品自行对照。 Ÿ 本产品使用光盘内IPCSearch激活后方能使用,激活时请填写有效邮箱,方便找回密码。 Ÿ 为了提高产品网络使用的安全性,建议您设置高强度密码:密码长度必须达到8-16个字符,且 至少由数字和字母或特殊字符中的两种或两种以上类型组合而成。请您定期更改用户名的密 码,建议每3个月更新一次密码。如果设备在较高安全风险的环境中使用,建议每月或每周更 新一次。请妥善保管好您的用户名与密码。 Ÿ 将本产品接入互联网需自担风险,包括但不限于产品可能遭受的网络攻击、黑客攻击、病毒感 染等,本公司不对因此造成的产品工作异常、信息泄露等问题承担责任,本公司将及时为您提 供产品相关技术支持。 Ÿ 如需获取最新文档,请至官网下载,官网地址www.kedacom.com。 【说明】 更多信息见附带光盘中的《高清网络摄像机用户手册》。...
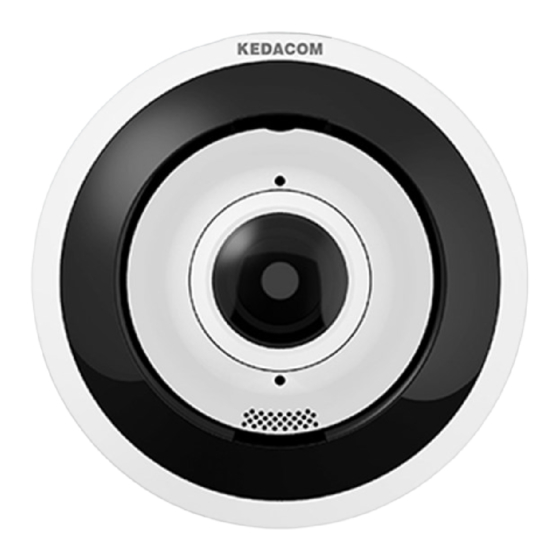
- Page 5 三外观及接口 外观: 塑料贴纸 装饰盖 机身 扬声器 micro SD卡槽 后盖 螺孔...
- Page 6 尺寸: 单位:mm Φ43.8 Φ98.5 Φ142.5 Φ160 尾线:...
- Page 7 表1 线缆接口介绍 接口 接口名称 功能描述 用户线缆组合 包含告警输入/输出,音频输入/输出,RS485串口等 视频输出接口 本地视频输出复合视频信号,BNC接口 电源接口 连接DC12V电源 网络接口 连接交换机等网络接入设备 表2 用户线缆组合接口介绍 接口名称 序号 颜色 接口名称 功能描述 黄 直流12V输出正极 DC 12V OUT+ 音频输出入接口,输入音频信号或进行语音对讲 粉 LINE IN 可连接的设备:拾音器等 白 音频输入接地 LINE IN GND 告警输入接口,输入告警信号 白棕 ALARM IN-2 可连接的设备:烟感器、声控开关等 浅绿...
- Page 8 四DC12V线径与传输距离关系表 当线径大小一定,DC12V电压损耗率低于10%时,推荐的最大传输距离。 不同线径的电源线最大长度和功率要求(仅供参考)。 线径 0.80 0.80 1.00 1.25 1.63 2.00 距离m (AWG20) (AWG20) (AWG18) (AWG16) (AWG14) (AWG12) 功率W...
- Page 9 五设备安装 设备支持吸顶安装、墙面安装、吊装、壁装。 吊装和壁装需配合支架进行安装,设备本身不含吊装支架和壁装支架,请联系供应商或客服购买。 在安装过程中请勿撕下摄像机装饰盖保护膜,同时需保证装饰盖内壁清洁,以免装饰盖脏污影响图 像效果,待安装完毕后撕下保护膜。 整机重量:590g(不含包装) 吸顶安装 墙面安装 吊装 壁装 安装存储卡(可选) micro SD卡容量最大支持256G,插入micro SD卡后,不建议对其进行热插拔,首次使用时需格式 化。 1.轻拉塑料贴纸取下装饰盖,露出存储卡上盖。 塑料贴纸...
- Page 10 2.拧松螺钉取下存储卡上盖,插入micro SD卡。 3.拧紧螺钉固定存储卡上盖,将设备装饰盖上的箭头对准Logo位置,固定上盖。...
- Page 11 吸顶安装 【说明】 吸顶安装和墙面安装方法相同,此处以吸顶安装为例进行说明。 当设备安装的墙体或天花板厚度和硬度适合固定自攻螺钉,同时其强度也能够承受设备的重量时, 您可以进行吸顶安装。 吸顶安装需配合藏线盒进行安装。藏线盒为标配件。藏线盒尺寸及外观如下图所示。 Φ123.49 Φ26.5 螺孔X4,与墙面固定 顶部出线孔 螺孔X4,与机身固定 侧出线孔X2 指示箭头...
- Page 12 1.存储卡安装。micro SD卡安装请参见存储卡安装部分; 2.安装贴纸。选择合适的安装位置,将随机附带的安装贴纸粘贴至选定的位置,并根据贴纸尺寸开 孔。确认安装方向时,贴纸上的箭头应对着设备的Logo。贴纸图示及其尺寸如下图所示: Φ=4mm Φ=90mm Φ=4mm Φ=4mm Φ=4mm 【说明】 如果在安装线缆时采用从安装面顶部出线的方式,还需要在安装贴纸中间的圆孔位置打一 个线缆出孔开口。如果采用从设备侧面出线的方式,需要通过藏线盒侧面的U型出线孔将 线缆引出。 3.安装膨胀螺栓。将随机附带的膨胀螺栓完全塞入开孔位;...
- Page 13 4.将藏线盒固定在墙面。将藏线盒底座上的四个螺孔对准膨胀螺栓,拧紧螺钉固定藏线盒。 5.穿线。根据实际需要选择顶部出线或侧面出线。 顶部出线:将尾线从顶部穿出。 侧面出线:将尾线从侧面出线孔穿出。 顶部出线 侧面出线 【说明】 侧面出线需要先掰开出线孔,再将尾线从侧出线孔穿出。...
- Page 14 6.将机身与藏线盒固定。将箭头对准尾线出线位置,此时机身底部的的四个螺孔对准藏线盒的四个螺 孔,拧紧螺钉固定机身与藏线盒。 7.固定装饰盖。将装饰盖上有箭头的位置对准Logo位置,固定上盖。 8.撕下装饰盖保护膜,连接线缆并上电。 【说明】 尾线连接完成后,将接口部分放在藏线盒内部,以达到较好的防水效果。...
- Page 15 吊装: 吊装支架和壁装支架不同,但安装方式类似,此处以吊装为例进行说明,壁装时请参考吊装安装步 骤说明。 【说明】 吊装和壁装配合吊装或壁装安装支架即可,无需使用藏线盒。 进行吊装或壁装,请确认安装的墙体或天花板厚度和硬度适合固定自攻螺钉,同时其强度也能够承 受设备和支架的总重量。 吊装支架尺寸如下图: 重量:0.6KG ∅122 锁紧螺孔钉 单位:mm 壁装支架尺寸如下图: 重量:0.55KG 86.3 1.将安装贴纸贴于墙面并打孔。根据贴纸所示孔位,在墙面确认打孔位置并打孔,塞入膨胀螺栓。 如果在安装线缆时采用从安装面顶部出线的方式,还需要在墙面打一个线缆出孔开口。如果采用从 侧面出线的方式,需要通过支架底座上的U型线缆通道侧口,将线缆引出。 【说明】 打孔选择钻头应与膨胀螺栓外径相配,孔深参考螺栓的长度。...
- Page 16 2.存储卡安装(可选)。micro SD卡安装请参见存储卡安装部分; 3.穿线。采用顶部出线时,将线缆穿过安装面;若采用侧面出线的方式,将线缆穿过支架底座上U型 线缆通道侧口。 顶部出线 侧面出线 4.将机身底部的的四个螺孔对准吊装支架上的四个螺孔,拧紧螺钉固定机身与支架。...
- Page 17 5.固定支架。将支架底座上的四个螺钉孔对准安装面上的四个膨胀螺栓孔,将四颗自攻螺钉拧紧到四 个塑料膨胀螺栓中,并锁紧,将吊装支架固定在安装面上。 6.固定装饰盖。将装饰盖上有箭头的位置对准Logo位置,固定上盖。...
- Page 18 7.撕下装饰盖保护膜,连接线缆并上电。...
- Page 19 六、登录客户端 1.最低配置和系统环境 处理器:Intel酷睿i5 7500系列及以上或相同性能的其他处理器 Ÿ RAM内存:8GB DDR4及以上 Ÿ 操作系统:WindowsXP操作系统或更高版本 Ÿ 浏览器:IE8.0及以上版本,Firefox(49及以下版本) Ÿ DirectX:9.0c Ÿ 2.设备激活 第一次使用时请运行光盘中附带的IPCSearch,在IPCSearch中将显示设备的IP地址、网关等信 息。若IPC设备所接入的网络有DHCP服务,DHCP服务器将自动给IPC分配IP地址。 Ÿ 批量激活:在IPCSearch中选中设备,点击批量处理,在弹出的界面中设置admin用户的密码和 找回密码时需要用的邮箱,点击激活按钮激活设备。待设备重启。 Ÿ 单个激活:在IPCSearch中选择设备,单击右键,选择设备激活。填写用户名、密码、找回密码 时需要用到的邮箱。点击激活按钮激活设备。待设备重启。 Ÿ Web客户端激活:也可以通过Web客户端激活。将PC机与设备设为同一网段,登录Web界面。 可在界面设置管理员密码和密码恢复邮箱,点击激活。...
- Page 20 3.修改设备IP 点击修改网络参数,在弹出的界面中配置网络参数。静态分配IP地址时,请选择自定义地址,填写 以太网参数。修改参数配置,需要填写管理员用户用户名(admin)及激活设备时所设置的密码。 完成IP配置后,设备将自动重启,重启时间约为60秒。 4.登录设备 1)在IPCSearch中双击设备或点击登录设备,输入用户名和密码,登录Web客户端。...
- Page 21 2)弹出快速设置界面。点击设备快速设置,根据界面提示对设备参数进行快速设置,或直接关闭快 速设置界面,进入浏览界面。 3)登录成功后,下载并安装视频插件。 4)进入客户端后,直接浏览图像。 【说明】不同型号,浏览界面略有差异,请以实际界面为准。更多客户端说明请参考客户端帮助文 档。 在Web客户端上,可以进行浏览、回放、图片管理、参数配置等操作。...
- Page 22 本保修卡适用于您购买的本公司系列产品。 1.免费保修期一年(仅限中国大陆地区,中国大陆以外地区请参考英文说明)。 2.凡保修期内,由于本产品自身引起的故障,请与公司售后服务部联系。 3.保修时我们将使用您的保修卡信息,请认真填写。 4.以下情况,属于有偿保修范围: -人为原因造成的设备故障 -因使用环境不符合本产品要求造成的故障 -因不可抗力造成的产品损坏 -无保修卡 -已过免费保修期 用户名称: 详细地址: 传真: 电话: 邮箱: 邮编: 产品名称: 产品型号: 购买日期:...
-
Page 23: Safety Instruction
I. Preface Thank you for purchasing our product. If there is any question, please do not hesitate to contact us. These instructions are intended to ensure that the user can use the product correctly to avoid danger or property loss. Please read this Guide carefully before using the product, and keep it properly for future reference. - Page 24 We shall provide technical support relating to the products in time. For the latest documents, please download at our website www.kedacom.com. [Note]: For more information, please refer to the User Manual for HD IP Camera in the attached CD.
-
Page 25: Appearance And Interface
III. Appearance and Interface Appearance: Plastic Sticker Decorative Main Body Cover Micro SD Card Slot Loudspeaker Back Cover Screw Hole... - Page 26 Dimensions: Unit: mm Φ43.8 Φ98.5 Φ142.5 Φ160 Tail Circuit:...
- Page 27 Table 1 Wiring Interface Interface Interface Name Function Including alarm in / out, audio in / out, RS-485 serial port and etc. User cable group Video output Local video output composite video signal, BNC port Power supply Connect to power supply of DC12V Network Connect to network access devices like a switch Table 2 Cable Group Interface...
- Page 28 IV. DC12V Wire Diameter VS. Transmission Distance The recommended max transmission distance when the wire diameter is certain and the voltage loss rate is less than 10% Requirements of max length and power for power cords of different diameters (for your reference). Diameter Distance 1.00...
-
Page 29: Installation
V. Installation The fisheye camera supports ceiling mount, wall mount, pendent mount and wall bracket mount. As pendent mount and wall bracket mount need brackets but the camera itself does not contain brackets, please contact your supplier or customer service personnel to purchase. Do not peel off the protective film on the decorative cover of the camera during installation, and ensure the inside of the decorative cover is clean;... - Page 30 2. Loosen the screws and take off the lid of storage card, and then insert micro SD card. 3. Tighten the screws to fix the lid of storage card, and align the arrow on the decorative cover of the camera to the logo and then fix the lid.
- Page 31 Ceiling Mount [Note]: The steps of ceiling mount and wall mount are the same, so we’ll take ceiling mount as an example. You can perform ceiling mount when the wall or ceiling is thick and solid enough for installing the tapping screws, and meanwhile the strength of it can bear the camera weight.
- Page 32 1. Install SD card. Please refer to the part of Install Storage Card for steps of installing the micro SD card; 2. Install sticker. Choose a proper position and stick the attached installation sticker onto it. Drill holes according to the sticker indicates and point the arrow on the sticker to the logo on the camera to ensure the right direction. Diagram and dimensions of the sticker are as follows: Φ=4mm Φ=90mm...
- Page 33 4. Fix the junction box onto the wall. Align the 4 screw holes on the junction box to the expansion bolts and tighten the screws to fix the junction box. 5. Thread wires. Choose top wiring or side wiring according to actual conditions. Top wiring: Thread wires out from the top.
- Page 34 6. Fix the camera body to the junction box. Align the arrow to the cable outlet and the four screw holes at the bottom of the camera will align to those four holes on the junction box. Tighten the screws to fix the camera body and the junction box.
- Page 35 Pendent Mount: The pendent bracket is different with the wall bracket, but their installation methods are similar. Now take the pendent bracket as an example to introduce the mount steps, which is also a reference for wall bracket mount. [Note]: Pendent mount and wall bracket mount need only the pendent bracket and the wall bracket but don’t need the junction box.
- Page 36 2. Install SD card. Please refer to the part of Install Storage Card for steps of installing the micro SD card; 3.Thread wires. If threading wires from the top, thread the wires through the mounting surface. If threading from the profile side of the device, thread the wires out through the U-shaped groove at the base of the bracket. Top Wiring Side Wiring 4.Align the four screw holes on the device base to the four screw holes on the bracket, tighten the screws to fix...
- Page 37 5.Fix bracket. Align the four screw holes on the bracket base to the four expansion bolts on the mounting surface, tighten the four tapping screws into the expansion bolts and fix the pendent bracket onto the mounting surface. 6.Fix the decorative cover. Align the arrow on the decorative cover to the logo and fix the cover.
- Page 38 7.Peel off the protective film on the decorative cover, connect wires and power in on.
- Page 39 VI. Login to Client 1. Minimum configurations and system requirements: Processor: Intel CORE®i5 7500 series or other equivalent processors Ÿ RAM Memory: 8GB DDR4 or above Ÿ Operating System: Windows XP or newer version Ÿ Browser: IE8.0 and newer version, Firefox (49 and lower version) Ÿ...
- Page 40 3. Modify device IP address Click “Modify Params” and set the network parameters. When configuring a static IP for the camera, please check “Custom device address (Close DHCP)” and fill the Ethernet parameters. During modification, the username (admin) and the password set during activation should be entered. After configuration, the camera will reboot automatically which takes 60s.
- Page 41 2) An interface of quick setting pops up. Click "Quick Setting" and perform quick settings as the interface indicates, or close the window and go to live view interface directly. ) After login successfully , download and install the plug-in. 4) Re-login to the web client and view live video directly.
-
Page 42: What Is Not Covered By This Warranty
Please refer to the licensing agreement accompanying the software for details of your rights with respect to its use. Kedacom does not warrant that the operation of the Kedacom Product will be uninterrupted or error-free. Kedacom is not responsible for damage arising from failures to follow instructions relating to the Kedacom Product's use. - Page 43 During warranty service, it is possible that the contents of the Kedacom product's storage media will be lost, replaced or reformatted. In such an event, Kedacom and its authorized agents are not responsible for any loss of data or other information contained on the storage media or any other part of the Kedacom product serviced.
- Page 44 Overseas Hotline: +86-0512-8896 9861 中国: 江苏省苏州市高新区金山路131号(215011) Tel: +86-512-6841 8188 Fax: +86-512-68412699 Suzhou Keda Technology Co.,Ltd. Singapore: 627A Aljunied Road, #09-07, BizTech Centre, Singapore 389842 Tel: +65-6842-5700 Fax: +65-6842-5900 05.03.800745 V1 20180720...
Need help?
Do you have a question about the IPC2860-HN-PIR15 and is the answer not in the manual?
Questions and answers