Danfoss VLT FC Series Service Manual
Hide thumbs
Also See for VLT FC Series:
- Installation manual ,
- Operating instructions manual (64 pages) ,
- Operating manual (26 pages)
Table of Contents
Advertisement
Quick Links
Advertisement
Table of Contents
Troubleshooting

Subscribe to Our Youtube Channel
Related Manuals for Danfoss VLT FC Series


Summary of Contents for Danfoss VLT FC Series
- Page 1 FC Series, D1h–D8h, Da2/Db2/Da4/Db4, E1h–E4h, J8/J9 ® ® ® HVAC Drive FC 102 • VLT Refrigeration Drive FC 103 • VLT AQUA Drive FC 202 ® ® ® AutomationDrive FC 302 • VLT AutomationDrive FC 361 • VLT Parallel Drive Modules vlt-drives.danfoss.com...
-
Page 3: Table Of Contents
3.7 Product Options 4 Operator Interface and Drive Control 4.1 Introduction 4.2 Local Control Panel 4.2.1 Layout 4.2.2 Menus 4.2.3 Parameter Settings 4.2.4 Uploading and Downloading Parameter Settings 4.2.5 Restoring Factory Default Settings MG94A502 Danfoss A/S © 02/2019 All rights reserved. - Page 4 6.5.1 No Display 6.5.2 Intermittent Display 6.5.3 Motor Does Not Run 6.5.4 Incorrect Motor Operation 6.6 Alarms and Warnings 6.6.1 Overview of Alarms and Warnings 6.6.2 Alarm/Warning Identification Tables 6.7 Alarm and Warning Definitions Danfoss A/S © 02/2019 All rights reserved. MG94A502...
- Page 5 8.3.9 Gate Drive Card in E-sized Drives 8.4 Static Test Procedures 8.4.1 Rectifier Circuits Test 8.4.2 Inverter Section Tests 8.4.3 Brake IGBT Test 8.4.4 Intermediate Section Tests 8.4.5 IGBT Temperature Sensor Test 8.4.6 Gate Resistor Test MG94A502 Danfoss A/S © 02/2019 All rights reserved.
- Page 6 9.2.4 Programming the Parallel Drive Module 9.2.5 Service Kit Troubleshooting 9.3 Signal Test Board 9.3.1 Signal Test Board 9.3.2 Signal Test Board Pin Outs 10 D1h/D3h/D5h/D6h/J8 Drive Disassembly and Assembly 10.1 Before Proceeding Danfoss A/S © 02/2019 All rights reserved. MG94A502...
- Page 7 10.4.1 Removing the Heat Sink Access Panel 11 D2h/D4h/D7h/D8h/J9 Unit Disassembly and Assembly 11.1 Before Proceeding 11.2 D2h/D4h/D7h/D8h/J9 Disassembly and Assembly 11.2.1 General Information 11.2.2 Control Card and Control Card Mounting Plate 11.2.3 Power Card Mounting Plate MG94A502 Danfoss A/S © 02/2019 All rights reserved.
- Page 8 12.2 Parallel Drive System Disassembly and Assembly 12.2.1 Removing the Control Shelf 12.2.2 Removing a Drive Module 12.2.3 Installing the Drive Modules 12.2.4 Installing the Control Shelf 12.3 Parallel Drive Module Disassembly and Assembly Danfoss A/S © 02/2019 All rights reserved. MG94A502...
- Page 9 13.2.27 DC Bus Rails 14 Product Specifications 14.1 Fastener Torque Ratings 14.1.1 General Torque Tightening Values 14.1.2 Unique Torque Values in E1h–E4h Drives 14.2 DC Voltage Levels 14.3 Warning and Alarm Trips Points MG94A502 Danfoss A/S © 02/2019 All rights reserved.
- Page 10 ® Contents FC Series, D1h–D8h, Da2/Db2/Da4/Db4, E1h–E4h, J8/J9 15 Spare Parts 15.1.1 Using the Drive Configurator Tool 15.1.2 Spare Parts Lists 15.1.3 Recommended Current Scaling Cards 16 Block Diagrams Index Danfoss A/S © 02/2019 All rights reserved. MG94A502...
-
Page 11: Introduction
Danfoss drives. • The product-specific kit instructions provide information on installation of various options available for Danfoss drives. • Technical documentation for other product options is available at drives.danfoss.com/ knowledge-center/technical-documentation/. MG94A502 Danfoss A/S © 02/2019 All rights reserved. -
Page 12: Abbreviations And Acronyms
Miniature circuit breakers Motion control option Motor control processor Motion control tool MDCIC Multi-drive control interface card Millivolts NEMA National Electrical Manufacturers Association Negative temperature coefficient Nominal motor power Printed circuit board Danfoss A/S © 02/2019 All rights reserved. MG94A502... -
Page 13: Conventions
The specific approvals and certification for the drive can 1.6 Approvals and Certifications be found on the nameplate. For more information, contact the local Danfoss office or partner. The following list is a selection of possible type approvals and certifications for Danfoss drives:... -
Page 14: Safety
Also, the personnel must be familiar with the instructions and safety measures described in this manual. Authorized personnel are qualified personnel, trained by Danfoss to service Danfoss products. Danfoss A/S © 02/2019 All rights reserved. MG94A502... - Page 15 • Ensure the correct grounding of the equipment injury. by a certified electrical installer. • Do not touch energized parts of the drive when connected to mains. MG94A502 Danfoss A/S © 02/2019 All rights reserved.
-
Page 16: Electrostatic Discharge
• Exterior areas marked by the high-temperature symbol (yellow triangle) are hot while the drive is in use and immediately after being powered off. Danfoss A/S © 02/2019 All rights reserved. MG94A502... -
Page 17: Product Overview
The ® attempt to replace standalone modules with VLT serial number is listed on the nameplate. Refer to Parallel Drive Modules. Illustration 3.1 for details. MG94A502 Danfoss A/S © 02/2019 All rights reserved. -
Page 18: Enclosure Size Identification
P8 = 12-pulse, class A1 RFI Build date (wwy, where ww = the week and y = last digit of the year). For example, 345 = week 34 of 2015. Illustration 3.1 Sample Nameplates Danfoss A/S © 02/2019 All rights reserved. MG94A502... -
Page 19: Enclosure Size Definitions
– N55K D1h/D3h – – N75K D2h/D4h – – N90K D2h/D4h – – N110 D2h/D4h – – N150 D2h/D4h – – Table 3.5 200–240 V AC (T2) Voltage Rating for FC 302 MG94A502 Danfoss A/S © 02/2019 All rights reserved. - Page 20 N90K – – N110 – – N132 – – N160 – – N200 – – N250 – – N315 – – Table 3.7 380–480 V AC (T4) Voltage Rating for FC 361 Danfoss A/S © 02/2019 All rights reserved. MG94A502...
- Page 21 4-module system N710 P2/P4 – 4-module system N710 P6/P8 – 4-module system N800 P2/P4 – 4-module system N800 P6/P8 – 4-module system Table 3.8 380–500 V AC (T5) Voltage Rating for FC 302 MG94A502 Danfoss A/S © 02/2019 All rights reserved.
- Page 22 N1M0 – 4-module system N1M0 – 4-module system N1M2 – 4-module system N1M2 – 4-module system Table 3.9 525–690 V AC (T7) Voltage Rating for FC 102, FC 103, and FC 202 Danfoss A/S © 02/2019 All rights reserved. MG94A502...
- Page 23 4-module system N800 – 4-module system N900 – 4-module system N900 – 4-module system N1M0 – 4-module system N1M0 – 4-module system Table 3.10 525–690 V AC (T7) Voltage Rating for FC 302 MG94A502 Danfoss A/S © 02/2019 All rights reserved.
-
Page 24: Product Views
Gate drive card support bracket Brake IGBT module (optional) Mains input terminals IGBT modules Motor output terminals Capacitor bank Power terminal mounting plate Heat sink fan Illustration 3.2 Exploded View D3h Drive (D1h/D5h/D6h/J8 Drives are Similar). Danfoss A/S © 02/2019 All rights reserved. MG94A502... -
Page 25: Exploded View Of D2H/D4H/D7H/D8H/J9 Drive
Gate drive card SCR/diode modules Gate drive card support bracket IGBT modules Mains input terminals Capacitor bank Motor terminals Heat sink fan Illustration 3.3 Exploded View D4h Drive (D2h/D7h/D8h/J9 Drives are similar). MG94A502 Danfoss A/S © 02/2019 All rights reserved. -
Page 26: Exploded View Of Multi-Drive System
MDCIC (behind cover plate) Enclosure LCP and cable Busbar kit (optional) Control card EMC Shield Control shelf Cooling kit (optional) Drive module – – Illustration 3.4 Exploded View of 4-module System Danfoss A/S © 02/2019 All rights reserved. MG94A502... -
Page 27: View Of Control Shelf
Power supply for Pilz relay (optional) System identification label Pilz relay (optional) 44-pin cables between MDCIC and drive modules DIN rail Ferrite core Drive relay terminals Illustration 3.5 View of the Control Shelf MG94A502 Danfoss A/S © 02/2019 All rights reserved. -
Page 28: Exploded View Of Parallel Drive Module
Busbar/regeneration terminal 16 Power terminal mounting plate Inrush card SCR/diode modules 17 Heat sink fan RFI filter (optional) Gate drive card 18 Capacitor bank Illustration 3.6 Exploded View of Parallel Drive Module Danfoss A/S © 02/2019 All rights reserved. MG94A502... -
Page 29: View Of Parallel Drive Module
Motor output terminals (inside the unit) Brake fault jumper and connector Heat sink and heat sink fan Mains input terminals (inside the unit) Ground plate Terminal cover – – Illustration 3.7 View of Parallel Drive Module MG94A502 Danfoss A/S © 02/2019 All rights reserved. -
Page 30: Exploded View Of E-Sized Unit
DC capacitor bank AC fuses (optional) Balance/high frequency card Lower input plate Heat sink fans AC input busbars Input terminals Inrush card Motor terminals Illustration 3.8 Exploded View E3h Unit (E4h Unit is similar). Danfoss A/S © 02/2019 All rights reserved. MG94A502... -
Page 31: Product Options
AC fuses Disconnect + fuses Regeneration terminals Load sharing terminals Brake Table 3.12 Options available for E1h–E4h Drives 1) The disconnect option always includes fuses. Disconnect is not available in E3/E4 units. MG94A502 Danfoss A/S © 02/2019 All rights reserved. -
Page 32: Operator Interface And Drive Control
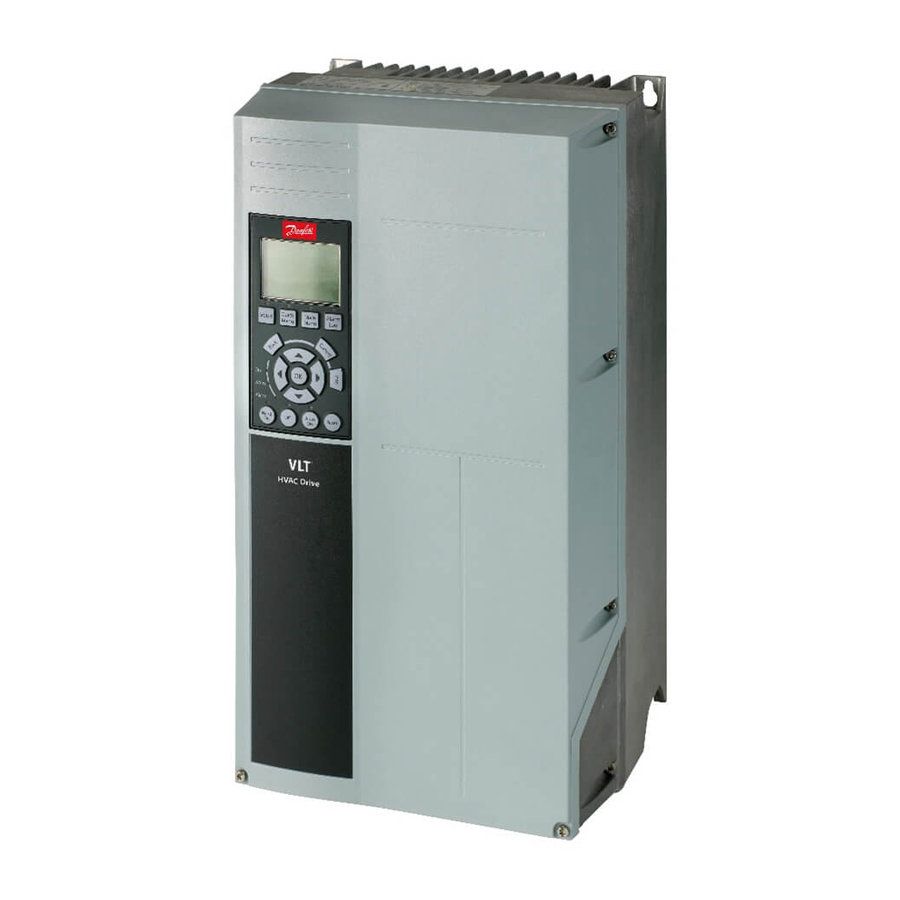
Reset Off Shows operational data, status, warnings, and alarms. • Programs drive functions. Illustration 4.1 Local Control Panel (LCP) • Manually resets the drive after a fault when auto reset is inactive. Danfoss A/S © 02/2019 All rights reserved. MG94A502... -
Page 33: Menus
Q4 Smart Setup D. Indicator lights Q5 Changes Made Indicator lights are used to identify the drive status and to provide a visual notification of warning or fault conditions. Illustration 4.2 Quick Menu View MG94A502 Danfoss A/S © 02/2019 All rights reserved. - Page 34 This menu provides the most efficient set-up for most applications. Perform the unit set-up in the order listed. Refer to the programming guide for the set-up steps. Danfoss A/S © 02/2019 All rights reserved. MG94A502...
-
Page 35: Parameter Settings
Restore the default parameter settings by initializing the unit. Initialization is carried out through parameter 14-22 Operation Mode or manually. Parameter 14-22 Operation Mode does not reset settings such as the following: MG94A502 Danfoss A/S © 02/2019 All rights reserved. -
Page 36: Status Messages
Bus jog 2 PROFIdrive profile was selected in parameter 8-10 Control Profile. The Jog 2 function is activated via serial communication. The motor is running with parameter 8-91 Bus Jog 2 Speed. Danfoss A/S © 02/2019 All rights reserved. MG94A502... - Page 37 • The DC brake is activated via serial communication. communication. • The jog function was selected as a reaction for a monitoring function (for example, No signal). The monitoring function is active. MG94A502 Danfoss A/S © 02/2019 All rights reserved.
- Page 38 Protection mode can be restricted in parameter 4-53 Warning Speed High. parameter 14-26 Trip Delay at Inverter Fault. Speed low Motor speed is below the value set in parameter 4-52 Warning Speed Low. Danfoss A/S © 02/2019 All rights reserved. MG94A502...
-
Page 39: Service Functions
Off 1, Off 2, and Off 3 active. Start inhibit is active. To enable start, refer to Start inhibit function in this table. Table 4.12 Operation Status NOTICE AUTO/REMOTE MODE In auto/remote mode, the drive requires external commands to execute functions. MG94A502 Danfoss A/S © 02/2019 All rights reserved. -
Page 40: Drive Inputs And Outputs
Some Illustration 4.6 Control Terminals options include more terminals for output signals. Danfoss A/S © 02/2019 All rights reserved. MG94A502... -
Page 41: Control Supply
Refer to chapter 8.5.14 Input Terminal Signal Tests. For proper operation of the drive, the drive input control terminals must be: • Wired properly. • Powered. • Programmed correctly for the intended function. • Receiving a signal. MG94A502 Danfoss A/S © 02/2019 All rights reserved. -
Page 42: Control Terminal Functions
RS485 interface and serial communication. Table 4.13 Control Terminals and Functions Terminal 1–3 4–6 Parameter 5-10 5-11 5-12 5-13 5-14 5-15 5-19 6-1* 6-2* 6-5* 5-4* 5-4* Table 4.14 Control Terminals and Associated Parameters Danfoss A/S © 02/2019 All rights reserved. MG94A502... -
Page 43: Shielded Cable Grounding
61. This terminal connects to ground through an internal RC link. Reduce the differential mode interference between conductors by using twisted-pair cables. Table 4.15 Shielded Cable Grounding MG94A502 Danfoss A/S © 02/2019 All rights reserved. -
Page 44: Internal Drive Operation
• Power section These areas and components are covered in greater detail in chapter 5.3 Sequence of Operation. Danfoss A/S © 02/2019 All rights reserved. MG94A502... - Page 45 In a parallel drive system, a ribbon cable links the power card to the MDCIC on the control shelf. The MDCIC provides supervision over the drive modules in the system. Illustration 5.1 Drive Module Basic Block Diagram MG94A502 Danfoss A/S © 02/2019 All rights reserved.
-
Page 46: Logic Section
(SMPS), which provides the unit with 24 V DC, (+) 18 V DC, repaired unit. The LCP is removable during operation to (–) 18 V DC, and 5 V DC operating voltage. The SMPS Danfoss A/S © 02/2019 All rights reserved. MG94A502... -
Page 47: Power Section
Average current. the rectifier • Peak current. DC bus filter circuitry containing the DC • Ground leakage current. coils (intermediate or DC bus circuit) Illustration 5.3 Typical Power Section of an Individual Drive MG94A502 Danfoss A/S © 02/2019 All rights reserved. -
Page 48: Sequence Of Operation
The low voltage supplies are activated when the DC bus reaches approximately 50 V DC less than the alarm voltage Danfoss A/S © 02/2019 All rights reserved. MG94A502... - Page 49 INRUSH PCA4 CBL8 REC+ REC- MK1802 K1G1K2G2K3G3 1 4 2 5 3 6 CBL10 DC INDUCTOR REC+ RFI PCA6 REC- SCR1 SCR2 SCR3 A1 RFI PCA6 Illustration 5.5 Rectifier Circuit in D-sized Drives MG94A502 Danfoss A/S © 02/2019 All rights reserved.
- Page 50 ® Internal Drive Operation FC Series, D1h–D8h, Da2/Db2/Da4/Db4, E1h–E4h, J8/J9 FAN POWER CARD POWER CARD PCA2 INRUSH CARD PCA4 GATEDRIVE CARD PCA5 INRUSH CARD PCA4 Illustration 5.6 Rectifier Circuit in E-sized Drives Danfoss A/S © 02/2019 All rights reserved. MG94A502...
-
Page 51: Intermediate Section
The assembly also contains the bleeder/balance circuitry. This circuitry maintains equal voltage drops across each capacitor, and provides a current path for discharging the capacitors when the drive is powered down. MG94A502 Danfoss A/S © 02/2019 All rights reserved. - Page 52 PCA7 MODULE IGBT4 REC- SCR1 SCR2 SCR3 REGEN+ A1 RFI PCA6 REGEN- BAL/HF PCA7 130B7184 130B7185 DC INDUCTOR CBANK 1 REC+ HF PCA7 BAL/HF PCA7 Illustration 5.7 Intermediate Section in D-sized Drives Danfoss A/S © 02/2019 All rights reserved. MG94A502...
- Page 53 Internal Drive Operation Service Guide FAN POWER CARD POWER CARD PCA2 INRUSH CARD PCA4 GATEDRIVE CARD PCA5 Illustration 5.8 Intermediate Section in E-sized Drives MG94A502 Danfoss A/S © 02/2019 All rights reserved.
-
Page 54: Inverter Section
Illustration 5.9 Output Voltage and Current Waveforms the pulses occur determines the frequency of the waveform. By employing a sophisticated control scheme, the drive delivers a current waveform that nearly replicates a true AC sine-wave. Danfoss A/S © 02/2019 All rights reserved. MG94A502... - Page 55 CBL13 1 6 10 5 1 6 10 5 1 6 10 5 PCA9 NTC1 PCA10 NTC2 PCA11 NTC3 + M - IGBT1 IGBT2 IGBT3 Illustration 5.10 Inverter Section in D-sized Drives MG94A502 Danfoss A/S © 02/2019 All rights reserved.
- Page 56 ® Internal Drive Operation FC Series, D1h–D8h, Da2/Db2/Da4/Db4, E1h–E4h, J8/J9 FAN POWER CARD POWER CARD PCA2 INRUSH CARD PCA4 GATEDRIVE CARD PCA5 Illustration 5.11 Inverter Section in E-sized Drives Danfoss A/S © 02/2019 All rights reserved. MG94A502...
-
Page 57: Brake Option
The power card and control return to the DC bus circuit. card also monitor the brake IGBT and brake resistor connection for short circuits and overloads. External placement of the brake resistor offers multiple advantages: MG94A502 Danfoss A/S © 02/2019 All rights reserved. - Page 58 FUSE OPTION CIRCUIT BAL/HF BREAKER BRAKE IGBT IGBT1 IGBT2 IGBT3 PCA7 MODULE IGBT4 REC- SCR1 SCR2 SCR3 REGEN+ A1 RFI PCA6 REGEN- PCA8 BRAKE IGBT MODULE IGBT4 REGEN+ REGEN- Illustration 5.12 Brake Option Danfoss A/S © 02/2019 All rights reserved. MG94A502...
-
Page 59: Cooling Fans
When the IGBT temperature reaches the fan Fan activation maximum speed temperature, the fan is running at 100% The following conditions activate the fans: speed. As the IGBT temperature decreases, the fan speed MG94A502 Danfoss A/S © 02/2019 All rights reserved. -
Page 60: Load Sharing And Regen
Fan minimum speed temperature = 70 °C (158 °F) from a DC source. An external DC source is required. Do • Fan maximum speed temperature = 85 °C not attempt without first consulting Danfoss Application (185 °F) Engineering Danfoss A/S © 02/2019 All rights reserved. -
Page 61: Specific Power Card Connections
Terminals 104 and 106 are extended to the top of each module through a wiring harness. The terminals are on the top of each module near the DC fuse. MG94A502 Danfoss A/S © 02/2019 All rights reserved. -
Page 62: Troubleshooting
If in doubt, consult the factory or • authorized repair center for assistance. After a repair to the drive. Refer to chapter 8.6 After-repair Tests. Danfoss A/S © 02/2019 All rights reserved. MG94A502... -
Page 63: Visual Inspection
(in the back) must be mounted on a flat solid surface. Vibration Look for unusual amounts of vibration around the drive. Mount the unit solidly or use shock mounts. Table 6.1 Visual Inspection MG94A502 Danfoss A/S © 02/2019 All rights reserved. -
Page 64: Fault Symptoms
8.5.9 Output Action: Ensure that terminal 27 is logic 1. Refer to Imbalance of Motor Voltage and Current. chapter 8.5.14 Input Terminal Signal Tests. Danfoss A/S © 02/2019 All rights reserved. MG94A502... -
Page 65: Alarms And Warnings
By using the [Reset] control key on the LCP. • Via a digital input with the reset function. • Via serial communication/optional fieldbus. • By resetting automatically using the [Auto Reset] function. MG94A502 Danfoss A/S © 02/2019 All rights reserved. -
Page 66: Alarm/Warning Identification Tables
Ground fault 2 Power card supply – 24 V supply low 1.8 V supply low – Speed limit – – AMA calibration failed – – AMA check U and I – – Danfoss A/S © 02/2019 All rights reserved. MG94A502... - Page 67 – Clock fault – – Locked rotor – – Mixing fan fault – Motor rotat. unexp. – Inrush supply – – External SCR disable – – Mains voltage – Mains frequency – MG94A502 Danfoss A/S © 02/2019 All rights reserved.
- Page 68 (X) This variable is programmable. Warnings/alarms depend on parameter setting. 1) Cannot be auto reset via parameter selection. LED indication Warning Yellow Alarm Red (flashing) Trip lock Yellow and red Table 6.3 Description of LED Indicator Lights Danfoss A/S © 02/2019 All rights reserved. MG94A502...
- Page 69 00000002 – Stop Delayed 00000200 Discharge Temperature High Discharge Temperature High 00000400 1024 Start Limit – 00000800 2048 Speed Limit – Table 6.5 Description of Alarm Word 2 and Warning Word 2 MG94A502 Danfoss A/S © 02/2019 All rights reserved.
-
Page 70: Alarm And Warning Definitions
Troubleshooting WARNING/ALARM 10, Motor overload temperature • Check the supply voltage and supply currents to According to the electronic thermal protection (ETR), the the drive. motor is too hot. Danfoss A/S © 02/2019 All rights reserved. MG94A502... - Page 71 ALARM 15, Hardware mismatch A fitted option is not operational with the present control card hardware or software. MG94A502 Danfoss A/S © 02/2019 All rights reserved.
- Page 72 A feedback sensor is mounted in the fan. If the fan is blocked motor can cause this alarm. commanded to run and there is no feedback from the sensor, this alarm appears. This alarm also shows if there is Danfoss A/S © 02/2019 All rights reserved. MG94A502...
- Page 73 The drive is still operational but, since the brake transistor has short-circuited, substantial power is transmitted to the brake resistor even if it is inactive. MG94A502 Danfoss A/S © 02/2019 All rights reserved.
- Page 74 Troubleshooting • Remove the power from the drive and check motor phase V. ALARM 32, Motor phase W missing Motor phase W between the drive and the motor is missing. Danfoss A/S © 02/2019 All rights reserved. MG94A502...
- Page 75 Check for loose or missing wiring. No feedback from the heat sink temperature sensor. It may be necessary to contact the Danfoss supplier or The signal from the IGBT thermal sensor is not available on service department. Note the code number for further the power card.
- Page 76 • Check for proper wire size. ALARM 50, AMA calibration failed • Contact the Danfoss supplier or Danfoss service Check the motor cables for short circuits or department. leakage currents. ALARM 51, AMA check U...
- Page 77 The control card and power card are incompatible. To below the maximum limit. If the drive is unable to limit check compatibility, contact the Danfoss supplier with the the frequency, it trips and issues an alarm. The latter may type code from the unit nameplate and the part numbers happen in the flux mode if the drive loses control of the of the cards.
- Page 78 Parameter 14-89 Option Detection is set to [0] Frozen config- has been running for less than the minimum time specified uration and the option layout has been changed. in parameter 22-77 Minimum Run Time. Danfoss A/S © 02/2019 All rights reserved. MG94A502...
- Page 79 60 s within a period of 600 s activates the alarm, and the 3 = Third drive module from left (in 4-module drive trips. module systems). 4 = Fourth drive module from left (in 4-module module systems). MG94A502 Danfoss A/S © 02/2019 All rights reserved.
- Page 80 This alarm is only for multi-drive systems. It is equivalent to generated the fault. alarm 69, Power card temperature. The report value in the alarm log indicates which drive module generated the alarm: Danfoss A/S © 02/2019 All rights reserved. MG94A502...
- Page 81 ALARM 427, FPC supply Supply voltage fault (5 V, 24 V, or 48 V) on fan power card is detected. Troubleshooting • Check fan power card wiring. • Replace fan power card. MG94A502 Danfoss A/S © 02/2019 All rights reserved.
-
Page 82: Drive And Motor Applications
If the load remains Consult Danfoss if uncertain about the torque character- excessive long enough, the drive trips on inverter time. istics of an application. -
Page 83: Overvoltage Trips
The same restriction on the amount of influence applies. The drive adds about 10% to the base speed before a trip occurs. Otherwise, the speed could continue to rise to potentially unsafe levels. MG94A502 Danfoss A/S © 02/2019 All rights reserved. -
Page 84: Control Logic Problems
For measurements, use a clamp-on style the problem is external to the drive. Check the circuitry ammeter to determine whether the current is balanced on providing the signal along with its associated wiring. Danfoss A/S © 02/2019 All rights reserved. MG94A502... -
Page 85: Internal Drive Problems
When the sensor becomes defective, the output voltage • Digital control system faults level varies by more than the 15 mV. The defective current sensor in that phase indicates current flow when there is MG94A502 Danfoss A/S © 02/2019 All rights reserved. -
Page 86: Emi Signal And Power Wiring
EMI. high-frequency currents can be coupled into the mains supply. Rectifier (SCR/diodes) DC link (DC bus) Inverter (IGBTs) Power section Logic-to-power interface Control logic Illustration 7.1 6-pulse Functionality Diagram Danfoss A/S © 02/2019 All rights reserved. MG94A502... - Page 87 Stray capacitance Stray capacitance Ground Potential 1 Potential 2 Potential 3 Illustration 7.2 Ground Currents Frequency converter Motor AC line Motor cable Stray capacitance Signal wiring to BMS Illustration 7.3 Signal Conductor Currents MG94A502 Danfoss A/S © 02/2019 All rights reserved.
- Page 88 ® Drive and Motor Application... FC Series, D1h–D8h, Da2/Db2/Da4/Db4, E1h–E4h, J8/J9 Frequency converter Motor AC line Motor cable Stray capacitance AC line Illustration 7.4 Alternate Signal Conductor Currents Danfoss A/S © 02/2019 All rights reserved. MG94A502...
-
Page 89: Preventive Measures
Refer to chapter 4.9 Shielded Cable Grounding. MG94A502 Danfoss A/S © 02/2019 All rights reserved. - Page 90 Mains supply Brake resistor Bare (unpainted) surface Metal box Star washers Connection to motor Brake cable (shielded) Motor Motor cable (shielded) EMC cable gland Illustration 7.5 Example of Proper EMC Installation Danfoss A/S © 02/2019 All rights reserved. MG94A502...
-
Page 91: Test Procedures
J8–J9 drives 20 minutes D9h–D10h enclosed drive systems 20 minutes Da2/Da4/Db2/Db4 parallel drive systems 20 minutes E1h–E4h drives 40 minutes E5h–E6h enclosed drive systems 40 minutes Table 8.1 Discharge Time MG94A502 Danfoss A/S © 02/2019 All rights reserved. -
Page 92: Tools Required
Split bus power supply p/n 130B3146 Signal test board p/n 176F8437 Parallel drive module service p/n 176F3745 Table 8.3 Instruments Recommended to Test Drives ® 1) Used for testing only VLT Parallel Drive Modules. Danfoss A/S © 02/2019 All rights reserved. MG94A502... -
Page 93: Metering Tools
• Connect the drive to the mains only after completion of static tests. • Complete all necessary precautions for system start-up, before applying power to the drive. MG94A502 Danfoss A/S © 02/2019 All rights reserved. -
Page 94: Preparations For Parallel Drive Systems
8.6.2 After-repair Tests for Parallel Drive Systems. 1 DC(+) bus 2 DC(-) bus Fasteners are M5 studs. Illustration 8.1 DC Bus Location in D1h–D8h Drives Danfoss A/S © 02/2019 All rights reserved. MG94A502... -
Page 95: Card Connectors
In D1h–D8h and E1h–E4h drives, the current scaling card is mounted on the power card. In parallel drive systems, all current scaling cards are connected to the multi-drive control interface card (MDCIC) on the control shelf. MG94A502 Danfoss A/S © 02/2019 All rights reserved. -
Page 96: Power Card In D-Sized Drives
MK104: Signal test board connector MK501: Heat sink and door/top fan control Standoff (8 mm) MK502: EMC relay control MK101: Current sensor feedback – – Illustration 8.4 Power Card in D-sized Drives Danfoss A/S © 02/2019 All rights reserved. MG94A502... -
Page 97: Power Card In E-Sized Drives
MK105: CANBUS connection to fan power card MK501: Mixing fan control MK104: Signal test board connector MK502: EMC relay control Standoff (8 mm) – – Illustration 8.5 Power Card in E-sized Drives MG94A502 Danfoss A/S © 02/2019 All rights reserved. -
Page 98: Mdcic In Parallel Drive Systems
MK111: Connector to module 1 MK107: Connector for current scaling card for module 1 MK112: Connector to module 2 MK100: MDCIC-to-control card connection – – Illustration 8.6 MDCIC in Parallel Drive Systems Danfoss A/S © 02/2019 All rights reserved. MG94A502... -
Page 99: Fan Power Card In E-Sized Drives
MK1200: Inrush card (MK110) and power card (MK105) MK803: Power card signals (MK902) MK602: Door/top fan control Fan power card (PCA16) MK600: Heat sink fan control Illustration 8.7 Fan Power Card in E-sized Drives MG94A502 Danfoss A/S © 02/2019 All rights reserved. -
Page 100: Gate Drive Card In D-Sized Drives
MK200: Brake IGBT test point (optional) MK501: U phase IGBT gate signal MK201: Brake IGBT gate signal (optional) MK502: U phase lower IGBT test point Illustration 8.8 Gate Drive Card in D-sized Drives Danfoss A/S © 02/2019 All rights reserved. MG94A502... -
Page 101: Gate Drive Card In E-Sized Drives
Gate drive card MK201: Brake IGBT gate signal (optional) MK501: U phase IGBT gate signal MK701: W phase IGBT signal MK100: IGBT temperature feedback Screw (T20) Illustration 8.9 Gate Drive Card in E-sized Drives MG94A502 Danfoss A/S © 02/2019 All rights reserved. -
Page 102: Static Test Procedures
With this test connection, the SCRs in the SCR/diode modules are reverse biased so they are blocking current flow. If a short circuit exists, it indicates that the SCRs are shorted. Replace the shorted SCR/diode module. Danfoss A/S © 02/2019 All rights reserved. MG94A502... -
Page 103: Inverter Section Tests
Infinity is a correct reading. The meter starts at a value and U, V, and W in sequence. climbs toward infinity as capacitance is charged within the drive. A diode drop indicates a correct reading. MG94A502 Danfoss A/S © 02/2019 All rights reserved. -
Page 104: Intermediate Section Tests
Use ohmmeter set to read ohms. exist in the DC link. Unplug connector MK100 on the gate drive card (see Illustration 8.8) and measure the resistance across each black and white pair. Danfoss A/S © 02/2019 All rights reserved. MG94A502... -
Page 105: Gate Resistor Test
• The gate signal wires are not connected from the problem with the switch. Replace the disconnect switch. gate drive card to the gate resistor board. • The gate resistors are defective. MG94A502 Danfoss A/S © 02/2019 All rights reserved. -
Page 106: Circuit Breaker Test
When there is no power, the contact is open. NOTICE POWER REQUIREMENTS Complete testing of the contactor requires an external 230 V AC supply. Danfoss A/S © 02/2019 All rights reserved. MG94A502... -
Page 107: Dynamic Test Procedures
• Do not touch energized parts of the drive when connected to mains. AC fuse Brake terminals (optional) Input terminals Output terminals Illustration 8.10 Power Terminals in D-sized Drive MG94A502 Danfoss A/S © 02/2019 All rights reserved. - Page 108 Brake/regen terminals (optional) Input terminals Output terminals Illustration 8.11 Power Terminals in E-sized Drives Whenever possible, perform these procedures with a split bus power supply. For more information, see chapter 9.1.1 Overview. Danfoss A/S © 02/2019 All rights reserved. MG94A502...
-
Page 109: No Display Test
LCP or the control card is imbalance of supply voltage is not more than 3%. defective. Replace the LCP. If the problem persists, replace the control card. Danfoss calculates mains imbalance per an IEC specifi- cation. 8.5.4 DC Bus Voltage Test •... -
Page 110: Switch Mode Power Supply Test
(common) of the signal board. With a positive (+) Remove power to drive. meter lead, check the following terminals on the Swap the phase. signal board. Reapply power to the drive and place it in run. Repeat the current measurements. Danfoss A/S © 02/2019 All rights reserved. MG94A502... -
Page 111: Input Waveform Test
The plug has 3 pairs of wires, 1 for each SCR module. Measure the resistance of each pair. Red is the SCR gate and black is the SCR cathode. A proper reading is between 5–50 Ω. MG94A502 Danfoss A/S © 02/2019 All rights reserved. -
Page 112: Output Imbalance Of Motor Voltage And Current
COMPATIBLE VOLTMETERS Use a PWM-compatible digital or analog voltmeter for monitoring output voltage. Digital voltmeters are sensitive to waveform and switching frequencies and commonly return erroneous readings. Danfoss A/S © 02/2019 All rights reserved. MG94A502... -
Page 113: Igbt Switching Test
An incorrect reading indicates either a defective IGBT or gate drive signal. To determine if the gate drive signal is correct, perform the gate drive signal test. See chapter 8.5.11 IGBT Gate Drive Signals Test. MG94A502 Danfoss A/S © 02/2019 All rights reserved. -
Page 114: Igbt Gate Drive Signals Test
Connect the split bus power supply. Refer to to -9 V DC. Average voltage read by the chapter 9.1.1 Overview. voltmeter is 2.2–2.5 V DC. When using an oscilloscope, the readings in Illustration 8.16 are correct. Danfoss A/S © 02/2019 All rights reserved. MG94A502... - Page 115 Input A 8.00 6.00 4.00 2.00 0.00V -2.00 -4.00 -6.00 -8.00 -100.0us 5 us/Div. Illustration 8.17 Gate Signal Waveform from Signal Test Board MG94A502 Danfoss A/S © 02/2019 All rights reserved.
-
Page 116: Current Sensors Test
The current sensor feedback signal in the circuit reads approximately 400 mV at a drive load of 100%. When the drive is at 0 speed, any reading above 15 mV negatively impacts the way the drive interprets the feedback signal. Danfoss A/S © 02/2019 All rights reserved. MG94A502... - Page 117 Table 8.12 Scaling Resistance, Parallel Drive Systems, N75k N55k 12-pulse, 380–500 V N90k N75k N110 N90k N132 N110 N160 N132 N200 N160 N250 N200 N315 N250 N400 N315 Table 8.9 Scaling Resistance, D1h–D8h Units, 525–690 V MG94A502 Danfoss A/S © 02/2019 All rights reserved.
-
Page 118: Fan Tests
Replace the failed fan. In E-sized drives, there are parameters that show the speed feedback for each fan. Fan speed differences of less than 200 RPM are meaningless. Danfoss A/S © 02/2019 All rights reserved. MG94A502... -
Page 119: Input Terminal Signal Tests
Check for an internal power supply Connect the (-) negative meter lead to terminal 20. Connect the (+) positive meter lead to Illustration 8.19 Analog Inputs Display terminal 12 or terminal 13 and measure the DC voltage. MG94A502 Danfoss A/S © 02/2019 All rights reserved. -
Page 120: After-Repair Tests
Replace the control card. Incorrect reading A negative voltage reading indicates a reversed polarity. Reverse the wiring to the analog input. Danfoss A/S © 02/2019 All rights reserved. MG94A502... -
Page 121: After-Repair Tests For D-Sized And E-Sized Drives
Connect a 24 V DC supply to the DC bus of the unit is safe to start. drive. Preferably, use a Danfoss split bus power supply. Connect it to the DC bus output of the Disconnect motor cables from output terminals moduleor, or to the busbars connecting the top (U, V, W). -
Page 122: Special Test Equipment
9 Special Test Equipment Special test tools have been developed to aid in troubleshooting Danfoss products. The tools are required to perform some of the testing procedures outlined in this guide. The following test equipment described in this section is available from Danfoss. - Page 123 SPLIT BUS POWER SUPPLY (130B4146) 44-Pin 44-Pin MDCIC DC Bus Connector (MK902) Ribbon Ribbon 24 V DC Cable Cable CONTROL CARD SERVICE KIT Illustration 9.3 Connection During Split Bus Mode in Parallel Drive MG94A502 Danfoss A/S © 02/2019 All rights reserved.
-
Page 124: Split Bus Power Supply Connection
690 V AC drives (T7) requires 610–1000 in field). V DC supply. • Current scaling card for the appropriate module. The Danfoss split bus power supply (p/n • 130B3146) is designed to provide 650 V DC, Tools for opening the service kit enclosure. •... - Page 125 The service kit includes an MDCIC and other components required to run an individual drive module outside of the parallel drive system. MG94A502 Danfoss A/S © 02/2019 All rights reserved.
-
Page 126: Split Bus Power Supply And Parallel Drive Modules
Table 9.1. Save the setting to EEPROM. Power cycle the drive module. The module is initialized in standalone mode and is ready for testing as described in chapter 8 Test Procedures. Danfoss A/S © 02/2019 All rights reserved. MG94A502... -
Page 127: After-Test Installation Of Parallel Drive Modules
• Do not place the current scaling card in slots MK108–MK110. • Ensure that both ends of the 44-pin MDCIC cable are properly seated in the connectors. MG94A502 Danfoss A/S © 02/2019 All rights reserved. -
Page 128: Signal Test Board Pin Outs
Signal from the control card to start gating the SCR front end. Signal 3.3 V DC – Inrush signal not relevant in E1h–E4h drives. mode 0 V DC – Run mode Not used Not used Not used Danfoss A/S © 02/2019 All rights reserved. MG94A502... - Page 129 8.00 buffered, U phase, Equal on all phases 6.00 negative. Signal TP25–TP30 4.00 originates on 2.00 control card. 0.00 V -2.00 -4.00 -6.00 -8.00 -4.0ms 50Us/Div 2v/div 100us/div Run at 10 Hz MG94A502 Danfoss A/S © 02/2019 All rights reserved.
- Page 130 Equal on all phases 6.00 phase, negative. TP25–TP30 4.00 Signal originates 2.00 on control card. 0.00 V -2.00 -4.00 -6.00 -8.00 -4.0ms 50Us/Div 2v/div 100us/div Run at 10 Hz Table 9.2 Signal Test Board Pins Danfoss A/S © 02/2019 All rights reserved. MG94A502...
-
Page 131: D1H/D3H/D5H/D6H/J8 Drive Disassembly And Assembly
For parallel drive modules, measure performance, or completely destroy sensitive electronic DC-bus capacitor voltages before and after the components. individual DC fuses. MG94A502 Danfoss A/S © 02/2019 All rights reserved. -
Page 132: D1H/D3H/D5H/D6H/J8 Disassembly And Assembly
Replace the door or front cover of the drive. Remove the control card mounting plate from the drive. Danfoss A/S © 02/2019 All rights reserved. MG94A502... - Page 133 D1h/D3h/D5h/D6h/J8 Drive Di... Service Guide LCP (Local control panel) Screw (T20) LCP cradle Power card Control card mounting plate Power card mounting plate Illustration 10.1 Control Card Mounting Plate MG94A502 Danfoss A/S © 02/2019 All rights reserved.
-
Page 134: Power Card Mounting Plate
Route the cables through the retaining clips. Lift the power card mounting plate from the Replace the control card mounting plate. Refer to drive. chapter 10.2.2 Control Card and Control Card Mounting Plate. Danfoss A/S © 02/2019 All rights reserved. MG94A502... - Page 135 D1h/D3h/D5h/D6h/J8 Drive Di... Service Guide Power card (PCA3) Power card mounting plate Screw (T20) Cable retaining clip Illustration 10.2 Power Card Mounting Plate MG94A502 Danfoss A/S © 02/2019 All rights reserved.
-
Page 136: Power Card
Any additional, customer-supplied standoff. wiring at MK106 and MK500 Replace the control card mounting plate. Refer to chapter 10.2.2 Control Card and Control Card Mounting Plate. Danfoss A/S © 02/2019 All rights reserved. MG94A502... - Page 137 MK500: Customer terminals for relays 1 and 2 modules) MK104: Signal test board connector MK501: Heat sink and door/top fan control Standoff (8 mm) MK502: EMC relay control MK101: Current sensor feedback – – Illustration 10.3 Power Card MG94A502 Danfoss A/S © 02/2019 All rights reserved.
-
Page 138: Ac Input Busbars
Remove the RFI filter and unplug the RFI cable procedure for the drive: from MK100 on the printed circuit card assembly. Reinstall in reverse order of this procedure. Tighten hardware according to chapter 14.1 Fastener Torque Ratings. Danfoss A/S © 02/2019 All rights reserved. MG94A502... - Page 139 Nut (13 mm) LCP cradle Top fan (IP20) Control terminals Screw (T25) Nut (10 mm) Control card mounting plate AC input busbars Screw (T20) Illustration 10.5 AC Input Busbars and Power Terminals MG94A502 Danfoss A/S © 02/2019 All rights reserved.
-
Page 140: Mains Input Terminal Block
It can be necessary to Reconnect any customer input power wiring, and remove 1 screw (T25) from the EMC shield when replace the R/S/T terminal label. removing the terminal block. Danfoss A/S © 02/2019 All rights reserved. MG94A502... - Page 141 U/V/W terminal label Cylinder busbar Motor terminal block Nomex tube Power terminal mounting plate Current sensor Thread-forming screw Mixing fan Wire harness (current sensor cables) Mixing fan housing – – Illustration 10.6 Power Terminals MG94A502 Danfoss A/S © 02/2019 All rights reserved.
-
Page 142: Motor Terminal Block
Reconnect wiring to motor terminals, and replace down to release it from the 2 metal retaining the U/V/W terminal label. clips. Remove the 3 cylinder busbars, 1 from the center of each current sensor. Danfoss A/S © 02/2019 All rights reserved. MG94A502... -
Page 143: Brake Terminal Block (Optional)
Fasten the R (+) terminal using 1 thread-forming Replace the motor terminal block. Refer to screw (T20) at the terminal block, and 1 screw chapter 10.2.7 Motor Terminal Block. (T40). Reconnect the brake wiring. MG94A502 Danfoss A/S © 02/2019 All rights reserved. -
Page 144: Mixing Fan
Unplug the mixing fan cable connector. Tape the free end of the fan cable to the mounting plate so that it does not fall back into the drive. Remove the mixing fan from the fan housing. Danfoss A/S © 02/2019 All rights reserved. MG94A502... - Page 145 D1h/D3h/D5h/D6h/J8 Drive Di... Service Guide Mixing fan release tab Power terminal mounting plate Cable connector Cable access hole Mixing fan Mixing fan slot Illustration 10.7 Mixing Fan MG94A502 Danfoss A/S © 02/2019 All rights reserved.
-
Page 146: Current Sensors
Remove the current sensors from the drive. mounting plate. Replace the power terminal mounting plate. Refer to chapter 10.2.9 Power Terminal Mounting Plate. Danfoss A/S © 02/2019 All rights reserved. MG94A502... - Page 147 D1h/D3h/D5h/D6h/J8 Drive Di... Service Guide Middle current sensor (inverted position) Thread-forming screw (T20) Outer current sensor (upright position) Power terminal mounting plate (IP20/Chassis) Illustration 10.8 Current Sensors in D3h Drive MG94A502 Danfoss A/S © 02/2019 All rights reserved.
-
Page 148: Balance/High Frequency Card
11.2.11 Power Terminal Mounting Plate. Attach the cable to the MK100 connector on the balance/high frequency card. Replace the power terminal mounting plate. Refer to chapter 10.2.9 Power Terminal Mounting Plate. Danfoss A/S © 02/2019 All rights reserved. MG94A502... -
Page 149: Dc Bus Rails
1 per bus rail. Remove 2 nuts (10 mm) from the lower end of the DC bus rails, 1 per bus rail. Lift the DC bus rails from the drive. MG94A502 Danfoss A/S © 02/2019 All rights reserved. -
Page 150: Inrush Card
MK1800 MK1800 MK1802 MK1802 Replace the DC bus rails. Refer to Remove 5 screws (T20) from the inrush card. chapter 10.2.13 DC Bus Rails. Remove the inrush card from the drive. Danfoss A/S © 02/2019 All rights reserved. MG94A502... - Page 151 Inrush support bracket DC(-) busbar Threaded standoff (11 mm) DC(-) busbar (DC coil to capacitor bank) DC(-) busbar (DC coil to capacitor bank) – – Illustration 10.9 DC Bus Rails and Inrush Card MG94A502 Danfoss A/S © 02/2019 All rights reserved.
-
Page 152: Scr Input Busbars
SCR modules, 1 in each busbar. Fasten 2 screws (T25) in the black plastic inrush support. Secure 3 standoffs (11 mm), 1 in each SCR input busbar. Replace the inrush card. Refer to chapter 10.2.14 Inrush Card. Danfoss A/S © 02/2019 All rights reserved. MG94A502... - Page 153 Screw (T30) IGBT gate signal connector Screw (T30) IGBT thermal sensor connector Current sensor cylinder busbar Snubber capacitor Cyclinder busbar support bracket Screw (T30) Screw (T30) – – Illustration 10.10 SCRs and IGBTs MG94A502 Danfoss A/S © 02/2019 All rights reserved.
-
Page 154: Gate Drive Card
MK100 Tighten hardware according to chapter 14.1 Fastener Torque Ratings. MK501 MK601 MK701 MK102 MK201 (if brake option is present) Replace the DC bus rails. Refer to chapter 10.2.13 DC Bus Rails. Danfoss A/S © 02/2019 All rights reserved. MG94A502... - Page 155 D1h/D3h/D5h/D6h/J8 Drive Di... Service Guide Thread-forming screws (T20) Thread-forming screw (T25) Snubber capacitor Screws (T25) Screws (T30) – – Illustration 10.11 Brake IGBT Module MG94A502 Danfoss A/S © 02/2019 All rights reserved.
-
Page 156: Igbts
For reassembly, use the replacement IGBT instructions. screws varies based on drive size. Remove the plastic IGBT support (not shown) by removing 4 screws (T25). Remove the IGBTs by removing 4 screws (T25) from each IGBT. Danfoss A/S © 02/2019 All rights reserved. MG94A502... - Page 157 Screw (T30) IGBT gate signal connector Screw (T30) IGBT thermal sensor connector Current sensor cylinder busbar Snubber capacitor Cylinder busbar support bracket Screw (T30) Screw (T30) – – Illustration 10.12 SCRs and IGBTs MG94A502 Danfoss A/S © 02/2019 All rights reserved.
-
Page 158: Standard Dc Capacitors
Remove 1 standoff (8 mm), and mark the location. Remove the screws (T25) from the remaining capacitors. Remove the capacitor locking panel by removing 12 thread-forming screws (T25). Lift the standard DC capacitors from the capacitor bank housing. Danfoss A/S © 02/2019 All rights reserved. MG94A502... - Page 159 3 screws (T30). Replace insulator sheet 1. Replace the balance/high frequency card. Refer to chapter 10.2.12 Balance/High Frequency Card. Replace the gate drive card. Refer to chapter 10.2.17 Gate Drive Card MG94A502 Danfoss A/S © 02/2019 All rights reserved.
- Page 160 FC Series, D1h–D8h, Da2/Db2/Da4/Db4, E1h–E4h, J8/J9 Balance/high frequency card Midplate Insulator sheet 1 DC(+) plate DC(-) plate Capacitor locking panel Insulator sheet 2 Standard DC capacitor Illustration 10.13 Standard DC Capacitor Bank, 240/400 V AC Unit Danfoss A/S © 02/2019 All rights reserved. MG94A502...
- Page 161 Remove the capacitor locking panel by removing Replace the balance/high frequency card. Refer to 6 thread-forming screws (T25). chapter 10.2.12 Balance/High Frequency Card. Lift the standard DC capacitors from the capacitor bank housing. MG94A502 Danfoss A/S © 02/2019 All rights reserved.
- Page 162 ® D1h/D3h/D5h/D6h/J8 Drive Di... FC Series, D1h–D8h, Da2/Db2/Da4/Db4, E1h–E4h, J8/J9 Replace the gate drive card. Refer to chapter 10.2.17 Gate Drive Card Danfoss A/S © 02/2019 All rights reserved. MG94A502...
- Page 163 Insulator sheet 2 Insulator sheet 3 Midplate 1 Midplate 2 Insulator sheet 1 Capacitor locking panel DC(-) plate Standard DC capacitors Plastic alignment cap – – Illustration 10.14 DC Capacitors, 690 V AC Unit MG94A502 Danfoss A/S © 02/2019 All rights reserved.
-
Page 164: Standard Dc Capacitor Bank Layouts
Illustration 10.17 N110 N90K Illustration 10.17 N132 N110 Illustration 10.17 N160 N132 Table 10.4 Standard DC Capacitor Bank Layout 525–690 V Standard DC capacitor Plug Illustration 10.15 Standard DC Capacitor and Plug Danfoss A/S © 02/2019 All rights reserved. MG94A502... - Page 165 Midplate standoff Midplate screw Midplate screw DC(-) plate standoff DC(-) plate standoff DC(-) plate screw DC(-) plate screw Table 10.5 Table 10.6 Illustration 10.16 Standard 4-Capacitor Layout Illustration 10.17 Standard 6-Capacitor Layout MG94A502 Danfoss A/S © 02/2019 All rights reserved.
-
Page 166: Twistlock Dc Capacitors
10.2.12 Balance/High Frequency Card. Remove 2 screws (T25) from the Replace the gate drive card. Refer to capacitors. chapter 10.2.17 Gate Drive Card. Remove insulator sheet 2 by unfastening 8 screws (T25). Danfoss A/S © 02/2019 All rights reserved. MG94A502... - Page 167 Insulator sheet 3 DC(-) plate Plug Midplate Twistlock DC capacitor DC(+) plate O-ring gasket Insulator sheet 1 Capacitor housing Insulator sheet 2 Housing gasket Illustration 10.18 Twistlock DC Capacitor Bank, 240/400 V AC Unit MG94A502 Danfoss A/S © 02/2019 All rights reserved.
- Page 168 Turn the twistlock DC capacitor approximately 30° chapter 10.2.12 Balance/High Frequency Card. counterclockwise to release it. Pull the capacitor Replace the gate drive card. Refer to out of the housing. chapter 10.2.17 Gate Drive Card. Danfoss A/S © 02/2019 All rights reserved. MG94A502...
- Page 169 Capacitor locking panel DC(+) plate O-ring gasket Midplate 1 Twistlock DC capacitor Insulator sheet 1 Capacitor bank housing Insulator sheet 2 Capacitor bank gasket Illustration 10.19 Twistlock DC Capacitors, 690 V AC Unit MG94A502 Danfoss A/S © 02/2019 All rights reserved.
-
Page 170: Twistlock Dc Capacitor Bank Layouts
FC 102, FC 103, and FC 202 FC 302 Illustration 10.22 N132 N110 Illustration 10.22 N160 N132 Table 10.9 Twistlock DC Capacitor Bank Layout 525–690 V Twistlock DC capacitor Plug Illustration 10.20 Twistlock DC Capacitor and Plug Danfoss A/S © 02/2019 All rights reserved. MG94A502... - Page 171 D1h/D3h/D5h/D6h/J8 Drive Di... Service Guide Illustration 10.21 Twistlock 4-Capacitor Layout Illustration 10.22 Twistlock 6-Capacitor Layout MG94A502 Danfoss A/S © 02/2019 All rights reserved.
-
Page 172: Heat Sink Fan
Disconnect the heat sink fan cable connector. To avoid dropping the end of the cable into the drive, affix the loose cable to the drive with adhesive tape. Danfoss A/S © 02/2019 All rights reserved. MG94A502... - Page 173 D1h/D3h/D5h/D6h/J8 Drive Di... Service Guide Screwdriver access holes for captive screws (T25) Nut (T25) Threaded stud Telescoping duct Duct flange Heat sink fan cover Illustration 10.23 Heat Sink Fan Access with Telescoping Cooling Duct MG94A502 Danfoss A/S © 02/2019 All rights reserved.
- Page 174 Hole for cable grommet Cable grommet Slots for heat sink fan cover Heat sink fan cover Mounting holes Fan cover tabs Illustration 10.24 Heat Sink Fan in IP21/IP54 (UL type 1/12) Drives Danfoss A/S © 02/2019 All rights reserved. MG94A502...
-
Page 175: Door Fan
Reposition the door fan grill over the filter and the fan. press until the grill snaps in place. Screw (T20) Release tab Door fan front grill Door fan filter Illustration 10.25 Front View of Door Fan Assembly MG94A502 Danfoss A/S © 02/2019 All rights reserved. - Page 176 FC Series, D1h–D8h, Da2/Db2/Da4/Db4, E1h–E4h, J8/J9 Door fan cable Air direction arrow Cable connector Door fan Nut (7 mm) Hole for corner post Door fan guard Corner post Illustration 10.26 Interior View of Door Fan Assembly Danfoss A/S © 02/2019 All rights reserved. MG94A502...
-
Page 177: Top Fan
Remove 2 screws (T25) from opposite to the drive. corners of the top fan grill. Replace the front cover on the drive, and fasten Lift the grill and top fan from the drive. with 2 screws (T25). MG94A502 Danfoss A/S © 02/2019 All rights reserved. - Page 178 D1h/D3h/D5h/D6h/J8 Drive Di... FC Series, D1h–D8h, Da2/Db2/Da4/Db4, E1h–E4h, J8/J9 Top fan housing Top fan cable and connector Screw (T25) Retaining clip Top fan Cable access hole Illustration 10.27 Top Fan with Housing Danfoss A/S © 02/2019 All rights reserved. MG94A502...
- Page 179 D1h/D3h/D5h/D6h/J8 Drive Di... Service Guide Screw (T25) Top fan cable and connector Top fan grill Top vent Top fan Cable access hole Illustration 10.28 Top Fan with Grill MG94A502 Danfoss A/S © 02/2019 All rights reserved.
-
Page 180: D5H/D6H Disassembly And Assembly
Remove 3 screws (17 mm) from the top of the mains input jumper busbars, 1 per busbar. Remove 3 nuts (13 mm) from the bottom of the mains input jumper busbars, 1 per busbar. Danfoss A/S © 02/2019 All rights reserved. MG94A502... - Page 181 Lift the fan access panel from the extended options cabinet. Remove the heat sink fan. See chapter 10.2.24 Heat Sink Fan. Reassembly Reinstall in reverse order of this procedure. Tighten hardware according to chapter 14.1 Fastener Torque Ratings. MG94A502 Danfoss A/S © 02/2019 All rights reserved.
-
Page 182: Removing The Drive From The Extended Options Cabinet
Lift the drive from the extended options cabinet. cabinet after the drive has been removed. Reassembly Reinstall in reverse order of this procedure. Tighten hardware according to chapter 14.1 Fastener Torque Ratings. Danfoss A/S © 02/2019 All rights reserved. MG94A502... - Page 183 D1h/D3h/D5h/D6h/J8 Drive Di... Service Guide Extended options cabinet-to-wall fastener Heat sink fan access panel Extended options cabinet-to-drive fastener – – Illustration 10.32 Extended Options Cabinet, Exploded View MG94A502 Danfoss A/S © 02/2019 All rights reserved.
-
Page 184: Contactor
Reinstall in reverse order of this procedure. Tighten Reassembly hardware according to chapter 14.1 Fastener Torque Ratings. Reinstall in reverse order of this procedure. Tighten hardware according to chapter 14.1 Fastener Torque Ratings. Danfoss A/S © 02/2019 All rights reserved. MG94A502... - Page 185 D1h/D3h/D5h/D6h/J8 Drive Di... Service Guide Contactor Contactor bracket Disconnect A1/A2 contactor coil terminals Illustration 10.33 D6h Contactor and Disconnect MG94A502 Danfoss A/S © 02/2019 All rights reserved.
-
Page 186: Heat Sink Access Panel
Fasten the internal hex screws (3 mm) connecting the size of the drive. the access panel to the back of the enclosure. There are 5 or 9 screws depending on the size of the drive. Danfoss A/S © 02/2019 All rights reserved. MG94A502... - Page 187 D1h/D3h/D5h/D6h/J8 Drive Di... Service Guide Heat sink access panel Drive enclosure Illustration 10.34 Heat Sink Access Panel MG94A502 Danfoss A/S © 02/2019 All rights reserved.
-
Page 188: D2H/D4H/D7H/D8H/J9 Unit Disassembly And Assembly
For parallel drive modules, measure performance, or completely destroy sensitive electronic DC-bus capacitor voltages before and after the components. individual DC fuses. Danfoss A/S © 02/2019 All rights reserved. MG94A502... -
Page 189: D2H/D4H/D7H/D8H/J9 Disassembly And Assembly
Similar to D4h, but includes 2 or 4 drive modules in Db2/Db4 parallel drive systems Enclosed drive module Similar to D4h, but includes 1 drive module in D10h enclosed drive system Table 11.2 Drives and Drive Modules Related to D2h Drive MG94A502 Danfoss A/S © 02/2019 All rights reserved. -
Page 190: Control Card And Control Card Mounting Plate
Replace the LCP cradle. The cradle can be Unplug the ribbon cable connecting the control replaced by hand. card and the power card. Replace the front cover or door of the drive. Danfoss A/S © 02/2019 All rights reserved. MG94A502... - Page 191 D2h/D4h/D7h/D8h/J9 Unit Dis... Service Guide Control card mounting plate LCP cradle Top fan Control terminals Screw (T25) Illustration 11.1 Control Card and Control Card Mounting Plate MG94A502 Danfoss A/S © 02/2019 All rights reserved.
-
Page 192: Power Card Mounting Plate
When installing the power card, ensure that the insulator sheet is installed behind the power card. Reassembly Reinstall in reverse order of this procedure. Tighten hardware according to chapter 14.1 Fastener Torque Ratings. Danfoss A/S © 02/2019 All rights reserved. MG94A502... - Page 193 Service Guide Current scaling card MK501 Power card (PCA3) MK902 MK104 MK106 MK101 Power card mounting plate MK103 Standoff (8 mm) MK502 Plastic standoff Illustration 11.2 Power Card and Power Card Mounting Plate MG94A502 Danfoss A/S © 02/2019 All rights reserved.
-
Page 194: Ac Input Busbars
14.1 Fastener Torque Ratings. from each end of the 3 fuses. Remove 3 nuts (13 mm), 1 from the top of each AC input busbar. Remove the AC input busbars from the drive module. Danfoss A/S © 02/2019 All rights reserved. MG94A502... - Page 195 AC input busbar Brake busbar (optional) Bottom nut (13 mm) U motor busbar Fuse spacer Brake terminal (optional) Mains input terminal Motor terminal block Illustration 11.3 AC Input Busbars and Power Terminals MG94A502 Danfoss A/S © 02/2019 All rights reserved.
-
Page 196: Mains Input Terminal Block
Place the R/S/T terminal label above the terminal Reconnect customer input wiring. connections. Slide the mains input terminal block downward to disengage it from the 2 metal retaining clips holding it in place. Danfoss A/S © 02/2019 All rights reserved. MG94A502... - Page 197 Motor terminal block Busbar insulator sleeve Thread-forming screw Cable retaining clip Motor busbar, U Nut with captive washer Motor busbar, V Current sensor cables Illustration 11.4 Exploded View of Terminal Blocks and Current Sensors MG94A502 Danfoss A/S © 02/2019 All rights reserved.
-
Page 198: Emc Shield
Fasten 1 thread-forming screw (T25) in the terminal block. Fasten 1 nut (13 mm). To attach the R(+) terminal: Fasten 1 thread-forming screw (T25) in the terminal block. Secure 1 screw (T40). Reconnect the brake wiring. Danfoss A/S © 02/2019 All rights reserved. MG94A502... -
Page 199: Motor Terminal Block
2 metal retaining Replace the mains input terminal block. Refer to clips. chapter 11.2.6 Mains Input Terminal Block. Reconnect wiring to the motor terminals, and replace the U/V/W terminal label. MG94A502 Danfoss A/S © 02/2019 All rights reserved. -
Page 200: Mixing Fan
Press the mixing fan into the slot until the release so that it does not fall back into the drive. tabs snap into place. Remove the mixing fan from the fan housing. Danfoss A/S © 02/2019 All rights reserved. MG94A502... - Page 201 D2h/D4h/D7h/D8h/J9 Unit Dis... Service Guide Mixing fan release tab Power terminal mounting plate Cable connector Cable access hole Mixing fan Mixing fan slot Illustration 11.5 Mixing Fan MG94A502 Danfoss A/S © 02/2019 All rights reserved.
-
Page 202: Power Terminal Mounting Plate
Fasten 3 nuts (8 mm) at the bottom of the plate. Remove the power terminal mounting plate from the unit. Replace the motor terminal block. Refer to chapter 11.2.9 Motor Terminal Block. Danfoss A/S © 02/2019 All rights reserved. MG94A502... -
Page 203: Current Sensors
Connect the current sensors cables to the current sensors, 1 cable to each current sensor. Route the cables through the cable guides. Replace the power terminal mounting plate. Refer to chapter 11.2.11 Power Terminal Mounting Plate. MG94A502 Danfoss A/S © 02/2019 All rights reserved. - Page 204 FC Series, D1h–D8h, Da2/Db2/Da4/Db4, E1h–E4h, J8/J9 Thread-forming screw (T20) Power terminal mounting plate Current sensor Mounting hole Current sensor cable connector Wire guide Mounting hole Cable clip Illustration 11.6 D2h Power Terminal Mounting Plate and Current Sensors Danfoss A/S © 02/2019 All rights reserved. MG94A502...
-
Page 205: Balance/High Frequency Card
Replace the power terminal mounting plate. Refer the balance/high frequency card. to chapter 11.2.11 Power Terminal Mounting Plate. Replace the power terminal mounting plate. Refer to chapter 11.2.11 Power Terminal Mounting Plate. MG94A502 Danfoss A/S © 02/2019 All rights reserved. - Page 206 Capacitor bank cover DC(+) capacitor plate DC(-) capacitor plate Capacitor locking panel Insulator sheet DC capacitor Illustration 11.7 Balance/High Frequency Card and DC Capacitor Bank (240/400 V unit shown, 690 V unit is similar.) Danfoss A/S © 02/2019 All rights reserved. MG94A502...
-
Page 207: Gate Drive Card
Remove 6 thread-forming screws (T20) from the MK601 gate drive card. Remove the card from the unit. MK701 Replace the AC input busbars or RFI option (not shown). Refer to chapter 11.2.5 AC Input Busbars. MG94A502 Danfoss A/S © 02/2019 All rights reserved. - Page 208 D2h/D4h/D7h/D8h/J9 Unit Dis... FC Series, D1h–D8h, Da2/Db2/Da4/Db4, E1h–E4h, J8/J9 MK1802 Inrush card MK1800 Screw (T20) Screw (T20) MK101 MK102 Gate drive card MK100 MK701 MK501 MK601 Illustration 11.8 Gate Drive Card and Inrush Card Danfoss A/S © 02/2019 All rights reserved. MG94A502...
-
Page 209: Inrush Card
Remove 5 screws (T20) from the inrush card. Connect the cable to the inrush card connector MK1802. Remove the inrush card from the unit. Replace the power card mounting plate. Refer to chapter 11.2.3 Power Card Mounting Plate. MG94A502 Danfoss A/S © 02/2019 All rights reserved. - Page 210 D2h/D4h/D7h/D8h/J9 Unit Dis... FC Series, D1h–D8h, Da2/Db2/Da4/Db4, E1h–E4h, J8/J9 MK1802 Inrush card MK1800 Screw (T20) Screw (T20) MK101 MK102 Gate drive card MK100 MK701 MK501 MK601 Illustration 11.9 Inrush Card and Gate Drive Card Danfoss A/S © 02/2019 All rights reserved. MG94A502...
-
Page 211: Scr Input Busbars
Fasten 2 standoffs (16 mm) in the inrush card support bracket. Secure 2 screws (T20) in the middle of the inrush card support bracket. Replace the inrush card. Refer to chapter 11.2.15 Inrush Card. MG94A502 Danfoss A/S © 02/2019 All rights reserved. - Page 212 Inrush card Screw (T40) Inrush support bracket Screw (T30) DC(-) busbar Gate lead DC(+) busbar Screw (T50) SCR input busbar Standoff (16 mm) Standoff (19 mm) Illustration 11.10 SCRs and SCR Input Busbars Danfoss A/S © 02/2019 All rights reserved. MG94A502...
-
Page 213: Dc Bus Rails
DC(+) bus rail IGBT module Screw (T20) IGBT output busbar IGBT output busbar Screw (T40) Snubber capacitor Screw (T25) Nut (8 mm) DC(-) bus rail Illustration 11.11 DC Bus Rails without Brake Option MG94A502 Danfoss A/S © 02/2019 All rights reserved. - Page 214 Replace the power card mounting plate. Refer to Remove 1 screw (T40) from the DC(-) bus rail, chapter 11.2.3 Power Card Mounting Plate. near the center. Remove the gate drive card. Refer to chapter 11.2.14 Gate Drive Card. Danfoss A/S © 02/2019 All rights reserved. MG94A502...
- Page 215 D2h/D4h/D7h/D8h/J9 Unit Dis... Service Guide DC(+) bus rail IGBT cable Gate drive card DC(-) bus rail Nut (13 mm) Screw (T40) Illustration 11.12 DC Bus Rails with Brake Option MG94A502 Danfoss A/S © 02/2019 All rights reserved.
-
Page 216: Igbts
Remove the IGBTs by removing 10 screws (T25) from each IGBT module. from each IGBT module. Reassembly in 690 V AC units For reassembly, refer to the replacement IGBT instructions that come with the spare parts kit. Danfoss A/S © 02/2019 All rights reserved. MG94A502... - Page 217 DC(+) bus rail IGBT module Screw (T20) IGBT output busbar IGBT output busbar IGBT terminal screw (T40) Snubber capacitor IGBT screw (T25) Nut (8 mm) DC(-) bus rail Illustration 11.13 IGBT Modules MG94A502 Danfoss A/S © 02/2019 All rights reserved.
-
Page 218: Standard Dc Capacitors
Remove the insulator between the DC(+) plate and the DC(-) plate. If necessary, first remove the screws connecting the DC(-) plate and the DC center plate to the capacitors. Remove the DC(-) plate by removing: Danfoss A/S © 02/2019 All rights reserved. MG94A502... - Page 219 DC(-) plate Capacitor bank cover Insulator sheet Screw (T25) DC center capacitor plate DC(+) plate Capacitor locking plate Insulator sheet Standard DC capacitor Illustration 11.14 Standard DC Capacitors, 400 V AC Unit MG94A502 Danfoss A/S © 02/2019 All rights reserved.
- Page 220 Screws (T25) connecting the plate to the positive terminals of capacitors 3, 9, and 11. Number of screws (T25) varies based on the size of the drive. Remove DC center plate 2 by removing: Danfoss A/S © 02/2019 All rights reserved. MG94A502...
- Page 221 Balance/high frequency card Insulator sheet Capacitor bank cover DC center plates DC(+) plate Capacitor locking panel Insulator sheet Standard DC capacitors DC(-) plate – – Illustration 11.15 Standard DC Capacitors, 690 V AC Unit MG94A502 Danfoss A/S © 02/2019 All rights reserved.
-
Page 222: Standard Dc Capacitor Bank Layouts
Illustration 11.20 N250 N200 Illustration 11.21 N315 N250 Illustration 11.21 N400 N315 Table 11.4 Standard DC Capacitor Bank Layout 525–690 V Standard DC capacitor Plug Illustration 11.16 Standard DC Capacitor and Plug Danfoss A/S © 02/2019 All rights reserved. MG94A502... - Page 223 DC(-) plate standoff DC(-) plate standoff DC(-) plate screw DC(-) plate screw Illustration 11.17 Standard DC Cap Bank with 8 Capacitor Illustration 11.18 Standard DC Cap Bank with 10 Capacitor Layout Layout MG94A502 Danfoss A/S © 02/2019 All rights reserved.
- Page 224 DC(-) plate standoff DC(-) plate standoff DC(-) plate screw DC(-) plate screw Illustration 11.19 Standard DC Cap Bank with 12 Capacitor Illustration 11.20 Standard DC Cap Bank with 9 Capacitor Layout Layout Danfoss A/S © 02/2019 All rights reserved. MG94A502...
- Page 225 DC(+) plate standoff DC(+) plate screw Midplate 1 standoff Midplate 1 screw Midplate 2 standoff Midplate 2 screw DC(-) plate standoff DC(-) plate screw Illustration 11.21 Standard DC Cap Bank 12 Capacitor Layout MG94A502 Danfoss A/S © 02/2019 All rights reserved.
-
Page 226: Twistlock Dc Capacitors
Remove the screws (T25) connecting the DC(+) plate to the positive terminals of capacitors 1, 2, 4, 9, and 12. The number of screws varies based on the size of the drive. Danfoss A/S © 02/2019 All rights reserved. MG94A502... - Page 227 DC(+) plate Capacitor locking plate Midplate Capacitor gasket DC(-) plate Plug Insulator sheet 1 Twistlock DC capacitor Insulator sheet 2 Capacitor bank housing Illustration 11.22 DC Twistlock Capacitors, 240/400 V AC Unit MG94A502 Danfoss A/S © 02/2019 All rights reserved.
- Page 228 Remove 1 standoff (8 mm) connecting midplate 1 to the positive terminal of capacitor 7. Remove the screws (T25) connecting midplate 1 to the negative terminal of capacitors 4, 8, 10, and 12.Number of Danfoss A/S © 02/2019 All rights reserved. MG94A502...
- Page 229 Midplate 1 Capacitor locking panel DC(-) plate O-ring gasket Standoff Plug Insulator sheet 1 Twistlock DC capacitor Insulator sheet 2 Capacitor bank housing Illustration 11.23 Twistlock DC Capacitors, 690 V AC Unit MG94A502 Danfoss A/S © 02/2019 All rights reserved.
-
Page 230: Twistlock Dc Capacitor Bank Layouts
Illustration 11.29 N315 N250 Illustration 11.29 N400 N315 Table 11.7 Twistlock DC Capacitor Bank Layout 525–690 V Twistlock DC capacitor Plug Illustration 11.24 Twistlock DC Capacitor and Plug Illustration 11.25 Twistlock 8-Capacitor Layout Danfoss A/S © 02/2019 All rights reserved. MG94A502... - Page 231 D2h/D4h/D7h/D8h/J9 Unit Dis... Service Guide Illustration 11.26 Twistlock 10-Capacitor Layout Illustration 11.28 Twistlock 9-Capacitor Layout Illustration 11.27 Twistlock 12-Capacitor Layout Illustration 11.29 Twistlock 12-Capacitor Layout MG94A502 Danfoss A/S © 02/2019 All rights reserved.
-
Page 232: Brake Igbt Module
(T40). Remove the insulator shield by removing 2 plastic standoffs. Remove the SCR input busbars. See chapter 11.2.16 SCR Input Busbars. Remove the brake IGBT module by removing 10 screws (T25). Danfoss A/S © 02/2019 All rights reserved. MG94A502... - Page 233 DC(-) to brake IGBT busbar Gate drive card Brake IGBT module Insulator shield DC(+) to brake IGBT busbar Brake IGBT output to R(-) terminal busbar – – Illustration 11.30 Brake IGBT Module MG94A502 Danfoss A/S © 02/2019 All rights reserved.
-
Page 234: Heat Sink Fan
Disconnect the heat sink fan cable connector. To avoid dropping the end of the cable into the drive, affix the loose cable to the drive with adhesive tape. Danfoss A/S © 02/2019 All rights reserved. MG94A502... - Page 235 D2h/D4h/D7h/D8h/J9 Unit Dis... Service Guide Screwdriver access holes for captive screws (T25) Nut (T25) Threaded stud Telescoping duct Duct flange Heat sink fan cover Illustration 11.31 Heat Sink Fan Access with Telescoping Cooling Duct MG94A502 Danfoss A/S © 02/2019 All rights reserved.
- Page 236 Screwdriver access holes for captive screws (T25) Mixing fan Mounting studs Cable grommet Slot for fan cover Fan cable connector Heat sink fan Fan cover Mounting holes Fan cover tabs Illustration 11.32 Heat Sink Fan in IP20/Chassis Drives Danfoss A/S © 02/2019 All rights reserved. MG94A502...
-
Page 237: Door Fan
Reposition the door fan grill over the filter and the fan. press to snap in place. Screw (T20) Release tab Door fan front grill Door fan filter Illustration 11.33 Front View of Door Fan Assembly MG94A502 Danfoss A/S © 02/2019 All rights reserved. - Page 238 FC Series, D1h–D8h, Da2/Db2/Da4/Db4, E1h–E4h, J8/J9 Door fan cable Air direction arrow Cable connector Door fan Nut (7 mm) Hole for corner post Door fan guard Corner post Illustration 11.34 Interior View of Door Fan Assembly Danfoss A/S © 02/2019 All rights reserved. MG94A502...
-
Page 239: Top Fan
Remove 2 screws (T25) from opposite to the drive. corners of the top fan grill. Replace the front cover on the drive, and fasten Lift the grill and top fan from the drive. with 2 screws (T25). MG94A502 Danfoss A/S © 02/2019 All rights reserved. - Page 240 D2h/D4h/D7h/D8h/J9 Unit Dis... FC Series, D1h–D8h, Da2/Db2/Da4/Db4, E1h–E4h, J8/J9 Top fan housing Top fan cable and connector Screw (T25) Retaining clip Top fan Cable access hole Illustration 11.35 Top Fan with Housing Danfoss A/S © 02/2019 All rights reserved. MG94A502...
- Page 241 D2h/D4h/D7h/D8h/J9 Unit Dis... Service Guide Screw (T25) Top fan cable and connector Top fan grill Top vent Top fan Cable access hole Illustration 11.36 Top Fan with Grill MG94A502 Danfoss A/S © 02/2019 All rights reserved.
-
Page 242: D7H/D8H Disassembly And Assembly
Reassembly Mains input jumper busbars Reinstall in reverse order of this procedure. Tighten Nut (13 mm) hardware according to chapter 14.1 Fastener Torque Ratings. Illustration 11.37 Mains Input Jumper Busbars in D7h/D8h Danfoss A/S © 02/2019 All rights reserved. MG94A502... - Page 243 Remove the heat sink fan. Refer to chapter 11.2.25 Heat Sink Fan. Reassembly Reinstall in reverse order of this procedure. Tighten hardware according to chapter 14.1 Fastener Torque Ratings. MG94A502 Danfoss A/S © 02/2019 All rights reserved.
-
Page 244: Contactor
A1 and A2. Remove 4 bolts (13 mm) from the contactor bracket and lift out the contactor. Reassembly Reinstall in reverse order of this procedure. Tighten hardware according to chapter 14.1 Fastener Torque Ratings. Danfoss A/S © 02/2019 All rights reserved. MG94A502... - Page 245 D2h/D4h/D7h/D8h/J9 Unit Dis... Service Guide Contactor A1/A2 contactor coil terminals Disconnect Contactor bracket Illustration 11.40 Contactor and Disconnect MG94A502 Danfoss A/S © 02/2019 All rights reserved.
-
Page 246: Heat Sink Access Panel
Fasten the internal hex screws (3 mm) connecting the size of the drive. the access panel to the back of the enclosure. There are 5 or 9 screws depending on the size of the drive. Danfoss A/S © 02/2019 All rights reserved. MG94A502... - Page 247 D2h/D4h/D7h/D8h/J9 Unit Dis... Service Guide Heat sink access panel Drive enclosure Illustration 11.41 Heat Sink Access Panel MG94A502 Danfoss A/S © 02/2019 All rights reserved.
-
Page 248: Da2/Db2/Da4/Db4 Parallel System Disassembly And Assembly
For parallel drive modules, measure performance, or completely destroy sensitive electronic DC-bus capacitor voltages before and after the components. individual DC fuses. Danfoss A/S © 02/2019 All rights reserved. MG94A502... -
Page 249: Lifting The Unit
This angle must be 65° or greater. Refer to Illustration 12.1. Attach and dimension the lifting cables properly. MG94A502 Danfoss A/S © 02/2019 All rights reserved. - Page 250 ® Da2/Db2/Da4/Db4 Parallel Sy... FC Series, D1h–D8h, Da2/Db2/Da4/Db4, E1h–E4h, J8/J9 65° Illustration 12.1 Lifting the Drive Module Danfoss A/S © 02/2019 All rights reserved. MG94A502...
-
Page 251: Parallel Drive System Disassembly And Assembly
Switched mode power supply (SMPS) Product label Pilz relay 44-pin cables from MDCIC to drive modules DIN rail Ferrite core Terminal block mounted on DIN rail Illustration 12.2 Control Shelf Disassembly for a 4-module System MG94A502 Danfoss A/S © 02/2019 All rights reserved. -
Page 252: Removing A Drive Module
Remove the M10x26 screws from the top of the unit, unfastening it from the top of the mounting panel. Using the proper lifting equipment, lift the drive module from the cabinet enclosure. Illustration 12.3 Removal of Bottom Mounting Bolts Danfoss A/S © 02/2019 All rights reserved. MG94A502... -
Page 253: Installing The Drive Modules
Install 2 DC fuses onto the tops of the DC-link terminals on each drive module. Install the microswitches on the outer side of each DC-link terminal. Refer to Illustration 3.7. Secure each fuse with 2 M10 screws and torque the screws. Install the next drive module. MG94A502 Danfoss A/S © 02/2019 All rights reserved. - Page 254 ® Da2/Db2/Da4/Db4 Parallel Sy... FC Series, D1h–D8h, Da2/Db2/Da4/Db4, E1h–E4h, J8/J9 Illustration 12.5 Installation of Bottom Mounting Bolts Danfoss A/S © 02/2019 All rights reserved. MG94A502...
-
Page 255: Installing The Control Shelf
Remove the control shelf assembly from its package. Remove the LCP from the control shelf. Use some type of mounting hardware to install the control shelf. Danfoss does not supply the mounting brackets for the control shelf. For correct EMC installation, refer to Illustration 12.6. - Page 256 Da2/Db2/Da4/Db4 Parallel Sy... FC Series, D1h–D8h, Da2/Db2/Da4/Db4, E1h–E4h, J8/J9 Control shelf must stay below this point Control shelf must stay above this point Illustration 12.6 Positioning the Control Shelf for Correct EMC Installation Danfoss A/S © 02/2019 All rights reserved. MG94A502...
-
Page 257: Parallel Drive Module Disassembly And Assembly
Refer to chapter 10 D1h/D3h/D5h/D6h/J8 Drive Disassembly and Assembly. Db2 system Refer to chapter 11 D2h/D4h/D7h/D8h/J9 Unit Disassembly and Assembly. Db4 system Refer to chapter 11 D2h/D4h/D7h/D8h/J9 Unit Disassembly and Assembly. Table 12.2 Additional Disassembly Instructions MG94A502 Danfoss A/S © 02/2019 All rights reserved. - Page 258 44-pin connector for cable from MDCIC AC fuses Blank cover plate (no LCP) Mains terminals to drive module Blank mounting plate (no control card) Mixing fan Power card Output terminals to motor Illustration 12.7 Parallel Drive Module Danfoss A/S © 02/2019 All rights reserved. MG94A502...
-
Page 259: Blank Mounting Plate
Remove 4 screws (T20), 1 from each corner of the blank mounting plate. Replace the blank LCP cover. The cover can be replaced by hand. Replace the front cover of the drive module. MG94A502 Danfoss A/S © 02/2019 All rights reserved. - Page 260 ® Da2/Db2/Da4/Db4 Parallel Sy... FC Series, D1h–D8h, Da2/Db2/Da4/Db4, E1h–E4h, J8/J9 Blank LCP cover Screw (T25) Blank mounting plate Power card Illustration 12.8 Blank Mounting Plate Danfoss A/S © 02/2019 All rights reserved. MG94A502...
-
Page 261: E1H-E4H Drive Disassembly And Assembly
For parallel drive modules, measure performance, or completely destroy sensitive electronic DC-bus capacitor voltages before and after the components. individual DC fuses. MG94A502 Danfoss A/S © 02/2019 All rights reserved. -
Page 262: E1H-E4H Disassembly And Assembly
Similar to E3h/E4h, but includes 1 drive module in a E5h/E6h enclosed drive system Table 13.2 E-sized Drives and Drive Modules NOTICE FASTENER VARIATIONS The number of fasteners in the following procedures can vary due to the differences between enclosure sizes. Danfoss A/S © 02/2019 All rights reserved. MG94A502... -
Page 263: Control Card And Control Card Mounting Plate
Reconnect any customer control wiring to the control card and option cards. In IP21/IP54 units, connect the LCP cable. Connect the USB, if present. Reattach the front cover, if present depending on the enclosure. MG94A502 Danfoss A/S © 02/2019 All rights reserved. - Page 264 Ribbon cable and connector (under control card mounting plate) LCP cradle Screws (T20) LCP cable connector Power card Control card Control card mounting plate Illustration 13.1 LCP and Control Card Mounting Plate Danfoss A/S © 02/2019 All rights reserved. MG94A502...
-
Page 265: Power Card Mounting Plate
Remove 4 nuts (8 mm) from the edges of the mounting plate. Remove 1 screw (T25) from the top center of the mounting plate. MG94A502 Danfoss A/S © 02/2019 All rights reserved. - Page 266 MK101 (to current sensors) Cable retaining clip MK103 (to gate drive card) MK1200 (CANBUS to inrush card and power card) MK501 (to mixing fans) Cable access hole Illustration 13.2 Power Card Mounting Plate Danfoss A/S © 02/2019 All rights reserved. MG94A502...
-
Page 267: Power Card
To MK501 avoid bending the card, lift it parallel to the MK502 power card. MK902 Any additional wiring at MK106 and MK500 Route the cables through the cable retaining clips. MG94A502 Danfoss A/S © 02/2019 All rights reserved. - Page 268 MK105 (to fan power card MK1200) Metal standoff (7 mm) MK104 (signal test connector) MK500 (to customer relays) MK502 (to EMC relays) Cable retaining clip MK101 (to current sensors) MK501 (to mixing fans) Illustration 13.3 Power Card Danfoss A/S © 02/2019 All rights reserved. MG94A502...
-
Page 269: Fan Power Card
MK602 them. MK802 Remove the fan power card from the drive. MK803 MK1200 Route the cables through the cable retaining clips on the mounting plate. MG94A502 Danfoss A/S © 02/2019 All rights reserved. - Page 270 Power card mounting plate Plastic standoff MK602 (to door/top fans) MK1200 (to inrush card and power card MK105) MK600 (to heat sink fans) Cable retaining clip Screw (T20) Illustration 13.4 Fan Power Card Danfoss A/S © 02/2019 All rights reserved. MG94A502...
-
Page 271: Inrush Card
Lift the inrush card upward to release it from the MK109 (SCR gate) alignment tabs at the bottom edge of the plastic MK110 (CAN bus) inrush card frame. Reinstall the power card mounting plate. MG94A502 Danfoss A/S © 02/2019 All rights reserved. - Page 272 MK109: SCR gate Inrush card frame MK110: Signals to power card (MK105) and fan power card (MK1200) Rectifier(-) bus plate Connection point for load share/regen (optional) Illustration 13.5 Inrush Card and Inrush Card Frame Danfoss A/S © 02/2019 All rights reserved. MG94A502...
-
Page 273: Inrush Card Frame And Rectifier Bus Plates
Remove the rectifier(-) bus plate from the drive. Reinstall the inrush card. Remove the insulator sheet. Remove 4 screws (T40), 1 from each SCR module and 1 from the DC coil. Remove the rectifier(+) bus plate from the drive. MG94A502 Danfoss A/S © 02/2019 All rights reserved. - Page 274 Nut (7 mm) Insulator sheet Inrush busbars Insulator sheet alignment pin Nut (7 mm) Rectifier(+) bus plate Rectifier(-) bus plate Bus plate screw (T40) Illustration 13.6 Inrush Card Frame and Rectifier Bus Plates Danfoss A/S © 02/2019 All rights reserved. MG94A502...
-
Page 275: Scr/Diode Modules
Remove the busbar from the drive. Disconnect the cable from the SCR/diode module. Remove 4 screws (T25), 1 from each corner of the SCR/diode module. Remove the SCR/diode module from the drive. MG94A502 Danfoss A/S © 02/2019 All rights reserved. - Page 276 ® E1h–E4h Drive Disassembly a... FC Series, D1h–D8h, Da2/Db2/Da4/Db4, E1h–E4h, J8/J9 Cable retaining clip SCR input busbar SCR/diode module Screw (T25) Screw (T40) Nut (8 mm) Illustration 13.7 SCR/Diode Modules Danfoss A/S © 02/2019 All rights reserved. MG94A502...
-
Page 277: Input Plate With Busbars
Secure 6 nuts (13 mm), 2 at the upper end of each AC input busbar. Secure 3 nuts (17 mm) and bolts, 1 for each input terminal (L1, L2, L3) at the bottom of the AC input busbars. MG94A502 Danfoss A/S © 02/2019 All rights reserved. - Page 278 Mixing fan vent (cable not shown) Nut (8 mm) Cable retaining clip Nuts (17 mm) and bolts for L1, L2, L3 connection Nut (8 mm) Illustration 13.8 Single Input Plate with Busbars only Danfoss A/S © 02/2019 All rights reserved. MG94A502...
-
Page 279: Split Input Plate With Options
UNIQUE TORQUE VALUES Tighten nuts (8 mm), which attach the input plate to the mounting rail, to 3.91 Nm (34.6 lb-in). Tighten all other fasteners according to chapter 14.1 Fastener Torque Ratings. MG94A502 Danfoss A/S © 02/2019 All rights reserved. - Page 280 Nut (30 mm) at upper RFI filter Nut (8 mm) in lower input plate AC input busbar Nut (8 mm) Illustration 13.9 Split Input Plate with Optional RFI Filter, AC Fuses, and Disconnect Danfoss A/S © 02/2019 All rights reserved. MG94A502...
-
Page 281: Input Plate Mixing Fan
13.2.10 Split Input Plate with Options. Remove 2 screws (T20) from opposite corners of the fan assembly. Feed the cable through the fan cable access hole. Remove the mixing fan from the input plate. MG94A502 Danfoss A/S © 02/2019 All rights reserved. - Page 282 Upper input plate (front view, with options not shown) 5 Upper input plate (back view) Cable retaining clip Mixing fan Mixing fan vent Screw (T20) Cable access hole Alignment arrow Illustration 13.10 E1h/E3h Input Plate Mixing Fan (E2h/E4h is Similar). Danfoss A/S © 02/2019 All rights reserved. MG94A502...
-
Page 283: Power Card Mixing Fan
Remove 2 screws (T20) from opposite corners of the mixing fan. Feed the cable through the fan cable access hole. Remove the mixing fan from the fan cage. MG94A502 Danfoss A/S © 02/2019 All rights reserved. - Page 284 ® E1h–E4h Drive Disassembly a... FC Series, D1h–D8h, Da2/Db2/Da4/Db4, E1h–E4h, J8/J9 Fan screw (T20) Fan cage Mixing fan Cable access hole Screw (T25) Fan location Illustration 13.11 Power Card Mixing Fan Danfoss A/S © 02/2019 All rights reserved. MG94A502...
-
Page 285: Gate Drive Card Mounting Plate
MK201 (if brake option is present) MK501 MK601 MK701 Reinstall the input plate and any attached options. Refer to chapter 13.2.9 Input Plate with Busbars and chapter 13.2.10 Split Input Plate with Options. MG94A502 Danfoss A/S © 02/2019 All rights reserved. - Page 286 FC Series, D1h–D8h, Da2/Db2/Da4/Db4, E1h–E4h, J8/J9 Gate drive card Screw (T20) MK501 Leg of mounting plate MK100 IGBT output busbar MK601 MK701 MK101 MK 201 (for brake option) Illustration 13.12 Gate Drive Card Mounting Plate Danfoss A/S © 02/2019 All rights reserved. MG94A502...
-
Page 287: Gate Drive Card
MK201 (if brake option is present). unit. MK501 MK601 MK701 Reinstall the input plate and any options. Refer to chapter 13.2.9 Input Plate with Busbars and chapter 13.2.10 Split Input Plate with Options. MG94A502 Danfoss A/S © 02/2019 All rights reserved. - Page 288 ® E1h–E4h Drive Disassembly a... FC Series, D1h–D8h, Da2/Db2/Da4/Db4, E1h–E4h, J8/J9 MK101 MK100 Screw (T20) MK701 Gate drive card MK201 (optional brake) MK501 MK601 Illustration 13.13 Gate Drive Card Danfoss A/S © 02/2019 All rights reserved. MG94A502...
-
Page 289: Current Sensors
3 motor busbars. sensors from the drive. Reinstall the input plate. Refer to chapter 13.2.9 Input Plate with Busbars and chapter 13.2.10 Split Input Plate with Options. MG94A502 Danfoss A/S © 02/2019 All rights reserved. - Page 290 Nut (13 mm) Lower nut (13 mm) Current sensor Current sensor cable connector Current sensor busbar Screw (T20) Screw (T25) Heat sink fan housing Left motor busbar Right motor busbar Illustration 13.14 Current Sensors Danfoss A/S © 02/2019 All rights reserved. MG94A502...
-
Page 291: Motor Busbar Assembly
Reinstall the gate drive card mounting plate, if removed. See chapter 13.2.13 Gate Drive Card Mounting Plate. Reinstall the input plate. Refer to chapter 13.2.9 Input Plate with Busbars and chapter 13.2.10 Split Input Plate with Options. MG94A502 Danfoss A/S © 02/2019 All rights reserved. - Page 292 IGBT motor busbar Current sensor cable connector Nut (13 mm) Screw (T20) Current sensor Heat sink fan housing Current sensor busbar Right motor busbar Illustration 13.15 E1h/E3h Motor Busbar Assembly (E2h/E4h is Similar) Danfoss A/S © 02/2019 All rights reserved. MG94A502...
-
Page 293: Balance/High Frequency Card
Refer to chapter 13.2.13 Gate Drive Card Mounting Plate. Reinstall the input plate. Refer to chapter 13.2.9 Input Plate with Busbars or chapter 13.2.10 Split Input Plate with Options. MG94A502 Danfoss A/S © 02/2019 All rights reserved. - Page 294 Ground bar nut (8 mm) Balance/high frequency card MK100 cable connector (only in 690 V drives) Nut (8 mm) Left current sensor busbar Illustration 13.16 Balance/High Frequency Card in E2h/E4h, 580–690 V AC (Other Drives Similar) Danfoss A/S © 02/2019 All rights reserved. MG94A502...
-
Page 295: Heat Sink Fan
Take care not to damage the fan wires during removal. Remove the fan from the fan housing. MG94A502 Danfoss A/S © 02/2019 All rights reserved. - Page 296 Current sensor Fan grommet Fan grommet (installed in fan housing) Heat sink fan Fan cable heat sink fan Fan cable connector Illustration 13.17 Heat Sink Fan (Shown with Left Motor Busbar Removed) Danfoss A/S © 02/2019 All rights reserved. MG94A502...
-
Page 297: Dc Snubber Capacitors
13.2.10 Split Input Plate with Options. Remove the 6 DC snubber capacitors from the drive. DC snubber capacitor IGBT module Screw (T30) DC bus plates Illustration 13.18 DC Snubber Capacitors in E1h/E3h Drives MG94A502 Danfoss A/S © 02/2019 All rights reserved. - Page 298 13.2.10 Split Input Plate with Options. Remove the 3 DC snubber capacitor pairs from the drive. Y-shaped busbar DC snubber capacitor pair Nut (40 mm) DC bus plates Illustration 13.19 DC Snubber Capacitors in E2h/E4h Drives Danfoss A/S © 02/2019 All rights reserved. MG94A502...
-
Page 299: Twistlock Dc Capacitors
Lift the DC(-) bus plate from the drive, and remove the insulator sheet behind it. To remove a DC capacitor, use the special tool provided in the parts kit (or grip the edges with a large pliers). MG94A502 Danfoss A/S © 02/2019 All rights reserved. - Page 300 DC(-) bus plate Insulator sheet (for balance/high frequency card) Insulator sheet 3 DC(+) bus plate Plug Insulator sheet 1 DC capacitor Illustration 13.20 E1h/E3h Capacitor Bank, 380–500 V AC (T5), 16 DC Capacitors Danfoss A/S © 02/2019 All rights reserved. MG94A502...
- Page 301 To remove a DC capacitor, use the special tool provided in the parts kit (or grip the edges with a large pliers). Turn the DC capacitor approximately 30 degrees counterclockwise to release it. Pull the capacitor out of the drive. MG94A502 Danfoss A/S © 02/2019 All rights reserved.
- Page 302 Insulator sheet (for balance/high frequency card) Midplate 2 (lower) DC(+) bus plate Insulator sheet 3 Insulator sheet 1 DC capacitors Illustration 13.21 E1h/E3h Capacitor Bank, 525–690 V AC (T7), 18 DC Capacitors Danfoss A/S © 02/2019 All rights reserved. MG94A502...
-
Page 303: Dc Capacitor Layouts
FC 102, FC 103, and FC 202 FC 302 Illustration 13.24 N450T7 N355T7 N500T7 N400T7 Illustration 13.26 N560T7 N500T7 N630T7 N560T7 Illustration 13.27 N710T7 N630T7 N800T7 N710T7 Table 13.4 DC Capacitor Bank Layout 525–690 V MG94A502 Danfoss A/S © 02/2019 All rights reserved. - Page 304 Illustration 13.22 E1h/E3h (T5) 315 kW with 14 Capacitor Layout DC(+) plate screw Midplate standoff DC(+) plate standoff DC(-) plate screw Midplate screw DC(-) plate standoff Illustration 13.23 E1h/E3h (T5) 355/400 kW with 16 Capacitor Layout Danfoss A/S © 02/2019 All rights reserved. MG94A502...
- Page 305 Illustration 13.24 E1h/E3h (T7) 355/400 kW with 15 Capacitor Layout DC(+) plate screw Midplate standoff DC(+) plate standoff DC(-) plate screw Midplate screw DC(-) plate standoff Illustration 13.25 E2h/E4h (T5) 450/500 kW with 20 Capacitor Layout MG94A502 Danfoss A/S © 02/2019 All rights reserved.
- Page 306 DC(+) plate screw Midplate 1 screw DC(+) plate standoff Midplate 1 standoff DC(-) plate screw Midplate 2 screw DC(-) plate standoff Midplate 2 standoff Illustration 13.27 E2h/E4h (T7) 630/710 kW with 21 Capacitor Layout Danfoss A/S © 02/2019 All rights reserved. MG94A502...
-
Page 307: Igbts
Remove 4 screws (T25) from each IGBT or brake IGBT. The number of fasteners can vary with the drive. Reassembly in E1h/E3h drives For reassembly, use the IGBT spare part instructions that come with the parts kit. MG94A502 Danfoss A/S © 02/2019 All rights reserved. - Page 308 ® E1h–E4h Drive Disassembly a... FC Series, D1h–D8h, Da2/Db2/Da4/Db4, E1h–E4h, J8/J9 Screw (T25) Screw (T25) IGBT mounting frame IGBT module Illustration 13.28 IGBT Modules in E2h/E4h Drives (E1h/E3h is Similar) Danfoss A/S © 02/2019 All rights reserved. MG94A502...
-
Page 309: Door Fan
Remove the fan from the enclosure door. the fan cable. Replace the filter over the fan on the outside of the door. Reposition fan grill over the filter and press to snap in place. MG94A502 Danfoss A/S © 02/2019 All rights reserved. - Page 310 E1h–E4h Drive Disassembly a... FC Series, D1h–D8h, Da2/Db2/Da4/Db4, E1h–E4h, J8/J9 Front grill Door fan front view Release tab Nut (7 mm) Filter Corner bracket Screw (T20) Door fan back view Illustration 13.29 Door Fan Assembly Danfoss A/S © 02/2019 All rights reserved. MG94A502...
-
Page 311: Top Fan
Reconnect the in-line cable connector. Lift the fans from the pins in the fan housing. Slide the fan housing and fans into position under the retaining clips. Secure 2 screws (T25) in the fan housing. MG94A502 Danfoss A/S © 02/2019 All rights reserved. - Page 312 ® E1h–E4h Drive Disassembly a... FC Series, D1h–D8h, Da2/Db2/Da4/Db4, E1h–E4h, J8/J9 Fan housing Screw (T25) Mounting pin (inside housing) Cable access hole Retaining clip Illustration 13.30 Top Fan Danfoss A/S © 02/2019 All rights reserved. MG94A502...
-
Page 313: Vertical Brake Busbars
R(-) vertical brake busbar. R(+) vertical brake busbar. Lift the busbar from the drive. Replace the input plate. Refer to chapter 13.2.9 Input Plate with Busbars and chapter 13.2.10 Split Input Plate with Options. MG94A502 Danfoss A/S © 02/2019 All rights reserved. - Page 314 FC Series, D1h–D8h, Da2/Db2/Da4/Db4, E1h–E4h, J8/J9 Screw (T40) Horizontal brake busbars R(-) vertical brake busbar Screw (T40) Nut (13 mm) R(+) vertical brake busbar Screw (T40) Screw (T40) Illustration 13.31 Brake Busbars Danfoss A/S © 02/2019 All rights reserved. MG94A502...
-
Page 315: Horizontal Brake Busbars
13.2.13 Gate Drive Card Mounting Plate. 2 nuts (13 mm) from the right end of Replace the input plate. Refer to the busbar. chapter 13.2.9 Input Plate with Busbars and chapter 13.2.10 Split Input Plate with Options. MG94A502 Danfoss A/S © 02/2019 All rights reserved. - Page 316 Top horizontal brake busbar Bottom horizontal brake busbar Thread-forming screw (T20) Middle horizontal brake busbar Screw (T40) Nut (13 mm) Snubber capacitor Vertical brake busbars Illustration 13.32 Horizontal Brake Busbars in E1h/E3h Drives Danfoss A/S © 02/2019 All rights reserved. MG94A502...
- Page 317 2 thread-forming screws (T25). Replace the input plate. Refer to chapter 13.2.9 Input Plate with Busbars and 2 nuts (13 mm) from the right end of chapter 13.2.10 Split Input Plate with Options. the busbar. MG94A502 Danfoss A/S © 02/2019 All rights reserved.
- Page 318 Bottom horizontal brake busbar Screw (T40) Middle horizontal brake busbar Thread-forming screw (T25) (behind snubber capacitor) Nut (13 mm) Snubber capacitor Vertical brake busbars Illustration 13.33 Horizontal Brake Busbars in E2h/E4h Drives Danfoss A/S © 02/2019 All rights reserved. MG94A502...
-
Page 319: Dc Bus Rails
Remove 2 screws (T25) from the top of the bus rail. Remove the zip ties connecting the cables to the bus rail. Lift the left DC(+) bus rail from the unit. MG94A502 Danfoss A/S © 02/2019 All rights reserved. - Page 320 DC(+) bus rail (left) Screws (T40) only with optional regen terminals Nut (13 mm) DC(-) bus rail (right) Regen terminals (optional) Nut (13 mm) for optional brake Illustration 13.34 DC Bus Rails Danfoss A/S © 02/2019 All rights reserved. MG94A502...
-
Page 321: Product Specifications
Nm (in-lb) Nm (in-lb) 2.8 (24) 2.8 (24) 5.1 (45) 4.0 (35) Table 14.3 Torque Values for Thread-forming into Plastic Class A: Clamping metal Class B: Clamping PCA or plastic MG94A502 Danfoss A/S © 02/2019 All rights reserved. -
Page 322: Unique Torque Values In E1H-E4H Drives
All M5 fasteners attaching input plates to side mounting rail Torque: 3.91 Nm (34.6 lb-in) Torque: 3.91 Nm (34.6 lb-in) All gasketed M5 fasteners except door screws – – Torque: 3.91 Nm (34.6 lb-in) Illustration 14.1 Unique Torque Values, E1h–E4h Drives Danfoss A/S © 02/2019 All rights reserved. MG94A502... -
Page 323: Dc Voltage Levels
DC bus ripple V pkpk Mains phase alarm (60 s delay) DC bus ripple V pkpk Table 14.6 Warning/Alarm Trip Points, D-sized Drives, 380–480/500 V AC 1) Based on crest factor of 1.414 MG94A502 Danfoss A/S © 02/2019 All rights reserved. - Page 324 85 (185) Active inrush card overtemperature trip [°C (°F)] 85 (185) 85 (185) 85 (185) 85 (185) 85 (185) 85 (185) Table 14.9 Warning and Alarm Trip Points, E-sized Drives, 525–690 V AC Danfoss A/S © 02/2019 All rights reserved. MG94A502...
-
Page 325: Spare Parts
All spare parts are suitable for conformal coated drives and can be used in either coated or non-conformal coated drives. 15.1.1 Using the Drive Configurator Tool For the latest spare parts information, visit the Danfoss website using the following directions. Go to https://vltconfig.danfoss.com/. -
Page 326: Recommended Current Scaling Cards
N710 N630 N200T5 176F3157 4.2 Ω N800 N710 N250T5 176F3158 4.2 Ω N1M0 N800 N250T5 176F3158 Table 15.4 Recommended Current Scaling Cards, Parallel Drive Systems and Parallel Drive Modules, 380–500 V (T5) Danfoss A/S © 02/2019 All rights reserved. MG94A502... - Page 327 176F3154 3.1 Ω N560 N500 176F3155 2.7 Ω N630 N560 176F3415 2.5 Ω N710 N630 176F6628 2.1 Ω N800 N710 176F6632 Table 15.7 Recommended Current Scaling Cards, E1h–E4h Drives, 525–690 V (T7) MG94A502 Danfoss A/S © 02/2019 All rights reserved.
- Page 328 ® Spare Parts FC Series, D1h–D8h, Da2/Db2/Da4/Db4, E1h–E4h, J8/J9 Danfoss A/S © 02/2019 All rights reserved. MG94A502...
- Page 329 Spare Parts Service Guide MG94A502 Danfoss A/S © 02/2019 All rights reserved.
- Page 330 ® Spare Parts FC Series, D1h–D8h, Da2/Db2/Da4/Db4, E1h–E4h, J8/J9 Danfoss A/S © 02/2019 All rights reserved. MG94A502...
- Page 331 Spare Parts Service Guide MG94A502 Danfoss A/S © 02/2019 All rights reserved.
- Page 332 ® Spare Parts FC Series, D1h–D8h, Da2/Db2/Da4/Db4, E1h–E4h, J8/J9 Danfoss A/S © 02/2019 All rights reserved. MG94A502...
- Page 333 Spare Parts Service Guide MG94A502 Danfoss A/S © 02/2019 All rights reserved.
- Page 334 ® Spare Parts FC Series, D1h–D8h, Da2/Db2/Da4/Db4, E1h–E4h, J8/J9 Danfoss A/S © 02/2019 All rights reserved. MG94A502...
- Page 335 Spare Parts Service Guide MG94A502 Danfoss A/S © 02/2019 All rights reserved.
- Page 336 ® Spare Parts FC Series, D1h–D8h, Da2/Db2/Da4/Db4, E1h–E4h, J8/J9 Danfoss A/S © 02/2019 All rights reserved. MG94A502...
- Page 337 Spare Parts Service Guide MG94A502 Danfoss A/S © 02/2019 All rights reserved.
- Page 338 ® Spare Parts FC Series, D1h–D8h, Da2/Db2/Da4/Db4, E1h–E4h, J8/J9 Danfoss A/S © 02/2019 All rights reserved. MG94A502...
- Page 339 Spare Parts Service Guide MG94A502 Danfoss A/S © 02/2019 All rights reserved.
- Page 340 ® Spare Parts FC Series, D1h–D8h, Da2/Db2/Da4/Db4, E1h–E4h, J8/J9 Danfoss A/S © 02/2019 All rights reserved. MG94A502...
- Page 341 Spare Parts Service Guide MG94A502 Danfoss A/S © 02/2019 All rights reserved.
- Page 342 ® Spare Parts FC Series, D1h–D8h, Da2/Db2/Da4/Db4, E1h–E4h, J8/J9 Danfoss A/S © 02/2019 All rights reserved. MG94A502...
- Page 343 Spare Parts Service Guide MG94A502 Danfoss A/S © 02/2019 All rights reserved.
- Page 344 ® Spare Parts FC Series, D1h–D8h, Da2/Db2/Da4/Db4, E1h–E4h, J8/J9 Danfoss A/S © 02/2019 All rights reserved. MG94A502...
- Page 345 Spare Parts Service Guide MG94A502 Danfoss A/S © 02/2019 All rights reserved.
- Page 346 ® Spare Parts FC Series, D1h–D8h, Da2/Db2/Da4/Db4, E1h–E4h, J8/J9 Danfoss A/S © 02/2019 All rights reserved. MG94A502...
- Page 347 Spare Parts Service Guide MG94A502 Danfoss A/S © 02/2019 All rights reserved.
- Page 348 ® Spare Parts FC Series, D1h–D8h, Da2/Db2/Da4/Db4, E1h–E4h, J8/J9 Danfoss A/S © 02/2019 All rights reserved. MG94A502...
- Page 349 Spare Parts Service Guide MG94A502 Danfoss A/S © 02/2019 All rights reserved.
- Page 350 ® Spare Parts FC Series, D1h–D8h, Da2/Db2/Da4/Db4, E1h–E4h, J8/J9 Danfoss A/S © 02/2019 All rights reserved. MG94A502...
- Page 351 Spare Parts Service Guide MG94A502 Danfoss A/S © 02/2019 All rights reserved.
- Page 352 ® Spare Parts FC Series, D1h–D8h, Da2/Db2/Da4/Db4, E1h–E4h, J8/J9 Danfoss A/S © 02/2019 All rights reserved. MG94A502...
- Page 353 Spare Parts Service Guide MG94A502 Danfoss A/S © 02/2019 All rights reserved.
- Page 354 ® Spare Parts FC Series, D1h–D8h, Da2/Db2/Da4/Db4, E1h–E4h, J8/J9 Danfoss A/S © 02/2019 All rights reserved. MG94A502...
- Page 355 Spare Parts Service Guide MG94A502 Danfoss A/S © 02/2019 All rights reserved.
- Page 356 ® Spare Parts FC Series, D1h–D8h, Da2/Db2/Da4/Db4, E1h–E4h, J8/J9 Danfoss A/S © 02/2019 All rights reserved. MG94A502...
- Page 357 Spare Parts Service Guide MG94A502 Danfoss A/S © 02/2019 All rights reserved.
-
Page 358: Block Diagrams
® Block Diagrams FC Series, D1h–D8h, Da2/Db2/Da4/Db4, E1h–E4h, J8/J9 16 Block Diagrams MK102 TEST CONNECTOR MK104 MK102 44 PIN 30 PIN Danfoss A/S © 02/2019 All rights reserved. MG94A502... - Page 359 Block Diagrams Service Guide MG94A502 Danfoss A/S © 02/2019 All rights reserved.
- Page 360 ® Block Diagrams FC Series, D1h–D8h, Da2/Db2/Da4/Db4, E1h–E4h, J8/J9 Danfoss A/S © 02/2019 All rights reserved. MG94A502...
- Page 361 Block Diagrams Service Guide MG94A502 Danfoss A/S © 02/2019 All rights reserved.
- Page 362 ® Block Diagrams FC Series, D1h–D8h, Da2/Db2/Da4/Db4, E1h–E4h, J8/J9 Danfoss A/S © 02/2019 All rights reserved. MG94A502...
- Page 363 Block Diagrams Service Guide MG94A502 Danfoss A/S © 02/2019 All rights reserved.
-
Page 364: Index
Inrush busbar.................. 271 D3h drive....................22 Motor busbar.................. 289 D4h unit....................187 Motor busbar assembly............... 289 Rectifier bus plate................271 D5h drive....................22 SCR input busbar................273 D6h drive....................22 Vertical brake.................. 311 Danfoss A/S © 02/2019 All rights reserved. MG94A502... - Page 365 EMC shield.................... 196 Heater....................... 29 Extended options cabinet............. 178, 240 High frequency card..............146, 291 Extended Options Cabinet............. 180 High voltage................... 72 External commands................37 High voltage warning................. 12 Horizontal brake busbars..............313 MG94A502 Danfoss A/S © 02/2019 All rights reserved.
- Page 366 Illustration..................26, 27 Installation..................251 Local control panel (LCP)........... 30, 44, 107 Programming.................. 125 Logic section..................44 Reinstallation.................. 125 Removal.................... 250 Service kit troubleshooting............125 Testing....................124 Main Menu....................31 Main Menu Mode................. 32 Danfoss A/S © 02/2019 All rights reserved. MG94A502...
- Page 367 Mains....................138 Testing....................100 Motor..................140, 197 Recycling....................11 Power................105, 106, 200 Regen....................59 Reference................... 34, 35, 36 Regen Illustration..................318 Load sharing..................58 Terminal....................59 Relays......................44 Remote reference................. 35 MG94A502 Danfoss A/S © 02/2019 All rights reserved.
- Page 368 Type code..................16, 124 Unintended start.................. 12 Vertical brake busbars..............311 Voltage Imbalance................... 68 Rating............... 17, 18, 19, 20, 21 Warnings Codes....................66 List of....................68 Trip points................321, 322 Waveform....................81 Danfoss A/S © 02/2019 All rights reserved. MG94A502...
- Page 369 Index Service Guide MG94A502 Danfoss A/S © 02/2019 All rights reserved.
- Page 370 Danfoss can accept no responsibility for possible errors in catalogues, brochures and other printed material. Danfoss reserves the right to alter its products without notice. This also applies to products already on order provided that such alterations can be made without subsequential changes being necessary in specifications already agreed. All trademarks in this material are property of the respective companies.
Need help?
Do you have a question about the VLT FC Series and is the answer not in the manual?
Questions and answers
How can clear log S:28[M26]in my danfoss vfd
To clear log S:28[M26] in your Danfoss VLT FC Series VFD, reset the unit. This clears alarms and warnings, as noted for similar faults like ALARM 78. Make sure the issue causing the log has been resolved before resetting.
This answer is automatically generated
How do I clear log S:28[M26] in my danfoss vfd