Siemens SINAMICS S120 Getting Started
Hide thumbs
Also See for SINAMICS S120:
- Function manual (1094 pages) ,
- Diagnostic manual (947 pages) ,
- Manual (848 pages)
Table of Contents
Advertisement
Advertisement
Table of Contents

Related Manuals for Siemens SINAMICS S120


Summary of Contents for Siemens SINAMICS S120
- Page 3 ___________________ Preface ___________________ Fundamental safety instructions ___________________ SINAMICS Overview ___________________ Startdrive commissioning tool S120 ___________________ Fundamentals ___________________ Commissioning Getting Started ___________________ Performing basic parameterization ___________________ Loading the project to the target device ___________________ Commissioning a drive ___________________ Appendix 12/2018 6SL3097-5AG30-0BP0...
- Page 4 Note the following: WARNING Siemens products may only be used for the applications described in the catalog and in the relevant technical documentation. If products and components from other manufacturers are used, these must be recommended or approved by Siemens. Proper transport, storage, installation, assembly, commissioning, operation and maintenance are required to ensure that the products operate safely and without any problems.
-
Page 5: Preface
(mailto:docu.motioncontrol@siemens.com). Siemens MySupport/Documentation At the following address (http://www.siemens.com/mdm), you can find information on how to create your own individual documentation based on Siemens' content, and adapt it for your own machine documentation. Training At the following address (http://www.siemens.com/sitrain), you can find information about SITRAIN (Siemens training on products, systems and solutions for automation and drives). -
Page 6: Startdrive
SINAMICS Converters for Single-Axis Drives – Distributed Converters (D 31.2) • SINUMERIK 840 Equipment for Machine Tools (Catalog NC 62) • Installation/assembly SINAMICS S120 Equipment Manual for Control Units and Additional System • Components SINAMICS S120 Equipment Manual for Booksize Power Units •... -
Page 7: Startdrive
Basic and Extended Functions SINAMICS S120 Safety Integrated Function Manual Basic Functions SINAMICS S120 Function Manual Drive Functions Commissioning Of a simple SINAMICS S120 drive with Getting Started (up to Firmware V5.1 SP1) STARTER Commissioning With STARTER SINAMICS S120 Commissioning Manual (up to firmware V5.1 SP1) - Page 8 Country-specific telephone numbers for technical support are provided in the Internet at the following address (https://support.industry.siemens.com/sc/ww/en/sc/2090) in the "Contact" area. Compliance with the General Data Protection Regulation Siemens respects the principles of data privacy, in particular the data minimization rules (privacy by design). Getting Started, 12/2018, 6SL3097-5AG30-0BP0...
-
Page 9: Startdrive
For the SINAMICS Startdrive product – including the installed SINAMICS DCC option package – this means the following: The product only sends personal data to SIEMENS AG if the user explicitly requests this. This occurs in the following cases: ● If the SINAMICS Startdrive program and the SINAMICS DCC option package end unexpectedly, then the user is given the opportunity to send diagnostics information to SIEMENS AG for analysis. - Page 10 Relevant directives and standards You can obtain an up-to-date list of currently certified components on request from your local Siemens office. If you have any questions relating to certifications that have not yet been completed, please ask your Siemens contact person.
-
Page 11: Getting Started, 12/2018, 6Sl3097-5Ag30-0Bp0
SINAMICS S devices showing the test symbols fulfill the EMC requirements for Australia and New Zealand. ● Quality systems Siemens AG employs a quality management system that meets the requirements of ISO 9001 and ISO 14001. Not relevant standards China Compulsory Certification SINAMICS S devices do not fall in the area of validity of the China Compulsory Certification (CCC). - Page 12 This document contains recommendations relating to third-party products. Siemens accepts the fundamental suitability of these third-party products. You can use equivalent products from other manufacturers. Siemens does not accept any warranty for the properties of third-party products. Ground symbols Table 1...
-
Page 13: Getting Started, 12/2018, 6Sl3097-5Ag30-0Bp0
This documentation is aimed at beginners who want to commission a drive system using Startdrive. The steps described in this document allow a simple SINAMICS S120 drive train (CU320-2 PN) to be put into operation. It does not claim to be complete, however. The complete commissioning functions are described in the Commissioning Manual with Startdrive. - Page 14 Preface Getting Started, 12/2018, 6SL3097-5AG30-0BP0...
-
Page 15: Table Of Contents
Table of contents Preface ........................... 3 Fundamental safety instructions ....................17 General safety instructions ....................17 Equipment damage due to electric fields or electrostatic discharge ........23 Warranty and liability for application examples ..............24 Industrial security ......................25 Residual risks of power drive systems ................27 Overview ..........................29 Startdrive commissioning tool ....................31 Structure of the user interface .................... - Page 16 Table of contents Call Startdrive........................63 Commissioning workflow ....................64 Check lists to commission SINAMICS S ................66 Creating a project offline in Startdrive .................68 5.4.1 Creating a new project......................68 5.4.1.1 Creating a new project (in the Portal view) ................68 5.4.1.2 Creating a new project (in the Project view) ................69 5.4.2 Inserting the drive unit offline ....................71 5.4.3...
- Page 17 Table of contents 6.1.2 Configuring inputs/outputs of the Control Unit ..............121 6.1.2.1 Isolated digital inputs ......................121 6.1.2.2 Bidirectional digital inputs/outputs ..................122 6.1.2.3 Measuring sockets ......................123 Infeed unit ........................126 6.2.1 Available infeed units ......................126 6.2.2 Function modules ......................126 6.2.3 Line data / operating mode ....................127 6.2.4 Enable logic........................129 6.2.5...
- Page 18 Table of contents Getting Started, 12/2018, 6SL3097-5AG30-0BP0...
-
Page 19: Fundamental Safety Instructions
Fundamental safety instructions General safety instructions WARNING Electric shock and danger to life due to other energy sources Touching live components can result in death or severe injury. • Only work on electrical devices when you are qualified for this job. •... - Page 20 Fundamental safety instructions 1.1 General safety instructions WARNING Risk of electric shock and fire from supply networks with an excessively low impedance Excessively high short-circuit currents can lead to the protective devices not being able to interrupt these short-circuit currents and being destroyed, and thus causing electric shock or a fire.
- Page 21 Fundamental safety instructions 1.1 General safety instructions WARNING Arcing when a plug connection is opened during operation Opening a plug connection when a system is operation can result in arcing that may cause serious injury or death. • Only open plug connections when the equipment is in a voltage-free state, unless it has been explicitly stated that they can be opened in operation.
- Page 22 • If you come closer than around 2 m to such components, switch off any radios or mobile phones. • Use the "SIEMENS Industry Online Support app" only on equipment that has already been switched off. NOTICE...
- Page 23 Fundamental safety instructions 1.1 General safety instructions WARNING Unrecognized dangers due to missing or illegible warning labels Dangers might not be recognized if warning labels are missing or illegible. Unrecognized dangers may cause accidents resulting in serious injury or death. •...
- Page 24 Fundamental safety instructions 1.1 General safety instructions WARNING Malfunctions of the machine as a result of incorrect or changed parameter settings As a result of incorrect or changed parameterization, machines can malfunction, which in turn can lead to injuries or death. •...
-
Page 25: Equipment Damage Due To Electric Fields Or Electrostatic Discharge
Fundamental safety instructions 1.2 Equipment damage due to electric fields or electrostatic discharge Equipment damage due to electric fields or electrostatic discharge Electrostatic sensitive devices (ESD) are individual components, integrated circuits, modules or devices that may be damaged by either electric fields or electrostatic discharge. NOTICE Equipment damage due to electric fields or electrostatic discharge Electric fields or electrostatic discharge can cause malfunctions through damaged... -
Page 26: Warranty And Liability For Application Examples
Fundamental safety instructions 1.3 Warranty and liability for application examples Warranty and liability for application examples Application examples are not binding and do not claim to be complete regarding configuration, equipment or any eventuality which may arise. Application examples do not represent specific customer solutions, but are only intended to provide support for typical tasks. -
Page 27: Industrial Security
Siemens’ products and solutions undergo continuous development to make them more secure. Siemens strongly recommends that product updates are applied as soon as they are available and that the latest product versions are used. Use of product versions that are no longer supported, and failure to apply the latest updates may increase customer’s exposure... - Page 28 Fundamental safety instructions 1.4 Industrial security WARNING Unsafe operating states resulting from software manipulation Software manipulations (e.g. viruses, trojans, malware or worms) can cause unsafe operating states in your system that may lead to death, serious injury, and property damage. •...
-
Page 29: Residual Risks Of Power Drive Systems
Fundamental safety instructions 1.5 Residual risks of power drive systems Residual risks of power drive systems When assessing the machine- or system-related risk in accordance with the respective local regulations (e.g., EC Machinery Directive), the machine manufacturer or system installer must take into account the following residual risks emanating from the control and drive components of a drive system: 1. - Page 30 Fundamental safety instructions 1.5 Residual risks of power drive systems For more information about the residual risks of the drive system components, see the relevant sections in the technical user documentation. Getting Started, 12/2018, 6SL3097-5AG30-0BP0...
-
Page 31: Overview
Overview This manual provides instructions on how to commission a simple SINAMICS S120. To create a sample project the following points are explained: 1. Which hardware components do you need for the sample project? 2. How do you create a simple project in the Startdrive commissioning tool? 3. - Page 32 Overview Getting Started, 12/2018, 6SL3097-5AG30-0BP0...
-
Page 33: Startdrive Commissioning Tool
Startdrive commissioning tool Structure of the user interface 3.1.1 Project view for parameterizing the drive The following figure shows an example of the components of the project view: ① Project navigation (displays the components and project data in a hierarchic structure.) ②... -
Page 34: Project Navigation
Startdrive commissioning tool 3.2 User interface - parameterization 3.1.2 Project navigation Description The project tree is used to display and edit components and project data. After they have been inserted, drives are hierarchically displayed as follows in the project tree: Figure 3-2 Example: Project tree The most important information of a project:... - Page 35 Startdrive commissioning tool 3.2 User interface - parameterization For instance, you can insert an infeed unit from the hardware catalog (see Chapter "Inserting and specifying an infeed unit (Page 72)"). The SINAMICS modules are arranged as follows in the hardware catalog: ①...
-
Page 36: Device View
Startdrive commissioning tool 3.2 User interface - parameterization 3.2.2 Device view Configure the drive line-up in the "Device view". You insert components and edit the DRIVE- CLiQ connections. You can call the device view by double-clicking the "Device configuration" entry in the project tree. The device overview provides a tabular overview of all configured components and their data. -
Page 37: Parameterization Editor
Startdrive commissioning tool 3.2 User interface - parameterization 3.2.3 Parameterization editor The parameterizing editor comprises 2 tabs, under which you can parameterize the drive: ● In the function view, you parameterize the drive using a graphic user interface. The individual screen forms are based on the function diagrams – and include the parameters required. - Page 38 Startdrive commissioning tool 3.2 User interface - parameterization Note Default value If you call interconnection screen forms in the function view, then a series of parameters are already preassigned values. For less experienced users, we recommend that they first work with the preassigned values.
-
Page 39: Parameter View
Startdrive commissioning tool 3.2 User interface - parameterization 3.2.5 Parameter view The "Parameter view" (expert list) provides a clearly organized display of the parameters available for the device. Note Blocked parameters Parameters with the padlock icon cannot be edited or changed OFFLINE. To enter these parameters OFFLINE, use the appropriate screen forms and dialogs in the hardware configuration that you find in the device view. - Page 40 Startdrive commissioning tool 3.2 User interface - parameterization Structure of the parameter view The following figure shows the structure of the parameter view: ① Secondary navigation: Limits the parameter display to the required parameter group. Applies to S120, S150, G150 and G130.
-
Page 41: Inspector Window
Startdrive commissioning tool 3.2 User interface - parameterization Blocked parameters Parameters can be locked in the parameter view to prevent changes. In this case, they are marked with the symbol . Parameters are always locked in the following cases: ● When the parameter has been set by means of a previous basic parameterization (such as in the device configuration) and a parameter change would take effect later with an altered structure. - Page 42 For each information type, there are additional subareas that can be displayed via secondary ② tabs The most important information type for SINAMICS S120 drives is the "Properties" area. The following secondary tabs are displayed in this area: ● General Display of the properties and settings of the drive device, drive object, or the hardware component.
-
Page 43: Device Configuration Detection
Startdrive commissioning tool 3.2 User interface - parameterization 3.2.7 Device configuration detection The results of a detection run are listed in the dialog "Detection of the device configuration". The components are assigned as follows: ● Components are assigned to drive objects. ●... -
Page 44: User Interface - Control Panel
Startdrive commissioning tool 3.3 User interface - Control panel User interface - Control panel The drive control panel (see Chapter "Using the control panel (Page 165)") is used to control and monitor individual drives. You traverse drives with the control panel by specifying values. Depending on the operating mode, these are, for example, speed setpoints. -
Page 45: Information System - Online Help
Startdrive commissioning tool 3.4 Information system - online help Information system - online help 3.4.1 General remarks on the information system The information system of the Startdrive in TIA Portal helps you solve your problems and offers the required help topics at each step of the configuration. While working with the program, you receive the following support: ●... - Page 46 Startdrive commissioning tool 3.4 Information system - online help The information system is divided into the following areas: ● Search area In the search area, you can perform a full text search across all help topics. ● Navigation area You can find the table of contents and favorites in the navigation area. ●...
- Page 47 Startdrive commissioning tool 3.4 Information system - online help Identification of the topics according to the information type The information system provides you with a wide range of information. The help topics are identified by different symbols depending on the type of information they contain. Symbols tell you at a glance what kind of information you have just opened.
-
Page 48: Opening The Information System
Startdrive commissioning tool 3.4 Information system - online help The following figure shows the "Info" tab in the Inspector window with several messages and a question mark symbol: In the same manner, additional support for listed messages can be called in the "Diagnostics"... - Page 49 Startdrive commissioning tool 3.4 Information system - online help Opening help for error messages Numerous actions in the Startdrive are supported with messages in the inspector window. If help on such a message is available, a blue question mark appears behind the message. To view the help for a message, follow these steps: 1.
- Page 50 Startdrive commissioning tool 3.4 Information system - online help Getting Started, 12/2018, 6SL3097-5AG30-0BP0...
-
Page 51: Fundamentals
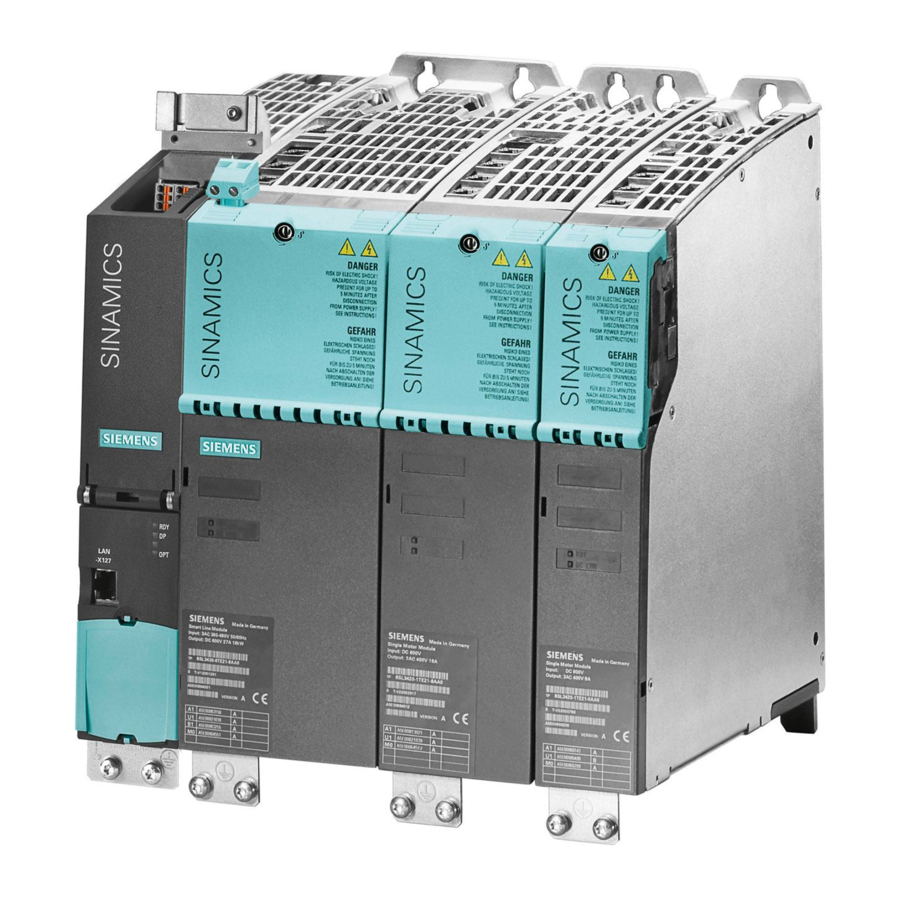
● A programming device (PG/PC) ● Startdrive commissioning tool ● A communication interface, e.g. PROFINET, Ethernet ● Completely wired-up drive line-up (see SINAMICS S120 manuals) A configuration example with booksize components and PROFINET communication is shown in the following figure:... -
Page 52: Safety Instructions For Commissioning
• Observe the safety instructions provided in the hardware documentation. • When assessing the risk, take into account residual risks. Note Please observe the installation guidelines and safety instructions in the SINAMICS S120 Manuals. Getting Started, 12/2018, 6SL3097-5AG30-0BP0... -
Page 53: Bico Interconnections
Further information Detailed information on BICO technology and BICO connections can be found in Section "Basics of the drive system" in the SINAMICS S120 Drive Functions Function Manual. In Startdrive for S120, the parameterization is possible via: ● Parameter view ●... - Page 54 Fundamentals 4.3 BICO interconnections Connectors Abbreviation Symbol Name Description Connector input Can be connected with a connector output as source. Connector Input (signal sink) Connector output Can be used as a source for a connector input. Connector Output (signal source) Invalid BICO interconnections If you click the icon , the message "Invalid BICO wiring"...
-
Page 55: Interconnect Bico Inputs
Fundamentals 4.3 BICO interconnections 4.3.2 Interconnect BICO inputs Use a connection dialog to connect binector or connector inputs. Connecting a signal To make a connection, proceed as follows: 1. Click the binector or connector icon of the signal that you want to connect ( A connection dialog for the selection of the possible parameters opens. -
Page 56: Interconnecting Bico Outputs
Fundamentals 4.3 BICO interconnections 2. Select the parameter that you want to connect. If connectable bits of the parameter are available, they are displayed in a drop-down list. Figure 4-3 BICO dialog: Parameter bits opened 3. Select the parameter bit that you want to connect. 4. - Page 57 Fundamentals 4.3 BICO interconnections Figure 4-4 BICO dialog output The last set signal sink is displayed in the "Selected sinks" field. If a connection was not available previously, the text "No sink selected" is displayed. 2. Activate the check boxes for the parameters that you want to connect. If connectable bits of the parameter are available, they are displayed in a drop-down list.
- Page 58 Fundamentals 4.3 BICO interconnections Figure 4-5 BICO dialog output: Parameter bits opened 3. Activate the check boxes for the parameter bits that you want to connect. 4. Confirm with OK. The connection dialog closes. Result The binector or connector output is connected to the selected parameter (bit). Multiple connections at outputs Several interconnections can be set simultaneously for a parameter, which for reasons of space however, cannot be displayed in the interconnections field.
-
Page 59: Comparing Parameter Settings
Fundamentals 4.4 Comparing parameter settings Comparing parameter settings The actual parameters of a drive object can be compared with another parameter set using the comparison function in the parameter view. You can compare the following values of a parameter: ● Deactivate comparison ●... - Page 60 Fundamentals 4.4 Comparing parameter settings Icon Meaning Online - Offline: The comparison values are different and error-free. Online - Factory setting: The comparison values are different and error-free. The value of at least one subordinate parameter index is different from the factory set- ting.
-
Page 61: Permanently Save The Settings
Fundamentals 4.5 Permanently save the settings Permanently save the settings Saving configurations in the project In Startdrive, settings are predominantly made via screen forms. The complete project must be saved in order that the settings made are permanently active. 1. Click "Save project" in the toolbar. Select the "Project >... -
Page 62: Restoring Factory Settings
Fundamentals 4.6 Restoring factory settings Restoring factory settings In online operation, you can restore the factory settings for the drive control. 1. Establish an online connection (Page 101) to your drive unit. 2. Click the icon in the function view of the active Startdrive project. The factory settings are restored. -
Page 63: Loading Project Data From A Drive Unit
Fundamentals 4.7 Loading project data from a drive unit Loading project data from a drive unit Preconditions ● A project is open. ● The hardware configuration and software to be loaded must be compatible with the Startdrive. If the data on the device was created with a previous program version or with a different configuration software, please make sure they are compatible. - Page 64 Fundamentals 4.7 Loading project data from a drive unit Getting Started, 12/2018, 6SL3097-5AG30-0BP0...
-
Page 65: Commissioning
Commissioning Call Startdrive Note The following procedure is based on the Windows 7 operating system. Operation can deviate slightly for other operating systems Procedure 1. Click on the TIA Portal icon in your user interface. 2. Call the Startdrive/TIA Portal from the start menu of your PC. Startdrive is opened in the TIA Portal. -
Page 66: Commissioning Workflow
Commissioning 5.2 Commissioning workflow Commissioning workflow A drive can be commissioned in two ways: ● Creating a project OFFLINE in Startdrive. The components of the drive are combined OFFLINE in Startdrive. ● Loading the configuration of the drive OFFLINE into the project. The components of the drive are loaded into the project OFFLINE and supplemented as needed. - Page 67 Commissioning 5.2 Commissioning workflow Creating a project by reading out a device configuration The following steps are necessary for commissioning a drive by reading out a device configuration: 1. Create a project with Startdrive (Page 68). 2. Optional: Establish an online connection to the drive. (Page 101) 3.
-
Page 68: Check Lists To Commission Sinamics S
Commissioning 5.3 Check lists to commission SINAMICS S Check lists to commission SINAMICS S Checklist for commissioning booksize power units Carefully observe the content of the following checklist, and read the safety instructions in the manuals before starting any work. Table 5- 1 Checklist for commissioning (booksize) Check... - Page 69 Commissioning 5.3 Check lists to commission SINAMICS S Activity Is the memory card correctly inserted in the Control Unit? Are all necessary components of the configured drive line-up available, installed and connected? Do the temperature monitoring circuits fulfill the specifications of protective separa- tion? Have the DRIVE-CLiQ topology rules been observed? Have the line-side and motor-side power cables been dimensioned and routed in...
-
Page 70: Creating A Project Offline In Startdrive
Commissioning 5.4 Creating a project offline in Startdrive Creating a project offline in Startdrive 5.4.1 Creating a new project 5.4.1.1 Creating a new project (in the Portal view) Precondition You have opened the Startdrive in the TIA Portal (Page 63)application. Creating a new project You can create new projects once the Startdrive application has been opened in the TIA Portal. -
Page 71: Creating A New Project (In The Project View)
Commissioning 5.4 Creating a project offline in Startdrive Figure 5-2 Getting Started 5.4.1.2 Creating a new project (in the Project view) Precondition You have opened the application Startdrive in the TIA Portal (Page 63) in the Project view. Getting Started, 12/2018, 6SL3097-5AG30-0BP0... - Page 72 Commissioning 5.4 Creating a project offline in Startdrive Creating a new project You can create new projects once the Startdrive application has been opened in the TIA Portal. 1. In the Startdrive Project view, select "Project > New". The "Create a new project" dialog box opens. Figure 5-3 Creating a new project 2.
-
Page 73: Inserting The Drive Unit Offline
Commissioning 5.4 Creating a project offline in Startdrive 5.4.2 Inserting the drive unit offline Precondition You have created a project (Page 69) or have opened an existing project. Inserting a drive unit via the project view Proceed as follows to insert new drive units in the project view: 1. -
Page 74: Inserting An Infeed Unit
Commissioning 5.4 Creating a project offline in Startdrive Note Comparing and possibly changing version numbers When creating a drive device, the current firmware version is always suggested. It is possible that the suggested firmware version does not match the version number of your memory card in the drive device. - Page 75 Commissioning 5.4 Creating a project offline in Startdrive Procedure You can add an infeed via the hardware catalog. 1. Open the "Line Modules" entry in the hardware catalog. Active Line Modules, Basic Line Modules and Smart Line Modules can be selected. 2.
- Page 76 Commissioning 5.4 Creating a project offline in Startdrive 4. In the device view, click the infeed. Make sure that you click in the white area of the infeed. 5. In the secondary navigation of the inspector window, select "Line Module - Selection – ALM"...
-
Page 77: Making Detailed Settings
Commissioning 5.4 Creating a project offline in Startdrive 3. Drag a non-specified infeed unit into the device view in the light gray area of the existing infeed unit. Figure 5-9 Connect the infeed in parallel Then also specify the infeed unit connected in parallel. You can connect further infeed units in parallel in the same manner. - Page 78 Commissioning 5.4 Creating a project offline in Startdrive When first switched on with a new/modified network, an automatic controller setting must be implemented using the line and DC link identification routine (p3410). While the identification routine is running, it is not permissible for other loads to be switched in/switched out. Procedure 1.
-
Page 79: Inserting A Motor Module Or Power Module
Commissioning 5.4 Creating a project offline in Startdrive Set the desired device supply voltage here (see chapter "Line data/operating mode (Page 127)"). Make the other entries depending on the infeed type. If you have used a Basic Line Module (BLM) or Smart Line Module (SLM) as infeed unit, then here, the detailed settings have now been completed. -
Page 80: Inserting And Specifying A Motor Module
Commissioning 5.4 Creating a project offline in Startdrive Note When you use Power Modules, it is usually possible to dispense with an infeed. General The procedure for creating and configuring a device in the device configuration of Startdrive is almost identical for Motor Modules and Power Modules. The drive device configuration requires at least one of these modules. - Page 81 Commissioning 5.4 Creating a project offline in Startdrive 3. Drag the unspecified Motor Module into the device view. Figure 5-13 Motor Module inserted The DRIVE-CLiQ connection is automatically established. 4. Click the Motor Module in the device view. Ensure that you click in the white area of the Motor Module.
-
Page 82: Inserting And Specifying A Power Module
Commissioning 5.4 Creating a project offline in Startdrive 6. In the Inspector window, select entry "Motor Module - Selection - xxx". Figure 5-14 Motor Module specified All Motor Modules for the "High dynamic (servo)" drive object type (default setting for the 1st call) are displayed in the list. - Page 83 Commissioning 5.4 Creating a project offline in Startdrive 1. Open the "Power Modules" item in the hardware catalog. The following Power Modules are available for selection: – AC Power Module 2. Select the required, unspecified Power Module in the device overview. Figure 5-15 Power Module selected 3.
-
Page 84: Making Detailed Settings
Commissioning 5.4 Creating a project offline in Startdrive 6. In the Inspector window, select entry "Power Module - Selection - xxx". Figure 5-17 Power Module specified All Power Modules for the "High dynamic (servo)" drive object type (default setting for the 1st call) are displayed in the list. - Page 85 Commissioning 5.4 Creating a project offline in Startdrive ● Motor Module additional data / Power Module additional data Allows filter settings for modules of the "VECTOR" type drive object. The procedure for detail settings is identical for Motor Modules and Power Modules. Procedure Detailed settings are shown below, using a Power Module as an example.
-
Page 86: Connecting Several Modules In Parallel
Commissioning 5.4 Creating a project offline in Startdrive Additional display or entry fields are now unhidden depending on the respective filter selected. Figure 5-19 Example: Power Module additional data 6. Now parameterize the associated detailed settings for the selected filter. Result You have performed the detail settings for a selected Power Module or Motor Module. -
Page 87: Changing The Drive Object Type
Commissioning 5.4 Creating a project offline in Startdrive 3. Drag a non-specified Motor Module into the device view, into the light gray area of the existing Motor Module. Figure 5-20 Connecting Motor Modules in parallel Then also specify the Motor Module connected in parallel (refer to Chapter "Inserting and specifying a Motor Module (Page 78)"). - Page 88 Commissioning 5.4 Creating a project offline in Startdrive Setting the drive object type in the Motor Modules or Power Modules list 1. If the device configuration is not active in your Startdrive project, call it via the project tree. 2. Select the desired drive axis in the device configuration. 3.
-
Page 89: Inserting A Motor
Commissioning 5.4 Creating a project offline in Startdrive 4. In the Inspector window, select the "General" menu. Figure 5-22 Changing the drive object type; Motor Module as example 5. Select the desired type from the "Drive object type" drop-down list (generally "Universal (vector)"... -
Page 90: Inserting And Specifying Motors From The Motor List
Commissioning 5.4 Creating a project offline in Startdrive ● An infeed is inserted. Note If you add the infeed unit at a later point in time, then you must manually wire the "infeed unit" component with the other components. ● An encoder is inserted (optional). 5.4.5.2 Inserting and specifying motors from the motor list Procedure... -
Page 91: Inserting And Specifying Motors That Are Missing From The Motor List
Commissioning 5.4 Creating a project offline in Startdrive Result The motor is inserted and specified. If you have selected a motor without encoder, add an encoder and an encoder evaluation in the next step. 5.4.5.3 Inserting and specifying motors that are missing from the motor list If you want to insert, specify and manage motors in your device configuration, which are not contained in the motor list, you can enter the most important motor data, such as the rating plate values of the motor, manually in the Inspector window. -
Page 92: Making Detailed Settings
Commissioning 5.4 Creating a project offline in Startdrive The additionally activated subareas are displayed in the Inspector window under "Motor details". Figure 5-23 Motor specified 8. Acquire the required motor data of the inserted motor. Note The pink input fields are mandatory input fields. If appropriate values are not entered in these fields, then the device configuration cannot be completed. - Page 93 Commissioning 5.4 Creating a project offline in Startdrive Procedure 1. Select the motor in the device view and open the Inspector window. 2. In the Inspector window, select the "Motor details > Rating plate values" menu. In the screen form, the following setting options are displayed: Figure 5-24 Motor details rating plate values 3.
-
Page 94: Inserting Measuring Systems
This is the reason that high quality encoders must be used for motor encoders. – Siemens motors that have already been configured are created in the device view with the matching encoder and the encoder evaluation. -
Page 95: Inserting An Encoder
Note Encoders from the hardware catalog SIEMENS in-house encoders which are listed in the hardware catalog no longer have to be parameterized as they are already preassigned the appropriate settings. In contrast, third-party encoders must be parameterized as described below. - Page 96 Commissioning 5.4 Creating a project offline in Startdrive Utilizing this procedure, you insert the encoder after the motor (see Chapter "Inserting and specifying motors from the motor list (Page 88)"). Procedure Proceed as follows to insert and specify an encoder in your device configuration: 1.
-
Page 97: Specifying The Encoder Evaluation
Commissioning 5.4 Creating a project offline in Startdrive Adding additional encoders If you require additional encoders for your device configuration, then you can configure these in the same way. These encoders are then normally used as machine encoders. 5.4.6.3 Specifying the encoder evaluation Precondition You have already specified an encoder. -
Page 98: Making Detailed Settings
Commissioning 5.4 Creating a project offline in Startdrive 5.4.6.4 Making detailed settings You can configure the following encoder details for measuring systems during commissioning: ● Actual value processing ● Encoder details such as encoder type, incremental tracks, gear ratio, etc. Procedure 1. -
Page 99: Inserting Additional System Components
Commissioning 5.4 Creating a project offline in Startdrive 4. In the Inspector window, select the menu "Measuring system details" again. In the screen form, the following setting options are displayed: Figure 5-30 Encoder details 5. Make the detailed settings for the encoder in the white fields. The gray fields are automatically corrected in accordance with your settings. -
Page 100: Adding A Cbe20 Communication Board
Commissioning 5.4 Creating a project offline in Startdrive 5.4.7.1 Adding a CBE20 Communication Board Preconditions ● A project has been created. ● A Control Unit is contained in the device configuration. ● No Terminal Board TB30 is contained in the device configuration. TB30 and CBE20 cannot be created simultaneously in the device configuration. -
Page 101: Adding A Terminal Board
Commissioning 5.4 Creating a project offline in Startdrive – TM120 Terminal Module – TM150 Terminal Module 2. Select the Terminal Module in the device overview. 3. Drag the Terminal Module to the device view. The DRIVE-CLiQ connections are drawn automatically. 5.4.7.3 Adding a Terminal Board Terminal Board TB30 is a terminal module with which it is possible to expand the interfaces... - Page 102 Depending on the type and design, a maximum of 3 VSMs (e.g. Active Line Modules in Chassis design) can be added to a Line Module via drag & drop. You can find further information on the rules for operating multiple VSMs per Line Module in the SINAMICS S120 Function Manual Drive Functions.
-
Page 103: Establishing An Online Connection To The Drive Unit
Commissioning 5.5 Establishing an online connection to the drive unit Establishing an online connection to the drive unit 5.5.1 Overview Interfaces for the online connection 2 interfaces are available for CU320-2 PN Control Units, via which you can go online with the drive: ●... -
Page 104: Using An Online Connection Via The Ethernet Interface
Commissioning 5.5 Establishing an online connection to the drive unit Figure 5-31 CU320-2 PN interfaces Selecting the preferred PG/PC interface If you prefer to use a specific network interface of your PG/PC to establish an online connection, you can preset this interface. 1. - Page 105 Commissioning 5.5 Establishing an online connection to the drive unit Quick search via "Online access" In order to obtain a fast overview, you can start a search in "Online access" at the required interface. If the wiring to your drive is error-free and you have wired the correct drive (LED flashing for checking), the drive is displayed with the appropriate IP address.
- Page 106 Commissioning 5.5 Establishing an online connection to the drive unit 4. If no interface has yet been preset, select the "PG/PC interface" for your PC in the drop- down list. 5. Select the required "Connection to interface/subnet" from the drop-down list. For Ethernet/IE, this is X127 of the CU320-2 PN.
-
Page 107: Alternative: Loading The Configuration Of The Drive Into The Project
Commissioning 5.6 Alternative: Loading the configuration of the drive into the project Alternative: Loading the configuration of the drive into the project 5.6.1 Uploading a device as a new station Precondition ● There is a physical LAN connection between the drive and the PG/PC. ●... -
Page 108: Revising The Configuration
Commissioning 5.6 Alternative: Loading the configuration of the drive into the project 4. Select the entry "Accessible device [169.254.11.22]" and right-click in the selected line. The list of the possible options/commands appears. 5. Select the command "Upload device as new station". Result The configuration is loaded from the drive into the project. - Page 109 Commissioning 5.6 Alternative: Loading the configuration of the drive into the project Result ● The component is displayed in the device view as specified (the area now has a dark color). The data are displayed accordingly in the device overview. ●...
-
Page 110: Alternatively: Creating A Project With A Device Configuration Derived From The Hardware
Commissioning 5.7 Alternatively: Creating a project with a device configuration derived from the hardware Alternatively: Creating a project with a device configuration derived from the hardware 5.7.1 Deriving the hardware device configuration Preconditions ● A project has been created. ● The Control Unit is inserted in the device configuration. ●... - Page 111 Commissioning 5.7 Alternatively: Creating a project with a device configuration derived from the hardware Figure 5-34 Example: Device configuration detection - all components assigned All components found in the actual topology of the drive unit are displayed in an overview (for details, see Section "Device configuration detection (Page 41)").
- Page 112 Commissioning 5.7 Alternatively: Creating a project with a device configuration derived from the hardware If you want to set another motor control, proceed as follows: 1. Activate the option of the required drive object type in the dialog header. – Universal (vector) = VECTOR drive object type –...
-
Page 113: Transferring The Determined Device Configuration To Startdrive
Commissioning 5.7 Alternatively: Creating a project with a device configuration derived from the hardware Renaming the component 1. Select the components which are to be renamed. 2. Call the "Rename" shortcut menu. 3. Enter a new name for the component. Connecting components in parallel The parallel connection view supports you in the parallel connection of components. - Page 114 Commissioning 5.7 Alternatively: Creating a project with a device configuration derived from the hardware Creating the component topology in Startdrive After you have checked and, if required, corrected the topology determined in the configuration, you can transfer this topology to a Startdrive project. 1.
-
Page 115: Revising The Configuration
Commissioning 5.7 Alternatively: Creating a project with a device configuration derived from the hardware 5.7.3 Revising the configuration Optimally, all components are transferred specified to the device configuration during an automatic configuration and do not have to be subsequently specified or supplemented. If this is the case, a message is shown in the message display that the automatic device configuration has been performed without error. -
Page 117: Performing Basic Parameterization
Chapter "Web server" of the SINAMICS S120 Function Manual Drive Functions. You configure the web server in the Startdrive commissioning tool in the "Web server"... - Page 118 2. Then save the project to accept the settings. Restricting web server access to just secure connections Using the default configuration of the web server, you can access the SINAMICS S120 converter via an HTTP connection or via an encrypted HTTPS connection. Using the configuration, access can be restricted so that only a secure HTTPS connection is possible.
-
Page 119: Supported Browsers
6.1.1.2 Supported browsers You can display the content of the web server either on a PC/laptop screen, a tablet PC or a smart phone. The web server integrated in SINAMICS S120 converters supports the following browsers: Commissioning device Operating system... -
Page 120: Setting Or Changing Web Server User Accounts
☐ "Drive control > Parameters > Basic parameterization > Web server" For SINAMICS S120, the rights of both user accounts "SINAMICS" and "Administrator" are permanently predefined and cannot be changed by users. The user "Administrator" has full access rights by default. However, the standard "SINAMICS"... - Page 121 Performing basic parameterization 6.1 Control Unit Enabling the user "SINAMICS" and/or "Administrator" The "SINAMICS" user and the "Administrator" user can be enabled with their own specific rights. You can also set whether password protection will be active for the "SINAMICS" user. To enable a user and activate a password, proceed as follows: 1.
- Page 122 Performing basic parameterization 6.1 Control Unit Deleting the password for user "SINAMICS" You can only use this function ONLINE. You can delete the password of user "SINAMICS" as follows: 1. Click the "Delete password" button. The "Delete password" dialog opens. Figure 6-3 Deleting the password 2.
-
Page 123: Configuring Inputs/Outputs Of The Control Unit
Performing basic parameterization 6.1 Control Unit 3. Enter the new password in the "New password" input field. Pay attention to upper and lower case. 4. Repeat the password in the "Confirm password" field. For security reasons, the password entries displayed in the input fields are encrypted. The entry is checked. -
Page 124: Bidirectional Digital Inputs/Outputs
Performing basic parameterization 6.1 Control Unit 6.1.2.2 Bidirectional digital inputs/outputs ☐ "Drive control > Parameters > Inputs/outputs > Bidirectional digital inputs/outputs" The bidirectional inputs/outputs of terminals X122 and X132 on the CU (DO1) can be used by a drive object as well as by a higher-level controller (resource sharing). The assignment to a terminal is defined by means of BICO interconnections which are either connected to a controller via the DO1 telegram p0922 = 39x or to a drive object. -
Page 125: Measuring Sockets
Performing basic parameterization 6.1 Control Unit 1. Select the digital input/output on the required terminal. 2. Interconnect the signal source of the digital input (8 to 15). 3. Proceed as follows to change the digital input into a digital output: –... - Page 126 Function diagrams (see SINAMICS S120/S150 List Manual) Diagnostics - measuring sockets (T0, T1, T2) • 8134 Overview of important parameters (see SINAMICS S120/S150 List Manual) Adjustable parameters CI: Measuring sockets signal source • p0771[0...2] Measuring sockets characteristic curve value x1 •...
- Page 127 Performing basic parameterization 6.1 Control Unit Measuring sockets characteristic curve value y1 • p0778[0...2] Measuring sockets characteristic curve value x2 • p0779[0...2] Measuring sockets characteristic curve value y2 • p0780[0...2] Measuring sockets offset • p0783[0...2] Measuring sockets limitation on/off • p0784[0...2] Display parameters Measuring sockets signal to be output •...
-
Page 128: Infeed Unit
Performing basic parameterization 6.2 Infeed unit Infeed unit 6.2.1 Available infeed units Infeed units (Line Modules) include the central line infeed for the DC link. Various infeed units are available to address various application scenarios: Basic parameterization of the infeed unit Define the following data in the basic parameterization of the infeed unit: ●... -
Page 129: Line Data / Operating Mode
Performing basic parameterization 6.2 Infeed unit Function module Explanation Supplementary closed-loop control (r0108.3) For applications with asymmetrical line voltages: A negative se- quence system current controller is used to balance the line cur- rents and reduce the DC link ripple. For applications with resonance effects in the current or the filter voltage (e.g. - Page 130 Performing basic parameterization 6.2 Infeed unit Figure 6-5 Example: Line data/operating mode for an Active Line Module The representation of this screen form is dependent upon the respective Line Module being used: Setting Explanation Device supply volt- DC-link voltage The value in this field (p3510) is deter- setpoint default mined automatically from the defined setting...
-
Page 131: Enable Logic
Performing basic parameterization 6.2 Infeed unit Selecting the operating mode for ALM The operating mode depends on the motor voltage. Example: The DC-link voltage must be lower in the USA. For this reason, you can switch the mode of an Active Line Module in order to be able to use it as a Smart Line Module (Smart Mode). - Page 132 Performing basic parameterization 6.2 Infeed unit The line contactor can be controlled with the following drive objects via r0863.1: ● For the infeed drive object ● For the SERVO and VECTOR drive objects Parameterizing the switch-on delay and the monitoring time This dialog shows the enable interconnection of the line contactor.
-
Page 133: Drive Axes
Performing basic parameterization 6.3 Drive axes Drive axes 6.3.1 SERVO drives 6.3.1.1 Basic parameterization of the drive axes During the basic configuration, not all of the available options are displayed in the drop-down list "Basic parameterization". Options are either not displayed at all (e.g. mechanical options), or are shown grayed out. -
Page 134: Function Modules
Performing basic parameterization 6.3 Drive axes 6.3.1.2 Function modules ☐ "Drive axis > Parameters > Basic parameterization > Function modules" When required, during the basic parameterization you can switch-in various function modules for the selected drive axis. Note You can only activate and deactivate function modules OFFLINE. Note The display of the function modules that can be activated is dynamic and depends on the selected drive axis and the configuration of this drive axis. -
Page 135: Control Mode
Performing basic parameterization 6.3 Drive axes Function module Explanation Extended stop and retract (r0108.9) In the "Setpoint channel" area, activates the "Extended stop and retract" func- tion. Cogging torque compensation (r0108.22) In the parameter view, activates all parameters of the "Cogging torque com- pensation"... -
Page 136: Limits
Performing basic parameterization 6.3 Drive axes Precondition ● You have completely specified and configured the motor used in the device configuration of the drive axis. Note This basic parameterization cannot be performed without having completed this full configuration. Selecting the control type 1. -
Page 137: Drive Settings
Performing basic parameterization 6.3 Drive axes 6.3.1.5 Drive settings ☐ "Drive axis > Parameters > Basic parameterization > Drive settings" No entries are required on this page for motors with DRIVE-CLiQ interface or motors of the motor database. Precondition ● You have completely specified and configured the motor used in the device configuration of the drive axis. -
Page 138: Sampling Times/Pulse Frequency
Performing basic parameterization 6.3 Drive axes – [2] Calculation without equivalent circuit diagram data The equivalent circuit diagram data entered during the parameter assignment of the motor is not changed. The equivalent circuit diagram data is not calculated. 2. After the calculation type has been set (exception: "No calculation"), you can confirm the calculation if this has not been done already (red status symbol). -
Page 139: Actual Value Processing
Note You cannot set the values arbitrarily. The rules for setting the sampling times can be found in Chapter "System rules, sampling times and DRIVE-CLiQ wiring" of the SINAMICS S120 Function Manual Drive Functions. Enter the sampling times for the internal control loops. - Page 140 Performing basic parameterization 6.3 Drive axes Preparing actual values To transfer the encoder position from the drive to an open-loop control / position control, the "Cyclical actual value" = Gn_XIST1 and "Absolute actual value" = Gn_XIST2 (n = 1 or 2, number of the encoder) data is used in a telegram.
- Page 141 1. Enter here the fine resolution of the encoder used in bits. The pre-setting is 11 bits and is sufficient for all Siemens motor encoders. 2. The multiturn resolution is set to 9 bits for all Siemens motor encoders and does not need to be adjusted.
- Page 142 Performing basic parameterization 6.3 Drive axes Figure 6-8 Encoder actual values X_IST1 It is important that the multiturn information is still sufficient to record all revolutions which are important for determining the position at start-up. If all values lie outside the quadrants, uncontrolled movements of the axis can occur.
-
Page 143: Rotor Position Synchronization
Performing basic parameterization 6.3 Drive axes Inverting values As the mounting direction of the encoder (at the right- or left-hand side) cannot be defined, but depends on the specific motor being used (linear motor, torque motor, etc.), where appropriate, invert the position and the speed in order to reverse the direction. 1. - Page 144 Please also refer to the description of the pole position identification provided in the " SINAMICS S120 Function Manual Drive Functions". The supplementary conditions for using the individual techniques are also described in the appropriate chapter. Determining the suitable technique for the pole position identification...
- Page 145 • Ensure that this technique is only performed by appropriately trained and experienced technical experts. Note Contact the SIEMENS service organization if you are not familiar and trained in using this technique. – [1] Saturation-based 1st harmonic – [4] Saturation-based 2-stage...
-
Page 146: Mechanical System
Performing basic parameterization 6.3 Drive axes – [10] Motion-based The motion-based PolID technique is the preferred technique if the motor can move. The motor traverses left and right along a defined path. If both paths are identical, the pole position identification (PolID) was successful. –... - Page 147 Performing basic parameterization 6.3 Drive axes Parameterizing encoder selection for position control An encoder is assigned to the position control during commissioning. This encoder setting is shown in a drop-down list at the top right in the "Mechanical system" screen form. You can change the encoder assignment in this screen form before parameterizing the position control.
- Page 148 Performing basic parameterization 6.3 Drive axes The LU per load revolution should be selected as high as possible. In this way, a better dynamic response can be achieved. If the values for p2506 are too low, this can result in jumps when speed precontrol is activated.
-
Page 149: Enable Logic
Performing basic parameterization 6.3 Drive axes The encoder resolution is too low here to convert the chain links to a linear SI unit without rounding-off errors having an effect on the modulo correction. A chain link must therefore be taken as target variable. Target variable to be controlled: 1 chain link 40 chain links travelled per load revolution. -
Page 150: Vector Drives
Performing basic parameterization 6.3 Drive axes 6.3.2 VECTOR drives 6.3.2.1 Basic parameterization of the drive axes During the basic configuration, not all of the available options are displayed in the drop-down list "Basic parameterization". The following table lists the available options for the basic parameterization of a VECTOR drive axis or axes –... - Page 151 Performing basic parameterization 6.3 Drive axes The following table provides an overview of the function modules that can be used. In addition to the individual function modules, the table includes an explanations of how each function module can be used. Function module Explanation S120...
-
Page 152: Control Mode
Performing basic parameterization 6.3 Drive axes Function module Explanation S120 S150 G150 G130 VECT Moment of inertia estimator In the "Open-loop/closed-loop control" area, adds (r0108.10) the "Speed setpoint filter" function. The moment of inertia estimator can now be activated in the "Pre- control"... -
Page 153: Limits
Performing basic parameterization 6.3 Drive axes ● U/f control for drive requiring a precise frequency and FCC ● U/f control with parabolic characteristic and ECO ● Operation with braking resistor ● I/f control with fixed current ● U/f control with independent voltage setpoint ●... -
Page 154: Optimization Runs
Performing basic parameterization 6.3 Drive axes Number Designation Description p1120 Ramp-up time Ramp-up/ramp-down time always refers to the time interval from motor standstill to the set maximum speed (without using roundings). p1121 Ramp-down time p1135 OFF3 ramp-down The OFF3 ramp-down time is effective from the maximum speed down to the motor time standstill. - Page 155 Performing basic parameterization 6.3 Drive axes Setting the technological application and selection of the motor data identification 1. Select one of the following applications in the "Technology application" (p0500) drop- down list: – [0] Standard drive (VECTOR) – [1] Pumps and fans –...
-
Page 156: Actual Value Processing
Performing basic parameterization 6.3 Drive axes Procedure Proceed as follows to finalize calculating motor and controller parameters: 1. In the "Controller data calculation" field, click on "Finish drive parameterization". The automatic calculation of motor and controller parameters is completed and the following message displayed. - Page 157 Performing basic parameterization 6.3 Drive axes Fine resolution p0419 (XIST_1) Encoders with their sampling mechanism provide significantly more precise information than that determined with the pulse counts. They can be evaluated by the drive unit and transferred as fine resolution to the controller. Change the fine resolution, for example, when increased precision is required for machining a workpiece.
- Page 158 1. Enter here the fine resolution of the encoder used in bits. The pre-setting is 11 bits and is sufficient for all Siemens motor encoders. 2. The multiturn resolution is set to 9 bits for all Siemens motor encoders and does not need to be adjusted.
- Page 159 Performing basic parameterization 6.3 Drive axes Precondition ● You have completely specified and configured the motor used in the device configuration of the drive axis. Note This basic parameterization cannot be performed without having completed this full configuration. Extrapolating position values This parameter is displayed only for pure SSI encoders, namely, for encoders without HTL/TTL or SIN/COS tracks.
-
Page 160: Mechanical System
Performing basic parameterization 6.3 Drive axes Virtual multiturn resolution With a rotary absolute encoder (p0404.1 = 1) with activated position tracking (p0411.0 = 1), the virtual multiturn resolution (p0412) can be used to enter a virtual multiturn resolution. This makes it possible to generate a virtual multiturn encoder (r0483) from a singleturn encoder. - Page 161 Performing basic parameterization 6.3 Drive axes 3. Enter the load revolutions for the gear ratio between the motor shaft and load shaft in the "Number of load revolutions" (p2505) field. 4. Enter the neutral length unit LU per load revolution in the "LU per load revolution" (p2506) field.
- Page 162 Performing basic parameterization 6.3 Drive axes 10 mm distance are travelled per load revolution. According to the encoder resolution, maximum 15,000 LU/10 mm = 1,500 LU per mm can be defined. We will select 1,000 LU per mm (1 LU = 1 µm). 10 mm per revolution results in 10,000 per revolution: ●...
-
Page 163: Enable Logic
Performing basic parameterization 6.3 Drive axes 6.3.2.8 Enable logic ☐ "Infeed unit > Parameters > Basic parameterization > Enable logic" If, when commissioning, you interconnected telegrams, then these interconnections are displayed in the "Enable logic" screen form. Further specification is not required. If, when commissioning, you did not specify any telegram types, then you must interconnect the required signal sources in the "Enable logic"... - Page 164 Performing basic parameterization 6.3 Drive axes Getting Started, 12/2018, 6SL3097-5AG30-0BP0...
-
Page 165: Loading The Project To The Target Device
Loading the project to the target device In order to set up your project, you need to load the project data you generated offline on the connected drive units. Project data are generated, for example: ● When configuring the hardware ●... - Page 166 Loading the project to the target device 3. Check the messages in the "Load preview" dialog. Activate the required actions in the "Action" column to perform a secure download. Figure 7-1 Example: Load preview As soon as downloading becomes possible, the "Load" button is enabled. 4.
-
Page 167: Commissioning A Drive
Commissioning a drive Using the control panel ☐ "Drive axis > Commissioning > Control panel" Traverse the drive and test the settings that have already been made with the control panel (see also the overview in Section "Drive control panel (Page 42)"). WARNING Non-observance of the safety instructions for the drive control panel The safety shutdowns from the higher-level controller have no effect with this function. - Page 168 Commissioning a drive 8.1 Using the control panel Activating the control panel When an ONLINE connection has been established, the bar in the header area is shown in color. The control elements are grayed-out – with the exception of the "Activate" button. The remaining control elements become active after you have activated the control panel and set the enables.
- Page 169 Commissioning a drive 8.1 Using the control panel Deactivating the control panel When you deactivate the control panel, you return the master control. To deactivate the control panel, proceed as follows: 1. Click the "Off" button to switch off the drive. This is a basic requirement for deactivating the control panel.
-
Page 170: Traversing The Drive With Speed Specification
Commissioning a drive 8.2 Traversing the drive with speed specification Traversing the drive with speed specification After you have set the drive enables, in the "Control Panel" screen form specify the operating mode and switch on the motor. Specifying the setpoint To specify the setpoint, proceed as follows: 1. -
Page 171: Appendix
Appendix List of abbreviations Note The following list of abbreviations includes all abbreviations and their meanings used in the entire SINAMICS family of drives. Abbreviation Source of abbreviation Meaning A… Alarm Warning Alternating Current Alternating current Analog Digital Converter Analog digital converter Analog Input Analog input Active Interface Module... - Page 172 Appendix A.1 List of abbreviations Abbreviation Source of abbreviation Meaning C… Safety message Controller Area Network Serial bus system Communication Board CAN Communication Board CAN Communication Board Ethernet PROFINET communication module (Ethernet) Compact Disc Compact disc Command Data Set Command data set CF Card CompactFlash Card CompactFlash card...
- Page 173 Appendix A.1 List of abbreviations Abbreviation Source of abbreviation Meaning DRIVE-CLiQ DRIVE-CLiQ DRAM Dynamic Random Access Memory Dynamic Random Access Memory DRIVE-CLiQ Drive Component Link with IQ Drive Component Link with IQ Dynamic Servo Control Dynamic Servo Control Doppelsubmodul Double submodule Digital Time Clock Timer EASC...
- Page 174 Appendix A.1 List of abbreviations Abbreviation Source of abbreviation Meaning FPGA Field Programmable Gate Array Field Programmable Gate Array Firmware Firmware Gigabyte Gigabyte Global Control Global control telegram (broadcast telegram) Ground Reference potential for all signal and operating voltages, usually defined as 0 V (also referred to as M) Gerätestammdatei Generic Station Description: Describes the fea-...
- Page 175 Appendix A.1 List of abbreviations Abbreviation Source of abbreviation Meaning Kreuzweiser Datenvergleich Data cross-check Know-how protection Know-how protection Kinetische Pufferung Kinetic buffering Proportional gain KTY84-130 Temperature sensor Symbol for inductance Light Emitting Diode Light emitting diode Linearmotor Linear motor Lageregler Position controller Least Significant Bit Least significant bit...
- Page 176 Appendix A.1 List of abbreviations Abbreviation Source of abbreviation Meaning Nullmarke Zero mark Normally Open (contact) NO contact Netzstromrichter Line-side converter Network Time Protocol Standard for synchronization of the time of day NVRAM Non-Volatile Random Access Memory Non-volatile read/write memory Open Architecture Software component which provides additional functions for the SINAMICS drive system...
- Page 177 Appendix A.1 List of abbreviations Abbreviation Source of abbreviation Meaning Power Supply Power supply Power Stack Adapter Power Stack Adapter PT1000 Temperature sensor Positive Temperature Coefficient Positive temperature coefficient Point To Point Point-to-point Pulse Width Modulation Pulse width modulation Prozessdaten Process data r…...
- Page 178 Safe stop Safety Integrated Safety Integrated Safety Info Channel Safety Info Channel Safety Integrity Level Safety Integrity Level SITOP Siemens power supply system Safely-Limited Acceleration Safely limited acceleration Smart Line Module Smart Line Module Safely-Limited Position Safely Limited Position Safely-Limited Speed...
- Page 179 Appendix A.1 List of abbreviations Abbreviation Source of abbreviation Meaning Terminal Board Terminal Board Technology Extension Software component which is installed as an addi- tional technology package and which expands the functionality of SINAMICS (previously OA applica- tion) Totally Integrated Automation Totally Integrated Automation Transport Layer Security Encryption protocol for secure data transfer (previ-...
- Page 180 Appendix A.1 List of abbreviations Abbreviation Source of abbreviation Meaning Zero Mark Zero mark Zustandswort Status word Getting Started, 12/2018, 6SL3097-5AG30-0BP0...
-
Page 181: Documentation Overview
Appendix A.2 Documentation overview Documentation overview Getting Started, 12/2018, 6SL3097-5AG30-0BP0... -
Page 182: Shortcut Menus And Icons In Startdrive
Appendix A.3 Shortcut menus and icons in Startdrive Shortcut menus and icons in Startdrive A.3.1 Function calls project view A.3.1.1 Project navigation Shortcut menu The shortcut menu of a drive in the project navigator contains the following entries: Menu item Icon (button) in the toolbar Description Open... -
Page 183: Bico Interconnections
Appendix A.3 Shortcut menus and icons in Startdrive A.3.2 BICO interconnections The following icons are used for BICO interconnections: Icon Meaning Allows the BICO interconnection of a binector input. The interconnection dialog is opened by clicking on the icon. Allows the BICO interconnection of a binector output. The interconnection dialog is opened by clicking on the icon. - Page 184 Appendix A.3 Shortcut menus and icons in Startdrive Getting Started, 12/2018, 6SL3097-5AG30-0BP0...
-
Page 185: Index
Index Changeover switch Position 0, 181 Position 1, 181 Chassis, 66 Analog output, 123 Commissioning Checklist booksize, 66 Checklist chassis, 66 Creating a Startdrive project, 68, 69 Basic configuration Deriving the hardware device configuration, 108 Web server, 115 Inserting a Motor Module, 77 Basic parameter assignment Inserting a Power Module, 77 Calculation of the controller data (SERVO), 135... - Page 186 Index Drive unit Inserting offline, 71 Limits SERVO, 134 VECTOR, 151 Line contactor control, 129 Enable logic Line Module SERVO, 147 Detailed setting, 75 VECTOR, 161 Line protection, 67 Encoder Power unit, 67 Detailed settings, 96 Inserting, 94 Overview, 92 Encoder evaluation, 95 Measuring socket, 123 Measuring system...
- Page 187 Index Project data Terminal Module Download to drive units, 163 Insert, 98 Loading from a drive unit, 61 Project view Startdrive, 31 Properties, 39 Uploading Pulse frequency From a drive unit, 61 SERVO, 136 Loading project data in the drive unit, 163 Sampling times VECTOR, 77 SERVO, 136...
Need help?
Do you have a question about the SINAMICS S120 and is the answer not in the manual?
Questions and answers