Table of Contents
Advertisement
Quick Links
Download this manual
See also:
Operating Manual
CAUTION
This laser printer is a class 1 laser product that complies with 21CFR 1040.10 and 1040.11 of the
CDRH standard and IEC825. This means that this machine does not produce hazardous laser
radiation. The use of controls, adjustments or performance of procedures other than those specified
herein may result in hazardous radiation exposure.
This laser radiation is not a danger to the skin, but when an exact focusing of the laser beam is
achieved on the eye's retina, there is the danger of spot damage to the retina.
The following cautions must be observed to avoid exposure of the laser beam to your eyes at the time
of servicing.
1) When a problem in the laser optical unit has occurred, the whole optical unit must be exchanged
as a unit, not as individual parts.
2) Do not look into the machine with the main switch turned on after removing the developer unit,
toner cartridge, and drum cartridge.
3) Do not look into the laser beam exposure slit of the laser optical unit with the connector connected
when removing and installing the optical system.
4) The upper frame and the middle frame contains the safety interlock switch.
Do not defeat the safety interlock by inserting wedges or other items into the switch slot.
CLASS 1
LASER PRODUCT
LASER KLASSE 1
LASER WAVE – LENGTH : 780 ± 10nm
Pulse times : 45 ± 2µs/7mm
Out put power : 0.35mW ± 0.05mW
SERVICE MANUAL
FIELD MANUAL
CAUTION
INVISIBLE LASER RADIATION,
WHEN OPEN AND INTERLOCKS DEFEATED.
AVOID EXPOSURE TO BEAM.
VORSICHT
UNSICHTBARE LASERSTRAHLUNG,
WENN ABDECKUNG GEÖFFNET UND
SICHERHEITSVERRIEGELUNG ÜBERBRÜCKT.
NICHT DEM STRAHL AUSSETZEN.
SHARP CORPORATION
CODE: 00ZJX8200FM1E
COLOR LASER
PRINTER
JX-8200
MODEL
AVATTAESSA JA SUOJALUKITUS
OHITETTAESSA OLET ALTTIINA
NÄKYMÄTTÖMÄLLE LASERSÄTEILYLLE ÄLÄ
KATSO SÄTEESEEN.
ADVARSEL
USYNLIG LASERSTRÅLNING VED ÅBNING, NÅR
SIKKERHEDSBRYDERE ER UDE AF
FUNKTION. UNDGÅ UDSAETTELSE FOR
STRÅLNING.
VARNING !
OSYNLIG LASERSTRÅLNING NÄR DENNA DEL
ÄR ÖPPNAD OCH SPÄRREN ÄR URKOPPLAD.
BETRAKTA EJ STRÅLEN. – STRÅLEN ÄR
FARLIG.
This document has been published to be used
for after sales service only.
The contents are subject to change without notice.
VARO !
Advertisement
Table of Contents

Related Manuals for Sharp JX-8200


Summary of Contents for Sharp JX-8200
-
Page 1: Service Manual
CODE: 00ZJX8200FM1E FIELD MANUAL COLOR LASER PRINTER JX-8200 MODEL CAUTION This laser printer is a class 1 laser product that complies with 21CFR 1040.10 and 1040.11 of the CDRH standard and IEC825. This means that this machine does not produce hazardous laser radiation. - Page 2 Caution • The fusing unit is hot. Exercise care when inspecting it. • Do not switch the printer rapidly on and off. After turning the printer off, • wait 10 to 15 seconds before turning it back on. • Printer power must be turned off before installing any supplies. CAUTION INVISIBLE LASER RADIATION WHEN OPEN AND INTERLOCKS DEFEATED.
-
Page 3: Table Of Contents
COTENTS [ 1 ] FEATURES ......1-1 [ 9 ] OPERATION CHECK ....9-1 1. -
Page 4: 1 ] Features
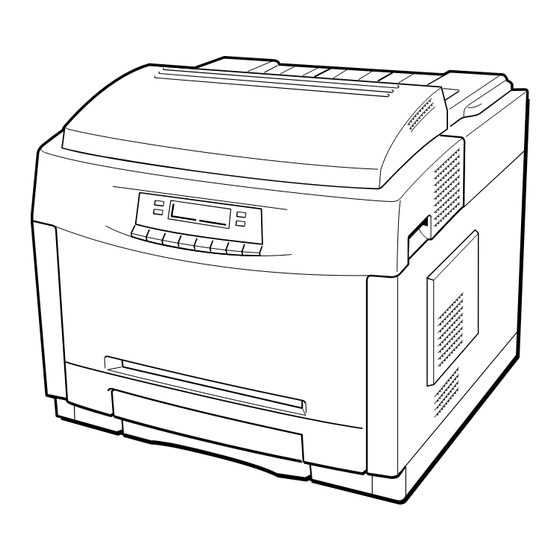
SHARP SERVICE MANUAL JX8200SM [1] FEATURES & [2] SYSTEM CONFIGURATIONS [1] FEATURES 1) Small footprint and compact size 2) High speed print: 12 ppm (monochrome) 3ppm (4 color) 3) High printing quality of 600 dpi 4) High volume paper input tray: 250 sheets input tray... -
Page 5: 2 ] System Configurations
SHARP SERVICE MANUAL JX8200SM [1] FEATURES & [2] SYSTEM CONFIGURATIONS [2] SYSTEM CONFIGURATIONS 1. Hardware configurations A. Consumables parts Color Toner Photo Black Toner Toner Color toner (C) Conductor unit Consumable parts Color toner (M) Color Color toner (Y) Developer... - Page 6 SHARP SERVICE MANUAL JX8200SM [1] FEATURES & [2] SYSTEM CONFIGURATIONS B. Electrical section HOST COMPUTER(PC) HOST COMPUTER(Macintosh) BI-directional Network I/F RS232C I/F Local Talk I/F Parallel I/F ICU PWB Network Bi-directional Local Talk & RS232C I/F PWB (Option) Parallel I/F...
- Page 7 SHARP SERVICE MANUAL JX8200SM [1] FEATURES & [2] SYSTEM CONFIGURATIONS 1) PS2 board (Option) (JX-80PS) D. Option PostScript level 2 compatible interpreter software expanding option board. The parts are common with the flash memory board stated below. The above software is written into the flash memory board.
-
Page 8: 3 ] Specification
″ × 11″) over- Cassette paper feed (universal) head projection transparency film in your printer. (Normal paper) SHARP specifies JX-80TA/JX-80TL suitable transparency film to use with the JX-8200. Size Dimensions Weight Capacity 210 × 297 mm (2) Photoconductor section ⁄... - Page 9 SHARP SERVICE MANUAL JX8200SM [3] SPECIFICATION (3) Scanning section (6) Fusing section 1) Laser beam 1) Fusing system: Heat roller pressing system Kind (Semiconductor laser) 2) Heat roller specifications Upper heat roller (30 Φ, silicone rubber) Wave length (780nm) Lower heat roller (30 Φ, silicone rubber)
-
Page 10: Print Performance
SHARP SERVICE MANUAL JX8200SM [3] SPECIFICATION Print speed calculation is taken from start printing and paper output (9) High voltage PWB unit are completed. In this case, the measurement does not include the 1) System processing time of controller. Invertor system... -
Page 11: Controller
SHARP SERVICE MANUAL JX8200SM [3] SPECIFICATION 3. Controller PAPER SIZE CPU: IDT79R3081/25MHz LETTER 2550 3300 2400 2450 ASIC: IDT79R3710, IDT79R3741 LEGAL 2550 4200 2400 2450 D9001-SJ4 (EET ASIC by Destiny) 2480 3507 2338 2380 Memory Base ROM: 4MB max. PCL5EC Flash ROM (Optional): 8MB max. -
Page 12: Power
SHARP SERVICE MANUAL JX8200SM [3] SPECIFICATION (Machine) 5. Power Humidity Power supply 40°C, 90% Engine Type Voltage 120 V 108 - 132 V 60 Hz 50°C, 60% 220/240 V 198 - 264 V 50/60 Hz Power consumption Maximum: 1200 W... -
Page 13: Safety Standard And Legal
SHARP SERVICE MANUAL JX8200SM [3] SPECIFICATION 7. Safety standard and legal 9. Others Safety regulation Acoustic Noise The Sharp version printer conform with the following regulations. Printing: less than 53 dBA 120 V model: – UL (1950 D3) Stand-by mode:... -
Page 14: Font
SHARP SERVICE MANUAL JX8200SM [3] SPECIFICATION Line Printer Bitmap Font 10. Font Stick Font for HP-GL/2 Built-in fonts PS2 (35 outline fonts) PCL5EC (45 outline fonts) Type 1 Fonts (Compatible with Adobe Type1 font) 1 TrueType fonts (Compatible with Windows 3.1) -
Page 15: 4 ] Supplies
SHARP SERVICE MANUAL JX8200SM [4] SUPPLIES [4] SUPPLIES Type Size Transparency JX-80TA (Letter) SHARP (no backing sheet) JX-80TL (A4) SHARP Envelope Commercial 10 1. CONSUMABLE PARTS Monarch International DL (1) Consumable parts International C5 Part name Model Usable life Contents... -
Page 16: 5 ] Installation
SHARP SERVICE MANUAL JX8200SM [5] INSTALLATION 4) Safety [5] INSTALLATION Be sure to ground the machine. 5) Power plug Check the power plug shape, and do not use unmatched-shape 1. Installation (use) environment check one. Be sure to check the following installation (use) environment check before installing the machine. -
Page 17: Printer Handling
SHARP SERVICE MANUAL JX8200SM [5] INSTALLATION 4) Gases and chemicals 3. Unpacking Avoid installation near gases and chemicals. Especially be careful 1) Cut the packing straps and tape that hold the top portion of the of a diazo copier, which may generate ammonia gas. Installation box onto the printer package and lift off the top portion. -
Page 18: Packing List
SHARP SERVICE MANUAL JX8200SM [5] INSTALLATION 2) Place the secondary feeder on a sturdy, flat table. 4. Packing List 3) Turn off the printer and remove all cables from the back of the printer including the power cable and computer interface cable. - Page 19 SHARP SERVICE MANUAL JX8200SM [5] INSTALLATION B. Installation of Memory (SIMM) (2) Installation of Memory and Interface Boards 1) Remove the controller board from the printer. Before installing any additional memory, the LocalTalk/RS-232C in- terface board, the Ethernet interface board, the PostScript board, or 2) Remove the new SIMM from its packaging.
-
Page 20: Setup
SHARP SERVICE MANUAL JX8200SM [5] INSTALLATION 3) Remove the interface board from its packaging. 2) Open the top rear cover of the printer by pulling back the top rear cover release button located on its right side. After releasing the 4) Hold the interface port on the interface board so that it is sticking cover, raise it until it is vertical. - Page 21 SHARP SERVICE MANUAL JX8200SM [5] INSTALLATION 4) Peel off the arrows labeled f, g from the front of the printer and 2) Insert the bottom of the toner cartridge into the slot on the rear remove the two protective pins located on each side of the trans- side of the black toner box.
- Page 22 SHARP SERVICE MANUAL JX8200SM [5] INSTALLATION 5) Check that there is no toner remaining inside. If there is, lightly tap 2) Place the toner cartridge on top of the matching colour toner the cartridge until it falls into the toner box.
- Page 23 SHARP SERVICE MANUAL JX8200SM [5] INSTALLATION 5) Check that there is no toner remaining inside. If there is, lightly tap 4) Push the lock levers on both sides of the drum cartridge upwards the cartridge until it falls into the toner box.
- Page 24 SHARP SERVICE MANUAL JX8200SM [5] INSTALLATION (5) Removing the Protective Pins for the Fusing (6) Installing the Oil Bottle Unit The printer comes with two oil bottles. Install one into the printer now and store the other one for future use. When REPL OIL BOTTLE...
- Page 25 SHARP SERVICE MANUAL JX8200SM [5] INSTALLATION 2) Push the handles down and towards you until they click and lock (8) Loading Paper and Installing the Universal the fuser cleaner into place inside the fusing unit. Cassette Load paper into the universal cassette by following the procedure given below.
-
Page 26: Connecting The Power Cord
SHARP SERVICE MANUAL JX8200SM [5] INSTALLATION Adjusting the horizontal guide: 8. Connecting the Interface Cable While referring to the figure below, press the lock lever on the Your printer comes standard with a Centronics Parallel interface port. middle of the horizontal guide and move the horizontal guide... -
Page 27: Connecting To A Network
SHARP SERVICE MANUAL JX8200SM [5] INSTALLATION NOTE: The location of the serial port on the computer will vary from 9. Connecting to a Network computer to computer. Refer to your computer’s manual for the location of the serial port on your computer. -
Page 28: 6 ] External View And Internal Structure
SHARP SERVICE MANUAL JX8200SM [6] EXTERNAL VIEW AND INTERNAL STRUCTURE [6] EXTERNAL VIEW AND INTERNAL STRUCTURE 1. External parts A. Handle, lever, switch, etc. Part name Function, operation Paper tray Receives the printed and discharged paper. Top cover (scanning unit) lock Releases the optical section cover lock. - Page 29 SHARP SERVICE MANUAL JX8200SM [6] EXTERNAL VIEW AND INTERNAL STRUCTURE C. Operation panel ONLINE ERROR DATA SUPPLY LINE FORM RESET MENU ITEM ENTER FEED Part name Function, operation LINE KEY Changes the printer from the on-line to off-line state and vice versa. When on-line, the printer can receive information (ONLINE KEY) and communicate with connected computers.
- Page 30 SHARP SERVICE MANUAL JX8200SM [6] EXTERNAL VIEW AND INTERNAL STRUCTURE D. Connectors and switches Part name Function, operation Power socket AppleTalk/RS232C interface connector I/F, serial I/F for Apple computers Parallel interface connector Parallel I/F connector (50 pin) Connector for option paper feed unit The drive signal is supplied from the main body, and the sensor detecting signal from the option paper feed unit.
-
Page 31: Internal Parts
SHARP SERVICE MANUAL JX8200SM [6] EXTERNAL VIEW AND INTERNAL STRUCTURE 2. Internal parts A. Paper feed section and transport section (Main body sections) Part name Function, operation Paper size sensor (PS0) Paper size detection Paper size sensor (PS1) Paper size detection... - Page 32 SHARP SERVICE MANUAL JX8200SM [6] EXTERNAL VIEW AND INTERNAL STRUCTURE (Optional paper feed section) Part name Function, operation Paper size sensor (EXPS0) Paper size detection Paper size sensor (EXPS1) Paper size detection Paper size sensor (EXPS2) Paper size detection Paper size sensor (EXPS3)
- Page 33 SHARP SERVICE MANUAL JX8200SM [6] EXTERNAL VIEW AND INTERNAL STRUCTURE B. Scanning unit section Part name Function, operation Mirror Radiates laser beams to the OPC drum. Laser beam sensor lens Leads the reference laser beam (scanning start) to the laser beam sensor.
- Page 34 SHARP SERVICE MANUAL JX8200SM [6] EXTERNAL VIEW AND INTERNAL STRUCTURE C. OPC drum unit Part name Function, operation Tension spring A constant tension is applied to the OPC drum unit by the spring and the cover so that the OPC drum is fixed at the specified position.
- Page 35 SHARP SERVICE MANUAL JX8200SM [6] EXTERNAL VIEW AND INTERNAL STRUCTURE D. Color developing unit, toner hopper unit 6 – 8...
- Page 36 SHARP SERVICE MANUAL JX8200SM [6] EXTERNAL VIEW AND INTERNAL STRUCTURE D. Color developing unit, toner hopper unit Part name Function, operation Developing roller (Y) Developer and toner are attached to the roller surface by magnetic force and static electricity to make charged toner to adhere to the electrostatic latent images on the OPC drum.
- Page 37 SHARP SERVICE MANUAL JX8200SM [6] EXTERNAL VIEW AND INTERNAL STRUCTURE E. Black developing unit Part name Function, operation Developing roller drive coupler Transmits developing motor power to the developing drive system. Developing roller Developer and toner are attached to the roller surface by magnetic force and static electricity to make charged toner adhere to the electrostatic latent images on the OPC drum.
- Page 38 SHARP SERVICE MANUAL JX8200SM [6] EXTERNAL VIEW AND INTERNAL STRUCTURE G. Paper hold/transfer section Part name Function, operation Paper hold/transfer section lock release Releases the paper hold cover lock. (This cover is opened when replacing consumable parts.) lever Fusing unit connector Connects the fusing unit with the PCU PWB and the high voltage PWB.
- Page 39 SHARP SERVICE MANUAL JX8200SM [6] EXTERNAL VIEW AND INTERNAL STRUCTURE H. Fusing section Part name Function, operation Fusing roller cleaner Cleans the fusing roller surface. Heat roller Applies heat and pressure to toner on the paper to fuse. Pressure roller Applies a pressure to toner on the paper to fuse.
- Page 40 SHARP SERVICE MANUAL JX8200SM [6] EXTERNAL VIEW AND INTERNAL STRUCTURE J. Drive section 6 – 13...
- Page 41 SHARP SERVICE MANUAL JX8200SM [6] EXTERNAL VIEW AND INTERNAL STRUCTURE J. Drive section Part name Function, operation Developing roller clutch (BL) Turns on/off the connection between the developing motor and the developing roller. (BL) Developing roller clutch (C) Turns on/off the connection between the developing motor and the developing roller. (C) Developing roller clutch (M) Turns on/off the connection between the developing motor and the developing roller.
- Page 42 SHARP SERVICE MANUAL JX8200SM [6] EXTERNAL VIEW AND INTERNAL STRUCTURE K. Others Part name Function, operation OPC drum earth electrode Connects the ground and the OPC drum case and the main charger case. Color developing unit connector Connects the color developing unit and the PCU PWB and the high voltage PWB.
-
Page 43: Electric Parts
SHARP SERVICE MANUAL JX8200SM [6] EXTERNAL VIEW AND INTERNAL STRUCTURE 3. Electric parts A. Switches, sensors, detectors 6 – 16... - Page 44 SHARP SERVICE MANUAL JX8200SM [6] EXTERNAL VIEW AND INTERNAL STRUCTURE Part name Type Function, operation OPC drum detector (fuse PWB) Blows the fuse to reset the OPC drum counter when a virgin OPC drum unit is installed. Used to detect whether the installed fusing unit is a virgin one or not.
- Page 45 SHARP SERVICE MANUAL JX8200SM [6] EXTERNAL VIEW AND INTERNAL STRUCTURE B. Solenoids, clutches Part name Type Function, operation Separation solenoid Solenoid Drives the separation pawl. Developing shutter clutch Solenoid Turns of/off the developing shutter. solenoid Toner supply clutch solenoid (Y) Solenoid Turns on/off the toner clutch.
- Page 46 SHARP SERVICE MANUAL JX8200SM [6] EXTERNAL VIEW AND INTERNAL STRUCTURE C. Motors Part name Type Function, operation Fusing unit drive motor Stepping motor Drives the fusing unit and the transfer drum cleaner. Toner motor (Black) Stepping motor Drives the black toner supply section.
- Page 47 SHARP SERVICE MANUAL JX8200SM [6] EXTERNAL VIEW AND INTERNAL STRUCTURE E. Fuses Part name Section Type Specifications Thermal fuse (Fusing unit) Fusing unit Mold type 167°C Thermal fuse (Power unit) F706 Power PWB Mold type 1.0A 250V 102°C AC power fuse...
-
Page 48: Consumable Parts
SHARP SERVICE MANUAL JX8200SM [6] EXTERNAL VIEW AND INTERNAL STRUCTURE 4. Consumable parts Part name OPC drum unit Black toner bottle Color toner bottle Color developing unit Ozone filter Fusing unit Fuser cleaner Black developing unit Waste toner bottle 10 Oil bottle... -
Page 49: 7 ] Operations
[7] OPERATIONS 1. Operations (1) Power On Sequence After Power On, the printer enters the following sequence. POWER ON CHECK CRDY SIGNAL CRDY IS LOW? GET CONFIG & SELFTEST PASS? INITIALIZE ERROR JOB PROCESS (Ready condition) RESET 7 – 1... - Page 50 During Power On sequence, the printer lights all LED’s and LCD on the control panel. All Key operation is ignored. Fiashing LED Status LINE SUPPLY ERROR LCD Status HOTHING ALL BLACK SELF TEST WARMING UP PCL LE/LE Max.1s during Self Test Power ON During warming up engine (Max.
- Page 51 LCD and LED Status Overview The following state transition diagram roughly shows how LCD content and LED indication change according to the printer state. How to interpret the diagram: Number and alphabet in parentheses show the state. Find that number and alphabet in Table below, which show how LCD content and LED indication change by transition.
- Page 52 Receiving analyzing data (2) Data reception Data reception Data reception begins. Printing of begins ends Display List ends Print Data reception ends Data reception ends begins (No Display List) (Display Listpresent) Receiving, Analyzing Standby Analyzing Standby analyzing ends (No data) data (Data present) printing data...
- Page 53 (4) Schematic of the Printer Control Menus LINE OFFLINE To the MENU SERIAL MENU Note 1 From the TEST MENU MENU MENU MENU MENU MENU PRINTING MENU CONFIG MENU PCL MENU PS MENU PARALLEL MENU ITEM ITEM ITEM ITEM ITEM ∗...
- Page 54 (5) Set Values ITEM in each MENU have predetermined values to be set. (There is no need to set values for ITEM in TEST MENU.) The values which can be set in each ITEM are shown below. a. PRINTING MENU 1 ∗...
- Page 55 e. IO MENU ON ∗ , OFF PARALLEL If PARALLEL = ON, enable the use of the parallel port. If PARALLEL = OFF, disable the use of the parallel port. PCL, PS2, AUTO ∗ EMULATION Sets the default printer language for parallel port. If EMU = Auto the stream of (EX only) data being sent to the printing will be analyzed to determine which language is being used by the printer job.
- Page 56 ADV FUNCTION SERIAL EMULATION* AUTO AUTO BAUDRATE 9600 9600 9600 DATA BIT PARITY NONE NONE NONE HANDSHK DTR/DSR DTR/DSR DTR/DSR DTR POLARITY LOCALTALK EMULATION NETWORK EMULATION AUTO AUTO TOP MARGIN LEFT MARGIN PRINTER NAME JX-8200 JX8200 JX8200 7 – 8...
- Page 57 (6) Sleep Mode On/Off ICU can control sleep mode using SLPON and SLPOFF commands. When ICU sends the SLPON command to PCU, the printer engine will enter Sleep Mode after Passed setting time. If ICU send the SLOFF command to PCU in Sleep Mode, it is canceled and the printer engine will be warming up sequence.
- Page 58 7 – 10...
- Page 59 When a consumable part life (specified count value) is reached, print- ing is stopped even during operation. The count conditions and life values are as shown below. Photoconductor life over: Photoconductor not supplied (Sharp version): Stops. Drum counter 50000 or above: Stops. Fuser life over: Fuser counter 60000 or above: Stops.
-
Page 60: 8 ] Adjustments
SHARP SERVICE MANUAL JX8200SM [8] ADJUSTMENTS [8] ADJUSTMENTS Remove the drive section cover. Adjustments list Section Content Drive Developing shutter clutch solenoid position adjustment Developing shutter clutch shaft angle adjustment Optical Scanner unit position (angle) adjustment 1. Drive section A. Developing shutter clutch solenoid position... - Page 61 SHARP SERVICE MANUAL JX8200SM [8] ADJUSTMENTS 3) Attach the developing shutter clutch solenoid adjustment jig in the Remove the drive slide frame unit developing shutter clutch attachment position. Drive unit slide cam spring 4) Manually turn on the developing shutter clutch solenoid.
- Page 62 SHARP SERVICE MANUAL JX8200SM [8] ADJUSTMENTS B. Developing shutter clutch shaft angle adjustment (1) Outline/purpose The four developing shutters in the developing sections are opened/closed by one clutch. Therefore, the open/close angles of the four shutters must be aligned for one clutch to open/close all the four.
-
Page 63: Optical Section
SHARP SERVICE MANUAL JX8200SM [8] ADJUSTMENTS (5) Troubles caused by improper adjustment The following troubles may occur when the adjustment is improper. * The developing shutter does not open or close completely when it should. As a result, the following phenomena may occur. -
Page 64: Power Unit Adjustments
SHARP SERVICE MANUAL JX8200SM [8] ADJUSTMENTS 4) Tighten the scanner unit fixing screw. 3. Power unit adjustments Adjustment items 1. 5V voltage adjustment 2. 5V overcurrent protection detection level adjustment 3. 24V overcurrent protection detection level adjustment 4. POFF signal output detection level adjustment A. - Page 65 SHARP SERVICE MANUAL JX8200SM [8] ADJUSTMENTS D. Details (1) 5V power voltage adjustment 1) Set the 5V and 24V power outputs to non-load state. RV704 R777 2) Input the rated power voltage to the primary side (AC). (Turn on the power.) Set the voltmeter across resistor R777 (5V ∼...
- Page 66 SHARP SERVICE MANUAL JX8200SM [8] ADJUSTMENTS (3) 24V power overcurrnet protection detection level adjustment 1) Turn RV701 fully counterclockwise. FT701 R777 RV701 2) Connect 4A load (1.25Ω, 30W or more) to the 5V power. Insert a resistor of 1.25Ω (30W or more) across the resistor R777.
-
Page 67: Transfer Drum/Opc Drum Contact Pressure Adjustment
SHARP SERVICE MANUAL JX8200SM [8] ADJUSTMENTS 3) Remove the OPC drum unit from the printer body. 4. Transfer drum/OPC drum contact 4) Manually turn the gear section of the OPC drum in the arrow pressure adjustment direction, and move the cyan image on the OPC drum to the position shown in the figure below. - Page 68 SHARP SERVICE MANUAL JX8200SM [8] ADJUSTMENTS 6) Install the OPC drum unit to the printer body. 8) Close the transfer section of the printer. 7) Manually turn the gear section of the transfer section and move (Note) Slowly close the transport section.
- Page 69 SHARP SERVICE MANUAL JX8200SM [8] ADJUSTMENTS 11) Manually turn the gear section of the transfer drum to shift the transfer drum in the forward direction by about 15mm. (Wipe off the toner image on the drum paper.) 13) Turn and change the contact pressure adjustment plate (ec- centric plate) position to change the contact pressure.
-
Page 70: Margin Setting
SHARP SERVICE MANUAL JX8200SM [8] ADJUSTMENTS 20) Install the OPC drum to the printer body. 5. Margin setting 21) Manually turn the transfer drum gear section to move the trans- Margin setting is done in increment 1/600 inch. fer drum to the position shown below. (White sheet position) * Margin setting by key operation. -
Page 71: Icu Pwb/Flash Memory Pwb Setting
SHARP SERVICE MANUAL JX8200SM [8] ADJUSTMENTS IDT/Sim exclusive-use cable 6. ICU PWB/flash memory PWB setting A. Flash memory setting (1) Flash memory short pin setting J401 1-2 (short) EX ROM Bank 0 or 1 J402 (Lower 4MB) not write protected... - Page 72 SHARP SERVICE MANUAL JX8200SM [8] ADJUSTMENTS Set the jumper of flash memory on the source side as shown, and Start Windows. insert into CN1. Start the terminal software of Windows. Perform setting of the host side serial port for communication with...
- Page 73 SHARP SERVICE MANUAL JX8200SM [8] ADJUSTMENTS Copy the flash memoly. In the case of PS2 copy source address bf400000 destination address bec00000 size 2090000 (Exsample) In the case of (3), Enter <IDT> Diagnostics - Enter selection 1. Run All Tests 2.
- Page 74 SHARP SERVICE MANUAL JX8200SM [8] ADJUSTMENTS c. Starting procedure with the copied flash memory Remove the IDT/Sim ROM from IC22, IC23. Set PPOS, PCL ROM to IC22, IC23. Set the flash memory jumpers as shown below. J401: 1-2 J404: 2-3...
-
Page 75: 9 ] Operation Check
SHARP SERVICE MANUAL JX8200SM [8] ADJUSTMENTS [9] OPERATION CHECK 5. Details (procedures) A. Main charger current check List (1) Outline/purpose Section Content Measure the main charger current to check for an overcurrent or an High voltage OPC drum unit 1 Main charger current insufficient current. - Page 76 SHARP SERVICE MANUAL JX8200SM [8] ADJUSTMENTS (2) Details 1) Enter the normal diag mode and select the VOL TEST MAIN CH mode with the MENU key. 2) Press the FORM FEED key to turn on the main charger. It can be turned off by the RESET key.
- Page 77 SHARP SERVICE MANUAL JX8200SM [8] ADJUSTMENTS (2) Details 2) Remove the output wire the discharger high voltage PWB. 1) Enter the normal diag mode and select VOL TEST MAIN CH 3) Connect a resistor of 200 MΩ and the digital multi meter (current mode with the MENU key.
- Page 78 SHARP SERVICE MANUAL JX8200SM [10] DIAGNOSTICS 10 – 1...
- Page 79 SHARP SERVICE MANUAL JX8200SM [10] DIAGNOSTICS 10 – 2...
- Page 80 SHARP SERVICE MANUAL JX8200SM [10] DIAGNOSTICS 10 – 3...
- Page 81 SHARP SERVICE MANUAL JX8200SM [10] DIAGNOSTICS 10 – 4...
-
Page 82: Diagnostics
SHARP SERVICE MANUAL JX8200SM [10] DIAGNOSTICS 3. Diagnostics operation flow (Normal diagnostics mode) ERROR SUPPLY DATA ONLINE ( K ) ( C ) ( M ) ( Y ) 00:DOP HFIN POUT 01:PE 02:PS3 WTBS 03:EXPE EXPS0 EXPS1 EXPS2 04:EXPUSD... - Page 83 SHARP SERVICE MANUAL JX8200SM [10] DIAGNOSTICS (Special diagnostics mode) ENTER LINE OFF) (ONLINE) (SET) (PAPER EXIT) To the normal diagnostics mode Special diagnostics mode display (home position) PCU DIAG MODE SXX home position Counter kind selection TTL,YPR,MPR,CPR,KPR,JAM,OPC, MENU MAM,PLM,HLH,THO,DVM,HLL COUNTER SET2 TTL...
-
Page 84: Operating Procedures
SHARP SERVICE MANUAL JX8200SM [10] DIAGNOSTICS 4. Operating procedures 5. Details Each mode has different operating procedures and displays from the A. Normal diagnostics mode other mode. (1) PCU ROM version display A. Normal mode a. Menu display While pressing and holding the MENU key and the ENTER (SET) key... - Page 85 SHARP SERVICE MANUAL JX8200SM [10] DIAGNOSTICS (Table of sensors/detectors) Option paper feed unit Sensor SENSOR/ DETECTOR’S DESCRIPTION FUNCTION Paper size EXPS0 EXPS1 EXPS2 NAME Cabinet switch Active low (when the INVOICE (24V power line on/off) printer cover is opened) LETTER...
- Page 86 SHARP SERVICE MANUAL JX8200SM [10] DIAGNOSTICS (4) High voltage unit and charger unit operation check a. Menu display VOL TEST XXX b. Details Press v key or w key to select the output mode. Then press the FORM FEED (PAPER EXIT) key to output the high voltage of the selected mode.
- Page 87 SHARP SERVICE MANUAL JX8200SM [10] DIAGNOSTICS (Details of operational conditions) DISPLAY LEVEL 1 LEVEL 2 LEVEL 3 PRINT OPERATIONAL CONDITIONS TEST PRINT JAM (*ON)/OFF P=XXX H=XXX T=XXX Setting to judge paper jam detection during printing. HEATER (*ON)/OFF P=XXX H=XXX T=XXX...
- Page 88 SHARP SERVICE MANUAL JX8200SM [10] DIAGNOSTICS (Items which are set to the default values) (Toner concentration control level) DISPLAY ITEM LEVEL 1 LEVEL 2 LEVEL 3 Yellow toner concentration control level (TONER LEVEL YTON) TONER LEVEL YTON YTON XXX (Set to 80.)
- Page 89 SHARP SERVICE MANUAL JX8200SM [10] DIAGNOSTICS (Each color toner supply quantity and each unit print quantity count values) DISPLAY Item LEVEL 1 LEVEL 2 LEVEL 3 Photoconductor using print quantity (COUNTER SET DRUM) COUNTER SET DRUM DRUM XXXXXXXX Yellow developer print quantity...
- Page 90 SHARP SERVICE MANUAL JX8200SM [10] DIAGNOSTICS B. Special diagnostics mode (1) The consumable parts counter value and the error counter value can be checked. To execute the special diagnostics, the machine must enter the nor- mal diagnostics mode first. Each color toner concentration level can be displayed.
- Page 91 SHARP SERVICE MANUAL JX8200SM [10] DIAGNOSTICS After selecting the developing unit kind, press the ENTER (SET) key (2) Each developing unit toner concentration to display the toner concentration control level. control level check (change) Under this state, press the RESET key to return to the developing The above values can be set to desired values.
- Page 92 SHARP SERVICE MANUAL JX8200SM [10] DIAGNOSTICS (Time-out time) (4) Sleep mode, scanner motor time-out time check and set The above values can be set to the desired values. a. Menu display TIMEOUT SET XXX (Content) b. Details Select TIMEOUT SET XXX with the MENU key.
- Page 93 SHARP SERVICE MANUAL JX8200SM [10] DIAGNOSTICS (6) Consumable parts life (counter) and life warning (counter value) check and setting a. Menu display COUNTER LIM XXXXXXXX b. Details The consumable parts life counter value and the life warning counter value can be set arbitrarily.
- Page 94 SHARP SERVICE MANUAL JX8200SM [10] DIAGNOSTICS 10 – 17...
- Page 95 SHARP SERVICE MANUAL JX8200SM [10] DIAGNOSTICS 10 – 18...
- Page 96 SHARP SERVICE MANUAL JX8200SM [10] DIAGNOSTICS 10 – 19...
- Page 97 SHARP SERVICE MANUAL JX8200SM [10] DIAGNOSTICS 10 – 20...
-
Page 98: Troubleshooting
SHARP SERVICE MANUAL JX8200SM [11] TROUBLESHOOTING Self diagnostics message data process flow [11] TROUBLESHOOTING CRT DISPLAY 1. Self diagnostic message A. Outline PRINTER HOST P(S2) In case of trouble in the printer or when any consumable part is P(C) exhausted, the printer detects and analyzes it and the operation... - Page 99 SHARP SERVICE MANUAL JX8200SM [11] TROUBLESHOOTING Engine Status Operator Call Errror Paper Jam Consumable 2 Consumable 1 Toner Empty Fusing/Paper Exit Yellow Toner Empty Photo Conductor Fuser Oil Near END Section Paper Jam (ADD TONER Y) Cartridge Life Over (NEAR END OIL)
- Page 100 SHARP SERVICE MANUAL JX8200SM [11] TROUBLESHOOTING Display 1 All LEDs are blink During printing MESSAGE SERVICE (C1) During diagnostics MESSAGE OPTICAL ERROR Section Scanning unit PCU PWB Content Optical system error Occurrence conditions Laser scanning trouble Details, causes (The laser beam scanning synchronization signal (HSYNC) is not recognized. (The signal synchronization is not 498usec.))
- Page 101 SHARP SERVICE MANUAL JX8200SM [11] TROUBLESHOOTING Display 4 All LEDs are blink During printing MESSAGE SERVICE (C4) During diagnostics MESSAGE HEATER HIGH Section Fusing unit PCU PWB Power supply unit Content Fusing unit overheat trouble Occurrence conditions Fusing high temperature trouble Details, causes (The thermistor signal (RTH) rises above 4.1V.
- Page 102 SHARP SERVICE MANUAL JX8200SM [11] TROUBLESHOOTING Display 7 All LEDs are blink During printing MESSAGE SERVICE (C7) During diagnostics MESSAGE MAIN MOTOR ERROR Section OPC drum section Transfer drum section Drive section PCU PWB Content OPC drum/transfer drum motor trouble...
- Page 103 SHARP SERVICE MANUAL JX8200SM [11] TROUBLESHOOTING Display 11 All LEDs are blink During printing MESSAGE SERVICE (P4) During diagnostics MESSAGE Section PCU PWB ICU PWB Content Serial communication trouble Occurrence conditions ICU PWB-PCU PWB communication trouble Details, causes ICU PWB-PCU PWB communication trouble Remedies Replace the PCU PWB.
- Page 104 SHARP SERVICE MANUAL JX8200SM [11] TROUBLESHOOTING Display 14 ERROR ON SUPPLY ON During printing MESSAGE (Supply) During diagnostics MESSAGE REPL DRUM Section Photoconductor drum section Content Photoconductor drum cartridge life over Occurrence conditions Photoconductor unit life is reached. (50000 prints)
- Page 105 SHARP SERVICE MANUAL JX8200SM [11] TROUBLESHOOTING Display 17 ERROR ON SUPPLY ON During printing MESSAGE REPL FUSER (Supply) During diagnostics MESSAGE Section Fusing section Content Fusing unit life over Occurrence conditions Fusing unit life is reached. (60000 sheets.) Fusing unit installation detection trouble Details, causes (The fusing unit life is reached.
- Page 106 SHARP SERVICE MANUAL JX8200SM [11] TROUBLESHOOTING Display 21 ERROR ON During printing MESSAGE COVER OPEN During diagnostics MESSAGE PRINTER OPEN Section Interlock switch section Content Opening section (cabinet) open Occurrence conditions The opening section (cabinet) is opened to turn off the lock switch.
- Page 107 SHARP SERVICE MANUAL JX8200SM [11] TROUBLESHOOTING Display 23 ERROR ON During printing MESSAGE PAPER JAM (Place) During diagnostics MESSAGE PAPER JAM DRUM Section Transfer drum section Content Paper jam in the transfer drum section Occurrence conditions Paper is not separated from the transfer drum.
- Page 108 SHARP SERVICE MANUAL JX8200SM [11] TROUBLESHOOTING Display 24 ERROR ON During printing MESSAGE PAPER JAM (Place) During diagnostics MESSAGE PAPER JAM PIN Section Resist roller/Charger roller/Transfer drum section Content Paper jam in the resist roller, the transfer drum section. Occurrence conditions The resist roller does not transport paper.
- Page 109 SHARP SERVICE MANUAL JX8200SM [11] TROUBLESHOOTING Display 25 ERROR ON During printing MESSAGE PAPER JAM (Place) During diagnostics MESSAGE Section Paper feed section Content Paper jam in the paper feed section (Standard paper feed unit) Occurrence conditions Paper is not fed to the resist roller.
- Page 110 SHARP SERVICE MANUAL JX8200SM [11] TROUBLESHOOTING Display 26 ERROR ON During printing MESSAGE PAPER JAM (Place) During diagnostics MESSAGE Section Option paper feed section Content Paper jam in the paper feed section (option) Occurrence conditions Paper is not fed to the resist roller.
- Page 111 SHARP SERVICE MANUAL JX8200SM [11] TROUBLESHOOTING Display 28 ERROR ON During printing MESSAGE PAPER JAM (Place) During diagnostics MESSAGE Section Paper pass section Content Paper remaining Occurrence conditions Paper remaining Paper sensor, paper detector, paper jam sensor trouble Details, causes (The paper sensor, paper detector, and paper jam sensor signals are active immediately after turning on the power.)
- Page 112 SHARP SERVICE MANUAL JX8200SM [11] TROUBLESHOOTING Display 30 ERROR ON During printing MESSAGE PAPER OUT (LOWER) (Type) During diagnostics MESSAGE PAPER EMPTY OPT Section Option paper feed section Content Optional paper feed unit paper empty (With the optional paper feed unit installed)
- Page 113 SHARP SERVICE MANUAL JX8200SM [11] TROUBLESHOOTING Display 34 SUPPLY ON LINE ON During printing NEAR END NEAR END COLDEV (Supply) During diagnostics MESSAGE Section Color developing section Content The color developing unit approaches the life. Occurrence conditions Color developing unit life warning Details, causes The black developing unit usage approaches 27000 prints (90% of life).
- Page 114 SHARP SERVICE MANUAL JX8200SM [11] TROUBLESHOOTING Display 38 All LED’s blink. During printing Message SERVICE (S3) During diag Message Section ICU PWB Content ICU PWB/RAM read/write trouble Generating condition ICU PWB/RAM operation trouble Details, cause ICU PWB/RAM trouble Removal, process...
- Page 115 SHARP SERVICE MANUAL JX8200SM [11] TROUBLESHOOTING Display 44 All LED’s blink. During printing Message SERVICE (E4) During diag Message Section ICU PWB Content ICU program error Generating condition ICU PWB operation trouble Details, cause ICU PWB trouble Removal, process ICU PWB repair/replacement Display 45 All LED’s blink.
- Page 116 SHARP SERVICE MANUAL JX8200SM [11] TROUBLESHOOTING Display 50 ERROR LED ON During printing Message LOCAL TALK ERROR During diag Message Section ICU PWB Content ICU/LOCAL TALK (APPLETALK) I/F PWB Generating condition ICU/LOCAL TALK (APPLETALK) I/F trouble Details, cause ICU/LOCAL TALK (APPLETALK) I/F section trouble...
-
Page 117: Jam Recover
SHARP SERVICE MANUAL JX8200SM [11] TROUBLESHOOTING LED and SWITCH Status of Error SWITCH MESSAGE ERROR SUPPLY DATA LINE LINE RESET MENU ITEM DOWN ENTER SERVICE (S1 - S9) SERVICE (C1 - C7) SERVICE (E4 - E6) SERVICE (P1 - P4) - Page 118 SHARP SERVICE MANUAL JX8200SM [11] TROUBLESHOOTING 11 – 21...
- Page 119 SHARP SERVICE MANUAL JX8200SM [11] TROUBLESHOOTING 11 – 22...
- Page 120 SHARP SERVICE MANUAL JX8200SM [11] TROUBLESHOOTING 11 – 23...
- Page 121 SHARP SERVICE MANUAL JX8200SM [11] TROUBLESHOOTING 11 – 24...
- Page 122 SHARP SERVICE MANUAL JX8200SM [11] TROUBLESHOOTING 11 – 25...
- Page 123 SHARP SERVICE MANUAL JX8200SM [11] TROUBLESHOOTING 11 – 26...
- Page 124 SHARP SERVICE MANUAL JX8200SM [11] TROUBLESHOOTING 11 – 27...
- Page 125 SHARP SERVICE MANUAL JX8200SM [11] TROUBLESHOOTING 11 – 28...
- Page 126 SHARP SERVICE MANUAL JX8200SM [11] TROUBLESHOOTING 11 – 29...
- Page 127 SHARP SERVICE MANUAL JX8200SM [11] TROUBLESHOOTING 11 – 30...
- Page 128 SHARP SERVICE MANUAL JX8200SM [11] TROUBLESHOOTING 11 – 31...
- Page 129 SHARP SERVICE MANUAL JX8200SM [11] TROUBLESHOOTING 11 – 32...
- Page 130 SHARP SERVICE MANUAL JX8200SM [11] TROUBLESHOOTING 11 – 33...
- Page 131 SHARP SERVICE MANUAL JX8200SM [11] TROUBLESHOOTING 11 – 34...
-
Page 132: Servicing For Troubles Related To Memory And Replacement Of Pcu Pwb
SHARP SERVICE MANUAL JX8200SM [11] TROUBLESHOOTING 3. Servicing for troubles related to memory and replacement of PCU PWB A. Outline The CPU (NV-RAM) in PCU PWB stores various set values, adjust- ment values, control data, counter values, etc. This data are required for operating the printer engine normally. -
Page 133: Disassembly And Assembly
SHARP SERVICE MANUAL JX8200SM [12] DISASSEMBLY AND ASSEMBLY [12] DISASSEMBLY AND ASSEMBLY List SECTION/ITEM PARTS NAME PAGE CABINETS Upper cabinet 12-1 Back cabinet 12-1 Cabinet R and L 12-1 Operation panel cabinet 12-1 Front lower cabinet 12-2 Transfer upper cabinet... -
Page 134: Cabinets
SHARP SERVICE MANUAL JX8200SM [12] DISASSEMBLY AND ASSEMBLY (3) Cabinet R and L 1. CABINETS Remove the cabinet R and L. (1) Upper cabinet Remove the upper cabinet. Front lower cabinet Back cabinet (2) Back cabinet (4) Operation panel cabinet Remove the back cabinet. - Page 135 SHARP SERVICE MANUAL JX8200SM [12] DISASSEMBLY AND ASSEMBLY (5) Front lower cabinet Remove the paper feed unit cover. Remove the paper cassette in advance. Paper feed unit cover Remove the transfer unit lower arm R and L, and lift and hold the transfer unit.
-
Page 136: Power Supply
SHARP SERVICE MANUAL JX8200SM [12] DISASSEMBLY AND ASSEMBLY 2. POWER SUPPLY 3. PAPER FEED SECTION (1) Power supply unit (1) Paper feed unit Remove the upper cabinet. (Refer to the A-1.) Remove the paper cassette and Waste toner box in advance. - Page 137 SHARP SERVICE MANUAL JX8200SM [12] DISASSEMBLY AND ASSEMBLY Remove the transfer unit lower arm R and L, and lift and hold the Remove the front lower cabinet with care not to break the pawl. transfer unit. Put the transfer unit lower arm R onto the transfer unit frame (transfer drum bearing section.)
- Page 138 SHARP SERVICE MANUAL JX8200SM [12] DISASSEMBLY AND ASSEMBLY (3) Transparent sheet sensor (OHP IN) (5) Paper empty detector Remove the operation cabinet. (Refer to the A-4.) Remove the paper feed unit. (Refer to the C-1.) Remove the paper transparent sheet sensor. (OHP IN) Remove the paper empty detector.
- Page 139 SHARP SERVICE MANUAL JX8200SM [12] DISASSEMBLY AND ASSEMBLY (7) Paper pick-up roller clutch (9) Charger roller clutch (Lift clutch) Remove the paper feed unit. (Refer to the C-1.) Remove the paper feed unit. (Refer to the C-1.) Remove the paper pick-up roller solenoid.
- Page 140 SHARP SERVICE MANUAL JX8200SM [12] DISASSEMBLY AND ASSEMBLY Remove the paper transport roller gear and paper transport roller. Remove the charger roller spring R and L, and remove the charger roller. Charger roller spring Paper transport roller gear Paper transport...
- Page 141 SHARP SERVICE MANUAL JX8200SM [12] DISASSEMBLY AND ASSEMBLY Remove the paper feed section right frame unit. Remove each clutch and gear. Paper feed section left frame unit Remove the upper resist roller. Remove the paper feed section right frame unit.
-
Page 142: Option Paper Feed Unit
SHARP SERVICE MANUAL JX8200SM [12] DISASSEMBLY AND ASSEMBLY (14) Lower resist roller Remove the charger roller tension lever, and remove the lower resist roller. Remove the paper feed unit. (Refer to the C-1.) Remove the waste toner sensor cover, and remove the waste toner sensor. - Page 143 SHARP SERVICE MANUAL JX8200SM [12] DISASSEMBLY AND ASSEMBLY (2) Paper pick-up unit (5) Paper pick-up roller/Paper pick-up roller clutch Remove the paper pick up unit. Remove the paper feed unit. (Refer to the C-1.) Remove the paper pick-up solenoid and the paper pick-up roller clutch.
- Page 144 SHARP SERVICE MANUAL JX8200SM [12] DISASSEMBLY AND ASSEMBLY Note for assembly: (6) Paper feed roller/Paper feed roller clutch When attaching the option paper feed unit, attach the drive gear as Remove the paper feed unit. (Refer to the C-1.) shown in the figure. After attaching, push the frame with fingers and Remove the paper pick-up clutch solenoid and the paper pick-up check that the drive gear is lifted up.
-
Page 145: Paper Hold And Transfer Section
SHARP SERVICE MANUAL JX8200SM [12] DISASSEMBLY AND ASSEMBLY 5. Paper hold and transfer section Open the transport section. Remove the separation pawl drive joint. (1) Separation pawl drive joint Open the transport section. Remove the separation pawl drive joint. Separation pawl... - Page 146 SHARP SERVICE MANUAL JX8200SM [12] DISASSEMBLY AND ASSEMBLY (4) Fusing unit wire (5) Transfer drum cleaning clutch solenoid Remove the fusing unit. Remove the operation cabinet. (Refer to the A-4.) Remove the transfer drum cleaning clutch solenoid. Remove the operation cabinet.
- Page 147 SHARP SERVICE MANUAL JX8200SM [12] DISASSEMBLY AND ASSEMBLY (7) Transfer drum cleaner brush clutch Remove the cam unit. Remove the operation cabinet. (Refer to the A-4.) Remove the paper hold/transfer lower frame. Cam unit Transfer drum cleaner clutch Remove the transfer drum cleaner clutch.
- Page 148 SHARP SERVICE MANUAL JX8200SM [12] DISASSEMBLY AND ASSEMBLY Remove the transfer drum cleaner brush clutch. Remove the transfer drum cleaner unit. (When removing, extend the right and the left frames slightly.) Transfer drum cleaner brush clutch Spring hook * Note for assembly Be sure to insert the spring hook into the center of the clutch sleeve hole.
- Page 149 SHARP SERVICE MANUAL JX8200SM [12] DISASSEMBLY AND ASSEMBLY (9) Transfer drum cleaning brush Remove the transfer drum cleaner brush clutch. Remove the operation cabinet. (Refer to the A-4.) Remove the paper hold/transfer lower frame. Transfer drum cleaner brush clutch Remove the transfer drum cleaning brush.
- Page 150 SHARP SERVICE MANUAL JX8200SM [12] DISASSEMBLY AND ASSEMBLY Remove the separation pawl drive joint. Remove the separation pawl unit. Remove the cabinet of the right cabinet operation section. (Refer to A-3/4.) Remove the left and the right lower arms of the transfer unit.
- Page 151 SHARP SERVICE MANUAL JX8200SM [12] DISASSEMBLY AND ASSEMBLY * Note for assembly Remove the harness cover. Check that the cut part of transfer drum guide positioning plate is inserted to the projection part of frame securely. Harness cover Remove the connector which is connected to the PCU PWB from the transfer unit.
- Page 152 SHARP SERVICE MANUAL JX8200SM [12] DISASSEMBLY AND ASSEMBLY Remove the right and left arms (lower) of the transfer unit. Slide the transfer unit fixing pin (left) toward the inside. (Do not pull it out.) Harness cover Transfer unit lower arm L...
-
Page 153: Optical Section
SHARP SERVICE MANUAL JX8200SM [12] DISASSEMBLY AND ASSEMBLY 6. Optical section Remove the right cabinet, the rear cabinet, and the upper cabinet. (Refer to the A-1/2/3.) Remove the cables of the grid bias electrode, the main charger (1) Optical unit electrode, and the GND electrode. - Page 154 SHARP SERVICE MANUAL JX8200SM [12] DISASSEMBLY AND ASSEMBLY (2) Drive unit slide cam Remove the right cabinet, the back cabinet, and the upper cabinet. (Refer to the A-1/2/3.) Remove the two drive unit tension springs. Drive unit tension spring Remove the drive slide frame unit.
- Page 155 SHARP SERVICE MANUAL JX8200SM [12] DISASSEMBLY AND ASSEMBLY Remove the cam shaft upper. Remove the drive belt A, then remove the drive belt B. Cam shaft upper Drive belt A Drive unit slide cam Drive belt B Remove the flywheel...
- Page 156 SHARP SERVICE MANUAL JX8200SM [12] DISASSEMBLY AND ASSEMBLY (4) Cabinet switches (6) Drum motor Remove the right cabinet, the back cabinet, and the upper Remove the right cabinet, the rear cabinet, and the upper cabinet. cabinet.(Refer to the A-1/2/3.) (Refer to the A-1/2/3) Remove the drum motor unit.
- Page 157 SHARP SERVICE MANUAL JX8200SM [12] DISASSEMBLY AND ASSEMBLY (Black) Remove the toner motor. Remove the drum unit, the color developer unit, and the black developer unit. Color developer unit Drum unit Black developer unit (8) Developing motor Remove the right cabinet, the back cabinet, and the upper cabinet.
- Page 158 SHARP SERVICE MANUAL JX8200SM [12] DISASSEMBLY AND ASSEMBLY Note for assembly (9) Toner supply clutch/developing shutter clutch • When installing the toner clutch spring, position the bent portion of Remove the right cabinet, the back cabinet, and the upper the toner clutch spring at the center of the notches (5 positions) of cabinet.(Refer to the A-1/2/3.)
-
Page 159: Other
SHARP SERVICE MANUAL JX8200SM [12] DISASSEMBLY AND ASSEMBLY (11) Developing shutter clutch solenoid 8. OTHER Remove the right cabinet, the back cabinet, and the upper (1) Waste toner sensor cabinet. (Refer to the A-1/2/3.) Remove the drive section cover. (Refer to the G-1.) Remove the paper feed unit. -
Page 160: Electrical Section
SHARP SERVICE MANUAL JX8200SM [13] ELECTRICAL SECTION [13] ELECTRICAL SECTION 1. ICU A. BLOCK DIAGRAM Engine I/F Mother Board Option Sharp G/A (Flash Video signal to PCU Memory (Process Control Unit) Board) (EX only) (Not used) FONT 85C30 *1: only for debugging... - Page 161 SHARP SERVICE MANUAL JX8200SM [13] ELECTRICAL SECTION ROM BLOCK Apple Talk & RS232C I/F BLOCK (Option) FCT162245 FIFO AM85C30 26LS31 AD bus DATA bus IO DATA D31-0 RS232C 26LS32 I/F connector LS245 Address bus MAX232 16Mbit A21-2 ROM x 2...
- Page 162 SHARP SERVICE MANUAL JX8200SM [13] ELECTRICAL SECTION a. CPU (IDT79R3081) I. BLOCK DIAGRAM BrCond(3:2,0) Master Pipeline Control Clock Generator Clkln Unit/Clock Doubler System Control Floating Point Coprocessor Integer Coprocessor (CP0) CPU Core (CP1) Exception/Control General Registers Register Unit Registers (32 x 32)
- Page 163 SHARP SERVICE MANUAL JX8200SM [13] ELECTRICAL SECTION II. Signal list (Pin configurations) Clkln A/D(14) Rsvd(4) A/D(13) Rsvd(3) A/D(12) Rsvd(2) A/D(11) A/D(10) Rsvd(1) CohReq A/D(9) Int(5) 84-Pin MQUAD/PLCC A/D(8) Top View Int(4) A/D(7) Int(3) A/D(6) SInt(2) A/D(5) SInt(1) A/D(4) SInt(0) A/D(3)
- Page 164 SHARP SERVICE MANUAL JX8200SM [13] ELECTRICAL SECTION PIN NAME DESCRIPTION Address Latch Enable: Used to indicate that the A/D bus contains valid address information for the bus transaction. This signal is used by external logic to capture the address for the transfer, typically using latches.
- Page 165 SHARP SERVICE MANUAL JX8200SM [13] ELECTRICAL SECTION b. Laser printer system controller (ASIC) (IDT79R3710) Interrupt Controller • 6 external level interrupts (through the PIO pins) I. Specifications • 14 internal interrupts Pin-Compatible System Controller with Laser Printer-control • Individual interrupt mask capability, enabling polling or interrupt-...
- Page 166 SHARP SERVICE MANUAL JX8200SM [13] ELECTRICAL SECTION (Pin out table) Signal Name Signal Name Signal Name Signal Name TCS ∗ IOWR ∗ AD[14] DADR[0] TAACK ∗ IORD ∗ RAS ∗ [0] AD[13] RAS ∗ [1] AD[12] PIO[0] IOA1 IOBE ∗ [1] RAS ∗...
- Page 167 SHARP SERVICE MANUAL JX8200SM [13] ELECTRICAL SECTION (Pin Assignment Table) Pins identified with an asterisk are active when low. Pull Up/ Pin Name Type Description Pull Dn CPU Interface A/D[31:0] P.U. Address/Data: Multiplexed address and data bus. (R3710 only) In the Address phase: A/D[31:4] are address, A/D[3:0] are Byte Enable[3:0]. During Typhoon Master cycles, A/D[3:2] contain address bits 3 and 2, and not Byte Enables.
- Page 168 SHARP SERVICE MANUAL JX8200SM [13] ELECTRICAL SECTION Pull Up/ Pin Name Pull Dn Type Description TDS ∗ R3710 Typhoon Data Strobe: only: O Master mode (input) – during Write indicates that there is valid data on the A/D bus. During Read indicates data phase.
- Page 169 SHARP SERVICE MANUAL JX8200SM [13] ELECTRICAL SECTION Pull Up/ Pin Name Pull Dn Type Description CACK ∗ Centronics acknowledge: Peripheral device driven. NOTE: This is the Compatibility Mode Name. CBUSY Centronics Busy: Peripheral device driven. NOTE: This is the Compatibility Mode Name.
- Page 170 SHARP SERVICE MANUAL JX8200SM [13] ELECTRICAL SECTION Pull Up/ Pin Name Pull Dn Type Description PIO[5]/DCD Programmable Input/Output or Data Carrier Detect: As input, it can be alternatively used as Data Carrier Detect for external modem or as a programmable I/O pin. In the modem option a change on the pin will set a flag in the Modem Status register and cause an interrupt.
- Page 171 SHARP SERVICE MANUAL JX8200SM [13] ELECTRICAL SECTION (Pin Assignment Table) CPU pins identified with an asterisk are active when LOW. Centronics signals preceded by an ’n’are active when LOW. Pin Name Drive Description R3710/40 Interface SYSCLK ∗ System Clock: connects directly to the CPU SYSCLK ∗ output.
- Page 172 SHARP SERVICE MANUAL JX8200SM [13] ELECTRICAL SECTION III. R3741 to R3710/40 CONNECTIONS Enhanced SCC functions support high-speed frame reception using DMA SysCil* • 14-bit byte counter SysReset* IOWr* • 10 x 19 SDLC/HDLC Frame Status FIFO IORd* IDT79R3710/40 IOCSx* IDT79R3741 •...
- Page 173 SHARP SERVICE MANUAL JX8200SM [13] ELECTRICAL SECTION Pin name Description PLCC,LCC DCDA, Data Carrier Detect (Inputs; Active Low) DCDB These pins function as receiver enables if they are programmed as Auto Enables; otherwise, they may 5 4 3 2 1 44 43 42 41 40 be used as general-purpose input pins.
- Page 174 SHARP SERVICE MANUAL JX8200SM [13] ELECTRICAL SECTION f. 20 BIT BUFFERS Pin name Description Data/Control Select (Input) I. FUNCTIONAL BLOCK DIAGRAM This signal defines the type of information transferred to or from the SCC. A High means data is transferred; a Low indicates a command is transferred.
- Page 175 SHARP SERVICE MANUAL JX8200SM [13] ELECTRICAL SECTION g. 16 BIT TRANSPARENT LATCHES h. 16 BIT BIDIRECTIONAL TRANSCEIVERS I. FUNCTIONAL BLOCK DIAGRAM I. FUNCTIONAL BLOCK DIAGRAM 1DIR 2DIR TO 9 OTHER CHANNELS TO 9 OTHER CHANNELS II. PIN CONFIGURATIONS II. PIN CONFIGURATIONS...
- Page 176 SHARP SERVICE MANUAL JX8200SM [13] ELECTRICAL SECTION i. OCTAL REGISTERED TRANSCEIVERS III. PIN DESCRIPTION Name Description I. BLOCK DIAGRAM A0 ∼ 7 Eight bidirectional lines carrying the A Register inputs or B Register outputs. B0 ∼ 7 Eight bidirectional lines carrying the B Register CE CP inputs or A Register outputs.
- Page 177 SHARP SERVICE MANUAL JX8200SM [13] ELECTRICAL SECTION (3) INTERFACE b. RS-232C Serial The Laser Printer is equipped with the following interfaces: Connector 1) IEEE 1284 Parallel (Standard) Female 25-pin DDK 17LE-13250-28 (D4CK) or equivalent. 2) RS-232C serial (option) 3) AppleTalk (option)
- Page 178 SHARP SERVICE MANUAL JX8200SM [13] ELECTRICAL SECTION Communication c. AppleTalk Communication: Start/stop mode ...Asynchronous Connector Baud rate: 300, 600, 1200, 2400, 4800, 9600, 19,200, Female 8-pin TCS7189-01-201 or equivalent. 38,400, 57,600 bps Transmission: Full duplex Synchronization: Start bit ..1 Stop bits .
- Page 179 SHARP SERVICE MANUAL JX8200SM [13] ELECTRICAL SECTION d. Network Interface Board (option) (2) Memory 125mm × 125mm • a. Outline Board Size Power Consumption 5V + /–10% × 1A • In this printer, RAM allocation will be defined. The following modes affect RAM allocation.
- Page 180 SHARP SERVICE MANUAL JX8200SM [13] ELECTRICAL SECTION b. Memory Map Description Size Address range Note DRAM Bank 0 8MBytes 00000000H-007FFFFFH Standard Bank 0a 4MBytes 00000000H-003FFFFFH Bank 0b 4MBytes 00400000H-007FFFFFH Bank 1 4MBytes 00800000H-00BFFFFFH Not used Bank 2 4MBytes 00C00000H-00FFFFFFH Bank 1...
- Page 181 SHARP SERVICE MANUAL JX8200SM [13] ELECTRICAL SECTION External I/O (for Option Board) Address Peripheral Register 0C000000H Extenal Serial I/O (85C30) Serial Port A Control Register 0C000004H Serial Port A Data Register 0C000008H Serial Port B Control Register 0C00000CH Serial Port B Data Register...
- Page 182 (3) INTERFACE a. Support I/O Interface b. Auto Port Sensing The Sharp Color Laser Controller provides one standard I/O and two These I/O port support Auto Port Sensing . This function can be set extended I/O slot as follows. ON/OFF for each port by Operation Panel.
- Page 183 SHARP SERVICE MANUAL JX8200SM [13] ELECTRICAL SECTION c. I/O Buffer size I/O Buffer Size Ethernet ∗ Parallel RS232C LocalTalk 100KB 64KB 12MB 200KB 64KB 16MB 400KB 64KB 24MB 400KB 64KB 40MB 64KB ∗ The I/O buffer on the DPI Ethernet board...
- Page 184 SHARP SERVICE MANUAL JX8200SM [13] ELECTRICAL SECTION (Nibble mode) Transfer HOST PRINTER /AUTOFD Send data is set with software /INTR depending on PE, /Fault, SELECT, and BUSY. Interrupt 0~35ms DELAY With delay on, 500ns timer is on. /ACK 0~1s /AUTOFD...
- Page 185 SHARP SERVICE MANUAL JX8200SM [13] ELECTRICAL SECTION (Termination mode) HOST PRINTER /SELECTIN Evalid ON when termination is effective. 0~35ms BUSY High PE, BUSY, and /Fault are set with software. /FAULT High /INTR Interrupt min0.5µs DELAY /ACK SELECT /INTR 0~1s /AUTOFD...
- Page 186 SHARP SERVICE MANUAL JX8200SM [13] ELECTRICAL SECTION Reverse idle phase: Set to LOW then to HIGH by the Reverse data transfer Nibble Mode: Data bit 1, then 5. peripheral device to generate an interrupt phase: Byte Mode: Same as the negation which informs the host of data ready.
- Page 187 SHARP SERVICE MANUAL JX8200SM [13] ELECTRICAL SECTION Negotiation phase: Set to HIGH. Host Logic High: Driven by the host. Reverse data transfer Set to HIGH. Set to HIGH by the host to show that all the other signals sourced by phase: the host are valid.
- Page 188 SHARP SERVICE MANUAL JX8200SM [13] ELECTRICAL SECTION B. COMMAND (EX only) (1) PJL a. Addition and change of PJL command parameters In this printer, PJL command parameters and their set values will be added to, changed from or deleted from the standard by the following reasons.
- Page 189 SHARP SERVICE MANUAL JX8200SM [13] ELECTRICAL SECTION b. All PJL commands supported and their parameter setting range The following Table shows all the PJL commands (19 commands) used for PJL support, their functions and parameter setting ranges. (PJL commands and their functions)
- Page 190 SHARP SERVICE MANUAL JX8200SM [13] ELECTRICAL SECTION General PJL Environment Variables Command Parameter Range AUTOCONT ∗ (DEFAULT) OFF, ON CLEARABLE-WARNIGS ∗ (SET) (INQUIRE) JOB, ON (DINQUIRE) COPIES 1 to 999 DENSITY ∗ ECONOMODE OFF, LIGHT, MEDIUM, DARK FORMLINES 5 to 128...
- Page 191 SHARP SERVICE MANUAL JX8200SM [13] ELECTRICAL SECTION Command Parameter Range ECHO <words> ASCII CODE 33 to 255 <SP>, <HT> INFO Printer model No. CONFIG Printer configuration (Number of trays MEMORY Total free amount STATUS Current printer status VARIABLERS Current readback setting and currently possible settings.
-
Page 192: Pcu
SHARP SERVICE MANUAL JX8200SM [13] ELECTRICAL SECTION 2. PCU A. PCU block diagram Data/Control signal Data/Control signal Drive signal Sensors/Detectors DRIVER Address/Data signal Loads (IC3/4/5/6/8/9) Control signal DRIVER Toner Data signal (IC12) motor (black) CPU (IC1) High voltage AMP (IC14) - Page 193 SHARP SERVICE MANUAL JX8200SM [13] ELECTRICAL SECTION b. Pin configurations RESET MODE1 MODE0/VPP (Open) (Open) C. Signal table NAME DESCRIPTION SIGNAL KIND Address/data signal 0 DATA Address/data signal 1 DATA Address/data signal 2 DATA Address/data signal 3 DATA Address/data signal 4...
- Page 194 SHARP SERVICE MANUAL JX8200SM [13] ELECTRICAL SECTION NAME DESCRIPTION SIGNAL KIND CTMGB Toner motor drive control signal B (Color) (Pulse signal) CONTROL Operation panel display data signal DATA Operation panel display data signal DATA Operation panel display data signal DATA...
- Page 195 SHARP SERVICE MANUAL JX8200SM [13] ELECTRICAL SECTION NAME DESCRIPTION SIGNAL KIND KTMB Toner motor drive signal B (Black) (Pulse signal) DRIVE KTMDA Black toner motor control signal A (Clock) CONTROL (CLOCK) KTMDB Black toner motor control signal B (Clock) CONTROL (CLOCK)
- Page 196 SHARP SERVICE MANUAL JX8200SM [13] ELECTRICAL SECTION NAME DESCRIPTION SIGNAL KIND POUT_ Paper detector signal (Paper exit section) (Detection at LOW) DETECT PRST Print start signal COMMAND Standard cassette size detection signal 0 (Detection at HIGH) DETECT Standard cassette size detection signal 1 (Detection at HIGH)
-
Page 197: Video I/F
SHARP SERVICE MANUAL JX8200SM [13] ELECTRICAL SECTION NAME DESCRIPTION SIGNAL KIND TDCAS_ Transfer drum cleaner clutch solenoid drive signal (Drive at LOW) DRIVE TDON_ Transfer discharger ON signal (The transfer discharger voltage is outputted at LOW.) CONTROL TDPOS Transfer drum home position sensor signal (Detection at HIGH) - Page 198 SHARP SERVICE MANUAL JX8200SM [13] ELECTRICAL SECTION C. Signal list D. Printer Operation Sequence Signal Direction Function Controller → Engine Command sending line to Warming Up Print (Command) Engine. Controller sends READY various commands to the 0 ms Min (11) Engine through this line.
- Page 199 SHARP SERVICE MANUAL JX8200SM [13] ELECTRICAL SECTION E. Print area and video signal 498.04 usec HSYNC 22.1 usec 5,100 dots 215.9 mm 8.5 inch 378.88 usec 4.2 mm 4.2 mm TBD mm 6,600 lines 5.17 secs 355.6 mm Letter 8.5" x 11" page 11 inch 3.28 sec...
-
Page 200: Report/Test Print Function
[14] REPORT/TEST PRINT FUNCTION Test Print There are 2 kinds of test prints as follows. In case of these tests, only one copy will be printed. * PS TEST PRINT The printer configuration information is printed. * FONT LIST 1. Built-in font list is printed. * Start-up Page Demo page is printed. - Page 201 14 – 2...
- Page 202 14 – 3...
- Page 203 14 – 4...
- Page 204 14 – 5...
- Page 205 *PowerPage.the PowerPage logo. PowerBand and PowerSmooth are US registered trademark of Pipeline Associates Inc. *User installable option. PostScript Level 2 compatible PostScript is a trademark of Adobe Systems Inc. which may be registered in ccrtain jurisdictions. *PCL ia a registered trademark of Hewlett-Packard Comany 14 –...
- Page 206 © COPYRIGHT 1997 BY SHARP CORPORATION All rights reserved. Printed in Japan. No part of this publication may be reproduced, stored in a retrieval system, or transmitted. In any form or by any means, electronic, mechanical, photocopying, recording, or otherwise, without prior written permission of the publisher.
Need help?
Do you have a question about the JX-8200 and is the answer not in the manual?
Questions and answers