Sign In
Upload
Download
Table of Contents
Contents
Add to my manuals
Delete from my manuals
Share
URL of this page:
HTML Link:
Bookmark this page
Add
Manual will be automatically added to "My Manuals"
Print this page
×
Bookmark added
×
Added to my manuals
Manuals
Brands
Multiplex Manuals
Remote Control
Royal SX 9
Instructions manual
Multiplex Royal SX 9 Instructions Manual
Hide thumbs
1
2
Table Of Contents
3
4
5
6
7
8
9
10
11
12
13
14
15
16
17
18
19
20
21
22
23
24
25
26
27
28
29
30
31
32
33
34
35
36
37
38
39
40
41
42
43
44
45
46
47
48
49
50
51
52
53
54
55
56
57
58
59
60
61
62
63
64
65
66
67
68
69
70
71
72
73
74
75
76
77
78
79
80
81
82
83
84
85
86
87
88
89
90
91
92
93
94
95
96
97
98
99
100
101
102
103
104
105
106
107
108
109
110
111
112
113
page
of
113
Go
/
113
Contents
Table of Contents
Bookmarks
Table of Contents
Contents
Table of Contents
Introduction
The ROYAL SX Philosophy
Arrangement of the Instructions
Safety Notes
General Safety Notes
Range Checking
Liability / Compensation
Guarantee
CE Conformity Declaration
Specification
The Transmitter Battery
Safety Notes
Charging the Transmitter Battery
The Correct Method of Charging
Fast Charging
Normal Charging
ROYAL SX Battery Management
Self-Discharge
Terms Used in Battery Charging
This Is Important
Unchanged Features
Replacing the Transmitter Battery
Trickle Charging
8.7. Transmitter Battery Care and Storage
Recycling
The Transmitter
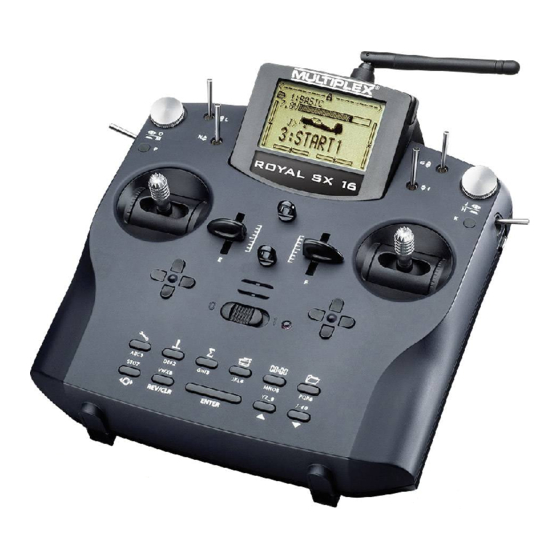
Front Face of the Transmitter
Rear Face of the Transmitter
Interior of the Transmitter
Mechanical Details
Opening / Closing the Transmitter Case
Removing / Installing the RF Module
Ideal Transmitter
Replacing the Transmitter Battery
Adjusting / Replacing the Stick Tops
Adjusting the "Hardness" of the Sticks
Ratchet / Friction System
Swivelling the Stick Units
Plastic Stick Top with Three Buttons
Advantages of Digital Trims
On-Screen Trim Display
The Cruciform Digital Trims
RF Module Excl. Scanner Installed
Switching on "Normally
Installation and Functions
Digital Trims
General Information
10.2. Switching on “Normally”
Switching On, Using the Transmitter
Switching on for the First Time
Switching the Transmitter on with Throttle-Check Active
Throttle-Check for Fixed-Wing Models
Binding Procedure
Range Checking
Throttle-Check for Model Helicopters
Fast Response ON/OFF
Status Display 1 (Standard)
Status Display 2 (Flight Phases)
The Status Displays
The "ROYAL SX" Philosophy
Using the Keypad
Operating the ROYAL SX
Status Display 3 (Timers)
Status Display 4 (System Information)
ROYAL SX Menu Structure
Using Buttons When Operating a Model
The
What Are Switches
What Are Transmitter Controls
What Do the Sticks, Sliders and Switches Do? Or: Global Assignments (Lists)
What Does "Assignment" Mean
Why "Global" Assignments
Which Assignment Lists Are Available
How Are the Assignment Lists Arranged
How Are the Assignment Lists Used
Summary: "Global Assignments
Global Mixer Definitions
How Are the Free Mixers Used in Fixed-Wing Model Aircraft
Which Global Mixers Are Available
Mixer Names with a "+" Suffix
Why "Global" Mixer Definitions
How Are Mixers Used in Helicopters
Summary of the "Free Mixers
Model Templates
Servo Configuration
Which Model Templates Are Available
Why Are Model Templates Needed
What Do the Model Templates Contain
Allocation - What's that
How Is the Calibration Carried out
Servo Calibration
What Can be Calibrated
Royal Sx
Menu I, Call up New Model
Selecting the Servo Configuration (Servo Conf.)32
Selecting the Template
Setting up a Fixed-Wing Model
The Method in Principle
Which Model Memory will be Used
Confirming with OK
Selecting the Assignment
Selecting the Stick Mode
Setting up the New Model in the Transmitter
12.3. 34
Entering the Model Name
Preparing the Controls / Switches
Selecting / Changing the Idle Position for Spoiler
Throttle
Changing the Switch on Position
Checking / Changing the Servo Assignment
Preparing Servos
Calibrating Servos = Setting the Centre and Maximum Travels
Checking / Changing the Direction of Servo Rotation36
Adjusting Ailerons, and Activating Landing Aid (Mixer AILERON+)
Activating Differential
Differential Aileron Travel
Setting the Differential Value
Mixers (Mixer ELEVATR+ )
Adjusting Elevator, Activating Elevator Mixers (Mixer ELEVATR+)
Spoiler to Elevator = Spoiler Compen-Sation
(Spoiler Input to ELEVATR+ Mixer)
Throttle to Elevator = Throttle Compen-Sation
Tr Input to ELEVATR+ Mixer)
Activating the Flap Input in the Mixer FLAP
(Camber-Changing Flaps)
Flaps)
Butterfly)
Activating the Elevator-Tr (Ele -Tr) Input in the
Activating the Mixer V-TAIL
Assigning V-Tail Servos
Checking / Changing the Direction of Servo Rotation41
Activating Inboard Flaps
Changing Flaps) (Mixer FLAP+)
Activating the Spoiler Input in the Mixer FLAP
V-Tail Models
12.10.2. Default Settings in the Menu Flight Phase
12.10.3. Assigning Flight Phase Switches
12.10.4. Locking / Unlocking Flight Phases
Adjusting the Remaining Inputs
12.10. Working with Flight Phases
What Is the Purpose of Switching between Different
Flight Phases
12.10.5. Copying Flight Phases
12.10.6. Changing Flight Phase Names
12.10.7. Setting a Transition Time
12.11. Supplementary Functions
12.11.1. D/R and Expo
12.11.2. Activating Combi-Switch
12.11.3. Motor Run Timer
Menu I, Call up New Model
Selecting the Servo Config(Uration)
Selecting the Template
Setting up a Model Helicopter
The Method in Principle
Setting up a New Model in the Transmitter45
Which Model Memory will be Used
Confirming with OK
Selecting the Assignment
Selecting the Stick Mode
Checking / Changing Control Settings for Idle / Collective Pitch Min. and Throttle Limiter Min
Changing the Switch on Positions and / or the Switch Assignment
Entering the Model Name
Preparing the Controls / Switches
Checking / Changing the Servo Assignment
13.5. Checking / Adjusting the Main Rotor
Calibrating Servos = Setting the Centre and Maximum Travels
Checking / Adjusting the Tail Rotor
Checking / Changing the Direction of Rotation of the Tail Rotor Servo
The TAIL Mixer
Basic
Differential Yaw (Rudder) Travel
Gyro
Parameter Type of Gyro
Mixer Zero Point
Offset Value
Collective Pitch to Tail (Revo-MIX)
Adjusting Gyro Suppression
Activating the Aileron Input in the FLAP+ Mixer 13.8
Throttle, and Associated Functions
What Is the Meaning of the Terms Limiter, Curve, Throttle Min., Trim, DTC and Throttle Cut
Throttle for Electric Helicopters
Throttle for I.C. Powered Helicopters
Setting the Collective Pitch Curve
What Is the Purpose of Switching between Different
Flight Phases
13.10.3. Assigning Flight Phase Switches
13.10.4. Locking / Unlocking Flight Phases
13.10.5. Copying Flight Phases
13.10.6. Changing Flight Phase Names
13.10.7. Setting a Transition Time
13.10. Working with Flight Phases
13.10.2. Default Settings in the Menu Flight Phase
Main Menu ¡Setup
Menu Transmitter
One of the Two 3-D Digi-Adjusters
Parameter Group Battery
Parameter Sound
Parameter Group Safety
Defining a Free Mixer
Menu
Method of Working and Options for the Mixer Inputs59
Mixer Def
Parameter Group Display
Making Mixer Inputs Switchable
Menu: Assignment
Sub-Menu Assign.controls
(Proportional) Transmitter Controls as Switches
Special Case Extra Sw
Sub-Menu Assign.switches
Menu Training
The ROYAL SX as Teacher Transmitter
The ROYAL SX as Pupil Transmitter
Menu User
Parameter Language
Parameter Name
Parameter PIN (Access Code)
Main Menu ¢Control
Menu Control
Menu Control
Menu ¢Triggerpoint
Parameter Step (Trim Increment)
Parameter Trim
Parameter D/R (Dual-Rate)
Parameter Expo
Parameter Fixed Value
Parameter Mode (Throttle Trim)
Parameter Trvl (Travel)
Parameter Collect. P1
Parameter Limit
Parameter Throttle P1
Parameter Time
Parameter Throttle Min. (Idle, Throttle Limiter)
Ail.diff. (Aileron Differential)
Combi-Sw. (Combi-Switch)
Control Menu Screen Layout
Main Menu
Mixer
Controls MIX (Transmitter Control Mixer)
Setting up Free Mixers
Comp. Mixer (Compensation Mixer)
Menu Mixer Fixed-Wing Models
Menu: Mixer Helicopters
Gyro (Gyro Mixer)
TAIL (Tail Rotor Mixer)
Basic Offset Value
Collective Pitch to Tail (Revo-MIX)
Differential Yaw (Rudder) Travel
Mixer Zero Point
Rotor Head (Swashplate Mixer)
Main Menu Servo K
Menu Calibrate
Sub-Menus for Individual Servos
Menu Assignment
The Procedure for Calibrating a Servo
ROYAL SX 16 Only: Special Features Relating to Servo 11 and / or Servo 12 (PPM Modulation)
17.4. 81
Menu Monitor
Menu: Test Run
Main Menu Timer a
Non-MULTIPLEX Receivers with Ten Channels
Slot, Sum and Interval Timers: Display and Reset
Example: Monitoring the Slot Time (Time Limit)
Summary: Timer 1 Μslot
Menu ¥Timer, Model for Flight Time Per Season / Session
Summary Timer Model
Menu ¥Timer, Μslot
Example: Recording Motor Run Time
Menu ¥Timer, ´Sum
Summary Timer 2 ´Sum
Menu ¥Timer, ¶¶Interval
Example
Monitoring Motor Run Time Per Climb
Summary Timer 3 ¶¶Interval
Total Transmitter Operating Time
Main Menu Memo I
Selecting a Model Memory
Copying a Model Memory
Erasing Model Memories
Managing Flight Phases
Selecting Flight Phase Names
Checking / Changing the Properties of the Current Model Memory
Copying Flight Phases
Setting the Flight Phase Transition Time
Locking / Unlocking Flight Phases
Setting up a New Model
What Can be Changed
What Is Displayed
Menu: Modulation
Special Facilities
Using the 3-D Digi-Adjuster to Alter Settings in Flight
PC Data Back-Up / Updating
Royal Sx
Using a Flight
Aluminium Stick Top with Switch or Button - Installation and Functions
Installing the Stick Tops
Simulator
Error Messages
Accessories
Trainer Lead
Connecting a Stick Switch or Second Stick Button
Connecting the Stick Button
Using the Stick Switches
Retro-Fitting Switches K and / or P
Using the Second Stick Button
Additional Accessories, Replacement Parts
Advertisement
Quick Links
1
Binding Procedure
Download this manual
Instructions
MULTIPLEX Modellsport GmbH & Co.KG • Westliche Gewerbestraße 1 • Bretten • Germany
© MULTIPLEX 2014 • Printed in Germany
www.multiplex-rc.de
Table of
Contents
Previous
Page
Next
Page
1
2
3
4
5
Advertisement
Table of Contents
Need help?
Do you have a question about the Royal SX 9 and is the answer not in the manual?
Ask a question
Questions and answers
Related Manuals for Multiplex Royal SX 9
Remote Control Multiplex SMART SX Manual
(13 pages)
Remote Control Multiplex SMART SX FLEXX Operating Instructions Manual
(216 pages)
Remote Control Multiplex Royal SX 16 Instructions Manual
(113 pages)
Remote Control Multiplex COCKPIT SX Instructions Manual
(84 pages)
Remote Control Multiplex PROFI CAR 403 Operating Instructions Manual
(48 pages)
Remote Control Multiplex EUROPA mc Series Manual
(98 pages)
Remote Control Multiplex Royal Evo Instructions Manual
(57 pages)
Remote Control Multiplex Commander MC Manual
(192 pages)
Remote Control Multiplex COCKPIT SX MLINK Supplementary Operating Instructions
(72 pages)
Remote Control Multiplex COCKPIT SX Supplementary Information
(14 pages)
Remote Control Multiplex Cockpit SX Instruction Manual
(36 pages)
Remote Control Multiplex Profi MC 3010 User Manual
(226 pages)
Remote Control MULTIPLEX PROFI TX 9 Instructions Manual
(227 pages)
Remote Control Multiplex PROFI mc 4000 Manual
(114 pages)
Remote Control Multiplex M-LINK RX-7-DR M-LINK Operating Instructions Manual
(33 pages)
This manual is also suitable for:
Royal sx 16
Table of Contents
Save PDF
Print
Rename the bookmark
Delete bookmark?
Delete from my manuals?
Login
Sign In
OR
Sign in with Facebook
Sign in with Google
Upload manual
Upload from disk
Upload from URL


Need help?
Do you have a question about the Royal SX 9 and is the answer not in the manual?
Questions and answers