
Related Manuals for Avery Berkel IM Series


Summary of Contents for Avery Berkel IM Series
-
Page 1: User Instructions
IM Series Counter Service Scales User Instructions ENGLISH *AWT35-000252* AWT35-000252-AB 09-11-2007... - Page 2 Full acknowledgment of the source must be given. Avery Berkel is a division of ITW Limited. This publication was correct at the time of going to print and is supplied without liability for errors or omissions.
-
Page 3: Table Of Contents
Creating messages Programming Operators 4.10 Setting function security 4.11 Printing data reports Machine Set-up Direct access (Hot) keys Dedicated keys Printer set-up Assigning a barcode format Adjusting the display brightness Machine operating modes Setting alarms Programming Products IM series User Instructions... - Page 4 Using the ADD key Returning products Pre-pack Operations Setting the machine to pre-pack Using PLUs Using tares Multiple labels Returning labels Back calculation Barcodes 10.1 Introducing barcodes 10.2 Branded goods 10.3 In-store goods 10.4 Barcode scanning IM series User Instructions...
- Page 5 14.2 Operating mode 14.3 Auto configure 14.4 Setting machine ID 14.5 Network map 14.6 Backup server 14.7 Dealing with network faults 14.8 Local mode 14.9 Network dump 14.10 Machine setup dump 14.11 Advanced set-up Data Backup IM series User Instructions...
- Page 6 15.1 Dumping/loading data Help 16.1 Set-up mode 16.2 Error messages 16.3 If things go wrong Appendix 17.1 Extended character sets 17.2 Supported AI codes 17.3 Substitution codes 17.4 Nutrient facts IM series User Instructions...
-
Page 7: Warnings
Warnings Warnings IM series User Instructions... -
Page 8: Warnings
The following warning may be applicable to your machine. WARNING: This is a class A product. In a domestic environment this product may cause radio interference in which case the user may be required to take adequate measures. IM series User Instructions Warnings... - Page 9 1.1 Warnings Cleaning the print head CAUTION: Do not use metallic objects on the print head. Only use the recommended print head cleaning kit. Warnings IM series User Instructions...
-
Page 10: About Your Machine
About your machine This chapter shows the models in the range and tells how you should handle the machines. Any legal requirements are stated in this chapter. Contents 2.1 - Description (page 12) 2.2 - Installation (page 14) IM series User Instructions... -
Page 11: Description
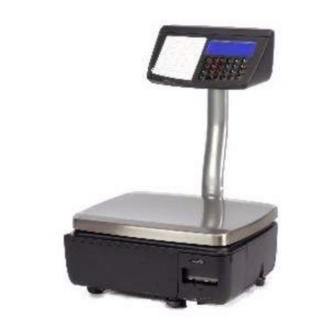
These User Instructions include all the functions available across the complete range of IM Series machines. This means that some of the functions described may not be available at your machine. You should ignore those sections which do not apply. - Page 12 2.1 Description numeric keys alpha character temperature keys function keys programmable call service Dept 3 keys engineer Fresh meat flashing character scan the barcode spirit level IM series User Instructions About your machine...
-
Page 13: Installation
Levelling Legal requirements To use the machine only in a manner which complies with any mandatory markings. In certain countries it is illegal to use pre-pack mode for direct trade with the public. About your machine IM series User Instructions... -
Page 14: Getting Started
3.1 - Connections (page 16) 3.2 - Switching on (page 17) 3.3 - Function keys (page 19) 3.4 - Solving problems (page 21) 3.5 - Printing (page 22) 3.6 - Routine maintenance (page 26) IM series User Instructions Getting started... -
Page 15: Connections
Take care not to trap any cables under the feet, or the ribs in the base of the machine, as this could cause weighing inaccuracies and damage to the cables. Figure 3.1 Connections and switches 1. USB 2. Power supply connection 3. Cash drawer 4. Expansion port 5. Ethernet network Getting started IM series User Instructions... -
Page 16: Switching On
The electrical supply at the socket outlet must provide over current protection of an appropriate rating Before operating your machine make sure that it has been programmed with the required functions. Typical keyboards and displays Figure 3.2 IM100 Sales keyboard Figure 3.3 IM202 Programming keyboard IM series User Instructions Getting started... - Page 17 3.2 Switching on Figure 3.4 Typical vendor display 6. Metrology information 7. Transaction count 8. Transaction details 9. Sub-total 10.Operator details 11.IM model number Getting started IM series User Instructions...
-
Page 18: Function Keys
Initiates a display test sequence. Pressed again during the test sequence prints a test report. Press operator key and type in PIN during test sequence to gain access to Manager Mode. IM series User Instructions Getting started... - Page 19 3.3 Function keys Move to the item above in the displayed list Move to the item below in the displayed list Getting started IM series User Instructions...
-
Page 20: Solving Problems
3.4 Solving problems Solving problems If you do not see the correct display, check the following: Act on any error message displayed. 16.2, Error messages, page 231 IM series User Instructions Getting started... -
Page 21: Printing
3.5 Printing Printing IM Series scales are supplied with a label/receipt printer. The printer will accept label or continuous paper rolls of two core diameters. The printer is fitted with a small hub to take paper or label rolls with the small core. - Page 22 120mm maximum Roll diameter Daily, using specified kit. Cleaning Changing the printer roll Changing the paper/label roll Note: If you are rewinding the backing paper follow the instructions on page Release print head catch IM series User Instructions Getting started...
- Page 23 Rewinding the paper Release print head catch Tear paper then remove core and backing paper Turn knob on rewind spindle to position 2 and remove backing paper from rewind spindle. position 2 position 1 Getting started IM series User Instructions...
- Page 24 Feed paper over rewind spindle, under guide bar and beneath paper guide. paper guide paper width guide rewind spindle Turn knob on rewind spindle to position 2 and feed backing paper through outer slots. position 2 Close print head. IM series User Instructions Getting started...
-
Page 25: Routine Maintenance
We recommend that the print head is cleaned daily in order to ensure maximum life and to maintain the quality of print. The print head should be cleaned using the specified head cleaning kit, part number SER/GSI/0236, available from your Avery Berkel centre. Always follow the instructions on the cleaning kit. Release print head catch... - Page 26 3.6 Routine maintenance Insert cleaning card Close print head Pull cleaning card through IM series User Instructions Getting started...
-
Page 27: Programming The Machine
4.6 - Creating product groups (page 45) 4.7 - Setting up the ADD label (page 46) 4.8 - Creating messages (page 49) 4.9 - Programming Operators (page 53) 4.10 - Setting function security (page 56) 4.11 - Printing data reports (page 58) IM series User Instructions... -
Page 28: Manager Mode
2. Reverse the overlay to reveal the programming side. 3. Slide the top edge of the overlay up under the protective cover until the bottom edge rests on the supports Figure 4.1 Programming overlays IM series User Instructions Programming the machine... - Page 29 2. All other operators will have factory default settings of PIN 0 and security level 0 unless you change them. For information on changing an operator PIN and security level see Programming Operators on page 53 while all segments are displayed operator number 0 - 99 enter PIN Programming the machine IM series User Instructions...
- Page 30 Select the like numbered Move to menu item menu item below. PLU Create/Edit quick save Save data entered up to this point. To exit Manager Mode from within a menu Figure 4.2 Navigating the menus IM series User Instructions Programming the machine...
-
Page 31: Creating And Editing Text
D. 2. Press followed by the identification number for the font you require at the start of the text. Programming the machine IM series User Instructions... - Page 32 Press then to move to the next line feed or to the end of displayed text. Correcting the last character displayed 1. Press to delete the last character. 2. Enter the character required. IM series User Instructions Programming the machine...
- Page 33 See section 17.1, page 237, for the table of characters available and the corresponding numeric codes. • Press followed by the numeric code keys for the character required. Programming the machine IM series User Instructions...
-
Page 34: Setting Up Data Tables
Tax reference 1. This is the reference normally used to calculate the tax. • Tax reference 2. Press with the PLU selected but before assigning the change transaction to use tax reference 2. • Pressing does not alter the price paid by the customer. change IM series User Instructions Programming the machine... - Page 35 You can set the security level for each discount rate. An operator will only be able to apply discount rates with a security level equal to or lower than his/her own security level. Programming the machine IM series User Instructions...
- Page 36 • assign a dedicated key to each payment option if required (see section 5.2, page 64). • select one of seven types of payment for each payment option or to disable it IM series User Instructions Programming the machine...
- Page 37 General Conversion Rate Stock Movement Format Pre-Set Value Minimum Value Maximum Value Halo Secur. Lev. Prices Yes/No Change Yes/No Refund Yes/No Enforce Value Y./No Open Drawer Yes/No Security Level Figure 4.6 Payment programming Programming the machine IM series User Instructions...
- Page 38 • General Preset value Payment keys programmed with a pre-set value will only allow a payment entry that matches the pre-set value. For example, you could have a dedicated key for £50 notes. IM series User Instructions Programming the machine...
- Page 39 When a receipt total has a negative value, and the payment key selected allows refunds, the receipt or ADD label is printed. If refunds are not allowed for the payment key selected you will see the message Refunds Disabled. Programming the machine IM series User Instructions...
- Page 40 The payment name, the value in the foreign currency and the conversion rate used is printed on the receipt. Security level Payment entry is only allowed if the operator security level is as high or higher than the security level set for the payment key. IM series User Instructions Programming the machine...
-
Page 41: Setting The Date And Time
The time is displayed to the right of the date in hours/minutes (24 hour). • You can only change the digit which flashes. • You can press to move along the display. Enter • Press when you have set all the digits you need to change. Programming the machine IM series User Instructions... -
Page 42: Creating Departments
Description of department (20 characters max.) Assign Machine Figure 4.9 Creating departments Enter Press instead of typing in the machine ID if you do not wish to allocate a specific machine to the department. IM series User Instructions Programming the machine... - Page 43 PLU 2 PLU 3 Dept 2 PLU 1 Bakery Dept 3 PLU 1 Fresh meat Dept 2 PLU 2 Bakery Dept 3 PLU 2 Fresh meat Figure 4.10 Using commodity and department keys Programming the machine IM series User Instructions...
-
Page 44: Creating Product Groups
Note: A product group can be used as a barcode lock see Printing barcodes, page 149 System Data 1 Products 4 Messages 1 Sign On 6 Group Names Group Name No. (0 - 99) Group Name (20 chars max.) Figure 4.11 Creating groups IM series User Instructions Programming the machine... -
Page 45: Setting Up The Add Label
System Data 6 Label Details 1 Add Label Label Format Add Label Text (200 chars. max.) Barcode Disabled/Enabled Date 1 Disabled Date 1 Days Date 1 Months Figure 4.12 Creating an ADD label Programming the machine IM series User Instructions... - Page 46 ADD label barcode must be enabled • all the transactions must be for the same PLU • the machine receipt barcode must be enabled see Machine Setup and must use an appropriate format. IM series User Instructions Programming the machine...
- Page 47 Tomatoes £/kg £ 1.60 1.60 1.000 Tomatoes £/kg £ 1.60 0.80 0.500 Total £2.80 Transactions 0 2 2 0 3 7 6 0 0 0 4 0 8 Figure 4.14 Typical ADD labels Programming the machine IM series User Instructions...
-
Page 48: Creating Messages
4.6, page Substitution codes You can include substitution codes in text messages for printing sales information. For a complete list of Avery Berkel and Dewey Decimal substitution codes available and how to use them, see Section 17.3 - Substitution codes, page 242. -
Page 49: Store Name
The position of the message depends on the label format selected for the machine. • Each label format can have up to two sales message fields. You can: • create up to 20 sales messages. • program each message with up to 200 characters. Programming the machine IM series User Instructions... - Page 50 Printed text for 2.5 kg sold: COOK AT 150° C FOR 2Hours 30Mins Sales message text: COOK AT 150° C FOR %%+9.2#30.1#20%% (or %%T30+20) Printed text for 1.0 kg sold: COOK AT 150° C FOR 50Mins IM series User Instructions Programming the machine...
- Page 51 The printed text is determined by the sales message reference number assigned to the machine as the Machine message in Printer setup. Programming the machine IM series User Instructions...
-
Page 52: Programming Operators
The factory default setting for operator 1 PIN is 4296 and for operator 1 security level is 2. • All other operators will have factory default settings of PIN 0 and security level 0 unless you change them. IM series User Instructions Programming the machine... - Page 53 The operator's transactions are added to the operator totals and the training value is listed in the operator totals report. Operator training text Each time an operator is changed from trading to training you have the opportunity to change the training text or remove it. Programming the machine IM series User Instructions...
- Page 54 4.9 Programming Operators • The training text is printed on receipts for transactions carried out while the operator is in training mode. • The same training text is used for any operator in training mode. IM series User Instructions Programming the machine...
-
Page 55: Setting Function Security
Please remember ..Always ensure that you have at least one operator with a security level high enough to change Operator PIN and security level settings. Programming the machine IM series User Instructions... - Page 56 If this happens see Part 2, section 16.1, page 230. Example:Setting security for table creation Manager Mode Tables Enter System Data Enter Shift security level 0 - 2 IM series User Instructions Programming the machine...
-
Page 57: Printing Data Reports
• Logo list • Tax Rate list • Tare Weight list • AI list Please remember ..Instructions for printing totals reports can be found in, Section 12.3 - Totals reports, page 194. Programming the machine IM series User Instructions... - Page 58 Neg Non Weighed Trading Receipt/Label Logged Off Metric Switch Override ****Report Complete**** Price Base Non Add Returns Refund No Sale Float Pick Up Paid Out Account ****Report Complete**** Figure 4.16 Data report examples IM series User Instructions Programming the machine...
- Page 59 ****Report Complete**** Figure 4.17 PLU file list Verify labels This function prints out the default labels for all programmed PLUs. Use this function to check that labels scan correctly before using them on products. Programming the machine IM series User Instructions...
- Page 60 Sign On Text: WELCOME TO AZ SUPERMARKET Sign Off Text: THANK YOU FOR SHOPPING AT AZ SUPERMARKETS Add Label Text: ASSORTED ITEMS Department Text 1: Meat 2: Bakery ****Report Complete**** Figure 4.18 Text report IM series User Instructions Programming the machine...
-
Page 61: Machine Set-Up
5.2 - Dedicated keys (page 64) 5.3 - Printer set-up (page 67) 5.4 - Assigning a barcode format (page 71) 5.5 - Adjusting the display brightness (page 72) 5.6 - Machine operating modes (page 73) 5.7 - Setting alarms (page 76) IM series User Instructions... -
Page 62: Direct Access (Hot) Keys
You will see the message Entry Accepted when the key has been assigned. Please remember ..Customized ‘hot' menu key assignments are not saved when you perform a machine dump, or restored with machine load. The default direct access keys are restored. IM series User Instructions Machine Set-up... -
Page 63: Dedicated Keys
1 Keyboard Setup 1 Key Assign 2Key Unassign 4....1 Standard Assign 2 ECR Assign 3 Funct Key Assign 1 PLU Dept. Number 0 Enter PLU 117 Assign Key Figure 5.2 Assigning a dedicated PLU key Machine Set-up IM series User Instructions... - Page 64 You may have different keys set up from the ones shown here depending on your requirements. Several different payment keys are shown here for different types of payment. Credit Coupon Cash Cheque Card Generic keys Generic keys can be allocated to: • departments • tare references IM series User Instructions Machine Set-up...
- Page 65 3 Funct Key Assign 12 Discount Discount Number _ _ Assign Key Figure 5.3 Assigning a generic key Note: You will be asked for the payment or discount number when you use these keys in sales mode. Machine Set-up IM series User Instructions...
-
Page 66: Printer Set-Up
If the tare interlock is enabled, you will only be able to print a label if you have selected a tare. Suppressing symbols If symbols are enabled then symbols, for example, £, kg, £/ are printed on labels. If you want to use pre-printed labels you can choose to disable symbols. IM series User Instructions Machine Set-up... - Page 67 Duplicate receipt Use this function to set up the printer to print a duplicate receipt. DUPLICATE is printed at the start and end of the duplicate receipt. Machine Set-up IM series User Instructions...
- Page 68 You can assign a message reference to a machine. The substitution code %%M can be programmed into a PLU text field, sales message or store name. The code is replaced by the assigned message which is printed in the appropriate text field on the label. IM series User Instructions Machine Set-up...
- Page 69 You can set the print density between 0% and 100%. The default setting is 100% but you may want to decrease the density when using a slow print speed. Machine Set-up IM series User Instructions...
-
Page 70: Assigning A Barcode Format
Barcode height Barcode height option allows you to set the height of barcodes on receipts and talons to be programmable in the range of 5-20 mm in 1mm intervals. The default height is 20mm IM series User Instructions Machine Set-up... -
Page 71: Adjusting The Display Brightness
Any further key presses will cause it to restart from the lowest value. Manager Mode 1....4 Machine Setup 1Customer 5....Adjusting 4Display Adjust 2 Vendor 5....increase brightness decrease brightness Figure 5.6 Adjusting display brightness Machine Set-up IM series User Instructions... -
Page 72: Machine Operating Modes
• TK (self service) only • both keyboards • TK/Item keyboard. If you choose to enable Both Keyboards all the keys except the function keys on the sales keyboard will be available. IM series User Instructions Machine Set-up... - Page 73 Larger keys for product selection can be set up by assigning two adjacent keys, or four keys in a square block, to the same PLU. Create suitable labels or a keyboard overlay to suit your own keyboard layout. Machine Set-up IM series User Instructions...
- Page 74 The keyboard overlay is inserted into a ‘wipe clean’ pocket with the opening at the right hand side. This means that you can remove the overlay provided and insert overlays printed to suit your own requirements. IM series User Instructions Machine Set-up...
-
Page 75: Setting Alarms
You can enable or disable the network error audible alarm. For information on network errors see Part 2, section 14.7, page 219. Note: .The error message will continue to flash on the display whenever the machine is idle. Machine Set-up IM series User Instructions... -
Page 76: Programming Products
6.3 - Changing prices (page 80) 6.4 - Creating and Editing PLUs (page 81) 6.5 - Deleting PLUs (page 88) 6.6 - Copying PLUs (page 89) 6.7 - Promotions (page 90) 6.8 - Creating a nutritional panel (page 97) IM series User Instructions... -
Page 77: Selecting Plus By Barcode
• Change Price • Create and Edit • Delete PLU • Copy PLU. Use a barcode scanner if available or use the keyboard to enter the barcode number if you have a ‘#' key. Programming Products IM series User Instructions... -
Page 78: Customizing The Menus
• Sales Text 1 • Barcode • Traceability • Nutri panel. • PLU Logo Example: Disabling an option Customize menu Enter Press option until you see the number option you want select Disabled Enter IM series User Instructions Programming Products... -
Page 79: Changing Prices
Note: For the each price, the display will highlight unit price, item price or neg. item price, according to the type of PLU selected. Change Price Department Unit Price/ Item Price Neg Item Price Entry Accepted Second Price 0,01 - 9999,99 Figure 6.1 Changing prices Programming Products IM series User Instructions... -
Page 80: Creating And Editing Plus
Pick lists are available for all programmed data for the following fields: • Department Number • PLU Number • Label Format • Tax References • Group Number • Tare Reference • Net Weight Reference • Promo/Sales Message • Barcode Formats • Traceability Scheme Reference IM series User Instructions Programming Products... - Page 81 3 By Count Neg. Neg Item Price 4 Fixed Weight Item Price 0000,00 5 Fixed Price Item Price 0000,00 Price Multiple Promotions page 86 Promotion Off Price Base Tare Prop. Tare Net Weight Date 1 Disabled Programming Products IM series User Instructions...
- Page 82 If a department has been assigned to the machine you are using, when you enter the PLU number to select a product, the selected product will be the one assigned to the default department for the machine. IM series User Instructions Programming Products...
- Page 83 Note: For substitution codes that you can use in PLU text messages 1 and 2 refer to section 4.8, Sales message page Tax reference Each PLU can have a tax reference assigned to it. Programming Products IM series User Instructions...
- Page 84 Set the item price to £1.40 and the price multiple to 4. To charge a premium when selling individual items (split pack price). 1. Set the item price to the higher value for that number of items. IM series User Instructions Programming Products...
- Page 85 • as a use by or sell by date computed from the number of months from the current date Date 1 Date 2 Figure 6.3 Sell by dates Programming Products IM series User Instructions...
- Page 86 Note: If you want the PLUs to be in Departments, enter the department number when you see the message Dept. Number and the barcode number when you see the message Enter PLU. IM series User Instructions Programming Products...
-
Page 87: Deleting Plus
Department Are You Sure? No Figure 6.4 Deleting PLUs Note: The default security level for Single PLU delete is 1. The default security level for the Range delete and All PLU delete is 2. Programming Products IM series User Instructions... -
Page 88: Copying Plus
The new barcode number will default so that the article number matches the PLU number. If the barcode number is already in use then the barcode number will be set to zero. Copy PLU From Dept. From PLU To Dept. To PLU Figure 6.5 Copying PLUs IM series User Instructions Programming Products... -
Page 89: Promotions
Please remember ..• Promotions are programmed in Create & Edit PLU. • Pressing disables the promotion. • Applying a manual discount to a PLU disables the promotional discount. Programming Products IM series User Instructions... - Page 90 Sales receipts and labels can be printed with details of the savings to the customer. • To print promotional information on the label you must select an appropriate label format when programming the PLU. IM series User Instructions Programming Products...
- Page 91 You must enter the percentage discount as a whole number. For example: A price reduction of 3% must be entered as 3.00. • Reduction The unit or total price of the PLU is reduced by the value programmed. Programming Products IM series User Instructions...
- Page 92 6.7 Promotions Weight/item free promotion The system automatically scales up the free quantity according to the amount purchased. Weight free promotion Figure 6.7 Free weights graph IM series User Instructions Programming Products...
- Page 93 • When serving a customer, the operator weighs all 5 hamburgers and enters 5 for the number of items. The value of the transaction is calculated automatically with the appropriate quantity (1) given free. Programming Products IM series User Instructions...
- Page 94 PLU. Please remember ..You must enter the percentage discount as a whole number. For example, a price reduction of 5% must be entered as 5.00. IM series User Instructions Programming Products...
- Page 95 Note: For other substitution codes that you can use in a promotional message refer to section 4.8, page Sales message and for Dewey Decimal codes see Appendix, section 17.3. Programming Products IM series User Instructions...
-
Page 96: Creating A Nutritional Panel
Figure 6.10 Fixed nutri panel label If you are using label rolls then the nutritional and PLU labels must be the same size. If you are using continuous labels then the size of both labels can differ. IM series User Instructions Programming Products... - Page 97 %%C as the text for servings per container. The scale looks for a numerical value followed by a g or G in the serving size text and uses that weight to calculate the number of servings. Programming Products IM series User Instructions...
-
Page 98: Serving Customers
7.4 - Barcode scanning (page 107) 7.5 - Overriding prices (page 108) 7.6 - Overriding weight (page 109) 7.7 - Voiding a transaction (page 110) 7.8 - Using tares (page 111) 7.9 - Using the FIX key (page 114) IM series User Instructions... -
Page 99: Basic Operations
You will only have access to functions that have the same level or a lower level of security than your own security level. • Only those operators with a security level equal to or greater than the function security are listed for selection. Serving Customers IM series User Instructions... - Page 100 • The correct label or paper roll is loaded. • For instructions for changing the printer roll see Changing the printer roll, page 23 • a FIX is not active (FIX icon not displayed). IM series User Instructions Serving Customers...
- Page 101 (this is called label streaming). In counter mode you can do the same by: • select a non-weighed product • press the enter key • select the number of labels required Serving Customers IM series User Instructions...
-
Page 102: Hand Pricing
1.100 1.50 1.65 Hand Price Unit Price 0,01 - 9999,99 Non-weighed items (item price) more than 1 item? number of items 1 - 99 0.38 1.14 3 Hand Price Item Price 0,01 - 9999,99 IM series User Instructions Serving Customers... -
Page 103: Using Plus
This is the method described in this handbook and is known as timeout selection. • enter the barcode number Barcode scan If your machine has a scanner • scan the barcode If your machine is not already in PLU mode, press to select it. Serving Customers IM series User Instructions... - Page 104 Your machine may have dedicated department keys or a general department key or both. • If the PLU you require is not in the department assigned to your machine, you can press the dedicated department key for that PLU when Enter PLU is displayed. IM series User Instructions Serving Customers...
- Page 105 If a frequent shopper promotion is in operation and a suitable label format is available, the label shows the normal selling price and a special price. Pressing disables the promotion. Serving Customers IM series User Instructions...
-
Page 106: Barcode Scanning
Repeat steps 1 and 2 until you have scanned all the goods. If the barcode does not scan Cntrl Changing the number of items More than 1 of the same item? 3 Items number of items 1 - 99 0.35 1.05 3 Baked beans IM series User Instructions Serving Customers... -
Page 107: Overriding Prices
An asterisk is printed to the right of the unit price symbol to indicate an override price. Weighed goods Unit Price 0,01 - 9999,99 receipt mode label mode Non weighed items more than 1 item? number of items 1 - 99 receipt mode label mode Item price Serving Customers IM series User Instructions... -
Page 108: Overriding Weight
Fixed price key If you have a Fixed Price set up on the sales keyboard you can change the unit price of a weighed PLU to a non weighed price for that single transaction only. IM series User Instructions Serving Customers... -
Page 109: Voiding A Transaction
PIN Void All? go to step 8 until you see the to display subtotal transaction you wish to void go to step 10 Serving Customers IM series User Instructions... -
Page 110: Using Tares
The types of tare available for you to use depend on local trading regulations and how your machine has been configured. Free (semi-automatic), cumulative and keyboard entered tares cancel when the load is removed from the weigh plate. Free tare PLU number IM series User Instructions Serving Customers... - Page 111 Keyboard entered tare If you are using a container with a known weight you can use the numeric keys to enter the weight Note: The weight display must be at zero. container weight PLU number Serving Customers IM series User Instructions...
- Page 112 Tare Operating and the new tare will be cancelled. Note: This only applies to manually selected tares. If a PLU with a stored tare is displayed and another PLU with a stored tare is selected, the interlock does not operate. IM series User Instructions Serving Customers...
-
Page 113: Using The Fix Key
Note: If your machine is configured only to retain the tare, the PLU will not be retained. Receipt mode Dept ? Commodity key department PLU number 0 - 9 cancel the tare cancel the FIX Serving Customers IM series User Instructions... - Page 114 PLU number 0 - 9 stick the label on the pack to label more packs containing the same product repeat steps 3 to 6 cancel the PLU cancel the tare cancel the FIX IM series User Instructions Serving Customers...
-
Page 115: Receipt Operations
8.2 - Paying for goods (page 120) 8.3 - Sales discount (page 124) 8.4 - Cash drawer operations (page 126) 8.5 - Refunds (page 127) 8.6 - Using the ADD key (page 129) 8.7 - Returning products (page 131) IM series User Instructions... -
Page 116: 8.1 Generating Receipts
Machines operating in receipt mode but not in PoS mode will print counter receipts. You do not need method of payment keys for this type of receipt. Note: Printing a sales receipt clears the operator total. IM series User Instructions Receipt Operations... - Page 117 Sales receipt (tax total printing configured) Note: ‘Transactions' printed at the bottom of the receipt may refer to the number of items sold or to the number of transactions depending on how your machine has been configured. Receipt Operations IM series User Instructions...
- Page 118 Note: Voided receipts are returned to the software during transaction collection to provide information regarding the number of receipts voided and which operators performed the task. IM series User Instructions Receipt Operations...
-
Page 119: Paying For Goods
For these countries, if an inclusive tax system is used and tax printing has been enabled, the receipt will include:tax reference • tax rate • net sales • tax value • gross sales. Receipt Operations IM series User Instructions... - Page 120 Call Supervisor and the security level required will be displayed. Example:Single payment (security level set) to display subtotal amount tendered IM 100 Max 15kg Min 100g e=5g Operators Secure Access Credit Card Card Authorising Op Maria Fred Call Supervisor IM series User Instructions Receipt Operations...
- Page 121 £ Maria Cash Enter Amount £2.75 amount tendered Card 15.00 To Pay 17.75 IM 100 Max 15kg Min 100g e=5g Payment Payment Type £ Maria Change Cash 2.75 £0.0 Card 15.00 To Pay 0.00 Receipt Operations IM series User Instructions...
- Page 122 Enter Amount £6.00 Dollars 25.00 amount tendered in local To Pay 5.23 currency IM 100 Max 15kg Min 100g e=5g Cash Payment Payment Type £ Maria Change Cash 6.00 £0.77 Dollars 25.00 To Pay 0.00 IM series User Instructions Receipt Operations...
-
Page 123: Sales Discount
The value or percentage is pre-programmed. Security levels may be assigned to discounts. If you do not have an adequate security level assigned, you will see the message Authorising Op and the list of authorized operators will be displayed. Receipt Operations IM series User Instructions... - Page 124 Steak 8.87 subtotal displayed IM 100 Max 15kg Min 100g e=5g Subtotal Trans 5 £ Maria £15.97 Cherries 1.25 Butter 0.95 Milk 2.05 Cheese 4.63 Steak 8.87 Cash while discounted amount tendered subtotal displayed IM series User Instructions Receipt Operations...
-
Page 125: Cash Drawer Operations
When making a payment (paid out) from the cash drawer you will be prompted to enter a reference code for the payment. Float 0.00 Operator Num. Float 100.00 Float amount added to drawer Receipt Operations IM series User Instructions... -
Page 126: Refunds
If your machine has been configured for ‘one shot’ operation for Refunds you will not need to press at step 8. Refund Refunding the cost of goods Hand Price mode Refund go to Refnd PLU more than 1 item? PLU number number of items 1 - 99 IM series User Instructions Receipt Operations... - Page 127 8.5 Refunds Pack Price 0,01 - 9999,99 Cash Refund while operator subtotal displayed Receipt Operations IM series User Instructions...
-
Page 128: Using The Add Key
You must press while the subtotal is displayed to print a label or ADD receipt. Printing an ADD label 00.00 0.00 Zero Dept ? 0.00 PLU number Add PLU Commodity key PLU number Commodity key IM series User Instructions Receipt Operations... - Page 129 8.6 Using the ADD key repeat steps 2 to 6 until you have totalised all the products £ Receipt Operations IM series User Instructions...
-
Page 130: Returning Products
0.00 Retrn PLU If your machine is operating in label mode go to step 5. more than 1 item? number of items 1 - 99 weighed goods? PLU number Pack Price weighed goods Return IM series User Instructions Receipt Operations... - Page 131 Disabling the printer is a temporary change. The printer status will revert to its normal status when the machine is next switched on. Please remember ..This function is only available in label mode. Receipt Operations IM series User Instructions...
-
Page 132: Pre-Pack Operations
9.1 - Setting the machine to pre-pack (page 134) 9.2 - Using PLUs (page 135) 9.3 - Using tares (page 137) 9.4 - Multiple labels (page 142) 9.5 - Returning labels (page 144) 9.6 - Back calculation (page 145) IM series User Instructions... -
Page 133: Setting The Machine To Pre-Pack
PLU number department Commodity key 0 - 9 1.000 8.55 8.55 Beef Stir Fry stick the label on the pack Zero 0.000 8.55 0.00 Beef Stir Fry more labels? Go to 0.000 Zero Enter PLU Pre-pack Operations IM series User Instructions... -
Page 134: Using Plus
PLU key or by entering the PLU number. This will override the currently displayed PLU. Weighed goods Dept ? Commodity key PLU number more labels? stick the label on the pack IM series User Instructions Pre-pack Operations... - Page 135 Zero Total Price and the transaction will not be accepted. Press when you see Enter PLU to print a blank label. Pre-pack Operations IM series User Instructions...
-
Page 136: Using Tares
What you see depends on how your machine has been configured. There are four options: • No tare display • Negative weight display • separate tare weight display • Separate tare and negative weight display IM series User Instructions Pre-pack Operations... - Page 137 9.3 Using tares Free tare 0.000 Zero Pre-Pack 0.000 Tare Dept ? department PLU number Commodity key 0 - 9 more labels? Pre-pack Operations IM series User Instructions...
- Page 138 Dept ? department Commodity key PLU number 0 - 9 different tare reference? stick the label on the pack more labels? IM series User Instructions Pre-pack Operations...
- Page 139 If you are using a container with a known weight you can use the numeric keys to enter the weight. container weight Dept ? Commodity key PLU number department 0 - 9 6 stick the label on the pack more labels? Pre-pack Operations IM series User Instructions...
- Page 140 9.3 Using tares Proportional tare Dept ? PLU number department Commodity key 0 - 9 Prop. Tare % tare value more labels? IM series User Instructions Pre-pack Operations...
-
Page 141: Multiple Labels
1 Pre-Pack selected change number of items? number of items 1 - 99 Hand Price mode Dept ? department Commodity key PLU number item price 0,01 - 9999,99 number of labels 1 - 999 Pre-pack Operations IM series User Instructions... - Page 142 9.4 Multiple labels more labels? end label run? X 2 (3) IM series User Instructions Pre-pack Operations...
-
Page 143: Returning Labels
1 - 999 Dept ? department Commodity key PLU number 0 - 9 ENTER pack price item price 0,01 - 9999,99 0,01 - 9999,99 number of labels 1 - 999 Pre-pack Operations IM series User Instructions... -
Page 144: Back Calculation
PLU record £/100g NET WEIGHT 0.25 400g £ £/01 Items 1.00 1. 00 0 2 0 0 0 9 9 0 0 1 0 0 5 > AZ Supermarket Figure 9.1 European back calculation IM series User Instructions Pre-pack Operations... - Page 145 23-12-02 * indicates £ price override £/kg 0.80 0.400 2.00 0 2 0 0 0 9 9 0 0 0 8 0 0 > AZ Supermarket re-wrapped back calculation Figure 9.2 Danish back calculation Pre-pack Operations IM series User Instructions...
-
Page 146: Barcodes
This section describes the different types of barcode and how they are used. Contents 10.1 - Introducing barcodes (page 148) 10.2 - Branded goods (page 150) 10.3 - In-store goods (page 153) 10.4 - Barcode scanning (page 156) IM series User Instructions... -
Page 147: Introducing Barcodes
You can enter data freely to specify the information you require to be embedded in the barcode provided it satisfies the requirements for the barcode type you are using. For example, it may need to be capable of encoding using AIs. Barcodes IM series User Instructions... - Page 148 The barcodes can be defined in the PLU or referenced to a label format. • Programming the barcode in the PLU is the preferred method for PoS barcodes. Please remember ..Create the barcodes before you create PLUs. IM series User Instructions Barcodes...
-
Page 149: Branded Goods
Some goods may come from the manufacturer already weighed and priced, for example frozen chickens and pre-packed fruit and vegetables. In this case the manufacturers barcode will include the product number and the selling price. Barcodes IM series User Instructions... - Page 150 6. Enter or scan the manufacturer's barcode number when you see the barcode format displayed. When the goods are scanned in sales mode the receipt shows the description programmed in the PLU and the price embedded in the manufacturer's barcode. IM series User Instructions Barcodes...
- Page 151 Sales receipt example Manufacturer’s label example Barcode format matches the specified Ean format. 20AAAAAVPPPPC 20Prefix - UK national code 00076 Article number Price verifier 0040 Price Overall check verifier Figure 10.1 Manufacturer’s label and printed receipt Barcodes IM series User Instructions...
-
Page 152: In-Store Goods
You can only enter the product number in the designated article number positions (A) in the barcode Please remember ..You can only assign a dry article barcode to a nonweighed PLU. It is illegal to use this type of barcode for a weighed PLU. IM series User Instructions Barcodes... - Page 153 Do this before you create the PLU. Refer to section 10.5, Creating a barcode reference, page 159. 1. Create a weighed or non weighed PLU. 2. Enter a label format that supports barcodes. 3. Program the unit or item price. Barcodes IM series User Instructions...
- Page 154 Sales receipt example Label example In-store barcode format matches the recommended EAN format. 02AAAAAVPPPPC 02 Prefix -In-store code for EAN13 01273Article number 6 Price verifier 0184Price 8 Overall check verifier Figure 10.3 Label and nonweighed receipt IM series User Instructions Barcodes...
-
Page 155: Barcode Scanning
10.4 Barcode scanning 10.4 Barcode scanning You can use the Avery Berkel scanner to: • read in-store or branded barcodes at a PoS machine when your machine is in sales mode. • help you program PLUs when your machine is in manager mode (see section 6.4,... - Page 156 Figure 10.4. • You can re-define the barcode formats to enable a source marked barcode or dry article barcode to be printed. • You can define and store up to 15 barcode formats. IM series User Instructions Barcodes...
- Page 157 Entry Accepted Press . If the format is acceptable you will see the message Entry Accepted. Enter Please remember ..Barcodes will only be printed on receipts or talons if you enable them in the machine. Barcodes IM series User Instructions...
-
Page 158: Creating A Barcode Reference
5 Tables 1 Label Barcode Format 3 Barcode Format 6... 2 Receipt 0 - 9 4....67 3 Talon 1 EAN13 2 Scandinavian 3....9 RSS Limited Edit Barcode Format Figure 10.5 Creating a barcode reference IM series User Instructions Barcodes... - Page 159 If there are more digits in the pack price or weight than specified in the barcode, the article number is printed instead of the barcode. Example 1 Example 2 barcode printed barcode overflow 02AAAAAVPPPPC Article number printed Figure 10.6 Barcode overflow Barcodes IM series User Instructions...
-
Page 160: Barcode Formats
Label or receipt sequence number MM Machine ID Network ID Note: You can include %% codes and %%(AI) codes in some barcode formats. See Appendix on page 236, for a list of codes available for use. IM series User Instructions Barcodes... - Page 161 2 digits together (printed on receipts) 1 - 2 digits together (printed on receipts)* Note: If only one digit is available, the least significant digit is printed for example, 12 would be printed as 2. Barcodes IM series User Instructions...
- Page 162 1 - 2 digits together (printed on receipts)* 4 - 7 digits 2 digits together (printed on receipts) Note: If only one digit is available, the least significant digit is printed for example, 12 would be printed as 2. IM series User Instructions Barcodes...
- Page 163 UPC12 01 02 03 04 05 06 07 08 09 10 11 12 RSS14 and RSS Limited These barcodes support Global Trade Item Numbers (GTINs). RSS14 barcodes have a maximum length of 14 characters. Barcodes IM series User Instructions...
- Page 164 RSS Limited barcodes only support GTINs with a 0 or 1 as the initial digit in the article number. 01 02 03 04 05 06 07 08 09 10 11 12 13 13 Default label format Permitted entries 13 digits 1 digits IM series User Instructions Barcodes...
-
Page 165: Variable Barcode Formats
AIs. Note: If the label field is not wide enough to accommodate all the characters, provided that there is room to increase the height sufficiently, the barcode will print as a ‘stacked’ barcode. Barcodes IM series User Instructions... -
Page 166: Product Traceability
11.7 - Defining the barcodes (page 178) 11.8 - Setting up the machine (page 182) 11.9 - Capturing the source data (page 185) 11.10 - Pre-pack operation (page 186) 11.11 - Counter service operation (page 189) IM series User Instructions... -
Page 167: Mandatory Information
The best way to ensure this is by individually labelling each pack, or by printing the full details on the counter or ECR receipt. If this is not possible you can use Tray labelling, see page 189. Product Traceability IM series User Instructions... -
Page 168: Using Traceability
This is particularly suitable for prepack operations where the operator may be packing a complete batch in one session and then selecting a new complete batch to pack. IM series User Instructions Product Traceability... -
Page 169: Traceability Schemes
Use Expiry Date uses the sell by date encoded (AI 17) in the supplier barcode. You can manually override this date if required. Scheme reference This is a reference number from 1 to 10 that is used to link the batch being processed to the correct scheme. Product Traceability IM series User Instructions... - Page 170 Linking a scheme to a PLU When creating or editing a PLU, you will be asked to enter the scheme reference number for the PLU provided that: • traceability is enabled and • more than one traceability scheme exists. IM series User Instructions Product Traceability...
-
Page 171: Printing The Information
Program the tables with the data names and associated text as you want them to appear on the traceability panel. • Create the traceability format which defines the way in which the information will be printed on the label. • Set up the traceability schemes required. Product Traceability IM series User Instructions... -
Page 172: Traceability Code Data
The data is interpreted according to the AI code function. • The data can be in any order and can be split into more than one barcode if necessary. Data interpretation • Printed as read Lot/carcass number IM series User Instructions Product Traceability... - Page 173 %%+2.6.1%% %%+2.23.2.1 - to - %%+2.23.2.5 7030 3, 9 %%+2.16#0 %%+2.6.3%% 7031 A, E %%+2.16#1 7032 - 7039 A, E %%+2.16#2 - %%+2.16#9 %%+2.23.4.1- to - %%+2.23.4.9 %%+2.24.1 - to - %%+2.24.9 %%+2.6.5%% %%+2.13%% Product Traceability IM series User Instructions...
- Page 174 AI code is to be assigned. 1 System Data 1Products 5 Tables 1Create & Edit 6 AI 2 Delete Enter AI Ref (%% code or Dewey code) Enter AI Code Figure 11.3 Adding or changing an AI code IM series User Instructions Product Traceability...
-
Page 175: Programming Traceability Tables
Cutting reference This table stores reference information about where the carcass was cut up and de- boned. It contains the name of the country and the approval number for the cutting centre. Product Traceability IM series User Instructions... - Page 176 These messages describe the type of animal or product. 1 System Data 8 Traceability 1 Tables 1 Table Names Origin ref number 2 Origin Enter text Figure 11.4 Creating origin messages Create other message lists in a similar way. IM series User Instructions Product Traceability...
-
Page 177: Defining The Barcodes
1 digit species= 1 = bovine 1 digit category= 4 = heifer 1 digit type= 1 = meat 2 digit breed of father= 01 = Charolais 2 digit breed of mother= 01 = Charolais Product Traceability IM series User Instructions... - Page 178 (maximum 20 digits) Country of birth 2 digit 1st origin message (maximum 4 digits) Country of fattening 2 digit 2nd origin message (maximum 4 digits) Country of slaughter 2 digit 3rd origin message (maximum 4 digits) IM series User Instructions Product Traceability...
- Page 179 2 digit breed message (maximum 4 digits) Breed of mother 2 digit breed message (maximum 4 digits) Breed if mixed 2 digit breed message (maximum 4 digits) Category 2 digit category message (maximum 4 digits) Product Traceability IM series User Instructions...
- Page 180 11.7 Defining the barcodes Barcode digit Used for Example Type 2 digit type message (maximum 4 digits) Species 2 digit species message (maximum 4 digits) IM series User Instructions Product Traceability...
-
Page 181: Setting Up The Machine
Born In: %%1 Reared In: %%2 Label print out (text area 3) Lot Number: 102354 Slaughtered In: UK (1143) Cutting In: UK (19985) Born In: Ireland Reared In: Ireland Figure 11.5 Traceability format and label printout Product Traceability IM series User Instructions... - Page 182 Processor centre 1 Country of cutting, Processor centre 1 7032 to 7039 A, E %%+2.16#2 - Processor centre (2 to 9) Country of cutting, Processor centre 2 to 9 %%+2.16#9 Text 3 Miscellaneous text IM series User Instructions Product Traceability...
- Page 183 Figure 11.7 Table of codes Note: When selecting a PLU with traceability enabled, the lot/carcass number is always displayed first followed by the remaining traceability information in the order in which it is stored in the carcass format. Product Traceability IM series User Instructions...
-
Page 184: Capturing The Source Data
PLUs. There are various ways in which the traceability data can be input to the machine. • Use the Avery Berkel scanner to read the proprietary barcodes printed on the carcass labels by the supplier. • Use the keyboard to enter the references for each data item when a product is selected. -
Page 185: 11.10 Pre-Pack Operation
Carcass/Lot number is always displayed first. If you see the message Not Found for any of the options enter the reference number for the origin message to be printed. Product Traceability IM series User Instructions... - Page 186 1.000 1.55 1.55 different origin? 1.000 1.55 1.55 origin number 1.000 1.55 1.55 Ireland Repeat step 5 for any other options you wish to change. IM series User Instructions Product Traceability...
- Page 187 11.10 Pre-pack operation more labels? to exit PLU Figure 11.8 Typical label Product Traceability IM series User Instructions...
-
Page 188: 11.11 Counter Service Operation
Note: You will need to program the PLU with a nominal unit or item price, but check that the label format selected has no fields for printing weight or price information. Figure 11.9 Tray label IM series User Instructions Product Traceability... -
Page 189: Reporting Functions
Contents 12.1 - Reports (page 191) 12.2 - Configuring reports (page 192) 12.3 - Totals reports (page 194) IM series User Instructions... -
Page 190: Reports
A Z report prints the X totals for the period and then resets those totals. Please remember ..If the report printing fails for any reason or you abort the report printing, the totals will be unchanged. IM series User Instructions Reporting Functions... -
Page 191: Configuring Reports
Cash report If you select Short Cash Rprt a summary machine report is printed that does not list the payment types. The report will include tax totals. Note: Only non zero tax totals are printed. Reporting Functions IM series User Instructions... - Page 192 Please remember ..The valid tax totals period is printed with the tax summary which can be different from the period of the cash report. IM series User Instructions Reporting Functions...
-
Page 193: Totals Reports
Total number of receipts + Total ADD labels Training value Value of all transactions in training mode Override value Value of override transactions Override count Total number of overrides Void value Value of void transactions Void count Total number of voids Reporting Functions IM series User Instructions... - Page 194 If you select the Z total, the totals are cleared. 2 Reports Press ENTER 1 Grand Totals 1 Totals Report 1 X Reports 2 ..2 Z Reports 10 System Cash Figure 12.1 Selecting the type of report IM series User Instructions Reporting Functions...
- Page 195 If you select All Machines a consolidated cash up report is printed at the end of Z reports,. Note: Returns value and Returns Trans are printed if return transactions are not zero. Reporting Functions IM series User Instructions...
- Page 196 Depending on how your machine is configured, a receipt item count may be printed. You can choose to print the report for an individual operator or all operators. IM series User Instructions Reporting Functions...
- Page 197 PLU, department and group reports can be listed in various formats (see page page 199) to help you analyse sales more easily. Note: Returns value and Returns Trans are printed only if return transactions are not zero. Reporting Functions IM series User Instructions...
- Page 198 You can specify either an individual PLU or a range of PLUs for listing PLU totals. To print the totals for one PLU only, enter the same PLU number for both the start and end value. Note: PLU totals reports include weight and items. IM series User Instructions Reporting Functions...
- Page 199 £2.86 02-08-2006 18:26 Return Items PLU 2002 ∗∗∗∗Report Complete∗∗∗∗ BAGUETTE Sales Value £121.77 Sales Items Counter Value £29.10 Figure 12.6 PLU report (non-clearing) Discount totals report Discount totals include manual transaction and receipt discounts. Reporting Functions IM series User Instructions...
- Page 200 Reports printed by PLU number will show the totals for all PLUs on promotion whether they are linked to a batch or not. IM series User Instructions Reporting Functions...
- Page 201 Figure 12.8 Promotion report (non-clearing) Security report Security reports are non-clearing reports and list: • the sequence numbers for the Z reports • the date and time of the last Z report for each report type Reporting Functions IM series User Instructions...
- Page 202 1 Totals Report 1 X Reports 2 Z Reports 1 Grand Totals 2 ..10 Clear All Totals 2 Are You Sure? No Figure 12.10Clearing totals To confirm that you want to clear totals, press IM series User Instructions Reporting Functions...
- Page 203 Discount Value £ 11.10 DeclaredDifference Discount Count Cash £ 702.53 2.53 No Sale Count Cheque£ 695.35 25.00 Pick Up Count Paid Out Count From: 02-08-2006 06:30 02-08-2006 18:29 ∗∗∗∗Report Complete∗∗∗∗ Figure 12.11System cash report Reporting Functions IM series User Instructions...
-
Page 204: Audit Mode
Contents 13.1 - Setting up the audit function (page 206) 13.2 - Printing the audit report (page 208) 13.3 - Erase audit list (page 209) 13.4 - Machines in local mode (page 210) IM series User Instructions... -
Page 205: Setting Up The Audit Function
This is the default mode for machines operating in label mode. The Audit Full message will be displayed on every transaction until the audit buffer has been cleared. Press to clear the message and complete the transaction. Audit Mode IM series User Instructions... - Page 206 Please remember ..When label override is disabled, to print labels you must: • assign the print key to a different operator at each machine • set up and use operator assigned keys. IM series User Instructions Audit Mode...
-
Page 207: Printing The Audit Report
Client Buff Mode Audit Report Summary Report Erase Audit List Detailed Report Start Date/Time End Date/Time Start Receipt No End Receipt No No Filters Label Receipt Receipt & Label Figure 13.1 Printing an audit report Audit Mode IM series User Instructions... -
Page 208: Erase Audit List
Server Buff Mode Client Buff Mode Audit Report Erase Audit List Start Date/Time End Date/Time Start Receipt No End Receipt No No Filters Label Receipt Receipt & Label Figure 13.2 Clearing the audit list IM series User Instructions Audit Mode... -
Page 209: Machines In Local Mode
If the client buffer is set to linear mode, no warnings will be given when the buffer is nearly full. No further transactions will be allowed when the buffer is full. Audit Mode IM series User Instructions... -
Page 210: Communications
This section describes to set up a network within the store. You can link up to 10 compatible machines in a store network. The system will support any combination of machines in the IM series range provided they have the same software version. -
Page 211: Setting Up A Network
ID set up it will not be recognized by the server. Network compatibility You can use MX100 back office software to link an IM series machine network to another existing IM series For further information contact your Avery Berkel centre 20 OPERATORS MAXIMUM Figure 14.1 Typical ethernet network... -
Page 212: Operating Mode
For example, cigarettes purchased at the tobacco kiosk. PoS machine PRINT SALES 1 2 3 4 5 6 MARIA RECEIPT 7 8 9 Operator Customer Figure 14.2 PoS purchase only IM series User Instructions Communications... -
Page 213: Auto Configure
If you choose not to perform a network dump, the PLU file at the client will gradually be updated to match the server. Manager Mode Enter Auto Configure Enter Are You Sure? No Please Wait ..Completed Communications IM series User Instructions... -
Page 214: Setting Machine Id
Note: If you set the machine ID to 0 it will operate as a stand alone machine. Communication 2 Machine ID Machine ID 0 - 31 Server Client Figure 14.3 Setting machine ID IM series User Instructions Communications... -
Page 215: Network Map
The PLU file in the client machine at that position does not match the server PLU file. The machine corresponding to that position is off line. (Map Error) The machine is set to Local Mode. Backup server Communications IM series User Instructions... -
Page 216: Backup Server
If there is a cable fault, both the main and backup server will bleep and each machine will show the other and the client machines as off-line. Before setting a machine to server status you should: • clear all transactions • clear all totals • Clear the audit list completely. IM series User Instructions Communications... - Page 217 14.6 Backup server Machine ID 1 Server Machine ID 2 (Backup server machine ID 6) Machine ID 10 Figure 14.5 Dual server network Communications IM series User Instructions...
-
Page 218: Dealing With Network Faults
222). The machine is in Local Mode. To reinstate the client Local Mode see page Client machine is not Check network cable. No Server communicating with server Set machine to operate in Local machine. Mode. IM series User Instructions Communications... -
Page 219: Local Mode
If you use a client machine in Local Mode you will not be able to store totals as these are collected and stored by the server. Audit buffer The audit buffer can operate in linear or circular mode. Communications IM series User Instructions... - Page 220 20 receipts with up to eight transactions per receipt (160 transactions). You can change the client buffer mode from linear to circular if required. If you wish to reset the audit buffer size, contact Avery Berkel. Please remember ..
-
Page 221: Network Dump
• make amendments to the PLU data at any machine provided that all the machines are switched on. Manager Mode COMMS COMMS Enter Network Dump Completed Please Wait ..Completed Communications IM series User Instructions... -
Page 222: Machine Setup Dump
Machine setup dump allows you to copy the machine setup and dedicated keys from machine to machine. The default security setting for this function is 2. Communication Auto Configure Machine ID 0 - 10 Server Client IM series User Instructions Communications... -
Page 223: Advanced Set-Up
TCP/IP protocol to identify the source and destination of data packets. The machines are manufactured with unique IP addresses which only need to be changed if the IM series network is to be integrated with an existing Ethernet network. The IP address of the machine consists of two parts. - Page 224 14.11 Advanced set-up Gateway IP address Where IM series machines are linked to a PC through a gateway, the IM series machine needs to know the gateway address in order to communicate with it. Network ID The machines are manufactured with a default network ID. You will only need to change it if more than one IM series network is required.
-
Page 225: Data Backup
This section describes how to back up and restore scale data. Please remember ..Remember to take a backup whenever you make any amendments, otherwise the files will be out of date. Contents 15.1 - Dumping/loading data (page 227) IM series User Instructions... -
Page 226: Dumping/Loading Data
Networked scales If you have a scale network that includes a host PC, you can back up and restore scale data using MX050 Scale Support Tool. Contact Avery Berkel for more information. Dumping The USB or data backup software tool receives data from the machine and stores a copy in its own memory until you wish to use it. - Page 227 Label formats can be dumped or loaded independently of the system file. If you want to keep a backup of a logo you must perform a System Dump. The system file includes label format and logo data. Data Backup IM series User Instructions...
-
Page 228: Help
This section contains information to help you if you encounter a problem while using the machine. Contents 16.1 - Set-up mode (page 230) 16.2 - Error messages (page 231) 16.3 - If things go wrong (page 234) IM series User Instructions... -
Page 229: Set-Up Mode
Super User PIN Manager Mode Enter Dept ? enter super user PIN Note: If you do not know or cannot remember the Super User PIN, contact Avery Berkel. Help IM series User Instructions... -
Page 230: Error Messages
The printer has run out of labels or is not feeding the labels correctly. Check the printer. You are trying to print the wrong type of label. Check printer set up. If you are using pre-printed labels check with Avery Berkel that the labels are suitable. LABEL NOT TAKEN You are trying to obtain a label before removing the previous one. - Page 231 PLU, ensure you entered the correct unit price. If you are in receipt mode, print the receipt for any current transactions. PRINT HEAD HOT Print head overheating. Allow the print head to cool. Contact Avery Berkel if the fault persists. SERIAL FAILED Communications failure with PC.
- Page 232 You are trying to complete a transaction with no goods on the machine or the goods weigh less than the minimum permitted. ZERO TOTAL PRICE Total price is zero. If you are using an open PLU, check that you have entered the unit price. IM series User Instructions Help...
-
Page 233: If Things Go Wrong
16.3 If things go wrong 16.3 If things go wrong IM series machines are sophisticated computers that employ the latest techniques and components that are commercially available. Reliability and accuracy have been designed into the machines which should give you trouble free use. - Page 234 You have looked up any error message to see if it is a situation you can resolve for yourself. Should the machine still fail to operate correctly, contact Avery Berkel for expert advice and prompt attention. A v e r y...
-
Page 235: Appendix
Appendix Contents 17.1 - Extended character sets (page 237) 17.2 - Supported AI codes (page 241) 17.3 - Substitution codes (page 242) 17.4 - Nutrient facts (page 250) IM series User Instructions... -
Page 236: Extended Character Sets
Ū Ų Á Â Ã È è é ê À Î ë ì í î ï ñ ò ó õ ö ù ú ý ÿ “ ô Ã ţ ď č ĺ ľ ň š IM series User Instructions Appendix... - Page 237 (7) This gives you the code for Y - 087. 10 11 13 14 15 LF FONT ° & ‘ < > " < > Appendix IM series User Instructions...
- Page 238 (7) This gives you the code for ◊ - 151 CNLF FONT ° & ‘ < > Ä Ö Å Ü Ø Æ £ ƒ € μ Ý § ƒ IM series User Instructions Appendix...
- Page 239 Noon qaf init qaf mid qaf end Alef Maksura kaf init kaf mid yeh hamza above kaf end μ init yeh hamza above lam init yeh hamza above lam mid beh init lam end Appendix IM series User Instructions...
-
Page 240: Supported Ai Codes
17.2 Supported AI codes 17.2 Supported AI codes AI (EAN128 only) Carcass Code (%%) 3103 3303 3902 7030 K0 (3, 9) 7031 K1 (A, E) 8005 IM series User Instructions Appendix... -
Page 241: Substitution Codes
17.3 Substitution codes There are two types of substitution code supported by the software: • the Avery Berkel code system This is a fixed system using the start code %% followed by a character representing the associated data. • a Dewey Decimal based system The Dewey Decimal based system divides information into classes, divisions and subdivisions to the number of levels needed to give the required amount of detail. - Page 242 1.2.5#pp.3 (nutrient number) Serving size Txt 1.2.6 Servings/Contnr 1.2.7 Per serving guide message 1.2.8 Per std measure guide message 1.2.9 Nutrient serving % RDA (nutrient number) 1.3.1#pp Nutrient std measure % RDA (nutrient number) 1.3.2#pp IM series User Instructions Appendix...
- Page 243 Trace origin 2.5 2.23.2.5 (423) Trace origin 4.1 2.23.4.1 (425) Trace origin 4.2 2.23.4.2 (425) Trace origin 4.3 2.23.4.3 (425) Trace origin 4.4 2.23.4.4 (425) Trace origin 4.5 2.23.4.5 (425) Trace origin 4.6 2.23.4.6 (425) Appendix IM series User Instructions...
- Page 244 Trace date 3 2.8.3 Trace species Trace text 3 2.10 Trace category 2.11 Trace type 2.12 Trace scheme license 2.13 (953) Trace Custom (Scheme) Data 2.14 Trace (Carcass) Reference Number 2.15 Trace scheme Processor 2.16#p %%Kp IM series User Instructions Appendix...
- Page 245 Promo batch end date (batch number) 5.6.5#pp PEpp Promo batch text (batch number) 5.6.6#pp PTpp Alternate currency (NB if pp is 0, prints local 5.7#pp currency; if non zero, prints currency associated with payment key #pp) Appendix IM series User Instructions...
- Page 246 Cooking and Points Points (per lb or kg) 9.1#ppp Cooking time (minutes per lb or kg) 9.2#ppp.1#ppp Transaction Gross weight 10.1.1 (3303) Net weight 10.1.2 (3103) Tare weight 10.1.3 PLU date (1 or 2) 10.2#p IM series User Instructions Appendix...
- Page 247 To enter a parameter, just type in the value and the system will insert the ‘#’. When all the codes and parameters have been entered the system will automatically add the closing ‘%%’ characters. Appendix IM series User Instructions...
- Page 248 Type in parameter value (eg. 21) (# is entered automatically) Nutrient Name 1_1-21_1 Nutrient RDA 1_1-21_2 Type in parameter value (# is entered automatically) If no text has previously been entered you will see the message Enter Text IM series User Instructions Appendix...
-
Page 249: Nutrient Facts
Vitamin B6 (mg) Vitamin B12 (µg) Vitamin C (mg) Vitamin D (µg) Vitamin E (mg) Vitamin K (µg) Vitamin H (µg) Calcium (mg) Iron (mg) Folic acid (µg) Niacin (mg) Trans Fat 27 - 50 Appendix IM series User Instructions... - Page 250 This text inserts total fat per serving with units. %%+1.3.1#5%% This text inserts the percentage RDA for total fat satisfied by a serving of this product. %%+1.2.4#6.2%% This text inserts saturated fat per serving with units. IM series User Instructions Appendix...
- Page 251 %%+1.3.1#22%% This text inserts the percentage RDA, for calcium, satisfied by a serving of this product. %%+1.3.1#23%% This text inserts the percentage RDA, for iron, satisfied by a serving of this product. Appendix IM series User Instructions...
- Page 252 Fix key pick up Fixed weight key Clear key Function keys Communications advanced set-up auto configure backup server Hand priced compatibility non-weighed items data clone weighed goods local mode Help machine ID IM series User Instructions...
- Page 253 86, floating vendor mode proportional tares operating modes 73, quick price change self service machines search key Machineprogramming selection creating messages sell by dates store name tax reference text 1 text 3 IM series User Instructions...
- Page 254 53, 54, receipts frequent shopper Text editing price clearing text weight or items free correcting text deleting characters displaying text extended character sets Receipt Mode inserting text displaying the customer’s change size of printed text receipt mode IM series User Instructions...
- Page 255 & receipt prepack & counter wastage weight limit scheme life IM series User Instructions...
- Page 256 Avery Berkel - a division of ITW Ltd. Foundry Lane, Smethwick, West Midlands, England B67 9DF Tel: +44 (0)870 903 2000 Email: info@averyberkel.com www.averyberkel.com...
Need help?
Do you have a question about the IM Series and is the answer not in the manual?
Questions and answers