
Related Manuals for Avery Berkel XM Series


Summary of Contents for Avery Berkel XM Series
- Page 1 XM and XT series Retail System Scales Setup and Programming Guide...
- Page 2 Full acknowledgment of the source must be given. Avery Berkel is a division of ITW Limited. This publication was correct at the time of going to print and is supplied without liability for errors or omissions.
-
Page 3: Table Of Contents
Contents page no. Before you Begin 1.1 Overview 1.1.1 Typical sales screen 1.1.2 Manager mode 1.2 Using Manager mode 1.2.1 Manager mode layout System Data 2.1 System data 2.2 Products 2.2.1 Editing a PLU 2.2.2 Creating a PLU 2.2.3 PLU Editor fields 2.3 Operators 2.3.1 Setting up a new operator... - Page 4 2.9 Payments 2.10 Departments 2.11 Groups 2.12 Miscellaneous fees System Setup 3.1 Setting date and time 3.2 Configuration 3.2.1 Network parameters 3.2.2 Setting network parameters 3.3 Touch menus 3.3.1 Bestseller keyboards 3.3.2 Static keyboards 3.3.3 Dynamic keyboard options 3.3.4 Key appearance Machine Setup 4.1 Networks overview 4.2 Comms Setup (Store networks)
- Page 5 4.7 Printer Settings 4.7.1 Printer settings menu 4.7.2 Label Taken Sensor Data Reports 5.1 Data reports 5.1.1 Verify labels Totals Reports 6.1 Overview 6.1.1 Report printing 6.1.2 Missing fields 6.2 Totals reports 6.2.1 Report numbering 6.2.2 Report fields 6.2.3 Operator Totals report 6.2.4 Operator Sales report 6.2.5...
- Page 6 Diagnostics and Transactions 7.1 Save Log File and Log Persistence 7.2 Transactions Data Transfer via USB 8.1 Backing up 8.1.1 Backup Entire System 8.1.2 Scheduled Backup 8.1.3 Backup Product File Only 8.2 Restoring Media Distribution and Configuration 9.1 Media Distribution using USB Memory Stick 9.1.1 Media Configuration File 9.1.2...
-
Page 7: Before You Begin
Before you Begin This chapter lists the fields you will see on the touchscreen and describes how to access manager mode functions. Contents 1.1, Overview 1.1.1, Typical sales screen 1.1.2, Manager mode 1.2, Using Manager mode 1.2.1, Manager mode layout XM and XT Setup and Programming Guide... -
Page 8: Overview
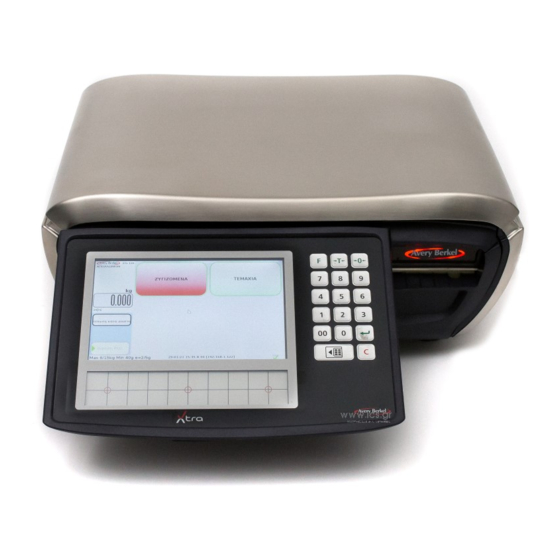
1.1 Overview 1.1 Overview 1.1.1 Typical sales screen Figure 1.1 Typical PLU selected display 1. Product information and sales messages 2. Tare weigh 3. Weight 4. Unit price 5. Total price 6. Scale condition icons 7. Print label 8. Menu bar 9. -
Page 9: Using Manager Mode
1.2 Using Manager mode 1.2 Using Manager mode 1.2.1 Manager mode layout To enter manager mode: Press the menu bar key to display the menu bar. 1. Select Setup Mode from the Menu bar. 2. Select Manager Mode on the Setup Mode screen. 3. - Page 10 1.2 Using Manager mode This page intentionally blank XM and XT Setup and Programming Guide...
-
Page 11: System Data
System Data This chapter tells you how to program the system data required for all the scales on the network. Contents 2.1, System data 2.2, Products 2.2.1, Editing a PLU 2.2.2, Creating a PLU 2.2.3, PLU Editor fields 2.3, Operators 2.3.1, Setting up a new operator 2.4, Discounts 2.4.1, Discount rates... -
Page 12: System Data
2.1 System data 2.1 System data The functions and information that you may need to edit are found in Note: Modifications to System Data. If you have a scale network set up, System Data applies System Data can only be made on a server or to all the scales in that network. -
Page 13: Products
2.2 Products 2.2 Products Important: Remember, you must be in Manager Mode in order to perform a programming operation. 2.2.1 Editing a PLU 1. From the Manager Mode screen, select System Data. 2. Select Products from the System Data screen. 3. - Page 14 2.2 Products 6. Use the scroll buttons to highlight the field you require (for example, Price), and touch 7. Use the numeric keypad to enter the new price. 8. Touch to confirm the entry. 9. If you do not want to edit the next field displayed, touch 10.Touch to save your changes.
-
Page 15: Creating A Plu
2.2 Products 2.2.2 Creating a PLU 1. From the Manager Mode screen, select 2. Select 3. Select 4. If you want to create a PLU in a department other than the one displayed, use the left and right arrows at the top of the product selection screen (see figure 2.1, page 13). - Page 16 2.2 Products 8. Use the Price Base field for products priced on weight. 9. If you do not want to edit the next field displayed, touch 10.Touch to save your changes. XM and XT Setup and Programming Guide...
-
Page 17: Plu Editor Fields
As described in other sections of this guide, you can set up and edit most of these lists yourself. If you cannot find the value or category in these lists, you may need to contact your Avery Berkel service provider for assistance. Field description Price The unit price for weighed goods or the item price for non-weighed items. - Page 18 2.2 Products NetWeight Value Weight value of a non-weighed product sold on an average weight basis. For example, 400g for all loaves of a certain size. Message ID 1 and Message ID 2 Select this field and touch to display the list of sales Note: When editing PLUs in Manager Mode, messages available for use with this PLU.
- Page 19 2.2 Products Figure 2.2 QR Barcode Displayed Group Assigns the PLU to a product category. See section 2.11, Groups. Information Label Selects whether an information label is printed or not. 2.2.3.1 Promotions You can program PLUs with a promotional price or offer. Five types of promotion are available: Price break promotion ...
- Page 20 2.2 Products If you do not program a third price and a second trip value, then only the second promotion price and its trip value will apply. You can change the unit or item price and the promotional prices using Change Price.
- Page 21 2.2 Products Mark down promo A mark down promotion allows you to temporarily mark down the price of an item by entering a reduced value. Mark down can also be set up as a function to appear on the keyboard as products are traded, thereby allowing a quick price change function (e.g.
- Page 22 2.2 Products 7. Touch 'Timed Promotions'. The 'Time Period' screen is displayed. You can now create and edit the time periods used for promotions. Assigning promotion time periods In 'PLU Editor' once you have enabled the promotion, the PLU can be assigned two separate time periods;...
- Page 23 2.2 Products 9. When the promotion is 'Enabled', the PLU can be assigned two separate time periods; 'Promo Time Period 1' and 'Promo Time Period 2'. 10.To enter the time period do the following: a. Promo Time Period 1: You must first select the type of promotion required using the 'Timed Promotions' function.
- Page 24 2.2 Products b. From the ‘PLU Editor’ screen, select ‘Promo Time Period 1’ and touch . The ‘Promo Time Period 1’ window is displayed. c. Using the arrows, select the promo time period. Note: When you save the selection in the 'Promo Time Period 2' To save, touch .
-
Page 25: Operators
2.3 Operators 2.3 Operators The information you need to set up an operator is listed here, followed by the steps for setting up an operator. Operator ID The operator ID can have up to 12 numeric characters Operator Name The operator name is displayed on the operator button and printed on the receipt. -
Page 26: Setting Up A New Operator
2.3 Operators 2.3.1 Setting up a new operator 1. Select Operators from the choices displayed in System Data. 2. Touch to add a new operator. 3. Select the Operator ID field and touch XM and XT Setup and Programming Guide... - Page 27 2.3 Operators 4. Enter the operator ID and touch to confirm the change. 5. Enter the operator name and touch XM and XT Setup and Programming Guide...
- Page 28 2.3 Operators 6. Use the numeric keypad to enter a PIN for the operator. Note: To set up an operator with access to Manager Mode functions, the PIN is 4296. 7. Assign the appropriate role to the operator. XM and XT Setup and Programming Guide...
- Page 29 2.3 Operators 8. The operator status defaults to enabled. To change the status, touch and select disabled. Touch confirm the change. 9. Touch to save your changes. When you have finished creating or editing operators, touch to return to the Manager Mode screen. XM and XT Setup and Programming Guide...
-
Page 30: Discounts
2.4 Discounts 2.4 Discounts You can apply a pre-programmed fixed discount or a variable discount to a receipt or to an individual transaction. If the scale is operating in label mode, discounts are applied to the transaction. 2.4.1 Discount rates Discount rates can be fixed or variable. - Page 31 2.4 Discounts 7. Use the numeric keys to enter the percentage or the value of the discount and when you have finished touch confirm the entry. Important:A percentage must be entered as a whole number. For example, 10% must be entered as 10.00 not 0.1 8.
-
Page 32: Tares
2.5 Tares 2.5 Tares When goods are to be weighed in containers, you can set up tare Note: Programmed values (container weights) that are stored against a reference number. (stored) tares are only available for use when Each tare is assigned to a dedicated touch button. Depending on how the machine is set to your machine has been configured, the tare buttons can be accessed label mode or pre-pack... -
Page 33: Assigning A Stored Tare
2.5 Tares 6. Use the numeric keys to enter the tare value and touch to confirm the entry. 7. Touch to save your changes. 2.5.2 Assigning a stored tare You can: Enter a tare reference number when programming a PLU. ... -
Page 34: Tax Rates
2.6 Tax rates 2.6 Tax rates If PLUs are configured with a tax rate, you can print the tax value and individual tax rates on the receipt. You can program each PLU with one or two tax references. There are 10 tax references available, and each one can be assigned a different tax rate. -
Page 35: Setting Up Tax Rates
2.6 Tax rates 2.6.1 Setting up tax rates 1. Select Tax Rates from the System Data screen. 2. Touch 3. Select the Tax Rate ID field and touch . Use the numeric keys to enter the ID number for the tax rate. 4. -
Page 36: Ledgers
2.7 Ledgers 2.7 Ledgers This function enables you to set up and manage accounts for the business. These accounts could be: Customer accounts Trade accounts (suppliers or customers) Stock functions. Stock functions might include specific areas of the business against which to charge goods. - Page 37 2.7 Ledgers Editing an account You can edit the account name and credit status, but you cannot edit the account ID. You can copy the account name and credit status and give the account a new ID. If you no longer require an account, you can delete it. ...
-
Page 38: Messages
2.8 Messages 2.8 Messages Messages enable you to select the appropriate information to be printed on labels, receipts, vouchers and other printed output such as banking operations slips. You can also set up text for adverts displayed whenever the scale is idle. - Page 39 2.8 Messages Edit/create a message category You can edit a message category description or you can create new descriptions. 1. Select Messages from the System Data screen. The list of message categories is displayed. 2. Highlight the message category description you want to edit from the list displayed in the table and touch the select button.
-
Page 40: Message Category
2.8 Messages 2.8.1 Message Category There are four message groups that contain the following category Note: Message categories are defined in values used by XM and XT series scales. Service Mode and 1. General cannot be changed from Generic Traceability Text - message category 31 Manager Mode. -
Page 41: Payments
2.9 Payments 2.9 Payments This function allows you to: define different payment methods. assign a dedicated touch key to each payment method if required (see 5.1, Data reports page 114) select one of 13 types of payment for each payment method. ... - Page 42 2.9 Payments Currency ID The currency symbol reference numbers are the same as those used to configure currency in service mode. Use the numeric keys to enter the reference number you require Currency symbol reference numbers 00 user 10 Lit 20 Pta 30 Won 40 Q...
- Page 43 2.9 Payments Minimum Amount Payment entries below the programmed minimum value are not allowed. Maximum Amount (HALO) Payment entries above the programmed maximum value are not allowed. Open drawer Each payment key can be programmed to open or not open the cash drawer.
-
Page 44: Departments
Bestseller keyboards. The menus and keys must be created and set up in the MX-SBT application. Contact your Avery Berkel service provider for more details. XM and XT Setup and Programming Guide... -
Page 45: Groups
2.11 Groups 2.11 Groups A product group is a category such as red meat, white meat or offal to which an individual PLU may be assigned. The products assigned to a group may be from one department or several. Cheese Group touch key Cheese Group menu/keyboard You can link product groups to touch keys and menus in the same way... - Page 46 2.11 Groups 3. Enter a value for the Group ID that has not already been assigned and touch . You can also allow the program to automatically assign the next available value when you save the new group. 4. Select the Description field and touch ....
- Page 47 2.11 Groups 5. Enter the description in the Description screen and touch Note: When you save a new group, the next available value will be . assigned as the Group ID. You can also manually assign a Group ID number that is not already assigned.
- Page 48 2.11 Groups 8. Touch OK when you receive the Save succeeded message. 9. The new group will appear in the Group list. Touch to exit Groups and return to the System Data menu. XM and XT Setup and Programming Guide...
- Page 49 2.11 Groups To edit a product group: 1. Select a product group and touch 2. Select the field you want to edit and touch 3. Touch 4. Touch 5. Touch OK when you receive the Save succeeded message. 6. Touch to exit Groups and return to the System Data menu....
-
Page 50: Miscellaneous Fees
2.12 Miscellaneous fees 2.12Miscellaneous fees This function enables you to add either a percentage of the total value or a fixed amount to the transaction. Examples of miscellaneous fees are: credit card surcharge delivery charge gift wrapping service ... - Page 51 2.12 Miscellaneous fees 3. Enter a value for the corresponding field as shown below in the Value column, and touch . 4. Repeat for each field you want to edit. 5. Touch to save the new fee. 6. Touch to exit. To edit a fee: 1.
- Page 52 2.12 Miscellaneous fees XM and XT Setup and Programming Guide...
-
Page 53: System Setup
System Setup This chapter tells you how to program the machines so that they operate in the way required to match the store operations. Contents 3.1, Setting date and time 3.2, Configuration 3.2.1, Network parameters 3.2.2, Setting network parameters 3.3, Touch menus 3.3.1, Bestseller keyboards 3.3.2, Static keyboards 3.3.3, Dynamic keyboard options... -
Page 54: Setting Date And Time
3.1 Setting date and time 3.1 Setting date and time The machine has an internal clock that stores the date and time. It uses the clock to calculate the sell-by dates printed on the labels and to print the date and time on printouts and reports. When you set the date and time on the server scale, any client scales connected to it will synchronise their clocks with the server. -
Page 55: Configuration
3.2 Configuration 3.2 Configuration 3.2.1 Network parameters These settings configure the way in which the functions listed operate for all the scales across a network and for stand alone scales. Account Validation Off - any account number accepted. You can enter any account reference and charge goods or make payments to that account. - Page 56 3.2 Configuration Idle Timeout Length of time (secs) the scale is inactive before idle time adverts are initiated. Keyboard System Defines whether the scale is using static or bestseller menus. Keyboard Hierarchy Allows buttons belonging to the same group to be displayed together. The grouping can be either by department or PLU group ID.
- Page 57 3.2 Configuration Transaction Buffer Selects the transaction buffer behaviour when it is full. Circular New transactions will overwrite the oldest transactions and trading can continue. Linear trading cannot continue when the buffer is full. A warning message is generated when the buffer is almost full.
- Page 58 3.2 Configuration Talon Barcode On/Talon Barcode Format These fields support talon printing. A talon is a slip containing the price to pay and an optional barcode. It is typically used when an order is placed and the customer has to return at a later time or date to collect it.
- Page 59 3.2 Configuration Report Header You can add text to a report header. This text can be printed on all totals reports and is displayed below the date/time header. To add text to a report header: 1. Touch ‘Manager Mode’. 2. Touch ‘Operator [X]’. 3.
- Page 60 3.2 Configuration 7. Touch the ‘Message [X],34’ screen is displayed. Select ‘Message ID’ and touch . A keypad is displayed. Using the keypad, enter a suitable ‘Message ID’ number. To save touch 8. Select ‘Message’ and touch . A keypad is displayed. Note: This text can be multi line and can contain font and...
- Page 61 3.2 Configuration Refer to the example report below: To select the message to be displayed on the receipt header: 1. Touch ‘Manager Mode’. 2. Touch ‘Operator [X]’. 3. Enter PIN number. 4. Touch ‘System Setup’. 5. Touch ‘Configuration’. The ‘Network Parameters’ screen is displayed.
- Page 62 3.2 Configuration 6. From the ‘Network Parameters’ screen, use the buttons to select ‘Report Header’ and touch . The ‘Report Header’ window is displayed in front of the ‘Report Header’ screen. 7. Use the buttons to select a message. To save touch .
- Page 63 3.2 Configuration When an advert is specified selecting a non-weighed PLU, by any method, causes the advert to be displayed for the duration specified in the advert and the scale to return to the Home screen. Self Service Keypad Timeout When the scales are put into Self-service Mode, a numeric keypad is displayed for PLU/BIN number entry.
- Page 64 3.2 Configuration 6. From the ‘Network Parameters’ screen, use the buttons to select ‘Self Service Keypad Timeout’ and touch 7. A numeric keypad is displayed. Using the numeric keypad enter a time delay (in seconds). To save touch . A message window is displayed “Save Succeeded”.
- Page 65 3.2 Configuration Speaker Volume You can adjust the volume of the loudspeaker as follows: Note: The loudspeaker volume adjustment is for 1. Touch ‘Manager Mode’. the XT model only. 2. Touch ‘Operator [X]’. 3. Enter PIN number. 4. Touch ‘System Setup’. 5.
-
Page 66: Setting Network Parameters
3.2 Configuration 7. Using the numeric keypad, enter the desired speaker volume in the range of 0 to 99 (where 0 is Quiet and 99 is Loud). To save touch . A message is displayed “Save Succeeded”. 3.2.2 Setting network parameters To set network parameters: 1. -
Page 67: Touch Menus
3.3 Touch menus 3.3 Touch menus There are two basic types of keyboard on Xtra scales: Note: You must be in Manager Mode in order 1. Bestseller to perform programming 2. Static operation, see section 1.2, Using Manager We recommend that you use the MX-SBT Keyboard Designer mode, page application to design and edit static keyboards, keys and menu... - Page 68 3.3 Touch menus To configure these settings, go to Manager Mode > System Setup > Configuration and: Select the day and hour for the Best Seller update. Select the Best Seller update period. This is the period after which the Best Seller keyboard is regenerated using the best seller counts.
- Page 69 3.3 Touch menus Although in theory you can design as many menus and sub-menus into your keyboard system as you wish, this is not recommended. The most efficient keyboard systems consist of a home keyboard containing various groups that link to a single lower keyboard containing the most popular products.
- Page 70 3.3 Touch menus 4. Using the green arrow buttons, scroll to the group from which you wish to add a product key and touch 5. Touch a blank key and then touch . A window will open with a list of products. 6.
- Page 71 3.3 Touch menus 7. Touch the product and then touch 8. Touch to keep the new product key on your keyboard. To add static menu links: 1. In Manager Mode, touch 2. Touch 3. Touch XM and XT Setup and Programming Guide...
- Page 72 3.3 Touch menus 4. Using the green arrow buttons, scroll to the keyboard you wish to edit and touch 5. Touch a blank key and then touch . XM and XT Setup and Programming Guide...
- Page 73 3.3 Touch menus 6. Use the green arrows to scroll to the keyboard you want to link to and then touch . The link will now appear on your keyboard. 7. Touch . XM and XT Setup and Programming Guide...
- Page 74 3.3 Touch menus Setting up a keyboard system with bestsellers and dynamic menus The process to set up this type of keyboard is as follows: 1. Add/Edit the Home keyboard. To add the Home keyboard, follow the process described in Setting up a manually-structured keyboard system page 2.
- Page 75 3.3 Touch menus 6. Use the green arrows to scroll to the department from which you want to add a best seller key and touch 7. The best seller key will now appear on your keyboard. Touch To add a dynamic keyboard link: 1.
- Page 76 3.3 Touch menus 4. Select the keyboard that you want to edit and touch 5. Touch a blank key and then touch XM and XT Setup and Programming Guide...
- Page 77 3.3 Touch menus 6. Select the department to which you want to add a dynamic link and touch . 7. The dynamic link will now appear on your keyboard. Touch Upon downloading the keyboards to the scale for the first time, you will need to trade one of each of what you think will be the bestselling products to populate the keyboards within two hours.
-
Page 78: Dynamic Keyboard Options
3.3 Touch menus 3.3.3 Dynamic keyboard options A dynamic keyboard generates buttons automatically depending on the products that are stored in the scale. These buttons can be grouped together by the product group or the department. Several settings control the setup and behaviour of dynamic keyboards. These are found in Configuration on page Keyboard Hierarchy... - Page 79 3.3 Touch menus 4. Select Department or Group. 5. Touch to keep the changes. 6. Touch to save all changes. Mix Groups and Products Alphabetically on a Dynamic Keyboard This option allows for product group keys and product keys to be intermixed on a keyboard rather than having the group keys first followed by the product keys.
- Page 80 3.3 Touch menus 4. From the 'System Setup' screen touch ‘Configuration’, the ‘Network Parameters’ screen opens. 5. Select the required sort order. To save the required sort order press . A 'Save Succeeded' window is displayed then closes. The 'Network Parameters' screen is then displayed. XM and XT Setup and Programming Guide...
- Page 81 3.3 Touch menus Dynamic Key Sort Order The way keys are sorted on a dynamic keyboard is controlled by the Dynamic Key Sort Order parameter, which can be set as follows: 1. In Manager Mode, touch 2. Touch 3. Use the arrows to scroll down the list to Dynamic Key Sort Order and touch 4.
- Page 82 3.3 Touch menus 5. Use to scroll and select from the following options: Numeric Alpha Best Seller Numeric Best Seller Alpha 6. Touch to keep the changes. 7. Touch save all changes. Dynamic Key Rows and Columns The Dynamic Key Rows and Dynamic Key Columns settings control the physical layout of each keyboard.
- Page 83 3.3 Touch menus 3. Use the arrows to scroll down the list to Dynamic Key Rows and touch 4. Select Value and touch XM and XT Setup and Programming Guide...
- Page 84 3.3 Touch menus 5. Type the number of rows you want on your keyboard and touch 6. Touch to save all changes. Setting key columns To set the number of key columns: 1. In Manager Mode, touch 2. Touch XM and XT Setup and Programming Guide...
- Page 85 3.3 Touch menus 3. Use the arrows to scroll down the list to Dynamic Key Rows and touch 4. Select Value and touch XM and XT Setup and Programming Guide...
- Page 86 3.3 Touch menus 5. Type in the number of key columns you want and touch 6. Touch to save all changes. Setting the maximum number of keyboards This sets the maximum number of dynamic keyboards to be generated behind each dynamic menu. Normally this will be set to 1 or 2. To set the maximum number of dynamic keyboards: 1.
- Page 87 3.3 Touch menus 3. Use the arrows to scroll down the list to Max Dynamic Keyboards and touch 4. Select Value and touch XM and XT Setup and Programming Guide...
- Page 88 3.3 Touch menus 5. Type in the maximum number of keyboards you want and touch 6. Touch to save all changes. XM and XT Setup and Programming Guide...
-
Page 89: Key Appearance
3.3 Touch menus 3.3.4 Key appearance When creating a keyboard, you can also edit the appearance of your keys. For example, you can change key size, key colour and key text. These options are found in: Manager Mode > System Setup > Touch Menus > Keys. Key size To change key size: 1. - Page 90 3.3 Touch menus Font colour To change font colour: 1. Select the key and touch 2. Select a font colour and touch . 3. Touch XM and XT Setup and Programming Guide...
- Page 91 3.3 Touch menus Fill colour To change font colour: 1. Select the key and touch 2. Select a fill colour and touch 3. Touch Key text To change key text: 1. Select the key and touch 2. Type the new text and touch 3.
- Page 92 3.3 Touch menus XM and XT Setup and Programming Guide...
-
Page 93: Machine Setup
Machine Setup This section contains information to help you set up your scale to operate as you require and to communicate with other scales on the network. It also includes how to level the scale and calibrate the touchscreen Contents 4.1, Networks overview 4.2, Comms Setup (Store networks) 4.2.1, Wired setup... -
Page 94: Networks Overview
4.1 Networks overview 4.1 Networks overview The machine network system in a store can consist of a mixture of label and receipt machines. The system will support any combination of machines in the XM and XT ranges provided they have the same software version. -
Page 95: Comms Setup (Store Networks)
4.2 Comms Setup (Store networks) 4.2 Comms Setup (Store networks) 4.2.1 Wired setup Scales are connected together using one or several hubs as required. The number and position of the hubs required is determined by the store layout and the type of hub used. Two scales can be connected together without the use of a hub. - Page 96 4.2 Comms Setup (Store networks) Static IP address networks Note: Before setting up an in-store network, In Manager Mode: obtain the appropriate IP addresses from the store 1. Select IT administrator. Enter the addresses at the machines before connecting to the 2.
- Page 97 4.2 Comms Setup (Store networks) 6. Select the IP address and touch . 7. On the IP Address screen, use the arrows and number buttons to set the IP address to one that is unique to that scale. 8. Touch 9.
-
Page 98: Wireless Setup (Wlan) - Rf Comms (Optional)
4.2 Comms Setup (Store networks) 4.2.2 Wireless setup (WLAN) - RF comms (optional) Power the scale up with the wireless USB adaptor plugged in so the scale will detect the type of adaptor it is and save the settings accordingly. In Manager Mode: 1. - Page 99 4.2 Comms Setup (Store networks) Advanced The options you will see in Advanced Wireless Setup will depend on the setting selected for Security Mode in Basic. ESSID (Extended Service Set Identifier) This is an alphanumeric string of up to 32 characters which separates wireless LANs.
- Page 100 4.2 Comms Setup (Store networks) Wireless Diagnostics: Displays information on signal quality, link quality, noise level and IP addresses. Wireless Scan: Use this option to scan for and choose wireless acccess pionts. Use the Page key to scroll thorugh the access points.
-
Page 101: Network Setup
4.3 Network setup 4.3 Network setup Computer name This only applies to scales on networks with DHCP enabled. The host name enables the machine to be identified even if the IP address has changed. Port This port number is used by the scales in the network to communicate across the network. -
Page 102: Ping
4.3 Network setup Short Machine ID The ID of a machine on a server/client network. This is displayed in the status bar of the scale and enables easy identification of scales. 4.3.2 Ping Use the PING command to check whether a scale is online or offline. Enter the IP address or host ID of the scale to be checked. -
Page 103: Level Scale
4.4 Level scale 4.4 Level scale This menu provides on-screen instructions for levelling the scale. The scale automatically compensates when it is not level. If the scale is out of level by more than 5° the ValuMax indicator will show a red cross in the display screen status bar. -
Page 104: Machine Settings
4.6 Machine Settings 4.6 Machine Settings Use this menu to edit the default machine department and the home keyboard. You can also select the text and logos that will appear on receipts. 4.6.1 Home Keyboard The home keyboard is the initial keyboard you see displayed after start up and when is touched. - Page 105 4.6 Machine Settings Product Playlist ID This setting lets you show a series of adverts at the same time as products are being traded. These may be adverts to cross-promote related products, promote a different store department etc. None Your choice ...
- Page 106 4.6 Machine Settings One Shot Label Mode When enabled, this setting lets you print a label for an item while the machine is in receipt mode. Wrapper Interface Control This setting allows you to temporarily disable and enable the triggering Note: The wrapper and cash drawer use the of the wrapper.
- Page 107 4.6 Machine Settings On a single printer machine, the receipt will be printed first, and then the operator will be prompted to take the receipt and then the bag label will be printed. Since the bag label is used to seal the bag, it will be printed after all the information has been printed.
-
Page 108: Printer Settings
4.7 Printer Settings 4.7 Printer Settings 4.7.1 Printer settings menu The 'Printer Settings' menu allows you to view a list of external printers connected and change printer settings. 1. Touch ‘Manager Mode’. 2. Enter pin. ‘Manager Mode’ screen is displayed. 3. - Page 109 4.7 Printer Settings 6. From the 'Printer Settings [X]' screen you can change the following settings: a. Label Taken Sensor: Select 'Label Taken Sensor' and touch . The 'Label Taken Sensor' window opens. From the 'Label Taken Sensor' window use the buttons to select either 'Enabled' or 'Disabled'.
- Page 110 4.7 Printer Settings From the 'Label Type' window use the buttons to select either 'separate' or 'continuous'. To save touch . A numeric keypad will automatically open to allow you to enter a Printer Roll Width. If you do not wish to enter a Printer Roll Width touch the numeric keypad to return to the ‘Printer Settings’...
-
Page 111: Label Taken Sensor
4.7 Printer Settings 4.7.2 Label Taken Sensor This setting allows the Label Taken Sensor to be disabled. The default Note: This feature will setting is Enabled. If disabled, the following will occur: only work with software v.3.3.0.0 or When streaming labels on continuous paper or separate labels, ... - Page 112 4.7 Printer Settings XM and XT Setup and Programming Guide...
-
Page 113: Data Reports
Data Reports This chapter describes the data reports available and the information they contain. Contents 5.1 Data reports 5.1.1 Verify labels XM and XT Setup and Programming Guide... -
Page 114: Data Reports
5.1 Data reports 5.1 Data reports 5.1.1 Verify labels This function allows you to check the layout of the labels set up for each of the products and that the correct label is assigned to the product, without affecting totals. Print single label 1. -
Page 115: Totals Reports
Totals Reports This chapter describes the totals reports available and the information they contain. Please remember: Totals are updated whenever a label or receipt has been printed successfully. You must be in Manager Mode to print a report. You can assign a security level to any report. -
Page 116: Overview
6.1 Overview 6.1 Overview You can print the following Totals reports in Manager Mode > Totals: Period 1 Reports Period 2 Reports Traceability Report Security Report Period 1 Reports and Period 2 Reports can be be cleared, but Traceability Reports and Security Reports do not have periods and cannot be cleared. -
Page 117: Missing Fields
6.1 Overview 6.1.2 Missing fields If there is no data for a particular field then that field on the report will be blank or a value of zero will be printed. XM and XT Setup and Programming Guide... -
Page 118: Totals Reports
6.2 Totals reports 6.2 Totals reports You can print the following reports: Operator Totals Operator Sales Tax Totals Machine Totals Grand Totals Item Totals Group Totals 6.2.1 Report numbering Each totals report has its own sequential number for security purposes. There are two separate number sequences, one for Print reports and one for Print and Clear reports. -
Page 119: Operator Totals Report
6.2 Totals reports Field name Description Return Amount Value of return transactions Return Trans Total number of returns Return Quantity Weight/items returned Refund Amount Value of refund transaction Refund Count Total number of refunds Discount Amount Value of all discounts Discount Count Total number of discounts No Sale Count... -
Page 120: Operator Sales Report
6.2 Totals reports Select Operator Totals and the press followed by to print all the operators. If you want to print a report for an individual operator, touch and enter the operator ID number. 6.2.4 Operator Sales report This report includes all the sales for the operator and prints: Operator ID ... -
Page 121: Machine Report
6.2 Totals reports 6.2.6 Machine report The information in this report will depend upon the payment methods setup for the machine. It will always include: Total monies for the cash drawer Total cash and, for example, could include Total credit ... -
Page 122: Grand Totals Report
6.2 Totals reports 6.2.8 Grand totals report A Grand total consolidates data from PLU, Operator, Department, Machine, Group and Discount reports for each machine on the system and prints a report of the total sales. Sales Value Counter Value ... -
Page 123: Group Report
6.2 Totals reports Select Items and the press followed by print all the PLUs. If you want to print a report for an individual PLU, touch and enter the PLU ID number. 6.2.10 Group report The data included in this report is: Sales value ... -
Page 124: Trace Totals
6.2 Totals reports 6.2.12 Trace totals The data is printed by lot number and depends on how the scheme has been configured. Only fields for which there have been transactions will be printed. Trace totals reports are non-clearing. Traded quantity is the total used weight of the batch/carcass. The quantity sold is comprised of sales weight, counter service, pre-pack and returns and is incremented each time a transaction is completed. -
Page 125: Diagnostics And Transactions
Diagnostics and Transactions This section describes the diagnostics available to you to help you check that your scale is performing as it should. Contents 7.1, Save Log File and Log Persistence 7.2, Transactions XM and XT Setup and Programming Guide... -
Page 126: Save Log File And Log Persistence
7.1 Save Log File and Log Persistence 7.1 Save Log File and Log Persistence These options are only used by service personnel. XM and XT Setup and Programming Guide... -
Page 127: Transactions
7.2 Transactions 7.2 Transactions There are three options in the Transactions function: Print Held Transactions Use this option to print and clear held transactions in the transaction store. Clear Transactions This option clears the transaction store without printing the contents of the store. - Page 128 7.2 Transactions 5. From the 'Manager Mode' screen select 'Transactions'. The 'Transactions' screen is displayed. 6. From the ‘Transactions;’ screen touch ‘Export to USB Memory Stick’. A message window is displayed ‘Transactions will be deleted after export. Are you sure you wish to continue’. touch .
- Page 129 7.2 Transactions 7. When a client machine is offline, a warning message is displayed. XM and XT Setup and Programming Guide...
- Page 130 7.2 Transactions XM and XT Setup and Programming Guide...
-
Page 131: Data Transfer Via Usb
Data Transfer via USB This section describes the backup and restore procedures for XM and XT scales. Contents 8.1, Backing up 8.1.1, Backup Entire System 8.1.2, Scheduled Backup 8.1.3, Backup Product File Only 8.2, Restoring XM and XT Setup and Programming Guide... -
Page 132: Backing Up
8.1 Backing up 8.1 Backing up All data transfer actions are available in Manager Mode > Data Transfer. Two backup options are available with Xtra scales: 1. Backup of the entire system, which saves the entire database and the media to a memory stick. 2. -
Page 133: Scheduled Backup
8.1 Backing up 4. When the backup has completed, touch 5. Remove the USB memory stick. The backup file will now be on the stick. 8.1.2 Scheduled Backup Scheduled backup default is weekly. The frequency of this task should only be amended by MxSBT or by a Service Engineer. Amend / Create new schedule The database contains a schedule which performs a nightly database backup at 02:00hrs... - Page 134 8.1 Backing up 5. Touch ‘Configuration’. The ‘Configuration’ screen is displayed. 6. Touch ‘Schedule’. The ‘Schedule’ screen is displayed. 7. To amend an existing schedule: a. From the ‘Description’ column select the schedule you want to amend and touch . The ‘Schedule [X]’ screen is displayed.
- Page 135 8.1 Backing up 10.To create a new scheduled task, touch . A ‘Schedule X’ screen is displayed. 11.From the ‘Field Name’ column select ‘Schedule ID’ and touch . A window is displayed with a numeric keypad. Using the keypad enter the ID number. This must be within the range of 1-9999.
- Page 136 8.1 Backing up 14.From the ‘Task Type’ window touch the buttons to select the following options: Reboot - This task will restart the scale at the time you have specified time in the ‘‘Date And Time (Start)’. Reboot is special in that if a scheduled reboot is missed due to the scale being switched OFF then the task will not be actioned Backup Database...
- Page 137 8.1 Backing up 15.To select any of the above options from the ‘Task Type’ window touch the button. For each option, new windows and screens will be displayed in the following order: a. A ‘Start Date / Time’ window is displayed. This will restart the scale at the date and time entered.
- Page 138 8.1 Backing up To save the selected repeat interval touch . The ‘Repeat Interval’ window closes and a ‘Maintenance Message’ screen opens. g. From the ‘Schedule [X]’ screen ‘Field Name’ column, select Note: If you do not enter ‘Last Occurred’ this shows the date and time when the a MAINTENANCE WARNING i.e.
- Page 139 8.1 Backing up h. From the ‘Maintenance Message’ screen you can use the keypad to enter a MAINTENANCE WARNING string. When the scheduled date and start time is reached then the MAINTENANCE WARNING string will be displayed. You can select to show a daily or weekly MAINTENANCE WARNING reminder until the service engineer disables this MAINTENANCE WARNING and chooses the appropriate repeat interval.
- Page 140 8.1 Backing up If there are no scheduled backup files present then the message "There are no scheduled backup files to restore" is given. After successfully restoring a database the message "Restore completed successfully" is given and the restored database is active immediately.
-
Page 141: Backup Product File Only
8.1 Backing up 8.1.3 Backup Product File Only Note: Length of time required to back up 1. Insert the USB memory stick into the scale’s USB port located varies with the size of behind the paper cartridge. the data - number of 2. -
Page 142: Restoring
8.2 Restoring 8.2 Restoring When restoring files, you can either delete the existing products or merge with the products on the memory stick. To restore the data file: 1. Insert the USB memory stick into the scales USB port located behind the paper cartridge. - Page 143 8.2 Restoring 4. The following window will appear. 5. When the restore is complete, touch 6. If the data restore function in manager mode is run without a USB memory stick inserted, an option is given to restore the database from one of the scheduled backup files. Scheduled backup files may exist for daily, weekly, monthly and yearly time periods.
- Page 144 8.2 Restoring 7. If one or more scheduled backup files are present then you will be prompted to restore them in the following order: Daily Weekly Monthly yearly 8. If there are no scheduled backup files present then the following message "There are no scheduled backup files to restore"...
-
Page 145: Media Distribution And Configuration
Media Distribution and Configuration This chapter describes the different ways of loading media files to the scales, explains media configuration files and gives information on different types of media files. Contents 9.1 Media Distribution using USB Memory Stick 9.1.1 Media Configuration File 9.1.2 Media File Specifications XM and XT Setup and Programming Guide... -
Page 146: Media Distribution Using Usb Memory Stick
9.1 Media Distribution using USB Memory Stick 9.1 Media Distribution using USB Memory Stick Media files can be loaded to the scale from a USB memory stick. The scale will automatically generate the media records, adverts and playlists as follows: 1. -
Page 147: Media Configuration File
9.1 Media Distribution using USB Memory Stick Note: This option is only available on the server and not on client scales. 6. When you touch , all existing adverts and their associated media is deleted. A new idle time playlist is generated Clients will check and based on the media and an optional media configuration file synchronise adverts with... - Page 148 9.1 Media Distribution using USB Memory Stick Example 1: An idle time playlist and a product playlist with picture and text adverts ?xml version="1.0" encoding="utf-8"?> < <!-- This configuration file generates a idle time playlist and a product playlist with picture and text adverts--> <Advertising>...
- Page 149 9.1 Media Distribution using USB Memory Stick A media configuration file without any play lists will result in all existing play lists and associated media to be deleted from the scale. Refer to Example 3: below Example 3: Deletes all play lists and associated media <?xml version="1.0"...
- Page 150 9.1 Media Distribution using USB Memory Stick Table 3: Element Names and Attributes - Video Element : Video XML Attribute Type Range Initial/Default Value Description Text “Advert” + sequence number The text advert will be translated Caption Text utf-8 “Advert”...
-
Page 151: Media File Specifications
9.1 Media Distribution using USB Memory Stick 9.1.2 Media File Specifications The table below details the different types of media file which are supported. The media file extension should be used to determine the type of advert to be displayed. Refer to Table 5 below Table 5: Types of Media File Note: Any single media Advert... - Page 152 9.1 Media Distribution using USB Memory Stick XM and XT Setup and Programming Guide...
- Page 153 Index subtotal display totalising Bestsellers transactions keys weighting PLU create & edit create PLU Comms setup DHCP scale networking wired Reports 113, 115, static IP address grand totals WLAN (RF comms) iems report Configuration machine report network parameters missing fields operator sales operator totals printing...
- Page 154 Foundry Lane, Smethwick, West Midlands, England B66 2LP Tel: +44 (0)870 903 2000 Fax: +44 (0)870 904 2223 Email: info@averyberkel.com Internet: www.averyberkel.com *ABR35-000568* ABR35-000568-AD...
Need help?
Do you have a question about the XM Series and is the answer not in the manual?
Questions and answers
we currently have a XM400 currently running on Windows 10 - does the software work if we upgrade to windows 11