Advertisement
Table of Contents
- 1 User Instructions
- 2 Cleaning the Scale
- 3 Installation
- 4 Error Messages
- 5 Error Codes
- 6 Displaying Service Information
- 7 Resetting the Machine
- 8 Selecting Sleep Mode
- 9 Using the Scale
- 10 Zeroing the Scale
- 11 Using Tares
- 12 Switching the Bleeper Alarm On/Off
- 13 Switching the Keyboard Bleeper On/Off
- 14 Changing the Bleeper Volume
- 15 Declaration of Conformity
- Download this manual
Advertisement
Table of Contents

Related Manuals for Avery Berkel FX 110


Summary of Contents for Avery Berkel FX 110
-
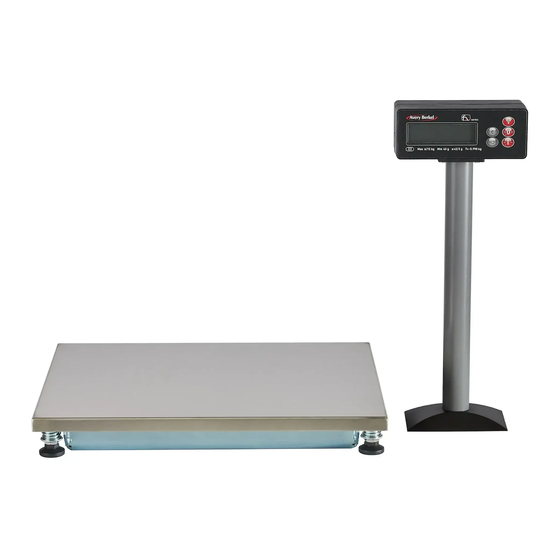
Page 1: User Instructions
FX 110 / FX 120 User Instructions Weight Only Scale Brisch number 76103-390 Issue 2 09/08/02 *76103-390* ENGLISH... - Page 2 Avery Berkel Limited 2001. All rights reserved. The information contained herein is the property of Avery Berkel Limited and is supplied without liability for errors and omissions. No part may be reproduced or used except as authorised by contract or other written permission.
-
Page 3: Cleaning The Scale
Warnings For your protection, all mains (110V or 230V) equipment used where damp or wet conditions may occur, must be supplied from a correctly fused source and protected by an approved RCD to BS7071 or BS7288 or IEC1008-2-2 BS EN 61008:1995. -
Page 4: Installation
Installation FX110 only Remove parts 1- 4 before installing the machine Make sure that the work surface is firm, steady and free from vibration and draughts. Hold the scale by the base when picking up. Do not pick up the scale by the weigh plate or cross. - Page 5 Installation FX120 To avoid the risk of RSI (Repetitive Strain Injury) it is important to ensure that the machine is placed on a surface which is ergonomically satisfactory to the user. In cases where usage is prolonged EN614-1 recommends frequent breaks for the user.
- Page 6 Connect power cable. To connect remote display. Replace the weighplate. Connect to power point.
- Page 7 Fitting the FX 120 scale mounted display Make sure the scale is not connected to the power supply and remove weigh plate. Turn over machine and place on a safe, level surface. Turn the machine round so the required mounting slot is next to the edge of the counter.
- Page 8 Place the mounting bracket into the slot. Place washer over screw hole and fix with the large replacement screw.
- Page 9 Refer to the drawings on the following pages and: Plug the display cable into the base. Feed the slack cable round the base. Secure the cable clips. Place machine upright. Replace the weigh plate. Connect to power point. Caution: Do not lift the scale by the column display or the weighplate.
- Page 10 Cable route: single display Cable from slot 3 Cable from slot 2 Cable from slot 1...
- Page 11 Cable route: dual display Cable from slot 3 Cable from slot 1...
- Page 12 Cable route: dual display Cable from slot 2 Cable from slot 1...
- Page 13 Cable route: dual display Cable from slot 2 Cable from slot 3...
- Page 14 Securing the cable clips...
- Page 15 FX 120 battery operation Note: Battery operation is not available on the FX110 Plug the battery pack into the scale (use 6 x 1.5v 2‘D’ size cells) and place the pack into the recess. Replace the cover and weighplate. NiCad Caution: To avoid damage to the scale caused by leaking batteries, remove flat or damaged batteries immediately.
-
Page 16: Error Messages
Error messages If a persistent error message appears or the scale locks up, disconnect then reconnect the scale to the power supply. If the scale remains inoperative, contact your authorised service agent. Weight Temporary Balance Under Over unsteady error failed range range Error codes:... -
Page 17: Displaying Service Information
Using the scale Testing the display Displaying service information Resetting the machine Press and hold Selecting sleep mode Press and hold Waking up the scale Depending on configuration... Either... -
Page 18: Zeroing The Scale
Zeroing the scale Make sure that the scale is at zero before weighing any goods. Weighing goods Place the goods onto the scale. Using tares To cancel a tare Cumulative tare Repeat until all the goods have been weighed. - Page 19 Management Mode Entering management mode Navigating management mode Sub-branch Branch 1 2 . 9 5 For Example: Value Branch ( Sub-branch ( Go to the next branch (press and hold) Branch ( Go to next sub-branch Sub-branch ( Go to the previous branch (press and hold) Sub-branch ( Go to previous sub-branch Sets the value to 0 enabling you to display a new value...
-
Page 20: Switching The Bleeper Alarm On/Off
Switching the bleeper alarm on/off Go to branch 19, Sub-branch 00 0 = Off 1 9 . 0 0 1 = On Switching the keyboard bleeper on/off Go to branch 19, Sub-branch 01 0 = Off 1 9 . 0 1 1 = On Target bleep Branch 19, Sub-branch 02 - Not applicable for this machine. - Page 21 Changing the duration of a ‘Long' press (press and hold) Go to branch 29, Sub-branch 00 Enter a value in units of 10 milliseconds (50 -255). 2 9 . 0 0 For example : 2 0 0 200 = 2 seconds 150 = 1½...
-
Page 23: Declaration Of Conformity
Declaration of Conformity The non-automatic weighing instrument Manufacturer Avery Berkel Type FX 110 Number of EC type approval certificate UK 2625 Manufacturer Avery Berkel Type FX 120 Number of EC type approval certificate T5532 Corresponds to the requirements of the following EC directives:... - Page 24 Email: sales@averyberkel.com Info@averyberkel.com Internet: http://www.averyberkel.com...
Need help?
Do you have a question about the FX 110 and is the answer not in the manual?
Questions and answers