Table of Contents
Advertisement
Advertisement
Table of Contents

Related Manuals for Avery Berkel FX210


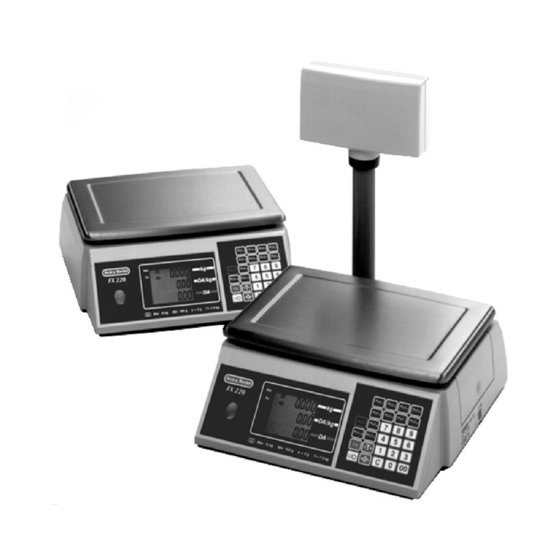
Summary of Contents for Avery Berkel FX210
- Page 1 Service Instructions FX210/FX220 76102-646 Issue 3 12.04.00 ENGLISH...
-
Page 2: Table Of Contents
Table of Contents Table of contents Removing the covers Installing expansion boards Installing a head-up display Status display Error messages Configuring the scale Management mode Restricted service access Full service access Verification mode Exiting from full or restricted service access Navigating service mode Product configuration branches Branch 0 - Edit counter... -
Page 3: Removing The Covers
Removing the covers Removing the covers Disconnect the power supply from the scale. Remove the weighplate. Break the tamper seal. Remove the screw (A) and remove the expansion board cover. Remove the feet (and the springs if the scale is a 30kg machine). Remove the screw (B) at the front edge of the scale. -
Page 4: Installing Expansion Boards
Installing expansion boards Installing expansion boards Refer to the fitting instructions included with each expansion board for details on configuration settings. Connect the wiring loom to the expansion boards. Remove the cover and place the boards in their correct slots. Break off the appropriate blanking plate and replace the cover. -
Page 5: Installing A Head-Up Display
Installing a head-up display Installing a head-up display Disconnect the FX from the mains power supply, or remove the battery pack. Using a flat-bladed screwdriver, remove the blanking plate from the back of the Attach the display using the two slotted screws. Carefully insert the plug from the display into the socket at the back of the FX. -
Page 6: Status Display
Status display Status display The status display shows some basic information about the scale. to view this information, press the display test key twice: Top row Middle row Bottom row Boot block product code Boot block version number Application block product code Application block version number Configuration block product code Configuration block version... -
Page 7: Error Messages
Error messages Error messages Temporary Weight Balance failed Under range Over range error unsteady Disconnect then reconnect the power supply. Battery failure - replace the batteries (do not use NiCad batteries). Power supply voltage too high. Make sure the correct power supply is being used (see page 28). -
Page 8: Configuring The Scale
Configuring the scale Configuring the scale There are three ways to configure the scale: Management Restricted Full service mode service access access Verification mode Configuration menus Service calibration Management mode This mode allows the user to configure a few branches of the scale. Because the configurations can be different for each scale, refer to the User Instructions for details on the branches available. -
Page 9: Full Service Access
Configuring the scale To enter restricted service access: The scale will now be in verification mode (see below). Full service access This will give full access to the scales configuration. Unplug the scale from the power supply. Break the security seal and carefully remove the blanking plate. Plug the service tool (part number 18165-140) into the side of the scale. -
Page 10: Exiting From Full Or Restricted Service Access
Configuring the scale Exiting from full or restricted service access To exit: Long Press You will need to disconnect the power supply, (remove the service tool if you are in full service access) and reconnect the power supply. Note: If you do not exit service mode correctly you will see an E 30 error message. Service Instructions... -
Page 11: Navigating Service Mode
Navigating service mode Navigating service mode Each configuration setting consists of a value and a location, the location consists of a Branch number and a Sub-branch number. Branch Sub-branch For example: Branch 5 = Weighing capacity 5. 0 7 Sub-branch 05 = Primary Capacity units Value 129 = lb Value Function... -
Page 12: Product Configuration Branches
Product configuration branches Product configuration branches Note: For older application block versions (0-5-0 or earlier) some branches or sub-branches are not available. Branch 0 - Edit counter Sub-branch Value This counter is automatically incremented whenever the 00 - Default user mode product configuration has been altered. -
Page 13: Branch 6 - Weighing Functionality
Product configuration branches Branch 6 - Weighing functionality Full service access only. Sub-branch Value Gross zero appears when the range is 00 - Zero indicator. This determines when the between ±0.25 divisions. gross zero indicator appears on the display. Gross zero appears when the range is between ±0.5 divisions. -
Page 14: Branch 7 - Weighing Limits
Product configuration branches Sub-branch Value Disable alternate units. 11 - Alternate Units. This will convert the displayed weight into the selected units. USA decimal Pounds. Grams. 12 - Weight steady. The weight must remain ± 0.1 divisions. within the given ± range for a set amount of ±... -
Page 15: Branch 08 - Gravity Compensation
Product configuration branches Branch 08 - Gravity compensation Full service access only. Sub-branch Value 00 - Calibration gravity factor. This is the As published by the support office of your national distributor. gravity factor of the location where the scale has been calibrated. -
Page 16: Branch 19 - Bleeper Functions
Product configuration branches Branch 19 - Bleeper functions Sub-branch Value Disabled. 00 - Bleep when below zero. Enabled. Disabled. 01 - Keyboard bleep. Enabled. 02 - Target bleep. Disabled. Enabled. 03 - Error bleep. Disabled. Enabled. 04 - Bleeper volume. Quiet. -
Page 17: Branch 60 - Tares
Product configuration branches Branch 60 - Tares Sub-branch Value Note: See also, branch 6 sub-branch 13 - tare increment, and branch 6 sub-branch 14 - automatic re-tare. 00 - Tare balance interlock. This determines Manual balance is disabled whilst any tare is whether the scale allows the zero key to be active. -
Page 18: Branch 61 - Currencies
Product configuration branches Branch 61 - Currencies Sub-branch Value Lower. For example, 100g. 00 - Default price base. Upper. For example, kg. Disabled. 01 - Enable numeric key timeout. This determines whether there is a time Enabled. restriction for entering numbers using the keyboard. -
Page 19: Branch 63 - Main Currency, Dual Currency Conversion
Product configuration branches Sub-branch Value No rounding. 06 - Total price rounding. 1 - 255 Round up or down to nearest 1-255. 07 - Add total rounding. No rounding. 1-255 (Round by). 08 - Dual currency display decimal places. 0 - 3 decimal places. 09 - Dual currency display thousands Disabled. - Page 20 Product configuration branches Sub-branch Value Disabled. 01 - Unit price thousands separator. Enabled. 02 - Price decimal marker. Comma. Decimal point. 03 - Unit price dummy zero. Disabled. Enabled. 04 - Total decimal places. 0 - 3 decimal places. 05 - Total thousands separator. Disable thousands separator for total price and add total.
-
Page 21: Branch 100 - Plus
Product configuration branches Branch 100 - PLUs The branch number for a PLU = 100 plus the PLU number. For example PLU 5 = 105, PLU 19 = 119 Sub-branch Value 00 - Unit price. 0 - 9999999 01 - Tare value. No static tare Tare value 02 - Proportional tare. -
Page 22: Calibration
Calibration Calibration You will only be allowed to calibrate the scale when using full service access. Unplug the scale from the power supply. Break the tamper seal, carefully remove the blanking plate and plug the service tool into the side of the scale. Replace the weighplate and re-connect the power supply. -
Page 23: Aborting Calibration
Calibration 11. Remove all the load. CAL 5 done 1. 7 155 1. 7 155 12. The calibration procedure is now complete. 13. Disconnect the scale from the power supply. 14. Remove the service tool from the side of the scale and reconnect the power supply. -
Page 24: Euro Conversion Procedure
Euro conversion procedure Euro conversion procedure To convert the scale to use Euros: 2002 E u r o A L T Remove the national currency sticker to reveal the Euro symbols: The scale will now use the Euro as the default price base. To view the national currency, press the Euro key. -
Page 25: Replacing A Head-Up Display
Replacing a head-up display Replacing a head-up display Slide the collar down the column. Gripping the headup display firmly, press hard at the two points marked A, and break open the covers: Disconnect and remove the damaged display. For the new display, make sure that both dip-switches are in the ON position. Fit the new display, making sure that the loom is connected to socket 'B'. -
Page 26: 30Kg Scales
30kg scales 30kg scales For 30kg scales, a stiffener plate must be used. Stiffener plate M8x16mm (x4) 13811-151 Foot spring 64413-112 30kg stiffener plate 65651-706 Base covers If you need to replace a damaged base cover, break off all four cut-outs from the new cover before replacing. -
Page 27: Illustrated Parts List
Illustrated parts list Illustrated parts list M4x6mm 13755-113 Foot (x4) 61664-151 Spring (30kg) Base cover/ 64413-112 Expansion board cover 70221-172 M4x6mm 13758-406 M6x16mm (x4) 13756-105 Blanking plate T701 Load cell 65379-482 See table for details Battery box cover Stiffener plate 61225-153 65556-110 Software... -
Page 28: Head-Up Display
Illustrated parts list Head-up display Front display housing 61226-265 Display window 61768-104 M4x10mm (x2) Self-tapping M4x19mm (x3) 15838-015 13838-044 LCD display Retaining 70658-231 plate 65543-401 Back display Housing housing collet 61226-266 633543-401 Column 61656-179 M5 slotted screw (x2) Bracket 61728-124 Bracket cover 61225-142... -
Page 29: Wiring Diagram
Illustrated parts list Wiring diagram Battery Mains holder adaptor 18137-268 See table *Non-backlit display for details 70658-231 Expansion *Backlit display card 70658-232 70785-955 Expansion card Tower Display* Expansion card 70734-896 70734-913 Load cell See table for details Display* 70734-895 Keyboard Display* 70785-965 70734-912... - Page 30 Illustrated parts list Power supplies Country Part number Note 70682-256 Low current 70682-259 High current 70682-257 Low current 70682-260 High current Europe 70682-258 Low current Europe 70682-261 High current Load cells Country Part number Note Canada 70718-367 15kg price computing Canada 70718-377 30kg price computing...
- Page 31 Index Index Key press duration 30kg scales 30kg stiffener plate Load cells Alternate currency Main currency 16 - 17 Management mode Bleeper functions Navigating service mode Calibration 20 - 21 Configurations Configuring the scale 6 - 8 Parts list 25 - 28 Covers PLUs Currencies...
- Page 32 This document contains a general guide only of the product and shall not form any contract unless specifically agreed by Avery Berkel in writing in each case on the Order Acknowledgment. The specification of the products described herein may vary from time to time and may be altered without notice.
Need help?
Do you have a question about the FX210 and is the answer not in the manual?
Questions and answers