Table of Contents
Advertisement
Quick Links
Advertisement
Table of Contents

Related Manuals for Avery Berkel XN series


Summary of Contents for Avery Berkel XN series
- Page 1 XM and XT series Retail System Scales Operator Instructions...
- Page 2 Full acknowledgment of the source must be given. Avery Berkel is a division of ITW Limited. This publication was correct at the time of going to print and is supplied without liability for errors or omissions.
-
Page 3: Table Of Contents
Contents page no. Safety Warnings 1.1 Safety and warnings 1.1.1 Safe Installation 1.1.2 Safe use 1.1.3 Cleaning the machine 1.1.4 Safety 1.1.5 EMC compliance 1.1.6 Cleaning the print head Installation 2.1 Installation 2.1.1 Level compensation system 2.1.2 Adjusting the screen angle 2.1.3 Inserting the keyboard overlay (XM only) 2.1.4... - Page 4 Getting Started - XT 4.1 Getting started 4.1.1 Vendor display 4.1.2 Customer display 4.1.3 Touchscreen keys 4.1.4 Fixed function keys 4.1.5 Programmable touch key area 4.1.6 Function menu bar Printing 5.1 Printer options 5.2 Label/receipt printers 5.2.1 Fitting the large core hub 5.2.2 Changing the printer roll - backing rewound 5.2.3...
- Page 5 6.3 Departments 6.3.1 Using departments 6.4 Price change 6.4.1 Overriding prices 6.4.2 Using the Price Change button 6.5 Overriding weight 6.6 Promotions and discounts 6.6.1 Cross-promos 6.6.2 Price promos 6.6.3 Weight/item free promos 6.6.4 Discount promos 6.6.5 Discounting prices 6.6.6 Voucher promotion 6.7 Tares 6.7.1...
- Page 6 6.11 Re-wrap function Serving Customers - Receipt Mode 7.1 Operating modes 7.1.1 Counter operation 7.1.2 PoS operation 7.1.3 Checkout operation 7.1.4 Hold Receipt Mode 7.1.5 Barcode scanning 7.2 Basic operation 7.2.1 Weighed goods 7.2.2 Non-weighed items 7.2.3 Displaying the operator subtotal 7.2.4 One shot labels 7.2.5...
- Page 7 Miscellaneous Functions 8.1 User functions 8.1.1 Idle time adverts and videos 8.1.2 Security levels 8.2 Web browser 8.3 Training videos and images 8.4 Operator PIN 8.5 Touchscreen calibration 8.6 Shutting down the machine Working with networked scales 9.1 Networked scales 9.1.1 Operating mode 9.1.2...
- Page 8 10.2.3 Tares 10.2.4 Tax rates 10.2.5 Discounts 10.3 Operators 10.3.1 Setting up a new operator Reporting Functions 11.1 Overview 11.1.1 Report printing 11.1.2 Missing fields 11.2 Totals reports 11.2.1 Report numbering 11.2.2 Report fields 11.2.3 Grand totals report 11.2.4 Operator Totals report 11.2.5 Operator Sales report 11.2.6 Items report 11.2.7 Machine report...
- Page 9 12.2.2 Automatic creation of records 12.3 Counter service operation 12.3.1 Selecting the PLU 12.4 Traceability passport 12.4.1 Printing a duplicate passport Looking After Your Scale 13.1 Cleaning the scale 13.1.1 Cleaning the touchscreen 13.2 Cleaning the print head 13.2.1 Cassette printer 13.2.2 Receipt printer 13.3 Service interval XM and XT Operator Instructions...
-
Page 10: Safety Warnings
Safety Warnings XM and XT Operator Instructions... -
Page 11: Safety And Warnings
1.1 Safety and warnings 1.1 Safety and warnings 1.1.1 Safe Installation The mains lead must be connected to a supply outlet with a protective earth contact. The electrical supply at the socket outlet must provide over-current protection of an appropriate rating. Pluggable equipment must be installed near an easily accessible socket outlet. -
Page 12: Emc Compliance
1.1 Safety and warnings 1.1.5 EMC compliance This is a class A product. In a domestic environment, this product may cause radio interference in which case the user may be required to take adequate measures. 1.1.6 Cleaning the print head CAUTION: Do not use metallic objects on the print head. -
Page 13: Installation
Installation This chapter contains information on handling and positioning the scale. Important: When programming or configuring the equipment, you must ensure that you comply with all relevant standards and legislation. The example settings given in this book may not be legal for trade with the public. -
Page 14: Installation
2.1 Installation 2.1 Installation Figure 2.1 Handling 2.1.1 Level compensation system The ValuMax levelling compensation system provides accurate weighing even when the scale is not level (up to 5 degrees from horizontal). An icon is displayed in the status bar to tell you that ValuMax is operating . -
Page 15: Adjusting The Screen Angle
2.1 Installation 2.1.2 Adjusting the screen angle 1. To unlock the handle, slide the catch on the underside of the red handle in the direction of the arrow. 2. To raise the screen, lift the front edge of the screen assembly upwards. -
Page 16: Connections
2.1 Installation 2.1.4 Connections Important: XM and XT series scales should be connected to the mains power supply before connecting USB/ethernet cables. Ethernet WIFI connector Figure 2.2 External connections On the underside of the scale, you will see: The power supply socket and the On/Off switch USB connection for a WiFi device (devices should be Avery Berkel approved) Three USB connectors for peripherals such as a hand scanner,... -
Page 17: Description
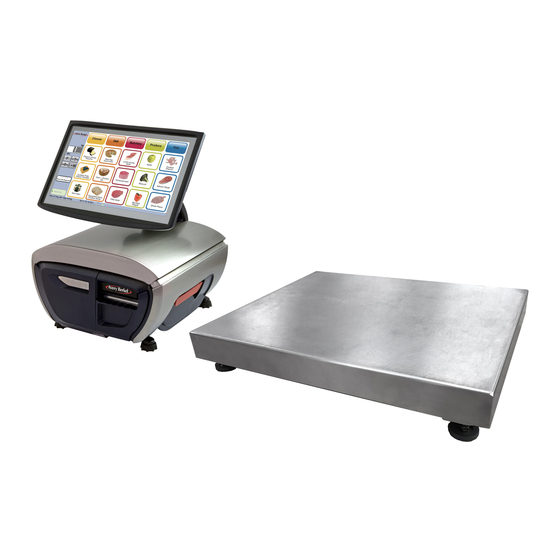
2.2 Description 2.2 Description The XM and XT series of scales and printers can be used for a wide range of weighing and label or receipt printing operations. The scales can be used for weighed goods and non-weighed items in counter service checkout or as a pre-pack printer. -
Page 18: Getting Started - Xm
Getting Started - XM This chapter describes what you can expect to see on the scale display and the functions associated with the different types of touch buttons and fixed keys. Important: When programming or configuring the equipment, you must ensure that you comply with all relevant standards and legislation. -
Page 19: Getting Started
3.1 Getting started 3.1 Getting started The minimum product information required for you to be able to use your scale is PLU (Product Look Up) number and unit or item price. However, it is useful to program a brief description for the display text and a label format if you are using label mode. -
Page 20: Customer Display
3.1 Getting started 3.1.2 Customer display This is a 7-inch colour display that can be used, if the scale is configured for it, to display text, image or video adverts when the scale is idle. 3.1.3 Touchscreen keys Important: Only use your finger or a touch screen stylus to select a key on the touch screen. -
Page 21: Fixed Function Keys (Tactile Keypad)
3.1 Getting started 3.1.4 Fixed function keys (tactile keypad) Resets the weight display to zero. Subtracts the weight of the container when weighing goods. Retains a tare, if in operation, unit is cancelled. If configured, retains the PLU until it is cancelled. Sets the scale to pre-pack if the scale configuration allows it. -
Page 22: Product Keyboard
3.1 Getting started 3.1.6 Product keyboard Home keyboard Menu Bar displayed Figure 3.2 Example PLU selection touch keyboard Home keyboard This is the touch keyboard set up in MX-SBT as the top level menu for the scale and displayed on the vendor screen after start up. Touch when other product keyboards are displayed to return to this keyboard. -
Page 23: Getting Started - Xt
Getting Started - XT This chapter describes what you can expect to see on the scale display and the functions associated with the different types of touch buttons. Important: When programming or configuring the equipment, you must ensure that you comply with all relevant standards and legislation. The example settings given in this book may not be legal for trade with the public. -
Page 24: Getting Started
4.1 Getting started 4.1 Getting started The minimum product information required for you to be able to use your scale is PLU (Product Look Up) number and unit or item price. However, it is useful to program a brief description for the display text and a label format if you are using label mode. -
Page 25: Fixed Function Keys
4.1 Getting started Static Static keyboards are keyboards and keyboard systems that are wholly or partially defined manually. Static keyboards can cover the main product keyboard, the lower fixed (or pop-up keyboard on XT), the pop-out side keyboard plus any further keyboards linked to it containing functions. - Page 26 4.1 Getting started Resets the weight display to zero. Subtracts the weight of the container when weighing goods. Retains a tare, if in operation, unit is cancelled. If configured, retains the PLU until it is cancelled. Sets the scale to pre-pack if the scale configuration allows it.
- Page 27 4.1 Getting started Number pad touch keys Change position Touch the green arrow at the top to change the position of the number pad if it is masking a button you want to use. When entering data, clears messages or characters from the data field.
- Page 28 4.1 Getting started Entering numerical data The number pad will automatically display when you touch a data entry field such as unit price, tare or labels. XM and XT Operator Instructions...
-
Page 29: Programmable Touch Key Area
4.1 Getting started 4.1.5 Programmable touch key area Up to 20 programmable keys are available in the touchscreen area. The touch buttons you see will depend on the scale configuration and the functions that have been assigned to the keys. Programmable touch key area 4.1.6 Function menu bar... -
Page 30: Printing
Printing The type of printer fitted in your XM and XT scales will depend on the model. The XM and XT series label/receipt printer has a take-up spool for paper rewind. The printer has a single motor driving both the paper feed and paper rewind mechanisms. -
Page 31: Printer Options
5.1 Printer options 5.1 Printer options Most XM and XT models have a label/receipt cassette printer in the base. The printer has sensors that inform you if the cassette is not ‘home’ or if the latch is not properly closed. XM410, XM420, XT410 and XT420 models have a receipt printer in the upper keyboard/display housing. -
Page 32: Label/Receipt Printers
The use of non-approved paper may reduce the life of the print head and invalidate your warranty. Approved labels and paper rolls are available from a number of suppliers whose addresses can be obtained from your Avery Berkel service provider. Print roll dimensions... -
Page 33: Fitting The Large Core Hub
5.2 Label/receipt printers 5.2.1 Fitting the large core hub 1. Pull the red handle until it clicks and then pull out the cassette to remove it from the scale. 2. Fit the large core so that the flat on the inside lines up with the flat on the small spindle and push it until it clicks into place.To remove the large hub, pull firmly. -
Page 34: Changing The Printer Roll - Backing Rewound
5.2 Label/receipt printers 5.2.2 Changing the printer roll - backing rewound (labels or continuous adhesive paper) 1. Pull the red handle until it clicks and then pull out the cassette to Note: For details of remove it from the scale. paper routes and rewinding the backing paper, see... -
Page 35: Changing A Continuous Paper Roll
5.2 Label/receipt printers Figure 5.1 Label and backing paper route 4. Adjust the paper width guide to fit the width of the labels and the label roll guide to retain the roll on the hub. 5. Replace the cassette ensuring that it is correctly located. Push in the red handle. - Page 36 5.2 Label/receipt printers 3. Feed the paper over the rewind spindle under the paper guide bar and then over the paper guide. Figure 5.2 Paper roll route 4. Adjust the paper width guide to fit the width of the paper and the paper roll guide to retain the roll on the hub.
-
Page 37: Receipt Printer
CAUTION: The use of non-approved printer rolls may reduce the life of the print head and invalidate your warranty. Approved paper rolls are available from a number of suppliers whose addresses can be obtained from your Avery Berkel centre. Printer roll dimensions Receipt printer... - Page 38 5.3 Receipt printer 2. Remove the empty core and replace it with a full roll. The yellow label on the cassette shows the route for the paper. 3. Replace the cassette and turn the handle clockwise to lock. XM and XT Operator Instructions...
-
Page 39: Fitting Large Core Paper Rolls
5.3 Receipt printer 5.3.2 Fitting large core paper rolls 1. Raise the large core support and release the red catch so that the support passes the spindle. 2. Re-fasten the catch and rest the large core support against the spindle. 3. -
Page 40: Serving Customers - Label Mode
Serving Customers - Label Mode This chapter tells you how to use the functions available at scales operating in label mode. Scales may be used for weighing or non-weighing applications for: Counter operations Self-service operations Rear-of-store operations such as prepack Contents 6.1, Basic operation 6.2, Product search... -
Page 41: Basic Operation
6.1 Basic operation 6.1 Basic operation Label mode is used for: Printing single weighed transactions Printing single non-weighed transactions Printing pre-pack labels Label streaming for non-weighed items Select the print mode appropriate to the type of transaction you are using from: Print immediate The label is printed as soon as a steady weight is achieved without any intervention from the operator. -
Page 42: Printing Labels
6.1 Basic operation 6.1.2 Printing labels Weighed goods Before weighing a product, you should ensure that the weight display shows zero. If necessary, press to reset the weight display. 1. Place the goods on the scale. 2. Select the PLU. 3. -
Page 43: Setting The Scale To Pre-Pack
6.1 Basic operation 6.1.3 Setting the scale to pre-pack Pre-pack mode enables a number of consecutive labels to be printed for each selected item. For this reason, the selected item – along with any tare details – are retained until cleared. In general, an item is selected in the usual way and the details are automatically ‘fixed’... -
Page 44: Product Search
6.2 Product search 6.2 Product search If the product you require is not displayed on the screen and you know the PLU number, you can enter the PLU number from the fixed keypad. If departments are set up for the system, you can enter the PLU number from the fixed keypad provided it is in the department currently set on the scale. -
Page 45: Searching By Department
6.2 Product search Searching by number Touch to display the numeric search screen. Use the fixed numeric keys to the right of the touchscreen area and enter the first few digits of the number. 6.2.2 Searching by department When you use the PLU search function to find a PLU, the products are listed by department. -
Page 46: Departments
6.3 Departments 6.3 Departments A department is a group of scales within the store that reflects the way in which the store operates and groups products logically, for example, produce, bakery, fresh meats, fish. 6.3.1 Using departments A department can be assigned to a scale and it becomes the default department for that scale. -
Page 47: Price Change
6.4 Price change Price change You can temporarily change the unit or item price for a product providing your security level is adequate. Price override Overriding the price changes it just for that transaction and the price reverts to the programmed price when the transaction is completed. Reprice (price change) If your scale has a price change button you can change the unit or item price for the product by touching the button and entering the new price in... -
Page 48: Using The Price Change Button
6.4 Price change 6.4.2 Using the Price Change button 1. Touch the Price Change button. 2. If necessary, select the operator from the list and use the fixed numeric keys to enter the PIN. 3. Use the numeric keys to enter the price in the New Price field. 4. -
Page 49: Overriding Weight
6.5 Overriding weight Overriding weight Pre-packed goods may have the weight printed on the pack label. The weight override function enables you to enter the weight manually. On both labels and receipts, an ‘H’ is printed to the left of the weight to indicate a weight override. -
Page 50: Promotions And Discounts
6.6 Promotions and discounts Promotions and discounts 6.6.1 Cross-promos PLU records can be configured to allow the scale to display cross- promotional information. This can be text information, pictures or flash graphics. 6.6.2 Price promos This type of promotion applies to weighed and non-weighed products. Second and third prices for the product can be applied automatically when either a certain weight or number of items of a product is sold. -
Page 51: Voucher Promotion
6.6 Promotions and discounts 6.6.6 Voucher promotion This type of promotion prints a voucher or coupon giving customers incentives to: Purchase more of the same product Try other products You can program a voucher to include: The description to be printed on the voucher Expiry date Information such as current date and time, operator number. -
Page 52: Tares
6.7 Tares 6.7 Tares The types of tare available for you to use depend on local trading regulations and how your scale has been configured. Free (semi-automatic), cumulative and keyboard entered tares cancel when the load is removed from the weigh plate. Preset tare keys (stored tares) allow you to use containers with known weights that have been pre-programmed in the scale. -
Page 53: Keyboard Entered Tare
6.7 Tares 4. Add required amount of product to the container. 5. Touch 6. Add more of product to the container. 7. Repeat until the required quantity is reached. 8. Press to print the label. 6.7.3 Keyboard entered tare If you are using a container with a known weight, you can use the Note: The weight display must be at zero. - Page 54 6.7 Tares 1. Select the tare for the container to be used. 2. Select the appropriate container. 3. Place the filled container on the scale and select the PLU. 4. Press to print the label. XM and XT Operator Instructions...
-
Page 55: Pre-Pack Tares
6.7 Tares Tare interlock (label mode only) In label mode, if the tare interlock has been enabled, you can only print a label if you have selected a tare. It operates in one of two ways: Enabled The manually selected tare can be overridden by a PLU with a stored Note: This only applies tare. -
Page 56: Using The Fix Key
6.8 Using the FIX key 6.8 Using the FIX key Use the FIX function: To retain a tare until it is cancelled Note: If your scale is configured only to retain To retain a PLU until it is cancelled the tare, the PLU will not For pre-pack operations at the scale if the scale has been be retained. -
Page 57: Using Add Mode
6.9 Using Add mode 6.9 Using Add mode Important: This function is only available if your scale is operating in label mode and has been set up to allow ADD mode operation. Selecting Add Mode enables you to obtain a single add label at the end of all the transactions with totals printed on it. -
Page 58: Returning Products
6.10 Returning products 6.10Returning products This function allows the value of unsold products, for example, items past their sell-by date, to be deducted from totals. Using the Return function: Retains the PLU until the transaction is entered. This acts as a check to ensure that the transaction is entered. - Page 59 6.10 Returning products Weighed goods 5. Place the goods on the scale. 6. Enter the pack value in the To Pay field. 7. Remove the goods from the scale. 8. Touch to print the label 9. Touch to return to normal operating mode when you have finished returning goods.
-
Page 60: Re-Wrap Function
6.11 Re-wrap function 6.11 Re-wrap function The re-wrap function enables you to override a pre-programmed price Note: The re-wrap and change the number of days or months the product can be function is only available in pre-pack mode. displayed. 1. Select the PLU. 2. -
Page 61: Serving Customers - Receipt Mode
Serving Customers - Receipt Mode This chapter tells you how to use the functions that are specific to receipt scales or scales operating in receipt mode. It includes functions you are likely to need when taking payments from customers for purchases. -
Page 62: Operating Modes
7.1 Operating modes 7.1 Operating modes In receipt mode, transactions are assigned to an individual operator and these transactions are then totalised. There are four different types of operation associated with receipt mode: Counter Receipt with PoS Checkout. Hold Receipt mode Selecting receipt mode If your scale is not already operating in receipt mode, you will need to select receipt mode. -
Page 63: Counter Operation
7.1 Operating modes Selecting PoS operation Touch Touch Selecting Checkout operation Touch 7.1.1 Counter operation This is the default operating mode for receipt scales. You can enter transactions, serve customers and produce receipts at a scale if you are logged on to that scale. XM and XT Operator Instructions... -
Page 64: Pos Operation
7.1 Operating modes 7.1.2 PoS operation PoS mode is normally used in conjunction with a cash drawer. Note: If your scale has ECR functions but PoS If PoS mode is enabled you can: is not enabled, you will Print sales receipts only be able to print counter receipts. -
Page 65: Barcode Scanning
7.1 Operating modes 7.1.5 Barcode scanning Use the barcode scanner at the scale to read barcodes: On products On labels On counter receipts On vouchers. Important: Check that the scale selects the correct PLU when you scan a source marked (branded) barcode. When the scanner successfully reads the barcode, it bleeps. -
Page 66: Basic Operation
7.2 Basic operation 7.2 Basic operation Important: If you attempt to enter a transaction when you are logged off, you will see the message Please Log On. 7.2.1 Weighed goods Select the product using any of the methods listed in Selecting the PLU on page section... -
Page 67: Displaying The Operator Subtotal
7.2 Basic operation 3. Touch the operator name to assign the transaction to that operator. If you cannot see your operator key, you may not be logged on. Log on before proceeding. Only operators that are logged on are shown on the operator display. Show Operators 7.2.3 Displaying the operator subtotal Your scale may have been configured to show the sub-total each time... -
Page 68: One Shot Labels
7.2 Basic operation 2. Select the operator name to display the operator subtotal screen. 7.2.4 One shot labels If this function has been enabled on your machine, you can print a label Note: If your machine is for an item while the machine is in receipt mode. When the product is a dual printer model (M420), or if you are selected, a print label button is seen on the right. -
Page 69: Paying For Goods
7.2 Basic operation 7.2.5 Paying for goods Printing a sales receipt The information printed on the sales receipt depends on how your scale has been configured. To print a sales receipt, you will need to take payment and your scale must: Have PoS (Point of Sale) mode enabled. - Page 70 7.2 Basic operation Sub total receipt If you require a subtotal receipt, touch on the Sub-Total screen. The transaction will be held and a subtotal receipt printed. If you touch for a transaction that is held, a duplicate counter receipt will be printed. Tax printing on receipts Each PLU can be programmed with one or two tax references.
- Page 71 7.2 Basic operation Re-printing a receipt If last subtotal has been enabled, you can recall the value and number of transactions from the last receipt transacted. Touch to generate a copy of the receipt. ‘DUPLICATE’ is printed on the copy receipt.
- Page 72 7.2 Basic operation Touch on the subtotal screen and you will see the message ‘Void whole receipt?’. Touch Yes. XM and XT Operator Instructions...
-
Page 73: Re-Open A Finalised Receipt
7.2 Basic operation 7.2.6 Re-open a finalised receipt You can re-open a previously printed receipt and add further transactions or remove unwanted transactions. Re-opening a receipt voids the original receipt. 1. Touch and enter the receipt number. If the receipt number cannot be found, you will see a message: Receipt does not exist. - Page 74 7.2 Basic operation Payment for purchases 1. The payment screen shows the outstanding transactions.The Note: The payment programmed types of payment are shown in the right-hand blue options you see may vary depending on how area of the screen. your scale has been configured.
- Page 75 7.2 Basic operation Displaying the customer’s change The scale displays the change required by a customer. The change is displayed while the counter receipt is being printed. Note: Items shown with a line drawn through them are void. See Voiding a transaction, section 4.1, page...
-
Page 76: Voiding Transactions
7.3 Voiding transactions Voiding transactions Important: You may cancel (void) an individual, unwanted transaction or all the transactions before printing the customer receipt. 1. Display the subtotal and touch . If you cannot see the Note: If security is set for the void function, the void operation can only button, touch... - Page 77 7.3 Voiding transactions 3. To cancel an individual transaction, highlight the line to be voided and then touch 4. Touch to confirm the void operation. XM and XT Operator Instructions...
-
Page 78: Discounts
7.4 Discounts 7.4 Discounts 7.4.1 Sales discount You can discount a receipt or an individual transaction with a pre- programmed fixed discount or with a variable discount. Fixed and variable discounts may be a percentage of the transaction or receipt total or a fixed value. Important: To discount a transaction, you must apply the discount before assigning the transaction. -
Page 79: Refunds
7.5 Refunds 7.5 Refunds If the refund function has been set up, you can refund the cost of goods to the customer. Refunds may be made as part of a sales transaction or as a separate operation. The scale shows the amount of cash refunded on the cash report and updates the refund totals values and count. -
Page 80: Banking (Cash Drawer) Operations
7.6 Banking (cash drawer) operations 7.6 Banking (cash drawer) operations If your scale is operating in PoS mode, there are ECR operations you can select that affect the amount of cash in the drawer. These are: No Sale Float Paid Out Pick Up Typically, you may find these buttons in the function menu area, displayed to the right of the touchscreen, or as one or more of the... - Page 81 7.6 Banking (cash drawer) operations Important: When using any Float, Paid Out or Pick Up operation, you must enter the amount added to or taken from the cash drawer so that the scale cash report is updated. No Sale Allows you to open the cash drawer without entering a sale. A No Sale slip is printed.
- Page 82 7.6 Banking (cash drawer) operations If the float amount is zero, you will see the message Entry Too Low displayed briefly. The display will then revert to the float amount entry screen. Float value ************** Float ************* Served by: Alan 29-06-10 10:05 Value £50.00...
- Page 83 7.6 Banking (cash drawer) operations 2. Use the touch screen keyboard to enter the appropriate reason code and touch 3. Use the numeric keys to enter the amount to be paid out. The amount paid out is then displayed in the field at the bottom left corner of the screen.
- Page 84 7.6 Banking (cash drawer) operations ************** Paid Out ************* Served by: Alan 29-06-10 10:05 1234abc Value £10.00 Signature ..............xm-machine#22 *********** Report Complete ******** Figure 7.7 Paid Out slip If the Paid Out amount is zero, you will see the message Entry Too Low displayed briefly.
- Page 85 7.6 Banking (cash drawer) operations If there is sufficient money in the cash drawer, a pick up slip is printed. ************** Pick Up ************* Served by: Alan 29-06-10 10:05 Value £100.00 xm-machine#227 *********** Report Complete ******** Figure 7.8 Pick Up slip If the pick up amount is zero, you will see the message Entry Too Low displayed briefly.
-
Page 86: Customer Accounts
7.7 Customer accounts 7.7 Customer accounts Customers may charge the cost of purchases to an account as long as the scale has been set up for this function in Service Mode and an account key has been assigned to the appropriate keyboard. Your scale will have been set up to allow you to charge goods or make payments to accounts that have previously been programmed in the scale. - Page 87 7.7 Customer accounts When the transaction is completed, the scale prints a receipt and a Received On Account slip. You should: Give the receipt to the customer Place the Received On Account slip in the cash drawer. Account Summary 29-06-10 10:05 Served by: Alan £50.00...
-
Page 88: Stock Mode (Trade Transactions)
7.8 Stock Mode (Trade transactions) Stock Mode (Trade transactions) In stock mode, the scale is used solely for data entry and capture. Any transactions performed in this mode do not update sales totals. Transactions are stored in the audit buffer and can be collected by suitable PC applications. - Page 89 7.8 Stock Mode (Trade transactions) A security level may have been assigned to the function in order to prevent unauthorised use. You will only have access to stock mode if your operator role allows it. Label mode Stock mode can only be used if the ADD function has been selected. Receipt mode Refunds, returns and negative PLUs are not allowed in stock mode.
-
Page 90: Miscellaneous Functions
Miscellaneous Functions This chapter describes some of the functions you may have available at the scale. Your scale may not have been configured for all the options available. Ignore those sections that do not apply. Contents 8.1, User functions 8.1.1, Idle time adverts and videos 8.1.2, Security levels 8.2, Web browser 8.3, Training videos and images... -
Page 91: User Functions
8.1 User functions 8.1 User functions The functions available at your scale will depend on how your scale has been configured. Some of the functions described in this book may not have been set up on your scale. 8.1.1 Idle time adverts and videos Your scale can be configured to show a series of adverts on the customer display.The adverts can be text, image or video and are displayed whenever no key press or weight change has been sensed... -
Page 92: Web Browser
8.2 Web browser 8.2 Web browser You may have a browser button set up under User Functions (Menu Bar) or on the dedicated keyboard below the touchscreen area. This button acts as a shortcut to a ‘home page’ (pre-specified URL). Figure 8.1 Browser header bar 1. -
Page 93: Training Videos And Images
8.3 Training videos and images 8.3 Training videos and images Your scale includes three training videos: 1. Screen Clean 2. Head Clean 3. Cassette Change Other videos and images may be available to assist you. These are accessed from touch keys or buttons set up on the scale. The keys may be assigned to the programmable (dedicated) key area below the touchscreen or to a touchscreen menu as shown below. -
Page 94: Operator Pin
8.4 Operator PIN 8.4 Operator PIN You may have been assigned a PIN. Your PIN must be entered when logging on or off. This only applies to scales operating in checkout mode. XM and XT Operator Instructions... -
Page 95: Touchscreen Calibration
8.5 Touchscreen calibration 8.5 Touchscreen calibration Select this option to initiate the touchscreen calibration procedure. Note: You can also Follow the on-screen instructions for calibrating the touchscreen, initiate touchscreen calibration at machine touching the crosshair in each position that it appears. startup when you are Important: Touch the crosshair for about one second to give the software prompted to Press... -
Page 96: Shutting Down The Machine
8.6 Shutting down the machine 8.6 Shutting down the machine You must ALWAYS shut down XM and XT machines using the following procedure: 1. For XM, press the Menu bar key on the keypad. For XT, click the green arrow on the right side of the screen. 2. -
Page 97: Working With Networked Scales
Working with networked scales This chapter describes how a scale network works. Contents 9.1, Networked scales 9.1.1, Operating mode 9.1.2, Status bar 9.2, Rejoining the network 9.3, Conflicting transaction sets 9.4, Floating between machines XM and XT Operator Instructions... -
Page 98: Networked Scales
9.1 Networked scales 9.1 Networked scales Networked machines are connected using either wired or wireless communications. This enables information to be passed between each connected machine (and other devices if used). One machine on the network is called the server and is responsible for overseeing the network. -
Page 99: Status Bar
9.1 Networked scales Floating operators In vendor mode, you can have a number of ‘floating’ operators logged on to the network at any time. You can serve customer and produce receipts or labels at any machine. 9.1.2 Status bar The status bar across the bottom of the screen changes colour to indicate the following conditions. - Page 100 9.1 Networked scales The scale cycles through these colours to reach its actual status. For example, if a scale is offline, it will cycle to yellow, then orange, then red over a period of a few seconds. If a client or server goes offline, you will be notified through the status bar colour and potentially also asked what you want to do with the remaining network.
- Page 101 9.1 Networked scales XM and XT Operator Instructions...
-
Page 102: Rejoining The Network
9.2 Rejoining the network 9.2 Rejoining the network If the offline machine was not removed from the network, it will just rejoin automatically as soon as the connection is available. The status bar turns from red to normal. On the rest of the network, the status bar turns from yellow to normal. -
Page 103: Conflicting Transaction Sets
9.3 Conflicting transaction sets 9.3 Conflicting transaction sets Conflicting transaction sets can occur when a machine is offline and then comes back online. The Synchronising Transactions message will appear momentarily. Typically, the newest set is always kept. There are two scenarios in which conflicting transaction sets can occur: Scenario 1, for the same operator: 1. -
Page 104: Floating Between Machines
9.4 Floating between machines 9.4 Floating between machines In the event that an operator has a subtotal open on one machine and then tries to add a transaction or enquire on the subtotal on another, the following message appears: XM and XT Operator Instructions... -
Page 105: Basic Programming
Basic Programming This chapter tells you how to set up some basic information for using the scale. The minimum product information required for you to use your scale is PLU (Product Look Up) number and unit or item price. However, it is useful to program a brief description for the display text and a label format if you are using label mode. -
Page 106: Using Manager Mode
10.1 Using Manager mode 10.1Using Manager mode 10.1.1 Manager mode layout To enter manager mode Press the menu bar key and then use the appropriate touch button to select: 1. Setup Mode from the Menu bar 2. Manager Mode on the Setup Mode screen 3. - Page 107 10.1 Using Manager mode The functions and information that you may need to edit are found in System Data. System data applies to all the scales in the network. You can create and edit system data at a scale or use one of the appropriate software applications.
-
Page 108: Products
10.2 Products 10.2Products 10.2.1 Editing a PLU 1. Use the touch button to select Setup Mode from the Menu bar. 2. Select Manager Mode on the Setup Mode screen. 3. Choose the operator and enter the PIN for that operator. Note: Only those operators with a security 4. - Page 109 10.2 Products 8. Use the scroll buttons to highlight the field you require, for example, Price. 9. Touch and use the numeric keypad to enter the new price. 10.Touch to confirm the entry. 11.If you do not want to edit the next field displayed, touch .
-
Page 110: Creating A Plu
10.2 Products 10.2.2 Creating a PLU 1. Follow steps as in Editing a PLU. 2. Enter the number for the new PLU and touch 3. Touch to be able to enter the description. When you Note: The PLU editor automatically highlights have finished, touch to confirm the entry. -
Page 111: Tares
10.2 Products 4. Use the numeric keys to enter the unit price. 5. If you do not want to edit the next field displayed, touch 6. Touch to save your changes. 10.2.3 Tares When goods are to be weighed in containers, you can set up tare values (container weights) that are stored against a reference number. -
Page 112: Discounts
10.2 Products Use tax reference 0 for products that are non-taxable. Inclusive tax The value of the transaction is displayed including the tax. Exclusive tax The value of the transaction is displayed, excluding the tax. The tax is added to the receipt subtotal as a separate item when the receipt is printed. -
Page 113: Operators
10.3 Operators 10.3Operators The information you need to set up an operator is listed here, followed by the steps for setting up an operator. Operator ID The operator ID can have up to 12 numeric characters. Operator name The operator name is displayed on the operator button and printed on the receipt. - Page 114 10.3 Operators 2. Touch to add a new operator. 3. Select the Operator ID field and edit the operator ID. Touch to confirm the change. 4. Enter the operator name and touch XM and XT Operator Instructions...
- Page 115 10.3 Operators 5. Use the numeric keypad to enter a PIN for the operator. Note: To set up an operator with access to Manager Mode functions the PIN is 4296. 6. Assign the appropriate role to the operator. 7. By default, the operator is automatically enabled when created. XM and XT Operator Instructions...
- Page 116 10.3 Operators 8. Touch to save your changes. When you have finished creating or editing operators, touch to return to the Manager Mode screen. XM and XT Operator Instructions...
-
Page 117: Reporting Functions
Reporting Functions This chapter describes the data reports available and the information they contain. Please remember: Totals are updated whenever a label or receipt has been printed successfully. You must be in Manager Mode to print a report. You can assign a security level to any report. Contents 11.1, Overview 11.1.1, Report printing... -
Page 118: Overview
11.1 Overview 11.1 Overview Figure 11.1 Example screen showing list of available reports 11.1.1 Report printing Select Print for a non-clearing report The totals for those values are carried forward. Select Print and Clear for a clearing report The totals are cleared and the relevant clearing date in the security report is updated. -
Page 119: Totals Reports
11.2 Totals reports 11.2 Totals reports You can print the following reports: Operator Totals Operator Sales Tax Totals Machine Totals Grand Totals Items Totals 11.2.1 Report numbering Each totals report has its own sequential number for security purposes. There are two separate number sequences – one each for Print reports and Print and Clear reports. -
Page 120: Grand Totals Report
11.2 Totals reports Field name Description Return Quantity Weight/items returned Refund Amount Value of refund transaction Refund Count Total number of refunds Discount Amount Value of all discounts Discount Count Total number of discounts No Sale Count Total number of No Sales Pick Up Amount** Amount of Pick Up Pick Up Count... -
Page 121: Operator Totals Report
11.2 Totals reports Refund Count Discount Value Discount Count No Sale Count 11.2.4 Operator Totals report The report includes all transactions assigned to the operator and prints: Operator ID Operator name Total sales amount (PoS mode) Total counter amount (non-PoS mode) Transaction count Number of customers Void count and amount... -
Page 122: Items Report
11.2 Totals reports 11.2.6 Items report The data included in this report is: Department ID PLU number Group ID Item description Sales quantity at the normal price Sales amount at the normal price Counter amount Counter quantity Return transactions Return amount Total sales amount Total counter amount Select Items and press... -
Page 123: Traceability Report
11.2 Totals reports Transaction count Returns value Returns count 11.2.9 Traceability report Some fields will only be printed if the scheme has been configured to use those fields.The data included in this report is: Lot Number GTIN Sales quantity Counter quantity Pre-pack quantity Traded quantity Weight limit... -
Page 124: Data Reports
11.3 Data reports 11.3 Data reports 11.3.1 Verify labels This function allows you to check the appearance of the labels set up for each of the products. Print single label 1. Touch 2. Select the product and touch to print the label. Print all labels 1. -
Page 125: Product Traceability
Product traceability The traceability function enables individual purchases to be traced back to the original batch by printing trace details on labels for all products associated with a particular batch.Traceability is primarily used for beef products but can be used for other types of meat or for non-meat products such as fish or cheese. -
Page 126: Traceability Schemes
12.1 Traceability schemes 12.1Traceability schemes The trace scheme defines the information to be collected about a carcass or batch. It also controls the information an operator will be asked to enter or the default values that will be used instead. If a scheme has been set up for a product, the product must be associated with that scheme. -
Page 127: Traceability Data Input
12.2 Traceability data input 12.2Traceability data input Scan the full traceability barcode or enter it from the sales keyboard once and the data is stored against a Lot reference number. Each time you select a product, you only need to scan or enter the barcode number and the lot numbers associated with the product will be displayed. - Page 128 12.2 Traceability data input 1. Touch to go to the lot creation screen. 2. Scan the barcode to populate the fields or manually enter the appropriate data for each attribute. 3. Touch to save the new lot you have created. Editing a lot 1.
-
Page 129: Multiple Barcodes
12.2 Traceability data input 12.2.1 Multiple barcodes The full traceability data may extend over more than one barcode. The system will recognise this and allow you to scan several barcodes. You will see the encoded information appear in the display as you scan each barcode. - Page 130 12.2 Traceability data input Last used Lot number Alternative Lot number If the system fails to recognise an existing lot number in the scanned data, you will be prompted to create a new lot. The new lot is created automatically by the system. Lot prompt disabled If lot prompt is disabled for the scheme, you will not be prompted for a lot number and one of the default lot numbers described in Automatic...
-
Page 131: Counter Service Operation
12.3 Counter service operation 12.3Counter service operation You can print traceability details on labels for all products associated with a Lot. Important: In order to sell a product, the PLU must be associated with a lot number. In counter service, you can scan the barcoded information from a tray label for the product, or you can type in the lot number at the keyboard and the scale will print it on the label or receipt. -
Page 132: Traceability Passport
12.4 Traceability passport 12.4Traceability passport A carcass may be delivered with a single barcoded label attached (traceability passport) containing all the information to provide full traceability for that animal. When the carcass has been split up for retail sale, the barcoded information is needed to create additional copies of the passport for scanning at the counter service point. -
Page 133: Looking After Your Scale
Looking After Your Scale This chapter tells you how to look after your scale to ensure that you get the maximum life and quality of service from it. Contents 13.1, Cleaning the scale 13.1.1, Cleaning the touchscreen 13.2, Cleaning the print head 13.2.1, Cassette printer 13.2.2, Receipt printer 13.3, Service interval... -
Page 134: Cleaning The Scale
13.1 Cleaning the scale 13.1Cleaning the scale CAUTION: Harsh abrasives, solvents, scouring cleaners and alkaline cleaning solutions, such as washing soda, should not be used, especially on the display windows. Under no circumstances should you attempt to wipe the inside of the scale. The exterior may be wiped down with a clean cloth moistened with water containing a small amount of washing up liquid. -
Page 135: Cleaning The Print Head
Always follow the instructions on the cleaning kit. 13.2.1 Cassette printer The print head should be cleaned using the specified head cleaning kit, part number ABR20-001678, available from your Avery Berkel supplier. 1. Remove the cassette. 2. Insert the cleaning card and close the print head. - Page 136 13.2 Cleaning the print head 3. Pull the cleaning card through. 4. Open the print head. 5. Replace the cassette. XM and XT Operator Instructions...
-
Page 137: Receipt Printer
13.2.2 Receipt printer The print head should be cleaned using the specified head cleaning kit, part number 76801-110, available from your Avery Berkel supplier. 1. Open the printer and remove the paper roll. 2. Insert the cleaning card and close the printer. -
Page 138: Service Interval
13.3 Service interval 13.3Service interval Your scales may have a suitable service interval set. If a service Note: If the scale is left interval has been set, a message will be displayed as you near the switched on, the message will be service date. - Page 139 Index create PLU edit PLU Barcode scanning Prepack mode machine setup multiple labels tares Customer accounts Printer cleaning Printing changing the roll 34, Data Reports label printing modes verify labels printer options Discounts printer type External connections Receipt transactions cash drawer operations counter receipt FIX key customer accounts...
- Page 140 Index security passport totals reports record creation Returning products schemes Returns tray labelling Trade transactions Safety Safety and warning User functions cleaning the machine adverts and videos safe Installation operator PIN scale maintenance web browser cleaning Using PLUs cleaning the printhead add mode service interval discounting prices...
- Page 141 Foundry Lane, Smethwick, West Midlands, England B66 2LP Tel: +44 (0)870 903 2000 Fax: +44 (0)870 904 2223 Email: info@averyberkel.com Internet: www.averyberkel.com ABR35-000520-AF...
Need help?
Do you have a question about the XN series and is the answer not in the manual?
Questions and answers