Xerox ColorQube 8570 Service Manual
Hide thumbs
Also See for ColorQube 8570:
- Manual d'utilisation (217 pages) ,
- User manual (200 pages) ,
- System administrator manual (140 pages)

Related Manuals for Xerox ColorQube 8570


Summary of Contents for Xerox ColorQube 8570
-
Page 1: Service Manual
ColorQube ® 8570/8870 Printer ColorQube 8570/8870 ® Service Manual Xerox Internal-Use Only... - Page 3 Xerox does not warrant or represent that such documentation is com- plete, nor does Xerox represent or warrant that it will notify or provide to such customer any future changes to this documentation. Customer performed service of equipment, or modules, components or parts of such equipment may affect the warranty offered by Xerox with respect to such equipment.
- Page 4 Introduction Revised, 3rd Revision - Xerox Internal Use Only October 2012 ColorQube 8570/8870 Service Manual...
-
Page 5: Table Of Contents
Consumables ........................Printer Specifications ...................... xvii Power Saver........................Physical Dimensions and Clearances ................Information Pages, Troubleshooting Pages, and Test Prints.......... xxii Acronyms and Abbreviations ..................Xerox Internal Use Only - Revised, 3rd Revision Introduction October 2012 ColorQube 8570/8870 Service Manual... - Page 6 Introduction Revised, 3rd Revision - Xerox Internal Use Only October 2012 ColorQube 8570/8870 Service Manual...
-
Page 7: About This Manual
Chapter 5 Parts List This chapter contains exploded views of the print engine and optional Field Replaceable Units The ColorQube 8570/8870 Service Manual is the primary document used for diagnosing, (FRUs), as well as part numbers for orderable parts and illustrated Parts List. -
Page 8: Service Safety Summary
CAUTION • if you suspect that the product needs servicing or repair, Use of other than Genuine Xerox solid ink may affect print and copy quality and printer reliabil- • whenever you clean the product. ity. It is the only ink designed and manufactured under strict quality controls by Xerox for spe- Service Safety Summary cific use with this printer. -
Page 9: Moving The Printer
Read and obey all posted warning labels. Throughout the printer, warning labels are displayed age to the printer caused by improper packaging is not covered by the Xerox warranty, service on potentially dangerous components. As you service the printer, check to make certain that all agreement, or Total Satisfaction Guarantee. -
Page 10: Symbols Used On The Printer
Figure 1 Hot Surface Symbol Avoid pinching fingers in the printer. Use caution to avoid personal injury. Figure 2 Pinch Injury Symbol Introduction Revised, 3rd Revision - Xerox Internal Use Only October 2012 Symbols Used on the Printer ColorQube 8570/8870 Service Manual... -
Page 11: Electrostatic Discharge Precautions
To ensure compliance with European Union regulations, use shielded interface cables. A signed copy of the Declaration of Conformity for this product can be obtained from Xerox. Xerox Internal Use Only - Revised, 3rd Revision... -
Page 12: Translation Of Warnings
WARNING tricité. L'électricité peut être à l'origine de blessures, voire d'un accident mortel. Les Use only Xerox materials and components. This product is safety certified using Xerox pièces amovibles peuvent être à l'origine de blessures. materials and components. The use of non Xerox materials and components may invali- AVVERTENZA: Spegnere la macchina. -
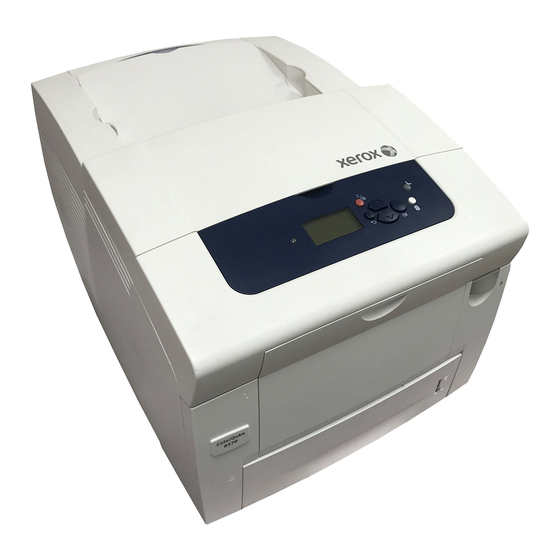
Page 13: Colorqube 8570/8870 Overview
Use extreme care when working near this power supply. High voltage is present on the The ColorQube 8570/8870 are solid ink technology printers utilizing a new formulation of solid power supply when the machine is in standby mode. Contact with electrical compo- ink and ink stick sensing technology. -
Page 14: Printer Configurations
Printer Configurations Parts of the Printer The ColorQube 8570/8870 is available in five configurations. Front View Table 1 Printer Configurations Features 8570N 8570DN 8570DT 8870EE Processor and Clock 1 GHz 1 GHz 1 GHz 1 GHz Speed Memory Configuration* 512 MB... - Page 15 USB Connection Memory (RAM) Connectors - (Primary - Left Side, Secondary - Right Side) Configuration Card NVRAM Ethernet 10/100/1000 Base-Tx Connection Xerox Internal Use Only - Revised, 3rd Revision Introduction October 2012 Parts of the Printer ColorQube 8570/8870 Service Manual...
-
Page 16: Printer Options
Optional 525-Sheet Feeder (Tray 3, 4, or 5) • Printer Stand Additional Memory The ColorQube 8570/8870 features 2 slots that accept a 512 MB or 1 GB of DDR2 SODIMMs. Memory modules must meet the following characteristics: • 200 Pin SODIMMS •... -
Page 17: Control Panel Layout
Printer goes to the Ready state without waiting for temperatures Ready) to reach operating values. On power-up, when the Xerox splash screen displays, press and release the Up Arrow button, then press the Down Arrow button. If the printer detects ink on the Drum, the display indicates a warming-up status. -
Page 18: Menu Map
Menu Map Figure 1 Figure 2 illustrate the Menu Map for the ColorQube 8570/8870. The Menu Map can be accessed through the Control Panel: Control Panel Menu -> Information -> Menu Map. Figure 2 Menu Map (page 2) Figure 1 Menu Map (page 1) -
Page 19: Routine Maintenance Items
CAUTION dard-capacity Drum Maintenance Unit produces 10,000 prints regardless of the colors used. The ColorQube 8570/8870 printer uses a new formulation of Ink having unique properties. The Extended-capacity Drum Maintenance Unit for the ColorQube 8570/8870 produces 30,000 Ink Loader on these products is keyed to accept this Ink shape only. The use of Ink not specifi- pages up to 20% coverage and 20,000 pages when coverage exceeds 20%. - Page 20 ColorQube 8870 Xerox Europe printers. Use of ink other than Genuine Xerox solid ink may affect print quality and printer reliability. It is the only ink designed and manufactured under strict quality controls by Xerox for specific use NOTE: The ColorQube 8570 Factory ink sticks A_D are compatible with both the ColorQube with these printers.
-
Page 21: Printer Specifications
Maximum RAM 2 GB Supported RAM Supports up to 2 GB of 512 MB or 1 GB DDR2 SDRAM using 2 slots. Xerox Internal Use Only - Revised, 3rd Revision Introduction October 2012 Consumables, Printer Specifications ColorQube 8570/8870 Service Manual... - Page 22 Table 7 Non-Ready State defects. Starting State FPOT Off (cold) 12 minutes Power Saver 2.5 minutes Low Power (Standby) 30 seconds Quiet Warm-Up 10 seconds Introduction Revised, 3rd Revision - Xerox Internal Use Only October 2012 Printer Specifications xviii ColorQube 8570/8870 Service Manual...
- Page 23 Information about paper sizes and weights that can be used in the printer trays is available on the Paper Tips page (Control Panel Menu -> Information -> Information Pages -> Paper Tips Page). See also: Recommended Media List at www.xerox.com/paper Xerox Internal Use Only - Revised, 3rd Revision Introduction October 2012 Printer Specifications...
-
Page 24: Power Saver
The printer can also be set to Saver modes. enter Standby mode at a specific time. The ColorQube 8570 & 8870 printers have Power Saver settings to reduce energy consump- Job Activated The printer warms up when it receives a print job. -
Page 25: Physical Dimensions And Clearances
19.75 in. (50.2 cm) Depth 27.0 in. (68.6 cm) Height 14.0 in. (35.6 cm) Weight 63.5 lbs. (28.8 kg) Figure 1 Clearance Specifications Xerox Internal Use Only - Revised, 3rd Revision Introduction October 2012 Physical Dimensions and ColorQube 8570/8870 Service Manual... -
Page 26: Information Pages, Troubleshooting Pages, And Test Prints
CMYK Sampler Pages Prints spectrum of color rectangles with the values of each component color (Cyan, Magenta, Yellow, Black). Introduction Revised, 3rd Revision - Xerox Internal Use Only October 2012 Physical Dimensions and , Information Pages, Trou- xxii ColorQube 8570/8870 Service Manual... - Page 27 Color Bands RGBK Dithers Prints 5 pages of dithered and solid fill regions of all colors for Printer Status Page. evaluating image uniformity. Xerox Internal Use Only - Revised, 3rd Revision Introduction October 2012 Information Pages, Troubleshooting Pages, and ColorQube 8570/8870 Service Manual...
- Page 28 Prints a blank sheet of paper. how often features are used, usage by tray, job and page counts, etc. Introduction Revised, 3rd Revision - Xerox Internal Use Only October 2012 Information Pages, Troubleshooting Pages, and Test xxiv ColorQube 8570/8870 Service Manual...
-
Page 29: Acronyms And Abbreviations
File Transfer Protocol DDNS Dynamic Domain Name System FTTR Fast Time To Ready DDR2 DIMM Double Data Rate Dual In-Line Memory Module FUNC Function Xerox Internal Use Only - Revised, 3rd Revision Introduction October 2012 Acronyms and Abbreviations ColorQube 8570/8870 Service Manual... - Page 30 Print Engine Self Test Kilo Byte Adobe Acrobat Portable Document Format Kilogram Page Description Language Local Network Area Preheater Pounds Plug Jack (electrical connections) Introduction Revised, 3rd Revision - Xerox Internal Use Only October 2012 Acronyms and Abbreviations xxvi ColorQube 8570/8870 Service Manual...
- Page 31 LEDs on PWB. SIMM Single Inline Memory Module used to increase printing capacity. Simplex Single sided copies Xerox Internal Use Only - Revised, 3rd Revision Introduction October 2012 Acronyms and Abbreviations ColorQube 8570/8870 Service Manual...
- Page 32 Introduction Revised, 3rd Revision - Xerox Internal Use Only October 2012 Acronyms and Abbreviations xxviii ColorQube 8570/8870 Service Manual...
- Page 33 1 Service Call Procedures Service Call Procedures....................Initial Actions ........................Routine Maintenance Activities ..................Cleaning Procedures....................... Final Actions........................1-13 Xerox Internal Use Only - Revised, 3rd Revision Service Call Procedures October 2012 ColorQube 8570/8870 Service Manual...
- Page 34 Service Call Procedures Revised, 3rd Revision - Xerox Internal Use Only October 2012 ColorQube 8570/8870 Service Manual...
-
Page 35: Service Call Procedures
Scroll through the menu to select Engine Error History, Jam History, or Diagnostics History. Press the OK button to display the results for each error history. Xerox Internal Use Only - Revised, 3rd Revision Service Call Procedures October 2012 Service Call Procedures... - Page 36 • TCP/IP Runtime • AppleTalk Startup • AppleTalk Runtime Example Figure 1 Jam History and Fault History Figure 2 CWIS Service Call Procedures Revised, 3rd Revision - Xerox Internal Use Only October 2012 Service Call Procedures ColorQube 8570/8870 Service Manual...
- Page 37 Bootable CDs Canned Air Dental Mirror Electrical Tape Heat Shrink Tubing IC Chip Puller Jeweler's Screwdriver Kit Pointer with Magnetized Head Xerox Internal Use Only - Revised, 3rd Revision Service Call Procedures October 2012 Service Call Procedures ColorQube 8570/8870 Service Manual...
-
Page 38: Initial Actions
Cracking or moderate fraying; a small amount of fraying is inevitable, so look for other signs of wear before replacing the Belt. Service Call Procedures Revised, 3rd Revision - Xerox Internal Use Only October 2012 Initial Actions, Routine Maintenance Activities... - Page 39 Pull the Waste Tray completely out of the printer. Figure 4 Inserting the Waste Tray Close the Side Door. Figure 2 Removing the Waste Tray Xerox Internal Use Only - Revised, 3rd Revision Service Call Procedures October 2012 Routine Maintenance Activities...
-
Page 40: Cleaning Procedures
Follow the General Cleaning procedure in Table 1 Table Jam Sensors Clean the Sensors with a dry cotton swab. Service Call Procedures Revised, 3rd Revision - Xerox Internal Use Only October 2012 Routine Maintenance Activities, Cleaning Procedures ColorQube 8570/8870 Service Manual... - Page 41 -> Eliminate Light Stripes -> Advanced): A cleaning cycle initiated by the user from the Control Panel that focuses on the problematic jet selected by the user. Figure 2 Cleaning the Tray 1 Pick Roller Xerox Internal Use Only - Revised, 3rd Revision Service Call Procedures October 2012...
- Page 42 Figure 3 Opening the Tray Use a moistened cloth to clean the Retard Roller. Figure 4 Cleaning the Retard Roller Close the affected tray. Service Call Procedures Revised, 3rd Revision - Xerox Internal Use Only October 2012 Cleaning Procedures 1-10 ColorQube 8570/8870 Service Manual...
- Page 43 Replace the Pick Assembly if it appears to be excessively worn or dam- aged. Figure 7 Cleaning the Drum Temperature Sensor Figure 6 Cleaning the Pick Assembly Close Tray 2. Xerox Internal Use Only - Revised, 3rd Revision Service Call Procedures October 2012 Cleaning Procedures ColorQube 8570/8870 Service Manual...
- Page 44 Close the Exit Cover. Figure 9 Opening the Lower Paper Guide Figure 11 Lowering the Paper Guide and Closing the Exit Cover Service Call Procedures Revised, 3rd Revision - Xerox Internal Use Only October 2012 Cleaning Procedures 1-12 ColorQube 8570/8870 Service Manual...
-
Page 45: Final Actions
Discuss the service call with the customer to ensure that the customer understands what has been done and is satisfied with the results of the service call. Figure 12 Cleaning the Wiper Blade Xerox Internal Use Only - Revised, 3rd Revision Service Call Procedures October 2012... - Page 46 Service Call Procedures Revised, 3rd Revision - Xerox Internal Use Only October 2012 Cleaning Procedures, Final Actions 1-14 ColorQube 8570/8870 Service Manual...
- Page 47 92,553 Ink Loader or I/O Board Disconnected..............2-39 99,016 PEST - All Three Clutches Failed................ 2-75 92,563, 92,570, 92,579 Electronics Module Faults ............2-40 Xerox Internal Use Only - Revised, 3rd Revision Fault Messages and Codes October 2012 ColorQube 8570/8870 Service Manual...
- Page 48 Remove Incorrect Ink Sticks (Cyan, Magenta, Yellow, Black) ........2-96 Remove Unidentified Ink Sticks (Cyan, Magenta, Yellow, Black) ........2-97 Jam Codes ........................2-97 Printer Fault Codes ......................2-102 Fault Messages and Codes Revised, 3rd Revision - Xerox Internal Use Only October 2012 ColorQube 8570/8870 Service Manual...
- Page 49 Figure 1 Power-On Self Test and Print Engine LED Locations Date Page Count Code Description Aug 3, 2009, 17:28:20 1018 93,603.00 Ink delivery and ink thermals Xerox Internal Use Only - Revised, 3rd Revision Fault Messages and Codes October 2012 Introduction, Power On Self Tests ColorQube 8570/8870 Service Manual...
- Page 50 The following list contains tests that are performed in the context of POST. • Field Pre-programmable Gate Array (FPGA) Testing NOTE: FPGA is the Printhead interface and motor controller for the ColorQube 8570/ 8870 printer. Verifies FPGA loaded properly. Reads chip ID and number.
- Page 51 Fault codes for PEST are displayed on the Control Panel and are in the 99,XXX series. For troubleshooting PEST fault codes, see Fault Messages and Codes Troubleshooting. Xerox Internal Use Only - Revised, 3rd Revision Fault Messages and Codes October 2012 Power On Self Tests...
- Page 52 IPSec number of Network Setup Ethernet Speed Auto installed trays. EtherTalk USB Setup USB Port Wait Timeout 30 secs Fault Messages and Codes Revised, 3rd Revision - Xerox Internal Use Only October 2012 PS NVRAM Reset ColorQube 8570/8870 Service Manual...
- Page 53 Activision Date Print Count Billing Meters Substituted Jets Warm-up Mode Set to Intelligent Ready Warm-up Settings Set to Job Activated Xerox Internal Use Only - Revised, 3rd Revision Fault Messages and Codes October 2012 PS NVRAM Reset ColorQube 8570/8870 Service Manual...
-
Page 54: Configuration Card Parameters
All software errors are combined into one fault code, 92,571, and if they are chronic that error will be displayed on the Control Panel. Fault Messages and Codes Revised, 3rd Revision - Xerox Internal Use Only October 2012 Configuration Card Parameters, Fault Messages and... - Page 55 ~10 ohms blue-red, ~10 ohms yellow-red, ~20 ohms blue-yellow Preheater Lift Solenoid ~18 ohms blue-red, ~18 ohms yellow-red, ~36 ohms blue-yellow Xerox Internal Use Only - Revised, 3rd Revision Fault Messages and Codes October 2012 Testing Clutch, Motor, and Solenoid Resistance...
- Page 56 Fault Messages and Codes Revised, 3rd Revision - Xerox Internal Use Only October 2012 Testing Clutch, Motor, and Solenoid Resistance 2-10 ColorQube 8570/8870 Service Manual...
- Page 57 Troubleshooting complete. Replace the Drum Assembly (REP 2.4). Does the error persist? Troubleshooting complete. Replace the Y-Axis Motor Assembly (REP 4.2). Xerox Internal Use Only - Revised, 3rd Revision Fault Messages and Codes October 2012 10,550 ColorQube 8570/8870 Service Manual 2-11...
- Page 58 Fault Messages and Codes Revised, 3rd Revision - Xerox Internal Use Only October 2012 10,550 2-12 ColorQube 8570/8870 Service Manual...
- Page 59 Check Tray 2 Lift Sensor for blockages, and check function of the Tray 2 Lift Motor. Check Tray 2 Lift Sensor for blockages, and check function of the Tray 2 Lift Motor. Xerox Internal Use Only - Revised, 3rd Revision Fault Messages and Codes...
- Page 60 Fault Messages and Codes Revised, 3rd Revision - Xerox Internal Use Only October 2012 72,215, 72,217 2-14 ColorQube 8570/8870 Service Manual...
- Page 61 For HCF Raise failure, reinsert the tray and verify that it raised properly. Does the error persist? Troubleshooting complete. Replace the 525-Sheet Feeder (REP 3.12). Xerox Internal Use Only - Revised, 3rd Revision Fault Messages and Codes October 2012 73,215, 73,952 ColorQube 8570/8870 Service Manual 2-15...
- Page 62 Fault Messages and Codes Revised, 3rd Revision - Xerox Internal Use Only October 2012 73,215, 73,952 2-16 ColorQube 8570/8870 Service Manual...
- Page 63 For HCF Raise failure, reinsert the tray and verify that it raised properly. Does the error persist? Troubleshooting complete. Replace the 525-Sheet Feeder (REP 3.12). Xerox Internal Use Only - Revised, 3rd Revision Fault Messages and Codes October 2012 74,215, 74,952 ColorQube 8570/8870 Service Manual 2-17...
- Page 64 Fault Messages and Codes Revised, 3rd Revision - Xerox Internal Use Only October 2012 74,215, 74,952 2-18 ColorQube 8570/8870 Service Manual...
- Page 65 For HCF Raise failure, reinsert the tray and verify that it raised properly. Does the error persist? Troubleshooting complete. Replace the 525-Sheet Feeder (REP 3.12). Xerox Internal Use Only - Revised, 3rd Revision Fault Messages and Codes October 2012 75,215, 75,952 ColorQube 8570/8870 Service Manual 2-19...
- Page 66 Fault Messages and Codes Revised, 3rd Revision - Xerox Internal Use Only October 2012 75,215, 75,952 2-20 ColorQube 8570/8870 Service Manual...
- Page 67 Measure the connector between pins 1 (red) and 2 (red). The measurement should be about 110 ohms at room temperature. Does the error persist? Troubleshooting complete. Xerox Internal Use Only - Revised, 3rd Revision Fault Messages and Codes October 2012 88,500 ~ 88,504...
- Page 68 Fault Messages and Codes Revised, 3rd Revision - Xerox Internal Use Only October 2012 88,500 ~ 88,504 2-22 ColorQube 8570/8870 Service Manual...
- Page 69 Kit in Chapter 5, Parts List). Does the error persist? Troubleshooting complete. Replace the Media Drive Assembly (REP 4.5). Xerox Internal Use Only - Revised, 3rd Revision Fault Messages and Codes October 2012 89,570, 89,571, 89,572 ColorQube 8570/8870 Service Manual...
- Page 70 Fault Messages and Codes Revised, 3rd Revision - Xerox Internal Use Only October 2012 89,570, 89,571, 89,572 2-24 ColorQube 8570/8870 Service Manual...
- Page 71 Good: 4.88 kohms at room temperature (The Printhead must be cool.) – Open: >5 kohms – Short: 0 ohms Xerox Internal Use Only - Revised, 3rd Revision Fault Messages and Codes October 2012 91,500, 91,523, 91,527, 91,531, 91,850, 91,862 ColorQube 8570/8870 Service Manual...
- Page 72 • Figure 6, Printhead P/J Locations Procedure Download the snippet file from the Xerox Support Website. Update the Printhead with snippet 8570-8870_SetPH-NVM.ps. Reboot the printer. Does the error persist? Troubleshooting complete. Figure 1 Printhead Wiring Harness Connectors Check the Printhead wiring harness connectors...
- Page 73 – Open Thermistor: 4.99 kohms – Shorted Thermistor: 0 Ohm Figure 1 Printhead Wiring Harness Connectors Xerox Internal Use Only - Revised, 3rd Revision Fault Messages and Codes October 2012 91,535, 91,539, 91,543, 91,854, 91,866 ColorQube 8570/8870 Service Manual 2-27...
- Page 74 – Open Thermistor: 4.99 kohms – Shorted Thermistor: 0 Ohm Does the error persist? Troubleshooting complete. Fault Messages and Codes Revised, 3rd Revision - Xerox Internal Use Only October 2012 91,547, 91,551, 91,555, 91,858, 91,870 2-28 ColorQube 8570/8870 Service Manual...
- Page 75 Do the Gearbox Gears turn smoothly but not the Wiper Gears? Troubleshooting complete. Replace the Media Drive Assembly (REP 4.5). Replace the Wave Amplifier (REP 5.9). Xerox Internal Use Only - Revised, 3rd Revision Fault Messages and Codes October 2012 91,610, 91,710 ~ 91,716, 94,704 ColorQube 8570/8870 Service Manual 2-29...
- Page 76 Reconnect the wiring harness connector and reroute the wiring to prevent pinching. Replace the Solenoid if necessary (REP 4.4). Fault Messages and Codes Revised, 3rd Revision - Xerox Internal Use Only October 2012 91,710 ~ 91,716, 94,704, 91,720 2-30 ColorQube 8570/8870 Service Manual...
- Page 77 Drive chatter before engaging the Head Tilt Drive? Inspect the Cone-nut on the X-Axis Motor lead screw shaft. Is Cone-nut damaged or broken? Xerox Internal Use Only - Revised, 3rd Revision Fault Messages and Codes October 2012 91,720, 91,721...
- Page 78 Process Module. Has the printer been running large continuous print job recently? Troubleshooting complete. Replace the Process Drive (REP 4.13). Fault Messages and Codes Revised, 3rd Revision - Xerox Internal Use Only October 2012 91,721 2-32 ColorQube 8570/8870 Service Manual...
- Page 79 Drive chatter during or at end of Printhead tilt motions? Inspect the Cone-nut on the X-Axis Motor lead screw shaft. Is Cone-nut damaged or broken? Figure 1 Right Side Wire Routing Xerox Internal Use Only - Revised, 3rd Revision Fault Messages and Codes October 2012 91,722...
- Page 80 Camshaft movement? Replace the Drum Maintenance Camshaft (REP 2.11) and Process Drive (REP 4.13). Fault Messages and Codes Revised, 3rd Revision - Xerox Internal Use Only October 2012 91,723 2-34 ColorQube 8570/8870 Service Manual...
- Page 81 Home the Printhead (ADJ 1.2). Reboot the printer. Does the problem persist? Troubleshooting complete. Replace the Process Drive (REP 4.13). Xerox Internal Use Only - Revised, 3rd Revision Fault Messages and Codes October 2012 91,724, 91,725 ColorQube 8570/8870 Service Manual 2-35...
- Page 82 Loosen the Head Tilt Latch or replace the Head Tilt Solenoid (REP 4.4). Figure 1 Head Tilt Gear Position Replace the Process Module (REP 4.13). Fault Messages and Codes Revised, 3rd Revision - Xerox Internal Use Only October 2012 91,726 2-36 ColorQube 8570/8870 Service Manual...
- Page 83 Reseat and/or replace the wiring harness. Does the error persist? Troubleshooting complete. Replace the Printhead Assembly (REP 2.3). Replace the Printhead Assembly (REP 2.3). Xerox Internal Use Only - Revised, 3rd Revision Fault Messages and Codes October 2012 91,900, 91,903, 91,904, 93,901 ColorQube 8570/8870 Service Manual 2-37...
- Page 84 Fault Messages and Codes Revised, 3rd Revision - Xerox Internal Use Only October 2012 91,900, 91,903, 91,904, 93,901 2-38 ColorQube 8570/8870 Service Manual...
-
Page 85: Electronics Module
& P/J402. Are the connections secure and undamaged? Reseat and/or replace the wiring harness. Replace the Electronics Module (REP 5.1). Xerox Internal Use Only - Revised, 3rd Revision Fault Messages and Codes October 2012 92,500, 92,550, 92,555, 92,558 , 92,553 ColorQube 8570/8870 Service Manual... - Page 86 Check all the Electronics Module cabling. Are the connections secure and undamaged? Reseat and/or replace the wiring harnesses. Replace the Electronics Module (REP 5.1). Fault Messages and Codes Revised, 3rd Revision - Xerox Internal Use Only October 2012 92,563, 92,570, 92,579, 92,571 2-40 ColorQube 8570/8870 Service Manual...
- Page 87 P/J110) (see Figure 1). Measure resistance of each to ground. • Pin 1 (VSS) • Pin 2 (Ground) Xerox Internal Use Only - Revised, 3rd Revision Fault Messages and Codes October 2012 92,587 ColorQube 8570/8870 Service Manual 2-41...
- Page 88 5.6) (Electronics Module). Reconnect the wiring harness connectors. Replace the Power Supply Board (REP 5.6) (Electronics Module). Fault Messages and Codes Revised, 3rd Revision - Xerox Internal Use Only October 2012 92,588 ~ 92,596, 92,597, 92,601 2-42 ColorQube 8570/8870 Service Manual...
- Page 89 4.7). Turn on the printer. Is the Fan turning? Replace the Power Control Board (REP 5.6) (Electronics Module). Troubleshooting complete. Troubleshooting complete. Xerox Internal Use Only - Revised, 3rd Revision Fault Messages and Codes October 2012 92,602, 92,604 ~ 92,606 ColorQube 8570/8870 Service Manual 2-43...
- Page 90 Jumper. • If the problem persists, perform the following procedure. • Jumper is not installed on the ColorQube 8570 Ink Loader. • Jumper is installed on the ColorQube 8870 Ink Loader. Troubleshooting Reference Applicable Part (Chapter 5 - Parts List) Initial Actions •...
- Page 91 Figure 2 Installing the Configuration Card Figure 1 Jumper Location on ColorQube 8570 Ink Loader Xerox Internal Use Only - Revised, 3rd Revision Fault Messages and Codes October 2012 92,808 ~ 92,813 ColorQube 8570/8870 Service Manual 2-45...
- Page 92 Reseat and/or replace the wiring harness. Replace the Power Control Board (REP 5.6) (Electronics Module. Figure 3 Printer Ground Locations Fault Messages and Codes Revised, 3rd Revision - Xerox Internal Use Only October 2012 92,808 ~ 92,813, 92,900 2-46 ColorQube 8570/8870 Service Manual...
- Page 93 Ink Loader that is not on the metal heater? (Look for ink debris on top of the Printhead. Ink dust is normal, pools of frozen ink are not normal.) Reboot the printer. Does the error persist? Troubleshooting complete. Xerox Internal Use Only - Revised, 3rd Revision Fault Messages and Codes October 2012 93,501, 93,506, 93,511, 93,516...
- Page 94 Does the error persist? Troubleshooting complete. Replace the Ink Loader (REP 1.8). Fault Messages and Codes Revised, 3rd Revision - Xerox Internal Use Only October 2012 93,523, 93,526, 93,529, 93,532 2-48 ColorQube 8570/8870 Service Manual...
- Page 95 Does the error persist? Troubleshooting complete. Replace the Ink Loader (REP 1.8). Xerox Internal Use Only - Revised, 3rd Revision Fault Messages and Codes October 2012 93,524, 93,527, 93,530, 93,533 ColorQube 8570/8870 Service Manual 2-49...
- Page 96 Does the error persist? Troubleshooting complete. Replace the Ink Loader (REP 1.8). Fault Messages and Codes Revised, 3rd Revision - Xerox Internal Use Only October 2012 93,525, 93,528, 93,531, 93,534 2-50 ColorQube 8570/8870 Service Manual...
-
Page 97: Printhead Level Sense Faults
The Ink Level Sensing remains disabled for approximately 5 minutes. Is level sense dis- abled? Continue to perform disable the Ink Loader Level Sensing procedure until level sens- ing is disabled. Xerox Internal Use Only - Revised, 3rd Revision Fault Messages and Codes October 2012 93,581 ~ 93,584, 93,597, 93,598, 93,599, 93,800... - Page 98 The Ink Level Sensing remains disabled for approximately 5 minutes. Is level sense disabled? Fault Messages and Codes Revised, 3rd Revision - Xerox Internal Use Only October 2012 93,597, 93,598, 93,599, 93,800...
- Page 99 ~25 Degree Celsius between the white and each colored wire. Does the error persist? Troubleshooting complete. Replace the Ink Loader (REP 1.8). Xerox Internal Use Only - Revised, 3rd Revision Fault Messages and Codes October 2012 93,600, 93,603, 93,606, 93,609 ColorQube 8570/8870 Service Manual 2-53...
- Page 100 ~25 Degree Celsius between the white and each colored wire Does the error persist? Troubleshooting complete. Replace the Ink Loader (REP 1.8). Fault Messages and Codes Revised, 3rd Revision - Xerox Internal Use Only October 2012 93,601, 93,604, 93,607, 93,610 2-54 ColorQube 8570/8870 Service Manual...
- Page 101 1.8). Is there any ink hanging from the bottom of the Ink Loader that is not on the metal heater? (Look for ink debris on top of the Printhead. Ink dust is normal, pools of frozen ink is not normal.) Xerox Internal Use Only - Revised, 3rd Revision Fault Messages and Codes October 2012...
- Page 102 1.8). Is the ink stick damaged? Re-insert the stick in question. Does the error persist? Fault Messages and Codes Revised, 3rd Revision - Xerox Internal Use Only October 2012 93,893 ~ 93,896, 93,962 ~ 93,965 2-56 ColorQube 8570/8870 Service Manual...
- Page 103 93,966 ~ 93,969 Unidentified Ink Sticks Inform customer to re-try sticks, and inform Xerox of sticks which will not work. An Ink Stick Sense error has occurred. The following troubleshooting procedure applies to these errors. Insert a different stick of the correct SKU. Does the error persist? Table 1 Applicable Fault Codes Inform customer to re-try sticks, and inform Xerox of sticks which will not work.
- Page 104 Reroute the wiring cables. Replace the Ink Loader (REP 1.8). Replace the Printhead Assembly (REP 2.3). Fault Messages and Codes Revised, 3rd Revision - Xerox Internal Use Only October 2012 93,966 ~ 93,969, 93,982 ~ 93,985 2-58 ColorQube 8570/8870 Service Manual...
- Page 105 Replace the Ink Loader (REP 1.8). Transfer the ink sticks to the new Ink Loader. Ver- ify that the Electronics Module is plugged in. Xerox Internal Use Only - Revised, 3rd Revision Fault Messages and Codes October 2012 93,994 ~ 93,997...
- Page 106 Fault Messages and Codes Revised, 3rd Revision - Xerox Internal Use Only October 2012 93,994 ~ 93,997 2-60 ColorQube 8570/8870 Service Manual...
- Page 107 Perform the Ink SKU Sensor test in Service Diagnostics (Diagnostics Menu > Monitor Menu > Ink SKU Sensor). > Ink SKU Sensor). Xerox Internal Use Only - Revised, 3rd Revision Fault Messages and Codes October 2012 94,000 ~ 94,003 Trapped Ink Stick Faults, 94,004 ~...
- Page 108 Replace the Y-Axis Motor Assembly (REP 4.2). Troubleshooting complete. Replace the Y-Axis Motor Assembly (REP 4.2). Fault Messages and Codes Revised, 3rd Revision - Xerox Internal Use Only October 2012 94,510 ~ 94,513 , 94,524, 94,526 2-62 ColorQube 8570/8870 Service Manual...
- Page 109 Clear- ance and Mounting Surface Specifications in the Introduction Chapter). Check the Drum Fan for operational. Does the Drum Fan operate? Xerox Internal Use Only - Revised, 3rd Revision Fault Messages and Codes October 2012 94,536, 94,538 ~ 94,541 ColorQube 8570/8870 Service Manual...
- Page 110 Reboot the printer and verify the error persists. • Check all the Drum cable connections. • Verify the Drum Maintenance Unit is genuine Xerox. • If the problem persists, perform the following procedure. • If the problem persists, perform the following procedure.
- Page 111 Introduction and General Informa- tion Chapter). Check the Drum Fan for operational. Does the Drum Fan operate? Replace the Drum Fan (REP 4.12). Xerox Internal Use Only - Revised, 3rd Revision Fault Messages and Codes October 2012 94,626 ColorQube 8570/8870 Service Manual 2-65...
- Page 112 360 degrees during homing sequence? Replace the Process Drive (REP 4.13). Does the error persist? Troubleshooting complete. Check the Transfix Load Arms for damage. Fault Messages and Codes Revised, 3rd Revision - Xerox Internal Use Only October 2012 94,700 2-66 ColorQube 8570/8870 Service Manual...
- Page 113 Replace the faulty Camshaft (DM Camshaft - 2.11, Transfix Camshaft - 2.12). Replace the Process Drive (REP 4.13). Replace the Process Drive (REP 4.13). Xerox Internal Use Only - Revised, 3rd Revision Fault Messages and Codes October 2012 94,701, 94,702, 94,703 ColorQube 8570/8870 Service Manual 2-67...
- Page 114 Table 1 Applicable Fault Code 94,704 Wiper or Media Drive Fault Procedure Refer to RAP 91,710 ~ 91,716, 94,704 troubleshooting procedure. Fault Messages and Codes Revised, 3rd Revision - Xerox Internal Use Only October 2012 94,704 2-68 ColorQube 8570/8870 Service Manual...
-
Page 115: Pest - Generic Error
Check the Jetstack Fuses as shown in Figure 1 (Fuses are connected Pin 1 to 3 and Pin 2 to 4 of P/J132. Are the Jetstack Fuses OK? Xerox Internal Use Only - Revised, 3rd Revision Fault Messages and Codes October 2012 99,001, 99,002, 99,003... - Page 116 • Power Supply Board (REP 5.6) (Electronics Module) • Printhead Assembly (REP 2.3) Figure 1 Jetstack Fuse Fault Messages and Codes Revised, 3rd Revision - Xerox Internal Use Only October 2012 99,002, 99,003, 99,004, 99,005 2-70 ColorQube 8570/8870 Service Manual...
- Page 117 (Ensure your DMM is rated to measure high-impedance resistance.) Replace the following components: • Power Supply Board (REP 5.6) (Electronics Module) Xerox Internal Use Only - Revised, 3rd Revision Fault Messages and Codes October 2012 99,004, 99,005, 99,006 ColorQube 8570/8870 Service Manual 2-71...
- Page 118 P/JAC2 Pin 1 to Pin 7 greater than 2 Megao- hms? (Ensure your DMM is rated to measure high-impedance resistance.) Fault Messages and Codes Revised, 3rd Revision - Xerox Internal Use Only October 2012 99,006, 99,008 2-72 ColorQube 8570/8870 Service Manual...
- Page 119 Test F2 in the Power Supply. Refer to Testing F2 and F3 in the Electrical Trou- bleshooting section in Chapter 6, General Troubleshooting. Xerox Internal Use Only - Revised, 3rd Revision Fault Messages and Codes October 2012 99,008, 99,009 ~ 99,013...
- Page 120 4.12). Does the error persist? Troubleshooting complete. Replace the I/O Board (REP 5.10). Figure 1 Ink Loader Thermistor Test Point Fault Messages and Codes Revised, 3rd Revision - Xerox Internal Use Only October 2012 99,009 ~ 99,013, 99,015 2-74 ColorQube 8570/8870 Service Manual...
- Page 121 Check resistance on the Right Side Wiring Harness and Left Side Wiring Harness J302. Are they open or shorted? Troubleshooting complete. Replace the Right Side Wiring Harness/Left Side Wiring Harness. Xerox Internal Use Only - Revised, 3rd Revision Fault Messages and Codes October 2012 99,016...
-
Page 122: Pest - Head Maintenance Clutch Disconnect
Checking Fuses for location of the Fuses. many R3M jams. Refer to Checking Fuses for location of the Fuses. Fault Messages and Codes Revised, 3rd Revision - Xerox Internal Use Only October 2012 99,017, 99,018 2-76 ColorQube 8570/8870 Service Manual... -
Page 123: Pest - Main Tray Pick Clutch Disconnect
Troubleshooting complete. Replace the Power Control Board (REP 5.6) (Electronics Module). Replace the Power Control Board (REP 5.6) (Electronics Module). Xerox Internal Use Only - Revised, 3rd Revision Fault Messages and Codes October 2012 99,019, 99,020 ColorQube 8570/8870 Service Manual 2-77... -
Page 124: Pest - Strip Solenoid Disconnect
Troubleshooting complete. Replace the Power Control Board (REP 5.6) (Electronics Module). Replace the Power Control Board (REP 5.6) (Electronics Module). Fault Messages and Codes Revised, 3rd Revision - Xerox Internal Use Only October 2012 99,021, 99,022 2-78 ColorQube 8570/8870 Service Manual... -
Page 125: Pest - Head Tilt Solenoid Disconnect
5.6) (Electronics Module). NOTE: Can indicate blown fuse (F303) in the Electronics Module. Refer to Checking Fuses location of the Fuses. Xerox Internal Use Only - Revised, 3rd Revision Fault Messages and Codes October 2012 99,023, 99,024 ColorQube 8570/8870 Service Manual... -
Page 126: Pest - X-Axis Motor Disconnect
Replace the Right Side Wiring Harness. Replace the X-Axis Motor (REP 4.11). Does the error persist? Troubleshooting complete. Fault Messages and Codes Revised, 3rd Revision - Xerox Internal Use Only October 2012 99,030 ~ 99,034 2-80 ColorQube 8570/8870 Service Manual... -
Page 127: Pest - Y-Axis Motor Disconnect
P/J302 (pins 11-16). Is it open or shorted? Replace the Power Control Board (REP 5.6) (Electronics Module). Xerox Internal Use Only - Revised, 3rd Revision Fault Messages and Codes October 2012 99,035, 99,036, 99,037, 99,038 ColorQube 8570/8870 Service Manual 2-81... -
Page 128: Pest - Process Motor Disconnect
(REP 4.13. Does the error persist? Troubleshooting complete. Replace the Power Control Board (REP 5.6) (Electronics Module) Fault Messages and Codes Revised, 3rd Revision - Xerox Internal Use Only October 2012 99,037, 99,038, 99,039, 99040 2-82 ColorQube 8570/8870 Service Manual... -
Page 129: Pest - Power Supply Faults
Replace the Electronics Module (REP 5.1). Replace the Printhead (REP 2.3). Replace the Main Controller Board (REP 5.6) (Electronics Module). Xerox Internal Use Only - Revised, 3rd Revision Fault Messages and Codes October 2012 99,042 ~ 99,051 ColorQube 8570/8870 Service Manual 2-83... -
Page 130: Pest - Power Supply +12V Or -15V Faults
Plug in the cables one at a time and remeasure to determine cable/subsystem causing the failure. Replace the Power Control Board, Power Supply Board (REP 5.6) (Electronics Module). Fault Messages and Codes Revised, 3rd Revision - Xerox Internal Use Only October 2012 99,052, 99,053 2-84 ColorQube 8570/8870 Service Manual... -
Page 131: Pest - Power Supply +12V Sleep Faults
P/J201. Are the connections secure and undamaged? Reseat and/or replace the wiring harness. Replace the Power Control Board (REP 5.6) (Electronics Module). Xerox Internal Use Only - Revised, 3rd Revision Fault Messages and Codes October 2012 99,056, 99,057 ColorQube 8570/8870 Service Manual 2-85... -
Page 132: Pest - Vpp/ Vss Measurement Too Low
Unplug the Wave Amp Drive cable, then test VPP/VSS points on the Printhead Board wiring harness connector P/J110 (see Figure 1). Measure resistance of each to ground. • Pin 1 (VSS) Fault Messages and Codes Revised, 3rd Revision - Xerox Internal Use Only October 2012 99,059, 99,060 2-86 ColorQube 8570/8870 Service Manual... -
Page 133: Pest - The Wave Amp Shorted
Are the connections secure and undamaged? Reseat the wiring harnesses. Replace the Wave Amp Signal Cable and/or Wave Amp Drive Cable. Does the error persist? Xerox Internal Use Only - Revised, 3rd Revision Fault Messages and Codes October 2012 99,061... -
Page 134: Pest - Ink Loader Solenoid Gate Push/Pull Disconnected
Ink Loader Board. Are the connections secure and undamaged? Reseat the wiring harnesses. Replace the Ink Loader (REP 1.8). Fault Messages and Codes Revised, 3rd Revision - Xerox Internal Use Only October 2012 99,061, 99,062 ~ 99,069 2-88 ColorQube 8570/8870 Service Manual... -
Page 135: Pest - All Ink Loader Gates Failed
Is the red LED on? Replace the Power Control Board (REP 5.6) (Electronics Module). Replace the Ink Loader (REP 1.8). Xerox Internal Use Only - Revised, 3rd Revision Fault Messages and Codes October 2012 99,070 ColorQube 8570/8870 Service Manual 2-89... -
Page 136: Pest - Power Dump Circuit Disconnected
13 ohms. Is it open or shorted? Replace the Power Control Board (REP 5.6) (Electronics Module). Replace the Drum Assembly (REP 2.4). Fault Messages and Codes Revised, 3rd Revision - Xerox Internal Use Only October 2012 99,071 2-90 ColorQube 8570/8870 Service Manual... -
Page 137: Close Front Door A (When Actually Closed)
Replace the Front Door Switch (REP 6.6). Replace the Front Door (REP 1.1). Xerox Internal Use Only - Revised, 3rd Revision Fault Messages and Codes October 2012 Close Front Door A, Close Exit Door B ColorQube 8570/8870 Service Manual 2-91... -
Page 138: Close Ink Loader Door C (When Actually Closed)
3.1). Does the error persist? Troubleshooting complete. Replace the Preheater and Deskew Assembly (REP 2.20). Fault Messages and Codes Revised, 3rd Revision - Xerox Internal Use Only October 2012 Close Ink Loader Door C, Paper Jam - Open Front 2-92 ColorQube 8570/8870 Service Manual... -
Page 139: Paper Jam - Open Exit Door B To Clear (No Jam Is Present And Message Won't Clear)
Replace the Tray Lift Sensor. Does the error persist? Troubleshooting complete. Replace the I/O Board (REP 5.10). Xerox Internal Use Only - Revised, 3rd Revision Fault Messages and Codes October 2012 Paper Jam - Open Exit Door B to Clear, Tray 2 Emp- ColorQube 8570/8870 Service Manual... -
Page 140: Tray 2 Is Missing (When Inserted)
Replace the Exit Assembly (REP 3.13). Reseat or replace the Exit Flag. Fault Messages and Codes Revised, 3rd Revision - Xerox Internal Use Only October 2012 Tray 2 is Missing, Unload Output Tray (when not full) 2-94 ColorQube 8570/8870 Service Manual... -
Page 141: Maintenance Kit Missing (When Installed)
Chapter 6, General Troubleshoot- Refer to Maintenance Kit Missing troubleshooting procedure in Chapter 6, General Trouble- ing. shooting. Xerox Internal Use Only - Revised, 3rd Revision Fault Messages and Codes October 2012 Maintenance Kit Missing, Waste Tray Missing ColorQube 8570/8870 Service Manual 2-95... -
Page 142: Ink Sticks Jammed
Refer to RAP 93,962 ~ 93,965, Incorrect Ink Sticks RAP for troubleshooting procedure. Fault Messages and Codes Revised, 3rd Revision - Xerox Internal Use Only October 2012 Ink Sticks Jammed, Remove Incorrect Ink Sticks (Cy- 2-96 ColorQube 8570/8870 Service Manual... -
Page 143: Remove Unidentified Ink Sticks (Cyan, Magenta, Yellow, Black)
Y Tray 4 Pick Flag W Imaging Z Tray 5 Pick Flag X Exit Y Shell Z Shutdown Xerox Internal Use Only - Revised, 3rd Revision Fault Messages and Codes October 2012 Remove Unidentified Ink Sticks (Cyan, Magenta, ColorQube 8570/8870 Service Manual 2-97... -
Page 144: Jam Codes
Replace the appropriate Separator Pad Assembly (REP 3.9). Replace the Pick Assembly (REP 3.10). Replace the Preheater and Deskew Assembly (REP 2.20). Fault Messages and Codes Revised, 3rd Revision - Xerox Internal Use Only October 2012 Jam Codes 2-98 ColorQube 8570/8870 Service Manual... - Page 145 Control Panel. age. Replace the Exit Module (REP Try using heavy media setting even for 3.13) if necessary. non-heavy media. Xerox Internal Use Only - Revised, 3rd Revision Fault Messages and Codes October 2012 Jam Codes ColorQube 8570/8870 Service Manual 2-99...
- Page 146 Control Panel Menu. Check the Exit Door Interlock Switch. Replace the Switch (REP 6.6) if neces- sary. Fault Messages and Codes Revised, 3rd Revision - Xerox Internal Use Only October 2012 Jam Codes 2-100 ColorQube 8570/8870 Service Manual...
- Page 147 (PL 4.1 Item 6) is functioning properly. Replace the Motor (REP 4.6) if necessary. Replace the 525-Sheet Feeder (REP 3.12). Xerox Internal Use Only - Revised, 3rd Revision Fault Messages and Codes October 2012 Jam Codes ColorQube 8570/8870 Service Manual 2-101...
-
Page 148: Printer Fault Codes
Edge Timeout door is not working. 89,113 Preheat Exit Sensor Trail- Media Trailing Edge is not detected. ing Edge Timeout Fault Messages and Codes Revised, 3rd Revision - Xerox Internal Use Only October 2012 2-102 ColorQube 8570/8870 Service Manual... - Page 149 PS to start imaging the current Y-Axis rev. 94,516 Drum Image Abort 94,518 Drum Image Timing The imaging sequence started too late. 94,558 Dm Timing Error Xerox Internal Use Only - Revised, 3rd Revision Fault Messages and Codes October 2012 ColorQube 8570/8870 Service Manual 2-103...
- Page 150 Fault Messages and Codes Revised, 3rd Revision - Xerox Internal Use Only October 2012 2-104 ColorQube 8570/8870 Service Manual...
- Page 151 3-37 Chase Pages........................3-37 Oil Bar Chase........................3-38 Purge Efficiency ......................3-38 X-Axis Motion ........................3-38 Drop Mass Calibration..................... 3-38 Head Roll ........................3-39 Xerox Internal Use Only - Revised, 3rd Revision Image Quality October 2012 ColorQube 8570/8870 Service Manual...
- Page 152 Image Quality Revised, 3rd Revision - Xerox Internal Use Only October 2012 ColorQube 8570/8870 Service Manual...
-
Page 153: Print-Quality Problems Overview
IQ18 Media Wrinkling or Damage Areas of prints have distinctive "worm track" pat- terns, and/or wrinkles in the paper itself Xerox Internal Use Only - Revised, 3rd Revision Image Quality October 2012 Print-Quality Problems Overview ColorQube 8570/8870 Service Manual... - Page 154 Image Quality Revised, 3rd Revision - Xerox Internal Use Only October 2012 Print-Quality Problems Overview ColorQube 8570/8870 Service Manual...
-
Page 155: Iq1 Image Quality Entry Rap
If a print-quality problem is not resolved with the information provided in the Diagnosing Print- Quality Problems section, refer to the Test Prints section. Figure 2 Discolored Jets on the Light Stripes Page Xerox Internal Use Only - Revised, 3rd Revision Image Quality October 2012 IQ1, IQ2 ColorQube 8570/8870 Service Manual... - Page 156 Use the Up or Down button to change the number of the affected jet. Press the OK but- ton. Select Save Change and Exit, and press the OK button to complete the procedure. Image Quality Revised, 3rd Revision - Xerox Internal Use Only October 2012 ColorQube 8570/8870 Service Manual...
-
Page 157: Iq3 Predominant Light Stripes, Scratches Or Marks Down The Print Or Parallel To The Long Axis Of Printing
Panel Menu -> Troubleshooting -> Print Quality Problems -> Remove Print Smears) (see Streaks, Smudges, or Smears). Does the problem persist? Figure 2 Predominant White Stripes Troubleshooting complete. Xerox Internal Use Only - Revised, 3rd Revision Image Quality October 2012 ColorQube 8570/8870 Service Manual... -
Page 158: Iq4 Streaks, Smudges, Or Smears Down The Print
Figure 1 Streaks, Smudges, or Smears Are the cables secured? Reconnect the cables. Replace the Printhead Assembly (REP 2.3). Figure 2 Smudges or Smears Image Quality Revised, 3rd Revision - Xerox Internal Use Only October 2012 IQ3, IQ4 ColorQube 8570/8870 Service Manual... - Page 159 3.2). The Preheater should alternate between open and closed position. Replace the Solenoid (REP 3.5) and/ or the Preheater and Deskew Assembly (REP 2.20) if necessary. Xerox Internal Use Only - Revised, 3rd Revision Image Quality October 2012 ColorQube 8570/8870 Service Manual...
-
Page 160: Iq5 Partial Image/ Color Missing
Applicable Parts (Chapter 5 - Parts List) • Drum Assembly, PL 2.1 Item 4 • Drum Maintenance Pivot Plate/Wiper Assembly, PL 2.1 Item 17 Image Quality Revised, 3rd Revision - Xerox Internal Use Only October 2012 3-10 ColorQube 8570/8870 Service Manual... -
Page 161: Iq6 The Printed Image Is Too Light Or Too Dark
Does the error persist? Troubleshooting complete. Check that correct driver setting and color correction setting are correct. From the Start menu, select Settings -> Printers and Faxes -> Xerox ColorQube 8570DN. Highlight Xerox ColorQube 8570DN. Right-click and select Printing Preferences. -
Page 162: Iq7 No Image Is Printed
PL 5.1 Item 9 • Cable, Wave Amp Signal, PL 5.1 Item 18 • Cable, ZIF, Wave Amp Drive, PL 5.1 Item 19 Image Quality Revised, 3rd Revision - Xerox Internal Use Only October 2012 3-12 ColorQube 8570/8870 Service Manual... -
Page 163: Iq8 Color Is Uneven Or Wrong (Uniformity)
Check that the correct driver setting and color correction setting are correct. From the Start menu, select Settings -> Printers and Faxes -> Xerox ColorQube Uneven or incorrect colors typically result from incorrect colors in the Ink Loader, old ink in the 8570DN. -
Page 164: Iq9 Skew
Check the Preheater that the Deskew Gate is operational (spring load movement). Are Deskew Gates damaged? Troubleshooting complete. Replace the Preheater and Deskew Assembly (REP 2.20). Does the error persist? Troubleshooting complete. Image Quality Revised, 3rd Revision - Xerox Internal Use Only October 2012 3-14 ColorQube 8570/8870 Service Manual... -
Page 165: Iq10 Ink On White Portion Of The Printed Page
• Exit Roller, PL 3.1 Item 6 • Retard Roller, PL 3.1 Item 10 • Drum Temperature Sensor, PL 6.1 Item 5 Xerox Internal Use Only - Revised, 3rd Revision Image Quality October 2012 IQ10 ColorQube 8570/8870 Service Manual 3-15... - Page 166 Troubleshooting complete. If ink spots appear after Eliminate Light Stripes or after long time in Power Saver mode, check the Purge Pressure Pump, Printhead Wiper, and Printhead. Image Quality Revised, 3rd Revision - Xerox Internal Use Only October 2012 IQ10 3-16...
-
Page 167: Iq11 Fuzzy Or Blurry Printing
Wave Amp, PL 5.1 Item 9 • Cable, ZIF, Wave Amp Drive, PL 5.1 Item 19 Figure 4 X-Axis Bias Hook Orientation Xerox Internal Use Only - Revised, 3rd Revision Image Quality October 2012 IQ11 ColorQube 8570/8870 Service Manual 3-17... -
Page 168: Iq12 Vertical Lines Appear Wavy
Check the X-Axis motion. Verify that there is nothing interfering with X-Axis motion. Replace any defective parts found. Does the error persist? Troubleshooting complete. Image Quality Revised, 3rd Revision - Xerox Internal Use Only October 2012 IQ11, IQ12 3-18 ColorQube 8570/8870 Service Manual... -
Page 169: Iq13 Ghosting
Drum Maintenance Drive test (Service Diagnostics Menu -> Exercise Menu -> Motors/ Shafts -> Drum Maintenance Cam Shaft). Does the error persist? Troubleshooting complete. Replace any defective parts found. Figure 3 Ghosting (Drum) Xerox Internal Use Only - Revised, 3rd Revision Image Quality October 2012 IQ12, IQ13 ColorQube 8570/8870 Service Manual... -
Page 170: Iq14 Oil On Print
Check the Drum Temperature Sensor for debris or damage. Replace the Sensor (REP 6.5) if necessary. Clean the Stripper Blade and Exit Guide. Does the error persist? Troubleshooting complete. Image Quality Revised, 3rd Revision - Xerox Internal Use Only October 2012 IQ13, IQ14 3-20 ColorQube 8570/8870 Service Manual... -
Page 171: Iq15 Incomplete Image Transfer, Drop Out, Loss Of Image Pixels
Drum Maintenance Cam Pivot Plate (REP 2.17) Figure 1 Incomplete Image Transfer Figure 2 Incomplete Image Transfer Figure 3 Incomplete Image Transfer Xerox Internal Use Only - Revised, 3rd Revision Image Quality October 2012 IQ14, IQ15 ColorQube 8570/8870 Service Manual 3-21... - Page 172 Menu -> Activators -> Preheater Solenoid. Troubleshooting complete. Replace the Transfix Load Module (REP 2.16) and the Transfix Load Arms (REP 2.21). Image Quality Revised, 3rd Revision - Xerox Internal Use Only October 2012 IQ15 3-22 ColorQube 8570/8870 Service Manual...
-
Page 173: Iq16 Repeating Print Defects
Drum. Clean the Drum. Does the error persist? Troubleshooting complete. Replace the Drum Assembly (REP 2.4). Xerox Internal Use Only - Revised, 3rd Revision Image Quality October 2012 IQ16, IQ17 ColorQube 8570/8870 Service Manual 3-23... - Page 174 Check the X-Axis motion. Ensure the X-Axis Motor is correctly installed with its nose cone fork properly interfaced to its guide in the right side frame as shown in Figure Figure 4 Verifying the X-Axis Motor Installation Image Quality Revised, 3rd Revision - Xerox Internal Use Only October 2012 IQ17 3-24 ColorQube 8570/8870 Service Manual...
-
Page 175: Iq18 Media Wrinkling Or Damage
Preheater should lay flat and not overlap. Replace the Preheater (REP 2.20) if necessary. Suggest increasing the margin size of the image. Does the error persist? Troubleshooting complete. Xerox Internal Use Only - Revised, 3rd Revision Image Quality October 2012 IQ18 ColorQube 8570/8870 Service Manual... -
Page 176: Iq19 Image Is Offset Or Cutoff
Correct the application settings. Some side to side adjustment can be made using Center Image (Hidden Service Diagnostics Menu -> Center Image). Does the error persist? Image Quality Revised, 3rd Revision - Xerox Internal Use Only October 2012 IQ19 3-26... -
Page 177: Iq20 Poor Ink Adhesion, Poor Image Durability
Front Door and check to see if the Arm moves up or down. Replace the Load Arms (REP 2.21) if no movement is visible. Figure 3 Poor Ink Adhesion, Poor Image Durability Xerox Internal Use Only - Revised, 3rd Revision Image Quality October 2012 IQ20 ColorQube 8570/8870 Service Manual... -
Page 178: Iq21 Gloss Irregularities
2.12) • Transfix Load Arms (REP 2.21) • Transfix Load Module (REP 2.16) Figure 3 Glossy Figure 4 Glossy Vertical Lines Image Quality Revised, 3rd Revision - Xerox Internal Use Only October 2012 IQ20, IQ21 3-28 ColorQube 8570/8870 Service Manual... -
Page 179: Iq22 Grainy
Process Drive. Replace the parts if necessary. • Drum Maintenance Pivot Plate Assembly (REP 2.17) • Drum Maintenance Camshaft (REP 2.11) • Process Drive Assembly (REP 4.13) Xerox Internal Use Only - Revised, 3rd Revision Image Quality October 2012 IQ21, IQ22 ColorQube 8570/8870 Service Manual 3-29... - Page 180 Image Quality Revised, 3rd Revision - Xerox Internal Use Only October 2012 IQ21, IQ22 3-30 ColorQube 8570/8870 Service Manual...
-
Page 181: Test Prints
To access the Test Print menu, open compliant. Verify that the printer is using Xerox ink. Follow the instructions on the Printhead the Hidden Service Menu from the Control Panel. -
Page 182: Color Bands, Rgbk Dither
Figure 5 Color Bans Figure 1 Red Dither Figure 2 Green Dither Figure 4 Black Dither Figure 3 Blue Dither Image Quality Revised, 3rd Revision - Xerox Internal Use Only October 2012 Color Bands, RGBK Dither 3-32 ColorQube 8570/8870 Service Manual... -
Page 183: Manufacturing Skew Margin
If there are repeating white stripes on the print, there may be a problem with the X-Axis motion, see IQ17 White Stripes (Pinstripes). Xerox Internal Use Only - Revised, 3rd Revision Image Quality October 2012 Manufacturing Skew Margin, YMCKRGB Solid Fills... -
Page 184: Cyan Solid Fills
Magenta Refresh: Prints 20 pages of Magenta solid fills double-sided. Figure 1 Cyan Solid Fills Figure 1 Magenta Solid Fills Image Quality Revised, 3rd Revision - Xerox Internal Use Only October 2012 Cyan Solid Fills, Magenta Solid Fills 3-34 ColorQube 8570/8870 Service Manual... -
Page 185: Yellow Solid Fills
• Black Refresh: Prints 20 pages of Black solid fills double-sided. Figure 1 Yellow Solid Fills Figure 1 Black Solid Fills Xerox Internal Use Only - Revised, 3rd Revision Image Quality October 2012 Yellow Solid Fills, Black Solid Fills ColorQube 8570/8870 Service Manual... -
Page 186: Red Solid Fills
1x: Prints 1 page of Green solid fills single-sided. • 10x: Prints 10 pages of Green solid fills single-sided. Figure 1 Green Solid Fill Image Quality Revised, 3rd Revision - Xerox Internal Use Only October 2012 Red Solid Fills, Blue Solid Fills 3-36 ColorQube 8570/8870 Service Manual... -
Page 187: Manufacturing Skew And Margins
If the lead-edge margins are outside of tolerance, check the Preheater Flag. Figure 1 Chase Page Xerox Internal Use Only - Revised, 3rd Revision Image Quality October 2012 Manufacturing Skew and Margins... -
Page 188: Oil Bar Chase
Figure 1 Oil Bar Chase (2 pages) Figure 2 Oil Bar Chase (1 page) Drop Mass Calibration This print must be printed on Xerox Photo paper. Using a lower grade paper results in inaccu- Purge Efficiency rate measurements. This print is used by Manufacturing and Engineering. -
Page 189: Head Roll
This print is used by Manufacturing. This print is used for Manufacturing only. Figure 1 Head Roll Figure 1 Intensity CMYK Xerox Internal Use Only - Revised, 3rd Revision Image Quality October 2012 Head Roll, Intensity CMYK ColorQube 8570/8870 Service Manual... -
Page 190: Solid Fill Red Scan
Solid Fill Green Scan This print is used for Manufacturing only. Figure 1 Solid Fill Green Scan Image Quality Revised, 3rd Revision - Xerox Internal Use Only October 2012 Solid Fill Red Scan, Solid Fill Blue Scan 3-40 ColorQube 8570/8870 Service Manual... -
Page 191: Jet Substitution Mode
Scroll to Turn Jet Substitution Mode Off and press OK. Print the Eliminate Light Stripes Test page to verify that Substitution Mode is disabled for all jets. Figure 1 Jet Substitution Exception Xerox Internal Use Only - Revised, 3rd Revision Image Quality October 2012 Jet Substitution Mode... -
Page 192: Image Specifications
206 mm x 346 mm Guaranteed Image Area 206 mm x 346 mm Figure 2 Image Alignment (Skew) Figure 1 Maximum Print Area Image Quality Revised, 3rd Revision - Xerox Internal Use Only October 2012 Image Specifications 3-42 ColorQube 8570/8870 Service Manual... - Page 193 Standard: 300 x 450 dpi • Enhanced: 525 x 450 dpi • Photo: 525 x 2400 dpi Figure 3 Maximum Print Area - Envelope Xerox Internal Use Only - Revised, 3rd Revision Image Quality October 2012 Image Specifications ColorQube 8570/8870 Service Manual 3-43...
- Page 194 Image Quality Revised, 3rd Revision - Xerox Internal Use Only October 2012 Image Specifications 3-44 ColorQube 8570/8870 Service Manual...
- Page 195 REP 3.4 Outer Duplex Guide ..................4-57 REP 3.5 Upper Duplex Guide and Solenoid ..............4-57 REP 3.7 Takeaway Roller ....................4-58 REP 3.8 Duplex Roller ....................4-59 Xerox Internal Use Only - Revised, 3rd Revision Repairs and Adjustments October 2012 ColorQube 8570/8870 Service Manual...
- Page 196 Repairs and Adjustments Revised, 3rd Revision - Xerox Internal Use Only October 2012 ColorQube 8570/8870 Service Manual...
-
Page 197: Disassembly Overview
Plastic refers to a metal, self-tapping screw used to secure parts onto plastic. Metal refers to metal, fine-threaded screws used to secure parts onto metal. Figure 1 Printer Orientation Xerox Internal Use Only - Revised, 3rd Revision Repairs and Adjustments October 2012... - Page 198 Fasteners used in the product appear in Figure 2. Removal procedures include dimensional specifications for screws being removed. Figure 2 Fastener Types Repairs and Adjustments Revised, 3rd Revision - Xerox Internal Use Only October 2012 Disassembly Overview ColorQube 8570/8870 Service Manual...
-
Page 199: Rep 1.1 Front Door/ Tray 1 (Mpt) Assembly
While releasing the left hinge pin from the frame, slide the Door to the right side to remove the Front Door (Tray 1). Figure 2 Installing the Retainer Figure 1 Releasing the Stopper Straps and Removing the Front Door Xerox Internal Use Only - Revised, 3rd Revision Repairs and Adjustments October 2012 REP 1.1... -
Page 200: Rep 1.5 Control Panel Cover
Open the Exit Cover. Open the Front Door. Figure 2 Removing the Control Panel Cover Figure 1 Opening the Exit Cover and Front Door Repairs and Adjustments Revised, 3rd Revision - Xerox Internal Use Only October 2012 REP 1.5 ColorQube 8570/8870 Service Manual... -
Page 201: Rep 1.6 Control Panel
Exit Cover before inserting the cover hinge pins into the pivot points in the printer frame. Replacement CAUTION Be sure to lock the ZIF connector after connecting the ribbon cable to the I/O Board. Xerox Internal Use Only - Revised, 3rd Revision Repairs and Adjustments October 2012 REP 1.6, REP 1.7... -
Page 202: Rep 1.8 Ink Loader
Ink Loader Board. Lift and remove the Ink Loader. Figure 2 Installing the Ink Loader Figure 1 Removing the Ink Loader Repairs and Adjustments Revised, 3rd Revision - Xerox Internal Use Only October 2012 REP 1.8 ColorQube 8570/8870 Service Manual... -
Page 203: Rep 1.9 Ink Loader Bezel
Be careful not to damage the Ink Melt Plates. Slide the Ink Loader Assembly out from the Bezel. Figure 1 Releasing the Handles Figure 3 Removing the Ink Loader Bezel Xerox Internal Use Only - Revised, 3rd Revision Repairs and Adjustments October 2012 REP 1.9... -
Page 204: Rep 1.10 Left Side Cover
Release the hooks on the Cover from the printer and remove the Left Side Cover. Figure 4 Aligning the Rail and Tab Figure 1 Removing the Left Side Cover Repairs and Adjustments Revised, 3rd Revision - Xerox Internal Use Only October 2012 REP 1.9, REP 1.10 4-10... -
Page 205: Rep 1.11 Right Side Cover
Right Cover and pull the Drum Maintenance Door towards you to remove it. Figure 1 Removing the Right Side Cover Figure 2 Removing the Drum Maintenance Door Xerox Internal Use Only - Revised, 3rd Revision Repairs and Adjustments October 2012 REP 1.11, REP 1.12... -
Page 206: Rep 1.13 I/O Access Door
Figure 1 Removing the I/O Access Door Figure 1 Removing the KL-Clip Remove the X-Axis Bias Spring (REP 2.24). Repairs and Adjustments Revised, 3rd Revision - Xerox Internal Use Only October 2012 REP 1.13, REP 1.14 4-12 ColorQube 8570/8870 Service Manual... - Page 207 15. Pull the Waste Tray Cover towards the right side to release the left hook and remove the Cover. Figure 3 Unlocking and raising the Wiper Blade Figure 5 Removing the Waste Tray Cover Xerox Internal Use Only - Revised, 3rd Revision Repairs and Adjustments October 2012 REP 1.14...
-
Page 208: Rep 1.15 Waste Tray
Figure 1 Removing the Waste Tray Pull the Maintenance Unit out from the printer. Figure 2 Removing the Drum Maintenance Unit Repairs and Adjustments Revised, 3rd Revision - Xerox Internal Use Only October 2012 REP 1.15, REP 1.16 4-14 ColorQube 8570/8870 Service Manual... -
Page 209: Rep 1.17 Tray 1 Arm
Figure 1 Opening Tray 1 Push the Arm towards the inside to release the Arm from the notch. Figure 2 Releasing the Tray 1 Arm Xerox Internal Use Only - Revised, 3rd Revision Repairs and Adjustments October 2012 REP 1.17... -
Page 210: Rep 1.18 Tray 1 (Mpt) Pick Roller Assembly
Slide the cover towards one side to remove it from the shaft. Figure 1 Removing the KL Clips and Gear Figure 3 Removing the Bearings and Cover Repairs and Adjustments Revised, 3rd Revision - Xerox Internal Use Only October 2012 REP 1.18 4-16... - Page 211 Be sure to press on the tray downward in order to rotate the Stopper and seat it in the correct bly. position. Figure 5 Positioning the Stopper Figure 4 Removing the Pick Roller Assembly Xerox Internal Use Only - Revised, 3rd Revision Repairs and Adjustments October 2012 REP 1.18 ColorQube 8570/8870 Service Manual...
- Page 212 Repairs and Adjustments Revised, 3rd Revision - Xerox Internal Use Only October 2012 REP 1.18 4-18 ColorQube 8570/8870 Service Manual...
-
Page 213: Rep 2.1 Funnel Cap
Release the Jetstack Cap from the left and right pins. Lift and remove the Jetstack Cap. Figure 1 Removing the Funnel Cap Figure 1 Removing the Jetstack Cap Xerox Internal Use Only - Revised, 3rd Revision Repairs and Adjustments October 2012 REP 2.1, REP 2.2... -
Page 214: Rep 2.3 Printhead Assembly
Place several sheets of paper between the Printhead and Drum to protect the Drum. Hold the Printhead back. Figure 2 Adjusting the X-Axis Motor Repairs and Adjustments Revised, 3rd Revision - Xerox Internal Use Only October 2012 REP 2.3 4-20... - Page 215 If the Head is in Park position (the Gear does not move), push on the Solenoid. engage the Head Tilt Gear. Figure 3 Disengaging the Head Tilt Gear Figure 4 Head Tilt Gear Indicator Xerox Internal Use Only - Revised, 3rd Revision Repairs and Adjustments October 2012 REP 2.3...
- Page 216 Figure Figure 8 Removing the Printhead Restraints Figure 6 X-Axis Bias Spring Hook Repairs and Adjustments Revised, 3rd Revision - Xerox Internal Use Only October 2012 REP 2.3 4-22 ColorQube 8570/8870 Service Manual...
- Page 217 Figure Figure 10 Printhead Electrical Connections Figure 12 Printhead Cradle Notch Locations Xerox Internal Use Only - Revised, 3rd Revision Repairs and Adjustments October 2012 REP 2.3 ColorQube 8570/8870 Service Manual...
- Page 218 Figure Figure 14 Removing the Printhead Figure 13 Printhead Cable Connections Repairs and Adjustments Revised, 3rd Revision - Xerox Internal Use Only October 2012 REP 2.3 4-24 ColorQube 8570/8870 Service Manual...
- Page 219 Do not put sharp bends (creases) in the cable; particularly near the ends of the cable, it can crack the conductors and cause 99,059 and 99,060 Vss and Vpp faults. Figure 16 Locking the ZIF Connector Xerox Internal Use Only - Revised, 3rd Revision Repairs and Adjustments October 2012 REP 2.3...
- Page 220 Rest the Printhead in the Cradle Notches and attach the 2 ribbon cables. Be sure to fully insert and then lock the ZIF cable. Figure 19 Gear Alignment Repairs and Adjustments Revised, 3rd Revision - Xerox Internal Use Only October 2012 REP 2.3 4-26...
- Page 221 Lower the Printhead Assembly into its mounts. The Printhead should tilt forward in the print position. Route the Purge Pump Hose through the frame and connect it to the Purge Pump. Xerox Internal Use Only - Revised, 3rd Revision Repairs and Adjustments October 2012 REP 2.3...
- Page 222 Printhead and does not pinch the Purge Pump Hose. Figure 23 X-Axis Bias Hook Orientation Figure 25 Installing the Printhead Tilt Spring Repairs and Adjustments Revised, 3rd Revision - Xerox Internal Use Only October 2012 REP 2.3 4-28...
-
Page 223: Rep 2.4 Drum Assembly
21. Print the Light Stripes page. Check if any jets are being substituted. If necessary, use the Control Panel to reset the jet substitution. 22. Package the defective Printhead and completed Printhead Checklist in the replacement part’s packaging. Xerox Internal Use Only - Revised, 3rd Revision Repairs and Adjustments October 2012 REP 2.3, REP 2.4... - Page 224 Load Arms. Repeat this process for the left side. Figure 1 Detaching the Transfix Load Module Spring Hooks Figure 2 Removing the Drum Cooling Fan Repairs and Adjustments Revised, 3rd Revision - Xerox Internal Use Only October 2012 REP 2.4 4-30...
- Page 225 Figure 5. Do not rest the Drum Assembly on the pulley. Figure 3 Disconnecting the Wiring Harness Connectors Figure 5 Drum Assembly Placement Xerox Internal Use Only - Revised, 3rd Revision Repairs and Adjustments October 2012 REP 2.4 ColorQube 8570/8870 Service Manual...
- Page 226 NOTE: Rotate the Drum Assembly to verify that the Drum rotates freely. If the Drum is not Figure 6 Installing the Transfix Load Arm Clevis Pins rotated freely, check the Drum Maintenance Cam at 6 o’clock position. Repairs and Adjustments Revised, 3rd Revision - Xerox Internal Use Only October 2012 REP 2.4 4-32...
- Page 227 20. Connect the Drum Fan wiring harness connector P/J903 to the I/O Board. 21. Install the Ink Loader. 22. Install the Lower Duplex Guide. Xerox Internal Use Only - Revised, 3rd Revision Repairs and Adjustments October 2012 REP 2.4 ColorQube 8570/8870 Service Manual...
-
Page 228: Rep 2.5 Y-Axis Belt
Wiper. Figure 1 Removing the Y-Axis Belt Figure 1 Removing the Printhead Wiper Belt and Wiper Drive Belt Repairs and Adjustments Revised, 3rd Revision - Xerox Internal Use Only October 2012 REP 2.5, REP 2.6 4-34 ColorQube 8570/8870 Service Manual... -
Page 229: Rep 2.8 Purge Pressure Pump
Perform the Process Drive Homing procedure (ADJ 1.3). Turn printer power on to check wiper operation. Figure 1 Removing the Purge Pressure Pump Xerox Internal Use Only - Revised, 3rd Revision Repairs and Adjustments October 2012 REP 2.6, REP 2.8 ColorQube 8570/8870 Service Manual... -
Page 230: Rep 2.9 Left And Right Printhead Restraints
Figure Figure 1 Lowering the Wiper Blade Figure 3 Releasing the Printhead Tilt Spring Repairs and Adjustments Revised, 3rd Revision - Xerox Internal Use Only October 2012 REP 2.9 4-36 ColorQube 8570/8870 Service Manual... - Page 231 (ADJ 1.2) and Process Drive Alignment procedure (ADJ 1.3) before restoring printer power. Figure 5 Removing the Printhead Restraint Screws Xerox Internal Use Only - Revised, 3rd Revision Repairs and Adjustments October 2012 REP 2.9 ColorQube 8570/8870 Service Manual 4-37...
-
Page 232: Rep 2.11 Drum Maintenance Camshaft
Replacement Parts List on PL 2.1 Item 11 NOTE: For additional tips, refer to the Drum Maintenance Camshaft Installation video (also available in the ColorQube 8570/8870 Training materials). Removal Remove the Front Door (REP 1.1). CAUTION Remove the Control Panel Cover (REP 1.5). -
Page 233: Rep 2.12 Transfix Camshaft
Figure 2 Installing the I/O Board - Correct Ground Plane position in front of the I/O Board Figure 1 Removing the Transfix Camshaft Figure 3 Installing the I/O Board - Incorrect Ground Plane position behind the I/O Board Xerox Internal Use Only - Revised, 3rd Revision Repairs and Adjustments October 2012 REP 2.12... -
Page 234: Rep 2.13 Stripper Carriage Assembly/ Transfix Roller
Move the I/O Board away from the printer to access the I/O Board Ground screw. Figure 2 Removing the I/O Board Ground Screw and Transfer Roller Shaft Figure 1 Removing the I/O Board Screws Repairs and Adjustments Revised, 3rd Revision - Xerox Internal Use Only October 2012 REP 2.13 4-40... - Page 235 Figure 5 Installing the I/O Board - Correct Ground Plane position in front of the I/O Board Figure 4 Removing the Transfix Roller Figure 6 Installing the I/O Board - Incorrect Ground Plane position behind the I/O Board Xerox Internal Use Only - Revised, 3rd Revision Repairs and Adjustments October 2012 REP 2.13...
-
Page 236: Rep 2.15 Y-Axis Tension Spring
Load Arms. Repeat this process for the left side. Figure 1 Removing the Y-Axis Spring Figure 1 Detaching the Transfix Load Module Spring Hooks Repairs and Adjustments Revised, 3rd Revision - Xerox Internal Use Only October 2012 REP 2.15, REP 2.16 4-42... - Page 237 21. Remove the screw that secures the Transfix Load Module Ground Spring and remove the Ground Strap. Figure 2 Removing the Transfix Load Arm Clevis Pins Figure 4 Removing the Transfix Module Ground Strap Xerox Internal Use Only - Revised, 3rd Revision Repairs and Adjustments October 2012 REP 2.16...
- Page 238 (ADJ 1.1). Fault Figure 6 Loosening the Process Drive Screw codes 91,720 ~ 91,723 indicate misalignment of the Wiper Assembly. Repairs and Adjustments Revised, 3rd Revision - Xerox Internal Use Only October 2012 REP 2.16 4-44 ColorQube 8570/8870 Service Manual...
-
Page 239: Rep 2.17 Drum Maintenance Pivot Plate/ Drum Wiper Blade Assembly
NOTE: For the following step, be sure to keep the C-Clip attach to the shaft. 11. Pull the shaft out from the chassis, Figure 2 Removing the Drum Maintenance Pivot Plate Figure 1 Removing the Shaft Xerox Internal Use Only - Revised, 3rd Revision Repairs and Adjustments October 2012 REP 2.17... - Page 240 NOTE: For additional tips, refer to the Drum Maintenance Pivot Plate Installation video (also available in the ColorQube 8570/8870 Training materials). Lift and remove the Drum Wiper Blade Assembly from the Drum Maintenance Pivot Plate. Before installing the Process Drive, perform the Manual Printhead Parking procedure (ADJ 1.4) and Wiper Blade Alignment procedure...
- Page 241 1/4 in. (6 mm). There should be about a quarter of an inch level space between the Blade and Drum. Figure 5 Installing the Drum Maintenance Pivot Plate Figure 7 Verifying the space between the Blade and Drum Xerox Internal Use Only - Revised, 3rd Revision Repairs and Adjustments October 2012 REP 2.17...
-
Page 242: Rep 2.20 Preheater And Deskew Assembly
1.2) and Process Drive Alignment procedure (ADJ 1.3) before restoring printer power. Figure 1 Disconnecting Wiring Harness Connectors Repairs and Adjustments Revised, 3rd Revision - Xerox Internal Use Only October 2012 REP 2.17, REP 2.20 4-48 ColorQube 8570/8870 Service Manual... - Page 243 DO NOT force it. Once fully inserted, release the latches to secure the Preheater to the printer frame. Figure 4 Wiring Harness Locations Figure 3 Installing the Preheater Xerox Internal Use Only - Revised, 3rd Revision Repairs and Adjustments October 2012 REP 2.20...
-
Page 244: Rep 2.21 Transfix Arm Kit (With Pins)
Remove the Outer Duplex Guide (REP 3.4). 10. Remove the Upper Duplex Guide and Solenoid (REP 3.5). 11. Remove the Exit Module (REP 3.13). Repairs and Adjustments Revised, 3rd Revision - Xerox Internal Use Only October 2012 REP 2.21 4-50 ColorQube 8570/8870 Service Manual... - Page 245 NOTE: Be sue to tighten the six screws to secure the Media Drive Assembly. Figure 3 Removing the Transfix Load Arm Clevis Pins Figure 5 Tightening the Media Drive Assembly Screws Xerox Internal Use Only - Revised, 3rd Revision Repairs and Adjustments October 2012 REP 2.21...
-
Page 246: Rep 2.22 X-Axis Bias Spring Hook, X-Axis Roll Adjuster Spring
Figure Figure 1 Releasing the Printhead Tilt Spring Figure 2 Releasing the X-Axis Bias Spring Hook Repairs and Adjustments Revised, 3rd Revision - Xerox Internal Use Only October 2012 REP 2.22 4-52 ColorQube 8570/8870 Service Manual... -
Page 247: Rep 2.24 X-Axis Bias Spring
Print Position procedure (ADJ 1.2) and Process Drive Alignment procedure (ADJ 1.3) before restoring printer power. Xerox Internal Use Only - Revised, 3rd Revision Repairs and Adjustments October 2012 REP 2.22, REP 2.24 ColorQube 8570/8870 Service Manual 4-53... - Page 248 Repairs and Adjustments Revised, 3rd Revision - Xerox Internal Use Only October 2012 REP 2.22, REP 2.24 4-54 ColorQube 8570/8870 Service Manual...
-
Page 249: Rep 3.1 Inner Simplex Guide With Pre-Deskew Sensor And Harness
Ensure switch wiring harness is routed through the restraints. Figure 1 Disconnecting Wiring Harness Connector Figure 3 Installing the Inner Simplex Guide Xerox Internal Use Only - Revised, 3rd Revision Repairs and Adjustments October 2012 REP 3.1... -
Page 250: Rep 3.2 Lower Inner Duplex Guide
Guide Assembly. Figure 1 Removing the Lower Inner Duplex Guide Figure 2 Removing the Lower Exit Guide Assembly Repairs and Adjustments Revised, 3rd Revision - Xerox Internal Use Only October 2012 REP 3.2, REP 3.3 4-56 ColorQube 8570/8870 Service Manual... -
Page 251: Rep 3.4 Outer Duplex Guide
Lift and remove the Outer Duplex Guide. Figure 1 Removing the Outer Duplex Guide Figure 1 Disconnecting Wiring Harness Connector from Right Side Harness Xerox Internal Use Only - Revised, 3rd Revision Repairs and Adjustments October 2012 REP 3.4, REP 3.5... -
Page 252: Rep 3.7 Takeaway Roller
Exit Module frame. Check that the Stripper Solenoid actuator engages the hole in the Stripper Carriage Assembly. Repairs and Adjustments Revised, 3rd Revision - Xerox Internal Use Only October 2012 REP 3.5, REP 3.7 4-58... -
Page 253: Rep 3.8 Duplex Roller
Figure 2 Removing the Takeaway Roller Figure 1 Removing the Duplex Roller Xerox Internal Use Only - Revised, 3rd Revision Repairs and Adjustments October 2012 REP 3.7, REP 3.8... -
Page 254: Rep 3.9 Separator Pad Kit
Figure 2 Installing the I/O Board - Correct Ground Plane position in front of the I/O Board Figure 1 Removing the Separator Pad Figure 3 Installing the I/O Board - Incorrect Ground Plane position behind the I/O Board Repairs and Adjustments Revised, 3rd Revision - Xerox Internal Use Only October 2012 REP 3.8, REP 3.9 4-60... -
Page 255: Rep 3.10 Pick Assembly And Retard Roller
Lift the Retard Roller vertically, then pull the Roller from the shaft in the tray. Figure 1 Removing Tray 2/3/4/5 Figure 3 Removing the Retard Roller Xerox Internal Use Only - Revised, 3rd Revision Repairs and Adjustments October 2012 REP 3.10... -
Page 256: Rep 3.12 525-Sheet Feeder
Carefully lift the printer away from the 525-Sheet Feeder. Figure 1 Removing the 525-Sheet Feeder Figure 4 Replacing the Pick Roller Repairs and Adjustments Revised, 3rd Revision - Xerox Internal Use Only October 2012 REP 3.10, REP 3.12 4-62 ColorQube 8570/8870 Service Manual... -
Page 257: Rep 3.13 Exit Module
Head Maintenance Clutch P/J119 from the Right Side Harness Figure 2 Loosening the Media Drive Screws Figure 1 Disconnecting Wiring Harness Connectors Xerox Internal Use Only - Revised, 3rd Revision Repairs and Adjustments October 2012 REP 3.13 ColorQube 8570/8870 Service Manual... - Page 258 Seat the Exit Module on the chassis. Torque the 4 screws to 12 in.-lbs and perform Wiper Blade Alignment procedure (ADJ 1.1). The printer may report errors 91,720~91,723, if the Wiper Assembly is misaligned. Repairs and Adjustments Revised, 3rd Revision - Xerox Internal Use Only October 2012 REP 3.13 4-64 ColorQube 8570/8870 Service Manual...
-
Page 259: Rep 3.14 Takeaway Guide
Use a flat tip screwdriver to release one of the latches of the Takeaway Guide and remove the Guide from the printer frame. Figure 1 Removing the Takeaway Guide Xerox Internal Use Only - Revised, 3rd Revision Repairs and Adjustments October 2012 REP 3.14... - Page 260 Repairs and Adjustments Revised, 3rd Revision - Xerox Internal Use Only October 2012 REP 3.14 4-66 ColorQube 8570/8870 Service Manual...
-
Page 261: Rep 4.1 Preheater Lift Solenoid
10. Remove 1 screw that secures the Preheater Lift Solenoid to the Transfix Load Module. 11. Remove the Preheater Lift Solenoid. Figure 1 Removing the Preheater Lift Solenoid Figure 1 Removing the Y-Axis Spring Xerox Internal Use Only - Revised, 3rd Revision Repairs and Adjustments October 2012 REP 4.1, REP 4.2... - Page 262 Spring Arm and slide the Y-Axis Motor Assembly out of the chassis. Figure 3 Removing the Y-Axis Drive Assembly Figure 2 Y-Axis Disconnecting Wiring Harness Connectors Repairs and Adjustments Revised, 3rd Revision - Xerox Internal Use Only October 2012 REP 4.2 4-68...
-
Page 263: Rep 4.3 Tray 1 Pick Solenoid
Align the hole in the Solenoid with the boss on the Media Drive Assembly before tightening the screw. Figure 4 Wiring Harness Locations Xerox Internal Use Only - Revised, 3rd Revision Repairs and Adjustments October 2012 REP 4.2, REP 4.3... -
Page 264: Rep 4.4 Head Tilt Solenoid
Lower the Wiper Blade to its lowest position by rotating the Wiper Drive Gears. Figure 1 Lowering the Wiper Blade Figure 2 Removing the Head Tilt Solenoid Repairs and Adjustments Revised, 3rd Revision - Xerox Internal Use Only October 2012 REP 4.4 4-70... - Page 265 Process Drive clockwise until you hear the Head Tilt Solenoid snap into place (see Figure for Head Tilt Latch position). Figure 4 Head Tilt Latch Position Figure 3 Engaging the Head Tilt Solenoid Xerox Internal Use Only - Revised, 3rd Revision Repairs and Adjustments October 2012 REP 4.4 ColorQube 8570/8870 Service Manual...
-
Page 266: Rep 4.5 Media Drive Assembly
Remove 1 screw (metal, T-20) that secures the braided ground wire to the Media Drive Motor mounting plate. Figure 2 Removing the Media Drive Assembly Figure 1 Removing the Screw Repairs and Adjustments Revised, 3rd Revision - Xerox Internal Use Only October 2012 REP 4.5 4-72 ColorQube 8570/8870 Service Manual... - Page 267 Check that the Media Drive Assembly is correctly positioned before tightening the screws. Figure 4 Verifying the Groove on the Shaft Figure 3 Aligning the Gear and Shafts Xerox Internal Use Only - Revised, 3rd Revision Repairs and Adjustments October 2012 REP 4.5...
-
Page 268: Rep 4.6 Tray 2 Lift Motor
Push Nut so the fingers point away from the shaft. Place a 3/8 in. nut driver over Figure 1 Removing the Lift Motor Gear the nut and press firmly to seat the nut on the shaft. Repairs and Adjustments Revised, 3rd Revision - Xerox Internal Use Only October 2012 REP 4.6 4-74... -
Page 269: Rep 4.7 Electronics Module Fan
Figure 1 Removing the KL-Clip 10. Remove the Waste Tray (REP 1.15). 11. Remove the X-Axis Bias Spring (REP 2.24). Xerox Internal Use Only - Revised, 3rd Revision Repairs and Adjustments October 2012 REP 4.7, REP 4.8 ColorQube 8570/8870 Service Manual 4-75... - Page 270 15. Reach into the Waste Tray cavity and pull the gear and shaft from the chassis. Figure 3 Raising the Wiper Blade Figure 5 Removing the Head Tilt Gear Repairs and Adjustments Revised, 3rd Revision - Xerox Internal Use Only October 2012 REP 4.8 4-76...
-
Page 271: Rep 4.9 Tray 2 Lift Motor Gear
Perform the Homing the Printhead Forward to Print Position procedure (ADJ 1.2) and Process Drive Alignment procedure (ADJ 1.3) before restoring the printer power. Xerox Internal Use Only - Revised, 3rd Revision Repairs and Adjustments October 2012 REP 4.8, REP 4.9 ColorQube 8570/8870 Service Manual 4-77... -
Page 272: Rep 4.10 Head Maintenance Clutch
Perform the Homing the Printhead Forward to Print Position procedure (ADJ 1.2) and Process Drive Alignment procedure (ADJ 1.3) before restoring printer power. Repairs and Adjustments Revised, 3rd Revision - Xerox Internal Use Only October 2012 REP 4.10, REP 4.11 4-78 ColorQube 8570/8870 Service Manual... -
Page 273: Rep 4.12 Drum Cooling Fan
Figure 1 Removing the Drum Cooling Fan Replacement NOTE: Check that the grounding strap contacts the Pivot Plate Shaft following installation. Figure 1 Process Drive Gear Alignment Xerox Internal Use Only - Revised, 3rd Revision Repairs and Adjustments October 2012 REP 4.12, REP 4.13... - Page 274 Release the Drum Encoder and Drum Fan wiring from the Process Drive wiring retainers. Figure 2 Disconnecting the Wiring Harness Connector Figure 3 Disconnecting and releasing the Wiring Harness Connectors Repairs and Adjustments Revised, 3rd Revision - Xerox Internal Use Only October 2012 REP 4.13 4-80...
- Page 275 Next, seat all three screws before torquing the screws to a final tightness of 12 in-lbs. Tightening the screws individually before seating all three can put undue strain on the mounting bosses. Xerox Internal Use Only - Revised, 3rd Revision Repairs and Adjustments October 2012 REP 4.13...
- Page 276 Repairs and Adjustments Revised, 3rd Revision - Xerox Internal Use Only October 2012 REP 4.13 4-82 ColorQube 8570/8870 Service Manual...
-
Page 277: Rep 5.1 Electronics Module
10. Hold and pull the Electronics Module out from the printer using the finger recesses. Figure 1 Removing Screws and Retaining Clips Figure 3 Removing the Electronics Module Xerox Internal Use Only - Revised, 3rd Revision Repairs and Adjustments October 2012 REP 5.1... -
Page 278: Rep 5.2 Hard Disk Drive
Remove the 2 thumbscrews on the Rear Panel of the Electronics Module and remove the Rear Panel. Figure 1 Remove the Screws and Rear Panel Figure 2 Removing the Hard Disk Drive Repairs and Adjustments Revised, 3rd Revision - Xerox Internal Use Only October 2012 REP 5.2 4-84 ColorQube 8570/8870 Service Manual... -
Page 279: Rep 5.3 Ram
Remove the 2 thumbscrews on the Rear Panel of the Electronics Module and remove the Rear Panel. Figure 1 Removing the Screws and Rear Panel Figure 3 Installing the Hard Disk Drive Xerox Internal Use Only - Revised, 3rd Revision Repairs and Adjustments October 2012 REP 5.2, REP 5.3... - Page 280 Board. Be sure to secure the RAM in place. Figure 2 Removing the RAM Figure 3 Installing the RAM Repairs and Adjustments Revised, 3rd Revision - Xerox Internal Use Only October 2012 REP 5.3 4-86 ColorQube 8570/8870 Service Manual...
-
Page 281: Rep 5.4 Nvram
Remove the 2 thumbscrews on the Rear Panel of the Electronics Module and remove the Rear Panel. Figure 2 Removing the NVRAM Figure 1 Removing the Back Cover Xerox Internal Use Only - Revised, 3rd Revision Repairs and Adjustments October 2012 REP 5.4... -
Page 282: Rep 5.5 Configuration Card
Board (if a Hard Disk Drive is installed). Figure 1 Removing the Configuration Card Figure 1 Removing the Rear Panel Repairs and Adjustments Revised, 3rd Revision - Xerox Internal Use Only October 2012 REP 5.5, REP 5.6 4-88 ColorQube 8570/8870 Service Manual... - Page 283 10. Remove 5 screws (metal, T-9) (3 on the right side and 2 on the rear side). Figure 4 Removing the Screws Figure 3 Removing the Screws Xerox Internal Use Only - Revised, 3rd Revision Repairs and Adjustments October 2012 REP 5.6...
- Page 284 13. Slide the Board Assembly out from the Electronics Module Cage. Figure 6 Removing the Board Assembly Module Figure 5 Removing the Left Panel Repairs and Adjustments Revised, 3rd Revision - Xerox Internal Use Only October 2012 REP 5.6 4-90...
- Page 285 Panel on the outside of the Cage. Figure 9 Removing the Screws and Support Rail Figure 8 Installing the Side Panel Xerox Internal Use Only - Revised, 3rd Revision Repairs and Adjustments October 2012 REP 5.6...
- Page 286 Lift and remove the Power Supply Board from the frame. Figure 11 Removing the Screws and Main Controller Board Figure 10 Removing the Screws and Power Supply Board Repairs and Adjustments Revised, 3rd Revision - Xerox Internal Use Only October 2012 REP 5.6 4-92...
-
Page 287: Rep 5.9 Wave Amplifier
Figure 2 Printhead Cable Connections 11. Remove the Electronics Module (REP 5.1). Figure 1 Removing the Ribbon Cable Retaining Clip Xerox Internal Use Only - Revised, 3rd Revision Repairs and Adjustments October 2012 REP 5.9 ColorQube 8570/8870 Service Manual 4-93... - Page 288 Wave Amp. Figure 3 Removing the Wave Amplifier Board Figure 4 Disconnecting the Wave Amp Wiring Harness Connector Repairs and Adjustments Revised, 3rd Revision - Xerox Internal Use Only October 2012 REP 5.9 4-94 ColorQube 8570/8870 Service Manual...
- Page 289 (ADJ 1.2) and Process Drive Alignment procedure (ADJ 1.3) before restoring the printer power. Figure 5 Positioning the Wave Amp Xerox Internal Use Only - Revised, 3rd Revision Repairs and Adjustments October 2012 REP 5.9 ColorQube 8570/8870 Service Manual 4-95...
-
Page 290: Rep 5.10 I/O Board
Figure 2 Installing the I/O Board - Correct Ground Plane position in front of the I/O Board Figure 3 Installing the I/O Board - Incorrect Ground Plane position behind the I/O Board Figure 1 Removing the I/O Board Repairs and Adjustments Revised, 3rd Revision - Xerox Internal Use Only October 2012 REP 5.10 4-96... -
Page 291: Rep 6.1 Paper Size Switch
Disconnect the wiring harness connector P/J131 from the Paper Size Switch. Figure 1 Disconnecting the Wiring Harness Connector Figure 3 Disconnecting the Wiring Harness Connector Xerox Internal Use Only - Revised, 3rd Revision Repairs and Adjustments October 2012 REP 6.1 ColorQube 8570/8870 Service Manual... -
Page 292: Rep 6.2 No Paper Sensor
Sensor. Figure 2 Wiring Connector Locations Figure 1 Remove the No Paper Sensor Repairs and Adjustments Revised, 3rd Revision - Xerox Internal Use Only October 2012 REP 6.2 4-98 ColorQube 8570/8870 Service Manual... -
Page 293: Rep 6.3 Paper Height Sensor
Release the 4 hooks that secure the Paper Height Sensor to the right side of the Pick Assembly recess. Figure 2 Wiring Connector Locations Figure 1 Removing the Paper Height Sensor Xerox Internal Use Only - Revised, 3rd Revision Repairs and Adjustments October 2012 REP 6.3... -
Page 294: Rep 6.5 Drum Temperature Sensor
Remove the defective switch from the Outer Duplex Guide. Figure 1 Removing the Exit Door and Front Door Switches Figure 1 Removing the Drum Temperature Sensor Repairs and Adjustments Revised, 3rd Revision - Xerox Internal Use Only October 2012 REP 6.5, REP 6.6 4-100... -
Page 295: Rep 6.7 Waste Tray Detect Sensor
Pull the cover to the right to release the left hook and position the cover out of the way. Figure 1 Removing the X-Axis Spring Retainer Figure 3 Removing the Waste Tray Cover Xerox Internal Use Only - Revised, 3rd Revision Repairs and Adjustments October 2012 REP 6.7... - Page 296 Perform the Homing the Printhead Forward to Print Position procedure (ADJ 1.2) and Process Drive Alignment procedure (ADJ 1.3) before restoring printer power. Repairs and Adjustments Revised, 3rd Revision - Xerox Internal Use Only October 2012 REP 6.7 4-102 ColorQube 8570/8870 Service Manual...
-
Page 297: Adj 1.1 Wiper Blade Alignment
NOTE: If the printer is experiencing 91,710~91,716 Wiper Movement faults, readjust the Wiper alignment so that the left-end is slightly lower (one drive gear tooth) than the right- end. Figure 1 Removing the KL-Clip Xerox Internal Use Only - Revised, 3rd Revision Repairs and Adjustments October 2012 ADJ 1.1... -
Page 298: Adj 1.2 Homing The Printhead Forward To Print Position
Printhead is Installed Adjustment NOTE: For additional information, refer to Homing the Printhead Forward to Print Position video (also available in the ColorQube 8570/8870 Training materials). Remove the Drum Maintenance Unit (REP 1.16) (optional or if possible). Use a small screwdriver to rotate the X-Axis Shaft with the Printhead centered over the Drum to clear the Left and Right Printhead Restraints. -
Page 299: Adj 1.3 Process Drive Alignment
• The holes in the Process Drive and gears must align as indicated in Figure Figure 3 Head Tilt Gear Indicator Xerox Internal Use Only - Revised, 3rd Revision Repairs and Adjustments October 2012 ADJ 1.2, ADJ 1.3 ColorQube 8570/8870 Service Manual... -
Page 300: Adj 1.4 Manual Printhead Parking
Use this procedure to move the Printhead to its parked position. NOTE: For additional information, refer to Adjusting the Printhead to Park Position video (also available in the ColorQube 8570/8870 Training materials). Remove the Control Panel Cover (REP 1.5). Remove the Left Side Cover (REP 1.10). - Page 301 Figure Figure 2 Engaging the Headtilt Gear Figure 3 Rotating the Drum Maintenance Camshaft Xerox Internal Use Only - Revised, 3rd Revision Repairs and Adjustments October 2012 ADJ 1.4 ColorQube 8570/8870 Service Manual...
-
Page 302: Adj 1.5 Center The Printhead
Turn the Motor counter-clockwise until resistance, then 1 rotation clockwise to set to tilt position. Figure 2 Installing the Funnel Cap Figure 1 Adjusting the X-Axis Motor Repairs and Adjustments Revised, 3rd Revision - Xerox Internal Use Only October 2012 ADJ 1.5 4-108 ColorQube 8570/8870 Service Manual... - Page 303 PL 2.1 Imaging ........................ PL 3.1 Paper Path......................PL 4.1 Drive ........................PL 5.1 Electrical ......................PL 6.1 Sensors and Actuators ..................Xerox Supplies and Accessories..................5-10 Xerox Internal Use Only - Revised, 3rd Revision Parts List October 2012 ColorQube 8570/8870 Service Manual...
- Page 304 Parts List Revised, 3rd Revision - Xerox Internal Use Only October 2012 ColorQube 8570/8870 Service Manual...
-
Page 305: Parts List Overview
Serial Number Format The Parts List section identifies all part numbers and the corresponding location of all spared Changes to Xerox products are made to accommodate improved components. As subsystem components. improvements are made, part numbers may change from those appearing in this section. To get the latest part, provide the following information when ordering: Use of the Term “Assembly”... -
Page 306: Pl 1.1Covers
– 109R00783 Drum Maintenance Unit, Extended 050K68070 MPT Tray Arm (P/O PL 1.1 Item 059K63590 MPT Pick Roller (P/O PL 1.1 Item Parts List Revised, 3rd Revision - Xerox Internal Use Only October 2012 PL 1.1 ColorQube 8570/8870 Service Manual... -
Page 307: Pl 2.1 Imaging
Drum Ground Plate (Not Spared) – Roll Block (Not Spared) – Transfix Roller Shaft Restraint (Not Spared) – Transfix Load Module Ground Strap (Not Spared) Xerox Internal Use Only - Revised, 3rd Revision Parts List October 2012 PL 2.1 ColorQube 8570/8870 Service Manual... -
Page 308: Pl 3.1 Paper Path
Pick Assembly and Retard Roller 050E29040 525-Sheet Tray (adjustable to legal) 059K76570 525-Sheet Feeder (HCF) with Tray 038K23440 Exit Module Assembly 032K09900 Assembly, Guide, Out Takeaway Parts List Revised, 3rd Revision - Xerox Internal Use Only October 2012 PL 3.1 ColorQube 8570/8870 Service Manual... -
Page 309: Pl 4.1 Drive
Drum Cooling Fan 007K20021 Process Drive with Gear Box and Motor 004K07630 Damper, CAM, Head Tilt 807E16060 Head Tilt Missing Tooth Gear Xerox Internal Use Only - Revised, 3rd Revision Parts List October 2012 PL 4.1 ColorQube 8570/8870 Service Manual... -
Page 310: Pl 5.1 Electrical
Cable, Wave Amp Signal 117E36970 Cable, ZIF, Wave Amp Drive 117E29840 Cable, Printhead Interface 952K00190 ASM, Jetstack Fuse 117E36740 Cable, Right Umbilical Parts List Revised, 3rd Revision - Xerox Internal Use Only October 2012 PL 5.1 ColorQube 8570/8870 Service Manual... -
Page 311: Pl 6.1 Sensors And Actuators
Sensor, Drum Temperature 110E20390 (Safety) Front Door/Exit Door Interlock Switch 130E12620 Sensor, Waste Tray Opto 386732680 Engine Exit Flag 930K01500 Exit Module Sensor Assembly Xerox Internal Use Only - Revised, 3rd Revision Parts List October 2012 PL 6.1 ColorQube 8570/8870 Service Manual... -
Page 312: Xerox Supplies And Accessories
108R00965 Description Part Number Maintenance Kit, Standard Capacity, ColorQube 8570/8870 109R00784 Xerox ColorQube Ink (C), ColorQube 8570 (2 Sticks), North America 108R00926 Maintenance Kit, Extended Capacity, ColorQube 8570/8870 109R00783 Xerox ColorQube Ink (M), ColorQube 8570 (2 Sticks), North America 108R00927... - Page 313 Table 4 Kits and Other Items Description Part Number Inbox Kit, 8570/8870 (110V) 650K32340 Inbox Kit, 8570/8870(220V) 650K32510 Xerox Internal Use Only - Revised, 3rd Revision Parts List October 2012 Xerox Supplies and Accessories ColorQube 8570/8870 Service Manual 5-11...
- Page 314 Parts List Revised, 3rd Revision - Xerox Internal Use Only October 2012 Xerox Supplies and Accessories 5-12 ColorQube 8570/8870 Service Manual...
- Page 315 Operating Systems and Application Problems ..............6-51 Network Problems......................6-53 USB Port Testing ......................6-54 Firmware Upgrade ......................6-55 Printhead Cleaning Cycle....................6-55 Printhead Troubleshooting Checklist ................6-56 Xerox Internal Use Only - Revised, 3rd Revision General Troubleshooting October 2012 ColorQube 8570/8870 Service Manual...
- Page 316 General Troubleshooting Revised, 3rd Revision - Xerox Internal Use Only October 2012 ColorQube 8570/8870 Service Manual...
-
Page 317: Printer Power On Process
Table 1 provides typical timing of mechanical events that occur in the ColorQube 8570/8870 relative to power-on, assuming the printer is Control Panel displays “ColorQube 8570_8870 Power on Self Test 00:04 cold and was shutdown properly. Timing may also vary dependent on the Printhead position Complete.”... - Page 318 Mechanical Engine Initialization Diagram Figure 1 Mechanical Engine Initialization General Troubleshooting Revised, 3rd Revision - Xerox Internal Use Only October 2012 Printer Power On Process ColorQube 8570/8870 Service Manual...
-
Page 319: Hidden Service Menu
Turns On and Off the feature to automatically adjust the Print- head waveform for Drift. This is for manufacturing or engineering use only. Xerox Internal Use Only - Revised, 3rd Revision General Troubleshooting October 2012 Printer Power On Process, Hidden Service Menu... -
Page 320: Service Diagnostics
NOTE: Pressing any key may cause an abort if allowed by the test being performed. A power cycle is used to arbitrarily stop a test. General Troubleshooting Revised, 3rd Revision - Xerox Internal Use Only October 2012 Hidden Service Menu, Service Diagnostics... - Page 321 Refer to PS NVRAM Reset. press OK to Continue press any other key to Abort Abort - press any key to exit Xerox Internal Use Only - Revised, 3rd Revision General Troubleshooting October 2012 Service Diagnostics ColorQube 8570/8870 Service Manual...
- Page 322 NOTE: Jam History can only be accessed from Customer mode. There is no way to access the infor- mation from Service Diagnostics mode. General Troubleshooting Revised, 3rd Revision - Xerox Internal Use Only October 2012 Service Diagnostics ColorQube 8570/8870 Service Manual...
-
Page 323: Entering Service Diagnostics
Entering Service Diagnostics without Rebooting the Printer: This method does not provide access to all test functions. Tests are listed numerically. NOTE: Enter Service Diagnostics by rebooting the printer is recommended when troubleshoot- ing the printer. Xerox Internal Use Only - Revised, 3rd Revision General Troubleshooting October 2012 Service Diagnostics... -
Page 324: Service Diagnostics Menu Maps
Service Diagnostics Menu Maps The ColorQube 8570/8870 Service Diagnostics Menu Maps are not available from the Control Panel. Figure 1 Figure 2 contain the list of functions available in the Service Diagnostics Menu. Figure 1 Service Diagnostics Menu Map (1 of 2) - Page 325 Figure 2 Service Diagnostics Menu Map (2 of 2) Xerox Internal Use Only - Revised, 3rd Revision General Troubleshooting October 2012 Service Diagnostics Menu Maps ColorQube 8570/8870 Service Manual 6-11...
-
Page 326: Service Diagnostics Tests
See the Exercise menu table for a • Tray 4 Out of Media description of the individual test functions and results. General Troubleshooting Revised, 3rd Revision - Xerox Internal Use Only October 2012 Service Diagnostics Tests 6-12 ColorQube 8570/8870 Service Manual... - Page 327 Auto exit if no input for 10s. play result for the Power Saver but- operator abort <button> pressed ton. press any key to exit <button> released Xerox Internal Use Only - Revised, 3rd Revision General Troubleshooting October 2012 Service Diagnostics Tests ColorQube 8570/8870 Service Manual 6-13...
- Page 328 A change in heating behavior could indicate a problem with cooling or the thermal conductivity through the mounting. General Troubleshooting Revised, 3rd Revision - Xerox Internal Use Only October 2012 Service Diagnostics Tests 6-14 ColorQube 8570/8870 Service Manual...
- Page 329 A change in heating on period. behavior could indicate a problem with cooling or the thermal conductivity through the mounting. Xerox Internal Use Only - Revised, 3rd Revision General Troubleshooting October 2012 Service Diagnostics Tests ColorQube 8570/8870 Service Manual 6-15...
- Page 330 CW), so that able. its operation may be visually verified. The permanently connected Shafts will jog also. General Troubleshooting Revised, 3rd Revision - Xerox Internal Use Only October 2012 Service Diagnostics Tests 6-16 ColorQube 8570/8870 Service Manual...
- Page 331 Clutch and drives Pause displayed. edly until interrupted by a the related Motor. Control Panel button press. operator abort Xerox Internal Use Only - Revised, 3rd Revision General Troubleshooting October 2012 Service Diagnostics Tests ColorQube 8570/8870 Service Manual 6-17...
- Page 332 This test checks the Pick Clutch, Nudger Roller, and Separator Pad performance, although information is obtained about bearing, gear and shaft condition. General Troubleshooting Revised, 3rd Revision - Xerox Internal Use Only October 2012 Service Diagnostics Tests 6-18 ColorQube 8570/8870 Service Manual...
- Page 333 The function cycles the Motor/Shaft repeatedly until interrupted by a Control Panel button press. Xerox Internal Use Only - Revised, 3rd Revision General Troubleshooting October 2012 Service Diagnostics Tests ColorQube 8570/8870 Service Manual 6-19...
- Page 334 Heater (reported as a per- operator abort centage of the maximum rated power for that Heater). General Troubleshooting Revised, 3rd Revision - Xerox Internal Use Only October 2012 Service Diagnostics Tests 6-20 ColorQube 8570/8870 Service Manual...
- Page 335 Fast printing speed. a short period. The Y-Axis idle rotation tracks the state of the Drum Heater to keep the Drum evenly heated. Xerox Internal Use Only - Revised, 3rd Revision General Troubleshooting October 2012 Service Diagnostics Tests ColorQube 8570/8870 Service Manual...
- Page 336 Tray 5 through the simplex paper through the simplex paper path of Fast printing speed. path of Fast printing speed. General Troubleshooting Revised, 3rd Revision - Xerox Internal Use Only October 2012 Service Diagnostics Tests 6-22 ColorQube 8570/8870 Service Manual...
- Page 337 The sequence is not guaranteed to handle all initial mechani- cal conditions. Xerox Internal Use Only - Revised, 3rd Revision General Troubleshooting October 2012 Service Diagnostics Tests ColorQube 8570/8870 Service Manual...
- Page 338 Abort restore all factory default val- Abort - press any key to ues. exit General Troubleshooting Revised, 3rd Revision - Xerox Internal Use Only October 2012 Service Diagnostics Tests 6-24 ColorQube 8570/8870 Service Manual...
-
Page 339: General Troubleshooting
For events involving components, such as the Drum, Transfix Roller, or Ink Sticks, power cycling is recom- mended before additional testing is performed. Xerox Internal Use Only - Revised, 3rd Revision General Troubleshooting October 2012... -
Page 340: Electrical Troubleshooting
Disconnect all 3rd party devices and cables, then reboot the printer. Perform the selected test. Xerox printers are tested without 3rd party devices and cables; these may cause the Re-examine the event list. printer to fail. Always remove these devices and test the printer. - Page 341 To troubleshoot step 4, go to Printer Fails Power-up: +50V LED Does Not Illuminate in Chapter 6, General Troubleshooting. Figure 1 Printer Grounds Xerox Internal Use Only - Revised, 3rd Revision General Troubleshooting October 2012 Electrical Troubleshooting ColorQube 8570/8870 Service Manual...
- Page 342 The +50V will not be on at all time. The +50V can be Off when the printer is at Ready mode. Figure 3 Power Control Board LEDs (right side view) General Troubleshooting Revised, 3rd Revision - Xerox Internal Use Only October 2012 Electrical Troubleshooting...
- Page 343 Chapter 2 (Fault Messages and Codes) for troubleshooting fault codes on these LEDs. Figure 4 Main Controller Board LEDs (right side view) Figure 6 I/O Board LED Figure 5 Main Controller Board LEDs Xerox Internal Use Only - Revised, 3rd Revision General Troubleshooting October 2012 Electrical Troubleshooting...
- Page 344 +50V pwm’ed, to Deskew Clutch, Pick Clutch, Pick Solenoid F401 +50V F402 +50V pwm’ed, to Ink Loader Solenoids F501 +3.3V Sleep General Troubleshooting Revised, 3rd Revision - Xerox Internal Use Only October 2012 Electrical Troubleshooting 6-30 ColorQube 8570/8870 Service Manual...
- Page 345 Make sure to find the short before replacing the Power Control Board. Turn On the power switch. Xerox Internal Use Only - Revised, 3rd Revision General Troubleshooting October 2012 Electrical Troubleshooting...
- Page 346 Look for pinched wires and bent pins on the I/O Board. 3.3 volts and 3.3 volts sleep are carried on the printer’s gray ribbon cables. Disconnect the harnesses to isolate, if necessary. General Troubleshooting Revised, 3rd Revision - Xerox Internal Use Only October 2012 Electrical Troubleshooting 6-32...
- Page 347 12) and the triac channels (listed in Table 3). If the meter reads greater than 50k ohms, the triac has not been damaged. Xerox Internal Use Only - Revised, 3rd Revision General Troubleshooting October 2012 Electrical Troubleshooting ColorQube 8570/8870 Service Manual...
- Page 348 Printhead Reservoir #1 JAC2 Printhead Jetstack Right JAC2 Printhead Jetstack Left JAC3 Paper Preheater JAC3 Drum Heater #2 JAC3 Drum Heater #1 General Troubleshooting Revised, 3rd Revision - Xerox Internal Use Only October 2012 Electrical Troubleshooting 6-34 ColorQube 8570/8870 Service Manual...
- Page 349 With the power cord connected, touch the metal Electronics Module to discharge any static electricity. Turn off the printer. Xerox Internal Use Only - Revised, 3rd Revision General Troubleshooting October 2012 Electrical Troubleshooting...
- Page 350 J301, pins 4 and 8 to ground. Resistance of less than 50 ohms indicates a problem. Loader. Verify the harness is OK by disconnecting P/J801 on the I/O Board and retesting with the ohmmeter at P/J301. General Troubleshooting Revised, 3rd Revision - Xerox Internal Use Only October 2012 Electrical Troubleshooting 6-36 ColorQube 8570/8870 Service Manual...
- Page 351 Touch the Metal Electronics module to discharge any static electricity. Connect this cable to the Electronics Module. • Power Control to Ink Loader Board ( P/J401) Xerox Internal Use Only - Revised, 3rd Revision General Troubleshooting October 2012 Electrical Troubleshooting...
- Page 352 Attach the printer covers. Attach the printer covers. Perform full test of printer. Perform full test of the printer. General Troubleshooting Revised, 3rd Revision - Xerox Internal Use Only October 2012 Electrical Troubleshooting 6-38 ColorQube 8570/8870 Service Manual...
- Page 353 (Standby Settings), once a day, at pre-determined times. Use CentreWare IS to program Record any fault codes and report to Xerox Technical Support. If the printer detects the times. When Scheduled is selected, the printer will go to Standby after 2 minutes of...
- Page 354 91,900 should appear on the display to indicate the Printhead is disconnected. If the correct fault code is displayed, continue with the next steps of the procedure. General Troubleshooting Revised, 3rd Revision - Xerox Internal Use Only October 2012 Electrical Troubleshooting...
-
Page 355: Control Panel Malfunction
With the power cord connected, touch the Electronics Module to discharge any static electricity to prevent ESD damage to the printer may occur if static electricity is dis- charged to printer electronics. Xerox Internal Use Only - Revised, 3rd Revision General Troubleshooting October 2012... -
Page 356: Media Path And Transport Problems
Run the Paper Path test: Service Diagnostics Menu -> Exercise Menu -> Blank Print Menu. 10. Inspect the Rollers, Bushings and Gears of the paper path. General Troubleshooting Revised, 3rd Revision - Xerox Internal Use Only October 2012 Control Panel Malfunction, Media Path and Transport 6-42... - Page 357 Front Door is properly closed. The printer should be installed on a flat, level surface. Ensure the Preheater is clean and properly seated into the printer frame. Xerox Internal Use Only - Revised, 3rd Revision General Troubleshooting October 2012...
- Page 358 General Troubleshooting Revised, 3rd Revision - Xerox Internal Use Only October 2012 Media Path and Transport Problems 6-44 ColorQube 8570/8870 Service Manual...
-
Page 359: Noise Troubleshooting
Simplex in Enhanced mode. come into contact with the Drum Pulley resulting a metallic rubbing noise. Xerox Internal Use Only - Revised, 3rd Revision General Troubleshooting October 2012 Noise Troubleshooting ColorQube 8570/8870 Service Manual... -
Page 360: Of1 Drum Ground Plane Rubbing
Media Drive with 2 Clutches). Power Down The printer is in progress of powering Power Down off. Figure 1 Checking the Exit Module General Troubleshooting Revised, 3rd Revision - Xerox Internal Use Only October 2012 Noise Troubleshooting, OF1 6-46 ColorQube 8570/8870 Service Manual... -
Page 361: Of2 Drum Knocking (Drum Belt)
Troubleshooting complete. Replace the Y-Axis Belt (REP 2.5). Replace the Y-Axis Motor Assembly (REP 4.2). Figure 1 Checking the Y-Axis Belt Xerox Internal Use Only - Revised, 3rd Revision General Troubleshooting October 2012 OF2, OF3 ColorQube 8570/8870 Service Manual 6-47... -
Page 362: Of4 Tray 1 - Squeaking
Open and close Tray 1. This will reset the Pick Roller position and should eliminate the noise. Troubleshooting complete. Replace the Separator Pad Kit (REP 3.9). General Troubleshooting Revised, 3rd Revision - Xerox Internal Use Only October 2012 OF4, OF5 6-48 ColorQube 8570/8870 Service Manual... -
Page 363: Of6 Process Motor Gear Box (Transfix Output Gear)
Replace the Process Drive Assembly (REP 4.13). Figure 1 Checking the Transfix Output Gear Figure 1 Checking the Compound/ Helical Gear Xerox Internal Use Only - Revised, 3rd Revision General Troubleshooting October 2012 OF6, OF7 ColorQube 8570/8870 Service Manual 6-49... -
Page 364: Of8 Gear Skipping (Head Maintenance Train/ Media Path Gear Box)
Replace the Media Drive Assembly (REP 4.5). Tighten the Head Maintenance Gear. Figure 1 Checking the Head Maintenance Gear and Media Drive Assembly General Troubleshooting Revised, 3rd Revision - Xerox Internal Use Only October 2012 OF8, OF9 6-50 ColorQube 8570/8870 Service Manual... -
Page 365: Operating Systems And Application Problems
Start Jobs. Try your print job again. default web browser to send diagnostic information from the printer to the Xerox web site for In the Printer Setup Utility, select your printer. In the Printers menu, select Show Info. - Page 366 Additional Resources • Quick Install Steps For users that want to use the CUPS driver instead of CentreWare for Unix, access the Xerox • Additional resources web site for the latest CUPS ppd package at www.support.xerox.com. To download printer driv- Your printer supports connection to a variety of UNIX platforms.
-
Page 367: Network Problems
Ethernet Port is functional. If the request times out and fails to reply, either the cable or net port is functioning. If the request times out and fails, the cable or the port are malfunc- the port is defective. tioning. Xerox Internal Use Only - Revised, 3rd Revision General Troubleshooting October 2012 Network Problems... -
Page 368: Usb Port Testing
The trace should appear in the terminal dialog window. Examine the trace to troubleshoot the problem. Save the trace as a file, if necessary. General Troubleshooting Revised, 3rd Revision - Xerox Internal Use Only October 2012 Network Problems, USB Port Testing... -
Page 369: Firmware Upgrade
Printhead to the forward print position. Hold down the Cancel and Up buttons simultaneously while the XEROX logo is displayed After the print engine is in a known valid state, the Control Panel display shows the warm- on the Control Panel. -
Page 370: Printhead Troubleshooting Checklist
The Printhead Troubleshooting Checklist provides the procedure for troubleshooting Printhead problems. Complete this checklist as part of the Printhead replacement process. NOTE: The Printhead Troubleshooting Checklist is available on the ColorQube 8570/8870 EDOC CD-ROM and ColorQube 8570/8870 Service Manual (PDF format). -
Page 371: Wiring Data
7 Wiring Data How to Use the Plug/ Jack Location List ................. Plug/Jack Locations ......................Wire Routing Diagrams ....................7-11 Wiring Diagrams......................7-15 Xerox Internal Use Only - Revised, 3rd Revision Wiring Data October 2012 ColorQube 8570/8870 Service Manual... - Page 372 Wiring Data Revised, 3rd Revision - Xerox Internal Use Only October 2012 ColorQube 8570/8870 Service Manual...
- Page 373 Connects the I/O Board to the Drum Maintenance Pivot P/J240 Figure 6 E-106 Connects the Printhead Heater to the Wave Amp. Plate. Xerox Internal Use Only - Revised, 3rd Revision Wiring Data October 2012 How to Use the Plug/ Jack Location List ColorQube 8570/8870 Service Manual...
- Page 374 Connects the Power Supply Board to the Power Control Board. Figure 2 E-107 Printer USB Port Figure 1 Front Side P/J Locations Wiring Data Revised, 3rd Revision - Xerox Internal Use Only October 2012 How to Use the Plug/ Jack Location List, Plug/Jack ColorQube 8570/8870 Service Manual...
- Page 375 Right Side Electronics Module Left Side Electronics Module Figure 2 Right Side Electronics Module P/J Locations Figure 3 Left Side Electronics Module P/J Locations Xerox Internal Use Only - Revised, 3rd Revision Wiring Data October 2012 Plug/Jack Locations ColorQube 8570/8870 Service Manual...
- Page 376 Top Side Electronics Module I/O Board Figure 5 I/O Board P/J Locations Figure 4 Top Side Electronics Module P/J Locations Wiring Data Revised, 3rd Revision - Xerox Internal Use Only October 2012 Plug/Jack Locations ColorQube 8570/8870 Service Manual...
- Page 377 Printhead Wave Amplifier Figure 6 Printhead P/J Locations Figure 7 Wave Amp P/J Locations Xerox Internal Use Only - Revised, 3rd Revision Wiring Data October 2012 Plug/Jack Locations ColorQube 8570/8870 Service Manual...
- Page 378 Main Controller Board Power Control Board Figure 8 Main Controller Board P/J Locations Figure 9 Power Control Board P/J Locations Wiring Data Revised, 3rd Revision - Xerox Internal Use Only October 2012 Plug/Jack Locations ColorQube 8570/8870 Service Manual...
- Page 379 Power Supply Ink Loader Board Figure 10 Power Supply P/J Locations Figure 11 Ink Loader Board P/J Locations Xerox Internal Use Only - Revised, 3rd Revision Wiring Data October 2012 Plug/Jack Locations ColorQube 8570/8870 Service Manual...
- Page 380 Ink Loader Thermistor Drum Temperature Sensor Figure 12 Ink Loader Thermistor P/J Location Figure 13 Drum Temperature Sensor P/J Location Wiring Data Revised, 3rd Revision - Xerox Internal Use Only October 2012 Plug/Jack Locations 7-10 ColorQube 8570/8870 Service Manual...
- Page 381 P/J201 Figure 6 Connects the Power Supply (Electronics Module) to the Printhead. P/J240 Figure 6 Connects the Printhead Heater to the Wave Amplifier. Xerox Internal Use Only - Revised, 3rd Revision Wiring Data October 2012 Plug/Jack Locations, Wire Routing Diagrams...
- Page 382 P/JAC2 Figure 6 Connects the printer Power Supply (Electronics Module) to the Printhead Heaters. Figure 1 Right Side Wire Routing Wiring Data Revised, 3rd Revision - Xerox Internal Use Only October 2012 Wire Routing Diagrams 7-12 ColorQube 8570/8870 Service Manual...
- Page 383 Left Side Wiring Front Side Wiring Figure 2 Left Side Wire Routing Figure 3 Front Side Wire Routing Xerox Internal Use Only - Revised, 3rd Revision Wiring Data October 2012 Wire Routing Diagrams ColorQube 8570/8870 Service Manual 7-13...
- Page 384 Figure 4 Bottom Front Wire Routing Top Front Wiring Figure 6 Top Side Wire Routing Figure 5 Top Front Wire Routing Wiring Data Revised, 3rd Revision - Xerox Internal Use Only October 2012 Wire Routing Diagrams 7-14 ColorQube 8570/8870 Service Manual...
- Page 385 Wave Amplifier, Print Head, Print Head Heaters System Block Figure 2 Wave Amplifier, Printhead, Print Head Heaters Figure 1 System Block Diagram Xerox Internal Use Only - Revised, 3rd Revision Wiring Data October 2012 Wiring Diagrams ColorQube 8570/8870 Service Manual...
- Page 386 Optional Tray, Clutches, Solenoids, Tray 2 Lift Motor Figure 3 Purge Pump, Media Path Motor, Fans, Printhead Tilt Solenoid Figure 4 Optional Tray, Clutches, Solenoids, Tray 2 Lift Motor Wiring Data Revised, 3rd Revision - Xerox Internal Use Only October 2012 Wiring Diagrams 7-16...
- Page 387 Ink Level Sensors, Gate Solenoids, Ink Loader Board Hard Drive, Drum Heater, Paper Preheater Figure 6 Hard Drive, Drum Heater, Paper Preheater Figure 5 Ink Level Sensors, Gate Solenoids, Ink Loader Board Xerox Internal Use Only - Revised, 3rd Revision Wiring Data October 2012 Wiring Diagrams...
- Page 388 Solenoid Figure 7 Drum Heater Load Dump, Motors, Head Maintenance Clutch, Strip Solenoid Figure 8 I/O Board, Sensors (1 of 2) Wiring Data Revised, 3rd Revision - Xerox Internal Use Only October 2012 Wiring Diagrams 7-18 ColorQube 8570/8870 Service Manual...
- Page 389 I/O Board, Sensors (2 of 2) Figure 9 I/O Board, Sensors (2 of 2) Xerox Internal Use Only - Revised, 3rd Revision Wiring Data October 2012 Wiring Diagrams ColorQube 8570/8870 Service Manual 7-19...
- Page 390 Wiring Data Revised, 3rd Revision - Xerox Internal Use Only October 2012 Wiring Diagrams 7-20 ColorQube 8570/8870 Service Manual...
-
Page 391: Theory Of Operation
8 Theory of Operation Operational Overview...................... Paper Path of the Printer....................Sensors ........................... Printer Electronics ......................System Drive........................8-17 Print Process........................8-20 Purge System........................8-32 Xerox Internal Use Only - Revised, 3rd Revision Theory of Operation October 2012 ColorQube 8570/8870 Service Manual... - Page 392 Theory of Operation Revised, 3rd Revision - Xerox Internal Use Only October 2012 ColorQube 8570/8870 Service Manual...
-
Page 393: Operational Overview
Operational Overview System Overview The ColorQube 8570/8870 consists of the Control Panel, Print Engine, and Optional Sheet The ColorQube 8570/8870 uses a Printhead and new ink formulation to produce color or black Feeder. and white output. Figure 2 ColorQube 8570/8870 Subassemblies The printer is made up of ten major subsystems. - Page 394 Printhead jets. Electronics Module The Electronics Module includes the Main Controller Board, Power Control Board, and the Power Supply. Theory of Operation Revised, 3rd Revision - Xerox Internal Use Only October 2012 Operational Overview ColorQube 8570/8870 Service Manual...
-
Page 395: Paper Path Of The Printer
Drum. Then, the paper is routed through the Preheater, between the Transfix Roller and Drum, to the Output Tray. Figure 1 ColorQube 8570/8870 Paper Path Figure 2 Tray 1 Pick Diagram Xerox Internal Use Only - Revised, 3rd Revision Theory of Operation October 2012 Paper Path of the Printer... - Page 396 Only the Exit Roller reverses during duplex printing. Figure 3 Tray 1 Pick Mechanism Figure 4 Paper Path Sensors Theory of Operation Revised, 3rd Revision - Xerox Internal Use Only October 2012 Paper Path of the Printer ColorQube 8570/8870 Service Manual...
- Page 397 Preheater and transfix system to the Exit Tray in the same manner as a single-sided print. Figure 5 Tray 2/ 3/ 4/ 5 Pick Diagram Figure 6 Duplex Drive Components Xerox Internal Use Only - Revised, 3rd Revision Theory of Operation October 2012 Paper Path of the Printer...
-
Page 398: Sensors
(interlock), detect the presence and size of media, and monitor printer temperatures. Figure 7 Preheater Components Figure 1 Sensor Locations Theory of Operation Revised, 3rd Revision - Xerox Internal Use Only October 2012 Paper Path of the Printer, Sensors ColorQube 8570/8870 Service Manual... -
Page 399: Printer Electronics
The Temperature Sensors (Thermistors) have a known value of resistance whose value varies with temperature. The Temperature Sensors are used primarily in the Drum, Preheater, and Printhead for temperature sensing. Figure 2 Electronics Components Xerox Internal Use Only - Revised, 3rd Revision Theory of Operation October 2012 Sensors, Printer Electronics... - Page 400 NVRAM must be transferred to the Main Controller Board in the replacement Electronics Module. Memory The ColorQube 8570/8870 supports up to two 512 MB of DDR2 DIMMs for a maximum of 1 GB total. NOTE: Memory should be installed in the primary socket before installing in the secondary socket.
- Page 401 Printhead. The Power Control Board also generates regulated 1.8V and 12V. Figure 5 Main Controller Board Figure 6 Power Control Board Xerox Internal Use Only - Revised, 3rd Revision Theory of Operation October 2012 Printer Electronics...
- Page 402 +12V_SLEEP in Power Saver modes. Fuse F1 provides protection for the switch- ing Power Supply in the DC section. Figure 8 Power Supply Wiring Diagram Figure 7 Power Supply Theory of Operation Revised, 3rd Revision - Xerox Internal Use Only October 2012 Printer Electronics 8-12 ColorQube 8570/8870 Service Manual...
- Page 403 FPGA Motors Y-Axis Motor The FPGA is the Printhead interface and motor controller for the ColorQube 8570/8870 printer. The Y-Axis Motor is a DC Motor with an encoder that is used to turn the Drum. The Power Con- Figure 9 illustrates the Block Diagram for FPGA.
- Page 404 Main Board. It is then passed through a switching regulator. The Power Control Board con- nects 3.3V to 3.3V_SLEEP with a switch when not in power saving modes. Theory of Operation Revised, 3rd Revision - Xerox Internal Use Only October 2012 Printer Electronics...
- Page 405 Figure 14 Wave Amplifier Signal Diagram Xerox Internal Use Only - Revised, 3rd Revision Theory of Operation October 2012...
- Page 406 Amp driver. The pulse sequence is common to all active PZT elements when the head is fired. The repetition rate is optimized for the specific print head design. Theory of Operation Revised, 3rd Revision - Xerox Internal Use Only October 2012 Printer Electronics...
-
Page 407: System Drive
Hard Disk Drive Board to provide signals and power for the Hard Disk Drive Board. Figure 16 Hard Disk Drive Figure 1 System Drive Component Locations Xerox Internal Use Only - Revised, 3rd Revision Theory of Operation October 2012 Printer Electronics, System Drive... - Page 408 Drum Maintenance System is controlled by the rotational direction of the Motor. after it is fully loaded. Figure 3 Transfix Roller is loaded Figure 2 Process Drive Assembly Theory of Operation Revised, 3rd Revision - Xerox Internal Use Only October 2012 System Drive 8-18 ColorQube 8570/8870 Service Manual...
- Page 409 Figure 4 Transfix and Drum Maintenance are loaded The Drum Maintenance stays loaded as the Transfix unloads. Figure 6 Media Drive Assembly Figure 5 Drum Maintenance is loaded Xerox Internal Use Only - Revised, 3rd Revision Theory of Operation October 2012 System Drive...
-
Page 410: Print Process
Belts and gears can be severely injured. Figure 1 Drum Oiling Theory of Operation Revised, 3rd Revision - Xerox Internal Use Only October 2012 Print Process 8-20 ColorQube 8570/8870 Service Manual... - Page 411 See Jet Substitution Mode Chapter 3 - Image Quality. Figure 2 Ink Loading Xerox Internal Use Only - Revised, 3rd Revision Theory of Operation October 2012 Print Process ColorQube 8570/8870 Service Manual...
- Page 412 Figure 3 Ink Stick Gate Figure 4 Chute Level Sense and SKU Configuration Sensors Theory of Operation Revised, 3rd Revision - Xerox Internal Use Only October 2012 Print Process 8-22...
- Page 413 Heaters in the reservoir and the jet array keep the ink in a liquid state. Figure 6 Printhead Detail Figure 5 Printhead Components Xerox Internal Use Only - Revised, 3rd Revision Theory of Operation October 2012...
- Page 414 The head-to-drum buttons define the space between the Jet Stack and the Drum. Figure 7 Printhead X-Axis Drive Figure 8 Print/ Ready Position Theory of Operation Revised, 3rd Revision - Xerox Internal Use Only October 2012 Print Process 8-24 ColorQube 8570/8870 Service Manual...
- Page 415 Printhead tilt arm/ follower is engaged at the Park position of the Tilt the correct force for the wiper. Cam. Figure 10 Wipe Position Figure 9 Park/ Sleep Position Xerox Internal Use Only - Revised, 3rd Revision Theory of Operation October 2012 Print Process ColorQube 8570/8870 Service Manual...
- Page 416 Printhead is back and locked) by the right restraint and the left home stop on the left side frame. Figure 11 Wiper Bypass Position Figure 12 Printhead Tilt Drive Theory of Operation Revised, 3rd Revision - Xerox Internal Use Only October 2012 Print Process 8-26 ColorQube 8570/8870 Service Manual...
- Page 417 Tilt Cam Gear and tilts the Printhead. After one revolution of the Tilt Gear, the latching mechanism is pulled back into position by the Head Tilt Solenoid. Figure 13 Head Tilt Gear Detail Figure 14 Drum Assembly Xerox Internal Use Only - Revised, 3rd Revision Theory of Operation October 2012 Print Process...
- Page 418 Keep your fingers away from the Drum drive; it uses a closed-loop servo drive system. Since the motor speeds up if it senses the Drum slowing down, fingers caught in the Belts and gears can be severely injured. Theory of Operation Revised, 3rd Revision - Xerox Internal Use Only October 2012 Print Process 8-28...
- Page 419 Drum Maintenance System to track consumable life. At startup, four oiling cycles are performed to condition the Drum. Figure 17 Drum Maintenance Xerox Internal Use Only - Revised, 3rd Revision Theory of Operation October 2012 Print Process...
- Page 420 Drum stops rotating and the Transfix Roller is lifted by the Process Drive. Figure 18 Printhead Wiper Blade Theory of Operation Revised, 3rd Revision - Xerox Internal Use Only October 2012 Print Process 8-30 ColorQube 8570/8870 Service Manual...
- Page 421 Module. The media is then fed out over the Ink Loader until the trailing edge is at the nip of the Exit Module Roller. Figure 19 Transfix Components Figure 20 Exit Path Xerox Internal Use Only - Revised, 3rd Revision Theory of Operation October 2012 Print Process...
-
Page 422: Purge System
Purge fail- ures are only counted for weak or missing jets that can be cleared by cleaning cycle. Figure 1 Purge System Theory of Operation Revised, 3rd Revision - Xerox Internal Use Only October 2012 Purge System 8-32... - Page 424 Copyright © 2010-2012, Xerox Corporation. All rights reserved. Unpublished rights reserved under the copyright laws of the United States. Part#: 705P01286...
- Page 425 Printhead Troubleshooting Checklist ColorQube 8570/8870/8700/8900 Version 3.0 IMPORTANT! This checklist outlines proper Printhead troubleshooting procedures. All Xerox service employees and any other service personnel on any job involving a Printhead replacement should perform the procedures. Service Person Name Service Company...
- Page 426 How to identify ColorQube 8570, 8870, Note: 8700, and 8900 Xerox Ink Sticks • Verify that the molded Xerox is shown on top of the ink stick. ColorQube 8570/ 8870 1. ColorQube 8570 N/ DN/ DT 2. ColorQube 8870 DN ColorQube 8700/ 8900 1.
- Page 427 SKU’s can be determined by looking at size of the ink stick and the bottom of the ink stick. Compare the letter pattern for the different regions. There are different ink SKU’s available for the ColorQube 8570/ 8870/ 8700/ 8900 printer. ColorQube 8570/ 8700 Ink SKU...
- Page 428 Loader channel. Verify and correct for the wrong color, brand or indicating ink Circle one model of ink loaded in the Ink Loader. Use ColorQube 8570/ contamination? 8870/ 8700/ 8900 ink stick to verify the Printhead level sense works correctly.
- Page 429 Printhead (outlined in red in the illustration)? Is the Faceplate Example of Bad Wipe Action contaminated? Circle one If YES, replace the Wiper Assembly. Repeat the checklist stating in Step 5. Copyright © 2012 by Xerox Corporation. All rights reserved. 604E56261 Page 5...
- Page 430 9a. Empty the Waste Tray. Purge System. 9b. From the printer Control Panel, select: ColorQube 8570/ 8870: Eliminate Light Stripes - Basic and run one cleaning cycle. ColorQube 8700/ 8900: Machine Status button > Tools > Troubleshooting > Fix Image Quality > Light Lines > Fix.
- Page 431 To substitute a working jet for the missing jet, perform the following procedure. From the Control Panel, select: ColorQube 8570/ 8870: Troubleshooting > Print Quality Problems > Eliminate Light Stripes > Jet Substitution Mode. ColorQube 8700/ 8900: Machine Status button > Tools >...
- Page 432 Evidence that the printer was tipped or moved while the Printhead was hot is shown in the illustrations. An abnormally raised level of ink in a reservoir (shown in the Magenta reservoir) Ink overflow can also indicate the use of poor-quality, non-Xerox ink that has clogged the Printhead’s Filter. Check for the use of non-Xerox ink.
- Page 433 IMPORTANT – Note the brand and lot code of the generic ink, if available. A completed checklist and sample prints must be returned with each Printhead. Xerox reserves the right to refuse reimbursement to service personnel who do not enclose a completed the Troubleshooting Checklist and a sample print from the malfunctioning Printhead with each returned Printhead.
Need help?
Do you have a question about the ColorQube 8570 and is the answer not in the manual?
Questions and answers