Table of Contents
Advertisement
Copyright Information
This document contains proprietary information that is protected by copyright. No part of this document may be photocopied, reproduced, or
translated to another language without the prior written consent of FELIXrobotics BV.
FelixRobotics BV
Wapendragervlinder 17
3544DL Utrecht
Netherlands
Copyright © 2013 FELIXrobotics.
support@FELIXprinters.com
Assembly instruction manual FELIX 2.0 3d printer
Version1 – 24-August -2013
www.FELIXprinters.com
Page 1 of 51
Advertisement
Table of Contents

Related Manuals for Felix printers Felix 2.0


Summary of Contents for Felix printers Felix 2.0
- Page 1 Assembly instruction manual FELIX 2.0 3d printer Version1 – 24-August -2013 Copyright Information This document contains proprietary information that is protected by copyright. No part of this document may be photocopied, reproduced, or translated to another language without the prior written consent of FELIXrobotics BV.
-
Page 2: Table Of Contents
Assembly instruction manual FELIX 2.0 3d printer CONTENTS CONTENTS INTRODUCTION REQUIRED TOOLSET REQUIRED SKILLS IMPORTANT NOTE MODULE 1: FRAME (TIME: 10-30 MINUTES) MODULE 2: Z-AXIS (TIME: 45-90 MIN.) MODULE 3: THE EXTRUDER (TIME: 30-90 MIN.) MODULE 3: THE X-AXIS (TIME: 30-60 MIN.) MODULE 5: TABLE (TIME: 1-2 HOURS) MODULE 6: Y-AXIS (TIME: 10-30 MIN.) -
Page 3: Introduction
Assembly instruction manual FELIX 2.0 3d printer INTRODUCTION First of all thank you choosing FELIXprinters! To get your Felix printer up and running as fast and painless as possible please follow this manual carefully. When things are unclear or if you have any remarks or tips, please contact us at support@felixprinters.com. -
Page 4: Required Toolset
Assembly instruction manual FELIX 2.0 3d printer REQUIRED TOOLSET The following tools are minimally required to assemble and use the Felix printer Wrenches 7 and 13mm Tweezers. (included in kit) Nippers. Caliper Allen Key set. IMPORTANT: they need to be preferably long and have a round head at the end. -
Page 5: Required Skills
Assembly instruction manual FELIX 2.0 3d printer REQUIRED SKILLS The following skills are required to put the Felix printer together: Basic soldering skills Skills to assemble a mechanical construction Technical insight Common sense If you lack any of these skills or are unsure please get help from someone who can guide you or do this for you... -
Page 6: Module 1: Frame (Time: 10-30 Minutes)
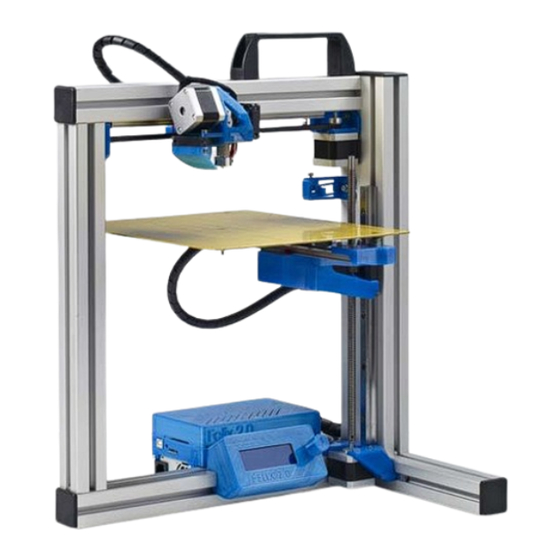
Assembly instruction manual FELIX 2.0 3d printer MODULE 1: FRAME (TIME: 10-30 MINUTES) Required for this module Tools Allen key set Level reference surface Level Parts Bag with description ‘frame module’. Aluminum beams. Overview of frame module The goal of this module is to create the frame on the right. Try to make everything as perpendicular as possible to each other. Let surfaces align as good as possible. - Page 7 Assembly instruction manual FELIX 2.0 3d printer Take beam 4 and 1. They must be connected as oriented in the above picture. Slide one of the two beams number 2 onto beam 1. Watch the orientation of the drilled hole.
- Page 8 Assembly instruction manual FELIX 2.0 3d printer Next try to slide it also on beam 4. Thighten the screws, again not too tight. Take beam 3. Screw both frame connectors on the far-ends. Slide it onto beam 2 and tighten it.
- Page 9 Assembly instruction manual FELIX 2.0 3d printer Topview of frame Get the protective caps and mount them carefully with a hammer When all the beams are aligned and leveled, it is time to firmly tighten the frame connectors. Put the damping feet underneath the frame near the edge The handle should be mounted in the final stages of assembly.
-
Page 10: Module 2: Z-Axis (Time: 45-90 Min.)
Assembly instruction manual FELIX 2.0 3d printer MODULE 2: Z-AXIS (TIME: 45-90 MIN.) Note: Most holes are designed to minimize the need for any post processing, like filing and drilling. Sometimes, however the bolts will not fit smoothly and it therefore needs to be drilled out slightly. Required drill sizes can be 3, 4 and 5mm. - Page 11 Assembly instruction manual FELIX 2.0 3d printer t_slot nut - 8 ST M4 Put three in the frame as indicated in the picture above. Put the motor in place and guide the wires through the hole Put some tape on the far edge of the rail to prevent the cart from Motor wires sliding off.
- Page 12 Assembly instruction manual FELIX 2.0 3d printer 12mm Start to align the z-axis guide. Push the bottom side against the printed part. Measure the distance of the edge as indicated above. The distance should be 12mm. Mount the 2 bearings.
- Page 13 Assembly instruction manual FELIX 2.0 3d printer As indicated screw on both sides m4x20 bolts into the part to clamp the 2 big plastic parts together. On the bottom insert the bronze nut into the plastic part. Mount the big part onto the cart of the linear bearing with M5x16...
- Page 14 Assembly instruction manual FELIX 2.0 3d printer M4x20 bolt M4 thin nut Take the z-axis_limitswitchvane and slide the nut into the slot. On top screw in an m4x20 bolt. Don’t screw it all the way in, let the tip of the Mount the opto-sensors with the small Philips head screws.
- Page 15 Assembly instruction manual FELIX 2.0 3d printer CAREFULLY Screw in the z-axis spindle from the top until it reaches the motor and place the z-axis assembly in the middle. Make sure the brass nut is inside the z-axis carrier assembly.
-
Page 16: Module 3: The Extruder (Time: 30-90 Min.)
Assembly instruction manual FELIX 2.0 3d printer MODULE 3: THE EXTRUDER (TIME: 30-90 MIN.) Collect the following tools Allen key set Large file Drill 4mm BOM Extruder Part description Amount Extru_base_v9_F1_5 Extru_base_pt2_v5_F1_5 Extru_base_pt4_F1_5 Extru_arm_v5_F_1_5 Extru_airduct_v2 motor nema 17 Fan 40x40x10mm... - Page 17 Assembly instruction manual FELIX 2.0 3d printer From right to left. M4x20 bolt, 2x small washer, bearing, small washer, plastic part, thin nut. Mount the extruder wheel onto the motor with the little set-screw from the bag of the extruder wheel. The set-screw should not stick out more then 0.5mm, because it might then scrape the surrounding plastic...
- Page 18 Assembly instruction manual FELIX 2.0 3d printer Insert the m4 self locking nuts into the hexagon holes of the extru_base_pt4, use an m4x20 bolt including washer as indicated above. Make sure the wires match and also the orientation of the sticker on the fan.
- Page 19 Assembly instruction manual FELIX 2.0 3d printer NOTE: Make sure the bolt goes picture above. straight into the nut! This bolt and washer combination will be used to put some tension on filament which will be pushed down into the hot-end.
- Page 20 Assembly instruction manual FELIX 2.0 3d printer Mount the fan and airduct with m4x20 bolts onto the extruder base. Use m4 selflocking nuts and also use washers.The bolts don’t have to go all the way through the self locking part of the nut.
- Page 21 Assembly instruction manual FELIX 2.0 3d printer Mount the extru_base_pt4 as shown above. Insert the belt tensioning part as shown above. Congratulations you’ve finished the extruder module! Move hot-end into slot and make sure edge of hot-end touches the base of the extruder.
-
Page 22: Module 3: The X-Axis (Time: 30-60 Min.)
Assembly instruction manual FELIX 2.0 3d printer MODULE 3: THE X-AXIS (TIME: 30-60 MIN.) Note: Don’t waste any belt. There is only one long belt in the kit, which must be divided in such a way that it is usable for the x and y-axis. - Page 23 Assembly instruction manual FELIX 2.0 3d printer Position and fix the rail onto the frame. Let the rail touch the x-axis belt Mount the extruder assembly onto the cart of the linear guide, with 4 mount part. m3x6 countersunk bolts.
- Page 24 Assembly instruction manual FELIX 2.0 3d printer Mount a pulley onto the motor-shaft upside down. The distance between the bottom of the pulley and the face of the motor should be approx 0.5mm, this can be adjusted later on if required.
- Page 25 Assembly instruction manual FELIX 2.0 3d printer When you turn the bolt clockwise the belt will get more tension. It finally should look like the picture above. This however is a picture from an older revision. Cut off the remaining piece of belt. Only 2cm should stick out of the end of the extruder base.
-
Page 26: Module 5: Table (Time: 1-2 Hours)
Assembly instruction manual FELIX 2.0 3d printer MODULE 5: TABLE (TIME: 1-2 HOURS) Important notes: Work carefully; this will benefit the print quality. Make sure that you don’t warp the surface of the table by exerting too much force /weight on the table... - Page 27 Assembly instruction manual FELIX 2.0 3d printer It should finally look like this. You are done with assembly of the table. support@FELIXprinters.com www.FELIXprinters.com Page 27 of 51 ...
-
Page 28: Module 6: Y-Axis (Time: 10-30 Min.)
Assembly instruction manual FELIX 2.0 3d printer MODULE 6: Y-AXIS (TIME: 10-30 MIN.) Required tools for this module Allen key set. wrench BOM y-axis Part description Amount y-stage bracket pt1_v6_F1_5 y-stage bracket pt2_v6_F1_5 y-stage bracket pt4_v4 20x10_aluminum profile + protective cap... - Page 29 Assembly instruction manual FELIX 2.0 3d printer Mount the small y-stage bracket pt4_v4 onto the y-stage bracket pt2_v5_F1_5 . Use a m4x25 bolt and a m4 nut. This small part is needed to tension the belt later on. Take the table assembly and place the m4x30 countersunk bolts as indicated above on the three holes in the table.
- Page 30 Assembly instruction manual FELIX 2.0 3d printer After placement mount table bolts with an M4 thin nut. Use a small washer underneath the m4 nuts at the plastic parts. Use a large washer for the bolt at the small aluminum beam.
- Page 31 Assembly instruction manual FELIX 2.0 3d printer Now it is time to put the left over belt from the x-axis onto the y-axis. Take the belt and cut it off straight. Re-orientate the frame by placing the wide beam onto a table. Mount Push the belt inside the bracket.
- Page 32 Assembly instruction manual FELIX 2.0 3d printer Next step is to tension the belt by turning the tensioning bolt. See picture above. The belt should be tensioned when the distance between the parts is approx. 1 to 2 mm. Check if you applied enough tension by pushing the belt as displayed above.
-
Page 33: Module 7: Electronics (Time: 2-4 Hrs.)
Assembly instruction manual FELIX 2.0 3d printer MODULE 7: ELECTRONICS (TIME: 2-4 HRS.) The goal of this module is to install all electric wires and to neatly put them away in the frame. The required tools for this module are:... - Page 34 Assembly instruction manual FELIX 2.0 3d printer To make the printer work properly the schematics below must be matched. This chapter will guide you step by step to match the schematics above. NOTE: It is important that the cables are placed as neatly as possible. Placing the wires in a messy way, can lead to EMC problems. The electronics can become sensitive to outside influences and lead to unreliable printing.
-
Page 35: Mount The Powersupply
Assembly instruction manual FELIX 2.0 3d printer 12.1 MOUNT THE POWERSUPPLY. BOM Electronics Part description Amount Electonics_case_F_2_0_v3_base Electonics_case_F_2_0_v4_cap Felixprinters electronics mini-ATX-seasonic Power Cable EU,USA,Australian or British Pre-crimped cables 3 threads USB cable 1.8m Get the parts described in the table above. - Page 36 Assembly instruction manual FELIX 2.0 3d printer Mount the powersupply assembly onto the frame with m4x16 bolts including washers. Before mounting the electronics make sure the potmeters are set ok. The pot-meters shown in the figure above regulate the power to the Slide the electronics box in like displayed above.
-
Page 37: 12.2 Guide Wires
Assembly instruction manual FELIX 2.0 3d printer 12.2 GUIDE WIRES Take the 3 wire cable and mount it onto the sensor as shown above. Cut a piece of 20cm from the frame strips. Remove sharp edges, to prevent damage to cables. - Page 38 Assembly instruction manual FELIX 2.0 3d printer Guide the cables of the foil-heater along as shown above. Wrap a cable-tie around it to again provide tension relieve on the cable. Guide the cables of the z-axis table like indicated above. Make sure the wires are mounted to the small aluminum beam as indicated above.
-
Page 39: Connect All Wires To The Electronics Board
Assembly instruction manual FELIX 2.0 3d printer Mount the extruder motor like indicated above. 12.3 CONNECT ALL WIRES TO THE ELECTRONICS BOARD. We now will connect all the wires to the electronics board and make it look like this Do this for the rest of the motor wires. Note the cable ties. - Page 40 Assembly instruction manual FELIX 2.0 3d printer Hot-end Connect the thermistors(temperature sensor) of the heated bed(red wires) and hot-end(black wires) Connect green and purple wire. Green wire functions as an on-off switch for the printer. The purple wire is the standby power for the logic of the electronics.
- Page 41 Assembly instruction manual FELIX 2.0 3d printer Do this also for the z-axis loop and the x-axis loop. Finally for the loop which enters the electronics cabinet. Congratulations you have finished the electronics part and it is time for some finishing touches.
-
Page 42: Finishing Touches (Time: 30-45 Min.)
Assembly instruction manual FELIX 2.0 3d printer FINISHING TOUCHES (TIME: 30-45 MIN.) Check all the bolts if they are tightened correctly. Check if all the axes can move freely, without cables being jammed. Put a little bit of oil or grease on the z-spindle, to make it run smoothly. Preferably a thicker kind of grease or oil, we use motor-oil. - Page 43 Assembly instruction manual FELIX 2.0 3d printer bed. PVC tape, has the same sticking quality as kapton tape, but significantly lower costs. Downside is the durability of the tape. Needs to be replaced more often. Painterstape. This is only recommended for very small parts, with small contact surface to the bed.
-
Page 44: Final Checklist To Ensure Proper Assembly Of Printer (15Mins)
Assembly instruction manual FELIX 2.0 3d printer FINAL CHECKLIST TO ENSURE PROPER ASSEMBLY OF PRINTER (15MINS) This checklist is used by our assembly team to ensure proper installation of the printer. Each check is of great importance and if all checked ok, it ensures optimal operation of the machine. - Page 45 Assembly instruction manual FELIX 2.0 3d printer Congratulations you are finished with the assembly of your FELIXprinter. The next step is to install the software and make your first testprint. Please download the user manual to continue. support@FELIXprinters.com www.FELIXprinters.com Page 45 of 51...
- Page 46 Assembly instruction manual FELIX 2.0 3d printer APPENDIX: BOM FELIX 2.0 Prod. Nr. Bolts and screws Amount 140 011.0 Set screw D-916 – M3 x 6-N - 140 012.0 Bolt D-7991 - M3 x 6 --- 6N - CSK 140 013.0 Bolt D-7991 - M3 x 8 --- 8N - CSK 140 014.0...
- Page 47 Assembly instruction manual FELIX 2.0 3d printer 110 020.0 t_slot nut – 5 ST M3 110 21.0 t_slot nut – 8 ST M3 121 010.0 Printed Parts 121 011.0 x-stage-motor-bracket_v6_F2_0 121 012.0 x-axis belt mount_v6_F2_0 121 013.0 y-stage bracket pt1_v6_F1_5 121 014.0...
- Page 48 Assembly instruction manual FELIX 2.0 3d printer Extru_arm_v6_F_1_5 121 026.0 121 027.0 Extru_airduct_v2 121 024.0 Extru_base_pt4_V3_F2_0 121 028.0 Electonics_case_F_2_0_v3_base 121 029.0 Electonics_case_F_2_0_v4_cap 150 010.0 Electronics 150 013.0 Heater Cartidge incl 2m wires 150 014.0 Thermistor incl 2m 150 011.0 Electronics board - Felixprinters 150 025.0...
-
Page 49: Hiwin Lineair Ball Bearing Set
Assembly instruction manual FELIX 2.0 3d printer 150 015.0 Opto sensor 150 026.0 motor nema 17 150 016.0 Kapton - Foil Heater 150 017.0 precrimped cables 3 threads 150 018.0 USB cable 1.8m 130 010.0 Mechanics 130 011.0 Hiwin lineair ball bearing set – MGN12H1R0300Z1HM 130 012.0... - Page 50 Assembly instruction manual FELIX 2.0 3d printer 110 014.0 40x40x400 profile, incl 3xD7 110 011.0 80x40x440 incl work 110 015.0 40x40 protective caps 110 016.0 80x40 protective caps 110 017.0 frame connector set 110 019.0 Protective cap, handle 140 035.0 hex sockethead bolt M8x16 buttonhead 110 023.0 or...
- Page 51 Assembly instruction manual FELIX 2.0 3d printer Fabricated parts Assembled Hot-end, containing 130 019.0 Hot_End_base_1.75mm_v2 130 021.0 Hot_End_peek_isolation_1.75_v3 130.020.0 hot_end_heated_nozzle_1.75_v4 130.022.0 Aluminum plate, table_2mm_F2_0 130 017.0 Trapezium spindle TR10x2mm 330mm 130 017.0 Trapezium hexagon nut TR10x2 170 010.0 Others 170 011.0 tweezers 170 012.0...
Need help?
Do you have a question about the Felix 2.0 and is the answer not in the manual?
Questions and answers