Table of Contents
Advertisement
2008-2011 Domestic
Battery Charger
Maintenance and Service
Domestic PowerDrive, IQ Plus and
High Frequency Battery Chargers
Manual
Manual Number 103373121
Edition Code 0408D1010C
L IS
L IS
T E
T E
B A
B A
IN
IN
T T
T T
D
D
D
D
E R
E R
U
U
5 3
5 3
E 5
E 5
S T
S T
6 R
6 R
Y
Y
R IA
R IA
2 3
2 3
C H
C H
3 8
3 8
A R
A R
L
L
2 2
2 2
G
G
1 1
1 1
E R
E R
0
0
1 .
C O
O F
N N
2 .
E C
T H
C O
E
T
N N
P R
A C
IN
S U
A C
A C
3 .
2
E C
O P
IN
IN
M
M
M
T O
T
E R
P P
P U
P U
O
O
O N
D C
L Y
D
D
D
D
V A
1 0
V O
C
C
T :
T :
E L
E L
R Y
IT
S E
P L
L T
C O
O
O
U
U
1 2
1 2
: 2
: 2
5 A
O R
C O
U G
R D
T P
T P
0 V
0 V
6 5
6 5
M
F R
A M
A G
, 9
, 9
6 0
6 0
W
P S
N D
T O
E
T O
U
U
T :
T :
.5
4 .
H E
O M
M
A N
U
U
S
S
4 8
4 8
.5
A ,
A ,
A F
N
IF
1 0
E T
S .
R E
D
A
P A
P A
B A
B A
E R
C E
F R
P R
V,
V,
6 0
6 0
B O
T E
T O
O P
T E
T E
1 3
1 3
H
H
R
T T
T T
F O
P T
E Q
N
N
A
A
Z
Z
O U
D Y
C H
E R
E R
1 5
R
A C
U E
E R
T S
T S
T P
A N
IE
IE
A M
C O
L Y
P A
P A
6 ,0
6 ,0
U T
A R
S
S
L E
N C
T E
T E
D
G E
A R
A R
P S
R R
.
Y
G R
N
N
8 7
8 7
LE
P U
A N
E C
C H
A S
O U
T
T
,8
,8
A D
L L
R
E
E
A R
P E
P E
0 5&
0 5
T U
C H
G O
D
T
S H
N D
N
N
&
IN
R N
A R
O D
T H
C H
G E
O W
E D
D
D
6 ,1
6, 1
P O
G
E N
A R
R
IN
IN
LA
P L
S
O F
G E
.
W
N
, T
G
G
1 4
1 4
R IT
U G
D .
C H
T A
G E
IL
O N
H R
,8
,8
Y
F
A R
P E
L
E E
3 3
3 3
S L
D IS
R A
S T
C H
: P
O W
G E
R
T E
A R
W
O S
C O
R
T O
. IN
A R
IR
IT
L Y
N N
S H
A
T
A U
G E
E
IV
S T
F IN
IT
O U
E ;
E C
U T
IA
T O
R .
R A
T
S
IS
L
M
T L
"+
IG
D C
O F
H
C H
A T
E T
",
H T
R A
A R
R E
P L
F
A U
T E
IC
D .
O U
U G
G E
A L
N E
T O
O F
L Y
T
O F
B Y
M
R A
G A
A T
L E
T E
T IV
R E
G R
IC
S S
A S
W
E ;
C E
A L
T H
IL
L
"- ",
P T
P IN
L Y
A N
A C
G
B L
A C
L E
P L
K .
.
U G
S E
N S
E ;
B L
U E
.
Advertisement
Table of Contents
Troubleshooting

Related Manuals for Club Car 2008-2011

Summary of Contents for Club Car 2008-2011
-
Page 1: Battery Charger
2008-2011 Domestic Battery Charger Maintenance and Service Manual L IS L IS R IA R IA 6 ,0 6 ,0 0 5& & 6, 1 6 ,1 R IT D IS . IN F IN “+ ”, T IV “- ”,... - Page 3 Car factory-trained technician. It is the policy of Club Car, LLC to assist its distributors and dealers in continually updating their service knowl- edge and facilities so they can provide prompt and efficient service for vehicle owners. Regional technical rep- resentatives, vehicle service seminars, periodic service bulletins, maintenance and service manuals, and other service publications also represent Club Car’s continuing commitment to customer support.
- Page 4 ý WARNING • Read Section 1 – Safety before attempting any service on a Club Car vehicle or charger. • Before servicing a Club Car vehicle or charger, read complete section(s) and any referenced information that may be relevant to the service or repair to be performed.
-
Page 5: Table Of Contents
DC Cord and Plug Inspection ....................... 3-11 Checking Battery Condition After a Charge Cycle ................3-12 Start Charge Cycle ........................3-12 Troubleshooting ..........................3-12 Test Procedures ..........................3-16 Index of Test Procedures ......................3-16 2008-2011 Domestic Battery Charger Maintenance and Service Manual Page iii... - Page 6 Retractable AC Cord Reel ......................4-30 Charging a Battery Pack that has Low Voltage ................4-31 Onboard Charger Removal and Installation ..................4-33 DS Villager 4 ..........................4-33 Precedent Vehicles ........................4-34 Page iv 2008-2011 Domestic Battery Charger Maintenance and Service Manual...
- Page 7 DS, 800, 810 and 850 Vehicles – 4 x 12-Volt ................Turf 1 and Carryall 1 Vehicles – 6 x 8-Volt ................... Precedent Vehicles – 4 x 12-Volt ....................Precedent Vehicles – 6 x 8-Volt ....................2008-2011 Domestic Battery Charger Maintenance and Service Manual Page v...
- Page 8 Charger Installation and Operation ....................AC Power Connection ........................Charging Batteries ........................Testing Charger Operation ......................6-11 DC Cord and Plug Inspection ....................... 6-11 Checking Battery Condition After a charge Cycle ................6-12 Start Charge Cycle ........................6-12 Troubleshooting ..........................6-12 Test Procedures ..........................
- Page 9 8-27 Voltage Suppressor ........................8-27 Charger Relay ..........................8-28 Charger AC Circuit Breaker ......................8-28 Charger AC Cord .......................... 8-28 Charging a Battery Pack that has Low Voltage ................8-29 2008-2011 Domestic Battery Charger Maintenance and Service Manual Page vii...
- Page 10 How To Identify Charge Algorithm Number .................. 10-3 The Charge Circuit ........................... 10-4 Onboard Charger Operation ......................10-4 Charger Displays .......................... 10-6 AC Power Connection ........................10-7 Charging Batteries ........................10-7 Page viii 2008-2011 Domestic Battery Charger Maintenance and Service Manual...
- Page 11 Battery Troubleshooting Examples: 12-Volt Batteries ..............10-19 Battery Troubleshooting Examples: 8-Volt Batteries ..............10-20 Battery Troubleshooting Examples: 6-Volt Batteries ..............10-21 Charger Repairs ..........................10-22 Onboard Charger Removal and Installation ..................10-22 SECTION i – INDEX 2008-2011 Domestic Battery Charger Maintenance and Service Manual Page ix...
- Page 12 Page x 2008-2011 Domestic Battery Charger Maintenance and Service Manual...
-
Page 13: Section 1 - Safety
- Internal: Drink large quantities of milk or water. Follow with milk of magnesia or vegetable oil. Call a physician immediately. - Eyes: Flush with water for 15 minutes. Call a physician immediately. 2008-2011 Domestic Battery Charger Maintenance and Service Manual Page 1-1... - Page 14 • If battery wire terminals are damaged or corroded, they should be replaced or cleaned as necessary. Failure to do so may cause them to overheat during operation and could result in a fire, property damage, or personal injury. WARNING CONTINUED ON NEXT PAGE... Page 1-2 2008-2011 Domestic Battery Charger Maintenance and Service Manual...
-
Page 15: Disabling The Vehicle
3. Disconnect the batteries, negative (–) cable first, as shown (Figure 1-1 through Figure 1-8). 4. After disconnecting the batteries, wait 90 seconds for the controller capacitors to discharge. 2008-2011 Domestic Battery Charger Maintenance and Service Manual Page 1-3... -
Page 16: Connecting The Batteries
2. Remove negative battery cable. 2. Remove negative battery cable. 3. Remove positive battery cable. 3. Remove positive battery cable. Connect battery cables in reverse order. Connect battery cables in reverse order. Page 1-4 2008-2011 Domestic Battery Charger Maintenance and Service Manual... - Page 17 2. Remove negative battery cable. 2. Remove negative battery cable. 3. Remove positive battery cable. 3. Remove positive battery cable. Connect battery cables in reverse order. Connect battery cables in reverse order. 2008-2011 Domestic Battery Charger Maintenance and Service Manual Page 1-5...
-
Page 19: Section 2 - Charger Identification And Specifications
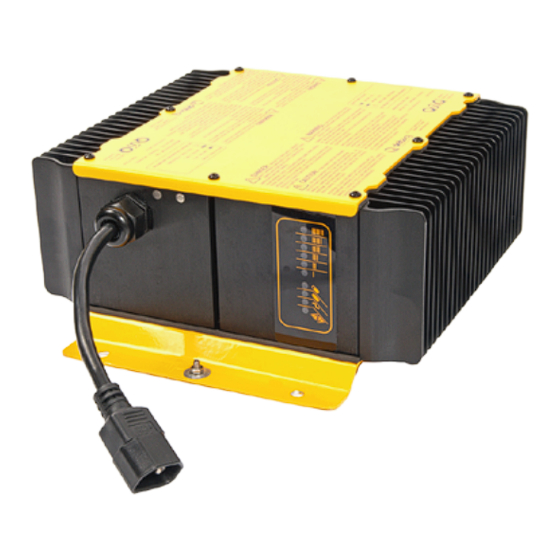
There are several different battery charger models available. It is important to properly identify the battery charger type and model number before attempting to service a Club Car battery charger. The battery charger can be identified by the model number printed on the charger. Refer to the appropriate section of this manual, as indicated in the chart below, for information on troubleshooting, repairing and/or replacing the battery charger. -
Page 20: Specifications
31 lb 31.6 lb 33 lb Weight (14.1 kg) (14.3 kg) (15.0 kg) Mounting configuration Mounting: Set on shelf, wall mount with keyhole, or hang securely • • • from ceiling. Page 2-2 2008-2011 Domestic Battery Charger Maintenance and Service Manual... - Page 21 24 lb 24.6 lb 26 lb Weight (10.9 kg) (11.2 kg) (11.8 kg) Mounting configuration Mounting: Set on shelf, wall mount with keyhole, or hang securely • • • from ceiling. 2008-2011 Domestic Battery Charger Maintenance and Service Manual Page 2-3...
- Page 22 (264 cm) 104 in. 144 in. 240 in. DC cord length (264 cm) (365.8 cm) (609.6 cm) 24.25 lb. 24.7 lb. 25.35 lb. Weight (11 kg) (11.2 kg) (11.5 kg) Page 2-4 2008-2011 Domestic Battery Charger Maintenance and Service Manual...
- Page 23 (264 cm) 104 in. 144 in. 240 in. DC cord length (264 cm) (365.8 cm) (609.6 cm) 24.0 lb. 24.5 lb. 26.0 lb. Weight (10.89 kg) (11.11 kg) (11.8 kg) 2008-2011 Domestic Battery Charger Maintenance and Service Manual Page 2-5...
- Page 24 (24 cm) Weight 37 lb (16.8 kg) 37.7 lb (17.1 kg) 38.2 lb (17.3 kg) 37 lb (16.8 kg) Mounting Configuration Mounting: Onboard (secured to the vehicle) • • • • Page 2-6 2008-2011 Domestic Battery Charger Maintenance and Service Manual...
- Page 25 (14.1 kg) (14.1 kg) (14.1 kg) Mounting configuration Mounting: Set on shelf, wall mount with keyhole, or hang securely from ceiling. • • • Mounting: Onboard (secured to the vehicle) 2008-2011 Domestic Battery Charger Maintenance and Service Manual Page 2-7...
- Page 26 22.0 in. 22.0 in. DC cord length (55.8 cm) (55.8 cm) 37.0 lb 37.0 lb Weight (16.8 kg) (16.8 kg) Mounting configuration Mounting: Onboard (secured to the vehicle) • • Page 2-8 2008-2011 Domestic Battery Charger Maintenance and Service Manual...
- Page 27 Case – overall width 9.7 in. (24.6 cm) Case – overall height 4.3 in. (11 cm) Weight < 11 lbs (< 5 kg) Mounting configuration Mounting: Onboard Secured to the vehicle 2008-2011 Domestic Battery Charger Maintenance and Service Manual Page 2-9...
-
Page 29: Section 3 - Powerdrive Charger (External)
17930-11, 17930-18, and 17930-19). Do not attempt to service a battery charger that has not been properly identified. If a charger cannot be properly identified, contact your local Club Car dealer or distributor. The PowerDrive battery charger is automatic and has no external controls (Figure 3-1, Page 3-1). When the charger is connected, there is a 2 to 15 second delay before charging begins. -
Page 30: Powerdrive External Charger Features
4 second intervals for Limo vehicles), during a charge cycle (with the DC plug still connected) if AC power to the charger is interrupted. The light will go out when AC power is restored. Page 3-2 2008-2011 Domestic Battery Charger Maintenance and Service Manual... -
Page 31: The Charge Circuit
RECEPTACLE #10 BLACK #10 BLACK #18 GRAY #18 GRAY #10 RED SENSE LEAD FUSE Figure 3-2 Charge Circuit and Battery Configuration – DS, DS Villager 4, 800, 810 and 850 2008-2011 Domestic Battery Charger Maintenance and Service Manual Page 3-3... -
Page 32: Turf 1 And Carryall 1
#10 BLACK #18 GRAY #18 GRAY #10 RED To Solenoid SENSE LEAD FUSE BLACK TO NEGATIVE TERMINAL Figure 3-3 Charge Circuit and Battery Configuration – Turf 1 and Carryall 1 Page 3-4 2008-2011 Domestic Battery Charger Maintenance and Service Manual... -
Page 33: Precedent - 4 X 12-Volt
TO SOLENOID FRONT OF VEHICLE CHARGER RECEPTACLE BATTERY BANK SINGLE POSITION CONNECTOR ONBOARD COMPUTER SPEED CONTROLLER Figure 3-4 Charge Circuit and Style A Battery Configuration – 4 x 12-Volt Precedent Vehicles 2008-2011 Domestic Battery Charger Maintenance and Service Manual Page 3-5... -
Page 34: Precedent - 6 X 8-Volt
If the charger works with one vehicle, but does not work with another vehicle, then most likely the problem is in the vehicle charge circuit. Check wire continuity and connections between the charger receptacle, onboard computer and batteries. Page 3-6 2008-2011 Domestic Battery Charger Maintenance and Service Manual... - Page 35 OF VEHICLE RECEPTACLE BATTERY BANK TO SOLENOID SINGLE POSITION CONNECTOR ONBOARD COMPUTER SOLID STATE SPEED CONTROLLER Figure 3-6 Charge Circuit and Style C Battery Configuration – 6 x 8-Volt Precedent Vehicles 2008-2011 Domestic Battery Charger Maintenance and Service Manual Page 3-7...
-
Page 36: Charger Installation And Operation
• Install surge arrestors on incoming AC power lines. Surge arrestors will help protect electrical components in the charger and on the vehicle from all but direct or close lightening strikes. Page 3-8 2008-2011 Domestic Battery Charger Maintenance and Service Manual... -
Page 37: Ac Power Connection
• Do not pull on the DC cord (Figure 3-8, Page 3-9). Do not twist, rock or bend the plug. To disconnect the charger plug from the vehicle receptacle, grasp the plug by the handle and pull the plug straight out of the receptacle. WARNING CONTINUED ON NEXT PAGE... 2008-2011 Domestic Battery Charger Maintenance and Service Manual Page 3-9... - Page 38 (20 to 50 charge cycles). For maximum battery life, Club Car recommends that electric vehicles always be recharged after 40 to 50 energy units of discharge or each night in order to avoid deep discharging the batteries. Charging between rounds will also extend battery life;...
-
Page 39: Testing Charger Operation
See also DC Cord Removal on page 3-27. See following NOTE. NOTE: If the warning tag has been damaged or removed from the DC cord, have it replaced immediately. 2008-2011 Domestic Battery Charger Maintenance and Service Manual Page 3-11... -
Page 40: Checking Battery Condition After A Charge Cycle
If you do not have this publication, contact your Club Car representative. If the specified test procedures identify no problems, plug the DC cord into the vehicle and let it charge until the charger shuts off automatically. If a problem is found, correct it and then charge the vehicle. - Page 41 DC cord is wired in reverse polarity Check battery charger wiring Test Procedure 4B – Both Diodes Failed Both diodes failed on page 3-21 Troubleshooting Guide continued on next page... 2008-2011 Domestic Battery Charger Maintenance and Service Manual Page 3-13...
- Page 42 10 second intervals for Onboard computer malfunction page 3-19 Precedent vehicles) See Batteries section in the appropriate Battery or batteries need to be replaced maintenance and service manual Page 3-14 2008-2011 Domestic Battery Charger Maintenance and Service Manual...
- Page 43 TO RELAY TAN WIRE TO SECONDARY COIL PRIMARY COIL WIRES (TAN) SECONDARY COIL WIRES (BLACK) DC CORD BLACK RED WIRE TO HEATSINK WIRE TO AMMETER Figure 3-10 PowerDrive Battery Charger 2008-2011 Domestic Battery Charger Maintenance and Service Manual Page 3-15...
-
Page 44: Test Procedures
3.3. Check the connections of the 18-gauge gray wire from the receptacle to the sense lead fuse, and from the sense lead fuse to the onboard computer gray wire. See following WARNING. Page 3-16 2008-2011 Domestic Battery Charger Maintenance and Service Manual... - Page 45 (+) post of battery no. 1 and the negative (–) post of battery no. 6 (Figure 3-13, Page 3-17). Place multimeter red (+) probe here. FRONT OF VEHICLE Place multimeter black (–) probe here. Figure 3-13 Turf 1 and Carryall 1 Battery Voltage Test 2008-2011 Domestic Battery Charger Maintenance and Service Manual Page 3-17...
- Page 46 32 volts DC to allow the onboard computer to close the charger relay. If battery pack voltage is too low to start charger, temporarily bypass the charger relay. See Charging a Battery Pack that has Low Voltage on page 3-34. Page 3-18 2008-2011 Domestic Battery Charger Maintenance and Service Manual...
- Page 47 (4) from the relay. Connect the tan wire (4) to the AC circuit breaker (Figure 3-22, Page 3-23). 5.3. With relay bypassed, there should be continuity across the AC cord blades (Figure 3-17, Page 3-19). Figure 3-17 AC Cord Test 2008-2011 Domestic Battery Charger Maintenance and Service Manual Page 3-19...
- Page 48 7. Ensure that the charger is wired properly and all connections are clean and tight. See following CAU- TION. CAUT ION • If connections are not clean and tight, excessive heat will be created and the charger may become damaged. Page 3-20 2008-2011 Domestic Battery Charger Maintenance and Service Manual...
- Page 49 DC cord and ammeter. See Test Procedure 8 – Conti- nuity on page 3-24. Also check the diodes (heatsink). See Test Procedure 4 – Diodes on page 3-20. 2008-2011 Domestic Battery Charger Maintenance and Service Manual Page 3-21...
- Page 50 5. Make sure the secondary coil wires are not touching one another. With the relay bypassed, insert the AC plug into an outlet. If the AC line fuse blows or AC circuit breaker trips, the transformer is shorted inter- nally and must be replaced. Page 3-22 2008-2011 Domestic Battery Charger Maintenance and Service Manual...
- Page 51 2. If the charger does not taper to below 5 amps within 15 minutes, batteries may not be receiving a full charge and the onboard computer should be checked. See Test Procedure 2 – Onboard Computer on page 3-19. See following NOTE. 2008-2011 Domestic Battery Charger Maintenance and Service Manual Page 3-23...
- Page 52 3. To check the continuity of the DC cord, disconnect the black wire of the DC cord from the ammeter (Figure 3-24, Page 3-27). 4. Disconnect the red wire of the DC cord from the heatsink. Page 3-24 2008-2011 Domestic Battery Charger Maintenance and Service Manual...
- Page 53 (short pin) of the DC plug. Place the red (+) probe on the positive (+) pin of the DC plug. The multimeter should indicate no tone. If a tone is emitted (indicating a closed circuit) then the voltage suppressor has failed and should be replaced. See following NOTE. 2008-2011 Domestic Battery Charger Maintenance and Service Manual Page 3-25...
- Page 54 4. Place the continuity test probes on the two terminals of the AC circuit breaker. The tester should indicate continuity. If the tester does not indicate continuity, replace the AC circuit breaker. Page 3-26 2008-2011 Domestic Battery Charger Maintenance and Service Manual...
-
Page 55: Charger Repairs
DC CORD TO RED WIRE ASSEMBLY BLACK WIRE AT RELAY TO AMMETER DC CORD RED WIRE TO HEATSINK STRAIN RELIEF BUSHING Figure 3-24 DC Cord Figure 3-25 DC Cord Replacement 2008-2011 Domestic Battery Charger Maintenance and Service Manual Page 3-27... -
Page 56: Heatsink
2. Connect the red wire from the DC cord and the red wire from the charger relay to the center terminal post on the heatsink. Tighten nut to 18 in-lb (2.0 N·m). Page 3-28 2008-2011 Domestic Battery Charger Maintenance and Service Manual... -
Page 57: Transformer
• Make sure wiring is properly routed and secured. Failure to properly route and secure wiring could result in charger malfunction, property damage, or severe personal injury. 9. Install the charger cover and check charger for proper operation. 2008-2011 Domestic Battery Charger Maintenance and Service Manual Page 3-29... -
Page 58: Ammeter
• Do not allow ammeter post to rotate as the nut is tightened. Rotation of the post could result in a damaged ammeter. 6. Install the charger cover. 7. Plug the charger into the vehicle and check ammeter for proper operation. Figure 3-26 Ammeter Page 3-30 2008-2011 Domestic Battery Charger Maintenance and Service Manual... -
Page 59: Fuse Link
NOTE: The charger relay blade connector is located off-center within the relay housing. When connecting voltage suppressor slip-on connector to relay blade connector, make sure slip-on connector is positioned so that flat side of connector is closest to relay housing (Figure 3-27, Page 3-33). 2008-2011 Domestic Battery Charger Maintenance and Service Manual Page 3-31... -
Page 60: Charger Relay
5. Disconnect the AC cord green wire from the charger base (Figure 3-27, Page 3-33). 6. Use a pair of pliers to grip the strain relief bushing and remove it and the AC cord from the charger. Page 3-32 2008-2011 Domestic Battery Charger Maintenance and Service Manual... - Page 61 3. Position the strain relief bushing on the AC cord. 4. Using pliers, install the strain relief bushing and AC cord into the mounting hole in the charger face. 5. Install the charger cover. 2008-2011 Domestic Battery Charger Maintenance and Service Manual Page 3-33...
-
Page 62: Charging A Battery Pack That Has Low Voltage
BLACK AC CIRCUIT BREAKER SECONDARY RELAY COIL BLACK BLACK FUSE AMMETER PRIMARY COIL AC INPUT PLUG GREEN CASE AC CORD GROUND WHITE Figure 3-28 PowerDrive Charger Wiring Diagram (Relay Bypassed) Page 3-34 2008-2011 Domestic Battery Charger Maintenance and Service Manual... - Page 63 See Section 11 – Electrical System and Testing in the appropriate maintenance and service manual. 2008-2011 Domestic Battery Charger Maintenance and Service Manual Page 3-35...
-
Page 65: Section 4 - Powerdrive Charger (Onboard)
For battery chargers with model numbers listed above that are installed in vehicles other than DS and Prece- dent vehicles, contact your local Club Car dealer or distributor. The PowerDrive battery charger is automatic and has no external controls (Figure 4-1, Page 4-1). When the AC cord is plugged in, there is a 2 to 15 second delay before charging begins. -
Page 66: Powerdrive Onboard Charger Features
(+) post of battery no. 1. The blue wire (sense lead) from the charger is connected, through a 3-way wire adapter at the sense lead fuse, to the gray wire that connects the charger receptacle to the onboard computer. Page 4-2 2008-2011 Domestic Battery Charger Maintenance and Service Manual... - Page 67 BLACK No. 10 RED GRAY RED TO No. 10 RED POSITIVE Three Pin TERMINAL Connector BLACK TO BATTERIES NEGATIVE ONBOARD TERMINAL – CHARGER Figure 4-3 Charge Circuit – Precedent Vehicles 2008-2011 Domestic Battery Charger Maintenance and Service Manual Page 4-3...
-
Page 68: Charger Operation
The AC line to which the charger is to be connected must be of the proper AC input voltage for the charger and must be capable of supplying sufficient current. See Section 2 – Charger Identification and Specifica- tions. Page 4-4 2008-2011 Domestic Battery Charger Maintenance and Service Manual... -
Page 69: Normal Charger Operation
(20 to 50 charge cycles). For maximum battery life, Club Car recommends that electric vehicles always be recharged after 40 to 50 energy units of discharge or each night in order to avoid deep discharging the batteries. Charging between rounds will also extend battery life;... -
Page 70: Checking Battery Condition
2. Wait 20 seconds, then reconnect the AC cord to the wall outlet. See following NOTE. NOTE: The charger will not operate unless a delay of approximately 20 seconds is observed. Page 4-6 2008-2011 Domestic Battery Charger Maintenance and Service Manual... -
Page 71: Troubleshooting
Test Procedure 1 – Battery Voltage on Gray sense lead fuse is blown page 4-10 Test Procedure 2 – Control Board on Control board malfunction page 4-12 Troubleshooting Guide continued on next page... 2008-2011 Domestic Battery Charger Maintenance and Service Manual Page 4-7... - Page 72 Test Procedure 2 – Control Board on Onboard computer malfunction page 4-12 Test Procedure 7 – Battery State of Batteries may be fully charged Charge Test on page 4-18 Troubleshooting Guide continued on next page... Page 4-8 2008-2011 Domestic Battery Charger Maintenance and Service Manual...
-
Page 73: Test Procedures
2. Control Board 3. AC Power and Continuity Check of AC Circuit 4. Diodes 5. Charger DC Circuit Continuity Test 6. Transformer 7. Battery State of Charge Test 8. Continuity 2008-2011 Domestic Battery Charger Maintenance and Service Manual Page 4-9... - Page 74 1.2. Verify the connection of the 10-gauge black wires in the charger adapter harness. One wire con- nects to the onboard computer black lead wire. The second wire connects to the charger receptacle black lead wire. Page 4-10 2008-2011 Domestic Battery Charger Maintenance and Service Manual...
- Page 75 Figure 4-8 Battery Voltage Test – Precedent Style C Battery Configuration (Viewed from driver side of vehicle) 1. RED probe to battery no. 1 (+). 2. BLACK probe to battery no. 6 (-). 2008-2011 Domestic Battery Charger Maintenance and Service Manual Page 4-11...
- Page 76 ý DANGER • Do not touch any wire or component in the battery charger while AC power is present. Failure to heed this warning will result in an electric shock. Page 4-12 2008-2011 Domestic Battery Charger Maintenance and Service Manual...
- Page 77 7. If the charger is wired correctly, check the continuity of the AC cord, AC cord reel, transformer primary coil, and the internal AC circuit breaker individually. See Test Procedure 8 – Continuity on page 4-19. 2008-2011 Domestic Battery Charger Maintenance and Service Manual Page 4-13...
- Page 78 Check all three fuse connections inside the charger to be sure they are clean and tight. The proper tightness for the fuse link connections is 22 in-lb (2.5 N·m). Page 4-14 2008-2011 Domestic Battery Charger Maintenance and Service Manual...
- Page 79 5. Excessive heat due to a loose connection may also cause both fuse links to blow. Be sure fuse connec- tions are tightened to 22 in-lb (2.5 N·m). 6. Ensure that the charger and vehicle are wired properly and all connections are clean and tight. 2008-2011 Domestic Battery Charger Maintenance and Service Manual Page 4-15...
- Page 80 RED WIRE RED WIRE BLACK WIRE BLACK WIRE Figure 4-15 DC Cord Test – DS Villager 4 Vehicles Figure 4-16 DC Cord Test (Probes Reversed) – DS Villager 4 Vehicles Page 4-16 2008-2011 Domestic Battery Charger Maintenance and Service Manual...
- Page 81 ý DANGER • Do not touch any wire or component in the battery charger while AC power is present. Failure to heed this warning will result in an electric shock. 2008-2011 Domestic Battery Charger Maintenance and Service Manual Page 4-17...
- Page 82 1. With the batteries fully charged, disconnect the AC charger plug for approximately 20 seconds and then reconnect it. The ammeter should jump to a reading between 14 and 18 amps and then taper to below 5 amps within 15 minutes. Page 4-18 2008-2011 Domestic Battery Charger Maintenance and Service Manual...
- Page 83 5. Remove the charger cover. 6. Disconnect the green wire (2) from charger case and position it so it does not touch any metal part of the charger (Figure 4-20, Page 4-21). 2008-2011 Domestic Battery Charger Maintenance and Service Manual Page 4-19...
- Page 84 POWERDRIVE CHARGER (ONBOARD) Test Procedures WAVETEK 1000 2000 200k 200nA 1000 --- FUSED 750V 200 OHM SETTING Figure 4-18 AC Cord and Retractable Cord Reel Continuity Test Figure 4-19 Heatshrink Removal Page 4-20 2008-2011 Domestic Battery Charger Maintenance and Service Manual...
- Page 85 AC plug. The tester should indicate continuity on one flat blade only. If any other reading is obtained, the cord reel must be replaced. 2008-2011 Domestic Battery Charger Maintenance and Service Manual Page 4-21...
- Page 86 DC cord. The tester should indicate continuity on the black DC cord wire only. If any other reading is obtained, the DC cord must be replaced. Page 4-22 2008-2011 Domestic Battery Charger Maintenance and Service Manual...
- Page 87 1. Disconnect the DC cord, the AC cord from the wall outlet, and remove the battery charger from the vehi- cle. See Onboard Charger Removal on page 4-33. 2. Remove the charger cover. 3. Disconnect the wires from the AC circuit breaker. 2008-2011 Domestic Battery Charger Maintenance and Service Manual Page 4-23...
-
Page 88: Charger Repairs
DC CORD BLUE WIRE TO CONTROL BOARD DC CORD BLACK WIRE TO AMMETER DC CORD RED WIRE TO HEATSINK STRAIN RELIEF BUSHING Figure 4-22 DC Cord Figure 4-23 DC Cord Replacement Page 4-24 2008-2011 Domestic Battery Charger Maintenance and Service Manual... -
Page 89: Heatsink
18 in-lb (2.0 N·m). 5. Install the charger cover and install the charger in the vehicle. See Onboard Charger Installation on page 4-34. 6. Check charger for proper operation. 2008-2011 Domestic Battery Charger Maintenance and Service Manual Page 4-25... -
Page 90: Transformer
9. Install the charger cover and install the charger in the vehicle. See Onboard Charger Installation on page 4-34. 10. Check charger for proper operation. Page 4-26 2008-2011 Domestic Battery Charger Maintenance and Service Manual... -
Page 91: Ammeter
(4) 1/4 turn. See following CAUTION. CAUT ION • Do not allow ammeter post to rotate as the nut is tightened. Rotation of the post could result in a damaged ammeter. 2008-2011 Domestic Battery Charger Maintenance and Service Manual Page 4-27... -
Page 92: Fuse Link
5. Remove the relay. Charger Relay Installation Install in reverse order of removal. Connect wires as shown (Figure 4-25, Page 4-29). Tighten nut securing relay to charger base to 18 in-lb (2.0 N·m). Page 4-28 2008-2011 Domestic Battery Charger Maintenance and Service Manual... -
Page 93: Charger Ac Circuit Breaker
2. Remove the charger cover. 3. Disconnect the AC cord black wire from the AC circuit breaker (Figure 4-25, Page 4-29). 4. Disconnect the AC cord white wire from the control board. 2008-2011 Domestic Battery Charger Maintenance and Service Manual Page 4-29... -
Page 94: Retractable Ac Cord Reel
(Figure 4-19, Page 4-20). 4. Disconnect the short AC cord from the retractable cord reel. Retractable AC Cord Reel Installation Install in reverse order of removal. Page 4-30 2008-2011 Domestic Battery Charger Maintenance and Service Manual... -
Page 95: Charging A Battery Pack That Has Low Voltage
• The relay wiring must be properly connected prior to placing the charger back into normal service. Failure to properly connect the relay wiring could result in property damage, severe personal injury, or death. 2008-2011 Domestic Battery Charger Maintenance and Service Manual Page 4-31... - Page 96 BLACK HEATSINK BLACK BLACK BLUE FUSE AMMETER CONTROL BOARD RELAY AC CIRCUIT BREAKER BLACK BLACK GREEN CASE WHITE GROUND AC CORD Figure 4-26 PowerDrive Onboard Charger Wiring Diagram (Relay Bypassed) Page 4-32 2008-2011 Domestic Battery Charger Maintenance and Service Manual...
-
Page 97: Onboard Charger Removal And Installation
5. Disconnect the 10-gauge charger DC cord blue wire (17) from the 3-way wire adapter (18) at the sense lead fuse (20) (Figure 4-28, Page 4-34). 6. Cut any wire tie(s) that secures the DC cord to the vehicle. 7. Lift charger and reel assembly from vehicle. 2008-2011 Domestic Battery Charger Maintenance and Service Manual Page 4-33... -
Page 98: Precedent Vehicles
2. Disconnect the charger DC cord at the three pin connector (1) (Figure 4-29, Page 4-35). 3. Remove four bolts (2), flat washers (3), lock washers (4) and nuts (5) securing charger to chassis. 4. Lift charger assembly from vehicle. Page 4-34 2008-2011 Domestic Battery Charger Maintenance and Service Manual... - Page 99 2. Install four bolts (2) and nuts (5) securing charger to chassis and tighten to 108 in-lb (12 N·m). 3. Connect the batteries. See Connecting The Batteries on page 1-4. Figure 4-29 Onboard Charger Mounting – Precedent Vehicles 2008-2011 Domestic Battery Charger Maintenance and Service Manual Page 4-35...
-
Page 101: Section 5 - Powerdrive 2 Charger (External)
22110-11, 22110-18, and 22110-19). Do not attempt to service a battery charger that has not been properly identified. If a charger cannot be properly identified, contact your local Club Car dealer or distributor. The PowerDrive 2 battery charger is automatic and has no external controls (Figure 5-1, Page 5-1). When the charger is connected, there is a 2 to 15 second delay before charging begins. -
Page 102: Powerdrive 2 Battery Charger Features
10 second intervals for Precedent vehicles), during a charge cycle (with the DC plug still connected) if AC power to the charger is interrupted. The light will go out when AC power is restored. Page 5-2 2008-2011 Domestic Battery Charger Maintenance and Service Manual... -
Page 103: The Charge Circuit
RECEPTACLE #10 BLACK #10 BLACK #18 GRAY #18 GRAY #10 RED To Solenoid SENSE LEAD FUSE BLACK TO NEGATIVE TERMINAL Figure 5-2 Charge Circuit and Battery Configuration – DS Vehicles 2008-2011 Domestic Battery Charger Maintenance and Service Manual Page 5-3... -
Page 104: Charger Installation And Operation
• Do not charge the vehicle batteries with the vehicle covered or enclosed. Any enclosure or cover should be removed or unzipped and pulled back when batteries are being charged. An accumulation of hydrogen gas could result in an explosion. Page 5-4 2008-2011 Domestic Battery Charger Maintenance and Service Manual... - Page 105 Note: Appearance of receptacle Note: Appearance of may vary depending on vehicle. receptacle may vary depending on vehicle. Figure 5-4 Charger Receptacle Figure 5-5 Incorrect DC Plug Removal 2008-2011 Domestic Battery Charger Maintenance and Service Manual Page 5-5...
-
Page 106: Ac Power Connection
1. With the charger DC cord disconnected from the vehicle charger receptacle, connect the AC power sup- ply cord to an AC outlet designed to provide the proper AC voltage for the charger. Page 5-6 2008-2011 Domestic Battery Charger Maintenance and Service Manual... -
Page 107: Testing Charger Operation
(20 to 50 charge cycles). For maximum battery life, Club Car recommends that electric vehicles always be recharged after 40 to 50 energy units of discharge or each night in order to avoid deep discharging the batteries. Charging between rounds will also extend battery life;... -
Page 108: Dc Cord And Plug Inspection
See also DC Cord Removal on page 5-23. See following NOTE. NOTE: If the warning tag has been damaged or removed from the DC cord, have it replaced immediately. Page 5-8 2008-2011 Domestic Battery Charger Maintenance and Service Manual... -
Page 109: Checking Battery Condition After A Charge Cycle
If you do not have this publication, contact your Club Car representative. If the specified test procedures identify no problems, plug the DC cord into the vehicle and let it charge until the charger shuts off automatically. If a problem is found, correct it and then charge the vehicle. - Page 110 Test Procedure 4 – Rectifier on page 5-16 fuse link blows Loose internal fuse connection Tighten connection Battery is wired in reverse polarity Check vehicle wiring DC cord is wired in reverse polarity Check battery charger wiring Page 5-10 2008-2011 Domestic Battery Charger Maintenance and Service Manual...
- Page 111 10 second intervals for Onboard computer malfunction page 5-15 Precedent vehicles) See Section 13 – Batteries in the Battery or batteries need to be replaced appropriate maintenance and service manual 2008-2011 Domestic Battery Charger Maintenance and Service Manual Page 5-11...
-
Page 112: Test Procedures
2. Onboard Computer 3. AC Power and Continuity Test of AC Circuit 4. Rectifier 5. Charger DC Circuit Continuity Test 6. Transformer 7. Battery State of Charge Test 8. Continuity Page 5-12 2008-2011 Domestic Battery Charger Maintenance and Service Manual... - Page 113 Figure 5-8 Receptacle Wire Connections (all vehicles except Precedent) 3.3. Remove the gray sense lead fuse and check it for continuity with a multimeter set to 200 ohms. The resistance should be less than 2 ohms. 2008-2011 Domestic Battery Charger Maintenance and Service Manual Page 5-13...
- Page 114 See Charging a Battery Pack that has Low Voltage on page 5-29. Place multimeter black (–) probe here. FRONT OF VEHICLE Place multimeter red (+) probe here. Figure 5-10 Precedent Battery Configuration Page 5-14 2008-2011 Domestic Battery Charger Maintenance and Service Manual...
- Page 115 (4) from the relay. Connect the black wire (4) to the AC circuit breaker (Figure 5-16, Page 5-19). 5.3. With relay bypassed, there should be continuity across the AC cord blades (Figure 5-11, Page 5-15). Figure 5-11 AC Cord Test 2008-2011 Domestic Battery Charger Maintenance and Service Manual Page 5-15...
- Page 116 750V ç ç DIODE ( ) SETTING DIODE ( ) SETTING (AC) (AC) – – (AC) (AC) RECTIFIER RECTIFIER Figure 5-12 Rectifier Test Figure 5-13 Rectifier Test – Probes Reversed Page 5-16 2008-2011 Domestic Battery Charger Maintenance and Service Manual...
- Page 117 POSITIVE PIN WAVETEK 1000 PULL HERE PULL HERE PULL HERE PULL HERE 2000 200k 200nA 1000 --- FUSED 750V ç NEGATIVE PIN DIODE ( ) SETTING Figure 5-14 DC Plug Test 2008-2011 Domestic Battery Charger Maintenance and Service Manual Page 5-17...
- Page 118 4.1. To bypass the relay, remove the black wire (3) from the AC circuit breaker and disconnect the black wire (4) from the relay. Connect the black wire (4) to the AC circuit breaker (Figure 5-16, Page 5-19). See following DANGER. Page 5-18 2008-2011 Domestic Battery Charger Maintenance and Service Manual...
- Page 119 BLACK (AC) AC INPUT PLUG GREEN BLACK BLACK (DISCONNECTED FROM RELAY CASE – (AC) AND CONNECTED TO BREAKER) AC CORD GROUND RECTIFIER WHITE BLACK Figure 5-16 Transformer Test Wiring Diagram 2008-2011 Domestic Battery Charger Maintenance and Service Manual Page 5-19...
- Page 120 3. Disconnect the green wire (2) from charger case and position it so it does not touch any metal part of the charger (Figure 5-17, Page 5-20). WAVETEK 1000 2000 200k 200nA 1000 --- FUSED 750V 200 OHM SETTING Figure 5-17 AC Cord and Plug Continuity Test Page 5-20 2008-2011 Domestic Battery Charger Maintenance and Service Manual...
- Page 121 The PowerDrive 2 battery charger transformer has two sets of coils: a primary coil and a secondary coil (Figure 5-16, Page 5-19). Primary Coil 1. Disconnect AC cord from the wall outlet and DC plug from the vehicle receptacle. 2. Remove the charger cover. 2008-2011 Domestic Battery Charger Maintenance and Service Manual Page 5-21...
- Page 122 2. Remove the charger cover. 3. Disconnect the white wire from the left ammeter terminal (as viewed from inside the charger). 4. Place the continuity tester clip on one of the ammeter posts. Page 5-22 2008-2011 Domestic Battery Charger Maintenance and Service Manual...
-
Page 123: Charger Repairs
4. Remove the DC cord red wire from the ammeter. 5. Remove the DC cord blue wire from the blue wire located in the fiberglass sheathing. 6. Using pliers, squeeze the strain relief bushing and remove the DC cord. 2008-2011 Domestic Battery Charger Maintenance and Service Manual Page 5-23... -
Page 124: Rectifier
3. Remove all four wires from the rectifier (Figure 5-6, Page 5-8). 4. Remove the nut (1), lock washer (2), and screw (3) from the rectifier and remove the rectifier from the heatsink (Figure 5-19, Page 5-25). Page 5-24 2008-2011 Domestic Battery Charger Maintenance and Service Manual... -
Page 125: Transformer
1. Disconnect AC cord from the wall outlet and DC plug from the vehicle receptacle. 2. Remove the charger cover. 3. Disconnect the black primary coil wire (5) from the charger relay (Figure 5-17, Page 5-20). 2008-2011 Domestic Battery Charger Maintenance and Service Manual Page 5-25... -
Page 126: Ammeter
3. Disconnect the DC cord red wire (1) and the white wires (3 and 4) from the ammeter (Figure 5-20, Page 5-27). 4. Press the locking tabs on each side of the ammeter and remove the ammeter by gently pushing the ammeter through the front of the charger case. Page 5-26 2008-2011 Domestic Battery Charger Maintenance and Service Manual... -
Page 127: Fuse Link
(2.6 N·m). 3. Gently press the fuse assembly into the mounting tab so that the fuse link is visible from the side of the charger. 4. Install the charger cover. 2008-2011 Domestic Battery Charger Maintenance and Service Manual Page 5-27... -
Page 128: Voltage Suppressor
1. Disconnect AC cord from the wall outlet and DC plug from the vehicle receptacle. 2. Remove the charger cover. 3. Disconnect the two black wires attached to the AC circuit breaker (Figure 5-6, Page 5-8). Page 5-28 2008-2011 Domestic Battery Charger Maintenance and Service Manual... -
Page 129: Charger Ac Cord
See General Warning, Section 1, Page 1-1. See additional WARNING on page 5-1. If battery pack voltage is below 34 volts, the charger will not activate. The charger relay will have to be bypassed to activate the charger. See following WARNING. 2008-2011 Domestic Battery Charger Maintenance and Service Manual Page 5-29... - Page 130 See Section 11 – Electrical System and Testing in the appropriate maintenance and service manual. Page 5-30 2008-2011 Domestic Battery Charger Maintenance and Service Manual...
- Page 131 AC INPUT PLUG GREEN BLACK BLACK (DISCONNECTED FROM RELAY CASE – (AC) AND CONNECTED TO BREAKER) AC CORD GROUND RECTIFIER WHITE BLACK Figure 5-21 PowerDrive 2 Charger Wiring Diagram (Relay Bypassed) 2008-2011 Domestic Battery Charger Maintenance and Service Manual Page 5-31...
-
Page 133: Section 6 - Powerdrive 3 - Model 26560
This section includes information pertaining to service of the PowerDrive 3 battery charger (model numbers 26560-11, 26560-18, and 26560-19) (Figure 6-1, Page 6-1). Do not attempt to service a battery charger that has not been properly identified. If a charger cannot be properly identified, contact your local Club Car dealer or distributor. -
Page 134: Powerdrive 3 Battery Charger Features
16 hours and the batteries are not sufficiently charged. This indicates an abnormal charge cycle. The charger and batteries should be checked by your Club Car distributor/dealer. • The battery warning light will repeatedly illuminate for 10 seconds, at 4 second intervals, during a charge cycle (with the DC plug still connected) if AC power to the charger is interrupted. -
Page 135: The Charge Circuit
#10 BLACK #10 BLACK #18 GRAY #18 GRAY #10 RED SENSE LEAD FUSE Figure 6-2 Charge Circuit and Battery Configuration – 4 x 12-Volt DS, 800, 810 and 850 Vehicles 2008-2011 Domestic Battery Charger Maintenance and Service Manual Page 6-3... -
Page 136: Turf 1 And Carryall 1 Vehicles - 6 X 8-Volt
#18 GRAY #10 RED To Solenoid SENSE LEAD FUSE BLACK TO NEGATIVE TERMINAL Figure 6-3 Charge Circuit and Battery Configuration – 6 x 8-Volt Turf 1 and Carryall 1 Vehicles Page 6-4 2008-2011 Domestic Battery Charger Maintenance and Service Manual... -
Page 137: Precedent Vehicles - 4 X 12-Volt
TO SOLENOID FRONT OF VEHICLE CHARGER RECEPTACLE BATTERY BANK SINGLE POSITION CONNECTOR ONBOARD COMPUTER SPEED CONTROLLER Figure 6-4 Charge Circuit and Style A Battery Configuration – 4 x 12-Volt Precedent Vehicles 2008-2011 Domestic Battery Charger Maintenance and Service Manual Page 6-5... -
Page 138: Precedent Vehicles - 6 X 8-Volt
If the charger works with one vehicle, but does not work with another vehicle, then most likely the problem is in the vehicle charge circuit. Check wire continuity and connections between the charger receptacle, onboard computer and batteries. Page 6-6 2008-2011 Domestic Battery Charger Maintenance and Service Manual... - Page 139 OF VEHICLE RECEPTACLE BATTERY BANK TO SOLENOID SINGLE POSITION CONNECTOR ONBOARD COMPUTER SOLID STATE SPEED CONTROLLER Figure 6-6 Charge Circuit and Style C Battery Configuration – 6 x 8-Volt Precedent Vehicles 2008-2011 Domestic Battery Charger Maintenance and Service Manual Page 6-7...
-
Page 140: Charger Installation And Operation
• Install surge arrestors on incoming AC power lines. Surge arrestors will help protect electrical components in the charger and on the vehicle from all but direct or close lightening strikes. Page 6-8 2008-2011 Domestic Battery Charger Maintenance and Service Manual... -
Page 141: Ac Power Connection
• Do not pull on the DC cord (Figure 6-8, Page 6-9). Do not twist, rock or bend the plug. To disconnect the charger plug from the vehicle receptacle, grasp the plug by the handle and pull the plug straight out of the receptacle. WARNING CONTINUED ON NEXT PAGE... 2008-2011 Domestic Battery Charger Maintenance and Service Manual Page 6-9... - Page 142 (20 to 50 charge cycles). For maximum battery life, Club Car recommends that electric vehicles always be recharged after 40 to 50 energy units of discharge or each night in order to avoid deep discharging the batteries. Charging between rounds will also extend battery life;...
-
Page 143: Testing Charger Operation
See also DC Cord Removal on page 6-27. See following NOTE. NOTE: If the warning tag has been damaged or removed from the DC cord, have it replaced immediately. 2008-2011 Domestic Battery Charger Maintenance and Service Manual Page 6-11... -
Page 144: Checking Battery Condition After A Charge Cycle
If you do not have this publication, contact your Club Car representative. If the specified test procedures identify no problems, plug the DC cord into the vehicle and let it charge until the charger shuts off automatically. If a problem is found, correct it and then charge the vehicle. - Page 145 Loose internal fuse connection Tighten connection Battery is wired in reverse polarity Check vehicle wiring DC cord is wired in reverse polarity Check battery charger wiring Troubleshooting Guide continued on next page... 2008-2011 Domestic Battery Charger Maintenance and Service Manual Page 6-13...
- Page 146 10 second intervals for Onboard computer malfunction page 6-19 Precedent vehicles) See Batteries section in the appropriate Battery or batteries need to be replaced maintenance and service manual Page 6-14 2008-2011 Domestic Battery Charger Maintenance and Service Manual...
- Page 147 RED WIRE TO AMMETER DC CORD SECONDARY GREEN WHITE WIRE TO BLUE WIRE COIL GROUND WIRE PRIMARY COIL TO RELAY Figure 6-10 PowerDrive 3 Battery Charger Components – Model 26560 2008-2011 Domestic Battery Charger Maintenance and Service Manual Page 6-15...
-
Page 148: Test Procedures
3.3. Check the connections of the 18-gauge gray wire from the receptacle to the sense lead fuse, and from the sense lead fuse to the onboard computer gray wire. See following WARNING. Page 6-16 2008-2011 Domestic Battery Charger Maintenance and Service Manual... - Page 149 (+) post of battery no. 1 and the negative (–) post of battery no. 6 (Figure 6-13, Page 6-17). Place multimeter red (+) probe here. FRONT OF VEHICLE Place multimeter black (–) probe here. Figure 6-13 Turf 1 and Carryall 1 Battery Configuration 2008-2011 Domestic Battery Charger Maintenance and Service Manual Page 6-17...
- Page 150 32 volts DC to allow the onboard computer to close the charger relay. If battery pack voltage is too low to start charger, temporarily bypass the charger relay. See Charging a Battery Pack that has Low Voltage on page 6-34. Page 6-18 2008-2011 Domestic Battery Charger Maintenance and Service Manual...
- Page 151 5.3. With relay bypassed, there should be continuity across the AC cord blades (Figure 6-17, Page 6-19). Figure 6-17 AC Cord Test 2008-2011 Domestic Battery Charger Maintenance and Service Manual Page 6-19...
- Page 152 750V FUSED 750V ç ç DIODE ( ) SETTING DIODE ( ) SETTING (AC) (AC) – – (AC) (AC) Figure 6-18 Rectifier Test Figure 6-19 Rectifier Test – Probes Reversed Page 6-20 2008-2011 Domestic Battery Charger Maintenance and Service Manual...
- Page 153 POSITIVE PIN WAVETEK 1000 PULL HERE PULL HERE PULL HERE PULL HERE 2000 200k 200nA 1000 --- FUSED 750V ç NEGATIVE PIN DIODE ( ) SETTING Figure 6-20 DC Plug Test 2008-2011 Domestic Battery Charger Maintenance and Service Manual Page 6-21...
- Page 154 ý DANGER • Do not touch any wire or component in the battery charger while AC power is present. Failure to heed this warning will result in an electric shock. Page 6-22 2008-2011 Domestic Battery Charger Maintenance and Service Manual...
- Page 155 4. Using a multimeter set for 200 ohms, place the red (+) probe on one fuse terminal and the black (–) probe on the other fuse terminal. The tester should indicate continuity. If the tester does not indicate continuity, then the fuse has failed and must be replaced. 2008-2011 Domestic Battery Charger Maintenance and Service Manual Page 6-23...
- Page 156 AC plug (6). The tester should indicate continuity on only one flat blade. If any other reading is obtained, the AC cord and plug must be replaced. 10. If the correct readings were obtained, install the AC cord. See AC Cord Installation on page 6-33. Page 6-24 2008-2011 Domestic Battery Charger Maintenance and Service Manual...
- Page 157 3. Remove the transformer (black) secondary coil wires (1 and 2) from the rectifier (Figure 6-9, Page 6-11). 4. Place the continuity tester probes on the disconnected secondary coil wires. The tester should indicate continuity. If tester does not indicate continuity, replace the transformer. 2008-2011 Domestic Battery Charger Maintenance and Service Manual Page 6-25...
- Page 158 4. Place the continuity test probe on the two terminals of the AC circuit breaker. The tester should indicate continuity. If the tester does not indicate continuity, replace the AC circuit breaker. Page 6-26 2008-2011 Domestic Battery Charger Maintenance and Service Manual...
-
Page 159: Charger Repairs
6. Using pliers, squeeze the strain relief bushing and remove the DC cord. DC CORD BLUE WIRE TO RELAY DC CORD BLACK DC CORD WIRE TO FUSE RED WIRE TO AMMETER STRAIN RELIEF BUSHING Figure 6-23 DC Cord 2008-2011 Domestic Battery Charger Maintenance and Service Manual Page 6-27... -
Page 160: Rectifier
4. Gently press the fuse link (2) toward the transformer to remove it from its mounting tab. 5. Remove the screws (3) securing the rectifier/heatsink assembly (4) to the charger case. Figure 6-24 Rectifier/Heatsink Assembly Page 6-28 2008-2011 Domestic Battery Charger Maintenance and Service Manual... -
Page 161: Transformer
4. Place a piece of heatshrink tubing over the AC cord white wire. 5. Connect the AC cord white wire (4) to the tan primary coil wire (Figure 6-22, Page 6-24). 2008-2011 Domestic Battery Charger Maintenance and Service Manual Page 6-29... -
Page 162: Ammeter
2. Connect the DC cord red wire (1) and the white wires (2 and 3) to the ammeter terminals. 3. Install the charger cover. 4. Plug the charger into the vehicle and check ammeter for proper operation. Page 6-30 2008-2011 Domestic Battery Charger Maintenance and Service Manual... -
Page 163: Fuse Link
(2.6 N·m). 3. Gently press the fuse assembly into the mounting tab so that the fuse link is visible from the rear of the charger. 4. Install the charger cover. 2008-2011 Domestic Battery Charger Maintenance and Service Manual Page 6-31... -
Page 164: Relay Board Assembly
6. Disconnect the AC cord green wire (2) from the charger base. 7. Use a pair of pliers to grip the strain relief bushing and remove it and the AC cord from the charger. Page 6-32 2008-2011 Domestic Battery Charger Maintenance and Service Manual... - Page 165 7. Position the strain relief bushing on the AC cord. 8. Using pliers, install the strain relief bushing and AC cord into the mounting hole in the charger face. 9. Install the charger cover. 2008-2011 Domestic Battery Charger Maintenance and Service Manual Page 6-33...
-
Page 166: Charging A Battery Pack That Has Low Voltage
• The relay wiring must be properly connected prior to placing the charger back into normal service. Failure to properly connect the relay wiring could result in property damage, severe personal injury, or death. 9. Install the charger cover and the retaining screws. Page 6-34 2008-2011 Domestic Battery Charger Maintenance and Service Manual... - Page 167 AC CORD BREAKER RECTIFIER BLACK BLACK BLACK BLACK FUSE BROWN WHITE CASE GROUND 100 Ohm BLUE RELAY BOARD ASSEMBLY WITH SUPPRESSOR Figure 6-26 PowerDrive 3 Charger Wiring Diagram (Relay Bypassed) 2008-2011 Domestic Battery Charger Maintenance and Service Manual Page 6-35...
-
Page 169: Section 7 - Powerdrive 3 - Model 26580
This section includes information pertaining to service of the PowerDrive 3 battery charger (model numbers 26580-11, 26580-18, and 26580-19) (Figure 7-1, Page 7-1). Do not attempt to service a battery charger that has not been properly identified. If a charger cannot be properly identified, contact your local Club Car dealer or distributor. -
Page 170: Powerdrive 3 Battery Charger Features
16 hours and the batteries are not sufficiently charged. This indicates an abnormal charge cycle. The charger and batteries should be checked by your Club Car distributor/dealer. • The battery warning light will repeatedly illuminate for 10 seconds, at 4 second intervals, during a charge cycle (with the DC plug still connected) if AC power to the charger is interrupted. -
Page 171: The Charge Circuit
#10 BLACK #10 BLACK #18 GRAY #18 GRAY #10 RED SENSE LEAD FUSE Figure 7-2 Charge Circuit and Battery Configuration – 4 x 12-Volt DS, 800, 810 and 850 Vehicles 2008-2011 Domestic Battery Charger Maintenance and Service Manual Page 7-3... -
Page 172: Turf 1 And Carryall 1 Vehicles - 6 X 8-Volt
#18 GRAY #10 RED To Solenoid SENSE LEAD FUSE BLACK TO NEGATIVE TERMINAL Figure 7-3 Charge Circuit and Battery Configuration – 6 x 8-Volt Turf 1 and Carryall 1 Vehicles Page 7-4 2008-2011 Domestic Battery Charger Maintenance and Service Manual... -
Page 173: Precedent Vehicles - 4 X 12-Volt
TO SOLENOID FRONT OF VEHICLE CHARGER RECEPTACLE BATTERY BANK SINGLE POSITION CONNECTOR ONBOARD COMPUTER SPEED CONTROLLER Figure 7-4 Charge Circuit and Style A Battery Configuration – 4 x 12-Volt Precedent Vehicles 2008-2011 Domestic Battery Charger Maintenance and Service Manual Page 7-5... -
Page 174: Precedent Vehicles - 6 X 8-Volt
If the charger works with one vehicle, but does not work with another vehicle, then most likely the problem is in the vehicle charge circuit. Check wire continuity and connections between the charger receptacle, onboard computer and batteries. Page 7-6 2008-2011 Domestic Battery Charger Maintenance and Service Manual... - Page 175 OF VEHICLE RECEPTACLE BATTERY BANK TO SOLENOID SINGLE POSITION CONNECTOR ONBOARD COMPUTER SOLID STATE SPEED CONTROLLER Figure 7-6 Charge Circuit and Style C Battery Configuration – 6 x 8-Volt Precedent Vehicles 2008-2011 Domestic Battery Charger Maintenance and Service Manual Page 7-7...
-
Page 176: Charger Installation And Operation
• Install surge arrestors on incoming AC power lines. Surge arrestors will help protect electrical components in the charger and on the vehicle from all but direct or close lightening strikes. Page 7-8 2008-2011 Domestic Battery Charger Maintenance and Service Manual... -
Page 177: Ac Power Connection
• Do not pull on the DC cord (Figure 7-8, Page 7-9). Do not twist, rock or bend the plug. To disconnect the charger plug from the vehicle receptacle, grasp the plug by the handle and pull the plug straight out of the receptacle. WARNING CONTINUED ON NEXT PAGE... 2008-2011 Domestic Battery Charger Maintenance and Service Manual Page 7-9... - Page 178 (20 to 50 charge cycles). For maximum battery life, Club Car recommends that electric vehicles always be recharged after 40 to 50 energy units of discharge or each night in order to avoid deep discharging the batteries. Charging between rounds will also extend battery life;...
-
Page 179: Testing Charger Operation
See also DC Cord Removal on page 7-28. See following NOTE. NOTE: If the warning tag has been damaged or removed from the DC cord, have it replaced immediately. 2008-2011 Domestic Battery Charger Maintenance and Service Manual Page 7-11... -
Page 180: Checking Battery Condition After A Charge Cycle
If you do not have this publication, contact your Club Car representative. If the specified test procedures identify no problems, plug the DC cord into the vehicle and let it charge until the charger shuts off automatically. If a problem is found, correct it and then charge the vehicle. - Page 181 Loose internal fuse connection Tighten connection Battery is wired in reverse polarity Check vehicle wiring DC cord is wired in reverse polarity Check battery charger wiring Troubleshooting Guide continued on next page... 2008-2011 Domestic Battery Charger Maintenance and Service Manual Page 7-13...
- Page 182 10 second intervals for Onboard computer malfunction page 7-19 Precedent vehicles) See Batteries section in the appropriate Battery or batteries need to be replaced maintenance and service manual Page 7-14 2008-2011 Domestic Battery Charger Maintenance and Service Manual...
- Page 183 CIRCUIT BREAKER COIL TO AMMETER DC CORD SECONDARY GREEN WHITE WIRE TO BLUE WIRE GROUND WIRE PRIMARY COIL COIL TO RELAY Figure 7-10 PowerDrive 3 Battery Charger Components – Model 26580 2008-2011 Domestic Battery Charger Maintenance and Service Manual Page 7-15...
-
Page 184: Test Procedures
3.3. Check the connections of the 18-gauge gray wire from the receptacle to the sense lead fuse, and from the sense lead fuse to the onboard computer gray wire. See following WARNING. Page 7-16 2008-2011 Domestic Battery Charger Maintenance and Service Manual... - Page 185 (+) post of battery no. 1 and the negative (–) post of battery no. 6 (Figure 7-13, Page 7-17). Place multimeter red (+) probe here. FRONT OF VEHICLE Place multimeter black (–) probe here. Figure 7-13 Turf 1 and Carryall 1 Battery Configuration 2008-2011 Domestic Battery Charger Maintenance and Service Manual Page 7-17...
- Page 186 32 volts DC to allow the onboard computer to close the charger relay. If battery pack voltage is too low to start charger, temporarily bypass the charger relay. See Charging a Battery Pack that has Low Voltage on page 7-34. Page 7-18 2008-2011 Domestic Battery Charger Maintenance and Service Manual...
- Page 187 5.3. With relay bypassed, there should be continuity across the AC cord blades (Figure 7-17, Page 7-19). Figure 7-17 AC Cord Test 2008-2011 Domestic Battery Charger Maintenance and Service Manual Page 7-19...
- Page 188 7. Ensure that the charger is wired properly and all connections are clean and tight. See following CAU- TION. CAUT ION • If connections are not clean and tight, excessive heat will be created and the charger may become damaged. Page 7-20 2008-2011 Domestic Battery Charger Maintenance and Service Manual...
- Page 189 (+) on the DC plug (Figure 7-20, Page 7-22). Place the negative probe (–) on the pin marked negative (–). The multimeter should indicate an overload (no continuity). 2008-2011 Domestic Battery Charger Maintenance and Service Manual Page 7-21...
- Page 190 PULL HERE PULL HERE PULL HERE PULL HERE 2000 200k 200nA 1000 --- FUSED 750V ç NEGATIVE PIN DIODE ( ) SETTING Figure 7-21 DC Plug Test – Probes Reversed Page 7-22 2008-2011 Domestic Battery Charger Maintenance and Service Manual...
- Page 191 • The relay wiring must be properly connected prior to placing the charger back into normal service. Failure to properly connect the relay wiring could result in property damage, severe personal injury, or death. 2008-2011 Domestic Battery Charger Maintenance and Service Manual Page 7-23...
- Page 192 AC plug (6). The tester should indicate continuity on only one flat blade. If any other reading is obtained, the AC cord and plug must be replaced. 10. If the correct readings were obtained, install the AC cord. See AC Cord Installation on page 7-33. Page 7-24 2008-2011 Domestic Battery Charger Maintenance and Service Manual...
- Page 193 13. Move continuity test probe to the blue wire of the DC cord. Check for continuity at the middle pin. The tester should indicate continuity. If tester does not indicate continuity, replace DC cord. 2008-2011 Domestic Battery Charger Maintenance and Service Manual Page 7-25...
- Page 194 The Version 3.0 and 4.0 onboard computers will quickly flash the battery warning light on the dash to indicate a problem with the voltage supressor. Page 7-26 2008-2011 Domestic Battery Charger Maintenance and Service Manual...
- Page 195 4. Place the continuity test probe on the two terminals of the AC circuit breaker. The tester should indicate continuity. If the tester does not indicate continuity, replace the AC circuit breaker. 2008-2011 Domestic Battery Charger Maintenance and Service Manual Page 7-27...
-
Page 196: Charger Repairs
6. Using pliers, squeeze the strain relief bushing and remove the DC cord. DC CORD BLUE WIRE TO RELAY DC CORD BLACK DC CORD WIRE TO FUSE RED WIRE TO AMMETER STRAIN RELIEF BUSHING Figure 7-23 DC Cord Page 7-28 2008-2011 Domestic Battery Charger Maintenance and Service Manual... -
Page 197: Diode/Heatsink
3. Connect the orange and purple secondary coil transformer wires (1 and 2) to the diode/heatsink at the original locations. Tighten nuts to 18 in-lb (2.0 N·m). 4. Install the charger cover and check charger for proper operation. 2008-2011 Domestic Battery Charger Maintenance and Service Manual Page 7-29... -
Page 198: Transformer
• Make sure wiring is properly routed and secured. Failure to properly route and secure wiring could result in charger malfunction, property damage, or severe personal injury. 8. Install the charger cover and check charger for proper operation. Page 7-30 2008-2011 Domestic Battery Charger Maintenance and Service Manual... -
Page 199: Ammeter
2. Connect the DC cord red wire (1) and the white wires (2 and 3) to the ammeter terminals. 3. Install the charger cover. 4. Plug the charger into the vehicle and check ammeter for proper operation. 2008-2011 Domestic Battery Charger Maintenance and Service Manual Page 7-31... -
Page 200: Fuse Link
4. With a pair of pliers, squeeze in the retaining tabs on the sides of the circuit breaker and push the circuit breaker through the mounting hole in the face of the charger to remove. Page 7-32 2008-2011 Domestic Battery Charger Maintenance and Service Manual... -
Page 201: Charger Ac Cord
7. Position the strain relief bushing on the AC cord. 8. Using pliers, install the strain relief bushing and AC cord into the mounting hole in the charger face. 9. Install the charger cover. 2008-2011 Domestic Battery Charger Maintenance and Service Manual Page 7-33... -
Page 202: Charging A Battery Pack That Has Low Voltage
• The relay wiring must be properly connected prior to placing the charger back into normal service. Failure to properly connect the relay wiring could result in property damage, severe personal injury, or death. 9. Install the charger cover and the retaining screws. Page 7-34 2008-2011 Domestic Battery Charger Maintenance and Service Manual... - Page 203 AC CORD BREAKER BLACK BLACK ORANGE ORANGE BLACK FUSE BROWN WHITE CASE GROUND 100 Ohm BLUE RELAY BOARD ASSEMBLY WITH SUPPRESSOR Figure 7-25 PowerDrive 3 Charger Wiring Diagram (Relay Bypassed) 2008-2011 Domestic Battery Charger Maintenance and Service Manual Page 7-35...
-
Page 205: Section 8 - Iq Plus Charger (External)
11, 25730-18, and 25730-19). Do not attempt to service a battery charger that has not been properly identi- fied. If a charger cannot be properly identified, contact your local Club Car dealer or distributor. The IQ Plus battery charger is automatic and has no external controls (Figure 8-1, Page 8-1). When the charger is connected, there is a 2 to 15 second delay before charging begins. -
Page 206: Iq Plus External Charger Features
16 hours and the batteries are not sufficiently charged. This indicates an abnormal charge cycle. The charger and batteries should be checked by your Club Car distributor/dealer. • The battery warning light will repeatedly illuminate for 10 seconds, at 4 second intervals , during a charge cycle (with the DC plug still connected) if AC power to the charger is interrupted. -
Page 207: The Charge Circuit
Villager 6 and 8 #18 GRAY #18 GRAY #6 RED #10 RED Turf 2 and 252 SENSE LEAD FUSE Carryall 2 and 252 XRT 900 BATTERIES – Figure 8-2 Charge Circuit 2008-2011 Domestic Battery Charger Maintenance and Service Manual Page 8-3... -
Page 208: External Charger Installation And Operation
ý WARNING • Only trained technicians should repair or service the charger. Contact your nearest Club Car distributor/dealer. • Each charger should have its own dedicated 15 or 20 ampere separately protected (circuit breaker or fuse) single phase branch circuit, in accordance with all applicable electrical codes for the location. -
Page 209: External Charger Ac Power Connection
• Do not rock or bend the plug. To connect the charger plug to the vehicle receptacle, grasp the plug handle and push the plug straight into the receptacle (Figure 8-3). WARNING CONTINUED ON NEXT PAGE... 2008-2011 Domestic Battery Charger Maintenance and Service Manual Page 8-5... - Page 210 Vehicles should be restricted to 40 to 50 energy units of discharge between charges until the bat- teries have been properly seasoned (20 to 50 charge cycles). For maximum battery life, Club Car recommends that electric vehicles always be recharged after 40 to 50 energy units of discharge or each night in order to avoid deep discharging the batteries;...
-
Page 211: External Charger Plug And Receptacle
See fol- lowing NOTE. NOTE: If the warning tag has been damaged or removed from the DC cord, have it replaced immediately. 2008-2011 Domestic Battery Charger Maintenance and Service Manual Page 8-7... -
Page 212: Checking Battery Condition With An External Charger
If you do not have this publication, contact your Club Car representative. If the specified test procedures identify no problems, plug the DC cord into the vehicle and let it charge until the charger shuts off automatically. If a problem is found, correct it and then charge the vehicle. -
Page 213: Troubleshooting
Use the following Troubleshooting Guide for troubleshooting IQ Plus external battery chargers (model num- bers 25730-11, 25730-18, and 25730-19). The Troubleshooting Guide encompasses the entire battery charg- ing circuit. Test procedures specified in the Troubleshooting Guide can be found on the following pages. 2008-2011 Domestic Battery Charger Maintenance and Service Manual Page 8-9... - Page 214 DC cord is wired in reverse polarity Check battery charger wiring Test Procedure 4B – Both Diodes Failed Both diodes failed on page 8-17 Troubleshooting Guide continued on next page... Page 8-10 2008-2011 Domestic Battery Charger Maintenance and Service Manual...
- Page 215 (with DC charger cord unplugged) Test Procedure 2 – Onboard Computer on Onboard computer malfunction page 8-15 See Batteries section in the appropriate Battery or batteries need to be replaced maintenance and service manual 2008-2011 Domestic Battery Charger Maintenance and Service Manual Page 8-11...
-
Page 216: Test Procedures
2. Onboard Computer 3. AC Power and Continuity Test of AC Circuit 4. Diodes 5. Charger DC Circuit Continuity Test 6. Transformer 7. Battery State of Charge Test 8. Continuity Page 8-12 2008-2011 Domestic Battery Charger Maintenance and Service Manual... - Page 217 32 volts DC to allow the onboard computer to close the charger relay. If battery pack voltage is too low to start charger, temporarily bypass the charger relay. See Charging a Battery Pack that has Low Voltage on page 8-29. 2008-2011 Domestic Battery Charger Maintenance and Service Manual Page 8-13...
- Page 218 Place multimeter red (+) probe here. Place multimeter black (–) probe here. FRONT OF VEHICLE TRANSPORTER 4 AND 6 VEHICLES CARRYALL 6 VEHICLES (STYLE A) Figure 8-8 IQ Plus Battery Configuration Page 8-14 2008-2011 Domestic Battery Charger Maintenance and Service Manual...
- Page 219 (4) from the relay. Connect the tan wire (4) to the AC circuit breaker (Figure 8-14, Page 8-19). 5.3. With relay bypassed, there should be continuity across the AC cord blades (Figure 8-9, Page 8-15). Figure 8-9 AC Cord Test 2008-2011 Domestic Battery Charger Maintenance and Service Manual Page 8-15...
- Page 220 7. Ensure that the charger is wired properly and all connections are clean and tight. See following CAU- TION. CAUT ION • If connections are not clean and tight, excessive heat will be created and the charger may become damaged. Page 8-16 2008-2011 Domestic Battery Charger Maintenance and Service Manual...
- Page 221 DC cord and ammeter. See Test Procedure 8 – Conti- nuity on page 8-20. Also check the diodes (heatsink). See Test Procedure 4 – Diodes on page 8-16. 2008-2011 Domestic Battery Charger Maintenance and Service Manual Page 8-17...
- Page 222 5. Make sure the secondary coil wires are not touching one another. With the relay bypassed, insert the AC plug into an outlet. If the AC line fuse blows or AC circuit breaker trips, the transformer is shorted inter- nally and must be replaced. Page 8-18 2008-2011 Domestic Battery Charger Maintenance and Service Manual...
- Page 223 2. If the charger does not taper to below 5 amps within 15 minutes, batteries may not be receiving a full charge and the onboard computer should be checked. See Test Procedure 2 – Onboard Computer on page 8-15. See following NOTE. 2008-2011 Domestic Battery Charger Maintenance and Service Manual Page 8-19...
- Page 224 AC cord and plug must be replaced. WAVETEK 1000 2000 200k 200nA 1000 --- FUSED 750V (OHM) SETTING Figure 8-15 AC Cord and Plug Continuity Test Page 8-20 2008-2011 Domestic Battery Charger Maintenance and Service Manual...
- Page 225 If tester does not indicate continuity on both secondary coil wires, replace transformer. Ensure that the fuse is intact and not blown. 2008-2011 Domestic Battery Charger Maintenance and Service Manual Page 8-21...
- Page 226 4. Place the continuity test probes on the two terminals of the AC circuit breaker. The tester should indicate continuity. If the tester does not indicate continuity, replace the AC circuit breaker. Page 8-22 2008-2011 Domestic Battery Charger Maintenance and Service Manual...
-
Page 227: Charger Repairs
DC CORD TO RED WIRE ASSEMBLY BLACK WIRE AT RELAY TO AMMETER DC CORD RED WIRE TO HEATSINK STRAIN RELIEF BUSHING Figure 8-16 DC Cord Figure 8-17 DC Cord Replacement 2008-2011 Domestic Battery Charger Maintenance and Service Manual Page 8-23... -
Page 228: Heatsink
Tighten nut to 18 in-lb (2.0 N·m). 3. Connect one of the secondary coil transformer wires (tan) to the bottom terminal post of the heatsink. Tighten nut to 18 in-lb (2.0 N·m). Page 8-24 2008-2011 Domestic Battery Charger Maintenance and Service Manual... -
Page 229: Transformer
• Make sure wiring is properly routed and secured. Failure to properly route and secure wiring could result in charger malfunction, property damage, or severe personal injury. 9. Install the charger cover and check charger for proper operation. 2008-2011 Domestic Battery Charger Maintenance and Service Manual Page 8-25... -
Page 230: Ammeter
• Do not allow ammeter post to rotate as the nut is tightened. Rotation of the post could result in a damaged ammeter. 6. Install the charger cover. 7. Plug the charger into the vehicle and check ammeter for proper operation. Figure 8-18 Ammeter Page 8-26 2008-2011 Domestic Battery Charger Maintenance and Service Manual... -
Page 231: Fuse Link
NOTE: The charger relay blade connector is located off-center within the relay housing. When connecting voltage suppressor slip-on connector to relay blade connector, make sure slip-on connector is positioned so that flat side of connector is closest to relay housing (Figure 8-19, Page 8-29). 2008-2011 Domestic Battery Charger Maintenance and Service Manual Page 8-27... -
Page 232: Charger Relay
2. Connect the black wire to the AC circuit breaker, the white wire to the primary coil, and the green wire to the charger base. Tighten the screw on the green (ground) wire terminal to 18 in-lb (2.0 N·m). 3. Position the strain relief bushing on the AC cord. Page 8-28 2008-2011 Domestic Battery Charger Maintenance and Service Manual... -
Page 233: Charging A Battery Pack That Has Low Voltage
ý DANGER • Do not touch any wire or component in the battery charger while AC power is present. Failure to heed this warning will result in an electric shock. 2008-2011 Domestic Battery Charger Maintenance and Service Manual Page 8-29... - Page 234 See Section 11 – Electrical System and Testing in the appropriate maintenance and service manual. Page 8-30 2008-2011 Domestic Battery Charger Maintenance and Service Manual...
-
Page 235: Section 9 - Iq Plus Charger (Onboard)
Do not attempt to service a battery charger that has not been properly identified. If a charger cannot be prop- erly identified, contact your local Club Car dealer or distributor. For battery chargers with model numbers listed above that are installed in vehicles other than IQ Plus vehi- cles, contact your local Club Car dealer or distributor. -
Page 236: Iq Plus Onboard Charger Features
• The battery warning light will repeatedly illuminate for 10 seconds, at 4 second intervals, if the charger times out at 16 hours and the batteries are not sufficiently charged. This indicates an abnormal charge cycle. The charger and batteries should be checked by your Club Car distributor/dealer. UL AND CSA LISTING... -
Page 237: Onboard Charger Operation
ý WARNING • Only trained technicians should repair or service the charger. Contact your nearest Club Car distributor/dealer. • Each charger should have its own dedicated 15 or 20 ampere separately protected (circuit breaker or fuse) single phase branch circuit, in accordance with all applicable electrical codes for the location. -
Page 238: Onboard Charger Ac Power Connection
1. Connect the AC power supply cord to an AC outlet designed to provide the proper AC voltage for the charger. 2. The charger will activate automatically within 2 to 15 seconds. Page 9-4 2008-2011 Domestic Battery Charger Maintenance and Service Manual... -
Page 239: Checking Battery Condition With An Onboard Charger
If you do not have this publication, contact your Club Car representative. If the specified test procedures identify no problems, plug the AC cord into the wall outlet and let it charge until the charger shuts off automatically. If a problem is found, correct it and then charge the vehicle. -
Page 240: Testing Charger Operation
ý DANGER • Do not touch any wire or component in the battery charger while AC power is present. Failure to heed this warning will result in an electric shock. Page 9-6 2008-2011 Domestic Battery Charger Maintenance and Service Manual... - Page 241 Test Procedure 2 – Control Board on Onboard computer malfunction page 9-11 Test Procedure 6 – Transformer on Failed transformer page 9-15 Failed ammeter Replace ammeter Troubleshooting Guide continued on next page... 2008-2011 Domestic Battery Charger Maintenance and Service Manual Page 9-7...
- Page 242 See Batteries section in the appropriate Battery or batteries need to be replaced maintenance and service manual Batteries are getting close to full discharge Recharge batteries as soon as possible capacity Page 9-8 2008-2011 Domestic Battery Charger Maintenance and Service Manual...
-
Page 243: Test Procedures
32 volts DC to allow the onboard computer to close the charger relay. If battery pack voltage is too low to start charger, temporarily bypass the charger relay. See Charging a Battery Pack that has Low Voltage on page 9-29. 2008-2011 Domestic Battery Charger Maintenance and Service Manual Page 9-9... - Page 244 OF VEHICLE Place multimeter red (+) probe here. Place multimeter black (–) probe here. FRONT OF VEHICLE TRANSPORTER 4 AND 6 VEHICLES CARRYALL 6 VEHICLES (STYLE A) Figure 9-4 Battery Configurations Page 9-10 2008-2011 Domestic Battery Charger Maintenance and Service Manual...
- Page 245 Connect red (+) probe to terminal from which tan transformer wire was disconnected (Figure 9-6, Page 9-11). 4. Connect AC cord to outlet. Reading should be approximately 110 to 128 volts AC. 5. If reading is incorrect, replace control board. 2008-2011 Domestic Battery Charger Maintenance and Service Manual Page 9-11...
- Page 246 • The relay wiring must be properly connected prior to placing the charger back into normal service. Failure to properly connect the relay wiring could result in property damage, severe personal injury, or death. Page 9-12 2008-2011 Domestic Battery Charger Maintenance and Service Manual...
- Page 247 8. Ensure that the charger is wired properly and all connections are clean and tight. See following CAU- TION. CAUT ION • If connections are not clean and tight, excessive heat will be created and the charger may become damaged. 2008-2011 Domestic Battery Charger Maintenance and Service Manual Page 9-13...
- Page 248 See General Warning, Section 1, Page 1-1. 1. Disconnect the AC cord from the wall outlet. 2. Disconnect the batteries and discharge the controller. See Disconnecting The Batteries on page 1-3. Page 9-14 2008-2011 Domestic Battery Charger Maintenance and Service Manual...
- Page 249 ý DANGER • Do not touch any wire or component in the battery charger while AC power is present. Failure to heed this warning will result in an electric shock. 2008-2011 Domestic Battery Charger Maintenance and Service Manual Page 9-15...
- Page 250 • The relay wiring must be properly connected prior to placing the charger back into normal service. Failure to properly connect the relay wiring could result in property damage, severe personal injury, or death. Page 9-16 2008-2011 Domestic Battery Charger Maintenance and Service Manual...
- Page 251 10. If the correct readings are obtained in all of the previous steps, the short AC cord and the retractable cord reel are functioning properly. If any of the readings are incorrect, proceed to the following test procedures to determine which of the two components has failed. 2008-2011 Domestic Battery Charger Maintenance and Service Manual Page 9-17...
- Page 252 5. Remove the charger cover. 6. Disconnect the green wire (2) from charger case and position it so it does not touch any metal part of the charger (Figure 9-14, Page 9-19). Page 9-18 2008-2011 Domestic Battery Charger Maintenance and Service Manual...
- Page 253 AC plug. The tester should indicate continuity on one flat blade only. If any other reading is obtained, the cord reel must be replaced. 2008-2011 Domestic Battery Charger Maintenance and Service Manual Page 9-19...
- Page 254 DC cord. The tester should indicate continuity on the black DC cord wire only. If any other reading is obtained, the DC cord must be replaced. Page 9-20 2008-2011 Domestic Battery Charger Maintenance and Service Manual...
- Page 255 4. Place the continuity test probe on the two terminals of the AC circuit breaker. The tester should indicate continuity. If the tester does not indicate continuity, replace the AC circuit breaker. 2008-2011 Domestic Battery Charger Maintenance and Service Manual Page 9-21...
-
Page 256: Charger Repairs
2. Attach the red wire of the new DC cord to the center terminal of the heatsink and tighten the nut to 18 in-lb (2.0 N·m) (Figure 9-16, Page 9-22). Page 9-22 2008-2011 Domestic Battery Charger Maintenance and Service Manual... -
Page 257: Heatsink
18 in-lb (2.0 N·m). 5. Install the charger cover and install the charger in the vehicle. See Onboard Charger Installation on page 9-31. 6. Check charger for proper operation. 2008-2011 Domestic Battery Charger Maintenance and Service Manual Page 9-23... -
Page 258: Transformer
See General Warning, Section 1, Page 1-1. Ammeter Removal 1. Disconnect the AC cord and remove the battery charger from the vehicle. See Onboard Charger Removal on page 9-31. See WARNING on page 9-22. Page 9-24 2008-2011 Domestic Battery Charger Maintenance and Service Manual... - Page 259 • Do not allow ammeter post to rotate as the nut is tightened. Rotation of the post could result in a damaged ammeter. 6. Install the charger cover and install the charger in the vehicle. See Onboard Charger Installation on page 9-31. 7. Check charger for proper operation. 2008-2011 Domestic Battery Charger Maintenance and Service Manual Page 9-25...
-
Page 260: Fuse Link
2. Remove the charger cover. 3. Disconnect all wires from the relay (Figure 9-19, Page 9-27). 4. Remove two nuts and lock washers securing relay to the charger base. 5. Remove the relay. Page 9-26 2008-2011 Domestic Battery Charger Maintenance and Service Manual... -
Page 261: Charger Ac Circuit Breaker
1. Disconnect the AC cord and remove the battery charger from the vehicle. See Onboard Charger Removal on page 9-31. See WARNING on page 9-22. 2. Remove the charger cover. 2008-2011 Domestic Battery Charger Maintenance and Service Manual Page 9-27... -
Page 262: Retractable Ac Cord Reel
4. Place new heatshrink tubing over the short AC cord and connect the short AC cord to the retractable cord reel. Slide the tubing over the connection and carefully apply heat to shrink it. Page 9-28 2008-2011 Domestic Battery Charger Maintenance and Service Manual... -
Page 263: Charging A Battery Pack That Has Low Voltage
• Do not touch any wire or component in the battery charger while AC power is present. Failure to heed this warning will result in an electric shock. 5. Install the charger cover and install the charger in the vehicle. See Onboard Charger Installation on page 9-31. 2008-2011 Domestic Battery Charger Maintenance and Service Manual Page 9-29... - Page 264 HEATSINK BLACK BLACK BLUE FUSE AMMETER CONTROL BOARD RELAY AC CIRCUIT BREAKER BLACK BLACK GREEN CASE WHITE GROUND AC CORD Figure 9-21 IQ Plus Onboard Charger Wiring Diagram (Relay Bypassed) Page 9-30 2008-2011 Domestic Battery Charger Maintenance and Service Manual...
-
Page 265: Onboard Charger Removal And Installation
(Figure 9-22, Page 9-32). Slide the tubing over the connection and carefully apply heat to shrink it. 4. Connect the batteries. See Connecting The Batteries on page 1-4. 2008-2011 Domestic Battery Charger Maintenance and Service Manual Page 9-31... - Page 266 VILLAGER 8 To AC Cord Reel Route behind batteries TRANSPORTER 4 TRANSPORTER 6 CARRYALL 6 TURF 2 AND 252 CARRYALL 2 AND 252 XRT 900 Figure 9-22 Onboard Charger Mounting Details Page 9-32 2008-2011 Domestic Battery Charger Maintenance and Service Manual...
-
Page 267: Section 10 - High Frequency Charger (Onboard)
912-4852). Do not attempt to service a battery charger that has not been properly identified. If a charger can- not be properly identified, contact your local Club Car dealer or distributor. The High Frequency Battery Charger functions as an integral part of the vehicles' electrical system and will not work with other electric vehicles. -
Page 268: Features
The enclosure of the charger has been tested successfully to EN60529, meeting IP66. The AC supply inlet is rated to IP20, which is suitable for indoor use only. Keep all AC connections clean and dry. Page 10-2 2008-2011 Domestic Battery Charger Maintenance and Service Manual... -
Page 269: How To Identify Charge Algorithm Number
“two flashes”, pause, “five flashes”.] The charger will not repeat this series of flashes. To see the number again, repeat steps 1 and 3 with a 20 second pause between them. Figure 10-2 80% LED Flashes in Algorithm Display Mode 2008-2011 Domestic Battery Charger Maintenance and Service Manual Page 10-3... -
Page 270: The Charge Circuit
• Do not operate this charger if the AC supply cord is damaged or if the charger has received a sharp blow, been dropped, or otherwise damaged in any way. Refer all repair work to the manufacturer or qualified personnel. DANGER CONTINUED ON NEXT PAGE Page 10-4 2008-2011 Domestic Battery Charger Maintenance and Service Manual... - Page 271 See Battery Charger Identification on page 2-1. • Do not attempt to charge frozen batteries or batteries with bulged cases. Discard the battery in accordance with all environmental laws or return to an authorized Club Car dealer. Frozen batteries can explode.
-
Page 272: Charger Displays
Short: <80% Charge. Flashing: Long: >80% Charge. Reduced Power Mode: Low AC Voltage or High internal Amber Flashing: charger temperature. Charger error. Reset charger power and refer to Flashing: Troubleshooting Instructions below. Page 10-6 2008-2011 Domestic Battery Charger Maintenance and Service Manual... -
Page 273: Ac Power Connection
NOTE: Batteries should be put on charge even if they have been used for only a short time, i.e., 10 min- utes. The charger is automatic and will turn off when batteries are fully charged. If the charger does not seem to be operating properly, or if the batteries seem weak, contact a local Club Car distribu- tor/dealer. -
Page 274: Maintenance
Any charger not functioning correctly should be removed from use until it is properly repaired. This will prevent further damage to the vehicle and avoid the possibility of injury due to unsafe conditions. Contact your local Club Car distributor/dealer to perform all repairs and semiannual and annual periodic ser- vice. -
Page 275: Troubleshooting
Reset charger (interrupt AC power for 15 seconds). Reset charger (interrupt AC power for 15 Charger Internal Fault seconds). Return to qualified service depot if fault persists. 2008-2011 Domestic Battery Charger Maintenance and Service Manual Page 10-9... -
Page 276: Test Procedures
(–) probe at the negative (–) post of each battery. Record the readings. The on-charge voltage for the set should be between 56.0 volts and 63.0 volts depending on the age and state of charge of the batteries being tested. Page 10-10 2008-2011 Domestic Battery Charger Maintenance and Service Manual... - Page 277 For each 10 °F (5.6 °C) above 80 °F (26.7 °C), add 0.004 to the reading. For each 10 °F (5.6 °C) below 80 °F (26.7 °C), subtract 0.004 from the reading. 2008-2011 Domestic Battery Charger Maintenance and Service Manual Page 10-11...
- Page 278 1.240 – 1.245 – 1.240 – 80 °F no.3 Cell Dead .000 does (26.7 °C) – Replace Battery = 1.240 = 1.245 not rise = 1.235 = 1.250 = 1.240 Page 10-12 2008-2011 Domestic Battery Charger Maintenance and Service Manual...
- Page 279 Cell Dead 1.240 – 0 1.245 – 0 Float does 1.250 – 0 80 °F (26.7 °C) 0.000 – Replace Bat- = 1.240 = 1.245 not rise = 1.250 tery 2008-2011 Domestic Battery Charger Maintenance and Service Manual Page 10-13...
- Page 280 6 last (Style C 6 x 8-Volt Precedent) (Figure 10-7, Page 10-15). 3. Check and record the electrolyte temperature of the battery packs. Check cell no. 2 (second cell from positive post) in each battery. Page 10-14 2008-2011 Domestic Battery Charger Maintenance and Service Manual...
- Page 281 Figure 10-7 Battery Discharge Test – Precedent Style C Battery Configuration (Viewed from driver side of vehicle) 1. RED probe to battery no. 1 (+). 2. BLACK probe to battery no. 6 (-). 2008-2011 Domestic Battery Charger Maintenance and Service Manual Page 10-15...
- Page 282 120-129 °F 57 Minutes 72 Minutes (21-23 °C) (49-54 °C) 75-79 °F 130-150 °F 60 Minutes 74 Minutes (24-26 °C) (54-66 °C) 80-84 °F 62 Minutes ***** ***** (27-29 °C) Page 10-16 2008-2011 Domestic Battery Charger Maintenance and Service Manual...
- Page 283 120-129 °F 57 Minutes 72 Minutes (21-23 °C) (49-54 °C) 75-79 °F 130-150 °F 60 Minutes 74 Minutes (24-26 °C) (54-66 °C) 80-84 °F 62 Minutes ***** ***** (27-29 °C) 2008-2011 Domestic Battery Charger Maintenance and Service Manual Page 10-17...
- Page 284 120-129 °F 57 Minutes 72 Minutes (21-23 °C) (49-54 °C) 75-79 °F 130-150 °F 60 Minutes 74 Minutes (24-26 °C) (54-66 °C) 80-84 °F 62 Minutes ***** ***** (27-29 °C) Page 10-18 2008-2011 Domestic Battery Charger Maintenance and Service Manual...
-
Page 285: Battery Troubleshooting Examples: 12-Volt Batteries
Battery no. 2 should be replaced with a bat- tery that has the same age and usage as the other batteries in the set. 2008-2011 Domestic Battery Charger Maintenance and Service Manual Page 10-19... -
Page 286: Battery Troubleshooting Examples: 8-Volt Batteries
Battery no. 2 should be replaced with a bat- tery that has the same age and usage as the other batteries in the set. Page 10-20 2008-2011 Domestic Battery Charger Maintenance and Service Manual... -
Page 287: Battery Troubleshooting Examples: 6-Volt Batteries
Battery no. 2 should be replaced with a bat- tery that has the same age and usage as the other batteries in the set. 2008-2011 Domestic Battery Charger Maintenance and Service Manual Page 10-21... -
Page 288: Charger Repairs
Onboard Charger Installation – Precedent Vehicles 1. Installation is reverse of removal. 2. Tighten four lock nuts to 40 in-lb (5.4 N·m). 3. Connect the batteries. See Connecting The Batteries on page 1-4. Page 10-22 2008-2011 Domestic Battery Charger Maintenance and Service Manual... - Page 289 3 – on-charge battery voltage ......10-10 onboard computer 4 – hydrometer test ........10-11 testing ..............8-15 5 – discharge test ...........10-14 relay installation ............8-28 troubleshooting ..........10-9 12 volt battery troubleshooting examples ..10-19 removal ............8-28 2008-2011 Domestic Battery Charger Maintenance and Service Manual Page i-1...
- Page 290 ............9-21 installation ............9-31 DC cord ............9-20 removal ............9-31 relay ............9-21 repairs .............. 9-22 retractable cord reel ........9-19 testing ..............9-6 transformer ..........9-21 Page i-2 2008-2011 Domestic Battery Charger Maintenance and Service Manual...
- Page 291 ............6-30 installation ............5-27 testing ..............6-26 removal ............5-27 batteries long-term storage charge ........5-2 onboard computer battery condition after a charge cycle ....6-12 testing ..............5-15 charging batteries that have low voltage ..6-34 2008-2011 Domestic Battery Charger Maintenance and Service Manual Page i-3...
- Page 292 5 – DC circuit continuity test ......6-21 installation ............7-29 6 – transformer ..........6-22 removal ............7-28 7 – battery state of charge ....... 6-23 testing .............7-21, 7-25 Page i-4 2008-2011 Domestic Battery Charger Maintenance and Service Manual...
- Page 293 ..........7-12 testing ..............3-20 voltage suppressor long-term storage charge ........3-2 testing ..............7-26 onboard computer testing ..............3-19 PowerDrive charger (external) relay AC circuit breaker, charger installation ............3-32 see circuit breaker removal ............3-32 2008-2011 Domestic Battery Charger Maintenance and Service Manual Page i-5...
- Page 294 5 – DC circuit continuity test ......4-16 removal ...........4-33, 4-34 6 – transformer ..........4-17 repairs .............. 4-24 specifications ............. 2-2 7 – battery state of charge ....... 4-18 Page i-6 2008-2011 Domestic Battery Charger Maintenance and Service Manual...
- Page 295 AC cord without retractable cord reel ..4-19 ammeter ............4-23 DC cord ............4-22 relay .............4-23 retractable cord reel ........4-21 transformer ..........4-23 transformer installation ............4-26 removal ............4-26 testing ..............4-17 troubleshooting ............4-7 WARNING definition of ............1-1 2008-2011 Domestic Battery Charger Maintenance and Service Manual Page i-7...
- Page 296 Club Car NOTES...
- Page 297 5. If you are reviewing a Kit Instruction, were all indicated parts included in your kit? Yes / No Your Comments and Suggestions: Please send a copy of this page to: Fax: (706) 228-2662 or Thank You! E-mail: Tech_Pubs@clubcar.com Club Car’s Technical Publications Department 2008-2011 Domestic Battery Charger Maintenance and Service Manual...
- Page 300 Club Car, LLC www.clubcar.com P.O. Box 204658 Phone 1.706.863.3000 Augusta, GA 30917-4658 1.800.ClubCar Int’l +1 706.863.3000 1.706.863.5808...
Need help?
Do you have a question about the 2008-2011 and is the answer not in the manual?
Questions and answers