Advertisement
Quick Links
Advertisement

Related Manuals for Siruba LBHS-1790S


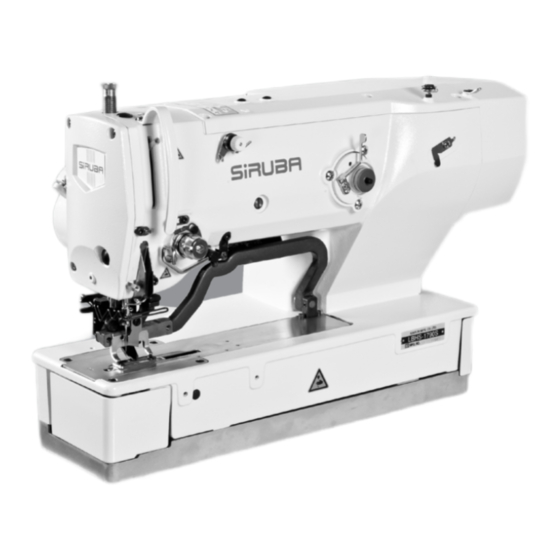
Summary of Contents for Siruba LBHS-1790S
- Page 1 使用說明書與零件圖 INSTRUCTION BOOK & PARTS LIST LBHS-1790S...
-
Page 3: To Ensure Safe Use Of Your Sewing Machine
Introduction TO ENSURE SAFE USE OF 為了安全地使用縫紉機 YOUR SEWING MACHINE For the sewing machine, automatic machine 由於縫製作業的具體情況,有時不得不靠近機 and ancillary devices (hereinafter collectively 器轉動的零部件進行操作而有可能接觸到轉動 referred to as "machine"), it is inevitable to 零部件,因此實際操作機器的操作員和維修保 conduct sewing work near moving parts of 養的維修人員,必須在事前仔細閱讀 有關安全 the machine. - Page 4 (II)Explanation of pictorial warning ( Ⅱ ) 警告圖示表示和指示標籤的說明 indications and warning labels 警告圖標表示 Pictorial warning indication 警告圖標表示 Pictorial warning indication 有接觸轉動部,造成受傷的危險。 作業時拿縫紉機的話,有讓手受傷的危險。 There is a risk of injury if contact-ing a Be aware that holding the sewing machine moving section. during operation can hurt your hands.
-
Page 5: Safety Precautions
Introduction SAFETY PRECAUTIONS 有關安全的注意事項 • 危險 •DANGER Accident means "to cause personal injury or 事故:是指給與人身以及財產帶來損害。 1. 需要打開電氣箱時,為了防止觸電事故,請 death or damage to property." 關閉電源,經過 5 分鐘以上的時間之後再打 1. When it is necessary to open the control box containing electrical parts, be sure to 開電氣箱蓋。... - Page 6 ⑶安 裝 ⑶Installation (Ⅰ)Table and table stand (Ⅰ)機台、台腳 1. 為了防止人身事故,請一定使用純正的機 1. Be sure to use SIRUBA genuine table and table stand in order to prevent accident 台、台腳。不得以使用非純正的零件時, that can result in personal injury or death. 請一定使用可以充分承受機器重量、運轉 If it is inevitable to use a table and table 時的反作用力的機台、台腳。...
- Page 7 Introduction 2. 使用市場出售的離合馬達時,因被捲入 V 2. If a commercially available clutch motor is used with the machine, be sure to select 形皮帶而造成的事故,請一定選用安裝有 one with an entanglement preventive 防止捲入功能的皮帶護罩的離合馬達。 pulley cover in order to protect against ⑷操作前 being entangled by the V-belt. 1.
- Page 8 fire accident by overheat. ⑹加 油 ⑹Lubrication 1. 請使用純正的機油和純正的潤滑脂向規定 1. Be sure to use SIRUBA genuine oil and 部位進行加油和塗抹潤滑脂。 SIRUBA genuine grease to the parts to 2. 為了防止發炎和膿腫,眼睛、身體上粘附 be lubricated. 了油時,請立即進行清洗。...
- Page 9 7. If the machine cannot be normally operated after repair or adjustment, immediately stop operation and contact SIRUBA or the distributor in your area for repair in order to prevent accident that can result in personal injury or death. 8. If the fuse has blown, be sure to turn...
- Page 10 法以外的用處。如果使用於規定用途以外 instruction manual in order to prevent 時,本公司一概不負任何責任。 2. 為了防止人身事故,請不要改裝機器。對 accident that can result in personal injury or death. SIRUBA assumes no 於因改裝而發生的事故,本公司一概不負 responsibility for damages or personal 任何責任。 injury or death resulting from the use of the machine for any application other than the intended one.
- Page 11 Introduction 2-1. 例如,向機針、彎針、分線器等需要穿 2-1. For example, threading the parts such as the needle, looper, spreader etc. 線的零件進行穿線或更換梭心時。 2-2. 例如,更換或調整組成機器的所有零部 which have to be threaded, or changing the bobbin. 件時。 2-3. 例如,檢查、修理、清掃機器時,或離 2-2. For example, changing or adjusting all component parts of the machine. 開機器時。...
- Page 12 2. Never operate the machine in any place 2. 為了防止因誤動作造成的事故,在超過額 where the voltage fluctuates by more 定電壓 ±10%的地方,請不要使用縫紉 than "rated voltage ±10%" in order to 機。 prevent accident caused by malfunction 3. 為了防止因誤動作造成的事故,對於使用 of the machine. 氣缸等高壓空氣的裝置,請確認了壓力符 3. Be sure to verify that the air-driven 合規定之後再進行使用。...
- Page 13 Introduction PRECAUTIONS TO BE TAKEN 為了安全地使用 LBHS-1790S SO AS TO USE THE LBHS-1790S 縫紉機的注意事項 SERIES MORE SAFELY • 危險 •DANGER 1. 為了防止觸電事故,打開電源時,請不要打 1. To avoid electrical shock hazards, neither open the cover of the electrical box for the 開馬達電氣箱蓋,也不要觸摸電氣箱內的零 motor nor touch the components mounted 件。...
- Page 14 5. 為了防止對人身的傷害,請不要在卸下馬達 5. To prevent from body injuring, please do not take off motor cover, eyes guard or 外罩、眼睛保護罩等安全裝置的狀態下運轉 other safety devices while operating. 縫紉機。 6. 為了防止對人身的傷害,放倒縫紉機時和 6. To prevent from body injuring, be caution do not clip your fingers, etc while putting 返回到原來的位置時,請注意不要夾到手指...
-
Page 15: Safety Devices And Warning Labels
Introduction SAFETY DEVICES AND WARNING 關於安全裝置和警告標籤 LABELS 注意被夾標籤 Pinch point warning label 警告標籤 ( 參照 II 頁警告標籤 ) 馬達護罩 這是不要把手指等夾進挑 Warning labels Motor guard 線桿和挑線桿護罩內的注 (Refer to the warning label on page II.) 這是防止馬達、齒輪、風扇、皮帶 意標籤。 記載著操作縫紉機時的最低限度的注意事項。 輪和人體接觸的護罩。 It is the warning label Record the minimum precautions of operating The guard could prevent human indicated that do not put... - Page 17 Introduction 頁 /PAGE INDEX 索引 I. 使用時的注意事項 I.IMPORTANT SAFETY INSTRUCTIONS II. 規格 II.SPECIFICATIONST 1. 子機種 1. SUBCLASS 2. 規格 2. SPECIFICATIONS 3. 標準縫製形狀一覽表 3. STANDARD SEWING SHAPE LIST 4. 構成 4. CONFIGURATION III. 安裝 III. INSTALLATION IV. 縫紉機運轉前 IV.PREPARATION BEFORE OPERATION 1.
- Page 18 頁 /PAGE INDEX 索引 12. 縫製資料編輯有/無的設定方法 12. METHOD OF SETTING SEWING DATA WITH/ WITHOUT EDIT 13. 縫製數據一覽表 13. SEWING DATA LIST 14. 複製縫製圖案 14. COPYING SEWING PATTERN 15. 使用圖案登記鍵 15. USING PATTERN REGISTER KEY 16. 使用參數登記鍵時 16. USING PARAMETER REGISTER KEY 17.
-
Page 19: Important Safety Instructions
ON after setting the sewing machine to the bed base properly. Ⅱ . 規格 Ⅱ .SPECIFICATIONS 1. Subclass 1. 子機種 Lockstitch buttonholing machine, LBHS- LBHS-1790S 平縫電子鎖扣眼縫紉機有以下 1790S, has the subclass machines below. 的子機種。 子機種 LBHS-1790S LBHS-1792K LBHS-1795S Subclass 襯衣、襯衫、... - Page 20 Ⅱ . 規格 Ⅱ .SPECIFICATIONS 2. Specification 2. 規格 標準速度:3600sti/min(最高:4200sti/min) (使用幹式旋梭時,最高:3300sti/min) 縫紉速度 Sewing speed Standard speed : 3,600 sti/min (Max. : 4,200 sti/min) (Max. : 3,300 sti/min when dry hook is used) 使用機針 DP×5 # 11 ~# 14 Needle DP 型全旋轉旋梭 使用旋梭...
- Page 21 Introduction 3. Standard sewing shape list 3. 標準縫製形狀一覽表 (5)輻射直線加固型 (6)輻射錐形加固型 (1)角型 (2)圓型 (3)輻射角型 (4)輻射型 (5)Radial straight (6)Radial taper bar-tacking (1)Square type (2)Round type (3)Radial square type (4)Radial type bar-tacking type type 液晶顯示 液晶顯示 液晶顯示 液晶顯示 液晶顯示 液晶顯示 PANEL PANEL PANEL PANEL PANEL PANEL...
- Page 22 4. Configuratio 4. 構成 ⑦ ② ③ ① ④ ⑤ ⑥ LBHS-1790S consists of the following LBHS-1790S 由以下部分所構成 components. ① Power ON/OFF switch ① 電源開關 ② Machine head (LBHS-1790S) ② 縫紉機機頭 (LBHS-1790S) ③ Operation panel ③ 操作盤 ④ Control box (MC-601) ④...
- Page 23 Introduction Ⅲ . 安裝 Ⅲ .INSTALLATION 危險 搬運縫紉機時,請至少 2 人以上進行。 To prevent possible accidents caused by the fall of the sewing machine, perform the work by two persons or more when the machine is moved. DANGER 1.Set-up of the table 1.
- Page 24 2. 電源線的連接 (2)Connecting the power source cord Voltage specification 電壓規格 ● ● For other type machines, power source 規格請參看電壓注意標籤和額定規格標 specifictions are indicated on the 牌。 請根據規格選接電線。 voltage caution seal and the rating label. Connect the cord in accordance with the specifictions. 電壓注意標籤 Voltage caution seal 額定規格標牌...
- Page 25 Introduction 3.Installing the sewing machine main unit 3. 縫紉機主體的安裝 Place hinge plates and shaft bearings ① 把絞鏈①和軸承座②(② -1:橡膠,② -2: (rubber) and (metal) in two ② -1 ② -2 金屬) 裝到機頭位置的 2 處,然後用固定螺 places on the head base and fix the hinge 絲③...
- Page 26 5.Connecting the safety switch connector 5. 安全開關的連接 Connect safety switch connector ① with 把安全開關插頭①連接到機頭側的插頭② connector ② located on the machine head 上。 side. ② ① 電纜夾 Cord clamp 6.Installing the hook oil shield plate 6. 旋梭防油板的安裝 Install hook oil shield plate ① onto bed base 用固定螺絲② 把旋梭防油板①安裝到機台座 ③ with setscrew ② . ③...
- Page 27 Introduction 8.Connecting the cords 8. 電纜的連接 Perform the connection of the cords as 請按照下圖所示的那樣連接電纜。 shown in the figure below. 縫紉機機頭 Sewing machine head CN14 CN16 SDC 電路板 SDC circuit board CN16 CN14 CN37 CN38 CN37 CN39 CN38 CN39 操作盤 CN41 CN41 Operation panel CN44...
- Page 28 9. Managing the cord 9. 電線的處理 ⑴ Slowly tilting the sewing machine, check ⑴請一邊慢慢地放倒縫紉機,一邊確認電纜 that the cords are not forcibly pulled. 沒有被勾住。 ⑵ Fix the cords with cord setting plate ① as ⑵如圖所示,用電線固定板①固定電線。 shown in the figure. ② ① 注意 : 放倒縫紉機時,請確認機頭支桿②安裝在機臺上。 Caution:When you tilt the sewing machine, make sure that the sewing machine head support bar ②...
- Page 29 Introduction 11.Fixing the temporary stop switch 11. 暫停開關的固定 The temporary stop switch has been in the 出貨時,暫停開關為 A 的狀態,請放鬆固 state as shown in figure A at the time of 定螺絲①,變更為 B 狀態,然後用附屬的 delivery.Loosen setscrew ① and set the 固定螺絲② 和固定螺絲① 固定好。 switch in the state as shown in figure B, and fix it with setscrew ①...
-
Page 30: Preparation Before Operation
Ⅳ .PREPARATION BEFORE Ⅳ . 縫紉機運轉前 OPERATION 1.Lubrioation 1. 加油 (1) Lubricating oil to oiling tank (1) 向加油罐裡加油 Fill the oiling tank with New Defrix Oil No.1 把 New Defrix Oil No.1 機油加到 MAX 記 ● ● up to the level indicated by “MAX” ① . 號的位置①。... - Page 31 Introduction 2. Inserting the needle 2. 機針的安裝方法 Hold needle with its recessed part facing 從縫紉機正面看,把機針凹部橫向轉到前側 toward the operator side A, insert the A 。 然後把機針插進針桿孔的深處,鎖緊 needle fully into the needle clamping hole, 機針固定螺絲①。機針使用 DP×5-(#11、 and tighten needle setscrew ① . Use a #14)。...
- Page 32 4. Threading the bobbin case 4. 梭殼的穿線方法 Rotating direction of bobbin and threading 梭芯轉動方向和穿線方法 (1)Fit the bobbin so that it rotates in the (1) 請按照箭頭所指示的方向把梭芯插進去。 direction of the arrow. (2) 請把機線穿過穿線口①,然後再從張力彈 (2)Pass the thread through thread slit 簧② 的下面躦過去,再次穿過穿線口③, ① , then through under the tension 從④把線拉出來。...
- Page 33 Introduction ② ① 注意 : 調整了底線張力之後,請確認記憶體開關的上線張力設定。(參照 P63) Caution:When bobbin thread tension is adjusted, check the needle thread tension setting of the memory switch. (See P .63) 6. Installation of bobbin case 6. 梭殼的安裝方法 (1)Lift up and hold bobbin case latch lever (1) 撥起梭殼抓手。...
- Page 34 7. Installing the knife 7. 切刀的安裝方法 When replacing the knife with a new one, 請按如下的步驟更換新的切刀。 perform as follows. (1) 卸下切刀固定螺絲 ②之後,就可以把切 (1)Knife ① can be easily removed together 刀①和墊片一起簡單地卸下來。 with the washer when removing knife (2) 用手按下切刀之後,如圖所示把切刀和 retaining screw ② . 針板上面的距離調整到...
-
Page 35: Operation Of The Sewing Machine
Introduction Ⅴ .OPERATION OF THE SEWING Ⅴ . 縫紉機的操作 MACHINE 1. 操作盤的開關說明 1. Explanation of the operation panel switch ② ③ ④ ⑤ ⑥ ① ⑩ ⑦ ⑧ ⑨ There are 3 states below according to back- 不同的背光的顏色,表示如下 3 種狀態。 light colors. - Page 36 名稱 NAME 功能 FUNCTION 名稱 NAME 功能 FUNCTION 液晶顯示部 表示圖案 No.、形狀等各種資料。 包邊寬度鍵 選擇顯示包邊寬度。 LCD display Various data such as pattern No., shape, OVEREDGING This key selects overedging width display. etc. are displayed. WIDTH key 準備鍵 開始縫製時按。 左加固寬度鍵 選擇顯示左加固寬度補償。 READY key 按鍵後,順次變換縫製準備完了...
- Page 37 Introduction 2. Basic operation of the sewing machine 2. 縫紉機的基本操作 1)Turn ON the power switch. 1) 打開電源開關 First, check that presser type A which 首先,請確認被設定的壓腳類型 A 和實際 has been set is the same as that of the 安裝的壓腳類型是否一樣。確認和設定方 presser actually mounted. For checking 法請參閱...
- Page 38 3. How to use the pedal 3. 踏板的操作方法 This sewing machine can be used by 本縫紉機,可以從下列 3 類型中選擇踏板的 selecting the pedal operating procedure 操作方法使用。請選擇作業效率高的和喜歡 from among 3 types below. Select the 的操作方法使用。 operating procedure you desire for working (1) 踏板類型的設定方法 efficiency and use the sewing machine.
- Page 39 Introduction (2) Explanation of pedal motion (2) 踏板的動作說明 單踏板(無中立位置) 單踏板(有中立位置) 2 踏板類型 1-pedal 1-pedal 2-pedal type (Without intermediate position) (With intermediate position) •初期位置 •初期位置 •初期位置 壓腳中立位置②或縫製位置③ 壓腳最高位置① 壓腳最高位置① (1) 安放縫製物 (1) 安放縫製物 (1) 安放縫製物 壓腳僅能上升左側踏板的踩 (2) 確認安放的縫製物 (2) 確認安放的縫製物 踏量 踩右側踏板到...
- Page 40 •Height of the respective positions of ① to •左面① ~③的各位置高度,可以用存儲開關 ③ described on the left side can be set or 設定變更。 → 20. 記憶體開關資料的變更方 changed by the memory switches. → 20. 法 Method of changing memory switch data ① ② ③...
- Page 41 Introduction 4. Input of the presser type 4. 輸入壓腳類型 (1) Setting procedure of the presser type (1) 叫出壓腳類型的設定參數 1) Call the presser type setting parameter. 1) 叫出壓腳類型的設定參數 Press PRESSER SELECTION key 按壓腳選擇鍵 ,顯示出記憶體開 and memory switch (level 1) edit 關(等級 1)編輯畫面 A 。 screen A is displayed.
- Page 42 5. Performing pattern selection 5. 選擇圖案 (1) Selection from the pattern selection (1) 從選擇畫面進行選擇 screen 1) 設定為輸入模式 1)Set the mode to the input mode. 液晶顯示①的背景照明為藍色輸入模式 When the back-light of LCD display ① 時,可以變更圖案。背景照明為綠色的縫 shows the input mode in blue color, it is 製模式時,請按準備鍵②...
- Page 43 Introduction 6. Changing needle thread tension 6. 變更上線張力 Needle thread tension can be changed 有關上線張力的資料,可以用縫製模式進行 while performing trial sewing since the 設定,也可以邊試縫邊變更。 data related to the needle thread tension (1) 叫出平行部張力設定資料 can be set by the sewing mode as well. 按平行部張力鍵...
- Page 44 •Set value of tension at ① parallel section • ① 平行布張力,② 加固縫張力的設定值 and ② bar-tacking section 放射圓頭形狀時,請把加固張力先設定為 For the eyelet radial shape, set the bar- 120 左右,成為平衡縫跡的張力。 tacking tension first to approximately 120 and make the balance of stitches. 操作盤設定值 Set value on panel 初期值...
- Page 45 Introduction To continue performing sewing from some 途中繼續進行縫製 ● ● 縫製動作停止狀態 : 顯示錯誤顯示畫面 B point in sewing Sewing motion stop status :Error display (1) 解除錯誤 screen B is displayed. 按復位鍵③ ,解除錯誤後,顯示出步 (1)Release the error. 驟動作畫面 C。 Press RESET key ③ to release the (2) 返回運針...
- Page 46 8. Winding bobbin thread 8. 繞底線 (1) Winding the bobbin (1) 底線的繞線方法 1) Set the bobbin 1) 安裝梭芯 Fit a bobbin fully onto the bobbin 把梭芯插到繞線軸上。按圖示的順序穿 winder shaft. Take the thread from the 線,往梭芯上繞線。然後,請向箭頭符 spool and pass it through the guides 號方向按卷線操作桿①。...
- Page 47 Introduction ① ③ ② ⑥...
- Page 48 9. Using the counter 9. 使用計數器 (1) Setting procedure of the counter value (1) 計數器值的設定方法 1) Call counter setting screen. 1) 叫出計數器設定畫面 Press COUNTER key ⑨ under the 在輸入模式按計數器鍵⑨ 之後,顯示 input mode, and counter screen A is 出可以設定計數器畫面 A。計數器值的設 displayed. Then setting is possible. 定,只能在輸入模式(液晶①...
- Page 49 Introduction (2) Kind of counter (2) 計數器類別 1. 縫製加數計數器 每進行 1 形狀的縫製之後,現在值數字加 1。 現在值和設定計數器 。 1. Sewing UP counter Every time the sewing of one shape is performed, the existing value is counted up. When the existing value is equal to the set value, count-up screen is displayed. 2.
- Page 50 10.Using the initial value pattern 10. 使用初期值模式 This sewing machine has the initial value 本縫紉機設有最適的縫製形狀(30 種形狀) to perform the optimum sewing for the . 各種形狀的初期 的初期值。 →請參照 Ⅸ sewing shapes (30 shapes). → Refer to Ⅸ 值資料一覽表 新編制縫製資料時,採用複 INITIAL VALUE DATA FOR EACH SHAPE 製初期值副本的方法非常便利。...
- Page 51 Introduction ② ① ⑦ ⑩...
- Page 52 11. Changing sewing data 11. 變更縫製數據 (1) Initial sewing data at the time of your (1) 購買時的初期縫製資料 purchase 購買時,已經登記了 1 ~ 10 的圖案, Patterns from 1 to 10 have been 該縫製資料僅切布長度的各種不同的角 already registered at the time of your 型形狀的初期值被輸入。 →角型形狀初 purchase.
- Page 53 Introduction 3) Select sewing data to be changed. 3) 選擇變更的縫製資料 Press ITEM SELECTION key ⑩ , and 按項目選擇鍵⑩ ,選擇想變更的資料 select the data item you desire to change. 項目。請注意有的形狀不使用的資料項目和 Data item which is not used according 沒有設定功能的資料項目均不能被顯示。→ to the shape and data item which is set 請參照...
- Page 54 12. Method of setting sewing data with/ 12. 縫製資料編輯有/無的設定方法 without edit 購買時,本縫紉機把使用頻率低的縫製資 This sewing machine has been set so 料項目目設定為不能編輯。如果縫製物需 as not to be capable of editing sewing 要進行更詳細的設定, 請將該縫製資料項 data items which are less frequently used 目目設定為可以編輯狀態。 at the time of your purchase. When you desire to set the data more closely in *縫製資料的編輯有/無的設定,當把...
- Page 55 Introduction (有編輯)(With edit) (無編輯)(Without edit) ② ③ ① ⑧ ⑩...
- Page 56 13. 縫製數據一覽表 13.Sewing data list ☆ Sewing data are those that can be inputted ☆縫製資料為圖案 1 ~ 99 的 99 個圖案的可 to 99 patterns from pattern 1 to 99 and can 以輸入的資料,可按每種圖案進行輸入。 be inputted to each pattern. The sewing 購買時,為不能選擇設定有/無編輯資料的 machine has been set in the state that 狀態。使用時,請根據需要變換為有編輯的...
- Page 57 Introduction •平行部間隔 設定左右平行部的縫製間隔 0.200∼2.500 0.025mm – •Pitch at parallel section This item sets sewing pitch of left and right parallel sections. •第 2 加固部長度 設定面前的加固部長度 •2nd bar-tacking length This item sets length of bar-tacking on the front side. 0.2∼5.0 0.1mm –...
- Page 58 •圓型形狀長度 設定圓型形狀的中心到上側的長度 •Round type shape length This item sets upper length from the center of round type shape. 圓型上 放射上 半月上 Top of Top of Top of 1.0∼5.0 0.1mm round type Radial semilunar type type 圓型下 放射下 半月下 Bottom of Bottom of Bottom of round type...
- Page 59 Introduction •下縫次數 :有下縫(設定次數) :無下縫 設定下縫的次數 1次 :With basting •Number of times of basting :Without basting 0∼9 – 1 time (Setting of number This item sets number of times of times) of basting. •下縫間隔 設定進行下縫時的縫製間隔 1.0∼5.0 0.1mm •Basting pitch This item sets pitch at the time of performing basting. •下縫捲入長度...
- Page 60 •右平行部張力(雙重縫的第 1 迴圈) 雙重縫時,設定第 1 迴圈的左平行部上線張力 •Right parallel section tension (1st cycle of double stitching) 0∼200 *2, *3 This item sets needle thread tension at right parallel section of 1st cycle at the time of double stitching. •第 1 加固部張力 設定第...
- Page 61 Introduction •縫製結束加固縫寬度 設定縫製結束加固縫的寬度 0.1∼1.5 0.1mm – •Tie stitching width at the end of sewing This item sets tie stitching width at the end of sewing. •縫製結束加固縫針數 設定縫製結束加固縫的針數 0∼8 – •Number of stitches of tie stitching at the end of sewing This item sets number of stitches of tie stitching at the end of sewing.
- Page 62 14. Copying sewing pattern 14. 複製縫製圖案 Data of pattern No. which has been 可以把已登記的圖案 NO. 的資料複製到沒 already registered can be copied to 有使用的 NO.。因為圖案設定為禁止重寫 pattern No. which has not been used. 複製,所以需要重寫時,請先把圖案消去 Overwriting copy of the pattern is 後再進行複製。 prohibited. When you desire to overwrite, 1) 設定為輸入模式...
- Page 63 Introduction 複製位置的圖案 No.(B) Pattern No. (B) of copy destination ② ③ 原複製圖案 ① Pattern No. of copy source...
- Page 64 15. Using pattern register key 15. 使用圖案登記鍵 Register pattern No. which are frequently 可以頻繁使用的圖案 NO. 登記到圖案登記 used with the pattern register key and use 鍵。 用輸入模式,只要按圖案登記鍵就可 them.Patterns which have been registered 以選擇被登記的圖案。 can be selected by pressing only the (1) 登記方法 pattern register key under the input mode.
- Page 65 Introduction ② ③ ① ⑩...
- Page 66 16. Using parameter register key 16. 使用參數登記鍵時 Register parameters which are frequently 把可以頻繁使用的參數登記到參數登記鍵 used with parameter register key and 進行使用。 用輸入模式,只要按參數登 use them.Parameters which have been 記鍵就可以選擇被登記的參數。 另外, registered can be selected by pressing 此鍵不僅可以設定參數,還可以登記圖案 only the parameter register key under the No.,因此可以使用與...
- Page 67 Introduction ② ③ ① ⑩ (2) Register status at the time of your (2) 購買時的登記狀態 purchase 登記鍵 登記參數 Register key Registered parameter 單重縫/雙重縫的變換 Changeover of single/double stitching 下縫 OFF/ 次數 Basting (off/number of times) 設定下縫上線張力 Basting needle thread tension setting 切布刀複數次動作...
- Page 68 17. Performing continuous stitching 17. 進行連續縫製時 This sewing machine can perform 本縫紉機,可以不提升壓腳,連續縫製複 continuous stitching which is capable of 數圖案。 在 1 迴圈中最多可以自動地縫製 continuously sewing plural sewing pattern 6 種形狀。 另外,最多還可以登記 20 個 data without lifting the presser foot. It 資料。需要時,請複製之後使用。→請參 is possible to automatically sew up to 照...
- Page 69 Introduction ② ① ⑦ ⑩...
- Page 70 (2) Method of editing continuous stitching ⑵連續縫製資料的編輯方法 data 1) 設定為輸入模式 1) Set the mode to the input mode. 液晶顯示①的背景照明為藍色的輸入模式 When the back-light of LCD display ① 時,可以輸入連續縫製資料。背景照明為 shows the input mode in blue color, it is 綠色的縫制模式時,請按準備鍵② 變 possible to select continuous stitching data.
- Page 71 Introduction ※Input is completed by the steps above. For ※ 以上輸入完了,進行連續縫製時,所有的資 the continuous stitching, however, input 料應在壓腳尺寸範圍內。因為超過的話,將 all data within the range of the presser 顯示範圍錯誤,所以請一定正確地輸入壓腳 size. Error message will be shown when 尺寸。 →請參照 4. 輸入壓腳類型 的內容。 the data exceeds the range. Be sure to precisely input the presser size.
- Page 72 18. 進行迴圈縫製時 18. Performing cycle stitching This sewing machine can perform sewing 本縫紉機可以順次地縫製複數的迴圈縫製 圖案資料。 最大可以輸入 15 種圖案,請 of plural sewing pattern data in one cycle in the order of the data.Use this stitching 在縫製物上有複數不一樣的扣眼時使用。 另外,最多還可以登記 20 個資料。 需要 when sewing plural different button holes 時,請拷貝之後使用。→請參照...
- Page 73 Introduction ② ① ⑦ ⑩...
- Page 74 (2) Method of editing cycle data ⑵迴圈縫資料的編輯方法 1) Set the mode to input mode. 1) 設定為輸入模式 When the back-light of LCD display ① 液晶顯示①的背景照明為藍色的輸入模式 shows the input mode in blue color, it is 時,可以輸入迴圈縫資料。背景照明為綠 possible to input the cycle data. When 色的縫製模式時,請按準備鍵②...
- Page 75 Introduction ② ③ ① ⑦ ⑧ ⑩...
- Page 76 19. Explanation of plural motions of knife 19. 切刀數次動作的說明 This sewing machine can automatically 本縫紉機安裝的切刀尺寸由操作盤來進行 actuate the knife plural times and sew a 設定,自動地讓切刀進行數次動作,因此 buttonhole larger than the size of knife by 可以縫製比切刀尺寸大的扣眼。不更換切 setting the size of knife attached from the 刀而要縫製各種各樣的形狀時,請設定之...
- Page 77 Introduction ② ③ ① ⑩ 縫製數據 S02 切布長度 Sewing data S02 Cloth cut length 第 1 次 1st time 第 2 次 2nd time 第 3 次 3rd time 記憶體開關資料一覽表(等級1) U18 切布刀尺寸 Memory switch data list (level 1) U18 Cloth cutting knife size...
- Page 78 20. Method of changing memory switch data 20. 記憶體開關資料的變更方法 1) Set the mode to input mode. 1) 設定輸入模式 When the back-light of LCD display ① 液晶顯示①的背景照明為藍色的輸入模 shows the input mode in blue color, 式時,記憶體開關資料可以進行變更。 it is possible to change the memory 背景照明為綠色的縫製模式時,請按準...
- Page 79 Introduction 等級 1 level 1 資料項目 No. 表示資料專案的圖示 Data item No. Pictograph showing data item 等級 2 level 2 ② ④ ① ⑩...
- Page 80 21. Memory switch data list 21. 記憶體開關資料一覽表 (1) Level 1 ⑴等級1 ☆ Memory switch data (level 1) are the ☆記憶體開關資料(等級1)是縫紉機通用的 motion data that the sewing machine has in common and the data that operate on 動作資料,是所有的縫製圖案通用的資料。 all sewing patterns in common. 項目...
- Page 81 Introduction 項目 設定範圍 編輯單位 初期值 Item Setting range Edit unit Initial value 1型 (1790S•1792K) •壓腳種類 5 型 請設定壓腳的種類。→ 參照 4. 輸入壓腳類型 (1795S) ー ー •Kind of presser Type 1 Set the kind of the presser. → 4. Inputting presser type (1790S•1792K) Type 5 (1795S)
- Page 82 (2) Level 2 ⑵等級 2 ☆ Press MODE switch for as long as three ☆持續 3 秒鐘按模式開關,變成可以編輯的狀 seconds and it is possible to edit. 態。 項目 設定範圍 編輯單位 初期值 Item Setting range Edit unit Initial value 雙踏板 2-pedal •踏板選擇 設定踏板的類型。 單踏板(無中間位置)...
- Page 83 Introduction 項目 設定範圍 編輯單位 初期值 Item Setting range Edit unit Initial value •倒轉針提升 允許/禁止 許可倒轉針提升 U01 壓腳提升最高位置被設定為 14.0mm 以上時, Needle up by reverse 自動地倒轉針提升,縫紉機停機。 run prohibited 也可以設定禁止此動作。 允許 •Needle up by reverse run Permitted/Prohibited ー ー Permitted When U01 Presser lifter maximum position is set to 禁止倒轉針提升...
- Page 84 Ⅵ . 維修 Ⅵ . MAINTENANCE 1. Adjusting the needle-to-hook relation 1. 機針 A 和旋梭的同步調整 Adjust the needle-to-hook relation when the 機針和旋梭的同步調節,請在機針落到針板 needle enters the center of the needle hole 孔的中央時調整。 in the throat plate. ⑴針桿高度 (1) Needle bar height 1) 把針桿降到最下點。...
- Page 85 Introduction 0.05mm (3) Adjusting the bobbin case positioning ⑶內旋梭的固定調整 stopper 用固定螺絲③把內旋梭固定器①的前端和內 Adjust with setscrew ③ so that the contact 旋梭②的端面的咬合調整為 0 ~ 0.2mm。 of the top end of bobbin case positioning stopper ① and the end of inner hook ② is 0 to 0.2 mm.
- Page 86 2. Adjusting the needle thread trimmer 2. 上線切線的調整 (1) Adjusting the thread grasping force of the ⑴上線切刀的切線力的調整 needle thread trimmer 上線切刀切線力不穩定的話,始縫時上線容 If the needle thread trimmer fails to 易跳線。 provide consistent thread grasping force, 1) 上線切線力弱時,鬆開螺絲①,卸下上線 the needle thread can slip off at the 切刀②。...
- Page 87 Introduction (2) Adjusting the height of the needle thread ⑵上切刀的安裝高度 trimmer 請鬆開上切刀安裝螺絲①調整上切刀的安裝 To adjust the height of the needle thread 刀度。請儘量使上切刀和壓腳不接觸。這樣 trimmer, loosen setscrew ① . Set the 上線切線殘線長度短。但是縫紉多層部時, height of trimmer as low as possible, 壓腳會傾斜。請把位置稍稍提高,不讓切刀 provided that it does not touch work 與壓腳相碰。...
- Page 88 3. Adjusting the presser bar pressure 3. 布壓腳壓力的調整 To adjust the pressure applied by the 布壓腳的壓力用壓腳調節螺絲①調節。鎖緊 presser bar to fabric, turn presser spring 調節螺絲①後,布壓腳壓力變大,布不容易 regulator ① . When the pressure is not 出褶。 enough to prevent fabric from puckering, turn regulator ① clockwise. 為了防止突然起動造成人身事故,請關掉電源,確認馬達確實停止轉動後...
- Page 89 Introduction 5. Thread tension 5. 線張力 (1) Thread take-up spring (purl stitch) ⑴挑線彈簧(直鎖眼縫) 1) The thread take-up amount of thread 1) 挑線彈簧①的挑線量為 8 ~ 10mm,始動 take-up spring ① is 8 to 10 mm, and 強度 0.06 ~ 0.1N 左右較為適當。 the appropriate pressure at the start is 2) 改變挑線彈簧的動作量時,請轉鬆螺絲...
- Page 90 6. Cleaning the filter 6. 濾清器的清掃 Clean filter ② of the fan located on the 請每週清掃機台下面的風扇篩過濾器②。 ● ● bottom surface of the machine table (bed 1) 沿箭頭方向拉過濾網①,把它卸下來。 base) once every week. 2) 用水沖洗清掃濾清器②。 1) Pull the screen kit ① in the direction of 3) 把濾清器②、過濾網①安裝到原來的位...
- Page 91 Introduction 1. 為了防止觸電事故,關掉電源 5 分鐘之後再打開外罩。 注意 2. 請一定關掉電源開關之後再打開控制箱的蓋子,更換規定容量的保險 絲。 CAUTION 1. To avoid electrical shock hazards, turn OFF the power and open the control box cover after about five minutes have passed. 2. Open the control box cover after turning OFF the power without fail. Then, replace with a new fuse with the specified capacity. ① ② ③...
- Page 92 Ⅶ . 標準部件 Ⅶ .GAUGE COMPONENTS 1. Cloth cutting knife 1. 切布刀 12.7 1/2 A 切刀尺寸(英寸) B 切刀尺寸(MM) C 記號 D 貨號 A Knife size (inch) B Knife size (mm) C Mark D Part No. BL724AJK BL724BJK 7/16 11.1 BL724CJK 12.7 BL724DJK 9/16...
- Page 93 Introduction 2. Throat plate 2. 針板 擺動幅度 Stitch width 5MM(刻印 • AXB) 6MM(刻印 • AXB) 規格 Type 5mm (Marking • AXB) 6mm (Marking • AXB) 標準(S) E201AJK(S5 • 1.4X6.2) E202AJK(S6 • 1.4X7.4) Standard (S) 針織布(K) E201BJK(K5 • 1.2X6.2) E202BJK(K6 • 1.2X7.4) For knits (K) 3. Presser 3.
- Page 94 Ⅷ . 錯誤代碼一覽表 Ⅷ .ERROR CODE LIST 錯誤代碼 錯誤內容 復位方法 復位地點 Error code Description How to recover Place of recovery •主控制電路板的 EEP-ROM 初期化 EEP-ROM 裡沒有寫入資料,或資料損壞時,自動進行通知 進行了初期化。 電源 OFF E001 •Contact of initialization of EEP-ROM of MAIN CONTROL Turn OFF the power. p.c.b.
- Page 95 Introduction 錯誤代碼 錯誤內容 復位方法 復位地點 Error code Description How to recover Place of recovery •記憶體開關資料錯誤 電源 OFF 記憶體開關資料損壞或是版本老時 E061 •Memory switch data error Turn OFF the power. When memory switch data is broken or revision is old. •縫製資料錯誤 電源 OFF 縫製資料損壞或是版本老時...
- Page 96 錯誤代碼 錯誤內容 復位方法 復位地點 Error code Description How to recover Place of recovery 縫製資料編輯畫面 •縫製開始加固縫的壓腳尺寸超過 [S64] 縫製開始加固縫 縫製開始加固縫的運針資料超過壓腳尺寸時 復位後可以重新啟動 寬度 E494 •Presser size over of tie stitching at sewing start Possible to re-start after Sewing data edit screen When stitching data of tie stitching at sewing start pressing reset key.
- Page 97 Introduction 錯誤代碼 錯誤內容 復位方法 復位地點 Error code Description How to recover Place of recovery •檢測出電源瞬間斷電 電源 OFF 輸入電源瞬間斷電時 E802 •Power instantaneous cut detection Turn OFF the power. When input power is instantaneously OFF. •過高電壓 輸入電源達 280V 以上時 電源 OFF E811 •Overvoltage Turn OFF the power.
- Page 98 錯誤代碼 錯誤內容 復位方法 復位地點 Error code Description How to recover Place of recovery •底線切線馬達原點檢索異常 原點檢索動作時,原點感測器信號沒有被輸入時 電源 OFF E911 •Bobbin thread trimmer motor origin retrieval error Turn OFF the power. When origin sensor signal is not inputted at the time of origin retrieval motion.
- Page 99 Introduction Ⅸ .MALFUNCTION & REASDNS Ⅸ . 故障的現象與原因 • 處理對策 AND CORRECTIVE MEASURES 現 象 原 因 頁 處理對策 Troubles Causes Page Corrective measures 1. 上線斷線 1. 平行部線張力過強。 • 平行部線張力過弱。 P .25 1. Needle thread breakage 2. 挑線彈簧的強度過強,移動量過大。 • 減弱挑線彈簧的彈力,或縮小移動量。 P .71 3.
- Page 100 現 象 原 因 頁 處理對策 Troubles Causes Page Corrective measures 6. 縫跡鼓起 1. 底線張力過弱。 • 加強底線張力。 P .14 6. Stitches float 2. 底線從梭殼脫出來。 • 重新正確地穿梭殼線。 P .14 • 底線捲繞量繞得不要過多。 P .28 1. Bobbin thread tension is too low. • Increase the bobbin thread tension. P .14 2.
- Page 101 Introduction...
- Page 103 Introduction...
- Page 118 P100...
- Page 119 P101...
- Page 120 P102...
- Page 121 由於對產品的改良及更新 , 本產品使用說明書中與零件圖之產品及外觀的修改恕不事先通知 ! The specification and/or the equipment described in the instruction book are subject to change because of modification with out previous notice BY723JK.JAN.2016...
Need help?
Do you have a question about the LBHS-1790S and is the answer not in the manual?
Questions and answers