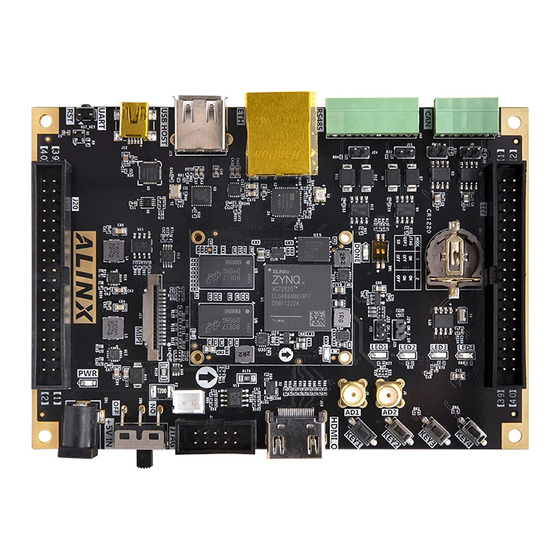
Alinx ZYNQ7000 FPGA User Manual
Hide thumbs Also See for ZYNQ7000 FPGA:

Advertisement

Quick Links

ZYNQ7000 FPGA
Development Board
AX7010
User Manual

Advertisement

Table of Contents
loading
Need help?

Need help?

Do you have a question about the ZYNQ7000 FPGA and is the answer not in the manual?

Questions and answers

Summary of Contents for Alinx ZYNQ7000 FPGA

  • Page 1 ZYNQ7000 FPGA Development Board AX7010 User Manual...
  • Page 2: Version Record

    ZYNQ FPGA Development Board AX7010 User Manual Version Record Revision Date Release By Description Rev 1.0 2020-09-06 Rachel Zhou First Release Amazon Store: https://www.amazon.com/alinx 2 / 48...
  • Page 3: Table Of Contents

    Part 7:ZYNQ Programmable Logic (PL) peripherals ......35 Part 7.1: HDMI Interface ..............35 Part 7.2: EEPROM 24LC04 .............. 37 Part 7.3: Real Time Clock DS1302 ........... 39 Part 7.4: Expansion Port J10 ............40 Amazon Store: https://www.amazon.com/alinx 3 / 48...
  • Page 4 ZYNQ FPGA Development Board AX7010 User Manual Part 7.5: Expansion Port J11 ............43 Part 7.6: User LEDs ................. 46 Part 7.7: User Buttons ..............47 Amazon Store: https://www.amazon.com/alinx 4 / 48...
  • Page 5 ZYNQ FPGA Development Board AX7010 User Manual The ZYNQ7000 FPGA development platform uses XILINX's Zynq7000 SOC chip XC7Z010 solution, which uses ARM+FPGA SOC technology to integrate dual-core ARM Cortex-A9 and FPGA programmable logic on a single chip. The Xilinx Zynq7000 series XC7Z010-1CLG400C is used as the core processor, which has rich hardware resources and peripheral interfaces on ARM and FPGA respectively.
  • Page 6: Part 1: Fpga Development Board Introduction

    HDMI Micro Micro SD 1个复位键,2个PS按键,4个PL按键 调试口 SD卡座 输出 卡槽 Figure 1-1: The Schematic Diagram of the AX7010 Through this diagram, you can see the interfaces and functions that the AX7010 FPGA Development Board contains: Amazon Store: https://www.amazon.com/alinx 6 / 48...
  • Page 7 1-channel USB Uart interface for serial communication with PC or external devices  RTC real time clock One of RTC real time clock with battery holders, battery model CR1220.  EEPROM 24LC04 One piece of IIC interface EEPROM 24LC04 Amazon Store: https://www.amazon.com/alinx 7 / 48...
  • Page 8: Part 2: Dimensional Structure

     2-way 40-pin expansion port 2-way 40-pin 0.1inch spacing expansion port for extending the IOs of ZYNQ PL parts, and can be connect to various ALINX modules (binocular camera, TFT LCD screen, high-speed AD module, etc.)  1-way 12-pin expansion port 1- way 12-pin 0.1inch spacing expansion port for extending the MIO of...
  • Page 9: Part 3: Power Supply

    AX7010 FPGA development board is shown in Figure 3-1 5V 电源 输入 3.3V/3A TLV62130R 保险丝 电源开关 1.5V/3A TLV62130R TPS51200 VREF TLV62130R 1.8V/3A TLV62130R 1.0V/3A SPX3819M5 VCCIO/0.5A -3-3 Figure 3-1: Power Supply Schematic Amazon Store: https://www.amazon.com/alinx 9 / 48...
  • Page 10 +1.0V->+1.8V->+1.5 V->+3.3V->VCCIO, circuit design to ensure the normal operation of the chip. Figure 3-2 shows the circuit design of the power supply: Amazon Store: https://www.amazon.com/alinx 10 / 48...
  • Page 11: Part 4: Zynq Chip

    The AX7010 FPGA development board uses Xilinx's Zynq7000 series chip, model XC7Z010-1CLG400C. The chip's PS system integrates two ARM CortexTM-A9 processors, AMBA® interconnects, internal memory, external memory interfaces and peripherals. These peripherals mainly include USB bus Amazon Store: https://www.amazon.com/alinx 11 / 48...
  • Page 12  Two Gigabit NIC support: divergent-aggregate DMA, GMII, RGMII, SGMII interface  Two USB2.0 OTG interfaces, each supporting up to 12 nodes  Two CAN2.0B bus interfaces  Two SD card, SDIO, MMC compatible controllers Amazon Store: https://www.amazon.com/alinx 12 / 48...
  • Page 13 BGA, pin pitch is 0.8mm the specific chip model definition of ZYNQ7000 series is shown in Figure 4-2 Figure 4-2: The Specific Chip Model Definition of ZYNQ7000 Series The chip of the BGA package, the pin name is in the form of letters + Amazon Store: https://www.amazon.com/alinx 13 / 48...
  • Page 14: Part 4.1: Jtag Interface

    ZYNQ development and debugging. On the AX7010 development board, a FTDI USB bridge chip FT232HL is used to realize USB and ZYNQ JTAG debug signals TCK, TDO, TMS, TDI for data communication. Figure 4-4 is the JTAG port schematic diagram. Amazon Store: https://www.amazon.com/alinx 14 / 48...
  • Page 15 On the AX7010 FPGA development board, the JTAG interface is USB interface. Users can connect the PC and JTAG interface to the ZYNQ system debugging through the USB cable provided by us. Figure 4-5: The JTAG port on the FPGA Board Amazon Store: https://www.amazon.com/alinx 15 / 48...
  • Page 16: Part 4.2: Fpga Power System

    VCCINT first, then VCCBRAM, then VCCAUX, and finally VCCO. If VCCINT and VCCBRAM have the same voltage, they can be powered up at the same time. The order of power outages is reversed. Amazon Store: https://www.amazon.com/alinx 16 / 48...
  • Page 17: Part 4.3: Zynq Boot Configuration

    X1 crystal on the development board. The input of the clock is connected to the pin of the PS_CLK_500 of the BANK500 of the ZYNQ chip. The schematic diagram is shown in Figure 5-1: Amazon Store: https://www.amazon.com/alinx 17 / 48...
  • Page 18: Part 5.2: Pl System Clock Source

    PL system clock source with 3.3V supply. The crystal output is connected to the FPGA global clock (MRCC), which can be used to drive user logic circuit within the FPGA. The schematic diagram of the clock source is shown in Figure 5-3. Amazon Store: https://www.amazon.com/alinx 18 / 48...
  • Page 19: Part 6:Zynq Processor System (Ps) Peripherals

    IO of the PS, and some peripherals are connected to the IO of the PL. First introduce the peripherals connected to the PS part. Part 6.1: QSPI Flash The AX7010 FPGA development board is equipped with a 256MBit Amazon Store: https://www.amazon.com/alinx 19 / 48...
  • Page 20 ZYNQ chip. In the system design, the GPIO port functions of these PS ports need to be configured as the QSPI FLASH interface. Figure 6-1 shows the QSPI Flash in the schematic. Figure 6-1: QSPI Flash Connection Diagram Amazon Store: https://www.amazon.com/alinx 20 / 48...
  • Page 21: Part 6.2: Ddr3 Dram

    The hardware design of DDR3 requires strict consideration of signal integrity. We have fully considered the matching resistor/terminal resistance, trace impedance control, and trace length control in circuit design and PCB design to ensure high-speed and stable operation of DDR3. Amazon Store: https://www.amazon.com/alinx 21 / 48...
  • Page 22 ZYNQ FPGA Development Board AX7010 User Manual Figure 6-2: The Schematic Part of DDR3 DRAM Figure 6-3: Two DDR3 DRAMs on the FPGA Board Amazon Store: https://www.amazon.com/alinx 22 / 48...
  • Page 23 DDR3_DQ [14] PS_DDR_DQ15_502 DDR3_DQ [15] PS_DDR_DQ16_502 DDR3_DQ [16] PS_DDR_DQ17_502 DDR3_DQ [17] PS_DDR_DQ18_502 DDR3_DQ [18] PS_DDR_DQ19_502 DDR3_DQ [19] PS_DDR_DQ20_502 DDR3_DQ [20] PS_DDR_DQ21_502 DDR3_DQ [21] PS_DDR_DQ22_502 DDR3_DQ [22] PS_DDR_DQ23_502 DDR3_DQ [23] PS_DDR_DQ24_502 DDR3_DQ [24] PS_DDR_DQ25_502 DDR3_DQ [25] Amazon Store: https://www.amazon.com/alinx 23 / 48...
  • Page 24 PS_DDR_A9_502 DDR3_A[9] PS_DDR_A10_502 DDR3_A[10] PS_DDR_A11_502 DDR3_A[11] PS_DDR_A12_502 DDR3_A[12] PS_DDR_A13_502 DDR3_A[13] PS_DDR_A14_502 DDR3_A[14] PS_DDR_BA0_502 DDR3_BA[0] PS_DDR_BA1_502 DDR3_BA[1] PS_DDR_BA2_502 DDR3_BA[2] PS_DDR_CS_B_502 DDR3_S0 PS_DDR_RAS_B_502 DDR3_RAS PS_DDR_CAS_B_502 DDR3_CAS PS_DDR_WE_B_502 DDR3_WE PS_DDR_ODT_502 DDR3_ODT PS_DDR_DRST_B_502 DDR3_RESET PS_DDR_CKP_502 DDR3_CLK_P PS_DDR_CKN_502 DDR3_CLK_N Amazon Store: https://www.amazon.com/alinx 24 / 48...
  • Page 25: Part 6.3: Gigabit Ethernet Interface

    When the network is connected to 100M Ethernet, the data transmission of ZYNQ and PHY chip is communicated through RMII bus, and the RTL8211E-VL transmission clock is 25Mhz. Data is sampled on the rising edge and falling Amazon Store: https://www.amazon.com/alinx 25 / 48...
  • Page 26 Figure 6-5: The GPHY chip on FPGA Board The Gigabit Ethernet pin assignments are as follows: Signal Name ZYNQ Pin Name ZYNQ Pin Number Description PS_MIO16_501 RGMII Transmit Clock ETH_GCLK PS_MIO17_501 Transmit data bit0 ETH_TXD0 PS_MIO18_501 Transmit data bit1 ETH_TXD1 Amazon Store: https://www.amazon.com/alinx 26 / 48...
  • Page 27: Part 6.4: Usb2.0 Interface

    FPGA development board. Table 6-4 shows the mode switching instructions: J5,J6 Status USB Mode Instruction J5 and J6 installation HOST Mode FPGA Development board as the main device, USB jumper caps port to connect the mouse, keyboard, USB and other slave peripherals Amazon Store: https://www.amazon.com/alinx 27 / 48...
  • Page 28 USB3320C, J3 is the Host USB interface, and J4 is the Slave USB interface. Jumper caps J5 and J6 are used for Host and Slave mode selection. Figure 6-7: The USB3320C chip on the FPGA Board Amazon Store: https://www.amazon.com/alinx 28 / 48...
  • Page 29: Part 6.5: Usb To Serial Port

    BANK501 of the ZYNQ EPP. Since the VCCMIO of the BANK is set to 1.8V, the data level of the CP2102GM is 3.3V, which is connected by the TXS0102DCUR level conversion chip. Figure 6-8 detailed the schematic diagram of the CP2102GM and ZYNQ connections Amazon Store: https://www.amazon.com/alinx 29 / 48...
  • Page 30 UART_TX PS_MIO48_501 Uart data input UART_RX PS_MIO49_501 Uart data output Silicon Labs provides virtual COM port (VCP) drivers for host PCs. These drivers allow the CP2102GM USB-UART bridge device to be displayed as a Amazon Store: https://www.amazon.com/alinx 30 / 48...
  • Page 31: Part 6.6: Sd Card Slot

    SD card is 3.3V, connected through the TXS02612 level shifter. The schematic of the Zynq7000 PS and SD card connector is shown in Figure 6-10: Figure 6-10: SD Card Connection Diagram Figure 6-11: SD Card Slot on the FPGA Board Amazon Store: https://www.amazon.com/alinx 31 / 48...
  • Page 32: Part 6.7: Ps Pmod Connector

    3.3V level standard. The schematic diagram of the PMOD connector is shown in Figure 6-12. Figure 6-12: PS PMOD connector Schematic Figure 6-13: PS PMOD connector on the FPGA board Amazon Store: https://www.amazon.com/alinx 32 / 48...
  • Page 33: Part 6.8: User Leds

    When the BANK500 IO voltage is high, the LED light is off, and when the BANK500 IO voltage is low, the LED will be illuminated. A schematic diagram of the ZYNQ BANK500 IO and LEDs connections is shown in Figure 6-14: Figure 6-14: User LEDs Schematic Amazon Store: https://www.amazon.com/alinx 33 / 48...
  • Page 34: Part 6.9: User Buttons

    ZYNQ BANK501 IO is low, and when it is not pressed, the signal is high. A schematic diagram of the ZYNQ BANK501 IO and button connections is shown in Figure 6-16: Figure 6-16: PS User Buttons Schematic Amazon Store: https://www.amazon.com/alinx 34 / 48...
  • Page 35: Part 7:Zynq Programmable Logic (Pl) Peripherals

    HDMI display device (HDMI IN), the HDMI signal is used as an input, and the HPD (hot plug detect) signal is used as an output. When the development board is used as an HDMI master (HDMI OUT), the opposite is true. Amazon Store: https://www.amazon.com/alinx 35 / 48...
  • Page 36 HDMI display device through the IIC bus. The pin level of the FPGA is 3.3V, but the level of HDMI is +5V, which requires the level conversion chip GTL2002D to connect. The conversion circuit of IIC is shown in Figure 7-3. Figure 7-3: GTL2002D level conversion circuit Amazon Store: https://www.amazon.com/alinx 36 / 48...
  • Page 37: Part 7.2: Eeprom 24Lc04

    HDMI hot plug detection signal HDMI_OUT_EN IO_L18P_T2_34 HDMI power output control Part 7.2: EEPROM 24LC04 AX7010 FPGA development board contains an EEPROM, model 24LC04, and has a capacity of 4Kbit (2*256*8bit). It consists of two 256-byte blocks and Amazon Store: https://www.amazon.com/alinx 37 / 48...
  • Page 38 EEPROM Figure 7-5: EEPROM Schematic Figure 7-6: EEPROM on the FPGA Board EEPROM Pin Assignment Signal Name ZYNQ Pin Name ZYNQ Pin Description Number EEPROM_I2C_SCL IO_25_34 IIC Clock Signal EEPROM_I2C_SDA IO_L12N_T1_MRCC_34 IIC Data Signal Amazon Store: https://www.amazon.com/alinx 38 / 48...
  • Page 39: Part 7.3: Real Time Clock Ds1302

    The RTC interface signal is connected to the IO ports of BANK34 and BANK35 on the ZYNQ PL side. Figure 7-7 shows the design of the DS1302: Figure 7-7: Real time clock DS1302 Schematic Amazon Store: https://www.amazon.com/alinx 39 / 48...
  • Page 40: Part 7.4: Expansion Port J10

    The expansion port J10 is a 40-pin 2.54mm double-row connector, which expands more peripherals and interfaces for users. Currently, the modules provided by ALINX include: ADDA module, LCD module, Gigabit Ethernet module, audio input/output module, matrix keyboard module, 500W binocular vision camera module, etc.
  • Page 41 Figure 7-10 shows the physical diagram of the J10 expansion port. Pin1, Pin2 and Pin39 of the expansion port, Pin40 has been marked on the board. Figure 7-10: Expansion header J10 on the FPGA Board J10 Expansion Header Pin Assignment Amazon Store: https://www.amazon.com/alinx 41 / 48...
  • Page 42 IO_L5P_T0_34 PIN25 EX_IO1_12N IO_L3N_T0_34 PIN26 EX_IO1_12P IO_L3P_T0_34 PIN27 EX_IO1_13N IO_L4N_T0_34 PIN28 EX_IO1_13P IO_L4P_T0_34 PIN29 EX_IO1_14N IO_L2N_T0_34 PIN30 EX_IO1_14P IO_L2P_T0_34 PIN31 EX_IO1_15N IO_L1N_T0_34 PIN32 EX_IO1_15P IO_L1P_T0_34 PIN33 EX_IO1_16N IO_L2N_T0_35 PIN34 EX_IO1_16P IO_L2P_T0_35 PIN35 EX_IO1_17N IO_L1N_T0_35 Amazon Store: https://www.amazon.com/alinx 42 / 48...
  • Page 43 The expansion port J10 is a 40-pin 2.54mm double-row connector, which expands more peripherals and interfaces for users. Currently, the modules provided by ALINX include: ADDA module, LCD module, Gigabit Ethernet module, audio input/output module, matrix keyboard module, 500W binocular vision camera module, etc.
  • Page 44 Figure 7-12 shows the physical diagram of the J11 expansion port. Pin1, Pin2 and Pin39 of the expansion port, Pin40 has been marked on the board. Figure 7-12: Expansion header J11 on the FPGA Board Amazon Store: https://www.amazon.com/alinx 44 / 48...
  • Page 45 IO_L11N_T1_35 PIN22 EX_IO2_10P IO_L11P_T1_35 PIN23 EX_IO2_11N IO_L8N_T1_35 PIN24 EX_IO2_11P IO_L8P_T1_35 PIN25 EX_IO2_12N IO_L4N_T0_35 PIN26 EX_IO2_12P IO_L4P_T0_35 PIN27 EX_IO2_13N IO_L5N_T0_35 PIN28 EX_IO2_13P IO_L5P_T0_35 PIN29 EX_IO2_14N IO_L16N_T2_35 PIN30 EX_IO2_14P IO_L16P_T2_35 PIN31 EX_IO2_15N IO_L13N_T2_35 PIN32 EX_IO2_15P IO_L13P_T2_35 Amazon Store: https://www.amazon.com/alinx 45 / 48...
  • Page 46 BANK35 IO voltage is low, the LED will be illuminated. A schematic diagram of the ZYNQ BANK35 IO and LEDs connections is shown in Figure 7-13: Figure 7-13: PL User LEDs Schematic Figure 7-14: PL User LEDs on the FPGA Board Amazon Store: https://www.amazon.com/alinx 46 / 48...
  • Page 47 In the circuit design, when the button is pressed, the signal is low, and when it is not pressed, the signal is high. The schematic is shown in Figure 7-15: Figure 7-15: PL User Buttons Schematic Amazon Store: https://www.amazon.com/alinx 47 / 48...
  • Page 48 ZYNQ Pin Name ZYNQ Description Number KEY1 IO_L21P_T3_35 PL User Button PL KEY1 KEY2 IO_L21P_T3_35 PL User Button PL KEY2 KEY3 IO_L20P_T3_34 PL User Button PL KEY3 KEY4 IO_L19N_T3_34 PL User Button PL KEY4 Amazon Store: https://www.amazon.com/alinx 48 / 48...

This manual is also suitable for:

Ax7010

Table of Contents