Table of Contents
Advertisement
Quick Links
U B L
U B L
U B L
T R O
T R O
T R O
S P A
S P A
S P A
A N D
A N D
A N D
N U A
N U A
N U A
M A
M A
M A
C K
C K
C K
Q U I
Q U I
Q U I
V O
V O
V O
S E R
S E R
S E R
n c .
a , I
r i v e
e r i c
h D
A m
T e c
4 5 2
L N S
a s t
h i o
1 E
i , O
n a t
4 6 2
6 7 4
c i n
8 . 5
7 3 3
. 5 2
C i n
8 . 5
5 1 3
3 2 0
. 5 2
n e #
8 . 8
5 1 3
. 5 2
P h o
a x #
5 1 3
m
i n f
. c o
x #
r i c a
M a
e f a
m e
v i c
S A
S e r
. L N
w w
: / / w
h t t p
O O T
O O T
O O T
E S H
E S H
E S H
P A R
P A R
P A R
R E
R E
R E
L
L
L
L O A
L O A
L O A
S 3
S 3
S 3
A
U S
4 5
I N G
I N G
I N G
T S
T S
T S
D
D
D
MADE IN USA
Advertisement
Table of Contents

Related Manuals for LNS QUICK LOAD SERVO S3


Summary of Contents for LNS QUICK LOAD SERVO S3
- Page 1 I N G I N G I N G O O T O O T O O T E S H E S H E S H P A R P A R P A R U B L U B L U B L T R O T R O...
-
Page 2: Table Of Contents
Part Feed Out Accuracy .......................2-5 Chapter 3: ..................3-1 Procedures ....................3-1 End of Bar Adjustment .........................3-2 Alignment Procedure........................3-3 Pusher Changeover ........................3-7 Carriage Unit Belt Tension Adjustment ..................3-10 Servo Motor Belt Tension Adjustment ..................3-12 Diameter Adjustment Motor Replacement................3-14 QUICK LOAD SERVO S3... - Page 3 Loading Table sub-assembly (Left/Front Load) ...............7-12 Pusher Locking sub-assembly (Left/Front Load)..............7-12 Pusher Locking sub-assembly (Left/Front Load)..............7-13 Pusher Locking sub-assembly (Left/Front Load)..............7-14 Loading Table Microswitch sub-assembly ................7-14 Loading Table Microswitch sub-assembly ................7-15 Servo Motor sub-assembly ......................7-16 Linear Rail Assembly........................7-17 QUICK LOAD SERVO S3...
-
Page 4: Alarms
In conjunction with each alarm will be a brief description of what the alarm is and a few tips and procedures of how to correct the problem. Figure 1-1 Remote control station QUICK LOAD SERVO S3... - Page 5 Loading channel lower position switch Measuring cell Proximity switch for diameter adjustment Home position proximity switch SQ10 Main access cover safety switch SQ11 Magazine grid cover safety switch SQ12 Retraction system in position switch / key QUICK LOAD SERVO S3...
-
Page 6: A002 - Emergency Stop Line Open
For case 1, after the solutions have been completed, press the STOP key on the remote control station to clear the message and reset the alarm. QUICK LOAD SERVO S3... -
Page 7: A003 - Lathe Emergency Stop Line Open
Bit 7 = 0 Reset the E-stop push button on the lathe. For case 2, after the solutions have been completed, press the STOP key on the remote control station to clear the message and reset the alarm. QUICK LOAD SERVO S3... -
Page 8: A004 - Bar Feeder Emergency Stop
Reset the E-stop push button on the remote control 76543210 Bit 6 = 0 station. For case 2, after the solution has been completed, press the STOP key on the remote control station to clear the message and reset the alarm. QUICK LOAD SERVO S3... -
Page 9: A006 - Air Pressure Failure
Flip the toggle switch on the PLC to the RUN position. Replace the air pressure switch. For case 2, after the solutions have been completed, press the STOP key on the remote control station to clear the message and reset the alarm. QUICK LOAD SERVO S3... -
Page 10: A007 - Main Access Cover Open
For case 2, after the solutions have been completed, press the STOP key on the remote control station to clear the message and reset the alarm. QUICK LOAD SERVO S3... -
Page 11: A009 - Bar Feeder Retracted Or Not Locked In It's Working Position
For case 2, after the solution has been completed, press the STOP key on the remote control station to clear the message and reset the alarm. QUICK LOAD SERVO S3... -
Page 12: A011 - Magazine Protection Grid Open
For case 2, after the solution has been completed, press the STOP key on the remote control station to clear the message and reset the alarm. QUICK LOAD SERVO S3... -
Page 13: A023 - Servo Drive Alarm
The Servo Drive Alarm occurs if the Mitsubishi servo amplifier generates an alarm. Solution: Turn the main power off to the Quick Load Servo S3 for 2 seconds and turn the power back on. Note: If the alarm keeps recurring, check the alarm code on the Mitsubishi servo amplifier and refer to Mitsubishi Servo Amplifier Alarm List pg. -
Page 14: A024 - Servo Motor Not Ready
Verify that the PLC output (Q4.4) is turning on when the manual or automatic cycle is started. • Verify that the K1 contactor is activated; input (I0.0) should be on. If the problem persists please contact LNS America, Inc. for further information. QUICK LOAD SERVO S3... -
Page 15: A025 - Servo Motor Positioning Following Error
• Check the alignment between the bar feeder and the lathe. The lathe or the bar feeder may have shifted over a long period if either is not lagged to the floor securely. If the problem persists please contact LNS America, Inc. for further information. QUICK LOAD SERVO S3... -
Page 16: A042 - Home Position Proximity Switch Sq5 Signal Missing
MODULE 1 • Check the tension of the drive belt. If it is not tight, 76543210 Bit 4 = 0 adjust. Refer to the Quick Load Servo S3 Instruction Manual, pg. 6-14. • Re-reference the bar feeder. QUICK LOAD SERVO S3... -
Page 17: A044 - Bar Loading Error
Alarm needs to be cleared. Press the STOP button on the remote control station to clear and reset the alarm. Remove the bar from the spindle and restart the top-cut positioning cycle. If the problem persists please contact LNS America, Inc. for further information. QUICK LOAD SERVO S3... -
Page 18: A046 - Clamping Device Has Closed Prior To Feed Out Complete
Input Part Length parameter is reached. Solution: Verify that the clamping device is closing properly and that the Clamping Signal Active interface parameter is set in conjunction with how the interface signal is being sent. QUICK LOAD SERVO S3... -
Page 19: A047 - Signal A2 Interrupted During Loading Cycle
Alarm needs to be cleared. Press the STOP key on the remote control station to clear the message and reset the alarm. Remove the bar stock from the loading channel and reset the bar feeder and the lathe in automatic cycle. QUICK LOAD SERVO S3... -
Page 20: A048 - Safety Time For Part Feed Out Elapsed
Feed out without turret Alarm needs to be cleared. Press the STOP key on the and without m-code remote control station to clear the message and reset the alarm. Contact LNS America, Inc. for further information. QUICK LOAD SERVO S3... -
Page 21: A049 - Measuring Cell Sq@ Is Activated Too Early
Measure the length of the bar stock being run. The length should not exceed the value set in this parameter. QUICK LOAD SERVO S3... -
Page 22: A050 - Signal A2 Interrupted During Production Cycle And The Clamping
Alarm needs to be cleared. Press the STOP key on the remote control station to clear the message and reset 76543210 Bit 1 = 0 the alarm. Restart the bar feeder and the lathe automatic cycle. QUICK LOAD SERVO S3... -
Page 23: A051 - Bar Stock Loading Error
Bit 2 = 1 past the measuring cell (SQ3). MODULE 1 • Load bar stock onto the magazine rack. 76543210 • Bit 2 = 0 Check that the loading fingers are set to pick up a single bar. QUICK LOAD SERVO S3... -
Page 24: A052 - Safety Time For Top-Cut Positioning Elapsed
5 minutes. Solution: Alarm needs to be cleared. Press the STOP key on the remote control station to clear the message and reset the alarm. Restart the bar feed and lathe in automatic production. QUICK LOAD SERVO S3... -
Page 25: A053 - Lathe Did Not Resume Its Production Cycle
1 minute after reaching top-cut position. Solution: Alarm needs to be cleared. Press the STOP key on the remote control station to clear the message and reset the alarm. Restart the bar feeder and the lathe automatic cycle. QUICK LOAD SERVO S3... -
Page 26: A083 - Upper Position Fault
Check the functionality of upper position switch SQ2. MODULE 1 Alarm needs to be cleared. Press the STOP key on the Bit 0 = 1 76543210 remote control station to clear the message and reset Bit 1 = 0 the alarm. QUICK LOAD SERVO S3... -
Page 27: A088 - Loading Channel Will Not Move To Lower Position
Check the wiring of lower position switch SQ1. MODULE 1 Alarm needs to be cleared. Press the STOP key on the Bit 0 = 0 76543210 remote control station to clear the message and reset Bit 1 = 1 the alarm. QUICK LOAD SERVO S3... -
Page 28: A091 - Measuring Cell Sq3 Signal Defective
Measuring Cell Adjustment – SQ3, pg. 3-21) MODULE 1 Alarm needs to be cleared. Press the STOP key on the 76543210 Bit 2 = 0 remote control station to clear the message and reset the alarm. QUICK LOAD SERVO S3... -
Page 29: Lower Position Fault
Bit 1 = 1 SQ1. MODULE 1 Alarm needs to be cleared. Press the STOP key on the Bit 0 = 0 76543210 remote control station to clear the message and reset Bit 1 = 1 the alarm. QUICK LOAD SERVO S3... -
Page 30: Loading Channel Upper Position Default
Check the wiring of lower position switch SQ1. MODULE 1 Alarm needs to be cleared. Press the STOP key on the Bit 0 = 0 76543210 remote control station to clear the message and reset Bit 1 = 1 the alarm. QUICK LOAD SERVO S3... -
Page 31: Loading Channel Upper Motion Default
Check the functionality of upper position switch SQ2. MODULE 1 Alarm needs to be cleared. Press the STOP key on the 76543210 Bit 1 = 1 remote control station to clear the message and reset the alarm. QUICK LOAD SERVO S3... -
Page 32: Loading Channel Lower Motion Default
Check the functionality of lower position switch SQ1. MODULE 1 Alarm needs to be cleared. Press the STOP key on the 76543210 Bit 0 = 1 remote control station to clear the message and reset the alarm. QUICK LOAD SERVO S3... -
Page 33: Loading Channel Did Not Reach Its Lower Position
Check for air leaks on the air valve assembly. Bit 0 = 0 76543210 • Check the functionality of upper position switch Bit 1 = 1 SQ2. • Check the wiring of upper position switch SQ2. QUICK LOAD SERVO S3... -
Page 34: Drive For Diameter Adjustment Error
Calibration of the Loading Table, pg. 3-31) • Replace the diameter adjustment motor - M2 (refer to Diameter Adjustment Motor Replacement, pg. 3-14) • Recalibrate the loading table (refer to Calibration of the Loading Table, pg. 3-31) QUICK LOAD SERVO S3... -
Page 35: Door Lathe Open
Restart the bar feed and lathe in automatic production. MODULE 0 Alarm needs to be cleared. Press the STOP key on the 76543210 Bit 5 = 0 remote control station to clear the message and reset the alarm. QUICK LOAD SERVO S3... -
Page 36: Servo Amplifier/Plc Communication Fault
Verify that the CN3 connector is connected properly on the servo amplifier as well as on the PLC. • Verify the 24VDC supply for the PLC. Any voltage fluctuation can result in poor performance of the PLC. If the problem persists please contact LNS America, Inc. for further information. QUICK LOAD SERVO S3... -
Page 37: Diameter Change Control Device Is Out Of Sync
Manual Mode icon. Press the function key on the remote control station corresponding to the V-channel Upper Position icon. Follow the Calibration of the Loading Table pg. 3-31 procedure in Chapter 2: Common Issues. QUICK LOAD SERVO S3... -
Page 38: Sps No Response
R e s p o n s e X A t t a c h e d Description: The SPS No Response alarm occurs when there is a communication problem between the remote control station and the LNS PLC. Solution: Cause Solution •... -
Page 39: Mitsubishi Servo Amplifier Alarm List
Servo complete auto tuning. Amplifier manual Cyclic operation Position shift occurs Confirm the cumulative Pulse counting error, etc. command pulses, due to noise. cumulative feedback pulses and actual servo motor position. QUICK LOAD SERVO S3... - Page 40 Absolute position counter warning AL.E6 Servo emergency stop warning AL.E9 Main circuit off warning Note: Deactivate the alarm about 30 minutes of cooling time after removing the cause of occurrence. 0: Pin-SG off (open) 1: Pin-SG on (short) QUICK LOAD SERVO S3...
- Page 41 2. Encoder fault Change the servo motor. amplifier. 3. Encoder cable faulty Repair or change the cable. (wire breakage or short) 4. Wrong combination of servo Use correct combination. amplifier and servo motor QUICK LOAD SERVO S3...
- Page 42 Regenerative 6. Regenerative transistor faulty. transistor fault Checking method 1) The regenerative brake option has overheated abnormally. 2) The alarm occurs even after removal of the built-in regenerative brake resistor or regenerative brake option. QUICK LOAD SERVO S3...
- Page 43 Parameter setting 1. Servo amplifier fault caused the Change the servo amplifier. is wrong. parameter setting to be rewritten. 2. Regenerative brake option not Set parameter No.0 correctly. used with servo amplifier was selected in parameter No.0. QUICK LOAD SERVO S3...
- Page 44 Checking method When the servo motor shaft is rotated with the servo off, the cumulative feedback pulses do not vary in proportion to the rotary angle of the shaft but the indication skips or returns midway. QUICK LOAD SERVO S3...
- Page 45 88888 Watchdog CPU, parts faulty Fault of parts in servo amplifier Change servo amplifier. Checking method Alarm (88888) occurs if power is switched on after disconnection of all cables but the control circuit power supply cables. QUICK LOAD SERVO S3...
- Page 46 External emergency stop was made Ensure safety and emergency stop valid. (EMG-SG opened.) deactivate emergency stop. warning AL.E9 Main circuit off Servo was switched on Switch on main circuit warning with main circuit power power. off. QUICK LOAD SERVO S3...
-
Page 48: Chapter 2
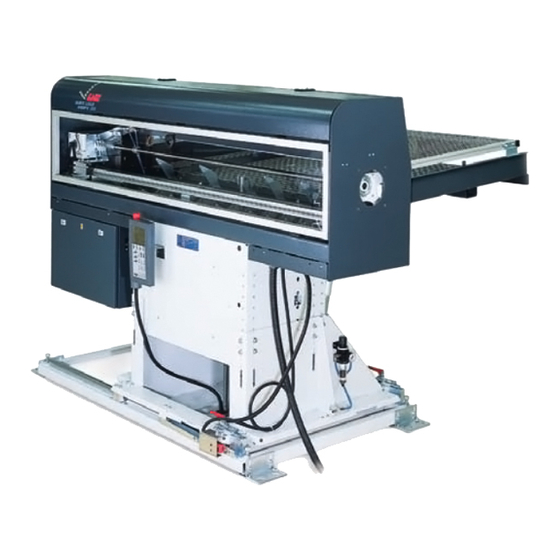
Common Issues he Quick Load Servo S3 is designed to be a user-friendly, simple, and reliable bar feeder, covering a range of diameters ¼” to 4 ¾”. Although easy to use, including extremely quick changeovers and the capability for unmanned operation this unit is not flawless. -
Page 49: Low Voltage / Plc Shutdown
Description: The Quick Load Servo S3 uses a LNS PCD2 controller (PLC) to send/receive inputs/outputs. The PLC is powered by a +24VDC input supplied by a transformer. The input supply voltage must be regulated to ensure proper functioning. The remote control station, which is used to send/receive data back and forth with the PLC, is powered by the +24VDC on the PLC. -
Page 50: Vibration Issues
Vibration Issues The term “vibration” is being used regarding the Quick Load Servo S3, to indicate that the RPM performance of the lathe is physically deteriorated, to the point of creating an unbalanced rotational oscillation of the bar stock, within the confines of the spindle of the lathe that is detrimental to the machining process. -
Page 51: Servo Motor Following Error During Sequence 12
Hitting back of spindle then recalibrate the loading table, refer to Alignment Procedure pg. 3-3 Calibration of the Loading Table pg. 3-31. Hitting back of • Verify the correct collet/chuck is installed for the material being run. clamping system QUICK LOAD SERVO S3... -
Page 52: Part Feed Out Accuracy
This application requires that the lathe be equipped with a pull-to-close type clamping system. If a push-to-close type clamping system is used then the “Feed with help of the turret” application must be selected. It is recommended by LNS that when feeding without the help of the turret that a dead-length, parallel gripping type clamping device be used. - Page 53 • If using a push-to-close type clamping system ensure the turret is being Part feeds out too long used to locate the part and that the turret is in the correct location • Verify that the barstock is concentric and clean of debris QUICK LOAD SERVO S3...
-
Page 54: Chapter 3
The video clips can be viewed on a PC with a compatible video card from the CD-ROM version of this manual. QUICK LOAD SERVO S3... -
Page 55: End Of Bar Adjustment
Press and hold the F-key corresponding to the pusher forward icon, until the pusher is ¼” behind the clamping system. Step 6: Press and hold the F3 (ENTER) key on the remote control station. The End Of Bar is now set. Step 7: Press the F2 (ESC) key on the remote control station. Procedure complete. QUICK LOAD SERVO S3... -
Page 56: Alignment Procedure
Level the bar feed in the x and y axis using a torpedo level. The level can be placed on the linear belt rail to verify the y-axis and on the retract rails to verify the x-axis. Use the leveling screws on the retract to adjust unit to level. Leveling screws Leveling screws QUICK LOAD SERVO S3... - Page 57 Using the central jackscrew and the hexagonal tube supplied with the bar feed; adjust the unit so that the pusher is centered up and down at the back of the spindle. Make sure that the unit raises or lowers uniformly. Central jackscrew Hexagonal tube Pusher should be centered vertically with the spindle. QUICK LOAD SERVO S3...
- Page 58 Pusher should be aligned horizontal to the spindle and the back of the collet Step 7: Once the bar feed has been aligned, anchor it using the ½ inch anchor bolts supplied with the unit. Anchor here Anchor here QUICK LOAD SERVO S3...
- Page 59 Step 11: For final alignment, load a bar into the v-channel and verify that it can be loaded into the spindle of the lathe without hitting the sides of the spindle or spindle liner. If the bar hits side to side the alignment will have to be adjusted. Bar stock should centered inside the spindle or spindle liner. Procedure complete. QUICK LOAD SERVO S3...
-
Page 60: Pusher Changeover
Pusher at the mechanical home position against the reference plate. Bar feed in STOP mode. Step 1: Open the main access cover. Step 2: Measure the distance of the End-of-Bar bushing. Step 3: Pull the carrier away from the home position. QUICK LOAD SERVO S3... - Page 61 Step 7: Put the new pusher in the bar feed. Step 8: Push the guide bushing in the front ring. Step 9: Place the rear end of the pusher in the carrier and tighten the setscrews. QUICK LOAD SERVO S3...
- Page 62 3 - 9 Step 10: Close the main access cover. Procedure complete. The following is a video clip of the Pusher Changeover procedure. Must have the electronic file to play. This movie may take several seconds to begin. QUICK LOAD SERVO S3...
-
Page 63: Carriage Unit Belt Tension Adjustment
3 - 1 0 Chapter 3: Procedures Carriage Unit Belt Tension Adjustment Procedure: Conditions: Bar feed power on. Bar feed in STOP mode. Step 1: Open the main access cover. Step 2: Pull the carriage unit forward towards the middle of the linear rail. Step 3: On each end of the carriage unit are black plastic end caps. - Page 64 Close the main access cover. Procedure complete. he following is a video clip of the Carriage Unit Belt Tension Adjustment procedure. Must have the electronic file to play. This movie ay take several seconds to begin. QUICK LOAD SERVO S3...
-
Page 65: Servo Motor Belt Tension Adjustment
Bar feed in STOP mode. Step 1: Open the main access cover. Step 2: Loosen the four nuts on the motor mount plate. Step 3: Using a lever (ex. screwdriver), raise the motor to create tension on the belt. QUICK LOAD SERVO S3... - Page 66 Remove the lever and close the main access cover. rocedure complete. he following is a video clip of the Servo Motor Belt Tension Adjustment procedure. Must have the electronic file to play. This movie may take several seconds to begin. QUICK LOAD SERVO S3...
-
Page 67: Diameter Adjustment Motor Replacement
3 - 1 4 Chapter 3: Procedures Diameter Adjustment Motor Replacement Procedure: Conditions: Bar feed power on. Bar feed in STOP mode. Step 1: Remove the front panel on the sub-base. Front panel Step 2: Remove the two rear panels on the sub-base. Step 3: Remove the four screws holding on the chain guard cover plate. - Page 68 Disconnect the M2 cable from the XP1 connector and remove t he bad motor. Cable M2 XP1 connector Bad motor Step 7: Insert the new motor and connect the M2 cable to the XP1 connector. Cable M2 XP1 connector New motor QUICK LOAD SERVO S3...
- Page 69 While pulling the motor toward the front of the bar feed to keep the chain taut, tighten the two screws for the motor assembly. View from front panel Step 10: Reassemble the chain guard. View from front panel View from rear panel Step 11: Reassemble the front panel. Front panel QUICK LOAD SERVO S3...
- Page 70 Step 12: Reassemble the two back panels. Procedure complete. The following is a video clip of the Diameter Adjustment Motor Replacement procedure. Must have the electronic file to play. This movie may take several seconds to begin. QUICK LOAD SERVO S3...
-
Page 71: Home Position Proximity Switch Adjustment - Sq5
At this point, the servo amplifier should read between 0.4 – 0.7. Adjust the slotted home position bracket until 0.4 – 0.7 value is achieved. Servo drive belt Slotted home position bracket Step 16: Close the main access cover. QUICK LOAD SERVO S3... - Page 72 Step 17: Press the STOP key on the remote control station to clear and reset the alarm. Procedure complete. The following is a video clip of the Home Position Proximity Switch Adjustment procedure. Must have the electronic file to play. This movie may take several seconds to begin. QUICK LOAD SERVO S3...
-
Page 73: Magazine And Loading Finger Adjustment
Procedure complete. The following is a video clip of the Magazine and Loading Finger Adjustment from Profiled to Round procedure. Must have the electronic file to play. Movie may take several seconds to begin. QUICK LOAD SERVO S3... -
Page 74: Measuring Cell Adjustment - Sq3
6mm bar stock Step 4: Push the stock up so that it is sticking out the front of the bar feeder. Step 5: Turn the gain adjustment on the measuring cell to the max position. Gain adjustment QUICK LOAD SERVO S3... - Page 75 CW until the sensor detects the bar. Once the sensor detects the bar continue to turn the gain CW another ½ turn. Turn gain adjustment up until sensor is lit. tep 9: Remove the material from the v-channel and close the main access cover. QUICK LOAD SERVO S3...
- Page 76 Step 10: Press the STOP key on the remote control station to clear the Main Access Cover Open alarm. Procedure complete. The following is a video clip of the Measuring Cell Adjustment procedure. Must have the electronic file to play. This movie may take several seconds to begin. QUICK LOAD SERVO S3...
-
Page 77: Pusher Reversing Distance Adjustment
Record the value of the pusher position on the remote control station. Take this value and subtract if from the value of the End of Bar position. Take this new value and enter it as the value for the Pusher Reversing Distance parameter. Procedure complete. QUICK LOAD SERVO S3... -
Page 78: Reference Procedure
A N I N T E R M E D I A T E P O S I T I O N P R E S S F 1 T O S E L E C T M A N U A L M O D E QUICK LOAD SERVO S3... - Page 79 P R E S S F 2 T O S E L E C T M A N U A L M O D E Procedure complete. The following is a video clip of the Reference Procedure. Must have the electronic file to play this movie. QUICK LOAD SERVO S3...
-
Page 80: Reset Interface Parameters
PLC in RUN mode. Step 1: Press the MENU button on the remote control station. Step 2: Press the #2 button on the remote control station. Step 3: Press the F4 button on the remote control station. QUICK LOAD SERVO S3... - Page 81 3 - 2 8 Chapter 3: Procedures Step 4: Press the #8 button on the remote control station. Step 5: Press the F3 button on the remote control station. Step 6: Press the #2 button on the remote control station. Step 7: Press the #5 button on the remote control station.
- Page 82 Press the #0 button on the remote control station. Step 9: Press the #3 button on the remote control station. Step 10: Press the F3 button on the remote control station. Step 11: Press the #1 button on the remote control station. QUICK LOAD SERVO S3...
- Page 83 Step 12: Press the F3 button on the remote control station. Step 13: Press the F1 butt on on the remote control station. Step 14: Press the F1 button on the remote control station. Procedure complete. QUICK LOAD SERVO S3...
-
Page 84: Calibration Of The Loading Table
I N T H E C H A N N E L L O A D I N G F L A G P O S I T I O N @ @ @ @ . @ M M QUICK LOAD SERVO S3... -
Page 85: Software Update/Restore
Smart Media. Smart Media, which is mainly used in photography, has been integrated for use with the user-friendly remote control station. The Smart Media Card holds a backup program for the Quick Load Servo S3 if at anytime there has been a power failure or any error has occurred in the user program. In addition, it automatically backs up any application/interface parameters that have been set for the most recent application being run. -
Page 86: Determining Display Firmware
Firmware v 2.08 Firmware v 2.08 (No card is present or the card is blank) If the display has firmware version 1.17a, proceed to page 4-3. If the display has firmware version 2.08, proceed to page 4-20. QUICK LOAD SERVO S3... -
Page 87: Plc Fault
Step 4: Once the 2 halves are separated insert the Smart Media card (solid back side facing up and chamfered edge away from you) into the slot. Black side Chamfered edge facing up away from you QUICK LOAD SERVO S3... - Page 88 A password is required at this point using the number buttons on the pendant enter 3; 1; 4; 1; 5. Step 9: There are 4 menu choices on this screen, press the F3 key for PLC Fault. QUICK LOAD SERVO S3...
- Page 89 Step 12: The PLC program will now be saved from the memory card to the PLC. This may take several minutes. Step 13: Press F4 (OK). Step 14: Turn off power to bar feeder. Step 15: Move the RUN/STOP switch to RUN position. Step 16: Restore power to the bar feeder. Procedure complete. QUICK LOAD SERVO S3...
-
Page 90: Plc Fault
Step 4: Once the 2 halves are separated insert the Smart Media card (solid back side facing up and chamfered edge away from you) into the slot. Black side Chamfered edge facing up away from you QUICK LOAD SERVO S3... - Page 91 A password is required at this point using the number buttons on the pendant enter 3; 1; 4; 1; 5. Step 9: There are 4 menu choices on this screen, press the F3 key for PLC Fault. QUICK LOAD SERVO S3...
- Page 92 Step 11: The parameters will then be restored from the MMI to the PLC. Step 12: Press F4 (OK). Step 13: Turn off power to bar feeder. Step 14: Move the RUN/STOP switch to RUN position. Step 15: Restore power to the bar feeder. Procedure complete. QUICK LOAD SERVO S3...
-
Page 93: Software Update
Step 4: Once the 2 halves are separated insert the Smart Media card (solid back side facing up and chamfered edge away from you) into the slot. Black side Chamfered edge facing up away from you QUICK LOAD SERVO S3... - Page 94 Step 8: A password is required at this point using the number buttons on the pendant enter 3; 1; 4; 1; 5. Step 9: There are 4 menu choices on this screen, press the F2 key for Software Update. QUICK LOAD SERVO S3...
- Page 95 Step 12: The bar feeder parameters will now be saved from the display to the PLC. Step 13: Press F4 (OK). Step 14: Turn off power to bar feeder. Step 15: Move the RUN/STOP switch to RUN position. Step 16: Restore power to the bar feeder. Procedure complete. QUICK LOAD SERVO S3...
-
Page 96: Software Update
Step 4: Once the 2 halves are separated insert the Smart Media card (solid back side facing up and chamfered edge away from you) into the slot. Black side Chamfered edge facing up away from you QUICK LOAD SERVO S3... - Page 97 Step 8: A password is required at this point using the number buttons on the pendant enter 3; 1; 4; 1; 5. Step 9: There are 4 menu choices on this screen, press the F2 key for Software Update. QUICK LOAD SERVO S3...
- Page 98 Step 11: Press F3 to restore data from memory card to the display (text and icons). Step 12: The registers will then be restored from the memory card to the display. Step 13: Press F4 (OK). Step 14: Turn off power to bar feeder. QUICK LOAD SERVO S3...
- Page 99 4 - 1 6 Error! Reference source not found. Error! Reference source not found. Step 15: Move the RUN/STOP switch to RUN position. Step 16: Restore power to the bar feeder. Procedure complete. QUICK LOAD SERVO S3...
-
Page 100: Software Update
Step 4: Once the 2 halves are separated insert the Smart Media card (solid back side facing up and chamfered edge away from you) into the slot. Black side Chamfered edge facing up away from you QUICK LOAD SERVO S3... - Page 101 Step 8: A password is required at this point using the number buttons on the pendant enter 3; 1; 4; 1; 5. Step 9: There are 4 menu choices on this screen, press the F2 key for Software Update. QUICK LOAD SERVO S3...
- Page 102 Step 11: Press F4 (PAGE DOWN) until you reach the screen to Restore PLC Program from Memory Card to PLC, press F3 (ENTER). Step 12: The PLC program will now be saved from the memory card to the PLC. This may take several minutes. QUICK LOAD SERVO S3...
- Page 103 Error! Reference source not found. Error! Reference source not found. Step 13: Press F4 (OK). Step 14: Turn off power to bar feeder. Step 15: Move the RUN/STOP switch to RUN position. Step 16: Restore power to the bar feeder. Procedure complete. QUICK LOAD SERVO S3...
-
Page 104: Plc Fault - V2.08
Step 4: Once the 2 halves are separated insert the Smart Media card (solid back side facing up and chamfered edge away from you) into the slot. Black side Chamfered edge facing up away from you QUICK LOAD SERVO S3... - Page 105 Step 8: A password is required at this point using the number buttons on the pendant enter 3; 1; 4; 1; 5. Step 9: There are 4 menu choices on this screen, press the F3 key for PLC Fault. QUICK LOAD SERVO S3...
- Page 106 Step 12: Press F4 (OK). Step 13: Turn off power to bar feeder Step 14: Move the RUN/STOP switch to RUN position. Step 15: Restore power to the bar feeder. Procedure complete. QUICK LOAD SERVO S3...
-
Page 107: Software Update - V2.08
Step 4: Once the 2 halves are separated insert the Smart Media card (solid back side facing up and chamfered edge away from you) into the slot. Black side Chamfered edge facing up away from you QUICK LOAD SERVO S3... - Page 108 Step 8: A password is required at this point using the number buttons on the pendant enter 3; 1; 4; 1; 5. Step 9: There are 4 menu choices on this screen, press the F2 key for Software Update. QUICK LOAD SERVO S3...
- Page 109 Step 12: Press F4 (OK). Step 13: Turn off power to bar feeder Step 14: Move the RUN/STOP switch to RUN position. Step 15: Restore power to the bar feeder. Procedure complete. QUICK LOAD SERVO S3...
-
Page 110: Chapter 5
Reference this section of the manual when changing applications on the lathe to achieve ideal operating conditions and also to attain maximum efficiency of the Quick Load Servo S3 automated bar feeding unit. -
Page 111: Application Setup
Chapter 5: Barfeed Applications Application Setup The Quick Load Servo S3 is equipped with 7 pre-defined applications and 1 custom application defined in any configuration by the user. An “application” is defined as a specific function of the barfeed in automatic operation coinciding with the material processing of the lathe. - Page 112 Parameters enabled: 6=2, 8A=1, 19=2, and 83=1 (all other “Application” type parameters set to SUB-SPINDLE STANDARD This parameter is not visible by default, a password is required to unlock. Contact LNS America, Inc. for more information. The sub-spindle is required to pull the material to the desired position. The turret is NOT used to position the material.
- Page 113 “Application” type parameters set to =1) ONE-SHOT SHAFT LOADING (High Speed Loading) This parameter is not visible by default, a password is required to unlock. Contact LNS America, Inc. for more information. A pull-to-close type clamping system is required by this application for positioning accuracy. If a push-to-close type system is used the turret must be used for positioning.
-
Page 114: Chapter 6
Maintenance eriodic maintenance of the Quick Load Servo S3 bar feeding system can only serve to improve the operation and prolong its useful life. Following a few simple steps can be extremely helpful and takes relatively no time at all. The list of... -
Page 115: Daily Maintenance
Check the PLC battery The PLC backup battery saves the PLC program in case of any power failure. The battery used in the LNS PCD2 is a non- rechargeable 3VDC Lithium/ CD2032 battery. Over time, the battery will slowly discharge. The following chart shows the average life expectancy of the battery: Avg. -
Page 116: Chapter 7
Note: When ordering parts the following information will be needed to ensure better customer support: • Bar feeder type • Bar feeder Serial Number (found on the sub-base) • Bar stock diameter • Lathe type (make and model) QUICK LOAD SERVO S3... -
Page 117: Recommended Spare Parts List
4.432 Emergency stop button Three feeding pusher are necessary to cover the entire range of the Quick Load Servo S3 bar feed system. Each pusher has a defined range of operation (refer to the Instruction Manual pg. 6-13). When ordering parts, to ensure better customer support, please specify the following information;... -
Page 118: Parts Order Form
Model of Lathe: Bar stock diameter: Qty. Part # Description Note: To place an order, this form should be photocopied, completed and faxed to (513) 528-8320 Please call (513) 528-5674 or price and availability of parts. QUICK LOAD SERVO S3... -
Page 119: Electrical Box Components
Main circuit breaker 4.242 4.242 Main disconnect switch R1-R5 4.606 6.102-A Interface relays 4.192 4.688 Transformer 6.115-A 24 Vdc power supply * Not shown in this picture. The LNS PCD2 is located on the electrical panel door. QUICK LOAD SERVO S3... -
Page 120: Loading Table Sub-Assembly (Left/Rear Load)
Chapter 7: Spare Parts 7 - 5 Loading Table sub-assembly (Left/Rear Load) QUICK LOAD SERVO S3... - Page 121 7 - 6 Chapter 7: Spare Parts Loading Table sub-assembly (Left/Rear Load) QUICK LOAD SERVO S3...
- Page 122 Chapter 7: Spare Parts 7 - 7 Loading Table sub-assembly (Left/Rear Load) QUICK LOAD SERVO S3...
-
Page 123: Pusher Locking Sub-Assembly (Left/Rear Load)
7 - 8 Chapter 7: Spare Parts Pusher Locking sub-assembly (Left/Rear Load) QUICK LOAD SERVO S3... - Page 124 Chapter 7: Spare Parts 7 - 9 Pusher Locking sub-assembly (Left/Rear Load) QUICK LOAD SERVO S3...
-
Page 125: Loading Table Sub-Assembly (Left/Front Load)
7 - 1 0 Chapter 7: Spare Parts Loading Table sub-assembly (Left/Front Load) QUICK LOAD SERVO S3... - Page 126 Chapter 7: Spare Parts 7 - 1 1 Loading Table sub-assembly (Left/Front Load) QUICK LOAD SERVO S3...
-
Page 127: Loading Table Sub-Assembly (Left/Front Load)
7 - 1 2 Chapter 7: Spare Parts Loading Table sub-assembly (Left/Front Load) QUICK LOAD SERVO S3... -
Page 128: Pusher Locking Sub-Assembly (Left/Front Load)
Chapter 7: Spare Parts 7 - 1 3 Pusher Locking sub-assembly (Left/Front Load) QUICK LOAD SERVO S3... -
Page 129: Pusher Locking Sub-Assembly (Left/Front Load)
7 - 1 4 Chapter 7: Spare Parts Pusher Locking sub-assembly (Left/Front Load) QUICK LOAD SERVO S3... -
Page 130: Loading Table Microswitch Sub-Assembly
Chapter 7: Spare Parts 7 - 1 5 Loading Table Microswitch sub-assembly QUICK LOAD SERVO S3... -
Page 131: Servo Motor Sub-Assembly
7 - 1 6 Chapter 7: Spare Parts Servo Motor sub-assembly QUICK LOAD SERVO S3... -
Page 132: Linear Rail Assembly
5 x 16 mm adapter plate screws, DIN 912 5 x 25 mm adapter plate screws, DIN 7984 5 mm serrated Belleville washers Gear shafts Drive box bearings 20 x 3 mm key Extrusion, 1830mm Rod, 1828 mm T-slot QUICK LOAD SERVO S3...
Need help?
Do you have a question about the QUICK LOAD SERVO S3 and is the answer not in the manual?
Questions and answers
LNS BARFEEDER sps no response , how do i fix this error
The SPS No Response alarm on the QUICK LOAD SERVO S3 occurs due to a communication problem between the remote control station and the LNS PLC. To fix this error:
1. Check the connectors between the PLC and the remote control station inside the cross piece to ensure they are correctly attached.
2. Verify continuity between the PLC and the remote control station.
These steps help restore proper communication and resolve the error.
This answer is automatically generated