Table of Contents

Related Manuals for Festo CPV -VI Series


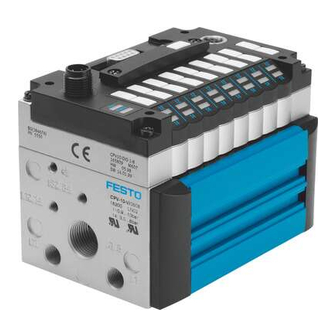
Summary of Contents for Festo CPV -VI Series
- Page 1 Compact Performance CPV valve terminal Pneumatics Typ: CPV..-VI...
- Page 3 Douglas Smith Layout: Festo, Dept. KI-TD Edition: 9811d © Festo AG & Co., 73726 Esslingen, 1998 Federal Republic of Germany The copying, distribution and utilization of this docu- ment as well as the communication of its contents to others without expressed authorization is prohibited. Of- fenders will be held liable for the payment of damages.
- Page 4 Part no.: 165 200 Title: MANUAL Designation: P.BE-CPV-GB CPV.. 9811d...
-
Page 5: Table Of Contents
Contents Designated use ..........V Target group . - Page 6 4. Commissioning General instructions ........4-3 Testing the valves........4-4 Locating faults.
-
Page 7: Designated Use
Festo: – as intended for use – in original condition – without unauthorized modifications –... -
Page 8: Important User Instructions
Important user instructions Danger This manual contains instructions on the dangers which categories may occur if the CPV valve terminal is not used cor- rectly. These instructions are always printed in italics, are framed and also signalled by pictograms. A distinction is made between the following: WARNING This means that personal injury or damage to property may occur if these instructions are not... - Page 9 Pictograms Pictograms and symbols complement the danger warn- ings and draw attention to the nature and conse- quences of dangers. The following pictograms are used: Uncontrolled movements of loose tubing. Unintentional movements of the connected actuators. High voltages or undefined switching states of the elec- tronic components which may influence connected cir- cuits.
-
Page 10: Information On This Manual
Information on this manual This manual contains specific information on the fitting, installation, commissioning, maintenance and conver- sion of the CPV valve terminal. It includes only the de- scription of the pneumatic components and refers to the variations of the CPV valve terminal listed in the table below. - Page 11 Information on further CP modules can be found in the manual for the relevant module. The following table gives a summary. Manuals on the CP system Peripherals Manual "CP system, installation and commissioning" Content General basic information on the method of operation, fitting, installation and commissioning of CP systems.
- Page 12 The CPV valve terminal consists of different plates. The main components of the CPV valve terminal are the valve plates (see drawing). Valve plates Fig. 0/2: Valve plates This manual contains documentation on the following valve plates: Product Equipment on terminal Number of valve locations depending on electrical connection MP, CP...
-
Page 13: Abbreviations
Abbreviations The following product-specific terms and abbreviations are used in this manual. Term Meaning AS-i Actuator-Sensor interface Blanking plate Plate without valve function, for filling empty locations Components Common term for connector plates, end plates, blanking plates, isolating plates, valve plates and pneumatic multiple connector plates Compact Performance CP cable Special cable for coupling the various CP modules... - Page 14 Term Meaning Electrical connector Plate with MP, AS-i or CP connections plate End plate Plate at the left and right-hand ends of the CPV valve terminal with channels or connections for compressed air supply to the valves and for the exhaust. Manual override Input/output modules Isolating plate...
-
Page 15: System Overview
1. System overview Chapter 1 System overview CPV... 9811d... - Page 16 1. System overview Contents 1. System overview Summary of variants........1-3 Description of components .
-
Page 17: Summary Of Variants
1. System overview 1.1 Summary of variants Festo can assist you with your automation problems at the machine level by means of valve terminals. The modular structure of the CP system enables you to in- corporate the CPV valve terminals and I/O modules to best advantage in your machine or system. - Page 18 1. System overview CPV valve The CPV valve terminals are available with the follow- terminal ing electrical connections: variants IC connection MP connection CP direct connection CP connection AS-i connection Fig. 1/1: Variants of the CPV valve terminal CPV valve The CPV valve terminal with IC (single) connection is terminal with available with 2 to 8 valve plates (also in uneven spac-...
- Page 19 1. System overview CPV valve ter- The CPV valve terminal with direct connection is avail- minal with di- able with 8 valve plates. It can be connected directly to rect connection the relevant fieldbus. CPV valve ter- This CPV valve terminal is connected to the AS-i bus minal with AS-i by means of a special AS-i cable.
- Page 20 1. System overview Grid sizes of The CPV valve terminals are available in the following the CPV valve sizes: terminals Designation Valve plate Valve CPV10 10 mm Micro valves CPV14 14 mm Mini valves CPV18 18 mm Midi valves Mixed operation with both grid sizes on one CPV valve terminal is not permitted.
- Page 21 1. System overview Pneumatic The supply and work tubing can be connected centrally multiple on CPV valve terminals with the pneumatic multiple connector plate connector plate. The CPV valve terminals can be sep- arated quickly from the supply and work tubing. By means of appropriate end plates, conversion from indi- vidual tubing to tubing with the pneumatic multiple con- nector plate can be made at any time.
-
Page 22: Description Of Components
1. System overview 1.2 Description of components The CPV valve terminal consists of the following com- ponents: " & % Electrical connector plate with MP, AS-i or CP connection Right-hand end plate (with/without supply connections or for pneum. m.c. plate) "... - Page 23 1. System overview Identification By means of the identification code, you can ascertain code which plates are fitted on your CPV valve terminal. This code is printed on the front between the manual over- rides 12 and 14. The identification codes are as follows: Ident.
- Page 24 1. System overview Valve plate (continuing) Ident. code: N Function: – Two single 3/2-way valves open in 82/84 basic position – 5/3-way valve pressurized in mid-position. This function is implemented with two 3/2-way valves open in basic position. 12/14 Ident. code: C Function: - Two 3/2-way valves, blocked in basic 82/84...
- Page 25 1. System overview Valve plate (continuing) Ident. code F (only CPV10 valve terminal) Function: or M 5/2-way single solenoid valve 82/84 PLEASE NOTE Observe the following limitations on using the "F valve plate" (Ident. code F) with CPV valve terminals •...
- Page 26 1. System overview On the CPV valve terminal you will find the following pneumatic connections and operating elements: " # & ' & & Valve location inscription clip (per valve) Support for inscription clip and cover of manual override " Type plate Manual override (per pilot solenoid, automatic reset or locking) Clip of pushing manual override...
- Page 27 1. System overview On the CPV valve terminal with IC connections you will find the following electrical connections and display ele- ments: " Label fields (per cable socket) Intermediate plug for current reduction (optional) " Type plate Connecting lugs for pilot solenoid coil 14 Earth/ground connection (per end plate) Connecting lugs for pilot solenoid coil 12 Yellow LEDs, signal status displays of pilot solenoids...
- Page 28 1. System overview On the CPV valve terminal with MC connection you will find the following connections and display elements: " SUB-D multipin plug ( 9-pin for terminals with 4 valves, 25-pin for terminals with 6 or 8 valves) Label clip "...
- Page 29 1. System overview On the CPV valve terminal with CP connection you will find the following electrical connections and display ele- ments: " & Incoming CP cable Continuing CP cable " Label clip Yellow LEDs, signal status display of relays Yellow LEDs, signal status display of the pilot solenoids Relay connections with cable &...
- Page 30 1. System overview On the CPV valve terminal with AS-i connection you will find the following electrical connections and display ele- ments: " & Green LED status display of the inputs (only CPV..-GE-ASI-4E4A-...) Cable socket for additional supply with black supply cable (only CPV..-GE-ASI-.-Z) "...
-
Page 31: Fitting
2. Fitting Chapter 2 Fitting CPV... 9811d... - Page 32 2. Fitting Contents 2. Fitting CPV valve terminal with individual tubing ....2-3 2.1.1 Fitting onto a wall ........2-4 2.1.2 Fitting onto a hat rail .
-
Page 33: Cpv Valve Terminal With Individual Tubing
2. Fitting WARNING Before undertaking installation or maintenance work, switch off the following: • the compressed air supply • the power supply to the valve solenoid coils You thereby avoid: – uncontrolled movements of loose tubing – unintentional movements of the connected actuators –... -
Page 34: Fitting Onto A Wall
2. Fitting 2.1.1 Fitting onto a wall In order to fit the CPV valve terminal onto a wall, you will require the appropriate fitting kit depending on the type of fitting. These kits are shown in the table below. PLEASE NOTE There is a special fitting kit, which is not shown here, for rear fitting of the CPV10/14 valve terminals with direct connection for Interbus Loop (type CPV..-GE-IBL-..) or for AS-i connection... - Page 35 2. Fitting Proceed as follows: • Make sure that the mounting surface can support the weight of the CPV valve terminal. • Fit the fastening profiles to the left and right hand end plates (see Fig. 2/2). Use the self-cutting screws supplied for this purpose (see table).
- Page 36 2. Fitting Fitting variant: rear Fitting variant: front " M4 screws (CPV10/14) or M5 screws M5.5 bore for wall fastening (CPV18) for wall fitting Self-cutting screws for fastening the Fixing bolts (only CPV10/14) profiles to the CPV valve terminal Self-cutting screws for fastening the "...
- Page 37 2. Fitting Fitting variant: rear Fitting variant: front " " CPV10 CPV14 CPV18 CPC10 CPV14 92 mm 92 mm 120 mm 109.5 mm 109.5 mm 62 mm 62 mm 26 mm 10 mm " 9 mm 13 mm 15 mm 10 mm x no.
-
Page 38: Fitting Onto A Hat Rail
2. Fitting Drill 4 holes with 5.5 mm diameter or a threaded bore for M5 screws in the fastening surface Valve Rear fitting Front fitting terminal Diameter of hole Threaded bore for: Diameter of hole Threaded bore for: CPV10/14 4.5 mm M4 screw 5.5 mm M5 screw... - Page 39 2. Fitting Proceed as follows: • Make sure that the fastening surface can support the weight of the CPV valve terminal. • Fit one of the following hat rails: Hat rail for CPV10/14 terminal Hat rail for CPV18 terminal Support rail as per Support rail as per EN 50022 - 35 x 7.5 EN 50022 - 35 x 15...
- Page 40 2. Fitting " For each end plate one M4 x 10 screw (CPV10), two M4 x 10 screws (CPV14) or two M5 x 10 screws (CPV18) Hat rail " Hat rail clamping unit Fixing bolts (only CPV10/14) Fig. 2/4: Fitting the valve terminal onto a hat rail •...
-
Page 41: Fitting With Feet
2. Fitting 2.1.3 Fitting with feet PLEASE NOTE In order to fit the CPV valve terminal with feet (at the level of work connections 2 and 4) you require the following fastening screws: • 4 M4 x 45 socket head screws (CPV10) •... - Page 42 2. Fitting • Make sure that there is enough room to connect the power cables and the pneumatic tubing. • In the case of CPV terminals with IC connection, you must insert the 4 socket head screws supplied into the holes intended for this purpose on the left and right-hand end plates (see diagram).
-
Page 43: Fitting The Cpv Valve Terminal Onto The Simatic Et 200X
2. Fitting 2.1.4 Fitting the CPV valve terminal onto the SIMATIC ET 200X PLEASE NOTE Instructions on the decentral periphery device ET 200X can be found in the SIEMENS AG manual. A CPV valve terminal with: • IC connection • 8 valve plates •... - Page 44 2. Fitting 2. Mark the positions of the 4 holes for the fastening screws on the base (see diagram). Tip: Hold the pneumatic interface module by the mounting surface and mark the position of the holes. Drill the 4 holes for M5 screws.
- Page 45 2. Fitting M5 screws, length at least 60 mm (ISO 1207/ISO 1580 - DIN 84 or DIN 912) Centring bolts Fig. 2/8: Fitting the CPV valve terminal onto the Siemens SIMATIC ET200X PLEASE NOTE In order to remove the CPV valve terminal, lift it up carefully and without tilting.
-
Page 46: Cpv Valve Terminal With Pneumatic Multiple Connector Plate
2. Fitting 2.2 CPV valve terminal with pneumatic multiple connector plate If you are using a pneumatic multiple connector plate, the power supply and work lines will be connected at a central point. This enables the supply and work lines to be disconnected from the CPV valve terminal easily and quickly. - Page 47 2. Fitting 2.2.1 Fitting the pneumatic multiple connector plate Make sure that the mounting surface can support the weight of the pneumatic multiple connector plate and the CPV valve terminal. Make sure also that there is enough room to connect the power cables and the pneumatic tubing.
- Page 48 2. Fitting Wall cutout dimensions for CPV valve terminals with standard pneumatic multiple connector plate CPV10/14: & " CPV18: & CPV10 terminal CPV14 terminal CPV18 terminal 29.5 mm + 39.5 mm + 59.0 mm + 60 mm 76.6 mm 98 mm "...
- Page 49 2. Fitting Wall cutout dimensions for CPV valve terminals with extended pneumatic multiple connector plate CPV10/18 " & & CPV14 " & & CPV10 terminal CPV14 terminal CPV18 terminal 60 mm + 30 mm + 40 mm + 118 mm 73 mm 89 mm "...
-
Page 50: Fitting The Pneumatic Multiple Connector Plate
2. Fitting Fitting the pneumatic multiple connector plate (rear side) In order to fit the pneumatic multiple connector plate in the extended version by the rear side to a mounting surface, proceed as follows: • Drill 2 holes in the mounting surface for M6 screws. The position of and distance between these holes can be seen in Fig.2/11. -
Page 51: Fitting The Cpv Valve Terminal Onto The Pneumatic Multiple Connector Plate
2. Fitting 2.2.2 Fitting the CPV valve terminal onto the pneumatic multiple connector plate Proceed as follows: • In the case of CPV valve terminals with individual connection, insert the socket head screws supplied into the fastening holes of the CPV valve terminal. In the case of CPV valve terminals with MP, AS-i or CP connection, the socket head screws are already in- serted with a retaining device in the fastening holes... -
Page 52: Fitting The Designation Support
2. Fitting 2.3 Fitting the designation support As a protection against unauthorized operation of the manual override and for mounting the designation clips for the valves, the CPV valve terminal has a designa- tion support. This is fitted on the front above the ma- nual override. -
Page 53: Installation
3. Installation Chapter 3 Installation CPV... 9811d... - Page 54 3. Installation Contents 3. Installation General connecting principles ......3-3 Connecting the CPV valve terminal ..... . 3-5 3.2.1 Auxiliary pilot air .
-
Page 55: General Connecting Principles
3. Installation 3.1 General connecting principles WARNING Before undertaking installation or maintenance work, switch off the following: • the compressed air supply • the power supply to the valve solenoid coils You thereby avoid: – uncontrolled movements of loose tubing –... - Page 56 3. Installation Basic installation – Connecting 1. Push the tubing as far as it will go over the port on the screw connector. 2. If necessary, pull the locking ring (A) over the tubing connection and tighten clamping screw (B). 3.
-
Page 57: Connecting The Cpv Valve Terminal
3. Installation 3.2 Connecting the CPV valve terminal PLEASE NOTE • If valves are fitted but not used, seal the work con- nections 2 and 4 with blind plugs. • Depending on the tool you are using, observe the following sequence when you connect the work lines: - if using a socket head wrench, you can connect the work lines in any sequence. -
Page 58: Auxiliary Pilot Air
6 bar supply pressure and a medium flow rate of approximately 1 drop/4 minutes. Observe the instructions on special oil for service units in the Festo Pneumatics Catalogue. – In the case of CPV valve terminals with internally branched auxiliary pilot air, the above mentioned instruction also applies to the supply air (connection 1/11). - Page 59 3. Installation External If the supply pressure of your CPV valve terminal is in pilot air the range 3 to 8 bar, you must operate it with external pilot air. In this case the external pilot air is supplied via port 12/14 on the CPV valve terminal.
-
Page 60: Connecting The Supply And Work Tubing
3. Installation 3.2.2 Connecting the supply and work tubing Fit the screw connectors or silencers as shown in the table below. Then connect the tubing. With pneumatic multiple connector plate Without pneumatic multiple connector plate 82/84 12/14 12/14 82/84 Connection Tubing Connection size ISO 228, Connection... - Page 61 3. Installation PLEASE NOTE If there are several systems with ducted exhaust air, use non-return valves in the common exhaust tubing, in order to avoid impairment of function as a result of back pressures. ! " CPV valve terminal 1 Common 3/5 "...
- Page 62 3. Installation PLEASE NOTE In the case of CPV valve terminals with two pressure zones and auxiliary pilot air taken internally on the right-hand side, the pressure on the right-hand side must be between 3 bar and 8 bar. PLEASE NOTE In the case of CPV valve terminals with ducted sup- ply air, connections 11 and 12/14 must be sealed with blind plugs.
-
Page 63: Connecting The Electrical Cables
(protection against direct and indirect contact) in accordance with EN 60204-1/IEC 204 is guaranteed on Festo valve terminals. Safety transformers with the ad- jacent designation must be used for supplying PELV networks. The valve terminals must be earthed in order to ensure their function (e.g. - Page 64 3. Installation Earthing the CPV valve terminal All variants have an earth/ground connection for ear- thing the CPV valve terminal. This is on both the left and right-hand end plates (see diagram). Earth/ground connections Fig. 3/5: Earth/ground connection of CPV valve terminal PLEASE NOTE Earth the CPV valve terminal.
- Page 65 Connecting current-consuming devices to the relay plate PLEASE NOTE Use only the ready made cable KRP-1-24-... from Festo for connecting current-consuming devices to the relay outputs. Connect the current-consuming devices to the relay outputs as follows: • Carefully insert the socket first onto the connecting lug of the lower relay output (see diagram).
- Page 66 CPV valve terminal with individual connection With this CPV valve terminal variant each valve sole- noid coil is connected separately. PLEASE NOTE • Use only the following pre-assembled Festo connecting sockets for connecting the valve solenoid coils. – KMYZ-3-24-...-LED / KMYZ-5-24-...-LED. An LED is incorporated in the transparent plugs of each of these connecting sockets.
- Page 67 3. Installation Connect the valve solenoid coils as follows: • For current reduction, insert the intermediate plug into the connecting lug of the appropriate pilot sole- noid. • Insert the socket into the connecting lugs of the ap- propriate pilot solenoid or of the intermediate lug (see diagram).
- Page 68 3. Installation CPV valve terminal with multipin or AS-i connection Connecting the multipin or AS-i cable PLEASE NOTE Detailed instructions on the electrical installation of the CPV valve terminal with multipin or AS-i connec- tions can be found with the relevant product. CP terminal with CP connection Connecting the CP cable PLEASE NOTE...
-
Page 69: Commissioning
4. Commissioning Chapter 4 Commissioning CPV... 9811d... - Page 70 4. Commissioning Contents 4. Commissioning General instructions ........4-3 Testing the valves.
-
Page 71: General Instructions
4. Commissioning 4.1 General instructions Before commissioning • • Switch off the power supply before connecting or dis- connecting plugs (otherwise functioning may be im- paired). • • Earth the CPV valve terminal at an end plate. • • Commission only a completely fitted and wired valve terminal. -
Page 72: Testing The Valves
4. Commissioning 4.2 Testing the valves PLEASE NOTE Before commissioning the CPV valve terminal, observe the specifications on medium, see chapter "Installation", section 3.2.1 Auxiliary pilot air. Proceed as follows when commissioning the CPV valve terminal: Commissioning variants Activity Preliminary test of the Test the valve-cylinder pneumatic tubing combination with the manual... - Page 73 4. Commissioning Checking the valve functions Manual override WARNING Before operating the manual override: • • Disconnect the operating voltage supply to the valve solenoid coils by unplugging the contact (IC, MP AS-i or CP connection). You then avoid undesired actuation of the valve solenoid coils.
- Page 74 4. Commissioning Different types of manual override The manual override is intended for use as follows: Manual override design Mode of operation Manual override with Manual override is reset by spring automatic reset (pushing) force. Manual override locking Manual override remains active, until it is reset by hand.
- Page 75 4. Commissioning Checking the valve-cylinder combination WARNING When pressurizing or repressurizing the valve termi- nal under the following conditions: – with safety start-up valve (slow pressure build-up) and – when there is an electrical signal (e.g. after EMERGENCY STOP) supply the auxiliary pilot air separately (3 to 8 bar). The auxiliary pilot air must reach its full level immedi- ately after being switched on, otherwise the slow press- ure build-up of the overall supply will have no effect...
- Page 76 4. Commissioning PLEASE NOTE • • Use a blunt pointed object for actuating the manual override with automatic reset. • • Actuate the manual override with max. 30 N. You thereby avoid functional interference or damage to the manual override. Testing Proceed as follows: •...
- Page 77 4. Commissioning CAUTION Before commissioning the CPV valve terminal, return the manual override to basic position. Actuate the manual override with locking Reaction of valve Push the slide of the The valve: manual override down – switches as far as possible. Leave slide in lower –...
-
Page 78: Locating Faults
4. Commissioning 4.2 Locating faults Impairment of function When you switch on the compressed air supply or when you have tested the individual valves, you can learn the following about the operating status of the pneumatic system. Operating status of the Valve position Error treatment when compressed pneumatic system... - Page 79 4. Commissioning If the operating status of the pneumatic system differs from the desired pneumatic operating status, the follow- ing requirements are probably not fulfilled. Desired Requirement Remarks pneumatic operating status Free of leakage – carefully laid tubing — – regulated auxiliary pilot air •...
- Page 80 4. Commissioning LED display of valves There is a yellow LED for each valve solenoid coil. This LED indicates the switching status of the valve solenoid coil when the CPV valve terminal is ready to operate. PLEASE NOTE Observe the assignment of the LED to the appropriate manual override: With IC connection: –...
- Page 81 4. Commissioning The relationship of the LEDs to the manual override is shown in the diagram below. LEDs and manual override for pilot solenoid 14 LEDs and manual override for pilot solenoid 12 Fig. 4/2: Relationship of the LEDs to the manual override 4-13 CPV...
- Page 82 4. Commissioning The LEDs show the switching status of the valve sole- noid coils. The meaning of the LEDs is shown in the table below. Switching position of valve Meaning Yellow out Basic position Logic 0 (signal not applied) Yellow alight –...
-
Page 83: Maintenance And Conversion
5. Maintenance and conversion Chapter 5 Maintenance and conversion CPV... 9811d... - Page 84 5. Maintenance and conversion Contents 5. Maintenance and conversion Fitting/removing CPV valve terminal components ... 5-3 5.1.1 Removing components from valve locations ....5-4 5.1.2 Fitting components into the valve locations .
-
Page 85: Fitting/Removing Cpv Valve Terminal Components
5. Maintenance and conversion 5.1 Fitting/removing CPV valve terminal components WARNING Before fitting, switch off the following: • the compressed air supply • the power supply to the valve solenoid coils You thereby avoid: – Uncontrolled movements of loose tubing. –... -
Page 86: Removing Components From Valve Locations
5. Maintenance and conversion 5.1.1 Removing components from valve locations The components on the CPV valve terminal can easily be removed for maintenance and conversion work. Proceed as follows: 1. Loosening the electrical connections: – MP, AS-i or CP connections •... - Page 87 5. Maintenance and conversion 2. Loosening the pneumatic connections • Individually wired CPV valve terminals (without pneu- matic multiple connector plate): Loosen the work tubing of the valve plate which is to be removed. 3. Loosening the CPV valve terminal from the mounting surface.
- Page 88 5. Maintenance and conversion 4. Removing the components. • Loosen both lower tie rods one turn. • Then loosen the upper tie rod and pull it over the components which are to be replaced. • Unscrew the two lower tie rods until the heads of the screws are flush with the outer surface of the end plate (do not remove the tie rod).
-
Page 89: Fitting Components Into The Valve Locations
5. Maintenance and conversion • Turn the component forwards around the front tie rod. Front tie bolt Rear tie bolt Fig. 5/2: Position of the tie bolt • Pull the component so that it snaps out of the front tie bolt. 5.1.2 Fitting components into the valve locations Proceed as follows: 1. - Page 90 5. Maintenance and conversion PLEASE NOTE – To equip the CPV10 Valve Terminal with "F valve plates" (Ident. code F), please note the assembly and application references in the "System Overview" chapter under "Valve Plate Overview". – Note that only CPV valve terminals with a CP connector can be assembled with relay plates (Ident.
- Page 91 5. Maintenance and conversion PLEASE NOTE There is only one version of the seal for all valve plates of the CPV18 valve terminal. The position of the seal is the same for all valve plates. • Place the components on the front tie rod. Press the components down so that they snap into the tie rod.
- Page 92 5. Maintenance and conversion – With MP, AS-i or CP connections PLEASE NOTE The flat seals between the valve block and the con- necting plate have been modifed. Replace the glued flat seals if they are more than one year old. You thereby guarantee reliable sealing on your CPV valve terminal.
- Page 93 5. Maintenance and conversion • The new single-part flat seal is no longer glued to the bottom of the electrical sub-base, but simply placed on the connecting lugs of the valve solenoid coils (see diagram). New flat seal Fig. 5/5: Flat seal •...
- Page 94 5. Maintenance and conversion 2. Fitting the CPV valve terminal CPV valve terminal with pneumatic multiple connector plate • Place the 3-seal and 4-seal strips in the recesses in the left or right-hand end plate. Press the 2-seal strips carefully into the threads of the work connec- tions.
-
Page 95: Conversion From Automatic Reset Manual Override To Locking Manual Override
5. Maintenance and conversion 5.2 Conversion from automatic reset manual override to locking manual override By removing a safety clip, you can convert your CPV valve terminal from automatic reset manual override to locking manual override. Proceed as follows: If you do not wish to use the safety clip again: •... -
Page 96: Conversion From Internal To External Pilot Air
5. Maintenance and conversion 5.3 Conversion from internal to external pilot air By fitting the appropriate left and right-hand end plates you can convert your CPV valve terminal to internal or external pilot air. PLEASE NOTE Mixed operation of the CPV valve terminal with inter- nal and external control air is not permitted. - Page 97 5. Maintenance and conversion PLEASE NOTE With end plates CPV..-EPL-PG (part nos. 161 372 and 162 542) as well as with CPV..-EPR-PG (part nos. 161 373 and 162 543), connection 12/14 is sealed internally. All available end plate combinations are listed in the table below.
- Page 98 5. Maintenance and conversion End plate pairs with external auxiliary pilot air Description for single tubing CPV..-EPL-E CPV..-EPR – Connections only in left-hand end plate – Division into pressure zones not permitted – Suitable for vacuum CPV..-EPL CPV..-EPR-E – Connections only in right-hand end plate –...
- Page 99 5. Maintenance and conversion End plate pairs with internal auxiliary pilot air and Description tubing via pneumatic multiple connector plate CPV..-EPL-PG CPV..-EPR-PG – Connections on the pneumatic multiple connector plate – Division into pressure zones only permitted with isolating plate Ident. code T –...
- Page 100 5. Maintenance and conversion Proceed as follows: • • Loosen the electrical and pneumatic connections (see section "Removing components from valve loca- tions"). • • Loosen the CPV valve terminal from the mounting surface. Proceed in the reverse sequence to that de- scribed in the sections "Fitting onto a wall", "Fitting onto a hat rail"...
- Page 101 5. Maintenance and conversion • • Place the CPV valve terminal on the right-hand end plate. Make sure that the tie rod, which has not yet been tightened, does not fall out of the CPV valve terminal. • • Remove the left-hand end plate from the CPV valve terminal.
-
Page 102: Conversion From Individual To Central Tubing
5. Maintenance and conversion 5.4 Conversion from individual to central tubing In order to convert your CPV valve terminal from indi- vidual to central tubing with the pneumatic multiple con- nector plate, you will require the following: – the pneumatic multiple connector plate –... -
Page 103: Converting The Cpv Valve Terminal To Two Pressure Zones
5. Maintenance and conversion 5.5 Converting the CPV valve terminal to two pressure zones In order to convert your CPV valve terminal to two pressure zones, you will require an isolating plate (to be ordered separately). Fit the isolating plate as described in the section "Fitting components into the valve locations". -
Page 104: Converting The Cpv Valve Terminal To Different Electrical Connections
5. Maintenance and conversion 5.6 Converting the CPV valve terminal to different electrical connections Due to the modular structure of the CPV valve terminal, you can convert it to IC, MP, AS-i or CP connections. PLEASE NOTE With this conversion you should observe: –... - Page 105 5. Maintenance and conversion CPV valve terminals with MP, AS-i or CP connection • • Loosen the 4 socket head screws of the connector plate. • • Pull the connector plate carefully away from the con- necting lugs of the pilot solenoid coils. MP, AS-i or CP connector plate •...
- Page 106 5. Maintenance and conversion 5-24 CPV... 9811d...
-
Page 107: Technical Appendix
A. Technical appendix Appendix A Technical appendix CPV... 9811d... - Page 108 A. Technical appendix Contents Technical appendix Accessories......... A-3 Technical specifications .
-
Page 109: Accessories
A. Technical appendix A.1 Accessories General CPV10/14 CPV18 Hat-rail mounting kit CPV10/14-VI-BG-NRH-35 CPV18-VI-BG-NRH-35 Wall mounting kit (rear) CPV10/14-VI-BG-RWL CPV18-VI-BG-RW Wall mounting kit (front) CPV..-VI-BG-ER200X Identifier clip IBS6x10 IBS9x20 CPV..-VI-BZ-T... CPV18-VI-BZ-T... Manual override cover CPV valve terminal with AS-i connection AS-i combi power unit ASI-CNT-115/230 V AC AS-i bus cable (yellow) ASI-1,5-Y-100... -
Page 110: Technical Specifications
- 5 to + 50 – medium - 5 to + 50 Protection class as per EN 60 529 IP 65 (with FESTO accessories cable) Relative humidity 90 % at 20 C or 40 % at 50 Corrosion protection (as per FN940070) - Page 111 A. Technical appendix General Approximate weights (in kg) CPV10 CPV14 CPV18 Electrical connector plate with AS-i connection - on CPV valve terminals with 2 valve locations 0.085 0.130 0.275 - on CPV valve terminals with 4 valve locations 0.110 0.175 0.355 Electrical connector plate with CP connection - on CPV valve terminals with 4 valve locations...
- Page 112 This corresponds to 1 drop/4 minutes at 6 bar supply pressure and with medium flow. Observe the specifications on special oil for maintenance units in the Festo Pneumatics Catalogue. – In the case of CPV valve terminals with internally...
- Page 113 A. Technical appendix PLEASE NOTE The flow rates of the valves are reduced by the screw couplings of the pneumatic connections. Pneumatik Rated flow CPV10 CPV14 CPV18 (without screw connectors) in [l/min] micro valves (CPV10), mini valves (CPV14) and midi valves (CPV18) of 11 ⇒...
- Page 114 A. Technical appendix Electrical components (CPV valve terminal with individual or CP connection) Electromagnetic compatibility of the CPV valve terminal with CP connection Interference emission: Tested as per EN 55011, limit value class B Resistance to interference Tested as per EN 50082–2 Protection against electric shock By means of PELV power units (protection against direct and indirect...
-
Page 115: Index
A. Technical appendix A.3 Index Abbreviations ....... . XI Auxiliary pilot air external . - Page 116 A. Technical appendix Danger categories ......VI Designated use ......V Designation clips .
- Page 117 A. Technical appendix Identification code ......1-9 Information on this manual ....VIII LED display of valves .
- Page 118 A. Technical appendix Rated flows ....... A-7 Relay outputs ......3-13 Relay plate .
Need help?
Do you have a question about the CPV -VI Series and is the answer not in the manual?
Questions and answers