
Related Manuals for Infortrend S12 Series


Summary of Contents for Infortrend S12 Series
- Page 1 Infortrend Table of Contents Infortrend EonStor / EonStor DS S12/ S16/ S24 Series Hardware Manual Version 2.6...
-
Page 2: Legal Information
Infortrend, shall be subject to the latest Standard Warranty Policy available on the Infortrend website: http://www.infortrend.com/global/Support/Warranty Infortrend may from time to time modify, update or upgrade the software, firmware or any accompanying user documentation without any prior notice. Infortrend will provide access to these new software, firmware or documentation releases from certain download sections of our website or through our service partners. -
Page 3: Contact Information
1 Cherrywood, Stag Oak Lane Chineham Business Park Basingstoke, Hampshire RG24 8WF, UK Tel: +44-1256-707-700 Fax: +44-1256-707-889 Email, Technical Support, Website Germany/ Infortrend Deutschland GmbH Wappenhalle Business Center Konrad-Zuse-Platz 8, 81829 Munich, Germany Tel: +49-89-2070-42650 Fax: +49-89-2070-42654 Email, Technical Support,... -
Page 4: Copyright Notice
Infortrend, the Infortrend logo, SANWatch, ESVA, EonStor, EonStor DS, Trademarks EonNAS, and EonPath are registered trademarks of Infortrend Technology, Inc. Other names prefixed with “IFT” and “ES” are trademarks of Infortrend Technology, Inc. Windows is a registered trademark of Microsoft Corporation. -
Page 5: Safety Precautions
Safety Precautions Safety Precautions Read these instructions carefully before you install, operate, or transport the EonStor DS RAID system and JBODs. Installation and Operation Install the rack cabinet and the associated equipment at a site where the ambient temperature (special room cooling equipment may be required) stays lower than: a. - Page 6 The use of Infortrend certified components is strongly recommended to ensure compatibility, quality and normal operation with your Infortrend products. Please contact your distributor for a list of Infortrend certified components (eg. SFP, SFP+, HBA card, iSCSI cable, FC cable, memory module, etc.).
- Page 7 ESD Precautions ESD Precautions Handle the modules by their retention screws, ejector levers, or the module’s metal frame/faceplate only. Avoid touching the PCB boards or connector pins. Use a grounded wrist strap and an anti-static work pad to discharge static electricity when installing or operating the enclosure.
-
Page 8: About This Manual
About This Manual About This Manual The manual introduces hardware components of 2U, 3U and 4U RAID and JBOD systems. It also describes how to install, monitor, and maintain them. The EonStor AxxF, AxxS, FxxF and SxxU series are NOT included in this manual. For non-serviceable components, please contact our support sites. - Page 9 About This Manual Aug. 2012 Management console connection update Nov. 2012 Updated EMC descriptions for DC powered systems Jan. 2013 Added ESDS SxxF-2851 models Feb. 2013 Updated ESDS S12 / 16 E – GR2251 specifications Added ESDS B24 JBOD support for designated 2U RAID systems Apr.
-
Page 10: Table Of Contents
Table of Contents Table of Contents Legal Information ........................2 Contact Information ....................... 3 Copyright Notice ........................4 Safety Precautions......................... 5 About This Manual ......................... 8 Table of Contents ......................... 10 Introduction Product Overview......................... 14 Model Naming Conventions ....................14 Model Variations........................ - Page 11 Table of Contents Components to Be Installed ....................52 Installing Controller Module(s) ................... 53 Installing Hard Drive(s) ......................54 Hard Drive Installation Prerequisites ..................54 Mux Board Installation......................56 SAS Interface ......................... 60 Installing the Hard Drive into Drive Tray................. 61 Installing the Hard Drive Tray into the Enclosure ..............
- Page 12 Table of Contents Front Panel ......................... 123 LCD Keypad for RAID Models....................123 LCD Panel LED Definitions ....................124 LED Panel for JBOD Models....................125 Drive Tray LED........................127 Controller LED........................128 Controller LED for RAID Models ..................128 Controller LED for JBOD Models ..................130 Ethernet Management Port LED for RAID Models ...............
- Page 13 Table of Contents Certifications Summary..........................186 Installing the Earth Lead Kit for DC PSU systems ............188 Slide Rail Kit Installation Guide RAID/JBOD models and corresponding slide rail kits ............ 191 EonStor DS Series ....................... 191 EonStor Series ........................192 Enclosure Installation Prerequisites ................
-
Page 14: Introduction
EonStor / EonStor DS S12/S16/S24 Series Introduction Product Overview This manual introduces 2U, 3U and 4U RAID/JBOD system that support 3Gbps, 6Gbps SAS or 3Gbps (SATA-II) and 6Gbps (SATA-III) drive interfaces. The 2U/ 3U/ 4U enclosure is designed to utilize 3.5” hard drives. Drive capacity can be expanded by attaching expansion hard drive enclosures (JBODs). -
Page 15: Model Variations
EonStor / EonStor DS S12/S16/S24 Series Model Variations Comprised of RAID and JBOD models, the RAID systems store hard drives and control the entire storage system while JBOD systems connect to a master RAID system and can expand storage capacities by adding more hard drives. All systems are compatible with SAS-3 and SAS-6;... -
Page 16: 2U Series
EonStor / EonStor DS S12/S16/S24 Series 2U Series iSCSI No. of host Hybrid 1Gb Hard Drive Single Dual Port speed (S12E) ports G(S)/R iSCSI port connectivity controller controller 1140 1Gbps 3Gbps 2140* 1Gbps 6Gbps 2251 10Gbps 6Gbps Fibre No. of host Hybrid 1Gb Hard Drive Single... -
Page 17: Series
EonStor / EonStor DS S12/S16/S24 Series 3U Series iSCSI No. of host Port Hybrid 1Gb Hard Drive Single Dual (S16E) ports G/R speed iSCSI port connectivity controller controller 1140 1Gbps 3Gbps 1149* 1Gbps 3Gbps 2140* 1Gbps 6Gbps 2142 1Gbps 6Gbps 2149* 1Gbps 6Gbps... - Page 18 EonStor / EonStor DS S12/S16/S24 Series No. of host Port Hybrid 1Gb Hard Drive Single Dual (S16S) ports G/R speed iSCSI port connectivity controller controller 2240* 6Gbps 6Gbps 2240-4 6Gbps 6Gbps 2242 6Gbps 6Gbps JBOD Exp. Port Port Hybrid 1Gb Hard Drive Single Dual...
-
Page 19: 4U Series
EonStor / EonStor DS S12/S16/S24 Series 4U Series No. of host Port Hard Drive Single Dual iSCSI (S24E) ports G/R speed connectivity controller controller 2142 1Gbps 6Gbps No. of host Port Hard Drive Single Dual Fibre (S24F) ports G/R speed connectivity controller controller... -
Page 20: Major Components
EonStor / EonStor DS S12/S16/S24 Series Major Components NOTE Upon receiving your system, check the package contents against the included Unpacking List. If module(s) are missing, please contact your system vendor immediately. The Cache Backup Module (CBM) is an optional feature in single controller systems. RAID Controller and Interface Each RAID controller comes with a pre-installed DIMM module. -
Page 21: Power Supply Unit With Built-In Cooling Module
EonStor / EonStor DS S12/S16/S24 Series Power supply unit with built-in cooling module 2U and 3U series: Two cooling modules protect the system from overheating, and two hot-swappable power supply unit (PSU) modules provide constant power to the system. The modular nature of the system and the easy accessibility to all major components ensure ease of maintenance. -
Page 22: The Rear Panel
EonStor / EonStor DS S12/S16/S24 Series The Rear Panel Dual Controller Models Dual controller systems are indicated by an “R” in their model number (please refer Model Naming Conventions). Controller A is located on top and controller B at the bottom for dual controller models. -
Page 23: Single-Controller Models
EonStor / EonStor DS S12/S16/S24 Series Single-Controller Models Single-controller models are designated by a “G” or “S” in their model number. The second controller slot is filled with a dummy cage (D). The 2UL-C and 2UL model differs in the additional cooling module at the center-bottom position. CH 0 CH 1 Be su re e very P SU sho uld... -
Page 24: Chassis
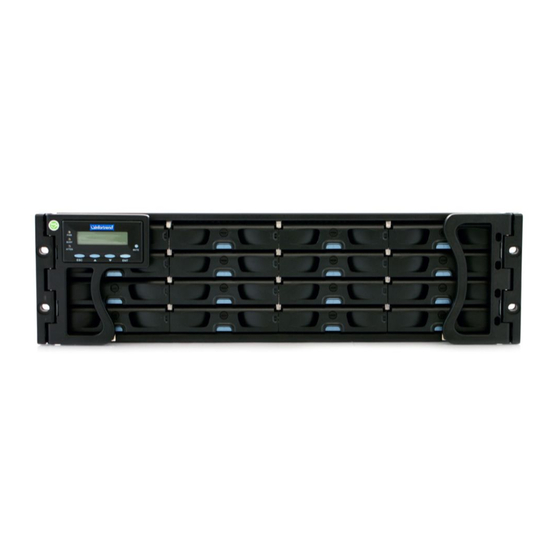
EonStor / EonStor DS S12/S16/S24 Series Chassis The RAID chassis is a rugged storage chassis divided into front and rear sections. The chassis is designed to be installed into a rack or cabinet. Front Panel RAID Models BUSY A TTEN MUTE E NT ... - Page 25 EonStor / EonStor DS S12/S16/S24 Series JBOD Models Drive trays (1): Each drive tray is hot-swappable and houses a 3.5-inch hard drive. LED panel (2): The LED panel indicates the operating status through five LEDs. Mute / Service button (3): The mute button is to mute an alarm when sound or to indicate to the administrator the system requires service.
-
Page 26: Rear Panel
EonStor / EonStor DS S12/S16/S24 Series Rear Panel Designation Description Designation Description Controller A Cooling Module Controller B Dummy cage Power supply + cooling module 2U-Gxxxx models 2U-R/S2840N and 2U-Rxxxx models... - Page 27 EonStor / EonStor DS S12/S16/S24 Series 3U-R/Gxxxx models 4U-R/Gxxxx models Be sure ever y PSU should Be sure ever y PSU should Be s ure ever y PSU should 405W have the same mark 405 W have the same mark 405W have the same mark ...
- Page 28 EonStor / EonStor DS S12/S16/S24 Series 4U: There are three hot-swappable power supply units to supply power to the system. A power switch can be located on right hand side of the PSU situated in the middle. For details, please refer to RAID Series PSU.
- Page 29 EonStor / EonStor DS S12/S16/S24 Series JBOD Rear Panel Designation Description Designation Description Controller A Cooling Module Controller B or dummy cage Power supply + cooling module (for single controller models) Power supply 2U-J1002R, 2U-J2000R/G, 2U-J2000R/S-N, 3U-J1000S/R, 3U-J1000S/R-1 & 3U-J2000R/S Dual controller JBOD Single controller JBOD NOTE...
- Page 30 EonStor / EonStor DS S12/S16/S24 Series 2U-J1000G Full Single controller JBOD Controller (1): The controller module contains a SAS expander board, which distributes I/Os from and to the managing RAID system. The controller also handles component status report and reports component status through the SAS links with a RAID system.
-
Page 31: Internal Backplane
EonStor / EonStor DS S12/S16/S24 Series Internal Backplane An integrated backplane separates the front and rear sections of the chassis. This circuit board provides logic level signals and low voltage power paths. Thermal sensors and I C devices are embedded to detect system temperatures and PSU/cooling module operating status. -
Page 32: Front Panel Components
EonStor / EonStor DS S12/S16/S24 Series Front Panel Components LCD/LED Panel LCD Keypad Panel for RAID Models The LCD keypad panel provides full access to RAID configuration settings and system information (refer to firmware manual for details). Initially, the LCD screen shows the system’s model name and the name can be manually assigned for identification in a multi-array configuration. - Page 33 EonStor / EonStor DS S12/S16/S24 Series LED Panel for JBOD Models The LED panel on a JBOD storage expansion system can be located on the chassis ear. The LED panel contains Service LED (1), a power supply status LED (2), cooling module status LED (3), temperature sensor status LED (4), System fault LED (5), rotary ID switch (6) and a Mute Service button (7).
-
Page 34: Chassis Ear
EonStor / EonStor DS S12/S16/S24 Series Chassis Ear Each chassis ear features a finger grip and two holes for securing chassis to the front rack posts. In JBOD models, an LED panel (see the previous sections for details) is mounted on the left chassis ear. A plastic housing conceals the chassis ear. To access the finger grips, flip open the panel. -
Page 35: Drive Tray
EonStor / EonStor DS S12/S16/S24 Series Drive Tray The drive tray is designed to accommodate separately purchased 3.5-inch SAS or SATA interface hard disk drives. There is a rotary bezel lock (1) that secures the drive tray in chassis, while a release button (2) can be used when retrieving disk drives from the chassis. -
Page 36: Rear Panel Components
EonStor / EonStor DS S12/S16/S24 Series Rear Panel Components Controller Module of RAID Models Designation Description Designation Description Host ports Serial port Convection holes Ethernet management port SAS expansion port Restore default button Hybrid host ports (selected models Restore default LED Controller status LED The controller on the dual controller models also features a Cache Backup Module (CBM), consisting of a Battery Backup Unit (BBU) and Flash Backup Module (FBM). -
Page 37: Controller Module Of Jbod Models
EonStor / EonStor DS S12/S16/S24 Series Controller Module of JBOD Models The expansion JBOD controllers features SAS expansion ports (1), SAS expansion port status LEDs* (2), controller status LEDs (3), extraction levers and retention screws (4) and convection holes* (5). * indicates the component is not present on all models J1000 JBOD models (8470 SAS connector type) J1002R &... -
Page 38: Host Port Of Raid Models
EonStor / EonStor DS S12/S16/S24 Series Host Port of RAID Models Fibre-Host RAID Models (SxxF Series) Model Host port type per controller SxxF-G/R1440 2x 4Gb/s Fibre SxxF-G/Rx8xx 4x 8Gb/s Fibre SxxF-G/R26xx 2x 16Gb/s Fibre SxxF-G/R26xx-4 2x 16Gb/s Fibre + 2x 1Gb/s iSCSI SxxF-G/R2842, G/R2852-6 4x 8Gb/s Fibre + 2x 1Gb/s iSCSI 4Gb/s or 16Gb/s fibre channel host ports location... -
Page 39: Sas-Host Raid Models (Sxxs Series)
EonStor / EonStor DS S12/S16/S24 Series SAS-Host RAID Models (SxxS Series) Model Host port type per controller SxxS-G/R2240 2x 6Gb/s SAS SxxS-G/R2240-4, G/R2250 4x 6Gb/s SAS S16S-G/R2242 2x 6Gb/s SAS + 2x 1Gb/s iSCSI 6Gb/s SAS Host Ports 6Gb/s SAS Host Ports 6Gb/s SAS + 1Gb/s... -
Page 40: Iscsi-Host Raid Models (Sxxe Series)
EonStor / EonStor DS S12/S16/S24 Series iSCSI-Host RAID Models (SxxE Series) Model Host port type per controller S12E-G1140, 2x 1Gb/s iSCSI SxxE-G/R2240, G/R2251 2x 10Gb/s iSCSI SxxE-G/R1140, G/R 1149, G/R2140, G/R2149 4x 1Gb/s iSCSI SxxE-G/R2142, G/R2152-6 6x 1Gb/s iSCSI 1Gb/s iSCSI Host Ports 10Gb/s iSCSI Host Ports 1Gb/s iSCSI Host Ports 1Gb/s iSCSI Host Ports... -
Page 41: Cache Backup Module (Cbm) For Raid Models
EonStor / EonStor DS S12/S16/S24 Series Cache Backup Module (CBM) for RAID Models The Cache Backup Module (CBM), located inside the controller, consists of a battery backup unit (BBU) (1) and flash backup module (FBM) (2). The CBM can sustain cache memory after a power failure. -
Page 42: 2U-Gxxxx Systems & S12S-J1000G Psu
EonStor / EonStor DS S12/S16/S24 Series 2U-Gxxxx Systems & S12S-J1000G PSU The PSU comes with a power socket (1), extraction handle (2), retention screw (3), PSU status LED (4), power switch (5), cooling fan / module status LEDs (6) and cooling module (7). -
Page 43: Dc Psu For Systems With "N" Designation
EonStor / EonStor DS S12/S16/S24 Series DC PSU for Systems with “N” Designation The PSU comes with a power socket (1), a power switch (2), PSU status LED (3), cooling module (4), cooling module status LEDs (5), retention screw (6) and an extraction handle (7). -
Page 44: 2U Redundant And 3U Raid Systems Psu & Cooling Module
EonStor / EonStor DS S12/S16/S24 Series 2U Redundant and 3U RAID Systems PSU & Cooling Module The 2U-Rxxx and 3U RAID systems come with two redundant, hot-swappable PSUs. Each PSU has a power socket (1), power switch (2), PSU status LED (3), cooling module (4), cooling module status LEDs (5), retention screw (6) and an extraction handle (7). -
Page 45: 4U Raid Systems Psu
EonStor / EonStor DS S12/S16/S24 Series 4U RAID Systems PSU The 4U RAID systems are equipped with three (3) redundant and hot-swappable load-sharing PSUs at the rear section of the chassis. The PSU is housed in a 1U canister containing both the power supply and dedicated cooling modules. The PSU has an extraction handle (1), retention screw (2), PSU status LED (3) and a power socket (4). -
Page 46: 4U Raid Systems Cooling Module
EonStor / EonStor DS S12/S16/S24 Series 4U RAID Systems Cooling Module There are two cooling modules at the rear that ventilate the enclosure. The cooling fans operate at two fan speeds. When the system is operating normally, the cooling fans operate at the lower speed. If a system module fails or when one of the temperature thresholds has been exceeded, the cooling fans automatically raise their rotation speeds to draw more airflow. -
Page 47: System Monitoring Features
EonStor / EonStor DS S12/S16/S24 Series System Monitoring Features There are a number of monitoring approaches that provide the operating status of individual components. Expansion Enclosure Support Monitoring: A managing RAID system is aware of the status of JBOD components including those of: ... -
Page 48: I 2 C Bus
EonStor / EonStor DS S12/S16/S24 Series JBOD Enclosure Status Monitoring: A RAID system, when connected with expansion JBODs, acquires the component status within other enclosures via a proprietary enclosure monitoring service using the in-band connectivity. No additional management connection is required. C bus The detection circuitry and temperature sensors are interfaced through a non-user-serviceable I... -
Page 49: Hot-Swapping
EonStor / EonStor DS S12/S16/S24 Series Hot-swapping The system comes with a number of hot-swappable components that can be exchanged while the system is still online without affecting the operational integrity. These components should only be removed from the system when they are being replaced. -
Page 50: Hardware Installation
Please refer to System Connection for sample topologies and configuration options. Contact your vendor or Infortrend for the list of compatible cables. Memory modules: If you wish to change the pre-installed DIMM module, you can find DIMM replacement procedures in Replacing the Memory Module for RAID Models. -
Page 51: Installation Procedures Overview
EonStor / EonStor DS S12/S16/S24 Series Make sure you are aware of the related positions of each plug-in module and interface connector. Cables must be handled with care and must not be bent. To prevent emission interference within a rack system and accidental cable disconnection, the routing paths must be carefully planned. -
Page 52: Unpacking The System
EonStor / EonStor DS S12/S16/S24 Series Unpacking the System Compare the Unpacking List included in the shipping package against the actual package contents to confirm that all required materials have arrived. Box contents For detail box content(s), please refer to the unpacking list that came with the system. -
Page 53: Installing Controller Module(S)
EonStor / EonStor DS S12/S16/S24 Series Installing Controller Module(s) WARNING When inserting the controller, please make sure you apply pressure evenly on both sides of the rear controller panel. Uneven pressure may slant the insertion angle and damage connector pins! Installation of the controller modules into the enclosure should only occur after the enclosure has been rack-mounted! Please refer to the RAID Enclosure Slide Rail Kit Installation Guide or the quick installation guide that came with the system. -
Page 54: Installing Hard Drive(S)
EonStor / EonStor DS S12/S16/S24 Series Installing Hard Drive(s) Installation of hard drives should only occur after the enclosure has been rack-mounted! Hard Drive Installation Prerequisites Hard drives are separately purchased and when purchasing hard drives, the following factors should be considered: Capacity (MB/GB): Use drives with the same capacity. - Page 55 EonStor / EonStor DS S12/S16/S24 Series NOTE If you use a dual-controller RAID system and prefer using SATA hard drives in the enclosure or in the attached JBODs, make sure you also purchase MUX kits. MUX Board: Shown below, controller A (1) and controller B (2) is connected to the backplane (3). With a MUX board (4) paired to the hard drive (5), data signals is able to switch between controllers A and B signal ports (indicated by the blue arrow / dotted line).
-
Page 56: Mux Board Installation
EonStor / EonStor DS S12/S16/S24 Series Mux Board Installation Two types of MUX-boards are available for 3.5 inch drive trays. The two differs in that one is a flat plate that sits underneath the MUX board and the other, in the form of a U-shaped plate. - Page 57 EonStor / EonStor DS S12/S16/S24 Series To install the MUX board and its support plate (go to step 2 if you are installing a brand new system that is not yet in operation): 1. Identify the hard drive tray you would like to install the MUX board onto by starting up your SANWatch Manager and go to Storage Manager >...
- Page 58 EonStor / EonStor DS S12/S16/S24 Series 3. Open the hard drive tray by pressing the button 4. a. If there is a hard drive in the tray, pull the hard drive tray about one inch protruding out of enclosure and hold for 30 seconds so the hard drive can spin down.
- Page 59 EonStor / EonStor DS S12/S16/S24 Series MUX board + flat support plate (secure the plate using 2 screws) MUX board + U-shaped support plate (secure the plate using 4 screws) 6. Install the SATA hard drive into the drive tray with MUX board Installing a Hard Drive with a MUX Board (SATA drives) 7.
-
Page 60: Sas Interface
EonStor / EonStor DS S12/S16/S24 Series SAS Interface The SAS interface features a dual-ported connectivity with pins on both sides of its connector that include SAS primary links (1), power link (2) and underneath it, the SAS secondary links (3). The SATA drives have only one port that includes the SATA physical links (4) and the power link (5). -
Page 61: Installing The Hard Drive Into Drive Tray
EonStor / EonStor DS S12/S16/S24 Series Installing the Hard Drive into Drive Tray Open the bezel by pressing the release button and gently pull out the tray. Place the hard drive into the drive tray, making sure that the interface connector is facing the open side of the drive tray and its label side facing up. -
Page 62: Installing The Hard Drive Tray Into The Enclosure
EonStor / EonStor DS S12/S16/S24 Series Installing the Hard Drive Tray into the Enclosure Once the hard drives have been installed in the drive trays, install the drive trays into the system. WARNING Each drive bay must be populated with a tray even if it does not contain a hard drive. With a bay empty, ventilation will be disrupted and the system will overheat. -
Page 63: Installing Cbm For Raid Models
EonStor / EonStor DS S12/S16/S24 Series Installing CBM for RAID Models The CBM consists of a battery backup unit (BBU) and flash backup module (FBM). The CBM can sustain cache memory in the event of a power failure or in the extremely unlikely event of both PSUs failing at the same time. -
Page 64: Controller Type
EonStor / EonStor DS S12/S16/S24 Series Controller Type There are two types of controllers. Type I controllers allow users to install and maintain the FBM and BBU while type II only allow users to maintain the BBU. If the controller of your RAID system has a protrusion at the back of the enclosure as shown in the illustration below, please see type II BBU installation instructions. -
Page 65: Installing The Fbm (Type I)
EonStor / EonStor DS S12/S16/S24 Series Installing the FBM (Type I) 1 0 1 1. Remove the BBU module (1) (please refer to the previous section). 2. Remove the top screw (2) and side screw (3) of the top cover (4) and remove it from the controller chassis. -
Page 66: Installing The Bbu (Type Ii)
EonStor / EonStor DS S12/S16/S24 Series Installing the BBU (Type II) 1 0 2 NOTE For type II controller FBMs, please contact your vendor. Remove the four screws and the top cover from the controller shown below. Install the BBU to the top cover by securing the three screws. Insert the back end of the BBU (1) onto the controller, connect the BBU power cable (2) and secure the top cover with the BBU using the four screws (3) shown below. -
Page 67: Installing The Raid Controller
EonStor / EonStor DS S12/S16/S24 Series Installing the RAID Controller 1 0 3 After completing the battery backup unit and flash backup module installation, the RAID controller can be re-inserted into the enclosure: 1. Insert the controller slowly into the module slot. When you feel the contact resistance, use slightly more force and then push both of the ejection levers upwards (indicated by the arrows) to secure the controller into chassis. -
Page 68: Installing The Earth Lead Kit For Dc Psu Systems
EonStor / EonStor DS S12/S16/S24 Series Installing the Earth Lead Kit for DC PSU systems 1 0 4 Grounding Kit Contents Item Description Quantity Grounding cable Ground screw 6#-32 (1/4 inch) with star-shaped washer M5 cage nut Internal Internal diameter diameter External diameter External... - Page 69 EonStor / EonStor DS S12/S16/S24 Series System model numbers with a designated “N” are powered by DC PSUs. The kit is for DC PSU systems only and the earth lead kit MUST be installed before you power on your system. The earth lead cable, dedicated screws and cage nut can be found in the accessory box.
-
Page 70: System Connection
EonStor / EonStor DS S12/S16/S24 Series System Connection This chapter outlines the general configuration rules you should follow when cabling a storage system and introduces basic information about topologies. You can use these topologies or refer to them as a guide for developing your own unique topologies. -
Page 71: Host-Side Topologies
EonStor / EonStor DS S12/S16/S24 Series preferred that all the disk drives within a chassis have the same capacity. Tiered storage configuration is supported, e.g., 150GB SAS drives in your RAID enclosure and 750GB SATA drives in JBODs. However, you should not include both SAS and SATA drives in a logical drive. -
Page 72: Maximum Concurrent Host Lun Connection ("Nexus" In Scsi)
EonStor / EonStor DS S12/S16/S24 Series Maximum Concurrent Host LUN Connection (“Nexus” in SCSI) 1 0 7 The "Max Number of Concurrent Host-LUN Connection" menu option is used to set the maximum number of concurrent host-LUN connections. Maximum concurrent host LUN connection (nexus in SCSI) is the arrangement of the controller internal resources for use with a number of the current host nexus. -
Page 73: Maximum Queued I/O Count
EonStor / EonStor DS S12/S16/S24 Series Maximum Queued I/O Count 1 0 8 The "Maximum Queued I/O Count" menu option enables you to configure the maximum number of I/O operations per host channel that can be accepted from servers. The predefined range is from 1 to 1024 I/O operations per host channel, or you can choose the "Auto"... -
Page 74: Fibre-Host Raid Connections
EonStor / EonStor DS S12/S16/S24 Series Fibre-Host RAID Connections The Fibre Channel standard allows optical connections. Optical cables can be used over longer distances and have been shown to be more reliable. Due to the demands of high transfer rates, optical cables are preferred for 8/4Gbps fiber connectivity. Optical cables are also less susceptible to EMI. - Page 75 EonStor / EonStor DS S12/S16/S24 Series WARNING The SFP transceiver contains a laser diode featuring class 1 laser. To ensure continued safety, do not remove any covers or attempt to gain access to the inside of the product. Refer all servicing to qualified personnel. FC port dust plugs Each FC port comes with a dust plug.
-
Page 76: Fibre-Host Topologies
EonStor / EonStor DS S12/S16/S24 Series Fibre-Host Topologies 1 1 0 The Fibre Channel standard supports three (3) separate topologies. They are point-to-point, Fibre Channel Arbitrated Loop (FC-AL), and fabric switch topologies. Point-to-Point: Point-to-point topology is the simplest topology. It is a direct connection between two (2) Fibre Channel devices. -
Page 77: Fibre Cabling
EonStor / EonStor DS S12/S16/S24 Series Fibre Cabling 1 1 1 Following are steps that should be completed with cabling: 1. Maintain a configuration plan. In addition to cabling topologies and list of networking components, the plan can also include firmware and software maintenance details. -
Page 78: Simple End-To-End Connection
EonStor / EonStor DS S12/S16/S24 Series Simple End-to-End Connection 1 1 2 HBA 0 HBA 0 HBA 1 HBA 1 EonPath EonPath CH0 B113 CH0 A112 CH2 A112 CH2 B113 CH3 A112 CH3 B113 CH1 B113 CH1 A112 0 1 2 3 CH0 A112 CH0 B113 CH2 A112... -
Page 79: Das (Direct-Attached) Connection
EonStor / EonStor DS S12/S16/S24 Series DAS (Direct-Attached) Connection 1 1 3 NOTE If a logical drive can be accessed by different servers, file locking, FC switch zoning, port binding, and multi-pathing access control will be necessary in order to avoid access contention. - Page 80 EonStor / EonStor DS S12/S16/S24 Series If a server has multiple data paths to a RAID system, a multi-path software is necessary, e.g., the EonPath driver. The two logical drives in the above drawing cannot leverage the full computer power of the system.
-
Page 81: Switched Fabric Connection (Dual-Controller)
EonStor / EonStor DS S12/S16/S24 Series Switched Fabric Connection (Dual-Controller) 1 1 4 NOTE A logical partition presented through LUN Mapping can be seen by all servers across SAN. Make sure you have access control such as file-locking, switch zoning, port binding, etc., to avoid access contention. - Page 82 EonStor / EonStor DS S12/S16/S24 Series Channel link bypass is provided on external FC switches. Each of the application servers shown in the diagram is equipped with two HBAs with FC links via two FC switches to the SFP ports on individual RAID controllers. You can refer to the ID tags on the host links to see the related logical volume mapping and cable links routing paths.
-
Page 83: Switched Fabric Connection (Single-Controller)
EonStor / EonStor DS S12/S16/S24 Series Switched Fabric Connection (Single-Controller) 1 1 5 HBA 0 HBA 0 HBA 1 HBA 1 EonPath EonPath CH1 B114 CH0 B114 CH0 A112 CH1 A112 CH0 B113 CH1 B113 CH1 A115 CH0 A115 12 x 11 x 1 2x 10 x... - Page 84 EonStor / EonStor DS S12/S16/S24 Series Above is the sample drawing showing connections with each SFP port connected to FC switches and then to host adapters. See logical associations in the drawing for LUN mapping details. Use Enclosure-specific spares to prevent a spare drive from participating in the rebuild of a logical drive on another enclosure.
-
Page 85: Sas-Host Raid Connections
EonStor / EonStor DS S12/S16/S24 Series SAS-Host RAID Connections One SFF-8088-to-SFF-8088 host link cable is included per controller. You can contact your vendor to purchase additional cables if you need more than the included one. The cables (28AWG x 8 pairs) are characterized by 100ohm, black colors, UL-approved, lead-free, 50, 120 or 170cm cable lengths;... -
Page 86: Sxxs-R/G2240-4 Controllers In Das (Direct-Attached Storage) Configuration
EonStor / EonStor DS S12/S16/S24 Series SxxS-R/G2240-4 Controllers in DAS (Direct-Attached Storage) 1 1 6 Configuration The 4-port SAS port models differ to 2-port SAS port systems in that by default, they provide users with cluster file storage configuration (each host SAS port can access all partitions by default). - Page 87 EonStor / EonStor DS S12/S16/S24 Series 4 SAS-port Partition-Dedicated Configuration Connection To configure a partition-dedicated file storage environment for 4 SAS-port systems, connect the cables as shown below. To map specific partitions (P1, P2, P3 & P4) to hosts / channels, please refer to the SANWatch User Manual. CH0 AID CH0 AID CH0 AID...
-
Page 88: Das (Direct-Attached Storage) Connection With Redundant Host Path
EonStor / EonStor DS S12/S16/S24 Series DAS (Direct-Attached Storage) Connection with Redundant Host Path 1 1 7 HBA 0 HBA 1 EonPath EonPath CH0 AID CH1 BID CH0 AID CH0 BID CH0 AID CH0 AID CH0 AID CH1 AID CH0 AID CH1 AID CH1 BID CH0 BID... - Page 89 EonStor / EonStor DS S12/S16/S24 Series HBA 0 HBA 1 EonPath CH0 AID CH1 AID CH0 AID CH1 AID RAID Single-controller models With more hard drives over the SAS expansion links, you can create more logical groups of drives. Avail these logical partitions using more LUN numbers. NOTE EonPath multi-pathing software or Linux Device Mapper is necessary for controlling and optimizing the access to logical drives via multiple data paths.
-
Page 90: Das (Direct-Attached Storage) Connection To Two Servers
EonStor / EonStor DS S12/S16/S24 Series DAS (Direct-Attached Storage) Connection to Two Servers 1 1 8 CH0 AID CH1 AID CH1 AID CH0 AID RAID NOTE If you would like a LUN (a logical partition) to be accessed by multiple hosts, file locking or multi-pathing access control will be necessary. -
Page 91: Iscsi-Host Raid Connections
EonStor / EonStor DS S12/S16/S24 Series iSCSI-Host RAID Connections Ethernet cable requirements: Ethernet cables are user-supplied. Cat5e shielded STP type network cables or better performance types (important for meeting the requirements imposed by emission standards). Straight-through Ethernet cables with RJ-45 plugs. ... -
Page 92: Network & Host Connection Topologies
EonStor / EonStor DS S12/S16/S24 Series Network & Host Connection Topologies 1 1 9 The iSCSI host ports connect to Ethernet network devices and iSCSI initiators that comply with the IETF iSCSI standard (RFC 3720). Network connection of the iSCSI ports is flexible. The use of network connecting devices, subnet, Name Servers, or iSCSI management software can vary from case to case. -
Page 93: High Availability Ip San With Redundant Raid Controller
EonStor / EonStor DS S12/S16/S24 Series High Availability IP SAN with Redundant RAID Controller 1 2 0 EonPath EonPath VLAN 1 VLAN 0 10 x 1 2x 1 0x 7 8 9 1 011 1 2 1 2 3 4 5 6 LD 0 LD 1 LD 2... - Page 94 EonStor / EonStor DS S12/S16/S24 Series configuration using this configuration. For remote replication setup, please refer to “High Availability IP SAN (Remote Replication Enabled) “High Availability IP SAN with Port Trunk (Remote Replication Enabled)”. 4 logical drives (each has 4 member drives; for better performance, you can include drives from JBOD) LD0 mapped to CH0 AID and CH0 BID;...
-
Page 95: Single-Controller With Fault-Tolerant Path
EonStor / EonStor DS S12/S16/S24 Series Single-Controller with Fault-Tolerant Path 1 2 1 HBA 0 HBA 1 HBA 0 HBA 1 EonPath EonPath CH2 ID0 CH2 ID0 CH0 ID0 CH0 ID0 CH3 ID0 CH3 ID0 CH1 ID0 CH1 ID0 CH2 ID1 CH2 ID1 CH0 ID1 CH0 ID1... -
Page 96: High Availability Ip San (Recommended Cabling Method For Remote Replication)
EonStor / EonStor DS S12/S16/S24 Series High Availability IP SAN (Recommended Cabling Method for Remote 1 2 2 Replication) EonPath EonPath VLAN 1 VLAN 0 10 x 11 x 1 2x 1 0 x 1 1x 12 x 7 8 9 1011 1 2 1 2 3 4 5 6 LD 0 LD 1... - Page 97 EonStor / EonStor DS S12/S16/S24 Series alternate paths to the same logical drive. 2 logical drives (each has 8 member drives). More logical drives can be created from drives in JBOD. LD0 mapped to CH0 AID, CH1 BID, CH2 AID and CH3 BID;...
-
Page 98: High Availability Ip San With Port Trunk (Remote Replication Enabled)
EonStor / EonStor DS S12/S16/S24 Series High Availability IP SAN with Port Trunk (Remote Replication Enabled) 1 2 3 EonPath EonPath VLAN 1 VLAN 0 10 x 11 x 1 2x 1 0 x 1 1x 12 x 7 8 9 1011 1 2 1 2 3 4 5 6 LD 0 LD 1... - Page 99 EonStor / EonStor DS S12/S16/S24 Series logical drives can be created from drives in JBOD. configuration LD0 mapped to CH0 AID and CH1 BID; LD has to be assigned to both controllers A and B to enable remote replication LD1 mapped to CH1 BID and CH0 AID; LD has to be assigned to both controllers A and B to enable remote replication...
-
Page 100: Single-Controller With Trunk
EonStor / EonStor DS S12/S16/S24 Series Single-Controller with Trunk 1 2 4 HBA 0 HBA 0 HBA 1 HBA 1 EonPath EonPath CH1 ID0 CH1 ID0 CH0 ID0 CH0 ID0 CH1 ID1 CH1 ID1 CH0 ID1 CH0 ID1 VLAN1 VLAN2 1 2x 1 0x 7 8 9 1 0 1 1 12... -
Page 101: Hybrid Host Connections
EonStor / EonStor DS S12/S16/S24 Series Hybrid Host Connections Hybrid systems feature two additional iSCSI ports that can be used for remote replication or host LUN mapping. Single Hybrid Unit Connected to FC/ iSCSI Hosts 1 2 5 HBA 0 HBA 0 HBA 0 HBA 0... -
Page 102: Utilizing Hybrid Iscsi Ports For Data Replication
EonStor / EonStor DS S12/S16/S24 Series Utilizing Hybrid iSCSI ports for Data Replication 1 2 6 HBA 0 HBA 0 HBA 0 HBA 0 HBA 1 HBA 1 HBA 1 HBA 1 EonPath EonPath EonPath EonPath FC #1 FC #2 iS C SI #1 iS C SI #2 The above diagram demonstrates how to utilize the iSCSI host ports for remote data... -
Page 103: Jbod Connections
EonStor / EonStor DS S12/S16/S24 Series JBOD Connections NOTE When connecting JBOD(s) to a 4-port SAS RAID system, please purchase pull type SAS cables from your vendor. A SAS host link cables are included per JBOD. If you need to purchase other cables or if you need other cable(s) of different length, please contact your vendor. -
Page 104: Sas Expansion Links
EonStor / EonStor DS S12/S16/S24 Series SAS Expansion Links 1 2 7 Depending on your RAID system, there are two types of JBOD SAS expansion configurations. RAID system using Type I expansion RAID system using Type II expansion For type I JBOD SAS expansion, please follow the instructions given in the following section. - Page 105 EonStor / EonStor DS S12/S16/S24 Series JBODs and Corresponding RAID Systems RAID Models 2U JBOD 3U JBOD Configuration S12S-J2000SN S12F-S2840N S12S-J1000-G S16S-J1000-S1 S12E-G1xxx S12S-J2000-G S12x-G2xxx Single-controller; single path S16E-G1xxx S16S-J1000-S / S16S-J1000-S1 S24F-G1xxx S16x-G2xxx S16S-J2000-S S24x-G2xxx S12S-J2000RN S12F-R2840N S12S-J1002-R S16S-J1000-R1 S12x-R1xxx S12S-J2000-R S12x-R2xxx...
- Page 106 EonStor / EonStor DS S12/S16/S24 Series Type I Expansion Connection Physical connections from RAID to JBODs: IN IN Single controller systems Dual controller systems...
-
Page 107: Type Ii Jbod Sas Expansion Configuration
EonStor / EonStor DS S12/S16/S24 Series Type II JBOD SAS Expansion Con figuration 1 2 9 Type II JBOD SAS expansion configuration applies to the following systems, SxxF-G/R2850, SxxF-G/R2851, SxxF-G/R2651, SxxE-G/R2251 & SxxE-G/R2152-6. Type II RAID system expansion capabilities are unique with additional 48 hard-drive JBOD. - Page 108 EonStor / EonStor DS S12/S16/S24 Series There is a rotary ID switch on every expansion enclosure that manually configured using a flat blade screwdriver. Configuring enclosure IDs: The configurable IDs for JBODs are from 1 to 15. Usually the numbering starts from the one closest to the managing RAID enclosure.
-
Page 109: Configuration Rules
EonStor / EonStor DS S12/S16/S24 Series Configu ration Rules 1 3 0 Following are the rules for connecting SAS interfaces across RAID and J enclosures: Fault-tolerant links in a dual-controller combinatio ns: Corresponding to SAS drives’ dual-ported interface, two phys ical links are available from ea ch disk drive, routed across the backplane bo... - Page 110 EonStor / EonStor DS S12/S16/S24 Series offering high redundancy. One expansion link connects JBODs from RAID to the nearest JBOD, and then to the fa rthest JBOD. Another expansion link connects to the farthest JBOD from the opposite direction and then to the nearest JBOD. ...
-
Page 111: Management Console Connections
EonStor / EonStor DS S12/S16/S24 Series Management Console Connections Designation Description Designation Description Serial port (for Telnet access) Local area network Single controller: DB9 male to female serial SANWatch/ telnet console Dual controller: Y-cable CAT5e LAN cable Dual controller management connection Single controller management connection Connecting RAID system to external consoles: ... -
Page 112: Power Connections
EonStor / EonStor DS S12/S16/S24 Series Power Connections nce all hard drives have be en properl y installed and the I/O ports manageme interfaces have been connected, the system can be powered on. Checklist 1 3 1 BEFORE powering on the system, please check the following: ... -
Page 113: Dc Power Supply Power Cord Connection
EonStor / EonStor DS S12/S16/S24 Series DC Power Supply Power Cord Connection 1 3 2 RAID and JBOD models with the “N” designation use this type of DC power supply. RAID JBOD SxxF-R/Sxxx”N” SxxS-JxxxxR/S-“N” re is a dummy-proof notch on the DC power cabl e plug that matches the power socket and there are clip-notches on both sides to hold the plug in place. -
Page 114: Connecting Power Cords
EonStor / EonStor DS S12/S16/S24 Series Connecting Power Cords 1 3 3 Use the included cable clamps to secure power cord connections. 1. Remove p ower co rds and cable clamps from the a ccessor y boxes. 2. Com bine cable strap w ith cable clamp. - Page 115 EonStor / EonStor DS S12/S16/S24 Series 5. Adjust the position so that when a power plug is connected to system power the barb anchor can be inserted into the anchor hole above the power socket. 2U and 3U RAID models 2U-Gxxxx and 4U RAID models...
-
Page 116: Power On Procedure
EonStor / EonStor DS S12/S16/S24 Series er On Procedure 1 3 4 Before you power on the RAID system, please power on the expansion JBOD storage systems first if your network configuration has multiple arrays. To power on the system please follow the procedures below. 1. -
Page 117: Power On Status Check
EonStor / EonStor DS S12/S16/S24 Series Power On Status Check 1 3 5 As a general rule, once the system has been powered on, there should NOT be LED(s) that light up nor should you hear an audible alarm from the amber system. - Page 118 EonStor / EonStor DS S12/S16/S24 Series PSU LEDs: PSU LED (indicated by the circle) : On (steady blue green) Cooling fan LED (indicated by the circle): Off 2UL-C 2U-Rxxxx & 3U Be s ure every P SU should Be s ure every P SU should Be s ure every P SU should have the same mark...
-
Page 119: Lcd Screen
EonStor / EonStor DS S12/S16/S24 Series LCD Sc reen 1 3 6 When powering on the RAID system, wait for the front panel LCD scr een to show “READY” or “No Host LUN.” The LCD screen startup sequence is shown and described in the sequence below: Initializing…... -
Page 120: Power Off Procedure
EonStor / EonStor DS S12/S16/S24 Series Power Off Procedure 1 3 7 If you wish to power down the system, please follow these steps: NOTE If you wish to power down the system, please ensure that no time-consuming cesses, like “Re generate Logical Drive Parity ”... -
Page 121: System Monitoring
EonStor / EonStor DS S12/S16/S24 Series System Monitoring The EonS tor DS se ries is equipped with a variety of self-monitoring features that help keep system managers aware of system operation statuses. Monit oring Features You may monitor the system through the following features: ... - Page 122 EonStor / EonStor DS S12/S16/S24 Series TCP/IP network, via the Ethernet Management port. The management session is conducted using the Ethernet managemen t port. For more details, see the SANWatch manual in the CD-ROM. SANWatch’s Notification Manager notifies users or events through email, MSN, etc. Notification Manager ...
-
Page 123: Front Panel
EonStor / EonStor DS S12/S16/S24 Series Front Panel LCD Keypad for RAID Models 1 3 8 Keypad Buttons The LCD keypad on RAID systems consists of five buttons, three LEDs, and a 16x2-character LCD screen that provides access to firmware-embedded utilities. ESC button (1): Press the ESC button to skip the current event. -
Page 124: Lcd Panel Led Definitions
EonStor / EonStor DS S12/S16/S24 Series LCD Panel LED Definitions 1 3 9 Name Color Status indicates that power has been turned on Blue and the system status is normal. 1. PWR (Power) Blue OFF indicates that no power is supplied to the system or the RAID system has failed. -
Page 125: Led Panel For Jbod Models
EonStor / EonStor DS S12/S16/S24 Series LED Panel for JBOD Models 1 4 0 Name Color Status indicates that the system is being White serviced or is requiring servic es. 1. Service White OFF indicates that the system is not bei serviced nor is r equiring services. - Page 126 EonStor / EonStor DS S12/S16/S24 Series indicates that the system is operating Green normally. Green/ 5. System fault Amber indicates that the system has Amber encountered abnormal conditions: Allow users to set enclosure IDs when 6. Rotary ID connected to JBOD expansion enclosure(s). switch Pressing less than one second mutes the audible alarm.
-
Page 127: Drive Tray Led
EonStor / EonStor DS S12/S16/S24 Series Drive Tray LED 1 4 1 LED indicators a re lo cated on the ri ght side of ea ch drive tray. When notified by a drive failure message, y ou should eck the drive tray indicators to find the correct location of the failed drive. -
Page 128: Controller Led
EonStor / EonStor DS S12/S16/S24 Series Controller LE Contro ller LED for RAID Models 1 4 2 1 2 3 4 5 6 Name Color Status indicates that a RAID controller is operating Green lthily. 1. Ctrl Green indicates that a component failure ha Amber Status curred, or inappropriate RAID configurations have... - Page 129 EonStor / EonStor DS S12/S16/S24 Series of a power outage. Once the transfer is done, all LEDs will turn off. This signal is local to each controller. indicates that the detected Amber CPU/board/chassis temperature has exceeded the higher temperature threshold. 3.
-
Page 130: Controller Led For Jbod Models
EonStor / EonStor DS S12/S16/S24 Series Controller LED for JBOD Models 1 4 3 Name Color Status indicates all 4 PHYs are validly linked Steady green to external d evices. Green indicates one of the 4 PHYs links 1. SAS Link Blinking green has failed. -
Page 131: Ethernet Management Port Led For Raid Models
EonStor / EonStor DS S12/S16/S24 Series Ethernet Management Port LED for RAID Models 1 4 4 Type I Name Color Status indicates 100Mbps connection established. Green Green 1. Speed status Off indicates 10 Mbps connection established or no connection established. indicates connection established Steady green Green... -
Page 132: Iscsi Host Port Led
EonStor / EonStor DS S12/S16/S24 Series iSCSI Host Port LED 1 4 5 Name Color Status indicates 1G b connec tion. Green Green 1. Sp eed status Off indicates 10/100 Mb connection established or is not connected. indicates connection established. Amber 2. -
Page 133: 10Gb Iscsi Host Port Led
EonStor / EonStor DS S12/S16/S24 Series 10Gb iSCSI Host Port LED 1 4 7 LED status Color Status Steady ON Green indicates a link has been established. Steady green Flashing Green indicates an active link. Flashing green Off indicates a link has not been established. -
Page 134: Fibre-Host Port Led For Fc Raid Models
EonStor / EonStor DS S12/S16/S24 Series Fibre-Host Port LED for FC RAID Models 1 4 8 Each controller module houses fibre channel host ports. Each of these ports has two LEDs for displaying the operating status. Name Color Status indicates an established link, Off mean Green Green 1. -
Page 135: Sas-Host Port Led For Sas Raid Models
EonStor / EonStor DS S12/S16/S24 Series SAS-Host Port LED for SAS RAID Models 1 4 9 Name Color Status indicates that all 4 PHYs are validly linked Steady Green to external de vices. 1. SAS Link Green Status Blinking indicates less than 4 PHY links are connected. OFF in icates all 4 PHYs are offline. -
Page 136: Psu / Cooling Module Leds
EonStor / EonStor DS S12/S16/S24 Series PSU / Cooling Module LEDs The PSU (Power Supply Unit) contains the LEDs for the PSU and the cooling module statuses. When either of the unit fails, you need to replace the PSU as soon as possible. -
Page 137: 2Ul-Gxxxx Model And 4U Raid Power Supply Led
EonStor / EonStor DS S12/S16/S24 Series 2UL-Gxxxx Model and 4U RAID Power Supply LED 1 5 0 Be sure every PSU should 405W have the same mark Status Description The power supply has not been turned on. The PSU module LED will (indicated by the arrow) blink Blinking blue... -
Page 138: 2Ul-Gxxxx Model Raid System Cooling Module Led
EonStor / EonStor DS S12/S16/S24 Series 2UL-Gxxxx Model RAID System Cooling Module LED 1 5 1 2UL-C Status Description The coolin g fan is op erating normally. The cooling fan has failed. 4U RAID System Cooling M odule LED 1 5 2 Be sure every PSU should Be sure every PSU should Be sure every PSU should... -
Page 139: Alarms And I2C Bus
EonStor / EonStor DS S12/S16/S24 Series Alarms and I2C Bus Other monitoring schemes include audible alarms and I C bus. Audible Alarms 1 5 3 If any of the following components fails, the audible alarm will be triggered: Cooling fan modules ... -
Page 140: Restoring Default System Settings
EonStor / EonStor DS S12/S16/S24 Series Restoring Default System Settings NOTE Restoring default settings is a last-resort function. All configurations, such as parameters and host LUN mappings, will be erased. You may need to restore default settings in the following cases: ... - Page 141 EonStor / EonStor DS S12/S16/S24 Series 5. Power off the RAID system. 6. Press and hold the Restore Default button (in dicated by the arrow) on blue Controller A. You may use a straightened paper clip to press the button. While pressing the Restore Default button down, power on the RAID system.
-
Page 142: System Maintenance
EonStor / EonStor DS S12/S16/S24 Series System Maintenance WARNING Do not remove a failed component from the system until you have a replacement on hand. If you remove a failed component without immediate replacement, it will disrupt the internal airflow. Qualified engineers who are familiar with the system should be the only ones who make component replacements. -
Page 143: Replacing The Controller Module(S): Single / Dual / Simultaneous Upgrade
EonStor / EonStor DS S12/S16/S24 Series Replacing the Controller Module(s): Single / Dual / Simultaneous Upgrade WARNING Controller firmware MUST be identical for proper functionality. DO NOT mix controller modules from different models. Each controller has a unique ID which is applied to host port names. As the result, you may encounter SAN problems with identical port names on multiple systems. - Page 144 EonStor / EonStor DS S12/S16/S24 Series Before you replace the controller(s), export and save the NVRAM data using the LCD panel, follow the illustration below: View and E RAID model No. Mute Beeper System Logical D rives Ready Functions Export NVRAM to Export NVRAM Export NVRAM to Controller...
- Page 145 EonStor / EonStor DS S12/S16/S24 Series 4. Loosen the screw that secures the control module’s ejection levers. 5. Push the ejection levers downwards (indicated by the arrows). The blue controller module will automatically ease out of the controller module bay 6.
- Page 146 EonStor / EonStor DS S12/S16/S24 Series Restoring NVRAM data. To restore previous ID/LUN mapping settings, users may use the following options: Use the “Restore NVRAM from Disks “or “Restore NVRAM from Files” functions in the firmware. ID/LUN mapping will be restored. ...
-
Page 147: Replacing The Memory Module On Raid Systems
EonStor / EonStor DS S12/S16/S24 Series Replacing the Memory Module on RAID Systems The RAID controller comes with a pre-installed DDRII DIMM module. You may upgrade it or replace it when the original module malfunctions (shown as the “NVRAM failure” event in SANWatch). WARNING Follow the ESD Precautions (refer to Precautions). - Page 148 EonStor / EonStor DS S12/S16/S24 Series 5. Insert the replacement module. Make sure the side clips are in the open positions. Align the DIMM module with the socket and firmly push th e DIMM module into the socket. The side clips will close automatically and secure the DIMM module into the socket.
-
Page 149: Replacing The Cbm For Raid Models
EonStor / EonStor DS S12/S16/S24 Series Replacing the CBM for RAID Models NOTE For type II controller models, flash backup module (FBM) is not user serviceable! For single controller models, upgradeable components are listed below: Battery Backup Unit (BBU): In the event of a power failure, the BBU can help store/ save cached data in the DRAM module for up to 72 hours. -
Page 150: Bbu Fault Conditions And Precautions
EonStor / EonStor DS S12/S16/S24 Series BBU Fault Conditions and Precautions 1 5 6 If a BBU leaks, gives off a bad odor, generates heat, becomes discolored or deformed, or in any way appears abnormal during use, recharging or storage, immediately remove it from the system and stop using it. -
Page 151: Replacing The Bbu
EonStor / EonStor DS S12/S16/S24 Series Replacing the BBU 1 5 7 To replace the BBU, follow these steps: 1. Remove the controller out of the enclosure (refer to Removing the Controller). 2. Loosen screws (1) and remove the BBU (2). For type II controller models, please unplug the BBU power connector (indicated by the blue circle). -
Page 152: Replacing The Fbm
EonStor / EonStor DS S12/S16/S24 Series Replacing the FBM 1 5 8 To replace the FBM, follow these steps: 1. Remove the controller module from the chassis (refer to Removing the Controller). 2. Remove the BBU module (see the previous section). -
Page 153: Replacing The Power Supply Module / Cooling Module
EonStor / EonStor DS S12/S16/S24 Series Replacing the P ower Supply Module / Cooling Module The power supply units (PSU) are configured in a redundant configuration with each PSU housed in a robust steel canister. Detecting a Failed PSU 1 5 9 If a PSU module fails, the system notifies you through the following indicators: ... -
Page 154: Replacing The Power Supply Unit
EonStor / EonStor DS S12/S16/S24 Series Replacing the Power Supply Unit 1 6 0 A failed PSU should be replaced as soon as possible, but only when you have a replacement module in your hand. Contact your vendor for more details (refer to Contact Information). - Page 155 EonStor / EonStor DS S12/S16/S24 Series 4. Insert the replacement module. Make sure the extraction handle (1) is held at its highest position so that the sa ddle notches on the sides of the handle can snap onto the metal anchor pins (2) placed along the interior walls of the PSU slot. Push the PSU into chassis (3), and when you feel the contact resistance, use slightly more forc e to engage the back-end connectors.
-
Page 156: Replacing 2Ul-Gxxxx Model Psu
EonStor / EonStor DS S12/S16/S24 Series Replacing 2UL-Gxxxx Model PSU 1 6 1 Power off the system and turn off the PSU by turning off the power switch (1). 2. Disconnect the power cord from the PSU socket (2). 3. Loosen the retention screw (3) that secures the extraction handle (4) to the chassis using a Phillips screwdriver. - Page 157 EonStor / EonStor DS S12/S16/S24 Series 5. Install the replacement module . Make sure the extraction handle (1) is held at its lowest position so that the sa ddle notches on the sides of the handle can snap onto the metal anchor pins (2) on the interior walls of the PSU slot. Push the PS into chassis, and when you feel the contact resistance, pull the handle up wards to secure the module.
-
Page 158: Replacing 4U Raid System Psu
EonStor / EonStor DS S12/S16/S24 Series Replacing 4U RAID System PSU 1 6 2 1. Disconnect the power cord that connects to the failed PSU. 2. Loosen the retention screw (indicated by the circles) that secures the blue extraction handle to the chassis using a Phillips screwdriver. B e s ur e e v er y P S U s h ou ld B e s ur e e v e ry P S U s h ou ld B e s ur e ev er y P S U s h ould... - Page 159 EonStor / EonStor DS S12/S16/S24 Series 4. Install the replacement module . Make sure the extraction handle (1) is held at its lowest position so that the saddle notches on the sides of the handle can snap onto the metal anchor pins (2) on the interior walls of the PSU slo t.
-
Page 160: Replacing A Cooling Module
EonStor / EonStor DS S12/S16/S24 Series placing a Cooling Module If a cooling module fails, the system notifies you through the following indicators: Cooling module status LED locations (blue circles) 2UL-C 2U-Rxxxx & 3U Be s ure every P SU should Be s ure every P SU should Be s ure every P SU should have the same m ark... -
Page 161: Replacing 2Ul-Gxxxx Raid System Cooling Module
EonStor / EonStor DS S12/S16/S24 Series Replacing 2UL-Gxxxx RAID System Cooling Module 1 6 3 To replace the cooling module: 1. Snatch the retention latches towards the center, and then pull the cooling module out of the chassis. 2. Install the replacement module by pushing it into the module bay. When fully inserted, the retention latches will hold the module in place. -
Page 162: Replacing 4U Raid Systems Cooling Module
EonStor / EonStor DS S12/S16/S24 Series Replacing 4U RAID Systems Cooling Module 1 6 4 The cooling module is secured in the chassis by a retention latch. To replace the cooling module, follow the steps below: WARNING! The fan replacement process should be completed within five (5) minutes. If the process takes too long, the accumulated heat can damage the system. -
Page 163: Replacing A Hard Drive
EonStor / EonStor DS S12/S16/S24 Series Replacing a Hard Drive WARNING Keep a replacemen t on hand before replacing the hard drive. Do not leave the drive tray open for an extended period of time or the internal airflow will be disrupted. Handle the hard drives with extreme care. - Page 164 EonStor / EonStor DS S12/S16/S24 Series 2. Unlock the drive tray bezel (indicated by the arrow) by using a small blue flat-blade screwdriver to set the bezel lock from lock to the un-lock position. 3. Open the drive tray. Press the button. The spring handle will pop out. 4.
- Page 165 EonStor / EonStor DS S12/S16/S24 Series 6. Replace the drive. After swapping the drive, fasten the retention screws back. Without MUX With MUX 7. Insert the drive tra y back into the enclosure. Install the drive tray with the front bezel open. When fully inserted, close the front bezel. 8.
-
Page 166: Replacing The Enclosure
EonStor / EonStor DS S12/S16/S24 Series Replacing the Enclosure The RAID enclosures are ruggedly constructed and under extremely rare instances do they incur damages so severe (breakage causing circuit exposure, deformation, etc.) that require replacing the enclosure. However impossible it may be, the likely-hood of an enclosure needing to be replaced is usually due to a faulty integrated backplane that separates the front and rear sections of the chassis as entioned previously in section... -
Page 167: Differential Diagnosis To Determine Backplane Failure
EonStor / EonStor DS S12/S16/S24 Series Differential Diagnosis to Determine Backplane Failure 1 6 5 Apart from obvious damage (circuit exposure, extreme enclosure deformation, etc.), an indication of enclosure backplane failure can be determined by differential diagnosis. The simple differential diagnosis will also assist in Technical Support staffs to promptly identify the issue! Differential diagnosis can be done by swapping two modules to test the backplane’s integrity. -
Page 168: Enclosure Replacement Must Knows
EonStor / EonStor DS S12/S16/S24 Series Enclosure Replacement Must Knows 1 6 6 1. Always use the differential diagnosis method mentioned above to test the integrity of the backplane board. 2. Record your differential diagnosis findings and consult with Technical Support. 3. -
Page 169: Enclosure Replacement Procedure
EonStor / EonStor DS S12/S16/S24 Series Enclosure Replacement Procedure 1 6 7 The following steps describe the enclosure replacement procedure: In extreme rare instances, if there are obvious damages to the enclosure exposing circuits inside, go to Step 3. When you suspect the backplane boar is faulty, perform the simple differential diagnosis test mentioned above. - Page 170 EonStor / EonStor DS S12/S16/S24 Series 10. Once your storage pool has been confirm is indeed back online, you may restore your original settings (please refer to Replacing System Configurations in the SANWatch User Manual) or you can choose to do so, manually.
-
Page 171: Appendix
EonStor / EonStor DS S12/S16/S24 Series Appendix Technical Specifications Host/Drive Interface 1 6 8 Fibre-host RAID models (S12F/S16/S24F series) Host O/S Compatibility Host O/S independent Host Interface 4Gbps / 8Gbps / 16Gbps Fibre Host Channels 2 or 4 fibre host channels (per controller) Drive Interface / channel Supports 12/ 16/ 24 channels of 3/6Gbps SAS or SATA-II/SATA-III Fibre/iSCSI Hybrid-host RAID models (S16F-R/G2842 series) -
Page 172: Raid Configurations For Raid Models
EonStor / EonStor DS S12/S16/S24 Series RAID Configurations for RAID Models 1 6 9 RAID Levels 0, 1(0 + 1), 3, 5, 6, 10, 30, 50, 60, and non-RAID disk spanning Cache Mode All drive channels are pre-confi gured and cannot be changed Cache Memory Write-through, write-back, and adaptive write policy Pre-installed DDR-II module with ECC, registered;... -
Page 173: Fault Tolerance For Raid Models
Drive S.M.A.R.T Support clone and replace, and perpetual clo functions. Yes (R models only, optional accesso CBM (Cache Backup Module) for single controller models) ISEMS (Infortrend Simple Enclosure Management Service) v ia I C interface Automatic Drive Failure Detectio Automatic Rebuild on Spare Driv... -
Page 174: Power Supply
EonStor / EonStor DS S12/S16/S24 Series Power Supply 1 7 1 S12 and S16 Series Input Voltage Dual controller model: 100VAC @ 10A 240VAC @ 5A with PFC (auto-switching) Single controller model: 100VAC @ 6A 240VAC @ 3A with PFC (auto-switching) Frequency 47 to 63Hz Dual controller model: 530W;... -
Page 175: Dimensions
Through backplane to controller Over-temperature Auto shutdown when lost cooling or exceeded ambient temperature; Protection over-voltage protection is also available. Dimensi 1 7 2 S12 series Dimensions Without chassis ears & With chassis ears & protrusions protrusions Height Width 446mm 481.6mm... -
Page 176: Environment
EonStor / EonStor DS S12/S16/S24 Series Environ ment 1 7 3 Humidity 5 to 95% (non condensing – operating and non-operating) Operating: a. With Battery Backup Module 0º to 35ºC Temperature b. With out Battery Backup Module 0º to 40ºC Non-operating: -40º... -
Page 177: Pin-Out
EonStor / EonStor DS S12/S16/S24 Series Pin-out Interface Models Fibre Host Port GbE Host Port SAS Host Port SAS Expansion Port DB-9 Serial Port ... -
Page 178: 4 / 8 / 16Gbps Fibre Channel And 10Gbps Iscsi Host Port Pin-Out
EonStor / EonStor DS S12/S16/S24 Series 4 / 8 / 16Gbps Fibre Channel and 10Gbps iSCSI Host Port Pin-out 1 7 4 Name Description Transmitter ground Transmitter fault indication – High indicates a fault condition FAULT Transmitter Disable – Module electrical input disables on high or open MOD_DEF(2) Module definition 2 –... - Page 179 EonStor / EonStor DS S12/S16/S24 Series Transmitter power +3.3V Transmitter ground Transmitter DATA In Inverse Transmitter Data In Transmitter Ground...
-
Page 180: Sas Host Port Pin-Out
EonStor / EonStor DS S12/S16/S24 Series SAS Host Port Pin-out 1 7 5 The Mini SAS host ports c omply with the SF F-8088 specification. Name Name RX0+ TX0+ RX0- TX0- RX1+ TX1+ RX1- TX1- RX2+ TX2+ RX2- TX2- RX3+ TX3+ RX3- TX3-... -
Page 181: Gbe Iscsi Host Port Pin-Out
EonStor / EonStor DS S12/S16/S24 Series GbE iSCSI Host Port Pin-out 1 7 6 Name Name BI_DA+ BI_DC- BI_DA- BI_DB- BI_DB+ BI_DD+ BI_DC+ BI_DD- NOTE Automatic MDI/MDI-X Crossover: Crossover can be i mplemented internally at hub or switch or externally through twisted p ir media. -
Page 182: Db-9 Serial Port & Cable
EonStor / EonStor DS S12/S16/S24 Series DB-9 Serial Port & Cable 1 7 7 Name Description Name Description DCD1 Data Carrier Detect DSR1 Data Set Ready RXD1 Receive Data RTS1 Request to Send TXD1 Transmit Data CTS1 Clear to Send DTR1 Data Terminal Ready Ringing indicator... -
Page 183: Ethernet Management Port
EonStor / EonStor DS S12/S16/S24 Series Ethernet Management Port 1 7 8 Name Name LAN_TXP LAN_TXN LAN_RXN LAN_RXP... -
Page 184: Sas (Sff-8088) Expansion Port Pin-Out
EonStor / EonStor DS S12/S16/S24 Series SAS (SFF-8088) Expansion P ort Pin-out 1 7 9 The Mini SAS host ports comply with the SFF-8088 specification. RAID Controller JBOD Controller Name Name RX0+ TX0+ RX0- TX0- RX1+ TX1+ RX1- TX1- RX2+ TX2+ RX2- TX2-... -
Page 185: Stp Ethernet Cable (Optional Accessory: Fibre-Host Raid Models)
EonStor / EonStor DS S12/S16/S24 Series STP Ethernet Cable (Optional Accessory: Fibre-Host RAID Models) 1 8 0 This shielded twisted pair cable is an optional accessory item. Mor e details are shown below: Description: SFTP CAT5E Ethernet cable. Color: black. ... -
Page 186: Summary
EonStor / EonStor DS S12/S16/S24 Series Certifications Summary Safety UL (609 50-1 2’nd) BSMI CNS 14336: 2005 IEC 60950-1, 2’nd Edition GOST-R GOST R 60950-1-2005 CE EN 55022: 2006/A1:2007 / EN 61000-3-2: 2006 / EN 61000-3-3: 1995/A1: 2001 /A2: 2005 / EN 55024: 1998/A1: 2001/A2: 2003 IEC 61000-4-2:1995/A2:2000 IEC 61000-4-3:1995/A2:2006... - Page 187 EonStor / EonStor DS S12/S16/S24 Series NEBS GR-1089 REQUIREMENTS The ESDS S12F-R2840 N & ESDS S12S-J2000N is suitable for connection to the Central Office, NEC. The ESDS S1 2F-R2840N & ESDS S12S-J2000N shall be installed and connected to the CBN, IBN. The ESDS S12F-R2840N &...
-
Page 188: Installing The Earth Lead Kit For Dc Psu Systems
EonStor / EonStor DS S12/S16/S24 Series Installing the Earth Lead Kit fo r DC PSU systems Groundi ng Kit Contents Item Description Quantity Grounding cable Ground screw 6#-32 (1/4 inch) with star-shaped washer M5 cage nut Internal Internal diameter diameter Externa l diameter External... - Page 189 EonStor / EonStor DS S12/S16/S24 Series System model numbers with a designated “N” are powered by DC PSUs. The kit is for DC PSU systems only and the earth lead kit MUST be installed before you power on your system .
- Page 190 Slide Rail Installation Guide A supplied 14AWGof star-shape Lug is used for grounding that utilize s 6kgf-cm to secure it to the frame and EUT. A supplied 14AWG Gauge wire used for grounding should be indicated also in this section. Grounding Kit Contents (please refer to the above installation kit and procedure).
-
Page 191: Slide Rail Kit Installation Guide
EonStor DS Series 1 8 1 Model \ Kit 9272 9273 9279 9373 S12 series* S12S-J1000G S12S-J1002R S16 series* S16S-J1000R/S S24 series * indicates not all systems in the series use the same slide rail... -
Page 192: Eonstor Series
Slide Rail Installation Guide EonStor Series 1 8 2 Model \ Kit 9272 9273 9279 9373 S12F-G1842 S12F-R1840 S12S-J1000G S12S-J1002R S16F series S16S-J1000R/S (-1) S24F-series... -
Page 193: Enclosure Installation Prerequisites
Slide Rail Installation Guide Enclosure Installation Prerequisites To ensure proper installation and functionality of the RAID system, please observe the following warnings: Cross check all compo ents have been received against the “Unpacking List”. Contact your vendo r immediately if anything is missing ... -
Page 194: Unpacking The System
Slide Rail Installation Guide Unpacking the System Use the “Unpacking List” to cross check all components have been received. The basic contents include one GUI CD pack, Quick Installation Guide and RAID Enclosure Installation Guide. For details on each slide rail kit contents, please refer to specific kit installation details in this manual Component Installation Procedure Please install components in the following order:... -
Page 195: Ift-9272Ceslide28-0030 / Ift-9272Ceslide36-0030
IFT-9272CSlide28/36-0030 Slide Rail Kit Rackmount Slide Rail Kits There are several types of Infortrend rackmount enclosure kits, details of each slide rail installation procedures are described and shown below: IFT-92 72CESlide28-0030 / IFT-9272CESlide36-0030 following table shows accesso ries that came... -
Page 196: Installation Procedure
IFT-9272CSlide28/36-0030 Slide Rail Kit Installa tion Procedure 1 8 4 1. T he installation of the IFT-9272 rack mount slide rail begins with determ ining where in e rack the system will be installed. Once determined, attach four M5 clip nuts (09) to ach front rack posts and two M5 clip buts to each rear rack pos Front rack post Rear rack post... - Page 197 IFT-9272CSlide28/36-0030 Slide Rail Kit 2. Align and adjust the l ength of the slide brackets by sliding the left front slide rail (03) and left rear slide rail (05). Do the same for the right front slide rail (02) and the right rear slide rail (04) so they match the clip nuts.
- Page 198 IFT-9272CSlide28/36-0030 Slide Rail Kit 5. Attach the inner brackets (01) to the sides of the subsystem chassis using five #6-32 x 6mm flat head screws (08) for each inner bracket. The inner brackets will protrude 75mm from the rear end of the chassis. Attaching inner brackets 6.
- Page 199 IFT-9272CSlide28/36-0030 Slide Rail Kit 7. Secure the subsystem enclosure in the server rack by fastening two M5 x 30mm pan head screws on each side through the enclosure forearm handle. Secure screws on side ears of system to finalize 9272CESlide 28/36-0010 rackmount kit installation...
-
Page 200: Ift-9273Ceslide32-0010 / Ift-9273Ceslide36-0010
IFT-9273CSlide32/36-0100 Slide Rail Kit IFT-9273CESlide32-0010 / IFT-9273CESlide36-0010 following table shows accessories that came with IFT-9273CSlider32/36-0010 rackmount rail installation kit, it is designed for 3U enclosures, 24~32” and 26~36” deep racks, respectively. IFT-9273 Kit Contents 1 8 5 Item Description Quantity Left L-shape rail Right L-shape rail Extension bracket... -
Page 201: Installation Procedure
IFT-9273CSlide32/36-0100 Slide Rail Kit Installation Procedure 1 8 6 1. The installation of the IFT-9273 rack mount slide rail begins with determining the osition where the system is going to be installed. Insert clip nuts (07) if your rack has n-threaded holes. - Page 202 IFT-9273CSlide32/36-0100 Slide Rail Kit 3. Determine where the slide will be installed on the rack, use the position screws (08) to secure the front and rear rack post positions that meet the slide rails. Rear rack post Front rack post Securing the slide rail onto the rack 4.
- Page 203 IFT-9273CSlide32/36-0100 Slide Rail Kit Rack mounting the enclosure 6. At the end of the L -shape slide rail, there are screw holes to secure the enclosu onto the slide rails. Use two 32 x 12mm flat head screws (09) on each end to secure the enclosure onto the slide rails.
- Page 204 IFT-9273CSlide32/36-0100 Slide Rail Kit Screws on the forearm securing the enclosure onto the rack...
-
Page 205: Ift-9279Cslider36
IFT-9279CSlider36 Slide Rail Kit IFT-9279CSlider36 The following table shows all accessories that came with the IFT-9279CSlider36 rackmount rail installation kit. It is designed for 36” deep racks. IFT-9279 Kit Contents: 1 8 7 Item Description Quantity Rackmount rail assembly, right-side Rackmount rail assembly, left-side Cross recess round head screws M5x30... -
Page 206: Installation Procedure
IFT-9279CSlider36 Slide Rail Kit Installation Procedure 1 8 8 1. Determine rail installation position. The screw-hole locations that secure the slide rail sing M5 flathead screws (04) must match on front and rear posts. Place two cage uts (06) on the two outer most holes of the front post between the M5 flathead screws (04). - Page 207 IFT-9279CSlider36 Slide Rail Kit Attach filler plates to the enclosure...
-
Page 208: Ift-9373Cslider36-0010
IFT-9279CSlider36 Slide Rail Kit . Install the enclosure into the rack with the assistance of another person. Slide the enclosure in as far as it will go. The plastic stoppers (indicated by the black arrow) on the rackmount rails will engage the protruding rivets (indicated by the blue arrow and circle) on the sides of RAID/JBOD enclosures. -
Page 209: Ift-9373 Kit Contents
IFT-9373CSlider36 Slide Rail Kit IFT-9373CSlider36-0010 rackmount rail installation kit. IFT-93 73 Kit Contents 1 8 9 Item Description Quantity Mounting bracket assembly, L-shape, left-side Mounting bracket assembly, L-shape, right-side Inner glide Screws, cross recess round head, M5x30 Cross recess truss head screws M5 x 9.0mm #6-32 x10mm flathead screws #6-32 L6 flathead screws... -
Page 210: Installation Procedure
IFT-9373CSlider36 Slide Rail Kit Installa tion Procedure 1 9 0 1. The installation begins with installing the inner glides (03) to the left and right side of e enclo sure using #6-32 L6 flathead scre ws (07). Make sure the p rotruding e (ind icat... - Page 211 IFT-9373CSlider36 Slide Rail Kit the enclosure. Please refer to the illustration below that matches your enclosure dimensions. 2U screw rackmount position 3U screw rackmount position 4U screw rackmount position 3. When adjusting the slide rail assembly to its appropriate lengths, make sure the L-shape rail (01) bend faces inwards, loosen the four screws to adjust its length.
- Page 212 IFT-9373CSlider36 Slide Rail Kit 4. Secure the front end of the L-shape rail below the top cage nut (use for securing the enclosure). Extend the rail to the appropriate length where it meets the rear post and secure the front and rear us ing M5x0.9mm screws (05).
- Page 213 IFT-9373CSlider36 Slide Rail Kit Securing a filler plate behind enclosure ears 6. It is strongly recommended that two people perform this procedure together! To mount the enclosure onto the rail and into the rack, place the enclosure on the installed rails and slide it into the rack until the front ears of the enclosure meets the front rack posts.
- Page 214 IFT-9373CSlider36 Slide Rail Kit Securing the enclosure with screws in the front and rear forearm area...
-
Page 215: Removing The Enclosure
IFT-9373CSlider36 Slide Rail Kit Removing the Enclosure 1 9 1 *Prior to removing the enclosure, power down your system (stop all I/O actions, please refer to Users’ manual) and all hard drives have been removed! *It is strongly recommended that two people work together on this procedure 1. -
Page 216: Once Mounted
IFT-9373CSlider36 Slide Rail Kit Once Mounted Once the enclosure has been mounted, you may refer to the Users Manual that came with your system for further instructions on completing the h ardware installation process. The Users Manual will go on to explain details on installation / maintenance of hard drives, controllers, optional modules (BBU, CBM, etc.), co oling modules, power supplies, cable connections, topology configurations, etc.
Need help?
Do you have a question about the S12 Series and is the answer not in the manual?
Questions and answers