
Subscribe to Our Youtube Channel
Related Manuals for Infortrend EonStor GS Series


Summary of Contents for Infortrend EonStor GS Series
- Page 1 EonStor GS Installation Guide This guide provides the procedure of setting up EonStor GS/GSe/GSe Pro/GSa and GSc family storage. Hardware and software initial setup will be step-by-step introduced. Version: 1.00 Updated: February 2020...
-
Page 2: Table Of Contents
EonStor CS Installation Guide Contents Contents ..............................2 Summary ..............................4 Audience ..............................5 Prologue ............................... 6 Enclosure Installation ......................... 7 1-1. Check in Box ..........................8 1-1.1 For Desktop Models (GSe Pro 100/200) ..................8 1-1.2 For 2U24/2U25/2U12/3U16/4U24/4U60 bay form factor models ..........10 1-1.3 For 4U form factor models ....................... - Page 3 EonStor CS Installation Guide Storage Initialization.......................... 45 Connect with Client Site ........................55 4-1. Block Level ..........................57 4-1.1 Create Pools ..........................57 4-1.2 Create Volume ........................... 61 4-1.3 Mapping ............................. 63 4-2. File Level ............................. 66 4-2.1 Create Pools ..........................66 4-2.2 Create Volume ...........................
-
Page 4: Summary
EonStor CS Installation Guide Summary For those who are going to deploying EonStor GS/GSe/GSe Pro/GSa and GSc family storage, this guide can help you build up the system with step-by-step tutorial. In this guide, we separate into several chapters: Enclosure installation, Network cabling, Storage initialization and Connect with client site. page 4 / 97 Installation Guide... -
Page 5: Audience
EonStor CS Installation Guide Audience This guide is intended for the Infortrend partners, customers, and employees who are going to building up EonStor GS. page 5 / 97 Installation Guide... -
Page 6: Prologue
EonStor CS Installation Guide 0. Prologue Use this Help Guide if you have any questions on how to Install EonStor GS/GSe/GSe Pro/GSc and GSa family storage. Enclosure Installation Outline of the installation process and a proper boot up of GS. Network Cabling Introduces the GS network architecture/topology, how to connect management network, and data ports for data transmission. -
Page 7: Enclosure Installation
EonStor CS Installation Guide 1. Enclosure Installation In This Section Outline of the installation process and a proper boot up of GS. Contents 1.1. Check in Box Check the components list in the package before your start GS installation. 1.2. Rackmount Installation Outline of the process of installing the GS into the rack, including slide rail and GS installation. -
Page 8: Check In Box
EonStor CS Installation Guide 1-1. Check in Box Before installing the storage system, make sure you have received the items listed below in your package box: 1-1.1 For Desktop Models (GSe Pro 100/200) Item Picture 1. Drive trays 2. Accessory box 3. - Page 9 EonStor CS Installation Guide Power cord Quick configuration guide Quick Installation Guide Unpacking list and China RoHS compliance documentation EonOne CD Software CD 3.5-inch HDD screws/2.5-inch HDD screws RS-232C serial cable (mini USB to DB9) page 9 / 97 Installation Guide...
-
Page 10: 1-1.2 For 2U24/2U25/2U12/3U16/4U24/4U60 Bay Form Factor Models
EonStor CS Installation Guide 1-1.2 For 2U24/2U25/2U12/3U16/4U24/4U60 bay form factor models Item Picture 1. Unpacking list and China RoHS compliance documentation 2. Rackmount kit 3. Tray EPE 4. Power cord, cable, and accessory boxes 5. Host board box (optional) Host board box 6. - Page 11 EonStor CS Installation Guide 2.5”/3.5” HDD tray Host Board Box Content (Optional) Host Board (optional) Power Cord, Cable, and Accessory Boxes Power cord Power cord clamp set Quick Installation Guide RS-232C serial cable (mini USB to DB9) page 11 / 97 Installation Guide...
- Page 12 EonStor CS Installation Guide 2.5”/3.5” HDD screws EonOne CD Mounting enclosure screws and nuts page 12 / 97 Installation Guide...
-
Page 13: 1-1.3 For 4U Form Factor Models
EonStor CS Installation Guide 1-1.3 For 4U form factor models Item Picture 1. Unpacking list and China RoHS compliance documentation 2. Rackmount kit 3. Power cord, cable, and accessory boxes 4. Enclosure chassis Power Cord, Cable, and Accessory Boxes Power Cord Mounting enclosure screws and nuts page 13 / 97 Installation Guide... - Page 14 EonStor CS Installation Guide Quick Installation Guide Quick configuration guide 2.5”/3.5” HDD screws Software CD Note! For models that are not listed here, please refer to the Unpacking list document and see the complete components you should find in the box. page 14 / 97 Installation Guide...
-
Page 15: Rackmount Installation
EonStor CS Installation Guide 1-2. Rackmount Installation Note! You can skip this step if your model is GSe Pro 100/200 tower model. 1-2.1 For 1U model Checking the contents of the slide rail kit Item Description Quantity Left front bracket Right front bracket Rear bracket Bracket support... - Page 16 EonStor CS Installation Guide Assembling the slide rail kit 1. Assemble the slide rail (03) by inserting the rear bracket into the ditch (marked with a blue oblong) of the left and right front brackets (01 and 02). 2. Determine where the slide rail (03) is going to be installed and adjust the length of the sliding front bracket (01 and 02) until it meets the front rack post.
- Page 17 EonStor CS Installation Guide 3. Secure the sliding front bracket with one M5 x 55 mm position screw (05) to the front rack post and two M5 x 55 mm position screws (05) to the rear rack post (top and bottom). 4.
- Page 18 EonStor CS Installation Guide 5. Attach one cage nut (08) to the front rack post. The cage nut secures the enclosure in place.. 6. Open the covers from the left and right ears of the enclosure, then lift the enclosure and align it with the slide rails on the rack, keeping the pressure even on both sides.
- Page 19 EonStor CS Installation Guide enclosure's chassis ears to secure the enclosure to the rack. page 19 / 97 Installation Guide...
-
Page 20: 1-2.2 For 2U/3U/4U Model
EonStor CS Installation Guide 1-2.2 For 2U/3U/4U model Checking the contents of the slide rail kit Assembling the slide rail kit Determine the position where to install the enclosure to the front and rear rack posts, then insert the cage nuts into the designated holes of the front rack posts. Note! If the rack does not require M5 cage nuts and has its own screw threads, use the M6 or No. - Page 21 EonStor CS Installation Guide Attach the inner glides to both sides of the enclosure using the no. 6-32 flathead screws. With the assistance of another person, lift and insert the enclosure onto the slide rails. Ensure that the inner glides on both sides of the enclosure meet the inner glide rails. Secure the enclosure using the M5, M6, or no.
-
Page 22: Install Drive On Trays
EonStor CS Installation Guide 1-3. Install Drive on Trays 1-3.1 3.5” and 2.5” Drive Tray Model (2U12/2U24/3U16/4U24) Press the release button to open the spring handle. Orient the hard drive to the tray with the interface connectors facing the open side of the tray and the label is facing up (A). - Page 23 EonStor CS Installation Guide 2.5” SAS / NL-SAS / SATA drive Type 1. Screws from the bottom side Type 2. Screws on tray’s sides Insert the assembled hard drive and tray to the enclosure with the spring handle open. page 23 / 97 Installation Guide...
- Page 24 EonStor CS Installation Guide Close the spring handle when the drive is fully inserted to the bay. IMPORTANT! The system should be full of drives. page 24 / 97 Installation Guide...
-
Page 25: 1-3.2 2.5" Drive Tray Model (2U25)
EonStor CS Installation Guide 1-3.2 2.5” Drive Tray Model (2U25) Press the release button to open the spring handle. Place the hard drive on the tray (A), then secure the clips to both sides of the tray (B). ... - Page 26 EonStor CS Installation Guide Close the spring handle when the drive is fully inserted to the bay. IMPORTANT! Hard drives are installed in all drive slots of the systems. page 26 / 97 Installation Guide...
-
Page 27: 1-3.3 3.5" And 2.5" Drive Tray Desktop Model (Gse Pro 100/200)
EonStor CS Installation Guide 1-3.3 3.5” and 2.5” Drive Tray Desktop Model (GSe pro 100/200) Press the release button to open the spring handle (A), then gently pull out the tray (B). Orient and place the hard drive to the tray with the interface connectors facing the open side of the tray and the drive label is facing up (A), then secure the drive with four screws (B). - Page 28 EonStor CS Installation Guide Insert the assembled hard drive and tray to the enclosure with the spring handle open, then close the spring handle after the drive is fully inserted to the bay. Once all drives are installed, the system recognizes the disk drives and scans them automatically when powered on.
-
Page 29: Jbod Connections (Optional)
EonStor CS Installation Guide 1-4. JBOD connections (Optional) Note! For the maximum drives that Infortrend storage system can support, please refer to the Expansion Enclosure Guide for more information 1-4.1 For GSe Pro 100/200 series Installing a expansion board on the unit for expansion connection 1. - Page 30 EonStor CS Installation Guide 3. Turn the host/expansion board’s knobs clockwise to secure the expansion board to the system. page 30 / 97 Installation Guide...
- Page 31 EonStor CS Installation Guide Connect the expansion systems using the installed 12Gb/s SAS expansion board. page 31 / 97 Installation Guide...
-
Page 32: 1-4.2 For Gse Pro 3000 Series
EonStor CS Installation Guide 1-4.2 For GSe Pro 3000 series Installing a expansion board on the unit for expansion connection. Note: The SAS expansion board can be only inserted into host board 2 ( which is on the right), and you cannot insert two SAS expansion host boards. - Page 33 EonStor CS Installation Guide 5. Secure the controller by fastening the two retention screws (1) under the ejection levers (2). page 33 / 97 Installation Guide...
- Page 34 EonStor CS Installation Guide Connect the expansion systems using the installed 12Gb/s SAS expansion board. page 34 / 97 Installation Guide...
- Page 35 EonStor CS Installation Guide page 35 / 97 Installation Guide...
-
Page 36: 1-4.3 For Gs/Gse/Gsa/Gsc 2U/3U/4U Form Factor Series
EonStor CS Installation Guide 1-4.3 For GS/GSe/GSa/GSc 2U/3U/4U form factor series Please refer to the Expansion Enclosure Guide > Expansion Enclosure Connection part for more information page 36 / 97 Installation Guide... -
Page 37: 1-4.4 For Gs/Gsa/Gsc 5000 Series
EonStor CS Installation Guide 1-4.4 For GS/GSa/GSc 5000 series (Option) Installing the SAS expansion boards Note! If the expansion board already attached on slot 9 and 10, you can skip this step and go to the step connecting expansion system 1. - Page 38 EonStor CS Installation Guide 5. Install the expansion board into the SAS expansion slot, then secure it with a screw. IMPORTANT! If you are using only one SAS expansion host board, you must install it to the host board’s slot 10. This slot is located on the rightmost side of the controller. 6.
- Page 39 EonStor CS Installation Guide Connecting expansion systems Connecting dual-controller expansions IMPORTANT! To ensure redundancy, a dual-controller SAS expansion must be connected to the opposite ends of the expansions (first and last expansion) set up in daisy-chain connection page 39 / 97 Installation Guide...
-
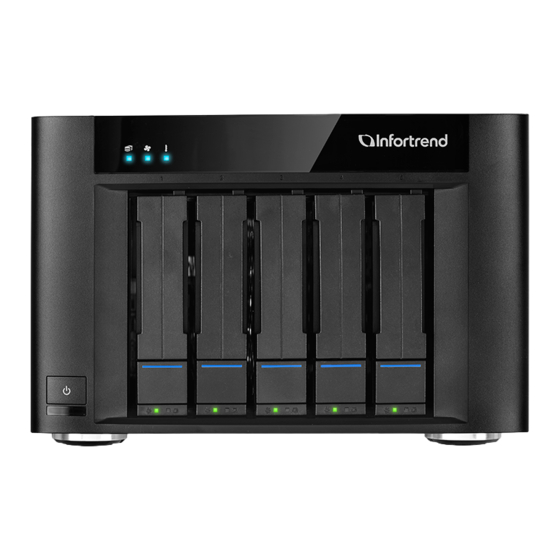
Page 40: Gs Status Checking
EonStor CS Installation Guide 1-5. GS Status Checking The following table shows the status of GS front panel LED, the system works normally with remaining green. GS front panel LED Number LED Name Service Power Cooling Module status Temperature status System fault The following table shows the status of GSe Pro 100/200 front panel LED, the system works normally with , and... - Page 41 EonStor CS Installation Guide Number LED Name System status Temperature status page 41 / 97 Installation Guide...
-
Page 42: Network Cabling
EonStor CS Installation Guide 2. Network Cabling In This Section Introduces the GS network architecture/topology, how to connect management network, and data ports for data transmission. Contents 2-1. Network Overview Introduces the GS network architecture/topology and the network combination based on the host board installed on each controller of the GS. -
Page 43: Network Overview
GSe Pro 100 series: CH3 is the default management port. You may refer to ‘’Detailed front and back product views’’ on official website. (access to link below->image) https://www.infortrend.com/global/products/families/gsepro/pro100 GSe Pro 200 series: CH3 is the default management port. You may refer to ‘’Detailed front and back product views’’... - Page 44 GSe Pro 3000 series: You may refer to ‘’Detailed front and back product views’’ on official website. (access to link below->image) https://www.infortrend.com/global/products/families/gsepro/pro3000 GS/GSe/GSa/GSc 2U/3U/4U/4U60 form factor series: You may refer to ‘’Detailed front and back product views’’ on official website. (access to link below->select the specific model->image) https://www.infortrend.com/global/products/gs...
-
Page 45: Storage Initialization
EonStor CS Installation Guide 3. Storage Initialization In This Section Outline of the process of GS initialization with EonOne Setup Wizard. Contents After hardware setup has been completed, you may access to the EonOne management webpage. EonOne Initialization wizard will pop up automatically for the GS initialization. Initial Setup Wizard is a quick configuration flow that allows users to set up all the necessary configurations of their GS. - Page 46 EonStor CS Installation Guide You can update the firmware on the following page if the firmware version on this unit is not the latest. To do so, click Browse and select the firmware installation file. Then click Update. The process may take several minutes to finish.
- Page 47 EonStor CS Installation Guide SNMP server. Service Manager identifies critical events requiring Infortrend’s assistance and sends requests to the Technical Support Department accordingly. To edit notification settings: Click Notification settings. Go to the Email page. Enable Email notification by clicking the switch button.
- Page 48 EonStor CS Installation Guide Go to the SNMP page. Enable SNMP trap by clicking the switch button. Click the Enable SNMPv1 support check box to activate the SNMPv1. Enter the Community information (the password of the SNMP). Click Add SNMPv1 trap receiver to add a trap server. Enter the Receiver IP address and select the Severity level to complete the settings page 48 / 97 Installation Guide...
- Page 49 EonStor CS Installation Guide Click the Enable SNMPv3 support check box to activate the SNMPv3. Enter the Username (the username for authentication) of the SNMPv3 server. Click Add SNMPv3 trap receiver to add a trap server. Enter the Receiver IP address and select the Severity level to complete the settings. page 49 / 97 Installation Guide...
- Page 50 Check I agree to automatically notify Infortrend when critical events occur. The system will automatically create a support ticket to Infortrend Service Center when any critical errors occur. Check I agree the requests from Infortrend support engineers to transmit system information for troubleshooting.
- Page 51 EonStor CS Installation Guide a notification to you. Set the device name, password for administrator, time and time zone for the device and configure DNS server(s) on the System settings page. Once you are finished, click Next. The Storage page helps you configure the drives for storage spaces. You can set up logical drives, pools and volumes from here.
- Page 52 EonStor CS Installation Guide Under Channel, configure the data port channels in the storage system in order to access the volumes. By default, the system automatically sets all on-board data ports for file-level access. You can change the channel type to block-level service manually. Once you are finished, click Next.
- Page 53 EonStor CS Installation Guide Select whether you need to join the device to an AD server or an LDAP server. Click Next to proceed. Under Summary, all the settings will be displayed for you to check if there is any mistake. After you click Start initialization, the system will start to execute the initialization process in the background.
- Page 54 EonStor CS Installation Guide Wait for the system to apply your configurations. Once it is done, click Close. page 54 / 97 Installation Guide...
-
Page 55: Connect With Client Site
EonStor CS Installation Guide 4. Connect with Client Site In This Section At this step the GS is established, the process for connecting with the client workstations and servers will be introduced here. The section introduces creating pools, volumes for mapping to a host operating system, shared folders, and local/ domain users for file sharing, and how to access the GS from Windows and macOS clients. - Page 56 EonStor CS Installation Guide 4-2. File-level 4-2.1 Create Pools During the initial setup wizard process we already created two pools; however, you can still create more than two pools at the GS for different purposes. This section outlines the process of creating more pools. 4-2.2 Create Volumes During the initial setup wizard process we already created volumes;...
-
Page 57: Block Level
EonStor CS Installation Guide 4-1. Block Level 4-1.1 Create Pools In the initialization setup wizard step, we created the first and the second storage pools. You can also create additional disk pools from management webpage for different uses. If you only need to create two disk pools and it has been successfully created, you can skip this step. ... - Page 58 EonStor CS Installation Guide Scroll down and click the Add logical drive button. You will be directed to the page for configuring logical drive parameters. Configure logical drive parameters. a. Select drive members from enclosures and JBOD that are available to be created as Logical Drives. b.
- Page 59 EonStor CS Installation Guide d. Select a stripe size for the logical drive. The default may be 128K. e. Click Apply. Once you have completed Logical Drive settings, your newly created Logical Drive will appear under the Add logical drive button. Click OK to complete pool setup. page 59 / 97 Installation Guide...
- Page 60 EonStor CS Installation Guide page 60 / 97 Installation Guide...
-
Page 61: 4-1.2 Create Volume
EonStor CS Installation Guide 4-1.2 Create Volume In the initialization setup wizard step we created volumes; you can also create additional volumes from management webpage for providing storage space to multiple host operating systems. If you only need to create the current amount of volumes and it has been successfully created, you can skip this step. - Page 62 EonStor CS Installation Guide page 62 / 97 Installation Guide...
-
Page 63: 4-1.3 Mapping
EonStor CS Installation Guide 4-1.3 Mapping In the initialization setup wizard step we created block-level volume; you will need to map a volume to the host side from management webpage in order to build up storage space to a host operating system. Follow the instructions below on how to map a volume to the host. - Page 64 EonStor CS Installation Guide 3. The list of Host LUN mapping configuration will appear. Select Create a host LUN mapping set automatically. Then Click OK. Note! If you wish to customize host LUN mapping manually, please refer to the software manual for the detailed settings.
- Page 65 5. Build up storage volumes on the host operating system. For Windows OS with the iSCSI protocol, please refer to the application notes below: https://www.infortrend.com/ImageLoader/LoadDoc/868/True/True/Infortrend%20document For Linux OS with the iSCSI protocol, please refer to the application notes below: https://www.infortrend.com/ImageLoader/LoadDoc/385/True/True/Infortrend%20document...
-
Page 66: File Level
EonStor CS Installation Guide 4-2. File Level 4-2.1 Create Pools In the initialization setup wizard step we created the first and the second storage pool. You can also create additional disk pools from management webpage for different uses. If you only need to create two disk pools and they have been successfully created, you can skip this step. - Page 67 EonStor CS Installation Guide 3. Scroll down and click the Add logical drive button. You will be directed to the page for configuring logical drive parameters. 4. Configure logical drive parameters. a. Select drive members from enclosures and JBOD that are available to be created as Logical Drives. b.
- Page 68 EonStor CS Installation Guide d. Select a stripe size for the logical drive. The default may be 128K. e. Click Apply. 5. Once you have completed Logical Drive settings, your newly created Logical Drive will appear under the Add logical drive button. Click OK to complete pool setup. page 68 / 97 Installation Guide...
- Page 69 EonStor CS Installation Guide page 69 / 97 Installation Guide...
-
Page 70: 4-2.2 Create Volume
EonStor CS Installation Guide 4-2.2 Create Volume In the initialization setup wizard step we created volumes; you can also create additional volumes from management webpage for different uses. If you only need to create the current amount of volumes and it has been successfully created, you can skip this step. - Page 71 EonStor CS Installation Guide page 71 / 97 Installation Guide...
-
Page 72: 4-2.3 Add Share Folder(S)
EonStor CS Installation Guide 4-2.3 Add Share Folder(s) After creating the local folders on the GS, you can create a shared folder for file sharing purpose with different protocol (CIFS/SMB, NFS, FTP, AFP, and Rsync). You can share local folders with remote users via the CIFS/SMB and NFS protocols. Go to Settings >... - Page 73 EonStor CS Installation Guide Name Description Specify a name for the shared folder. This name is displayed in the Folder Name shared folder list. Specify a name for the network sharing. Users only need to specify Share name share name when CIFS, AFP or WebDAV is selected as an access protocol.
-
Page 74: 4-2.4 Create User(S) And User Group(S)
EonStor CS Installation Guide 4-2.4 Create User(s) and User group(s) After setting a disk pool, a folder, and a shared folder, you can start to create users to set up the permissions. There are two ways to create users to manage the GS. Create Local User After setting up your disk pools, folders and shared folders, you can start creating users and set up their access permissions. - Page 75 EonStor CS Installation Guide Description Item Username Specify the new username. No spaces are allowed. Enter the password for this user account. Password Home Create a home directory (volume) for this user. When you check the directory box, the home directory path will automatically appear. Password Specify the validity period of the user password.
- Page 76 EonStor CS Installation Guide 2. Select the type of domain to join the GS to: Windows active directory or Lightweight Directory Access Protocol (LDAP). 3. Specify the information by domain type: Windows AD domain: Item Description AD server Specify the IP address or domain of the Windows AD server. AD security Select whether to protect the connection with the Windows AD server: None or TLS.
- Page 77 EonStor CS Installation Guide LDAP domain: Item Description LDAP server Specify the IP address of the LDAP server. LDAP Security Select whether to protect the connection with the LDAP server: None or TLS. Base DN Specify the LDAP base DN (distinguished name). Examples: dc=aadomain,dc=aa.local Root DN Specify the LDAP root DN.
- Page 78 EonStor CS Installation Guide 4. Click Save to save the information. 5. The system automatically retrieves the domain-specific user information (in Settings > Privilege > Users) and user group information (in Settings > Privilege > Groups). 6. To update information about domain users, click Update the user list. Create User Groups After creating the local user and export the domain user from AD/LDAP, you can also create the user group(s) for multiple users’...
- Page 79 EonStor CS Installation Guide 2. Specify the group name (required). 3. Select users as group members. page 79 / 97 Installation Guide...
- Page 80 EonStor CS Installation Guide page 80 / 97 Installation Guide...
-
Page 81: 4-2.5 Set Up The Folder Permission
EonStor CS Installation Guide 4-2.5 Set up the Folder Permission Define the folder-access permissions to local/domain users and group, check below how to set up the folder permission. 1. Go to Settings > Privilege > Shared Folders. 2. Check the folder created previously, click Edit. 3. - Page 82 EonStor CS Installation Guide The users/groups which have been already created can be listed. AD users (Domain users) can also be listed. page 82 / 97 Installation Guide...
- Page 83 EonStor CS Installation Guide page 83 / 97 Installation Guide...
-
Page 84: 4-2.6 Access The Share Folder
EonStor CS Installation Guide 4-2.6 Access the Share Folder There are two ways for a client side to access a shared folder. Direct Access 1. Before you start, make sure the server and GS are in the same subnet. 2. Make sure the shared folder is listed in Settings > Shared folders in EonOne. 3. - Page 85 EonStor CS Installation Guide 6. Open a file browser. Enter the IP address into the address bar and the shared folder(s) will appear. page 85 / 97 Installation Guide...
- Page 86 EonStor CS Installation Guide EonView 1. Go to Infortrend’s Official Website > Support > Technical Support, select the model you have, and go to Download > Software to download the EonView 2. Find your operating system type and download the corresponding file.
- Page 87 EonStor CS Installation Guide Alternatively, enter the specific IP to access the GS. page 87 / 97 Installation Guide...
- Page 88 EonStor CS Installation Guide 4. Click Next. Enter the account and password to access the GS system. 5. Switch to the Shared folders tab. page 88 / 97 Installation Guide...
- Page 89 EonStor CS Installation Guide 6. Click Add a shared folder and select the folder you want to mount on the local side. page 89 / 97 Installation Guide...
- Page 90 EonStor CS Installation Guide 7. Now, you can access this shared folder from your local computer. page 90 / 97 Installation Guide...
- Page 91 EonStor CS Installation Guide page 91 / 97 Installation Guide...
-
Page 92: Legal Disclaimer And Information
Standard Warranty Policy available on the Infortrend website: https://www.infortrend.com/global/Support/terms-conditions Infortrend may from time to time modify, update or upgrade the software, firmware or any accompanying user documentation without any prior notice. Infortrend will provide access to these new software, firmware, or documentation releases from certain download sections of our website or through our service partners. - Page 93 (1) products, software, or options not certified and supported by Infortrend are used; (2) configurations not certified and supported by Infortrend are used; (3) parts intended for one system are installed in another system of different make or model.
-
Page 94: Trademarks
Infortrend, SANWatch, EonOne, EonStor and EonServ are registered trademarks or trademarks of Infortrend Technology, Inc. Other names prefixed with “IFT”, “DS”, “GS”, “GSa”, “GSc”, “GSi”, “GSe”, “GSe Pro”, “CS” are trademarks of Infortrend Technology, Inc. All other names, brands, products or services are trademarks or registered trademarks of their respective owners. -
Page 95: Contact Information
EonStor CS Installation Guide Contact Information page 95 / 97 Installation Guide... -
Page 96: Website
EonStor CS Installation Guide Website For more information of Infortrend’s products and services, visit: https://www.infortrend.com/global/Home page 96 / 97 Installation Guide... -
Page 97: Customer Support
EonStor CS Installation Guide Customer Support Contact your system vendor or visit the following support site. http://www.infortrend.com/global/Support/Support page 97 / 97 Installation Guide...
Need help?
Do you have a question about the EonStor GS Series and is the answer not in the manual?
Questions and answers