Table of Contents
Advertisement
Advertisement
Table of Contents

Related Manuals for Sirona CEREC MC


Summary of Contents for Sirona CEREC MC
- Page 1 10.2017 New as of: Sirona Dental CAD/CAM System CEREC MC / MC X Operating Instructions (valid for USA) English (US) Operator Manual This product is covered by one or more of the following US patents: • US6454629 • US6702649 • US6394880 •...
- Page 2 Dentsply Sirona Operating Instructions (valid for USA) Sirona Dental CAD/CAM System 63 98 650 D 3439 D 3439.201.07.10.23 10.2017...
- Page 3 Dentsply Sirona Table of contents Operating Instructions (valid for USA) Sirona Dental CAD/CAM System Table of contents Dear Customer, ....................... Contact information ..................General data......................Identification of the danger levels..............Formats and symbols used ................Note PC / Acquisition Unit ................
- Page 4 Table of contents Dentsply Sirona Operating Instructions (valid for USA) Sirona Dental CAD/CAM System 5.4.7.2 Connecting the unit to the power supply ......5.4.7.3 Installing the unit ............... 5.4.7.4 Connecting the suction device (optional) ......5.4.7.5 Connecting to the PC via WLAN (option) ......
- Page 5 Dentsply Sirona Table of contents Operating Instructions (valid for USA) Sirona Dental CAD/CAM System 7.4.1.2 CEREC MC X ..............7.4.2 Changing instruments ..............Care, cleaning agents, and disinfectants ............. Cleaning surfaces..................7.6.1 Disinfecting..................7.6.2 Protection against medicaments ............. 7.6.3 Cleaning ..................
- Page 6 Table of contents Dentsply Sirona Operating Instructions (valid for USA) Sirona Dental CAD/CAM System 63 98 650 D 3439 D 3439.201.07.10.23 10.2017...
-
Page 7: Dear Customer
1 Dear Customer, Operating Instructions (valid for USA) Sirona Dental CAD/CAM System Dear Customer, ® Thank you for your purchase of this CEREC MC/MC X unit from Dentsply Sirona. This device enables you to produce dental restorations, e.g. from ceramic material with a natural appearance (CEramic REConstruction). -
Page 8: General Data
2 General data Dentsply Sirona 2.1 Identification of the danger levels Operating Instructions (valid for USA) Sirona Dental CAD/CAM System General data Please read this document completely and follow the instructions exactly. You should always keep it within reach. Original language of the present document: German. -
Page 9: Formats And Symbols Used
Dentsply Sirona 2 General data Operating Instructions (valid for USA) Sirona Dental CAD/CAM System Formats and symbols used The formats and symbols used in this document have the following meaning: Prerequisite Prompts you to do something. 1. First action step 2. Second action step Alternative action ➢... -
Page 10: General Description
3 General description Dentsply Sirona 3.1 Certification Operating Instructions (valid for USA) Sirona Dental CAD/CAM System General description Certification CE mark This product bears the CE mark in accordance with the provisions of Council Directive 2006/42/EC (machinery directive). As such, the following standards apply: DIN EN ISO 12100:2011-03, DIN EN 61010- 1:2011-07 and DIN EN 61326-1:2013-07. -
Page 11: Intended Use
Operating Instructions (valid for USA) Sirona Dental CAD/CAM System Intended use The Sirona Dental CAD/CAM System is intended for use in partially or fully edentulous mandibles and maxillae in support of single or multiple- unit cement retained restorations. For the SSO 3.5 L and SBL 3.3 L... -
Page 12: Further Use Of Sirona Dental Cad/Cam System
3 General description Dentsply Sirona 3.3 Further use of Sirona Dental CAD/CAM system Operating Instructions (valid for USA) Sirona Dental CAD/CAM System Further use of Sirona Dental CAD/CAM system The Sirona Dental CAD/CAM System is also: ● an optical impression system for computer assisted design and manufacturing (CAD/CAM) according to 21 CFR 872.3661. -
Page 13: Safety
Dentsply Sirona 4 Safety Operating Instructions (valid for USA) Sirona Dental CAD/CAM System Safety Basic safety information 4.1.1 Prerequisites NOTICE Important information on building installation The building installation must be performed by a qualified expert in compliance with the national regulations. DIN VDE 0100-710 applies in Germany. -
Page 14: Accessories
4 Safety Dentsply Sirona 4.2 Opening the processing chamber door during the machining process Operating Instructions (valid for USA) Sirona Dental CAD/CAM 4.1.4 Accessories In order to ensure product safety, this device may be operated only with original Dentsply Sirona accessories or third-party accessories expressly approved by Dentsply Sirona. -
Page 15: Installation And Startup
Operating Instructions (valid for USA) Sirona Dental CAD/CAM System Installation and startup Transport and unpacking All products from Dentsply Sirona are carefully checked prior to shipment. Please perform an incoming inspection immediately after delivery. 1. Check the delivery note to ensure that the consignment is complete. -
Page 16: Installation Site
5 Installation and startup Dentsply Sirona 5.3 Installation site Operating Instructions (valid for USA) Sirona Dental CAD/CAM System Installation site CAUTION Install out of the reach of patients! Do not install or operate the milling and grinding unit in the vicinity of the patient (place it at least 1.5 m away from the patient). -
Page 17: Functional Elements
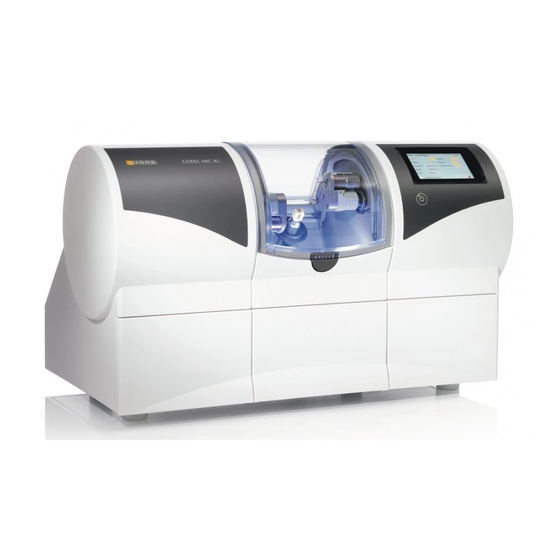
Dentsply Sirona 5 Installation and startup Operating Instructions (valid for USA) Sirona Dental CAD/CAM System 5.4.1 Functional elements Unit overview Overview of the milling and grinding unit Processing chamber ON/OFF switch Processing chamber Drawer door catch Display Water tank 63 98 650 D 3439... - Page 18 5 Installation and startup Dentsply Sirona 5.4 Commissioning Operating Instructions (valid for USA) Sirona Dental CAD/CAM System Ports on the back side Connections Main switch Communications interface for I = ON, 0 = OFF suction Fuse cover Bar code reader connection Power connection...
-
Page 19: Standard Accessories
Dentsply Sirona 5 Installation and startup Operating Instructions (valid for USA) Sirona Dental CAD/CAM System 5.4.2 Standard accessories 5.4.2.1 Instruments The following instruments are available for milling and grinding purposes. When replacing instruments, ensure the permitted instrument combinations are used (see "Permitted instrument combinations [ → 42]"). - Page 20 5 Installation and startup Dentsply Sirona 5.4 Commissioning Operating Instructions (valid for USA) Sirona Dental CAD/CAM System Instrument Usage Torque wrench Clamping format of the force transmission Step Bur 12 S 6240167 Grinding Triangular Step Bur 12 6260025 Grinding Cyl. Pointed Bur 12 S...
-
Page 21: Display Description
Dentsply Sirona 5 Installation and startup Operating Instructions (valid for USA) Sirona Dental CAD/CAM System 5.4.3 Display description These operating instructions describe how to operate the unit by executing and confirming commands via your PC. "Start" "Stop" "Cancel" You can also confirm commands such as "OK"... -
Page 22: Using The Processing Chamber Screen
5.4.6 Connecting the bar code reader The bar code reader is optional for the CEREC MC/MC X unit. Connecting the bar code reader ➢ Plug the bar code reader into the serial interface to the rear of the milling and grinding unit and secure with screws. -
Page 23: Installation
Dentsply Sirona 5 Installation and startup Operating Instructions (valid for USA) Sirona Dental CAD/CAM System 5.4.7 Installation 5.4.7.1 Connecting to the PC via LAN An Ethernet connection is located to the rear of the unit, which can be used to connect the PC to the milling and grinding unit. Use a network cable to do this (LAN connection). -
Page 24: Connecting The Suction Device (Optional)
5 Installation and startup Dentsply Sirona 5.4 Commissioning Operating Instructions (valid for USA) Sirona Dental CAD/CAM System Search for unit manually The unit is connected to the PC via a LAN cable or via WLAN. "Configuration" 1. Click the button in the system menu. - Page 25 (B). Notes on the suction tube: The suction tube is supplied at a length of approx. 2.0 m (CEREC MC/MC X/MC XL Premium Package). When connecting the suction device to the unit, please ensure that no sharp bends occur over the full length of the suction tube.
- Page 26 5 Installation and startup Dentsply Sirona 5.4 Commissioning Operating Instructions (valid for USA) Sirona Dental CAD/CAM System 5.4.7.4.3 Connecting the interface cable (for automatic mode) 1. Plug the 15-pole connector into the socket (A) of the processing machine. 2. Plug the 9-pole connector into the socket (B) of the suction device.
-
Page 27: Connecting To The Pc Via Wlan (Option)
Dentsply Sirona 5 Installation and startup Operating Instructions (valid for USA) Sirona Dental CAD/CAM System 5.4.7.5 Connecting to the PC via WLAN (option) Making the connection Connect access point ➢ Connect the LAN port A of the milling and grinding unit and the access point, using the network cable (10m, Order No.: 61 51 521). -
Page 28: Operating Several Milling And Grinding Units Over One
● 1x LAN switch (e.g. Netgear ProSave 5 Port Gigabit Switch, Model GS105) ● 1x LAN network cable (10m, Sirona Order No.: 61 51 521). LAN switch, connection example with 2 milling and grinding units 1. Connect the LAN port A of the milling and grinding units with the LAN switch using the included 10m LAN network cable. - Page 29 Dentsply Sirona 5 Installation and startup Operating Instructions (valid for USA) Sirona Dental CAD/CAM System 5.4.7.7.1 Höft & Wessel HW 8614/F2 1. Connect the HW 8614/F2 wireless module to the LAN port of the milling and grinding unit using the LAN crossover cable (1 m).
-
Page 30: Filling The Water Tank
5 Installation and startup Dentsply Sirona 5.4 Commissioning Operating Instructions (valid for USA) Sirona Dental CAD/CAM System IMPORTANT A network with CEREC Radio Devices can include up to three network devices. Larger networks are not possible. 5.4.8 Filling the water tank NOTICE... -
Page 31: Water Tank Cerec Mc Xl Basic
Dentsply Sirona 5 Installation and startup Operating Instructions (valid for USA) Sirona Dental CAD/CAM System NOTICE Damage to surfaces! In the undiluted state, the coolant additive DENTATEC disintegrates plastic surfaces and can cause discoloration. ➢ Do not place DENTATEC on the unit. -
Page 32: Switching The Unit On And Off
5 Installation and startup Dentsply Sirona 5.4 Commissioning Operating Instructions (valid for USA) Sirona Dental CAD/CAM System NOTICE Damage to surfaces! In the undiluted state, the coolant additive DENTATEC disintegrates plastic surfaces and can cause discoloration. ➢ Do not place DENTATEC on the unit. -
Page 33: Repacking
Dentsply Sirona 5 Installation and startup Operating Instructions (valid for USA) Sirona Dental CAD/CAM System Power-up display When the milling and grinding unit is switched on, the display shows a picture of the milling and grinding unit trying to contact the PC. -
Page 34: Storage
5 Installation and startup Dentsply Sirona 5.7 Storage Operating Instructions (valid for USA) Sirona Dental CAD/CAM System Storage NOTICE Repack only drained units! Drain the unit! See "Removing water from the unit“. Store the unit in a closed and dry room at a temperature of -10°C to 50°C for a maximum period of 12 months. -
Page 35: Operation
Dentsply Sirona 6 Operation Operating Instructions (valid for USA) Sirona Dental CAD/CAM System Operation CAUTION Risk of injury on calibration pins/instruments If you reach into the processing chamber (e.g.: when inserting/removing a ceramic block, changing instruments, or inserting/removing a calibration phantom), you may injure your hand on the calibration pins/ instruments. -
Page 36: Calibrating The Unit
6 Operation Dentsply Sirona 6.2 Calibrating the unit Operating Instructions (valid for USA) Sirona Dental CAD/CAM System Calibrating the unit NOTICE Use only the supplied calibration tools Use only the supplied calibration pins and the corresponding calibration phantom when calibrating the unit. - Page 37 Dentsply Sirona 6 Operation Operating Instructions (valid for USA) Sirona Dental CAD/CAM System Inserting the calibration pins and phantom 1. Press the catch of the processing chamber door and open the door. 2. Loosen the instruments with the torque wrench and remove them.
- Page 38 6 Operation Dentsply Sirona 6.2 Calibrating the unit Operating Instructions (valid for USA) Sirona Dental CAD/CAM System Inserting instruments 1. Open the processing chamber door following calibration. 2. Loosen the calibration pins with the torque wrench and remove them. 3. Loosen the ball pressure screw.
-
Page 39: Replacing The Set Screw
Dentsply Sirona 6 Operation Operating Instructions (valid for USA) Sirona Dental CAD/CAM System Replacing the set screw NOTICE Not to be confused Do not confuse the set screw with the ball pressure screw! NOTICE Wear to the set screw Replace the set screw every 1000 clamping procedures or if the pin has broken off. -
Page 40: Machining Process
6 Operation Dentsply Sirona 6.4 Machining process Operating Instructions (valid for USA) Sirona Dental CAD/CAM System Machining process 6.4.1 Process types Various process types are available for milling and grinding purposes. These vary in terms of the type of materials to be processed and the instruments to be used. -
Page 41: Milling
Dentsply Sirona 6 Operation Operating Instructions (valid for USA) Sirona Dental CAD/CAM System 6.4.1.2 Milling The milling option is available from the following serial numbers onwards: Machine type Serial number (wet milling) Serial number (dry milling also with retrofit) MC X... -
Page 42: Permitted Instrument Combinations
6 Operation Dentsply Sirona 6.4 Machining process Operating Instructions (valid for USA) Sirona Dental CAD/CAM System 6.4.1.3 Permitted instrument combinations Depending on the materials to be processed and the process type used, various instrument combinations are permitted. For an updated table of approved instrument combinations, please visit "www.sirona.com"... -
Page 43: Ending The Machining Processes
Dentsply Sirona 6 Operation Operating Instructions (valid for USA) Sirona Dental CAD/CAM System 6.4.4 Ending the machining processes 1. When the machining process has been completed, open the processing chamber door. 2. Remove the restoration. WARNING Risk of injury on the remainder of the ceramic block The remaining portion of the ceramic block may have sharp edges (e.g. -
Page 44: Entering The Bar Code
6 Operation Dentsply Sirona 6.5 Entering the bar code Operating Instructions (valid for USA) Sirona Dental CAD/CAM System Entering the bar code Barcode Reader active "Barcode Reader" If you have activated the option in the system configuration dialog (e.g. for CEREC Zirconia), you must read-in both bar codes with the bar code reader. -
Page 45: Manual Block Clamp
Dentsply Sirona 6 Operation Operating Instructions (valid for USA) Sirona Dental CAD/CAM System Manual block clamp NOTICE Wear of the ball pressure screw The high clamping forces cause wear of the ball pressure screw. ➢ Replace the ball pressure screw every 500 clamping operations. -
Page 46: Service
NOTICE Do not confuse the block screw with the ball pressure screw When operating a CEREC 3 grinding unit and a CEREC MC/MC X in the same room, be careful not to confuse the block screw of the CEREC 3 with the ball pressure screw of the CEREC MC/MC X. -
Page 47: Using The Cleaning Hose And The Wet Cleaning Process
Dentsply Sirona 7 Service Operating Instructions (valid for USA) Sirona Dental CAD/CAM System NOTICE Wear of the ball pressure screw The high clamping forces cause wear of the ball pressure screw. ➢ Replace the ball pressure screw every 500 clamping operations. -
Page 48: Changing Filter Bags And Hepa Filters
Dentsply Sirona 7.2 Changing filter bags and HEPA filters Operating Instructions (valid for USA) Sirona Dental CAD/CAM System 5. Sucking up as much dust as possible from the workpiece axis is recommended. You must also always remove the dust from the bottom of the impact pane of the block axis (see arrow). - Page 49 Dentsply Sirona 7 Service Operating Instructions (valid for USA) Sirona Dental CAD/CAM System Changing HEPA filters Replace the HEPA filter if suction power is still weak after replacing the filter bag. The HEPA filter is located behind the filter bag. NOTICE We recommend replacing the HEPA filter for the CEREC suction device once the filter bag has been replaced around 3 to 4 times.
-
Page 50: Changing The Water
Dentsply Sirona 7.3 Changing the water Operating Instructions (valid for USA) Sirona Dental CAD/CAM System 6. Remove the dusty HEPA filter and insert a new HEPA filter. 7. Put the perforated sheet back on and screw it down with the two Phillips screws. -
Page 51: Changing The Water
Dentsply Sirona 7 Service Operating Instructions (valid for USA) Sirona Dental CAD/CAM System NOTICE Damage to surfaces! In the undiluted state, the coolant additive DENTATEC disintegrates plastic surfaces and can cause discoloration. ➢ Do not place DENTATEC on the unit. ➢ Do not spill DENTATEC. - Page 52 7 Service Dentsply Sirona 7.3 Changing the water Operating Instructions (valid for USA) Sirona Dental CAD/CAM System To change the water, proceed as follows: ✔ The unit is switched on. ✔ No machining process is running. 1. Pull out the water tank at the front of the unit.
-
Page 53: Water Tank Cerec Mc Xl Basic
Dentsply Sirona 7 Service Operating Instructions (valid for USA) Sirona Dental CAD/CAM System 7.3.2.2 Water tank CEREC MC XL Basic Water tank Filter insert Tank Tank cap Tank drain To change the water, proceed as follows: ✔ The unit is switched on. -
Page 54: Instruments
7 Service Dentsply Sirona 7.4 Instruments Operating Instructions (valid for USA) Sirona Dental CAD/CAM System 11. Fill the tank with water until the filter insert is completely immersed (up to the bottom edge of the cover thread, approx. 3 liters). 12. Wait for a short time until the filter insert is completely soaked; then add an appropriate amount of water. - Page 55 Dentsply Sirona 7 Service Operating Instructions (valid for USA) Sirona Dental CAD/CAM System "Start" 4. Click on the button. The motors travel to the change position for the instruments. The dialog box for changing the instruments opens. 5. Press the catch of the processing chamber door and open the door.
-
Page 56: Care, Cleaning Agents, And Disinfectants
7 Service Dentsply Sirona 7.5 Care, cleaning agents, and disinfectants Operating Instructions (valid for USA) Sirona Dental CAD/CAM System Changing a defective instrument If an instrument breaks during the machining phase, the corresponding motor travels to the change position. A dialog box which marks the side with the broken instrument with a red cross then opens. -
Page 57: Replacing The Main Fuses
Dentsply Sirona 7 Service Operating Instructions (valid for USA) Sirona Dental CAD/CAM System Replacing the main fuses WARNING Electric shock Disconnect the power plug at the unit end before replacing the fuses. NOTICE Fuse type Use only fuses of the same type in the fuse holder! -
Page 58: Changing The Filter
7 Service Dentsply Sirona 7.8 Changing the filter Operating Instructions (valid for USA) Sirona Dental CAD/CAM System Changing the filter NOTICE Change the filter regularly! Clean the filter regularly and change it immediately when damaged. Otherwise, change it every 3 months. If a message appears stating that the water pressure is too low, you must clean the filter or, if it is damaged, replace it immediately. - Page 59 Dentsply Sirona 7 Service Operating Instructions (valid for USA) Sirona Dental CAD/CAM System 4. Rinse the water tank. 5. Insert a new filter with handle into the tank and press it firmly onto the base in the floor of the tank.
- Page 60 7 Service Dentsply Sirona 7.9 Removing water from the unit Operating Instructions (valid for USA) Sirona Dental CAD/CAM System NOTICE Cleaning the filter Clean the filter approx. every 12 to 15 units under running water, but at least with every water change.
-
Page 61: Using The Tank Cap Opener
Dentsply Sirona 7 Service Operating Instructions (valid for USA) Sirona Dental CAD/CAM System 7.10 Using the tank cap opener NOTICE Risk of damage to the tank Use the tank cap opener only for opening the tank cap and tank drain. Do not use the tank cap opener for closing the tank cap. To close the tank cap and tank drain, it is sufficient to tighten them clockwise by hand. -
Page 62: Technical Description
8 Technical description Dentsply Sirona 8.1 System requirements Operating Instructions (valid for USA) Sirona Dental CAD/CAM System Technical description System requirements 8.1.1 CEREC MC The CEREC SW software must only be installed on CEREC acquisition units or on the 64-bit inLab PC (optional). -
Page 63: Technical Data
Dentsply Sirona 8 Technical description Operating Instructions (valid for USA) Sirona Dental CAD/CAM System 8.2.2 Technical data Type designation Milling and grinding unit CEREC MC / MC X Rated line voltage 100 V - 230 V AC Rated power frequency 50/60 Hz Nominal current 1.5 - 3.5 A... -
Page 64: Consumable
* Milling possible: only with milling/grinding machines from the following serial numbers: inLab MC XL 129001, CEREC MC XL 129001, CEREC MC XL Premium Package 302001, CEREC MC X 231001 or replacement of the left motor on 2-motor machines or of the left motor in the motor set 1 on 4-motor machines. - Page 65 Dentsply Sirona 9 Consumable Operating Instructions (valid for USA) Sirona Dental CAD/CAM System Description Illustration 61 29 519 Filter unit (1x) 61 29 402 Filter unit (pack of 6) 65 78 095 Filter bag (double pack), CEREC 63 85 277 HEPA filter...
-
Page 66: Disposal
10 Disposal Dentsply Sirona Operating Instructions (valid for USA) Sirona Dental CAD/CAM System Disposal In accordance with Directive 2012/19/EU and national disposal regulations regarding old electrical and electronic devices, please be advised that such items must be disposed of in a special way within the European Union (EU). -
Page 67: Disinfecting
Dentsply Sirona Index Operating Instructions (valid for USA) Sirona Dental CAD/CAM System Index Bar code reader, 18 Filter Building installation, 13 mode, 58 Order No., 59 footprint, 16 Calibration tools Fuse, 18 Calibration phantom, 36 Fuse type, 57 Calibration pins, 36 Order No., 57... - Page 68 Index Dentsply Sirona Operating Instructions (valid for USA) Sirona Dental CAD/CAM System Packaging, 15 Packing, 33 Power connection, 18 Product safety, 14 Protection class, 63 Rated line voltage, 63 Repair, 13 Safety instructions, 8 Scope of supply, 33 Temperature range, 63...
- Page 69 Dentsply Sirona Index Operating Instructions (valid for USA) Sirona Dental CAD/CAM System 63 98 650 D 3439 D 3439.201.07.10.23 10.2017...
- Page 70 We reserve the right to make any alterations which may be required due to technical improvements. © Sirona Dental Systems GmbH Sprache: englisch (US) Printed in Germany D 3439.201.07.10.23 10.2017 Ä.-Nr.: 124 428 Sirona Dental Systems GmbH Contact in the USA: Sirona Dental, Inc.
Need help?
Do you have a question about the CEREC MC and is the answer not in the manual?
Questions and answers