Sirona Cerec AC Operating Instructions Manual
With omnicam
Hide thumbs
Also See for Cerec AC:
- Installation instructions manual (84 pages) ,
- Operating instructions manual (84 pages) ,
- Operating instructions for the acquisition unit (72 pages)

Related Manuals for Sirona Cerec AC


Summary of Contents for Sirona Cerec AC
- Page 1 MSKOMNT kÉï=~ë=çÑW= `bob`=^` táíÜ=`bob`=lãåáÅ~ã léÉê~íáåÖ=fåëíêìÅíáçåë=Ñçê=íÜÉ=^Åèìáëáíáçå=råáí Eåçí=î~äáÇ=Ñçê=rp^L`~å~Ç~F båÖäáëÜ Operating Instructions for the Acquisition Unit - With CEREC Omnicam...
-
Page 2: Table Of Contents
Table of contents Sirona Dental Systems GmbH Operating Instructions for the Acquisition Unit Table of contents Dear Customer, ......................Contact information ..................General data......................Structure of the document................2.1.1 Identification of the danger levels............. 2.1.2 Formats and symbols used .............. - Page 3 Sirona Dental Systems GmbH Table of contents Operating Instructions for the Acquisition Unit 5.3.3 Working clearances................. Installation and startup .................... Transport and unpacking................Disposal of packaging materials..............Scope of supply.................... Initial startup ....................6.4.1 Controls and functional elements ............ 6.4.2 Operating state LED................
- Page 4 Table of contents Sirona Dental Systems GmbH Operating Instructions for the Acquisition Unit 8.1.5.3 Removing the mirror sleeve ..........8.1.5.4 Refitting the mirror sleeve ..........8.1.5.5 Pre-cleaning of the mirror sleeve ........8.1.5.6 Wipe disinfection for the camera and mirror sleeve ..
-
Page 5: Dear Customer
1 Dear Customer, Operating Instructions for the Acquisition Unit Dear Customer, ® Thank you for your purchase of this CEREC AC unit from Sirona. This device enables you to produce dental restorations, e.g. from ceramic material with a natural appearance (CEramic REConstruction). -
Page 6: General Data
2 General data Sirona Dental Systems GmbH 2.1 Structure of the document Operating Instructions for the Acquisition Unit General data Please read this document completely and follow the instructions exactly. You should always keep it within reach. Original language of the present document: German. -
Page 7: Formats And Symbols Used
Sirona Dental Systems GmbH 2 General data Operating Instructions for the Acquisition Unit 2.1.2 Formats and symbols used The formats and symbols used in this document have the following meaning: Prerequisite Prompts you to do something. 1. First action step 2. Second action step Alternative action ➢... -
Page 8: Legend
Storage battery pack recycling symbol (see "Disposal of the storage battery pack" [ → 66]) The CEREC AC may contain an RF transmitter in the form of a WLAN card or a separate wireless module. Radio approval for Australia/New Zealand Follow the operating instructions. -
Page 9: Sirona Dental Systems Gmbh
Sirona Dental Systems GmbH 2 General data Operating Instructions for the Acquisition Unit Symbols on the packaging Take note of the following symbols on the packaging: Protect from moisture Fragile; handle with care Temperature during storage and transport Relative humidity during storage and transport... -
Page 10: General Description
Mark of conformity of the Eurasian Economic Community Intended use In connection with the grinding unit, the CEREC AC acquisition unit is used to manufacture dental restorations, e.g. from a natural-appearing ceramic material. The unit may be operated only by medically trained and qualified personnel. -
Page 11: Safety
Sirona Dental Systems GmbH 4 Safety Operating Instructions for the Acquisition Unit Safety Basic safety information 4.1.1 Prerequisites NOTICE Important information on building installation The building installation must be performed by a qualified expert in compliance with the national regulations. DIN VDE 0100-710 applies in Germany. -
Page 12: General Safety Information
CAUTION Note on the prevention, recognition, and elimination of unintended electromagnetic effects: The CEREC AC acquisition unit is Class B equipment (classified according to CISPR 11, EN 60601-1-2: 2007 based on IEC 60601-1- 2:2007 and A1:2004). This system may be operated in a residential area provided that it is used under the responsibility of a medical specialist. -
Page 13: Maintenance And Repair
Accessories In order to ensure product safety, this device may be operated only with original Sirona accessories or third-party accessories expressly approved by Sirona. The user is responsible for any damage resulting from the use of non-approved accessories. 4.1.7.1 Included accessories ●... -
Page 14: Sirona Dental Systems Gmbh
4 Safety Sirona Dental Systems GmbH 4.2 Safety labels Operating Instructions for the Acquisition Unit Plug connections of external interfaces CAUTION Additional devices connected to external interfaces must be tested according to the relevant standards, e.g.: EN 60601-1:1990 + A1:1993 + A2:1995 based on IEC 60601-1, EN... -
Page 15: Sirona Dental Systems Gmbh
Sirona Dental Systems GmbH 4 Safety Operating Instructions for the Acquisition Unit CAUTION In order to maintain electrical safety, the rear doors of the acquisition unit must be kept closed while it is in operation. The acquisition unit must not be operated inside of the patient area (within a radius of 1.5 m surrounding the patient) with the doors open. -
Page 16: Electrostatic Charge
4 Safety Sirona Dental Systems GmbH 4.3 Electrostatic charge Operating Instructions for the Acquisition Unit Electrostatic charge 4.3.1 ESD warning labels ESD warning label CAUTION Risk of injury or damage to components from electrostatic discharge For electrical components labeled with an ESD warning label, observe the following instructions. -
Page 17: About The Physics Of Electrostatic Charges
Sirona Dental Systems GmbH 4 Safety Operating Instructions for the Acquisition Unit 4.3.3 About the physics of electrostatic charges What is an electrostatic charge? An electrostatic charge is a voltage field on and in an object (e.g. a human body) which is protected against conductance to ground potential by a nonconductive layer (e.g. -
Page 18: Wireless Phone Interference With Equipment
In such cases, a cable LAN connection should be selected to ensure uninterrupted operation. If the only LAN interface on the rear of the CEREC AC is occupied by another plug, remove this wireless interface connection, and instead connect the LAN cable with the CEREC MC XL milling and grinding unit. -
Page 19: Integration In A Network Or Connection To A Modem
Sirona Dental Systems GmbH 4 Safety Operating Instructions for the Acquisition Unit Integration in a network or connection to a modem NOTICE Observe the following installation regulations The following installation regulations apply to integration of the acquisition unit in a network or connection of the acquisition unit to a... -
Page 20: Technical Information
5 Technical information Sirona Dental Systems GmbH 5.1 Technical description Operating Instructions for the Acquisition Unit Technical information Technical description CAD system for high-precision intraoral optical impressions ● High-resolution, heated oral camera (3D camera) with removable reflective sleeve (reflective sleeve sterilizable with hot air) ●... -
Page 21: Sirona Dental Systems Gmbh
TP-Link TL-WDN4800 ● Sound card: Realtek HD Audio onboard ● Graphics card: AMD R9 285 ● Supply board: 61 46 048 D3573 Sirona PC software ● Operating system: Windows Embedded Standard 7, 64Bit ● Installation: The operating system is installed at the factory. -
Page 22: Technical Data
5 Technical information Sirona Dental Systems GmbH 5.2 Technical data Operating Instructions for the Acquisition Unit Technical data Type designation CEREC AC Acquisition unit Rated line voltage 100 - 240 VAC /50 - 60 Hz Rated current 4.7 - 1.8 A Type of protection against electric shock... -
Page 23: Electromagnetic Compatibility
Electromagnetic compatibility Observance of the following information is necessary to ensure safe operation regarding EMC aspects. CEREC AC complies with the requirements for electromagnetic compatibility (EMC) according to IEC 60601-1-2:2001 and A1:2004. CEREC AC is hereinafter referred to as "UNIT". -
Page 24: Interference Immunity
5 Technical information Sirona Dental Systems GmbH 5.3 Electromagnetic compatibility Operating Instructions for the Acquisition Unit 5.3.2 Interference immunity The UNIT is intended for operation in the electromagnetic environment specified below. The customer or user of the UNIT should make sure that it is used in such an environment. -
Page 25: D3492
Sirona Dental Systems GmbH 5 Technical information Operating Instructions for the Acquisition Unit Interference IEC 60601-1-2 Test level Compliance level Electromagnetic environment – immunity tests guidelines Conducted RF d= [1.2] √P interference 150 kHz to 80 MHz IEC 61000-4-6 Radiated RF... -
Page 26: Working Clearances
5 Technical information Sirona Dental Systems GmbH 5.3 Electromagnetic compatibility Operating Instructions for the Acquisition Unit 5.3.3 Working clearances Recommended working clearances The UNIT is intended for operation in an electromagnetic environment, between portable and mobile RF where radiated RF interference is checked. The customer or the user of... -
Page 27: Installation And Startup
Operating Instructions for the Acquisition Unit Installation and startup Transport and unpacking All products from Sirona are carefully checked prior to shipment. Please perform an incoming inspection immediately after delivery. 1. Check the delivery note to ensure that the consignment is complete. -
Page 28: Initial Startup
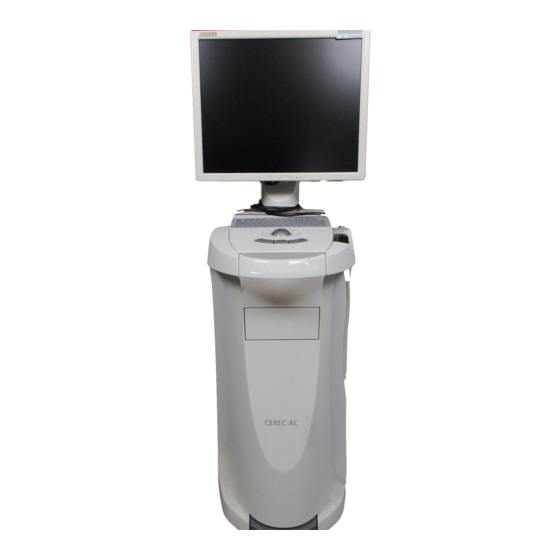
6 Installation and startup Sirona Dental Systems GmbH 6.4 Initial startup Operating Instructions for the Acquisition Unit Initial startup 6.4.1 Controls and functional elements Overview of the front panel Monitor ON/OFF switch Center trackball button Membrane keyboard Left trackball button CEREC camera... - Page 29 Sirona Dental Systems GmbH 6 Installation and startup Operating Instructions for the Acquisition Unit Operating state LED ON button Components of the Omnicam Press detent to release Camera windows Mirror sleeve Calibration set Sapphire glass (coated) NOTICE CEREC Omnicam is calibrated The CEREC Omnicam is calibrated ex works (see "Calibrating CEREC...
-
Page 30: Operating State Led
6 Installation and startup Sirona Dental Systems GmbH 6.4 Initial startup Operating Instructions for the Acquisition Unit Overview of rear side Fuses Power connection Main switch USB port I = ON, 0 = OFF 6.4.2 Operating state LED Operating state LED ON button LED not lit: Acquisition unit is switched off at main switch. -
Page 31: Plug Connections
1. Connect the unit to the line voltage with the power cord. 2. Carefully insert the connector of the CEREC Omnicam cable into the coupling on the CEREC AC, watching out for the guide nose. 3. Check the plug connections of the power supply and the camera. The CEREC Omnicam always remains connected. -
Page 32: Insert Battery (Optional)
6 Installation and startup Sirona Dental Systems GmbH 6.4 Initial startup Operating Instructions for the Acquisition Unit 6.4.4 Insert battery (optional) Bottom door Battery cover Storage battery Battery connector 1. Open the lower door on the back panel. NOTICE Open with coin. -
Page 33: Changing From Right-Handed To Left-Handed Operation
The unit is dry and can be put into operation. CAUTION Use only the supplied power cord Use only the power cord supplied by Sirona to connect the acquisition unit to the power supply. If the acquisition unit is switched on at the main switch, it can be activated with the ON button. -
Page 34: Switching The Units Off
6 Installation and startup Sirona Dental Systems GmbH 6.4 Initial startup Operating Instructions for the Acquisition Unit NOTICE Possible data loss and PC malfunction: Switching the acquisition unit off at the ON button during operation may cause data loss and PC malfunctions. -
Page 35: Battery-Backed Operation (Optional)
Sirona Dental Systems GmbH 6 Installation and startup Operating Instructions for the Acquisition Unit Battery-backed operation (optional) Introduction The acquisition unit PC has a battery-backed power supply. It is thus possible to operate the acquisition unit for a short time with no line voltage connected. - Page 36 6 Installation and startup Sirona Dental Systems GmbH 6.5 Battery-backed operation (optional) Operating Instructions for the Acquisition Unit Following a double-click on the symbol, the following monitoring window opens: The following information is displayed in the monitoring window: Monitoring window Explanation Line voltage switched on and battery available.
-
Page 37: Sirona Dental Systems Gmbh
Sirona Dental Systems GmbH 6 Installation and startup Operating Instructions for the Acquisition Unit Monitoring window Explanation Fan blocked, status message in monitoring window. Warning window with 30s countdown until the PC shuts down. A continuous signal is then sounded via the system loudspeaker. -
Page 38: Operation
7 Operation Sirona Dental Systems GmbH 7.1 Camera warm-up time Operating Instructions for the Acquisition Unit Operation Camera warm-up time When switching on the system, the camera needs to warm up for 15 - 20 minutes. If the coated sapphire glass of the Omnicam is not sufficiently warm, it may steam up during the acquisition. -
Page 39: Taking Acquisitions With The Cerec Omnicam
Sirona Dental Systems GmbH 7 Operation Operating Instructions for the Acquisition Unit Taking acquisitions with the CEREC Omnicam CAUTION Hot surface! The coated sapphire layer of the CEREC Omnicam is preheated in the camera cradle. When removing the CEREC Omnicam from its cradle, the surface temperature of the mirror sleeve can be up to 51°C. -
Page 40: Directing The Camera
7 Operation Sirona Dental Systems GmbH 7.4 Directing the camera Operating Instructions for the Acquisition Unit Proceeding with scanning procedure 1. Activate the foot control or click on the Omnicam icon with the cursor. The scanning procedure begins. 2. Proceed with the scanning procedure as described above. -
Page 41: Occlusal Scan
Sirona Dental Systems GmbH 7 Operation Operating Instructions for the Acquisition Unit 7.4.1 Occlusal scan Important: Ensure that the distance between the coated sapphire glass of the CEREC Omnicam and the scanned surface is observed. The distance must be between 0-15 mm (ideally: 5 mm). The camera does not rest on the teeth or the gums. -
Page 42: Lingual Scan
7 Operation Sirona Dental Systems GmbH 7.4 Directing the camera Operating Instructions for the Acquisition Unit 7.4.3 Lingual scan ✔ The CEREC Omnicam is on the tooth that is positioned next to the preparation in the distal direction. 1. Rotate the CEREC Omnicam from 90° in the buccal direction to around 45°... -
Page 43: Buccal Registration
Sirona Dental Systems GmbH 7 Operation Operating Instructions for the Acquisition Unit 7.4.5 Buccal registration A buccal registration can be used to establish contact with the antagonist. ✔ The jaw with the preparation is scanned. 1. Scan the occlusal, buccal and lingual view of the antagonist (see the section “Occlusal scan [ →... -
Page 44: Sirona Dental Systems Gmbh
7 Operation Sirona Dental Systems GmbH 7.4 Directing the camera Operating Instructions for the Acquisition Unit Completing the scanning process 1. Start as indicated above, on the occlusal surface of the right terminal tooth, and scan it occlusally. Tilt the camera by 45° in a palatinal direction (oral) and guide it from the distal to the mesial. -
Page 45: Sirona Dental Systems Gmbh
Sirona Dental Systems GmbH 7 Operation Operating Instructions for the Acquisition Unit The following scan sequence is implemented for the opposite second (third) quadrant: 1. Start by placing the device on the occlusal surface of a premolar, that has already been scanned, and guide the camera palatally (orally) at a mesial tilt of up to 90°... -
Page 46: Completing Measurements
7 Operation Sirona Dental Systems GmbH 7.5 Software for the CEREC Omnicam Operating Instructions for the Acquisition Unit ● When performing this activity, be careful not to accidentally cut out any areas that e.g. are located behind the model or are otherwise cut away from the line. -
Page 47: Maintenance
Some countries have legal regulations which require regular safety inspections of electrical devices or systems by the operator. Sirona would like to draw your attention to the fact that a retest must be carried out for the CEREC AC acquisition unit every three years at the latest. -
Page 48: Monitor Screen
"Cleaning agents and disinfectants [ → 47]" section to disinfect the non-critical contact surfaces of the CEREC AC, such as the camera holder, keyboard, and trackball. 2. Dispose of the absorbent gauze. Please ensure that no colored cloths are used for this as these can result in discoloration of the surfaces, e.g. -
Page 49: Trackball Holder
Sirona Dental Systems GmbH 8 Maintenance Operating Instructions for the Acquisition Unit 8.1.4 Trackball holder 1. Rotate the cover ring counterclockwise and remove it. 2. Clean inner surface of cover ring (A) with ethanol (commercially available cleaning alcohol). 3. Remove the ball. -
Page 50: General Information
8 Maintenance Sirona Dental Systems GmbH 8.1 Care, cleaning, disinfection, and sterilization Operating Instructions for the Acquisition Unit 8.1.5.1 General information The CEREC Omnicam is a very sensitive optical device and must therefore be handled with the utmost care. Protect the coated sapphire... -
Page 51: Refitting The Mirror Sleeve
Sirona Dental Systems GmbH 8 Maintenance Operating Instructions for the Acquisition Unit 8.1.5.4 Refitting the mirror sleeve ➢ Carefully refit the mirror sleeve until it locks in place. NOTICE There is a risk of damaging the camera window or the coated sapphire glass if the mirror sleeve is not pushed straight toward the front. -
Page 52: High-Level Disinfection Of The Mirror Sleeve
OPA disinfectant is available in your country via your dealer: A HLD set to support the HLD processes can be ordered from Sirona with REF 66 05 120. This replaces the set with REF 63 46 907. The processes for both HLD sets can be found in the document "Operating Instructions for CEREC Bluecam and CEREC Omnicam, care... -
Page 53: Sirona Dental Systems Gmbh
Sirona Dental Systems GmbH 8 Maintenance Operating Instructions for the Acquisition Unit 4. Place the white protective cap on the camera head and place the camera in the camera storage unit. ® 5. Use the following disinfectant for the high-level disinfection: CIDEX OPA. - Page 54 8 Maintenance Sirona Dental Systems GmbH 8.1 Care, cleaning, disinfection, and sterilization Operating Instructions for the Acquisition Unit 8. Carefully fill the HLD container up to the marking (B). You can use a funnel to pour in the fluid (A). Do not spill any disinfectant. Observe the safety instructions from the disinfectant manufacturer when cleaning if you do spill any disinfectant.
-
Page 55: Sirona Dental Systems Gmbh
Sirona Dental Systems GmbH 8 Maintenance Operating Instructions for the Acquisition Unit 10. Place the cover on the container and leave the mirror sleeve in the ® disinfectant for at least 12 minutes (CIDEX OPA). The mirror sleeve will not be damaged if it remains in the disinfectant for longer than the required time, but removing it shortly after the required time is recommended. -
Page 56: Hot Air Sterilization Of The Mirror Sleeve
8 Maintenance Sirona Dental Systems GmbH 8.1 Care, cleaning, disinfection, and sterilization Operating Instructions for the Acquisition Unit 13. Remove the bracket from the mirror sleeve carefully and slowly by pushing the bracket downwards. Ensure that the mirror sleeve is pointing upwards so that no fluids are able to penetrate into the interior of the mirror sleeve. -
Page 57: Calibrating Cerec Omnicam
4. Click on the button. The camera view is displayed in one window. 5. Enter the 8-digit Sirona ID. You can find this ID on the sticker on the calibration set. Calibrate the camera 1. Remove the protective cap from the calibration set. -
Page 58: Sirona Dental Systems Gmbh
8 Maintenance Sirona Dental Systems GmbH 8.2 Calibrating CEREC Omnicam Operating Instructions for the Acquisition Unit 5. Turn the screw counter-clockwise until you reach the next latching point. "OK" 6. Click on the button. In doing so, ensure that the CEREC Omnicam does not move. -
Page 59: Color Calibration
Sirona Dental Systems GmbH 8 Maintenance Operating Instructions for the Acquisition Unit Color calibration General information A color-calibrated Omnicam must be used for the color analysis. The color analysis can only be carried out with a CEREC Omnicam from a particular serial number. In order to test the CEREC Omnicam, use the Omnicam test tool on my.cerec.com ->... -
Page 60: Sirona Dental Systems Gmbh
8 Maintenance Sirona Dental Systems GmbH 8.3 Color calibration Operating Instructions for the Acquisition Unit Storing a color-calibration set The color-calibration set must be stored in its packaging in a dry place which is protected from light. It must be used with a disinfected Omnicam as the color-calibration set must itself not be disinfected. -
Page 61: Sirona Dental Systems Gmbh
Replacing the color calibration set Please note that the color calibration set ● can only be used with CEREC SW software ≥ 4.5 or Sirona Connect SW ≥ 4.5 or CEREC Premium SW ≥ 4.5. ● can only be kept for use for a maximum of 2 years. You can find the expiry date at the bottom of the color calibration set container. -
Page 62: Replacing The Main Fuse
8 Maintenance Sirona Dental Systems GmbH 8.4 Replacing the main fuse Operating Instructions for the Acquisition Unit Replacing the main fuse WARNING Electric shock Disconnect the power plug at the unit end before replacing the fuses. NOTICE Fuse type Use only fuses of the same type in the fuse module! -
Page 63: Charge Battery (Optional)
Sirona Dental Systems GmbH 8 Maintenance Operating Instructions for the Acquisition Unit Charge battery (optional) NOTICE Reduced buffer cycles After around 1000 buffer cycles the capacity of the battery fades due to the nature of the battery technology used. If the buffer times are too short, you should replace the battery. -
Page 64: Replace Battery (Optional)
8 Maintenance Sirona Dental Systems GmbH 8.6 Replace battery (optional) Operating Instructions for the Acquisition Unit Replace battery (optional) Bottom door Battery cover Storage battery Battery connector 1. Open the lower door on the back panel. NOTICE Open with coin. Use a coin to open the latch. Turn counterclockwise. -
Page 65: Disposal
Sirona Dental Systems GmbH 9 Disposal Operating Instructions for the Acquisition Unit Disposal In accordance with Directive 2012/19/EU and national disposal regulations regarding old electrical and electronic devices, please be advised that such items must be disposed of in a special way within the European Union (EU). -
Page 66: Disposal Of The Storage Battery Pack
Send in the replaced storage battery pack to Sirona (see the reverse side of these operating instructions for the mailing address). 63 81 136 D3492... -
Page 67: Pc Diagnostic Tool
Sirona Dental Systems GmbH 10 PC Diagnostic Tool Operating Instructions for the Acquisition Unit PC Diagnostic Tool 10.1 Start diagnostic tool Test Suitable for Customer Diagnostics Suitable for the user, in order to check the PC components. Technician Diagnostics Suitable for the technician, in order to check the PC components. -
Page 68: Test Procedure
10 PC Diagnostic Tool Sirona Dental Systems GmbH 10.2 Test procedure Operating Instructions for the Acquisition Unit 10.2 Test procedure 10.2.1 Customer Diagnostics ✔ You have started the "Customer Diagnostics" test and the system configuration is displayed. 1. Using the information in the system configuration, check whether the system corresponds to the default settings. - Page 69 Sirona Dental Systems GmbH 10 PC Diagnostic Tool Operating Instructions for the Acquisition Unit The result, i.e. "Pass" or "Fail", appears at the end of the test (see sections entitled "Test result: Pass" or "Test result: Fail"). 3. On completion of the test, press any key to go on to the test dialog.
-
Page 70: Technician Diagnostics
10 PC Diagnostic Tool Sirona Dental Systems GmbH 10.2 Test procedure Operating Instructions for the Acquisition Unit 10.2.2 Technician Diagnostics ✔ You have started the "Technician Diagnostics" test and the system configuration is displayed. 1. Using the information in the system configuration, check whether the system corresponds to the default settings. - Page 71 Sirona Dental Systems GmbH 10 PC Diagnostic Tool Operating Instructions for the Acquisition Unit 3. On completion of the test, press any key to go on to the test dialog. Tip: You can scroll to the individual test steps using the arrow keys.
-
Page 72: Sirona Windows Diagnostics
Diagnostics" or "Technician Diagnostics" tests has been completed with a "pass" and without errors. Performing the test Tip: Allow the "Sirona Windows Diagnostics" test to run for at least 1 hour. For optimum results, allow the test to run overnight. ✔... -
Page 73: Troubleshooting
2. Carry out the appropriate steps in the chapter entitled Troubleshooting [ → 73] . Ending the "Sirona Windows Diagnostics" test ➢ Click the "Stop" button. The individual test windows close. The PC is switched off. -
Page 74: Customer Diagnostics & Technician Diagnostics
10 PC Diagnostic Tool Sirona Dental Systems GmbH 10.3 Troubleshooting Operating Instructions for the Acquisition Unit 10.3.1 Customer Diagnostics & Technician Diagnostics Test Test description / condition Action if problems occur Display Script Control command without a test n.a. function Activity is rotating cursor... - Page 75 Test description / condition Action if problems occur Test WDC___TYP HDD___Short A range of destruction-free tests on 1. For the CEREC AC with the hard drives installed in a system Omnicam check the setting of the Self-Test are conducted with these functions.
-
Page 76: Sirona Windows Diagnostics
10 PC Diagnostic Tool Sirona Dental Systems GmbH 10.3 Troubleshooting Operating Instructions for the Acquisition Unit 10.3.2 Sirona Windows Diagnostics Test Test Description Action if problems occur Processor(s) Continuous load and inspection of ➢ Replace the PC. processor cores Motherboard testing Continuous load and inspection of the ➢... -
Page 77: Appendix
Sirona Dental Systems GmbH 11 Appendix Operating Instructions for the Acquisition Unit Appendix 11.1 DVD playback "Windows DVD videos can be played back on the acquisition unit via Media Center" "Start" "All ➢ Start the program via the corresponding icon or via Programs"... -
Page 78: Seal On Pc Slide-In Module
11 Appendix Sirona Dental Systems GmbH 11.3 Seal on PC slide-in module Operating Instructions for the Acquisition Unit 11.3 Seal on PC slide-in module NOTICE If the seal is broken, all warranty claims regarding the PC slide-module automatically expire. The PC slide-in module may be opened only by an authorized dental technician. -
Page 79: Index
Sirona Dental Systems GmbH Index Operating Instructions for the Acquisition Unit Index Acquisition unit enretec GmbH, 65 Overview, 28 Air pressure Foot pedal, 28 Operation, 22 Fuse Storage, 22 Fuse type, 62 Transport, 22 Order No., 62 Ambient temperature Replacement, 62... - Page 80 Index Sirona Dental Systems GmbH Operating Instructions for the Acquisition Unit ON button, 30, 33 Temperatur Online help, 34 Storage, 22 Operating mode, 22 Transport, 22 Operating state LED, 30 Trackball, 28 Cleaning, 49 Trackball button Packaging, 27 center, 28...
- Page 82 tÉ=êÉëÉêîÉ=íÜÉ=êáÖÜí=íç=ã~âÉ=~åó=~äíÉê~íáçåë=ïÜáÅÜ=ã~ó=ÄÉ=êÉèìáêÉÇ=ÇìÉ=íç=íÉÅÜåáÅ~ä=áãéêçîÉãÉåíëK «=páêçå~=aÉåí~ä==póëíÉãë=dãÄe péê~ÅÜÉW ÉåÖäáëÅÜ mêáåíÉÇ=áå=dÉêã~åó aPQVOKOMNKMSKONKMO MSKOMNT ûKJkêKW= NOP=TUP páêçå~=aÉåí~ä=póëíÉãë=dãÄe `çåí~Åí=áå=íÜÉ=rp^W páêçå~=aÉåí~äI=fåÅK SP=UN=NPS=aPQVO c~Äêáâëíê~≈É=PN QUPR=páêçå~=aêáîÉ lêÇÉê=kç SQSOR=_ÉåëÜÉáã `Ü~êäçííÉI=k`=OUOTP dÉêã~åó ïïïKëáêçå~KÅçã...
Need help?
Do you have a question about the Cerec AC and is the answer not in the manual?
Questions and answers