Sirona CEREC MC XL Operating Instructions Manual
Hide thumbs
Also See for CEREC MC XL:
- Installation instructions manual (88 pages) ,
- Operating instructions manual (70 pages) ,
- Operating instructions manual (50 pages)
Table of Contents
Advertisement
Quick Links
Advertisement
Table of Contents

Subscribe to Our Youtube Channel
Related Manuals for Sirona CEREC MC XL


Summary of Contents for Sirona CEREC MC XL
- Page 1 NOKOMNQ kÉï=~ë=çÑW== `bob`=j`=ui Eìé=íç=ëÉêá~ä=åìãÄÉê=NVVKVVVF léÉê~íáåÖ=fåëíêìÅíáçåë båÖäáëÜ Operating Instructions (up to serial number 199.999) This product is covered by one or more of the following US patents: • US6454629 • US6702649 • US6394880 • US7522764 • US7163443...
-
Page 2: Table Of Contents
Contents Sirona Dental Systems GmbH Operating Instructions CEREC MC XL Contents Dear Customer, ......................General data......................Identification of danger levels................ Formats and symbols used ................Note PC / Acquisition Unit ................General description ....................Certification ....................Normal use....................Safety ........................ - Page 3 General information................. 7.1.2 Changing the water (CEREC MC XL Basic) ........7.1.3 Changing the water (CEREC MC XL with premium package) ..7.1.3.1 Procedure for all materials except for base metals ..7.1.3.2 Procedure for processing base metal materials ....
- Page 4 Replacing the main fuses ................Changing the filter ..................7.6.1 CEREC MC XL Basic ............... 7.6.2 CEREC MC XL with premium package..........7.6.2.1 Procedure for all materials except for base metals ... 7.6.2.2 Base metal operation or mixed operation with base metal and other materials 7.6.3...
-
Page 5: Dear Customer
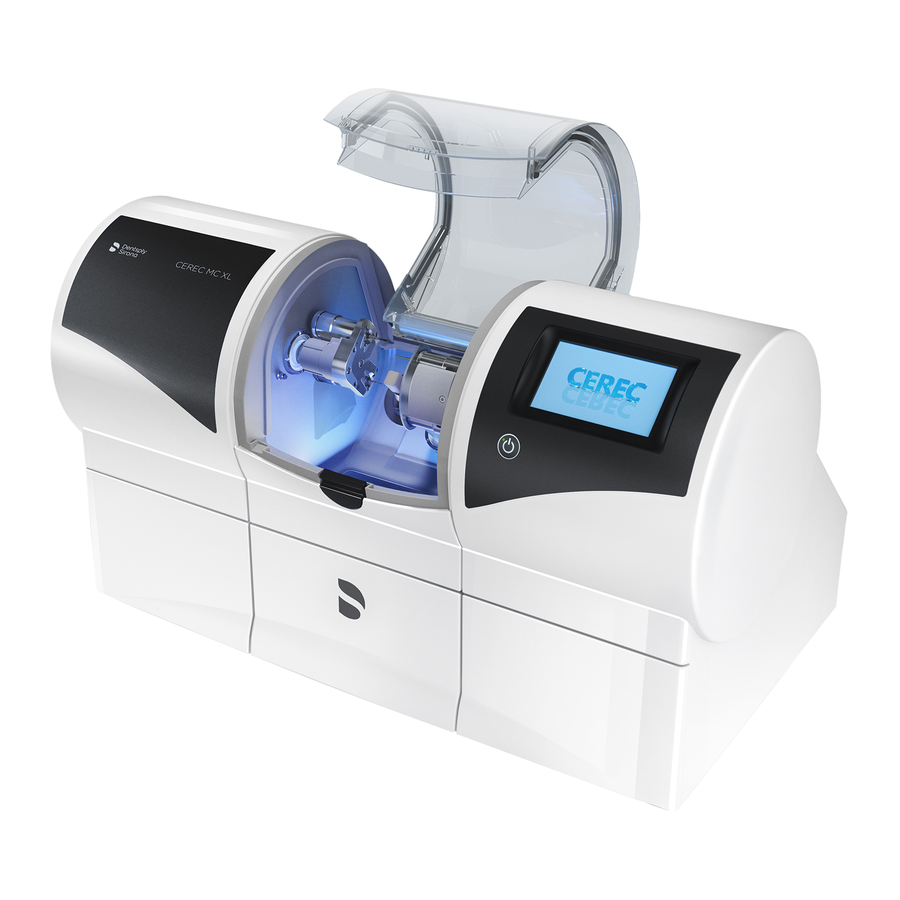
1 Dear Customer, Operating Instructions CEREC MC XL Dear Customer, ® Thank you for your purchase of this CEREC MC XL unit from Sirona. General description This device enables you to produce dental restorations, e.g. from ceramic material with a natural appearance (CEramic REConstruction). -
Page 6: General Data
2 General data Sirona Dental Systems GmbH 2.1 Identification of danger levels Operating Instructions CEREC MC XL General data Please read this document completely and follow the instructions exactly. You should always keep it within reach. Original language of the present document: German. -
Page 7: Formats And Symbols Used
Sirona Dental Systems GmbH 2 General data Operating Instructions CEREC MC XL 2.2 Formats and symbols used Formats and symbols used The formats and symbols used in this document have the following meaning: Prerequisite Prompts you to do something. 1. First action step 2. -
Page 8: General Description
3 General description Sirona Dental Systems GmbH 3.1 Certification Operating Instructions CEREC MC XL General description Certification CE mark Machinery directive CE mark This product bears the CE mark in accordance with the provisions of Council Directive 2006/42/EC (machinery directive). As such, the following standards apply: DIN EN ISO 12100:2011-03, DIN EN 61010- 1:2011-07 and DIN EN 61326-1:2013-07. -
Page 9: Safety
● The maintenance and repair of this unit may be performed only by Sirona or by agencies authorized by Sirona. ● Components which have failed and influence the safety of the unit must be replaced with original (OEM) spare parts. -
Page 10: Accessories
Product safety of inEos X5 original Sirona accessories or third-party accessories expressly approved by Sirona. In particular, only the power cable supplied with the unit or the corresponding original spare part may be used with the unit. The user assumes the risk of using non-approved accessories. -
Page 11: Installation And Startup
5.1 Transport and unpacking Installation and startup Transport and unpacking All products from Sirona are carefully checked prior to shipment. Please Transport and unpacking perform an incoming inspection immediately after delivery. 1. Check the delivery note to ensure that the consignment is complete. -
Page 12: Installation Site
5 Installation and startup Sirona Dental Systems GmbH 5.3 Installation site Operating Instructions CEREC MC XL Installation site CAUTION Install out of the reach of patients! Do not install or operate the grinding unit in the vicinity of the patient (place it at least 1.5 m away from the patient). -
Page 13: Functional Elements
Sirona Dental Systems GmbH 5 Installation and startup Operating Instructions CEREC MC XL 5.4 Commissioning 5.4.1 Functional elements Unit overview Overview of the milling unit Milling chamber ON/OFF switch Milling chamber Drawer door catch Display Water tank Ports on the back side... -
Page 14: Sirona Dental Systems Gmbh
5 Installation and startup Sirona Dental Systems GmbH 5.4 Commissioning Operating Instructions CEREC MC XL Grinding chamber CEREC milling chamber Grinding chamber Instrument set 1 Ceramic block Instrument set 2 Workpiece spindle (CEREC MC XL with premium package) Motor mount 61 46 885 D 3439... -
Page 15: Standard Accessories
(see "Permitted instrument combinations [ → 33]“). 5.4.2.2 Calibration pins The calibration pins are used when calibrating the instrument sets (see Fragment CEREC MC XL calibration pins "Calibrating the unit [ → 28]“). 61 46 885 D 3439 D 3439.201.02.19.02 12.2014... -
Page 16: Torque Wrench
To insert or replace the instruments or calibration pins, use the following torque wrench. Instrument Usage Torque wrench Clamping format of Fragment inLab MC XL+CEREC MC XL 300000 torque wrench the force transmission Step Bur 12 S 6240167 Grinding Triangular Cyl. -
Page 17: Display Description
Sirona Dental Systems GmbH 5 Installation and startup Operating Instructions CEREC MC XL 5.4 Commissioning 5.4.3 Display description These operating instructions describe how to operate the unit by executing and confirming commands via your PC. "Start" "Stop" "Cancel" "OK" You can also confirm commands such as directly on the display of your grinding unit. -
Page 18: Inserting The Grinding Chamber Sieve
5.4.6 Connecting the bar code reader The bar code reader is optional for the basic CEREC MC XL device. Fragment Notes on CEREC MC XL up to 199000 The bar code reader is included with the CEREC MC XL device as standard in the premium package. -
Page 19: Installation
Sirona Dental Systems GmbH 5 Installation and startup Operating Instructions CEREC MC XL 5.4 Commissioning 5.4.7 Installation 5.4.7.1 Connecting to the PC via LAN An Ethernet connection is located to the rear of the unit, which can be used to connect the PC to the grinding unit. Use a network cable to do this (LAN connection). -
Page 20: Sirona Dental Systems Gmbh
5 Installation and startup Sirona Dental Systems GmbH 5.4 Commissioning Operating Instructions CEREC MC XL Search for unit manually The unit is connected to the PC via a LAN cable or via WLAN. Prerequisite worldwide "Configuration" 1. Click the button in the system menu. -
Page 21: Connecting To The Pc Via Wlan (Option)
Sirona Dental Systems GmbH 5 Installation and startup Operating Instructions CEREC MC XL 5.4 Commissioning 5.4.7.4 Connecting to the PC via WLAN (option) Making the connection Connect access point ➢ Connect the LAN port A of the grinding unit and the access point, using the network cable (10m, Order No.: 61 51 521). -
Page 22: Operating Several Grinding Units Over One Access Point
● 1x LAN switch (e.g. Netgear ProSave 5 Port Gigabit Switch, Model GS105) ● 1x LAN network cable (10m, Sirona Order No.: 61 51 521). 1. Connect the LAN port (A) of the MC XL grinding unit with the LAN switch using the included 10m LAN network cable. -
Page 23: Filling The Water Tank
Sirona Dental Systems GmbH 5 Installation and startup Operating Instructions CEREC MC XL 5.4 Commissioning 5.4.8 Filling the water tank NOTICE Note on the tank cap opener Using the tank cap opener If you find the tank cap, tank drain or filter insert hard to open by hand, use the tank cap opener (see "Using the tank cap opener"... -
Page 24: Cerec Mc Xl With Premium Package
10. Fill the water tank up again until the filter insert is completely immersed (up to the bottom edge of the cap thread). 5.4.8.2 CEREC MC XL with premium package inLab water tank Water tank Filter inserts... -
Page 25: Switching The Unit On And Off
Sirona Dental Systems GmbH 5 Installation and startup Operating Instructions CEREC MC XL 5.4 Commissioning 7. Push the water tank back into the housing. 8. Switch the unit on (see Switching the unit ON and OFF [ → 25]). 9. Switch the pump on (press the "Pump"... -
Page 26: Repacking
5 Installation and startup Sirona Dental Systems GmbH 5.5 Repacking Operating Instructions CEREC MC XL "Pump" You can start or stop the water pump by pressing the button (C). This enables you to drain the water circuit without connecting to the PC (e.g. -
Page 27: Operation
Sirona Dental Systems GmbH 6 Operation Operating Instructions CEREC MC XL 6.1 Configuration (CEREC MC XL) Operation CAUTION Risk of injury on calibration pins/instruments If you reach into the grinding chamber (e.g.: when inserting/removing a ceramic block, changing instruments or inserting/removing a calibration phantom), you may injure your hand on the calibration pins/instruments. -
Page 28: Calibrating The Unit
6 Operation Sirona Dental Systems GmbH 6.2 Calibrating the unit Operating Instructions CEREC MC XL Calibrating the unit NOTICE Calibration tools Use only the supplied calibration tools Use only the supplied calibration pins and the corresponding calibration phantom when calibrating the grinding unit. -
Page 29: Sirona Dental Systems Gmbh
Sirona Dental Systems GmbH 6 Operation Operating Instructions CEREC MC XL 6.2 Calibrating the unit Inserting the calibration pins and phantom 1. Press the catch of the grinding chamber door and open the door. 2. Loosen the instruments with the torque wrench and remove them. -
Page 30: Sirona Dental Systems Gmbh
6 Operation Sirona Dental Systems GmbH 6.2 Calibrating the unit Operating Instructions CEREC MC XL Inserting instruments 1. Open the grinding chamber door following calibration. 2. Loosen the calibration pins with the torque wrench and remove them. 3. Loosen the ball pressure screw. -
Page 31: Production Process
Sirona Dental Systems GmbH 6 Operation Operating Instructions CEREC MC XL 6.3 Production process Production process 6.3.1 Process types Various process types are available for production purposes. These vary in terms of the type of materials to be processed and the instruments to be used. -
Page 32: Milling
Operating Instructions CEREC MC XL 6.3.1.2 Milling The milling option is available from the following serial numbers onwards: Machine type Serial number Fragment table CEREC MC XL 199000 milling inLab MC XL 129001 CEREC MC XL 129001 CEREC MC XL Premium Package... -
Page 33: Milling Models
The "Milling models" option can only be used if you have one of the following machines: - inLab MC XL from serial number 120 000 - CEREC MC XL Premium Package For milling purposes, use the following instruments as well as the appropriate torque wrench:... -
Page 34: Preparations
6 Operation Sirona Dental Systems GmbH 6.3 Production process Operating Instructions CEREC MC XL 6.3.2 Preparations ✔ Download or design a restoration (see operator's manual). Fragment Preparations ✔ "Milling" "Select Material" When the option is activated, in the material "Grinding" "Milling" selection step, you can choose between the manufacturing processes for plastic and zirconium oxide materials. -
Page 35: Terminating The Production Process
Sirona Dental Systems GmbH 6 Operation Operating Instructions CEREC MC XL 6.3 Production process 6.3.4 Terminating the production process 1. When the production process has been completed, open the grinding Fragment Terminating the production process chamber door. 2. Remove the restoration. WARNING... -
Page 36: Information Regarding The Quality Seal
Sirona Dental Systems GmbH 6.4 Entering the bar code Operating Instructions CEREC MC XL 6.3.5 Information regarding the quality seal (CEREC MC XL with premium package) Proper selection and processing of the material are decisive for the long- Fragment Seal of approval term clinical success of the restoration, especially in the case of zirconia. -
Page 37: Using The Manual Block Fixing
Sirona Dental Systems GmbH 6 Operation Operating Instructions CEREC MC XL 6.5 Using the manual block fixing Using the manual block fixing Store the block clamp tool in the corresponding holder (see also "Gluing on the tool holder" [ → 18]). You can attach the holder to a suitable location with the adhesive pad. -
Page 38: Sirona Dental Systems Gmbh
6 Operation Sirona Dental Systems GmbH 6.5 Using the manual block fixing Operating Instructions CEREC MC XL Blocks with 6 mm diameter block holders Fastening the block NOTICE Fasten the block tightly If the block is not tightened sufficiently, this may result in falsification of the production result and fracturing of its ceramic material. -
Page 39: Service
NOTICE Cleaning intervals CEREC MC XL premium package Machine care (CEREC MC XL with premium package) Interval: Once a week or after every 4th water change ➢ Change the filter (see Changing the filter [ → 52]) ➢... -
Page 40: Changing The Water
Fragment Do not confuse CEREC MC XL Do not confuse the block screw with the ball pressure screw When operating a CEREC 3 grinding unit and a CEREC MC XL grinding unit in the same room, be careful not to confuse the block screw of the CEREC 3 with the ball pressure screw of the CEREC MC XL. -
Page 41: Sirona Dental Systems Gmbh
Sirona Dental Systems GmbH 7 Service Operating Instructions CEREC MC XL 7.1 Changing the water Preventing odors All grinding additives contain a biologically degradable preservative. Despite this, however, odors may still develop under unfavorable conditions. Observe the following: ● Change the water at least once a week. -
Page 42: Changing The Water (Cerec Mc Xl Basic)
Sirona Dental Systems GmbH 7.1 Changing the water Operating Instructions CEREC MC XL 7.1.2 Changing the water (CEREC MC XL Basic) To change the water, proceed as follows: Fragment Change water (CEREC MC XL Basic) ✔ The unit is switched on. -
Page 43: Changing The Water (Cerec Mc Xl With Premium Package)
Sirona Dental Systems GmbH 7 Service Operating Instructions CEREC MC XL 7.1 Changing the water 7.1.3 Changing the water (CEREC MC XL with premium package) NOTICE Fragment Change the filter inserts regularly Change the filter inserts regularly! Replace both filter inserts after every fourth water change. -
Page 44: Procedure For Processing Base Metal Materials
7 Service Sirona Dental Systems GmbH 7.1 Changing the water Operating Instructions CEREC MC XL NOTICE Foaming not permissible! If any cleaning agents are used, this will create foam, which is not permitted. Do not use any cleaning agents. 10. Add approx. 75 ml of DENTATEC to the tank. -
Page 45: Sirona Dental Systems Gmbh
Sirona Dental Systems GmbH 7 Service Operating Instructions CEREC MC XL 7.1 Changing the water IMPORTANT Once the water has been changed, the collecting vessel will contain a mixture of base-metal slurry (in mixed operation, there will also be other materials) and water. The machining particles dispersed in the water will settle to the bottom of the collecting vessel within 24h, resulting in a clear separation between the water and the settled solid matter. -
Page 46: Sirona Dental Systems Gmbh
7 Service Sirona Dental Systems GmbH 7.1 Changing the water Operating Instructions CEREC MC XL 4. Close the drain opening (D) using your thumbs and pan the tank vigorously 5x in circular movements again. 5. Empty approx. 1/3 of the contents of the tank into the collecting vessel provided. -
Page 47: Instruments
"Bur table" Select your product there and then open the document. CEREC MC XL with premium package 7.2.1.2 For a continuously updated table of approved instrument combinations, Fragment Instrument combinations "www.sirona.com" please visit the . -
Page 48: Sirona Dental Systems Gmbh
7 Service Sirona Dental Systems GmbH 7.2 Instruments Operating Instructions CEREC MC XL "Start" 5. Click on the button. The motors travel to the change position for the instruments. The dialog box for changing the instruments opens. 6. Press the catch of the grinding chamber door and open the door. -
Page 49: Care, Cleaning Agents, And Disinfectants
Approved care, cleaning, and disinfecting agents Approved care, cleaning, and disinfecting agents Use only care, cleaning and disinfecting agents approved by Sirona! For a continuously updated list of approved agents, please visit Care, cleaning, and disinfecting agents, with REF number "www.sirona.com"... -
Page 50: Cleaning Surfaces
7 Service Sirona Dental Systems GmbH 7.4 Cleaning surfaces Operating Instructions CEREC MC XL Cleaning surfaces NOTICE Do not allow liquids to run into the ventilation slots! 7.4.1 Disinfecting Wipe surfaces down with a surface disinfectant (wiping disinfectant). Observe the manufacturer’s instructions regarding restrictions for use. -
Page 51: Replacing The Main Fuses
Sirona Dental Systems GmbH 7 Service Operating Instructions CEREC MC XL 7.5 Replacing the main fuses Replacing the main fuses Warning: main fuse WARNING Electric shock Disconnect the power plug at the unit end before replacing the fuses. NOTICE Fuse type Use only fuses of the same type in the fuse holder! -
Page 52: Changing The Filter
7 Service Sirona Dental Systems GmbH 7.6 Changing the filter Operating Instructions CEREC MC XL Changing the filter 7.6.1 CEREC MC XL Basic NOTICE Change the filter regularly Clean the filter regularly and change it immediately when damaged. Otherwise, change it every 3 months. -
Page 53: Cerec Mc Xl With Premium Package
Cleaning the filter Clean the filter approx. every 12 to 15 units under running water, but at least with every water change. 7.6.2 CEREC MC XL with premium package NOTICE Fragment Changing the filter regularly inLab+premium package Change the filter inserts regularly! Replace both filter inserts once a week or after every fourth water change. -
Page 54: Procedure For All Materials Except For Base Metals
7 Service Sirona Dental Systems GmbH 7.6 Changing the filter Operating Instructions CEREC MC XL 7.6.2.1 Procedure for all materials except for base metals ✔ The tank is empty, see "Removing water from the unit“. Fragment Changing the filter inLab+premium package 1. Pull out the water tank at the front of the unit. -
Page 55: Sirona Dental Systems Gmbh
Sirona Dental Systems GmbH 7 Service Operating Instructions CEREC MC XL 7.6 Changing the filter Opening the external water tank Opening the external water tank NOTICE Risk of damage to the hoses If you pull on the hose, you may damage it. -
Page 56: Sirona Dental Systems Gmbh
7 Service Sirona Dental Systems GmbH 7.6 Changing the filter Operating Instructions CEREC MC XL Preparing the external water tank Preparing the external water tank 1. Insert the plastic bag into the external water tank in such a way that it protrudes by around 3-4 cm. -
Page 57: Sirona Dental Systems Gmbh
Sirona Dental Systems GmbH 7 Service Operating Instructions CEREC MC XL 7.6 Changing the filter Installing the filters Installing the filters 1. Press down the 2 filters until they click into place on the lid. 2. Insert the lid with the filters into the container. -
Page 58: Removing Water From The Unit
7 Service Sirona Dental Systems GmbH 7.7 Removing water from the unit Operating Instructions CEREC MC XL Removing water from the unit 7.7.1 Procedure for all materials except for base metals You must remove water from the unit if you will not be using it for a long period of time or wish to transport it. -
Page 59: Using The Tank Cap Opener
Sirona Dental Systems GmbH 7 Service Operating Instructions CEREC MC XL 7.8 Using the tank cap opener Using the tank cap opener NOTICE Risk of damage to the tank Use the tank cap opener only for opening the tank cap, tank drain and filter insert. -
Page 60: Sirona Dental Systems Gmbh
7 Service Sirona Dental Systems GmbH 7.8 Using the tank cap opener Operating Instructions CEREC MC XL Opening the tank drain ✔ The water tank has been pulled out. ➢ Place the tank cap opener on the filter drain as shown, and take off the filter drain by unscrewing it counter-clockwise. -
Page 61: Technical Description
● Step Bur 12 S ● Step Bur 20 (only for CEREC MC XL with premium package) ● Cyl. Pointed Bur 12 S ● Cyl. Pointed Bur 20 (only for CEREC MC XL with premium package) Fragment Milling instruments 61 46 885 D 3439... -
Page 62: Sirona Dental Systems Gmbh
8 Technical description Sirona Dental Systems GmbH 8.2 Grinding and milling unit Operating Instructions CEREC MC XL Milling instruments ● Shaper 25 RZ ● Shaper 25 (only for milling models) ● Finisher 10 61 46 885 D 3439 D 3439.201.02.19.02 12.2014... -
Page 63: Technical Data
Sirona Dental Systems GmbH 8 Technical description Operating Instructions CEREC MC XL 8.2 Grinding and milling unit 8.2.2 Technical data Type designation Grinding unit CEREC MC XL Rated line voltage 100 V - 230 V AC Rated power frequency 50/60 Hz Rated current 1.5 - 3.5 A... -
Page 64: Disposal
9 Disposal Sirona Dental Systems GmbH Operating Instructions CEREC MC XL Disposal Your product is marked with the adjacent symbol. Within the European Environmentally sound disposal Economic Area, this product is subject to Directive 2002/96/EC as well as the corresponding national laws. This directive requires environmentally sound recycling / disposal of the product. -
Page 65: Index
Sirona Dental Systems GmbH Index Operating Instructions CEREC MC XL Index Bar code reader, 13 Grinding instruments, 61 Building installation, 9 Grinding speed, 61 Grinding unit Display, 17 Calibration tools Grinding chamber, 14 Calibration phantom, 28 Calibration pins, 28 Storage, 30... - Page 66 Index Sirona Dental Systems GmbH Operating Instructions CEREC MC XL Rated current, 63 Rated line voltage, 63 Repair, 9 Safety information, 6 Scope of supply, 26 Temperature range, 63 Transport, 11 Type designation, 63 Unit installation automatically, 19 Unit removal...
- Page 68 tÉ=êÉëÉêîÉ=íÜÉ=êáÖÜí=íç=ã~âÉ=~åó=~äíÉê~íáçåë=ïÜáÅÜ=ã~ó=ÄÉ=êÉèìáêÉÇ=ÇìÉ=íç=íÉÅÜåáÅ~ä=áãéêçîÉãÉåíëK «=páêçå~=aÉåí~ä=póëíÉãë=dãÄe=OMMSJOMNQ péê~ÅÜÉW ÉåÖäáëÅÜ mêáåíÉÇ=áå=dÉêã~åó a=PQPVKOMNKMOKNVKMO NOKOMNQ ûKJkêKW= NOM=MMR páêçå~=aÉåí~ä=póëíÉãë=dãÄe áå=íÜÉ=rp^W SN=QS=UUR=a=PQPV c~Äêáâëíê~≈É=PN páêçå~=aÉåí~ä=póëíÉãë=ii` lêÇÉê=kç aJSQSOR=_ÉåëÜÉáã QUPR=páêçå~=aêáîÉI=pìáíÉ=NMM `Ü~êäçííÉI=k`=OUOTP dÉêã~åó ïïïKëáêçå~KÅçã...
Need help?
Do you have a question about the CEREC MC XL and is the answer not in the manual?
Questions and answers
how often should the air filter be changed