3xLogic VX-2A-B-IWD User Manual
Visix v-series all-in-one cameras
Hide thumbs
Also See for VX-2A-B-IWD:
- Quick start manual (13 pages) ,
- Hardware and installation manual (80 pages)

Related Manuals for 3xLogic VX-2A-B-IWD


Summary of Contents for 3xLogic VX-2A-B-IWD
-
Page 1: User Manual
User Manual| VISIX V-Series All-in-One Cameras VISIX V-Series All-in-One Cameras User Manual VIGIL v8.8 All-In-One Software 10225 Westmoor Drive, Suite 300, Westminster, CO 80021 | www.3xlogic.com | (877) 3XLOGIC... - Page 2 VIGIL software and camera firmware versions. The content of this guide is subject to change without notice. The manual will be amended if there are any hardware updates or changes. 10225 Westmoor Drive, Suite 300, Westminster, CO 80021 | www.3xlogic.com | (877) 3XLOGIC...
-
Page 3: Regulatory Information
(Cd), lead (Pb), or mercury (Hg). For proper recycling, return the battery to your supplier or to a designated collection point. For more information see: www.recyclethis.info 10225 Westmoor Drive, Suite 300, Westminster, CO 80021 | www.3xlogic.com | (877) 3XLOGIC... -
Page 4: Safety Instruction
-30°C ~ 60°C, or -40°C ~ 60°C if the camera model has an “H” in its suffix), dusty or damp environment, and do not expose it to high electromagnetic radiation. To avoid heat accumulation, good ventilation is required for a proper operating environment. 10225 Westmoor Drive, Suite 300, Westminster, CO 80021 | www.3xlogic.com | (877) 3XLOGIC... - Page 5 isolate the lens from the IR LEDS. Fasten the dome cover to camera body so that the foam ring and the dome cover are attached seamlessly. 10225 Westmoor Drive, Suite 300, Westminster, CO 80021 | www.3xlogic.com | (877) 3XLOGIC...
-
Page 6: Table Of Contents
VIGIL Client - Adding a V-Series All-in-One Camera ................ 32 VIGIL VCM - Adding a V-Series All-in-One Camera ................33 3xLOGIC View Lite II Mobile (Android and iOS) – Adding a V-Series All-in-One Camera ....34 3xCLOUD Cross-Platform Web Client – Adding a V-Series All-in-One Camera ......... 35 4.6 R... - Page 7 Adding or Modifying an Encoder Profile ..................63 Stream.............................. 64 Stream Settings ..........................65 Privacy Mask ............................ 66 Video Out (BNC) ..........................66 7.3 E ....................... 67 VENT ONFIGURATION 10225 Westmoor Drive, Suite 300, Westminster, CO 80021 | www.3xlogic.com | (877) 3XLOGIC...
- Page 8 Zones and Rules Settings – Zones & Rules Tab ................104 Create Zone ............................ 106 Create Line (Tripwire)........................108 Create Counter ..........................111 Zones and Rules Settings – Logical Rules Tab ................112 10225 Westmoor Drive, Suite 300, Westminster, CO 80021 | www.3xlogic.com | (877) 3XLOGIC...
- Page 9 Activate ............................136 7.9 A ........................... 137 BOUT Information ............................ 137 License ............................138 8 IP ADDRESS – HEXADECIMAL/DECIMAL CONVERSION TABLE ............139 9 REVISION HISTORY ......................... 140 10225 Westmoor Drive, Suite 300, Westminster, CO 80021 | www.3xlogic.com | (877) 3XLOGIC...
-
Page 10: Visix V-Series All-In-One Cameras
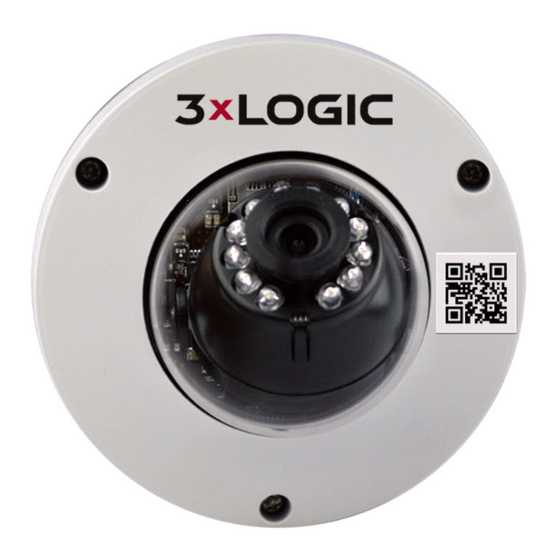
This makes these All-in-One cameras compatible with 3xLOGIC’s existing software suite including VIGIL Client, VIGIL VCM, VIGIL View Lite II, and VIGIL Cloud applications. Simple plug-and-play installation enables camera access using a standard web browser (Microsoft IE/Edge required for ActiveX Control), VIGIL Client, or through a mobile device or tablet utilizing the easy-to-use QR code quick setup. -
Page 11: Identifying The Camera On Your Network
MAC address hex values, however, the alternative method, which is recommended by 3xLOGIC, is to use the 3xLOGIC (VSX-IP) Camera Setup Utility. The utility makes detection and configuration of VISIX camera’s in any network environment simple and easy, regardless of network complexity. -
Page 12: Automatically Identify Camera Ip Address With 3Xlogic Camera Setup Utility
VIGIL Software v8.8 User Manual | VISIX V-Series All-in-One Cameras AUTOMATICALLY IDENTIFY CAMERA IP ADDRESS WITH 3XLOGIC CAMERA SETUP UTILITY Using the 3xLOGIC Camera (VSX-IP) Setup Utility is recommended for any network environment as it will find all VISIX cameras across multiple subnet masks, utilizing mDNS search discovery. Camera information such as IP Address, Subnet Mask and Gateway Settings will be displayed and can be edited from this utility. -
Page 13: Video Preview Using The 3Xlogic Camera Setup Utility
VIDEO PREVIEW USING THE 3XLOGIC CAMERA SETUP UTILITY Amongst its many functions, the 3xLOGIC Camera Setup Utility can provide the user with a video preview from a currently selected device. This can be used to quickly confirm the correct camera has been located, and that it is successfully streaming/recording footage. -
Page 14: Accessing The Camera Browser Interface
Figures described above are from Windows 7, Internet Explorer 9 environment. Upon completion, the camera’s web/browser interface will be fully accessible for video viewing and settings configuration. 10225 Westmoor Drive, Suite 300, Westminster, CO 80021 | www.3xlogic.com | (877) 3XLOGIC... -
Page 15: Quick Start
This will open the camera’s Live Viewer. Figure 4-2: Live Tab For more information on the Live tab user interface and options, see Section 6.1: Live Tab. 10225 Westmoor Drive, Suite 300, Westminster, CO 80021 | www.3xlogic.com | (877) 3XLOGIC... -
Page 16: Viewing Playback Video
Click the context arrow to reveal all search results for the selected day. All search Conditions will be enabled by default. All available files, with an included thumbnail and file information, will be visible. Figure 4-4: Search Result Thumbnails 10225 Westmoor Drive, Suite 300, Westminster, CO 80021 | www.3xlogic.com | (877) 3XLOGIC... - Page 17 Use the navigation controls at the bottom of the page to navigate multiple pages of search results. For more information on the Search (Playback) Tab interface and functionality, see Section 6.2: Search (Playback) Tab. 10225 Westmoor Drive, Suite 300, Westminster, CO 80021 | www.3xlogic.com | (877) 3XLOGIC...
-
Page 18: Configure Vigil Connect Alias
Fill in the VIGIL Connect Alias field with an alias of your choosing. Click Apply to save the new alias. Your VISIX V-Series All-in-One camera can now be networked with other 3xLOGIC utilities and VIGIL suite applications (VIGIL Client, VIGIL VCM, View Lite II(Android and iOS), 3xCLOUD, etc…) using only the camera’s VIGIL Connect Alias. -
Page 19: Configure A Video Analytics (Vca) Rule (Analytics License Required)
(people, car, etc…) size. Proper calibration of the camera is required to ensure accurate analytics counts and tracking. To begin calibration: Steps: Navigate to the Setup (Advanced) Tab > VCA > Calibration settings page. 10225 Westmoor Drive, Suite 300, Westminster, CO 80021 | www.3xlogic.com | (877) 3XLOGIC... - Page 20 Pause Pause the live preview image on the current frame. When you have calibrated the camera to your satisfaction, click Apply to save the new calibration settings. 10225 Westmoor Drive, Suite 300, Westminster, CO 80021 | www.3xlogic.com | (877) 3XLOGIC...
-
Page 21: Vca Analytics Rule Configuration
B. In the above example, Direction A was renamed “Counting Wire 1 - Out” and Direction B was renamed “Counting Wire 1 - In” for easy recognition. Click Apply at the bottom of the window to save the newly configured counting line. 10225 Westmoor Drive, Suite 300, Westminster, CO 80021 | www.3xlogic.com | (877) 3XLOGIC... - Page 22 12). Click Apply to save the new counter settings. The tripwire should now count both directions and display counts via the configured counters. For instructions on previewing your analytics overlay, see Previewing Analytics Overlay. 10225 Westmoor Drive, Suite 300, Westminster, CO 80021 | www.3xlogic.com | (877) 3XLOGIC...
-
Page 23: Configuring A Dwell Timer Zone
An analytics dwell event(alarm) will now trigger whenever an object has spent more than 5 seconds in the defined zone. For instructions on previewing your analytics overlay, navigate to Previewing Analytics Overlay. 10225 Westmoor Drive, Suite 300, Westminster, CO 80021 | www.3xlogic.com | (877) 3XLOGIC... - Page 24 In the Live viewer, right-click and select Show Counter and Show Zones to overlay counters and zones/lines. Figure 4-12: Example 1 Counting Line (Tripwire) Analytics Overlay Figure 4-13: Example 2 - Dwell Timer Zone Analytics Overlay 10225 Westmoor Drive, Suite 300, Westminster, CO 80021 | www.3xlogic.com | (877) 3XLOGIC...
-
Page 25: Integrating All-In-One Camera With Vigil Server Using Vigil Analytics Bridge
3xLOGIC All-in-One camera. INSTALLATION OF ANALYTICS BRIDGE The utilization of a 3xLOGIC All-in-One camera in VIGIL Server requires the installation of the VIGIL Analytics Bridge program on the same system as VIGIL Server. The Analytics Bridge installer can be... -
Page 26: Vigil Server Configuration
Click the Settings button to launch the Network Camera Settings window. If Network Camera was not checked before the previous step, the Network Camera Settings window will have deployed automatically. Figure 4-16: Configuring a Network Camera 10225 Westmoor Drive, Suite 300, Westminster, CO 80021 | www.3xlogic.com | (877) 3XLOGIC... -
Page 27: Vigil Server Configuration - Network Camera Settings
VIGIL Software v8.8 User Manual | VISIX V-Series All-in-One Cameras VIGIL SERVER CONFIGURATION – NETWORK CAMERA SETTINGS The Network Camera Settings window is where the direct configuration of the 3xLOGIC All-in-One camera will take place. Steps: Fill in all the required information and press OK. -
Page 28: Vigil Analytics Bridge - Launching The Vigil Analytics Bridge
VIGIL Software v8.8 User Manual | VISIX V-Series All-in-One Cameras VIGIL ANALYTICS BRIDGE – LAUNCHING THE VIGIL ANALYTICS BRIDGE Once the 3xLOGIC All-in-One camera has been configured in VIGIL Server, it must be configured in the VIGIL Analytics Bridge. Steps: To launch the Analytics Bridge, navigate to Start >... -
Page 29: Configuring A 3Xlogic All-In-One Camera In The Vigil Analytics Bridge
Status camera is enabled or disabled. Steps: To begin configuration of the 3xLOGIC All-in-One camera within VIGIL Analytics Bridge, click Add Device. Figure 4-21: Adding a Device to VIGIL Analytics Bridge 10225 Westmoor Drive, Suite 300, Westminster, CO 80021 | www.3xlogic.com | (877) 3XLOGIC... - Page 30 VIGIL Software v8.8 User Manual | VISIX V-Series All-in-One Cameras The Add/Edit Camera window will appear, shown below. Fill in all the required information regarding the 3xLOGIC All-in-One camera and press Load Device for a video preview from the camera.
- Page 31 Figure 4-23: VIGIL Analytics Bridge - Saving Changes Configuration is now complete. The VIGIL Server system will now record video and data based on the 3xLOGIC All-in-One camera’s-detected analytics events. 10225 Westmoor Drive, Suite 300, Westminster, CO 80021 | www.3xlogic.com | (877) 3XLOGIC...
-
Page 32: Adding All-In-One Camera To Vigil Suite Utilities
VIGIL Client viewer. For more information on configuring VIGIL Servers/V-Series All-in-One camera in VIGIL Client, please see Section 5.1 of the VIGIL Client Users Guide. 10225 Westmoor Drive, Suite 300, Westminster, CO 80021 | www.3xlogic.com | (877) 3XLOGIC... -
Page 33: Vigil Vcm - Adding A V-Series All-In-One Camera
VIGIL Servers/VISIX All-in-One cameras. If you experience issues connecting to the All-in-One camera in VCM, confirm the alias that has been entered is correct. If all settings appear to be correct, contact 3xLOGIC for further instruction or reference Tech Tip 140028 VIGIL Connect Troubleshoot Guide for troubleshooting tips. -
Page 34: 3Xlogic View Lite Ii Mobile (Android And Ios) - Adding A V-Series All-In-One Camera
3XLOGIC VIEW LITE II MOBILE (ANDROID AND IOS) – ADDING A V-SERIES ALL-IN-ONE CAMERA Steps: To interface a VISIX All-in-One camera with 3xLOGIC’s View Lite II mobile app, launch the View Lite II app on your mobile device (Android OS is pictured in the below screenshot, however, the process is identical in the iOS version). -
Page 35: 3Xcloud Cross-Platform Web Client - Adding A V-Series All-In-One Camera
The All-in-One camera should now be available to add to your 3xCLOUD layout. If you experience connection issues, confirm the connection info (IP Address and Port/VIGIL Connect Alias) you entered is correct. If all settings appear to be correct, contact 3xLOGIC for further instruction or reference Tech Tip 140028 VIGIL Connect Troubleshoot Guide for troubleshooting tips. -
Page 36: Reboot And Reset To Factory Default Procedures
Release the button after 10 seconds. Wait for the system to reboot. Factory Default Connection Settings IP address 192.168.xx.yy Network Mask 255.255.0.0 Gateway 192.168.0.1 Username Admin Password 12345 10225 Westmoor Drive, Suite 300, Westminster, CO 80021 | www.3xlogic.com | (877) 3XLOGIC... -
Page 37: Reset To Factory Default Settings Via Camera Web Interface
Navigate to Basic Tab> Camera Configuration Menu > Maintenance settings form. Click the Reset Camera Settings button. You will be prompted to confirm the factory reset process. Click OK to proceed. 10225 Westmoor Drive, Suite 300, Westminster, CO 80021 | www.3xlogic.com | (877) 3XLOGIC... -
Page 38: Basic Tab
Internet Connection Status The Storage Status section provides at-a-glance information regarding: Storage Device Status Total Capacity Storage Status Free Space Recorded Footage Date/Time Range 10225 Westmoor Drive, Suite 300, Westminster, CO 80021 | www.3xlogic.com | (877) 3XLOGIC... -
Page 39: Camera Configuration Menu
From the Time page, a user may view the camera’s current time or choose the camera’s time zone. After finishing configuration, click Apply to save the new settings. 10225 Westmoor Drive, Suite 300, Westminster, CO 80021 | www.3xlogic.com | (877) 3XLOGIC... -
Page 40: Users
Confirm Password entered password. Choose a User Group for User Group the user. Figure 5-4: Add a User After finishing configuration, click Apply to save the new settings. 10225 Westmoor Drive, Suite 300, Westminster, CO 80021 | www.3xlogic.com | (877) 3XLOGIC... -
Page 41: Modify A User
Set the camera’s maximum Frames-Per-Second value. A higher FPS is generally Max FPS reserved for main stream, while a lower, less data-intensive value is generally reserved for sub stream. 10225 Westmoor Drive, Suite 300, Westminster, CO 80021 | www.3xlogic.com | (877) 3XLOGIC... -
Page 42: Network
Enter in Primary and Secondary DNS Server connection information. Select the VIGIL Data Port. 22801 is the default and is the recommended Port Configuration port number by 3xLOGIC. 10225 Westmoor Drive, Suite 300, Westminster, CO 80021 | www.3xlogic.com | (877) 3XLOGIC... -
Page 43: Maintenance
Enable automatic firmware upgrade. The camera will poll an update Automatic Firmware cloud server hosted by 3xLOGIC for new firmware and will apply an Upgrade update when available. 10225 Westmoor Drive, Suite 300, Westminster, CO 80021 | www.3xlogic.com | (877) 3XLOGIC... -
Page 44: Storage Configuration Menu
The storage disk format of the selected device. Total Capacity The totally storage capacity of the selected device. Free Space Lists the remaining free space on the selected device. Status Current storage device status. 10225 Westmoor Drive, Suite 300, Westminster, CO 80021 | www.3xlogic.com | (877) 3XLOGIC... -
Page 45: Recording Device Control
Mount the currently selected device. This option is only available if the Mount currently selected device is inactive. Eject the currently selected device. This option is only available if the selected Eject device is mounted. 10225 Westmoor Drive, Suite 300, Westminster, CO 80021 | www.3xlogic.com | (877) 3XLOGIC... -
Page 46: Live And Search (Playback) Tabs
LIVE VIEWER – OPTIONS PANEL – OPTIONS TAB Steps: Clicking the Panel button and selecting the Options tab will open the Options panel. Figure 6-3: Live Tab Options 10225 Westmoor Drive, Suite 300, Westminster, CO 80021 | www.3xlogic.com | (877) 3XLOGIC... - Page 47 Section 0 for more detailed information regarding recording settings. Snapshot – Edit snapshot settings including snapshot export destination (click Browse and select a destination on your local system), and filename prefix. 10225 Westmoor Drive, Suite 300, Westminster, CO 80021 | www.3xlogic.com | (877) 3XLOGIC...
-
Page 48: Live Viewer - Options Panel - Status Tab
Select the Search tab link at the top-left of the camera’s browser interface. Figure 6-5: Opening the Search (Playback) Tab This will open the Playback Search form and viewing area. Figure 6-6: Search (Playback) Tab 10225 Westmoor Drive, Suite 300, Westminster, CO 80021 | www.3xlogic.com | (877) 3XLOGIC... - Page 49 Figure 6-7: Visual Search Result Timeline and Search Result Thumbnails Click the context arrow to reveal all search results as thumbnails. 10225 Westmoor Drive, Suite 300, Westminster, CO 80021 | www.3xlogic.com | (877) 3XLOGIC...
- Page 50 A file must be selected and manually started to begin the Playback Next File sequence. Use the navigation controls at the bottom of the page to navigate multiple pages of search results. 10225 Westmoor Drive, Suite 300, Westminster, CO 80021 | www.3xlogic.com | (877) 3XLOGIC...
-
Page 51: Setup (Advanced) Tab
Confirm Password entered password. Choose a User Group for User Group the user. Figure 7-3: Add a User After finishing configuration, click Apply to save the new settings. 10225 Westmoor Drive, Suite 300, Westminster, CO 80021 | www.3xlogic.com | (877) 3XLOGIC... -
Page 52: Modify A User
Opening the Setup Tab>Basic Configuration drop-down menu and clicking the Users link will open the Users settings page. Figure 7-5: Setup Tab – Basic Configuration Menu – TCP/IP Settings Form 10225 Westmoor Drive, Suite 300, Westminster, CO 80021 | www.3xlogic.com | (877) 3XLOGIC... -
Page 53: Basic Configuration Menu - Tcp/Ip Settings - Ipv6 Settings Configuration
When the enable IPv6 box is checked, IPv6 settings fields will deploy (pictured below). Figure 7-6: Setup Tab – Basic Configuration Menu – TCP/IP Settings – IPv6 Settings 10225 Westmoor Drive, Suite 300, Westminster, CO 80021 | www.3xlogic.com | (877) 3XLOGIC... -
Page 54: Date & Time
From the Date & Time settings page, a user may edit a camera’s time settings including time zone, time server, date and time format and time synchronization source. 10225 Westmoor Drive, Suite 300, Westminster, CO 80021 | www.3xlogic.com | (877) 3XLOGIC... -
Page 55: Stream
Stream settings page. NOTE: Advanced stream settings can also be accessed from the Setup Tab>Video Menu> Stream link. Figure 7-8: Setup Tab – Basic Configuration Menu – Stream Settings 10225 Westmoor Drive, Suite 300, Westminster, CO 80021 | www.3xlogic.com | (877) 3XLOGIC... -
Page 56: Stream Settings
Click the Enable button to enable camera still shots via the camera browser interface (VIGIL utilities interfaced with the device such as VIGIL Client can take snapshots regardless of the camera settings). 10225 Westmoor Drive, Suite 300, Westminster, CO 80021 | www.3xlogic.com | (877) 3XLOGIC... -
Page 57: Focus Assist
Click the Apply button at the bottom of the settings form (above the video preview) to apply settings changes. Click the Preview button to toggle the video preview on/off. Click the Pop- Up button to open the preview in a separate browser window. 10225 Westmoor Drive, Suite 300, Westminster, CO 80021 | www.3xlogic.com | (877) 3XLOGIC... -
Page 58: General Settings
Video Transformation settings may be automatically disabled depending on the presence of other camera settings. Conflicting settings will be listed (orange text, below). Figure 7-13: Setup Tab – Video Menu – Camera Settings – Video Transform 10225 Westmoor Drive, Suite 300, Westminster, CO 80021 | www.3xlogic.com | (877) 3XLOGIC... -
Page 59: Exposure Settings
Increasing this setting will allow for a clearer picture in Digital Slow Shutter darker environment by allowing more than the normal amount of light into the camera lens. 10225 Westmoor Drive, Suite 300, Westminster, CO 80021 | www.3xlogic.com | (877) 3XLOGIC... -
Page 60: Digital Wide Dynamic Range Settings
Set the Day to Night/Night to Day light thresholds for the automatic Day to Night / Night to day/night mode. Default values for DtN and NtD are 1 and 3, Day Level respectively. 10225 Westmoor Drive, Suite 300, Westminster, CO 80021 | www.3xlogic.com | (877) 3XLOGIC... -
Page 61: White Balance Settings
Video stabilization settings may be automatically disabled depending on the presence of other camera settings. Conflicting settings will be listed (orange text, below). Figure 7-19: Setup Tab – Video Menu – Camera Settings – Video Stabilization Settings 10225 Westmoor Drive, Suite 300, Westminster, CO 80021 | www.3xlogic.com | (877) 3XLOGIC... -
Page 62: Burnt-In Text (Osd)
Configure the positions of the Date, Time and Name text. Select a Text Position preconfigured position from the drop-down or designate custom positions using standard X and Y screen coordinates. 10225 Westmoor Drive, Suite 300, Westminster, CO 80021 | www.3xlogic.com | (877) 3XLOGIC... -
Page 63: Encoder Profile
Modify…). This will deploy the below stream settings form. Figure 7-22: Setup Tab – Video Menu –Encoder Profile Settings – Adding/Modifying an Encoder Profile 10225 Westmoor Drive, Suite 300, Westminster, CO 80021 | www.3xlogic.com | (877) 3XLOGIC... -
Page 64: Stream
The advanced stream settings form can also be accessed from the Setup Tab> Basic Configuration Menu> Stream link. Figure 7-23: Setup Tab – Video Menu –Stream Settings 10225 Westmoor Drive, Suite 300, Westminster, CO 80021 | www.3xlogic.com | (877) 3XLOGIC... -
Page 65: Stream Settings
Load Profile Settings. Encoder profiles can be configured from the Encoder Profiles settings form (Setup Tab>Video Menu>Encoder Profile). Click Apply to save new settings changes. 10225 Westmoor Drive, Suite 300, Westminster, CO 80021 | www.3xlogic.com | (877) 3XLOGIC... -
Page 66: Privacy Mask
Video Out settings page. Video Out settings will only be available on cameras with a BNC Video Out connection. Figure 7-25: Setup Tab – Video Menu –Video Out (BNC) Settings 10225 Westmoor Drive, Suite 300, Westminster, CO 80021 | www.3xlogic.com | (877) 3XLOGIC... -
Page 67: Event Configuration Menu
Remove button. You may be prompted to confirm the action. Click OK to confirm. After adding, removing or modifying rules as desired, click the Apply button to save changes. 10225 Westmoor Drive, Suite 300, Westminster, CO 80021 | www.3xlogic.com | (877) 3XLOGIC... -
Page 68: Adding Or Modifying An Event Rule
Check-off the Enable box. Enter a Name and Description for the rule. This name will be used to reference this specific rule throughout the camera’s browser interface. 10225 Westmoor Drive, Suite 300, Westminster, CO 80021 | www.3xlogic.com | (877) 3XLOGIC... -
Page 69: Event Source (Triggers) Tab - Adding/Modifying Event Rule
Click the Go to Schedule Configuration link to open the Schedule settings and configure a schedule as needed. The Schedule event source option will not be available until schedule settings have been properly configured. 10225 Westmoor Drive, Suite 300, Westminster, CO 80021 | www.3xlogic.com | (877) 3XLOGIC... -
Page 70: Event Action Tab - Adding/Modifying Event Rule
Enable this option to have the camera broadcast a UDP Multicast notification whenever the rule is triggered. Send Multicast (UDO) Notification Click the Go to Multicast Notification Configuration link to edit Multicast Notification settings. 10225 Westmoor Drive, Suite 300, Westminster, CO 80021 | www.3xlogic.com | (877) 3XLOGIC... -
Page 71: Motion Detection
Motion activity will only be graphed when a motion detection zone is actively selected within the image. Click the Save button to save changes to motion detection settings. 10225 Westmoor Drive, Suite 300, Westminster, CO 80021 | www.3xlogic.com | (877) 3XLOGIC... -
Page 72: Face Detection
Check off the Enable column box for the desired zone. This will deploy the zone over the image. Resize the zone as desired. A Name and Description value can be assigned to each zone. Click Apply to save any settings changes. 10225 Westmoor Drive, Suite 300, Westminster, CO 80021 | www.3xlogic.com | (877) 3XLOGIC... -
Page 73: Network Loss
Click Apply to save changes to network loss settings. 10225 Westmoor Drive, Suite 300, Westminster, CO 80021 | www.3xlogic.com | (877) 3XLOGIC... -
Page 74: Heart Beat
When associated with a schedule, an event will trigger only during the specified time range. Select a schedule from the list to display Schedule information. To remove a schedule, select the desired schedule from the list and click Remove. 10225 Westmoor Drive, Suite 300, Westminster, CO 80021 | www.3xlogic.com | (877) 3XLOGIC... -
Page 75: Adding/Modifying A Schedule
Opening the Setup Tab>Event Configuration drop-down menu and clicking the E-Mail Recipient link will open the E-Mail Recipient settings page. Figure 7-36: Setup Tab – Event Configuration Menu – E-Mail Recipients Settings 10225 Westmoor Drive, Suite 300, Westminster, CO 80021 | www.3xlogic.com | (877) 3XLOGIC... -
Page 76: Add/Modify An E-Mail Recipient
E-Mail Address Enter the e-mail address of the recipient. When you have filled in all the fields, click OK to save the new recipient. 10225 Westmoor Drive, Suite 300, Westminster, CO 80021 | www.3xlogic.com | (877) 3XLOGIC... -
Page 77: Ftp Notification
(time stamp, camera name, rule, etc…) To remove an existing FTP server, select it from the list and click Remove. You will be prompted to confirm. Click OK to confirm the removal. 10225 Westmoor Drive, Suite 300, Westminster, CO 80021 | www.3xlogic.com | (877) 3XLOGIC... -
Page 78: Add/Modify An Ftp Server
Click Test to test FTP connectivity. If the test fails, confirm the correct settings have been entered for the selected FTP server. Click OK to save the new FTP server settings. 10225 Westmoor Drive, Suite 300, Westminster, CO 80021 | www.3xlogic.com | (877) 3XLOGIC... -
Page 79: Http Notifications
To remove an existing HTTP server, select the server from the list and click Remove. You will be prompted to confirm. Click OK to confirm the removal. 10225 Westmoor Drive, Suite 300, Westminster, CO 80021 | www.3xlogic.com | (877) 3XLOGIC... -
Page 80: Add/Modify An Http Server
Click Test to test for a successful connection with the defined HTTP web server. Once you have configured your desired settings. Click OK to save the newly configured HTTP web server. 10225 Westmoor Drive, Suite 300, Westminster, CO 80021 | www.3xlogic.com | (877) 3XLOGIC... -
Page 81: Tcp Notifications
Alive Type Configure the TCP keep-alive packet mode. Alive Time Configure the time interval between keep-alive retransmissions. Click Apply to save changes to the TCP Notification settings. 10225 Westmoor Drive, Suite 300, Westminster, CO 80021 | www.3xlogic.com | (877) 3XLOGIC... -
Page 82: Tcp Server
Network Tab events. DI/DO Tab Select a default message or configure a custom message for DI/DO events. Click Apply to save changes to the TCP Server settings. 10225 Westmoor Drive, Suite 300, Westminster, CO 80021 | www.3xlogic.com | (877) 3XLOGIC... -
Page 83: Multicast Notification
<32 - Restricted to the same site, organization or department. <64 - Restricted to the same region. <128 - Restricted to the same continent. <255 - Unrestricted in scope; Global. 10225 Westmoor Drive, Suite 300, Westminster, CO 80021 | www.3xlogic.com | (877) 3XLOGIC... -
Page 84: Network Configuration Menu
To enable IPv6 protocol, click Enable IPv6. For more information on IPv6 settings, see IPv6 Settings Configuration, below. 10225 Westmoor Drive, Suite 300, Westminster, CO 80021 | www.3xlogic.com | (877) 3XLOGIC... -
Page 85: Network Configuration Menu - Tcp/Ip Settings - Ipv6 Settings Configuration
The device IP address. If DHCP is not enabled, the user may assign an IP Address address. Prefix Length Assign an address prefix length. Default Router Enter the default router address. 10225 Westmoor Drive, Suite 300, Westminster, CO 80021 | www.3xlogic.com | (877) 3XLOGIC... -
Page 86: Web Server Settings
NTP Server. If the test fails, confirm you have entered in the correct address for the NTP Server. Click Apply to save settings changes. 10225 Westmoor Drive, Suite 300, Westminster, CO 80021 | www.3xlogic.com | (877) 3XLOGIC... -
Page 87: Upnp Settings
Under the RTSP Configuration section of the RTSP settings page, a user may configure an RTSP port (default is 554). The user may also enable and choose the RTSP Authentication Type (digest or basic). 10225 Westmoor Drive, Suite 300, Westminster, CO 80021 | www.3xlogic.com | (877) 3XLOGIC... -
Page 88: Srtp
Assign DSCP levels for Video, Meta and ONVIF Meta. Low-latency services Video / Meta / ONVIF will be dedicated starting with components featuring the highest DSCP Meta DSCP value. 10225 Westmoor Drive, Suite 300, Westminster, CO 80021 | www.3xlogic.com | (877) 3XLOGIC... -
Page 89: Multicast
Assign DSCP levels for Video, Meta and ONVIF Meta. Low-latency services will be Video / Meta / ONVIF Meta DSCP dedicated starting with components featuring the highest DSCP value. 10225 Westmoor Drive, Suite 300, Westminster, CO 80021 | www.3xlogic.com | (877) 3XLOGIC... -
Page 90: Rtmp Settings
Check-off the Enable box to initiate RTMP streaming. The user may name the RTMP Name and Instance for both first and second streams. RTMP streaming URL for both stream profiles will be displayed. Click Apply to save RTMP settings changes. 10225 Westmoor Drive, Suite 300, Westminster, CO 80021 | www.3xlogic.com | (877) 3XLOGIC... -
Page 91: Mdns Settings
Figure 7-55: Setup Tab –Network Configuration Menu – WS-Discovery Settings Check-off the Enable box to enable WS Discovery (Web Services Dynamic Discovery). Click Apply to save settings changes. 10225 Westmoor Drive, Suite 300, Westminster, CO 80021 | www.3xlogic.com | (877) 3XLOGIC... -
Page 92: Smtp (E-Mail Server) Settings
Configure a test email. Enter the test recipient address and click the Test Test button to confirm successful SMTP configuration. Click Apply to save changes to SMTP settings. 10225 Westmoor Drive, Suite 300, Westminster, CO 80021 | www.3xlogic.com | (877) 3XLOGIC... -
Page 93: Ddns Settings
Configure a DDNS update interval (in seconds). Username and Configure login credentials if required. Field availability is dependent on Password chosen DDNS service provider. Click Apply to save DDNS settings changes. 10225 Westmoor Drive, Suite 300, Westminster, CO 80021 | www.3xlogic.com | (877) 3XLOGIC... -
Page 94: Snmp Settings
The camera default settings is public (read-only). Private (read-write) can also be used. Trap Setting Define an Address and Community for Trap Ver 1.0 and 2.0. Click Apply to save SNMP settings changes. 10225 Westmoor Drive, Suite 300, Westminster, CO 80021 | www.3xlogic.com | (877) 3XLOGIC... -
Page 95: Ip Filtering Settings
To remove an existing address from the filtered list, select the address in the list and click Remove. You will be prompted to confirm the removal. Click OK to confirm. Click Apply to save changes to IP Filtering settings. 10225 Westmoor Drive, Suite 300, Westminster, CO 80021 | www.3xlogic.com | (877) 3XLOGIC... -
Page 96: Hosted Service Settings
Server Address and Port Enter the hosted service IP Address and Port. Update Interval Enter an update interval (in minutes) Click Apply to save hosted service settings. 10225 Westmoor Drive, Suite 300, Westminster, CO 80021 | www.3xlogic.com | (877) 3XLOGIC... -
Page 97: Storage Menu
The storage disk format of the selected device. Total Capacity The totally storage capacity of the selected device. Free Space Lists the remaining free space on the selected device. Status Current storage device status. 10225 Westmoor Drive, Suite 300, Westminster, CO 80021 | www.3xlogic.com | (877) 3XLOGIC... -
Page 98: Recording Device Control
Mount the currently selected device. This option is only available if the currently Mount selected device is inactive. Eject the currently selected device. This option is only available if the selected Eject device is mounted. 10225 Westmoor Drive, Suite 300, Westminster, CO 80021 | www.3xlogic.com | (877) 3XLOGIC... -
Page 99: Ftp Settings
Filename Format Assign the filename format for the files uploaded to the FTP. Click Apply to save changes to FTP storage settings. 10225 Westmoor Drive, Suite 300, Westminster, CO 80021 | www.3xlogic.com | (877) 3XLOGIC... -
Page 100: Recording
Recording to halt recording when storage is at full capacity. Choose Delete Files and Recycle (Oldest First) to continue recording and overwrite the oldest files on the storage device when storage has reached full capacity. 10225 Westmoor Drive, Suite 300, Westminster, CO 80021 | www.3xlogic.com | (877) 3XLOGIC... - Page 101 Click Start to end the current file and begin recording a new file for the length you have configured. Click Apply to save Recording settings changes. 10225 Westmoor Drive, Suite 300, Westminster, CO 80021 | www.3xlogic.com | (877) 3XLOGIC...
-
Page 102: Continuous (Recording) Settings
Use the navigation controls at the bottom of the file list to navigate multiple pages of files. NOTE: Continuous footage files can only be accessed (downloaded) from this page and cannot be viewed via the Search (Playback tab). 10225 Westmoor Drive, Suite 300, Westminster, CO 80021 | www.3xlogic.com | (877) 3XLOGIC... -
Page 103: Vca Menu
People tracking requires an advanced All-in-One Analytics license. To restore VCA Enable/Disable settings to their factory default state, click Restore Defaults Click Apply to save settings changes. 10225 Westmoor Drive, Suite 300, Westminster, CO 80021 | www.3xlogic.com | (877) 3XLOGIC... -
Page 104: Zones And Rules Settings
When no item is actively selected, this section will display all zones/lines and counters currently configured on the device (as pictured in the above example). To create analytics rules or zones, right-click within the preview area. 10225 Westmoor Drive, Suite 300, Westminster, CO 80021 | www.3xlogic.com | (877) 3XLOGIC... - Page 105 Display the object speed value. Display System Messages – Display analytics system messages generated by the camera on-screen. Pause Pause the live video preview on the current frame. 10225 Westmoor Drive, Suite 300, Westminster, CO 80021 | www.3xlogic.com | (877) 3XLOGIC...
-
Page 106: Create Zone
Detect/Non-Detect Non-Detect -Cease detecting objects within the camera’s field of vision when they enter the analytics zone. Non- Detect zones are often utilized as a mask. 10225 Westmoor Drive, Suite 300, Westminster, CO 80021 | www.3xlogic.com | (877) 3XLOGIC... - Page 107 Speed Filter Configure a Lower Bound (km/h) and Upper Bound (km/h) speed value to define your speed range. 10225 Westmoor Drive, Suite 300, Westminster, CO 80021 | www.3xlogic.com | (877) 3XLOGIC...
-
Page 108: Create Line (Tripwire)
Draw the line within the preview area as desired by clicking and dragging to place both line endpoints. Figure 7-68: Setup Tab –VCA Menu –Zones and Rules Settings – Creating a Line 10225 Westmoor Drive, Suite 300, Westminster, CO 80021 | www.3xlogic.com | (877) 3XLOGIC... - Page 109 Enable this rule to trigger an analytics event whenever an object Stopped has stopped moving on the line for equal or greater than the defined amount of Time (Seconds). 10225 Westmoor Drive, Suite 300, Westminster, CO 80021 | www.3xlogic.com | (877) 3XLOGIC...
- Page 110 Blue, and the Threshold is set to 25%, than an object which is 25% blue or more will trigger an analytics event. Right-clicking a line within the preview area will deploy a menu. 10225 Westmoor Drive, Suite 300, Westminster, CO 80021 | www.3xlogic.com | (877) 3XLOGIC...
-
Page 111: Create Counter
Value column (A counting line rule named Zone 0 –Cnt Line – Dir A is used in the above example). 10225 Westmoor Drive, Suite 300, Westminster, CO 80021 | www.3xlogic.com | (877) 3XLOGIC... -
Page 112: Zones And Rules Settings - Logical Rules Tab
Adding/Modifying a Logical Rule. remove an existing logical rule, select the rule from the list and click Remove. You will be prompted to confirm the removal. Click OK to confirm. 10225 Westmoor Drive, Suite 300, Westminster, CO 80021 | www.3xlogic.com | (877) 3XLOGIC... -
Page 113: Adding/Modifying A Logical Rule
Select this conditional clause to trigger the logical rule when a clause was [was] true/false a specified period of time ago. Select this conditional clause to trigger the logical rule during a specified [time] daily time range. 10225 Westmoor Drive, Suite 300, Westminster, CO 80021 | www.3xlogic.com | (877) 3XLOGIC... - Page 114 See Tamper Detection Settings for more info on configuring tamper detection. Select this conditional clause to trigger the logical rule whenever a scene [learning] is being learned. 10225 Westmoor Drive, Suite 300, Westminster, CO 80021 | www.3xlogic.com | (877) 3XLOGIC...
-
Page 115: Calibration Settings
The VCA calibration process includes configuring the correct camera angle and field of view, as well as the delineation of anticipated object (people, car, etc…) size. Proper calibration of the camera is required to ensure accurate analytics counts and tracking. 10225 Westmoor Drive, Suite 300, Westminster, CO 80021 | www.3xlogic.com | (877) 3XLOGIC... - Page 116 Draw Horizon or less. Transparent Grid Select this option to make the green calibration grid transparent. (enabled by default) 10225 Westmoor Drive, Suite 300, Westminster, CO 80021 | www.3xlogic.com | (877) 3XLOGIC...
-
Page 117: Classification Settings
The maximum travelling speed (in km/h) of an object of this classification. Click Apply to save the new classification settings. Click Restore Defaults to reset the classifications to their default settings. This will delete any custom classification. 10225 Westmoor Drive, Suite 300, Westminster, CO 80021 | www.3xlogic.com | (877) 3XLOGIC... -
Page 118: Tamper Detection Settings
Opening the Setup Tab>VCA drop-down menu and clicking the Scene Change link will open the Scene Change settings page. Figure 7-73: Setup Tab –VCA Menu –Scene Change Settings 10225 Westmoor Drive, Suite 300, Westminster, CO 80021 | www.3xlogic.com | (877) 3XLOGIC... -
Page 119: Burnt-In Annotation Settings
Burnt-In Annotation settings page. Figure 7-74: Setup Tab –VCA Menu –Burnt-In Annotation Settings 1 (screenshot cont’d on next page) Figure 7-75: Setup Tab –VCA Menu –Burnt-In Annotation Settings 2 10225 Westmoor Drive, Suite 300, Westminster, CO 80021 | www.3xlogic.com | (877) 3XLOGIC... - Page 120 Display Counting Line Events – Select this option to burn counting line event Diagnostics information into the camera image. Click Apply to save settings changes. Click Restore Defaults to restore settings to their default state. 10225 Westmoor Drive, Suite 300, Westminster, CO 80021 | www.3xlogic.com | (877) 3XLOGIC...
-
Page 121: Counter Reporting Settings
This Month (first day of the current month until present) and Last Month. If a custom counter report is desired, fill out the required fields in the Request Command section manually. 10225 Westmoor Drive, Suite 300, Westminster, CO 80021 | www.3xlogic.com | (877) 3XLOGIC... -
Page 122: Database Service Tab - Counter Reporting Settings
From the Database Service tab, a user may enable Database Service (required for counter reporting and counter report email notifications) and configure related settings. Figure 7-77: Setup Tab –VCA Menu –Counter Reporting Settings– Database Service Tab 10225 Westmoor Drive, Suite 300, Westminster, CO 80021 | www.3xlogic.com | (877) 3XLOGIC... -
Page 123: E-Mail Notification Tab - Counter Reporting Settings
Figure 7-78: Setup Tab –VCA Menu - Counter Reporting Settings–E-Mail Notifications Tab To enable VCA counter reporting e-mail notifications, check-off Enable E-Mail Notification. 10225 Westmoor Drive, Suite 300, Westminster, CO 80021 | www.3xlogic.com | (877) 3XLOGIC... -
Page 124: Add/Modify A Counter Report E-Mail Notification Recipient
Provide a brief description of the recipient (intended use, etc…). This Description description will be displayed when the schedule is selected on the schedule settings page. E-Mail Address Enter the e-mail address of the recipient. 10225 Westmoor Drive, Suite 300, Westminster, CO 80021 | www.3xlogic.com | (877) 3XLOGIC... -
Page 125: Schedule Configuration
Select a Trigger Day (1-31) and Trigger Time from the available drop-down Monthly menus. Reports will be emailed to the recipient on the chosen day of the month, at the chosen time. 10225 Westmoor Drive, Suite 300, Westminster, CO 80021 | www.3xlogic.com | (877) 3XLOGIC... -
Page 126: Report Configuration
Click Send Test Report to send a test report using the currently configured settings to the e- mail entered in the E-mail Configuration section. Click OK to save the new recipient. Click Cancel to close the window without saving the recipient. 10225 Westmoor Drive, Suite 300, Westminster, CO 80021 | www.3xlogic.com | (877) 3XLOGIC... -
Page 127: Advanced Vca Settings
Blob (Motion), Counting Line, Tamper and Scene Change. Configure the amount of time the camera will track a stationary VCA object Stationary Object Hold-On Time before it ceases tracking. 10225 Westmoor Drive, Suite 300, Westminster, CO 80021 | www.3xlogic.com | (877) 3XLOGIC... -
Page 128: Import/Export Settings
Click the Export button to download an xml file (vca_config.xml) to your browsers downloads destination. This file can be imported to other cameras to assign them the same VCA configurations as the device from which is was exported. 10225 Westmoor Drive, Suite 300, Westminster, CO 80021 | www.3xlogic.com | (877) 3XLOGIC... -
Page 129: Maintenance Menu
Figure 7-85: Setup Tab –Maintenance Menu – User Group the user. Users – Add User After finishing configuration, click Apply to save the new settings. MODIFY A USER 10225 Westmoor Drive, Suite 300, Westminster, CO 80021 | www.3xlogic.com | (877) 3XLOGIC... -
Page 130: Remove A User
Opening the Setup Tab>Maintenance drop-down menu and clicking the Date & Time link will open the Date & Time settings page. Figure 7-87 Setup Tab –Maintenance Menu – Date and Time Settings 10225 Westmoor Drive, Suite 300, Westminster, CO 80021 | www.3xlogic.com | (877) 3XLOGIC... - Page 131 NTP server (Default: Time time.windows.com) Set Manually – Select this option to manually configure the camera’s date and time. Click Apply to save the new time settings. 10225 Westmoor Drive, Suite 300, Westminster, CO 80021 | www.3xlogic.com | (877) 3XLOGIC...
-
Page 132: Api Settings
From the Language settings page, a user may select the camera interface language. Select a desired language from the available drop-down menu. Languages include: English, Chinese and Korean. Click Apply to save settings changes. 10225 Westmoor Drive, Suite 300, Westminster, CO 80021 | www.3xlogic.com | (877) 3XLOGIC... -
Page 133: Firmware Upgrade
From the System Log page, a user can click Download System Log for an updated copy of the log. If desired, check-off Enable Auto Backup and configure the following details for auto backup of the system log to an FTP service of your choosing. 10225 Westmoor Drive, Suite 300, Westminster, CO 80021 | www.3xlogic.com | (877) 3XLOGIC... -
Page 134: Configuration Import/Export Settings
Import button will appear. Click Import to import settings from the selected file. CAUTION: Importing a settings file will overwrite all existing camera settings. 10225 Westmoor Drive, Suite 300, Westminster, CO 80021 | www.3xlogic.com | (877) 3XLOGIC... -
Page 135: Reset All Settings
3xLOGIC VIGIL Camera Server Software settings page. Figure 7-94 Setup Tab –Maintenance Menu –3xLOGIC Software Settings From the 3xLOGIC VIGIL Camera Server software settings page, a user can view the camera’s current VIGIL Camera Server software version. The user can also Stop (shut down) or Restart the camera’s VIGIL software by clicking the corresponding buttons. -
Page 136: Activation Menu
To register new license, enter the activation code into the Activation Code text field. Valid codes will be automatically processed and the corresponding license will appear in the Installed Licenses list. Click Apply to save settings changes. 10225 Westmoor Drive, Suite 300, Westminster, CO 80021 | www.3xlogic.com | (877) 3XLOGIC... -
Page 137: About Menu
IR Illumination Specs Micro-P Version TV-Out Manufacturer Name Audio In/Audio Out MAC Address DI/DO Pan/Tilt Capability RS-485 10225 Westmoor Drive, Suite 300, Westminster, CO 80021 | www.3xlogic.com | (877) 3XLOGIC... -
Page 138: License
Figure 7-94 Setup Tab –About Menu –License Information The License Information page provides a user with at-a-glance information regarding the licensing for several of the camera and software components. 10225 Westmoor Drive, Suite 300, Westminster, CO 80021 | www.3xlogic.com | (877) 3XLOGIC... -
Page 139: Ip Address - Hexadecimal/Decimal Conversion Table
Refer to the following table when converting the MAC address of the device to the IP address: Hex Dec Hex Dec Hex Dec Hex Dec Hex Dec Hex Dec Hex Dec 10225 Westmoor Drive, Suite 300, Westminster, CO 80021 | www.3xlogic.com | (877) 3XLOGIC... -
Page 140: Revision History
10225 Westmoor Drive, Suite 300, Westminster, CO 80021 | www.3xlogic.com | (877) 3XLOGIC © 2016 3xLOGIC, Inc. All rights reserved. Information in this document is subject to change without notice. 3xLOGIC and the 3xLOGIC logo are trademarks of 3xLOGIC, Inc. All other trademarks are the property of their respective owners. Revised: March 16, 2016 11:48 AM V1...
Need help?
Do you have a question about the VX-2A-B-IWD and is the answer not in the manual?
Questions and answers