3xLogic VISIX S-Series Installation Manual
Hide thumbs
Also See for VISIX S-Series:
- Quick start manual (16 pages) ,
- Quick start manual (21 pages) ,
- Quick start manual (17 pages)

Related Manuals for 3xLogic VISIX S-Series


Summary of Contents for 3xLogic VISIX S-Series
- Page 1 Installation Manual v3.1 | VISIX S-Series Network Camera VISIX S-Series Network Camera Hardware Installation Manual v3.1 12000 Pecos Street, Suite 290, Westminster, CO 80234 | www.3xlogic.com | (877) 3XLOGIC...
- Page 2 Please see Section 2 of this guide for a list of all 3xLOGIC cameras covered in this manual. This manual may contain technical inaccuracies or printing errors. The content is subject to change without notice. The manual will be amended if there are any hardware updates or changes.
- Page 3 (Cd), lead (Pb), or mercury (Hg). For proper recycling, return the battery to your supplier or to a designated collection point. For more information see: www.recyclethis.info. 12000 Pecos Street, Suite 290, Westminster, CO 80234 | www.3xlogic.com | (877) 3XLOGIC...
- Page 4 If the product does not work properly, please contact your dealer or the nearest service center. Never attempt to disassemble the camera yourself. (We shall not assume any responsibility for problems caused by unauthorized repair or maintenance.) 12000 Pecos Street, Suite 290, Westminster, CO 80234 | www.3xlogic.com | (877) 3XLOGIC...
- Page 5 The foam ring around the lens must be seated flush against the inner surface of the bubble to isolate the lens from the IR LEDS. Fasten the dome cover to camera body so that the foam ring and the dome cover are attached seamlessly. 12000 Pecos Street, Suite 290, Westminster, CO 80234 | www.3xlogic.com | (877) 3XLOGIC...
-
Page 6: Table Of Contents
Installation — Micro SD Card ........................43 5.2 VX-3P4-MD-I, VX-4S28-MD-I, VX-3P28-MD-I ....................44 Camera Description ............................ 44 Available Mounts ............................44 INstallation — Ceiling Mount ........................45 12000 Pecos Street, Suite 290, Westminster, CO 80234 | www.3xlogic.com | (877) 3XLOGIC... - Page 7 8 MULTI-SENSOR 180° PANORAMIC DOME CAMERA ..................77 8.1 VX-8S-180-AWD ............................77 Camera Description ............................ 77 Available Mounts ............................78 Installation — Micro sd Card ........................79 Installation — Ceiling Mount ........................79 12000 Pecos Street, Suite 290, Westminster, CO 80234 | www.3xlogic.com | (877) 3XLOGIC...
- Page 8 9.15 Universal Corner Mount (VX-CM) ......................103 9.16 Universal Pole Mount (VX-POLE) ......................104 9.17 180° Pendant Mount Bracket (VX-8S-180-BPM) ..................105 9.18 180° Wall Mount Bracket (VX-8S-180-BWM) ..................106 12000 Pecos Street, Suite 290, Westminster, CO 80234 | www.3xlogic.com | (877) 3XLOGIC...
-
Page 9: Introduction
The foam ring around the lens must be seated flush against the inner surface of the bubble to isolate the lens from the IR LEDS. Fasten the dome cover to camera body so that the foam ring and the dome cover are attached seamlessly. 12000 Pecos Street, Suite 290, Westminster, CO 80234 | www.3xlogic.com | (877) 3XLOGIC... -
Page 10: Camera Navigation Key
2 Camera Navigation Key 3xLOGIC offers a variety of network camera styles, types and models. The below table features all cameras in 3xLOGIC’s product offering which are covered in this manual. Find the model of your camera in the following list and proceed to the corresponding section of the manual for installation instructions. -
Page 11: Full Body Camera Installation
The overview of Full Body Camera is shown below: Overview (1) The overview of the components and the interface are shown below: Overview (2) The interfaces on the rear panel are shown below: Overview (3) 12000 Pecos Street, Suite 290, Westminster, CO 80234 | www.3xlogic.com | (877) 3XLOGIC... - Page 12 Power, Video and GND pins are used when the auto-iris is driven by video; Damp+, Damp-, Drive+ and Drive- pins are used when the auto-iris is driven by DC. 12000 Pecos Street, Suite 290, Westminster, CO 80234 | www.3xlogic.com | (877) 3XLOGIC...
-
Page 13: Available Mounts
Install the Lens a. Loosen the pan nut to adjust the pan angle [0°-360°]. b. Loosen the knob on the ceiling mount to adjust the tilt angle [0°-90]. 12000 Pecos Street, Suite 290, Westminster, CO 80234 | www.3xlogic.com | (877) 3XLOGIC... -
Page 14: Installation - Wall Mount
Adjust the Zoom Lever and Focus Lever to obtain the desired image on the monitor. Knob Install the Camera to the Mount and Adjust the Angle INSTALLATION — WALL MOUNT Steps: Install the Lens 12000 Pecos Street, Suite 290, Westminster, CO 80234 | www.3xlogic.com | (877) 3XLOGIC... - Page 15 Install the Wall Mount a. Loosen the pan nut to adjust the pan angle [0 °-360°]. b. Loosen the knob on the ceiling mount to adjust the tilt angle [0°-±45°]. 12000 Pecos Street, Suite 290, Westminster, CO 80234 | www.3xlogic.com | (877) 3XLOGIC...
-
Page 16: Installation - Micro Sd Card
Adjust the focus lever to obtain the desired image on the monitor. Tilt Adjust Nut Pan Adjust Nut Adjust the Surveillance Angle INSTALLATION — MICRO SD CARD Steps: SD Card Install the SD Card 12000 Pecos Street, Suite 290, Westminster, CO 80234 | www.3xlogic.com | (877) 3XLOGIC... -
Page 17: Indoor Dome Camera Installation
4.1 VX-2M-D2-RIA, VX-3M-D2-RIAWD, VX-2S-D3-RIA CAMERA DESCRIPTION The overview of the dome camera is shown below: Overview The overview of the components and the interface are shown below: Overview (2) 12000 Pecos Street, Suite 290, Westminster, CO 80234 | www.3xlogic.com | (877) 3XLOGIC... - Page 18 Description of Overview (2~3) Number Description Number Description Black Liner Bubble Lens BNC Interface Reset Status Indicator Test Serial Port Micro SD Card Slot Adapter Plate Side Outlet 12000 Pecos Street, Suite 290, Westminster, CO 80234 | www.3xlogic.com | (877) 3XLOGIC...
-
Page 19: Available Mounts
D2 Wall Mount w/ Junction Box (3xLOGIC Product #: VX-WMJ-D2) Universal Corner Mount (3xLOGIC Product #: VX-CM) Universal Pole Mount (3xLOGIC Product #: VX-POLE) INSTALLATION — CEILING MOUNT Steps: Hole BOTTOM Drill Template 12000 Pecos Street, Suite 290, Westminster, CO 80234 | www.3xlogic.com | (877) 3XLOGIC... - Page 20 Use pliers to remove the part shown in Figure 4-6, and simply route the cables through the side outlet. Side Outlet Side Outlet Install the Adapter Plate Lock Screw Install the Mounting Base 12000 Pecos Street, Suite 290, Westminster, CO 80234 | www.3xlogic.com | (877) 3XLOGIC...
- Page 21 Installation Manual v3.1 | VISIX S-Series Network Camera 0~80° 0~355° 0~355° 3-axis Adjustment Adjust the Lens 12000 Pecos Street, Suite 290, Westminster, CO 80234 | www.3xlogic.com | (877) 3XLOGIC...
- Page 22 To digitally adjust the zoom and focus, visiting the device’s web interface and adjust these settings from the PTZ control interface. Zoom and Focus Adjustment of Electronic Lens Bubble Dome Drive Black Liner Install the Black Liner and Bubble Complete the Installation 12000 Pecos Street, Suite 290, Westminster, CO 80234 | www.3xlogic.com | (877) 3XLOGIC...
-
Page 23: Vx-2V-Md-Riwh
Press RESET for 10s when the camera is powering on or rebooting to restore the default settings, including the user name, password, IP address, port No., etc. 12000 Pecos Street, Suite 290, Westminster, CO 80234 | www.3xlogic.com | (877) 3XLOGIC... -
Page 24: Available Mounts
1. Loosen the three screws on the edge of the dome cover with the screw driver. 2. Lift and put aside the dome cover to disassemble the camera. Dome Cover Screws Camera Body Remove the Dome Cover 12000 Pecos Street, Suite 290, Westminster, CO 80234 | www.3xlogic.com | (877) 3XLOGIC... -
Page 25: Install Preparation - Memory Card Installation
1. Attach the supplied drill template to the location where you want to install the camera. 2. Drill the screw holes and the cable hole according to the drill template as the figure below. Drill Template 12000 Pecos Street, Suite 290, Westminster, CO 80234 | www.3xlogic.com | (877) 3XLOGIC... - Page 26 Install the Mounting Base 4. Align the camera body with the mounting base and rotate the camera body counterclockwise to get it fitted with the mounting base. 12000 Pecos Street, Suite 290, Westminster, CO 80234 | www.3xlogic.com | (877) 3XLOGIC...
- Page 27 Section 2 for information on identifying and setting up the camera on your network Please reference the VIGIL Client User Guide or the 3xLOGIc VISIX V-Series Gen II User Manual for information on adjusting zoom and focus from VIGIL Client or from the camera browser interface respectively.
-
Page 28: Installation - Wall Mounting
A wall mounting bracket is not included in package. If you choose this mounting type, you have to prepare a bracket first. The wall mounting bracket shown below is only for demonstration. 12000 Pecos Street, Suite 290, Westminster, CO 80234 | www.3xlogic.com | (877) 3XLOGIC... - Page 29 1. Route the cables, install the wall mounting bracket, and secure the cap on the bracket. Wall Mounting Bracket Install Wall Mounting Bracket 2. Align the screw holes of the mounting base with the corresponding screw holes of the cap. Mounting Base 12000 Pecos Street, Suite 290, Westminster, CO 80234 | www.3xlogic.com | (877) 3XLOGIC...
-
Page 30: Installation - Pendant Mouting
When choosing a pendant mounting bracket, you must pay attention to the size of the cap which should match the mounting base of the camera. Size of the Mounting Base 12000 Pecos Street, Suite 290, Westminster, CO 80234 | www.3xlogic.com | (877) 3XLOGIC... - Page 31 6. Adjust the image and focus. 7. Install the dome cover back to the camera and tighten the lock screw to complete the installation. 12000 Pecos Street, Suite 290, Westminster, CO 80234 | www.3xlogic.com | (877) 3XLOGIC...
-
Page 32: (Optional) Installation Of Network Cable Water-Proof Jacket
6. Align the snap on the waterproof endcap ④ with the notch on the camera’s network interface socket ①, and then secure the waterproof endcap ④ to the camera’s network interface socket ① to finish installation. 12000 Pecos Street, Suite 290, Westminster, CO 80234 | www.3xlogic.com | (877) 3XLOGIC... -
Page 33: (Optional) Installation Of Waterproof Tape
Stretch Stretch Waterproof Tape Length After Stretching Stretch the Water-proof Tape 3. Wrap the water-proof tape around the cable connector tightly as shown in the figure below. 12000 Pecos Street, Suite 290, Westminster, CO 80234 | www.3xlogic.com | (877) 3XLOGIC... - Page 34 Make sure that all exposed wires are all firmly wrapped and concealed by the water-proof tape. 6. Press the tape firmly to make sure no water can penetrate as shown in the figure below. 12000 Pecos Street, Suite 290, Westminster, CO 80234 | www.3xlogic.com | (877) 3XLOGIC...
-
Page 35: Enabling Hdmi Output In Camera Browser Settings For Public View Monitor Use
Login to proceed. Enabling HDMI Output in Browser Settings 4. Navigate to Configuration>Image>Display Settings. 5. Click Other to deploy the Local Output settings menu. 6. Select HDMI_1080P60. 12000 Pecos Street, Suite 290, Westminster, CO 80234 | www.3xlogic.com | (877) 3XLOGIC... -
Page 36: Mini-Dome Camera Installation
Front Cover Dome Drive Micro SD Card Slot Network Cable Lens IR LED Power Cable Audio/Alarm Cable I, O: Alarm In / Out A: Audio Out Wi-Fi Antenna 12000 Pecos Street, Suite 290, Westminster, CO 80234 | www.3xlogic.com | (877) 3XLOGIC... -
Page 37: Wps Setup
MD Wall Mount (3xLOGIC Product #: VX-WM-MD) MD Pendant Mount (3xLOGIC Product #: VX-PM-MD) Universal Corner Mount (3xLOGIC Product #: VX-CM) Universal Pole Mount (3xLOGIC Product #: VX-POLE) 12000 Pecos Street, Suite 290, Westminster, CO 80234 | www.3xlogic.com | (877) 3XLOGIC... -
Page 38: Installation - Ceiling Mount
INSTALLATION — CEILING MOUNT Steps: Drill Template Hole A :for cables routed through the wall Screw hole1 :for Mounting Base FRONT Code:194101278 Drill Template/Adapter Plate Disassemble the Camera 12000 Pecos Street, Suite 290, Westminster, CO 80234 | www.3xlogic.com | (877) 3XLOGIC... - Page 39 Use pliers to remove the removable part and route the cables via side outlet (as shown in Figure 5-7) if no cable hole is drilled in step 1, and connect the corresponding cables. 12000 Pecos Street, Suite 290, Westminster, CO 80234 | www.3xlogic.com | (877) 3XLOGIC...
- Page 40 Installation Manual v3.1 | VISIX S-Series Network Camera Remove the Removable Part Adjusting Tool Rotation Tilt 3-axis Adjustment Install the Front Cover 12000 Pecos Street, Suite 290, Westminster, CO 80234 | www.3xlogic.com | (877) 3XLOGIC...
-
Page 41: Installation - Pendant Mount
The matched pendant bracket model is VX-PM-MD, and you need to purchases it separately if ceiling bracket mounting is adopted. Attach the Adapter Plate Attach the Dome Drive 12000 Pecos Street, Suite 290, Westminster, CO 80234 | www.3xlogic.com | (877) 3XLOGIC... -
Page 42: Installation - Wall Mount
INSTALLATION — WALL MOUNT Steps: NOTE: The matched ceiling bracket model is VX-WM-MD and you need to purchases it separately if wall bracket mounting is adopted. Install Wall Bracket 12000 Pecos Street, Suite 290, Westminster, CO 80234 | www.3xlogic.com | (877) 3XLOGIC... - Page 43 Installation Manual v3.1 | VISIX S-Series Network Camera Attach the Adapter Plate Attach the Camera 12000 Pecos Street, Suite 290, Westminster, CO 80234 | www.3xlogic.com | (877) 3XLOGIC...
-
Page 44: Installation - Micro Sd Card
This series of camera supports local storage, please refer to the following steps to install the Micro SD card. Steps: Remove the Front Cover Mirco SD Card Install and Uninstall Micro SD Card 12000 Pecos Street, Suite 290, Westminster, CO 80234 | www.3xlogic.com | (877) 3XLOGIC... -
Page 45: Vx-3P4-Md-I, Vx-4S28-Md-I, Vx-3P28-Md-I
MD Wall Mount (3xLOGIC Product #: VX-WM-MD) MD Pendant Mount (3xLOGIC Product #: VX-PM-MD) Universal Corner Mount (3xLOGIC Product #: VX-CM) Universal Pole Mount (3xLOGIC Product #: VX-POLE) 12000 Pecos Street, Suite 290, Westminster, CO 80234 | www.3xlogic.com | (877) 3XLOGIC... -
Page 46: Installation - Ceiling Mount
Installation Manual v3.1 | VISIX S-Series Network Camera INSTALLATION — CEILING MOUNT Steps: Side Clip Remove the Cover Install Micro SD Card 12000 Pecos Street, Suite 290, Westminster, CO 80234 | www.3xlogic.com | (877) 3XLOGIC... - Page 47 Installation Manual v3.1 | VISIX S-Series Network Camera Attach the Camera Loosen the Lens Set Screws Adjust Panning Position 12000 Pecos Street, Suite 290, Westminster, CO 80234 | www.3xlogic.com | (877) 3XLOGIC...
- Page 48 As the lens of camera has already been factory adjusted to the best image, you just need to adjust the panning position and tilting position to get the desired surveillance angle. Install the Back Box 12000 Pecos Street, Suite 290, Westminster, CO 80234 | www.3xlogic.com | (877) 3XLOGIC...
-
Page 49: Outdoor Dome Camera Installation
Press and hold RESET for 10s when the camera is powering on or rebooting to restore the default settings, including the user name, password, IP address, port No., etc. 12000 Pecos Street, Suite 290, Westminster, CO 80234 | www.3xlogic.com | (877) 3XLOGIC... -
Page 50: Available Mounts
Universal Pole Mount (3xLOGIC Product #: VX-POLE) INSTALLATION — CEILING MOUNT Steps: Drill Template Hole A: for cables routed through the ceiling screw hole 1: for Mounting Base Drill Template Remove the Bubble 12000 Pecos Street, Suite 290, Westminster, CO 80234 | www.3xlogic.com | (877) 3XLOGIC... - Page 51 As the lens has already been factory adjusted to the best image, you just need to adjust the panning position and tilting position to get the desired surveillance angle. 12000 Pecos Street, Suite 290, Westminster, CO 80234 | www.3xlogic.com | (877) 3XLOGIC...
-
Page 52: Installation - Micro Sd Card
Installation Manual v3.1 | VISIX S-Series Network Camera Bubble Reinstallation INSTALLATION — MICRO SD CARD Steps: Disassemble the Camera 12000 Pecos Street, Suite 290, Westminster, CO 80234 | www.3xlogic.com | (877) 3XLOGIC... - Page 53 Installation Manual v3.1 | VISIX S-Series Network Camera Insert the Micro SD Card Install the Bubble Cover 12000 Pecos Street, Suite 290, Westminster, CO 80234 | www.3xlogic.com | (877) 3XLOGIC...
-
Page 54: Vx-2M-Od2-Riah, Vx-3M-Od2-Riawd
Number Description Black Liner Reset LAN(PoE) 10/100M Self-adaptive Bubble Ethernet Interface Mounting Base Power Interface (DC 12v) SD Card Slot Lens Video Out Audio and Alarm Cables 12000 Pecos Street, Suite 290, Westminster, CO 80234 | www.3xlogic.com | (877) 3XLOGIC... -
Page 55: Available Mounts
OD2 Wall Mount w/ Junction Box (3xLOGIC Product #: VX-WMJ-OD2) OD2 Pendant Mount (3xLOGIC Product #: VX-PM-OD2) Universal Corner Mount (3xLOGIC Product #: VX-CM) Universal Pole Mount (3xLOGIC Product #: VX-POLE) 12000 Pecos Street, Suite 290, Westminster, CO 80234 | www.3xlogic.com | (877) 3XLOGIC... -
Page 56: Installation - Ceiling Mount
Hole A: for cables routed Screw Hole 3: for through the ceiling Mounting Base Code: 190600839 Drill Template Install the Mounting Base Dome Drive Install the Dome Drive 12000 Pecos Street, Suite 290, Westminster, CO 80234 | www.3xlogic.com | (877) 3XLOGIC... - Page 57 Set the iris type as MANUAL if the environment has a stable level of illumination. Set the iris type to AUTO if the environment has varying illumination levels. Adjust the Focus and Zoom 12000 Pecos Street, Suite 290, Westminster, CO 80234 | www.3xlogic.com | (877) 3XLOGIC...
- Page 58 Installation Manual v3.1 | VISIX S-Series Network Camera Install the Black Liner and Bubble 12000 Pecos Street, Suite 290, Westminster, CO 80234 | www.3xlogic.com | (877) 3XLOGIC...
-
Page 59: Vx-6S-Od3-Riawd, Vx-3S-Od3-Riah
Camera Overview 4 5 6 7 8 9 Camera Components Number Description Black Liner Bubble Power Interface Alarm Output A Alarm Output B Grounding Alarm Input Alarm In 12000 Pecos Street, Suite 290, Westminster, CO 80234 | www.3xlogic.com | (877) 3XLOGIC... -
Page 60: Available Mounts
Universal Pole Mount (3xLOGIC Product #: VX-POLE) INSTALLATION — CEILING MOUNT Steps: Cable Outlet Drilling Template Screw hole 1:for Mounting Base Hole A:for cables routed through the ceiling FRONT Drill Template 12000 Pecos Street, Suite 290, Westminster, CO 80234 | www.3xlogic.com | (877) 3XLOGIC... - Page 61 You can select to route the cables from the side outlet instead of the cable hole in the ceiling. See Figure below. Side Outlet Route the Cables via Side Outlet 12000 Pecos Street, Suite 290, Westminster, CO 80234 | www.3xlogic.com | (877) 3XLOGIC...
- Page 62 Installation Manual v3.1 | VISIX S-Series Network Camera Install the Black Liner and Bubble Tighten the Lock Screw 12000 Pecos Street, Suite 290, Westminster, CO 80234 | www.3xlogic.com | (877) 3XLOGIC...
-
Page 63: Installation - Wall Mount
INSTALLATION — WALL MOUNT NOTE: This wall mounting bracket is sold separately from this camera model. Steps: Install the Wall Bracket Screw Install the Rubber Ring and Screws 12000 Pecos Street, Suite 290, Westminster, CO 80234 | www.3xlogic.com | (877) 3XLOGIC... - Page 64 Installation Manual v3.1 | VISIX S-Series Network Camera Install the Black Liner and Bubble Lock Screw Tighten the Lock Screw 12000 Pecos Street, Suite 290, Westminster, CO 80234 | www.3xlogic.com | (877) 3XLOGIC...
-
Page 65: 3-Axis Adjustment
Connect the camera to a debug monitor so as to get the live view, and adjust the zoom lever (T~W) to adjust the zoom, and adjust the focus lever (F~N) to adjust the focus till you get a clear view. Lens Adjustment 12000 Pecos Street, Suite 290, Westminster, CO 80234 | www.3xlogic.com | (877) 3XLOGIC... -
Page 66: Bullet Camera Installation
7 Bullet Camera Installation 7.1 VX-3P28-MB-I, VX-3P4-MB-I, VX-4S4-MB-I, VX-SMBK-B CAMERA DESCRIPTION Bullet Camera Overview Number Description Sun Shield Back Box Grounding Screw Adjustable Bracket Mounting Base Reset 12000 Pecos Street, Suite 290, Westminster, CO 80234 | www.3xlogic.com | (877) 3XLOGIC... -
Page 67: Available Mounts
These cameras have a built-in mount for wall and ceiling mount applications. INSTALLATION — CEILING/WALL MOUNT Steps: Screw Hole Template Attach the template Secure the Camera to the Ceiling 12000 Pecos Street, Suite 290, Westminster, CO 80234 | www.3xlogic.com | (877) 3XLOGIC... - Page 68 Rotate 0~360° to adjust azimuth angle of the image. e. Tighten the adjustable nut to complete the installation. T Direction R Direction P Direction Adjustable 3-axis Adjustment 12000 Pecos Street, Suite 290, Westminster, CO 80234 | www.3xlogic.com | (877) 3XLOGIC...
-
Page 69: Vx-3Pv-B-I
Press and hold RESET for 10s when the camera is powering on or rebooting to restore the default settings, including the user name, password, IP address, port No., etc. 12000 Pecos Street, Suite 290, Westminster, CO 80234 | www.3xlogic.com | (877) 3XLOGIC... -
Page 70: Available Mounts
This line of camera has a built-in mount for wall and ceiling mount applications. INSTALLATION — MICRO SD CARD Steps: Lock Screw Disassemble the Camera Install the SD Card 12000 Pecos Street, Suite 290, Westminster, CO 80234 | www.3xlogic.com | (877) 3XLOGIC... -
Page 71: Installation - Wall Mount
Refer to Figure 7-7 , above (right). INSTALLATION — WALL MOUNT Steps: Ceiling Mounting 1:Screw Hole for 2:Screw Hole for Bracket Mounting Base Drilling Holes in the Wall 12000 Pecos Street, Suite 290, Westminster, CO 80234 | www.3xlogic.com | (877) 3XLOGIC... -
Page 72: View Angle Adjustment
Installation Manual v3.1 | VISIX S-Series Network Camera Secure the Camera VIEW ANGLE ADJUSTMENT 3-axis (pan/tilt/rotation) adjusting allows adjustment for optimum camera rotation and placement. PAN ADJUSTMENT Steps: TILT ADJUSTMENT Steps: 12000 Pecos Street, Suite 290, Westminster, CO 80234 | www.3xlogic.com | (877) 3XLOGIC... -
Page 73: Rotation Adjustment
ZOOM AND FOCUS ADJUSTMENT You can use the zoom lever and focus lever to adjust the zoom value and focus value. Steps: Zoom/Focus Lever Zoom and Focus Adjustment 12000 Pecos Street, Suite 290, Westminster, CO 80234 | www.3xlogic.com | (877) 3XLOGIC... -
Page 74: Vx-3M-B-Riawd, Vx-3M20-B-Riawd
LAN; Network Interface Label Definition AUDIO IN Audio Input Interface AUDIO OUT Audio Out Interface D+, D-: RS-485 Interface IN, G Alarm Input Interface 1A, 1B Alarm Output Interface 12000 Pecos Street, Suite 290, Westminster, CO 80234 | www.3xlogic.com | (877) 3XLOGIC... -
Page 75: Available Mounts
These cameras have a built-in mount for wall and ceiling mount applications. INSTALLATION — CEILING/WALL MOUNT Steps: Cable Hole Drill Template Junction Box Install the Junction Box 12000 Pecos Street, Suite 290, Westminster, CO 80234 | www.3xlogic.com | (877) 3XLOGIC... - Page 76 After the monitoring angle is adjusted, you may need to install a water-proof rubber case (purchased separately) to the foldable position of the bracket if a water-proof application is desired. 12000 Pecos Street, Suite 290, Westminster, CO 80234 | www.3xlogic.com | (877) 3XLOGIC...
- Page 77 Installation Manual v3.1 | VISIX S-Series Network Camera Romove the Front Box Zoom Lever Remove the Sun Shield Focus Lever Lens Adjustment Installation Complete 12000 Pecos Street, Suite 290, Westminster, CO 80234 | www.3xlogic.com | (877) 3XLOGIC...
-
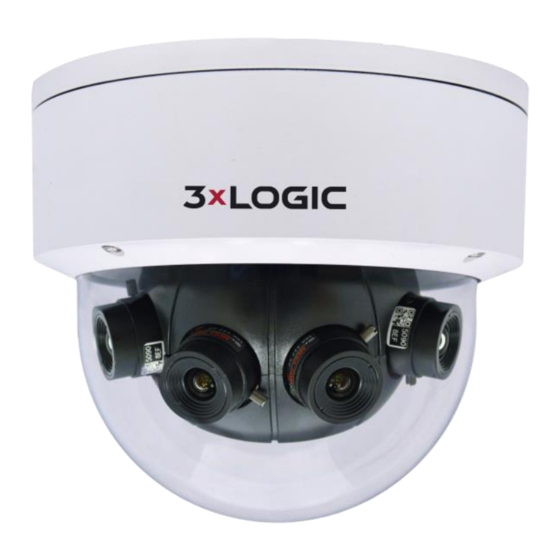
Page 78: Multi-Sensor 180° Panoramic Dome Camera
Installation Manual v3.1 | VISIX S-Series Network Camera 8 Multi-Sensor 180° Panoramic Dome Camera 8.1 VX-8S-180-AWD CAMERA DESCRIPTION Overview Overview (2) 12000 Pecos Street, Suite 290, Westminster, CO 80234 | www.3xlogic.com | (877) 3XLOGIC... -
Page 79: Available Mounts
180° Wall Mount Bracket (3xLOGIC Product #: VX-8S-180-BWM) 180° Pendant Mount Bracket (3xLOGIC Product #: VX-8S-180-BPM) Universal Corner Mount (3xLOGIC Product #: VX-CM) Universal Pole Mount (3xLOGIC Product #: VX-POLE) 12000 Pecos Street, Suite 290, Westminster, CO 80234 | www.3xlogic.com | (877) 3XLOGIC... -
Page 80: Installation - Micro Sd Card
Memory card is not included in the package. You have to prepare a memory card before installation. Steps: Memory Card Slot Camera Base Memory Card Memory Card Installation INSTALLATION — CEILING MOUNT Steps: Drill Template 12000 Pecos Street, Suite 290, Westminster, CO 80234 | www.3xlogic.com | (877) 3XLOGIC... - Page 81 The bolts should not be too loose to drop out, or too tight to secure the camera. Align the Camera with the Expansion Bolts Secure the Camera to the Ceiling 12000 Pecos Street, Suite 290, Westminster, CO 80234 | www.3xlogic.com | (877) 3XLOGIC...
- Page 82 View the live view image on your monitor. c. Adjust the panning position from 0° to 355°. Pan: 0°-355° Adjust Panning Position Tilt Adjusting Screw Adjust Tilting Position Tilt: 0°- 60° Adjust Tilting Position 12000 Pecos Street, Suite 290, Westminster, CO 80234 | www.3xlogic.com | (877) 3XLOGIC...
-
Page 83: Installation - Wall Mount
Insert the expansion screws first if the camera is mounted to the cement wall, and you can use the self-tapping screws directly if camera is mounted to the wooden wall. 12000 Pecos Street, Suite 290, Westminster, CO 80234 | www.3xlogic.com | (877) 3XLOGIC... - Page 84 Installation Manual v3.1 | VISIX S-Series Network Camera Screws Install the Screws Wall Mounting Bracket Safety Rope Install the Camera to the Bracket (1) 12000 Pecos Street, Suite 290, Westminster, CO 80234 | www.3xlogic.com | (877) 3XLOGIC...
- Page 85 Installation Manual v3.1 | VISIX S-Series Network Camera Install the Camera to the Bracket (2) Supplied Screwdriver Supplied Dome Cover Screw Install the Dome Cover 12000 Pecos Street, Suite 290, Westminster, CO 80234 | www.3xlogic.com | (877) 3XLOGIC...
-
Page 86: Installation - Pendant Mount
Please insert the expansion screws first if the camera is mounted to the cement ceiling, and you can use the self-tapping screws directly if camera is mounted to the wooden ceiling. Screws Install the Screws 12000 Pecos Street, Suite 290, Westminster, CO 80234 | www.3xlogic.com | (877) 3XLOGIC... - Page 87 Installation Manual v3.1 | VISIX S-Series Network Camera Safety Rope Install the Camera to the Bracket (1) Install the Camera to the Bracket (2) 12000 Pecos Street, Suite 290, Westminster, CO 80234 | www.3xlogic.com | (877) 3XLOGIC...
- Page 88 Installation Manual v3.1 | VISIX S-Series Network Camera Supplied Screwdriver Supplied Screw Dome Cover Install the Dome Cover 12000 Pecos Street, Suite 290, Westminster, CO 80234 | www.3xlogic.com | (877) 3XLOGIC...
-
Page 89: Waterproof Network Cable Jacket (Optional)
Camera’s Network Interface Socket O-Type Gasket Network Plug Waterproof Endcap Camera Waterproof Rubber Gasket Lock Nut Network Cable from Router/Switch Switch/Router Waterproof Accessory Installation INSTALLATION — WATERPROOF ACCESSORY Steps: 12000 Pecos Street, Suite 290, Westminster, CO 80234 | www.3xlogic.com | (877) 3XLOGIC... -
Page 90: Mount Schematics
Installation Manual v3.1 | VISIX S-Series Network Camera 9 Mount Schematics 9.1 D2 Ceiling Flush Mount (VX-FM-D2) 12000 Pecos Street, Suite 290, Westminster, CO 80234 | www.3xlogic.com | (877) 3XLOGIC... -
Page 91: D2 Wall Mount Adapter (Vx-Wm-D2)
Installation Manual v3.1 | VISIX S-Series Network Camera 9.2 D2 Wall Mount Adapter (VX-WM-D2) 12000 Pecos Street, Suite 290, Westminster, CO 80234 | www.3xlogic.com | (877) 3XLOGIC... -
Page 92: D2 Wall Mount With Junction Box (Vx-Wmj-D2)
Installation Manual v3.1 | VISIX S-Series Network Camera 9.3 D2 Wall Mount with Junction Box (VX-WMJ-D2) 12000 Pecos Street, Suite 290, Westminster, CO 80234 | www.3xlogic.com | (877) 3XLOGIC... -
Page 93: D2 Pendant Mount (Vx-Pm-D2)
Installation Manual v3.1 | VISIX S-Series Network Camera 9.4 D2 Pendant Mount (VX-PM-D2) 12000 Pecos Street, Suite 290, Westminster, CO 80234 | www.3xlogic.com | (877) 3XLOGIC... -
Page 94: Md Pendant Mount (Vx-Pm-Md)
Installation Manual v3.1 | VISIX S-Series Network Camera 9.5 MD Pendant Mount (VX-PM-MD) 12000 Pecos Street, Suite 290, Westminster, CO 80234 | www.3xlogic.com | (877) 3XLOGIC... -
Page 95: Md Wall Mount (Vx-Wm-Md)
Installation Manual v3.1 | VISIX S-Series Network Camera 9.6 MD Wall Mount (VX-WM-MD) 12000 Pecos Street, Suite 290, Westminster, CO 80234 | www.3xlogic.com | (877) 3XLOGIC... -
Page 96: Od Wall Mount (Vx-Wm-Od)
Installation Manual v3.1 | VISIX S-Series Network Camera 9.7 OD Wall Mount (VX-WM-OD) 12000 Pecos Street, Suite 290, Westminster, CO 80234 | www.3xlogic.com | (877) 3XLOGIC... -
Page 97: Od Pendant Mount (Vx-Pm-Od)
Installation Manual v3.1 | VISIX S-Series Network Camera 9.8 OD Pendant Mount (VX-PM-OD) 12000 Pecos Street, Suite 290, Westminster, CO 80234 | www.3xlogic.com | (877) 3XLOGIC... -
Page 98: Od2 Pendant Mount (Vx-Pm-Od2)
Installation Manual v3.1 | VISIX S-Series Network Camera 9.9 OD2 Pendant Mount (VX-PM-OD2) 12000 Pecos Street, Suite 290, Westminster, CO 80234 | www.3xlogic.com | (877) 3XLOGIC... -
Page 99: Od2 Wall Mount (Vx-Wm-Od2)
Installation Manual v3.1 | VISIX S-Series Network Camera 9.10 OD2 Wall Mount (VX-WM-OD2) 12000 Pecos Street, Suite 290, Westminster, CO 80234 | www.3xlogic.com | (877) 3XLOGIC... -
Page 100: Od2 Wall Mount With Junction Box (Vx-Wmj-Od2)
Installation Manual v3.1 | VISIX S-Series Network Camera 9.11 OD2 Wall Mount with Junction Box (VX-WMJ-OD2) 12000 Pecos Street, Suite 290, Westminster, CO 80234 | www.3xlogic.com | (877) 3XLOGIC... -
Page 101: Od3 Junction Box Bracket (Vx-Od3-Bjb)
Installation Manual v3.1 | VISIX S-Series Network Camera 9.12 OD3 Junction Box Bracket (VX-OD3-BJB) 12000 Pecos Street, Suite 290, Westminster, CO 80234 | www.3xlogic.com | (877) 3XLOGIC... -
Page 102: Od3 Wall Mount Bracket (Vx-Od3-Bwm)
Installation Manual v3.1 | VISIX S-Series Network Camera 9.13 OD3 Wall Mount Bracket (VX-OD3-BWM) 12000 Pecos Street, Suite 290, Westminster, CO 80234 | www.3xlogic.com | (877) 3XLOGIC... -
Page 103: Od3 Pendant Mount Bracket
Installation Manual v3.1 | VISIX S-Series Network Camera 9.14 OD3 Pendant Mount Bracket (VX-OD3-BPM 12000 Pecos Street, Suite 290, Westminster, CO 80234 | www.3xlogic.com | (877) 3XLOGIC... -
Page 104: Universal Corner Mount (Vx-Cm)
Installation Manual v3.1 | VISIX S-Series Network Camera 9.15 Universal Corner Mount (VX-CM) 12000 Pecos Street, Suite 290, Westminster, CO 80234 | www.3xlogic.com | (877) 3XLOGIC... -
Page 105: Universal Pole Mount (Vx-Pole)
Installation Manual v3.1 | VISIX S-Series Network Camera 9.16 Universal Pole Mount (VX-POLE) 12000 Pecos Street, Suite 290, Westminster, CO 80234 | www.3xlogic.com | (877) 3XLOGIC... -
Page 106: 180° Pendant Mount Bracket (Vx-8S-180-Bpm)
Installation Manual v3.1 | VISIX S-Series Network Camera 9.17 180° Pendant Mount Bracket (VX-8S-180-BPM) 12000 Pecos Street, Suite 290, Westminster, CO 80234 | www.3xlogic.com | (877) 3XLOGIC... -
Page 107: 180° Wall Mount Bracket (Vx-8S-180-Bwm)
Installation Manual v3.1 | VISIX S-Series Network Camera 9.18 180° Wall Mount Bracket (VX-8S-180-BWM) 12000 Pecos Street, Suite 290, Westminster, CO 80234 | www.3xlogic.com | (877) 3XLOGIC... - Page 108 Installation Manual v3.1 | VISIX S-Series Network Camera 9.19 Wall Mount Bracket for VX-2V-MD-RIWH (VX-WM-127) 83.5 mm (3.3") 46 mm (1.8") 6× M4 Depth:8 mm (0.3") 232 mm (9.1") 85.7 mm (3.4") 12000 Pecos Street, Suite 290, Westminster, CO 80234 | www.3xlogic.com | (877) 3XLOGIC...
- Page 109 4 × Φ8.5 mm (0.33 " Φ150 mm (5.9" ) 121.2 mm 6 × M4 (4.8 " Depth: 8 mm (0.31" ) 46 mm (1.8" ) 83.5 mm (3.3" ) 12000 Pecos Street, Suite 290, Westminster, CO 80234 | www.3xlogic.com | (877) 3XLOGIC...
- Page 110 Installation Manual v3.1 | VISIX S-Series Network Camera 9.21 In-Ceiling Flush Mount Adaptor for VX-2V-MD-RIWH (VX-FM-127) 98.07 mm (3.86") 93.02 mm (3.66") mm (3.86") 12000 Pecos Street, Suite 290, Westminster, CO 80234 | www.3xlogic.com | (877) 3XLOGIC...
Need help?
Do you have a question about the VISIX S-Series and is the answer not in the manual?
Questions and answers