Advertisement
Quick Links
Advertisement
Chapters

Related Manuals for Canon ImageRunner 5000 Series


Summary of Contents for Canon ImageRunner 5000 Series
- Page 2 Series User’s Guide imageRUNNER 5000 Series...
- Page 3 PREFACE Thank you for purchasing the Canon imageRUNNER 5000 Series. This Manual describes the method of using the imageRUNNER 5000 Series, its Copy and Mail Box functions, and the parts that are common to each function. Please read this manual thoroughly before operating the imageRUNNER 5000 Series in order to familiarize yourself with its capabilities, and to make the most of its many functions.
-
Page 4: How This Manual Is Organized
CHAPTER Some information in this manual is also relevant when using the Printer functions etc. of the imageRUNNER 5000 Series. Please use this manual in combination with the other manuals (printer manual etc.) when using the printer functions. How This Manual is Organized... -
Page 5: Safety Information
CANON INC. 3-30-2 SHIMOMARUKO, OHTA-KU, TOKYO, JAPAN CANON U.S.A., INC ONE CANON PLAZA, LAKE SUCCESS, N.Y. 11042, U.S.A. CANON CANADA INC. 6390 DIXIE ROAD MISSISSAUGA, ONTARIO L5T, 1P7, CANADA MANUFACTURED: THIS PRODUCT CONFORMS WITH DHHS RADIATION PERFORMANCE STANDARD, 21 CFR CHAPTER 1 SUBCHAPTER J. -
Page 6: Functions Of This Machine And Related Manuals
Functions of This Machine and Related Manuals This machine can also be used in a network or as a printer, when the Network Multi-PDL Printer Kit (option) is attached. Refer to the instruction manual for the relevant function as well as this manual. IMPORTANT •... -
Page 7: Operation Of The Machine And Terms Used In This Manual
Operation of the Machine and Terms Used in This Manual This machine makes effective use of a memory in order to perform print operations efficiently. For example, as soon as the machine has scanned the original that you want to copy, it can scan the next person’s original to make a copy without any need to wait. -
Page 8: Table Of Contents
Scanned Images ......... . . 32 What the imageRUNNER 5000 Series Can Do ..... 33 Various Kinds of Copies . - Page 9 Chapter 1 Before You Start Using This Machine Parts and Their Functions........1-2 External View .
- Page 10 Entering the Copy Quantity ........2-36 Specifying the Required Number of Copies .
- Page 11 Recalling a Previous Copy Job (Recall) ......3-58 Inverting Original Images (Nega/Posi)......3-60 Making Copies with the Original Image Repeated (Image Repeat) .
- Page 12 Erasing a Document from a Box ....... 4-95 Chapter 5 Printing Efficiently Changing the Exposure During Printing.
- Page 13 Setting the Timer (Timer Settings) ......6-24 Setting the Current Date and Time ......6-24 Setting the Time to Initiate Auto Sleep after Finishing Operations.
- Page 14 Options ..........7-13 Chapter 8 Troubleshooting Removing Paper Jams .
-
Page 15: Table Of Contents
Removing Punch Waste........9-32 Consumables ..........9-33 Copy Tray-C3 . -
Page 16: How To Use This Manual
How to Use This Manual The descriptions in this manual are presented using the following general format. Making Copies of Facing Pages in a Book (Two-page Separation) This feature enables you to copy facing pages in a book or magazine on separate sheets of paper. Original Copy IMPORTANT... -
Page 17: Symbols Used In This Manual
Symbols Used in This Manual Indicates a warning concerning operations that may lead to death or injury to persons if not performed correctly. In order to use the machine safely, always WARNING pay attention to these warnings. Indicates a caution concerning operations that may lead to injury to persons or damage to property if not performed correctly. -
Page 18: Safety Considerations
Safety Considerations Installation WARNING • Do not install the machine near alcohol, paint thinner or other inflammable substances. If inflammable substances come into contact with electrical parts inside the machine, this may result in a fire or electrical shock. • Do not place the following items on the machine. If these items come into contact with a high-volt- age area inside the machine, this may result in a fire or electrical shock. -
Page 19: Power Supply
• Do not install the machine in the following loca- tions. - A damp or dusty location - A location which is exposed to direct sunlight - A location subject to high temperatures - A location that is subject to open flames •... - Page 20 • Do not plug the machine into a multi-plug power strip, as this may cause a fire or electrical shock. • Do not bundle up or tie the power cord in a knot, as this may result in a fire or electrical shock. •...
-
Page 21: Handling
• If the breaker drops to the OFF position when you turn ON the power switch or when the copier is already ON, do not push the breaker back to the ON position. Doing so may lead to a fire, elec- trical shock, smoke, or the tripping of other breakers in the facility. - Page 22 • If the machine makes strange noises, or emits smoke, heat or unusual smells, immediately turn OFF the main power switch and unplug the power plug from the outlet. Then, contact your service representative. Continued use of the machine in this condition may result in a fire or electrical shock.
-
Page 23: Maintenance And Inspections
• Do not touch the Finisher while the machine is printing, as this may result in personal injury. • Turn OFF the power switch for safety when the machine will not be used for a long period of time such as overnight. Also, unplug the power plug for safety when the machine will not be used for an extended period of time such as during con- secutive holidays. - Page 24 • Do not throw used toner bottles into open flames, as this may ignite the toner remaining inside the bottles and result in burns or a fire. CAUTION • Unplug the power plug from the outlet at least once a year, and clean the area around the base of the plug’s metal pins to ensure all dust is removed.
-
Page 25: Consumables
• When loading paper or removing jammed origi- nals or paper, take care not to cut your hands on the edges of the original or paper. • When removing used toner bottles from the toner supply port, remove the bottles carefully to pre- vent toner from scattering and entering your eyes or mouth. -
Page 26: Warning Indications
Warning Indications CAUTION • The laser unit inside the machine emits laser light. Under no circumstances open the cover of the laser unit or remove the label attached to the cover. If the laser light escapes from the machine, exposure may cause serious damage to your eyes. DANGER- Laser radiation when open. -
Page 27: Periodic Inspection Of The Breaker
Periodic Inspection of the Breaker This machine has a breaker that detects excess current or leakage current. Be sure to test the breaker once or twice a month using the following procedure. IMPORTANT • Make sure that the main power is turned ON, and the machine is neither printing nor scanning before starting periodic inspection of the breaker. - Page 28 Move the breaker lever to ON (“ I ” side). Press the main power switch to ON (“ I ” side) Fill in the check sheet for the periodic inspection of the breaker at the end of this manual. Periodic Inspection of the Breaker...
-
Page 29: Installation Precautions
Installation Precautions Avoid Installing the Machine in the Following Locations • Avoid locations which are subject to low temperatures and low humidity, or high temperatures and high humidity. For example, avoid installing the machine near water faucets, hot water heaters, humidifiers, air conditioners, heaters and stoves. - Page 30 • Avoid locations where ammonia gas is emitted. • Avoid locations near volatile flammables, such as alcohol or paint thinner. • Avoid locations which are subject to vibra- tions. For example, avoid installing the machine on unstable floors or stands. •...
-
Page 31: Select A Safe Power Supply
Select a Safe Power Supply • Plug the machine into a 120V AC outlet. • Do not plug other electrical equipment into the outlet to which the machine is con- nected. • Do not plug the machine into a multi-plug power strip. -
Page 32: Handling Precautions
CAUTION • CANON RECOMMENDS THAT DATA STORED ON THE PROD- UCT’S HARD DISK DRIVE BE DUPLICATED OR BACKED UP TO PREVENT ITS LOSS IN THE EVENT OF FAILURE OR OTHER MALFUNCTION OF THE HARD DISK DRIVE. -
Page 33: Legal Limitations On Scanner Usage And The Use And Printing
Legal Limitations on Scanner Usage and the Use and Printing of Scanned Images Using your Scanner to reproduce certain documents, and the printing and use of such reproduc- tions, may be prohibited by law and may result in criminal and/or civil liability. A non-exhaustive list of these document is set forth below. -
Page 34: What The Imagerunner 5000 Series Can Do
What the imageRUNNER 5000 Series Can Do Most operations for using this machine are done from the touch panel display. By pressing the keys following the messages in the touch panel display, you can utilize the functions of this machine. - Page 35 Press to select the Special Features mode. Press to check the printing status, change the (See Chapter 3 “Useful Copy Functions”.) printing sequence or cancel printing. (See “Checking and Changing Printing Status,” on p. 5-13.) What the imageRUNNER 5000 Series Can Do...
- Page 36 Copy Sets (Cover/Sheet Insertion),” on p. 3-4.) Sheets (Two-page Separation),” on p. 3-2.) • When you select the [Front Cover] key. R E P O R T R E P O R T What the imageRUNNER 5000 Series Can Do...
- Page 37 (See “Making Copies Copies with Original Image Shifted (Shift),” on p. with Margins (Margin),” on p. 3-21.) 3-16.) • When you select the [Center Shift Corner Shift] key. What the imageRUNNER 5000 Series Can Do...
- Page 38 Enlarging Each Section on a Separate Copy Sheet (Image Separation),” on p. 3-38.) • When you select the [1 to 2] key. 11"x17" original CITY CITY LTR original CITY Original feeding direction What the imageRUNNER 5000 Series Can Do...
- Page 39 (See “Copying Separately- Set Originals (Job Build),” on p. 3-45.) Press to recall a previously set copy job. (See “Recalling a Previous Copy Job (Recall),” on p. 3-58.) What the imageRUNNER 5000 Series Can Do...
- Page 40 This mode enables you to make copies of orig- ing Copies with Image Reversed (Mirror Image),” inal images with the contrast reproduced more on p. 3-65.) sharply. (See “Making Sharp Contrast Copies (Sharpness),” on p. 3-67.) What the imageRUNNER 5000 Series Can Do...
-
Page 41: You Can Store Data And Print It At Your Convenience
• You can store a total of up to 1,000 items of document or image data, or up to 3,700 pages (LTR-size Canon Standard Chart) of document or image data, in all boxes. Depending on the conditions under which the hard disk is used, it may not be possible to attain the above values in some cases. - Page 42 [Change P Settings] key, you can originals. (See “Storing Originals in the Box,” change the print settings. (See “Printing Doc- on p. 4-3.) uments Stored in the Box,” on p. 4-6.) Start What the imageRUNNER 5000 Series Can Do...
-
Page 43: You Can Check, Change, And Cancel The Print Jobs
(See “Priority Printing,” on p. 5-16.) these documents will not be printed unless the password is entered, you can print classified documents preventing other people from ob- serving them. (See “Printing Secured Docu- ments,” on p. 5-20.) What the imageRUNNER 5000 Series Can Do... -
Page 44: Setting The Specifications According To The Method Of Use
• For details of the following settings, refer to the instruction manual for the relevant function. - [Printer Settings] (See the PS/PCL Reference Guide.) - [Remote UI On/Off] (See the Remote UI Guide.) - [Network Settings] (See the Network Guide.) What the imageRUNNER 5000 Series Can Do... -
Page 45: Displaying A Guide Screen
[ ] or [ ] key. Press the [Done] key to return to the Various originals menu screen. To return the display to the Guide Menu, press the [Guide Menu] key. What the imageRUNNER 5000 Series Can Do... -
Page 46: You Can Read The Messages From The System Manager
6-27.) A message board which the message appears in the Job/ Print monitor area. NOTE • For details on how to erase the message board, see “Erasing a Message Board,” on p. 6-73. What the imageRUNNER 5000 Series Can Do... -
Page 47: Functions That Conserve Power Consumption
Functions that Conserve Power Consumption You can conserve power consumption efficiently using the following functions when the machine is not operated. NOTE • There will be a slight delay when starting to use the machine next time. • The touch panel display will turn OFF when the machine enters one of these functions. •... -
Page 48: Quiet Mode
Quiet Mode If this machine is not operated (no keys are pressed) for a certain period of time after prints have been made or the key operation performed, the device sounds from this machine are stopped, and the machine enters the Quiet mode. -
Page 49: Other Useful Functions
Other Useful Functions Auto Drawer Switching Function If a paper drawer runs out of paper during printing, the machine automatically locates another paper drawer loaded with the same size paper, and begins feeding paper from that paper drawer. NOTE • You can set whether or not a paper drawer is subject to Auto Drawer Switching for each function. (See “Setting a Paper Drawer for Auto Paper Selection/ Auto Drawer Switching,”... -
Page 50: Paper Supply Indicator Function
Paper Supply Indicator Function This function shows the remaining amount of paper in each paper drawer when selecting the paper source “Selecting the Print Paper Size (Paper Se- (see “Selecting the Copy Paper Size (Paper Select) ,” on p. 2-9, lect),”... -
Page 52: Before You Start Using This Machine
Before You Start Using This Machine C H A P T E R This chapter describes what you should know before using this machine. Parts and Their Functions ..........1-2 External View. -
Page 53: Parts And Their Functions
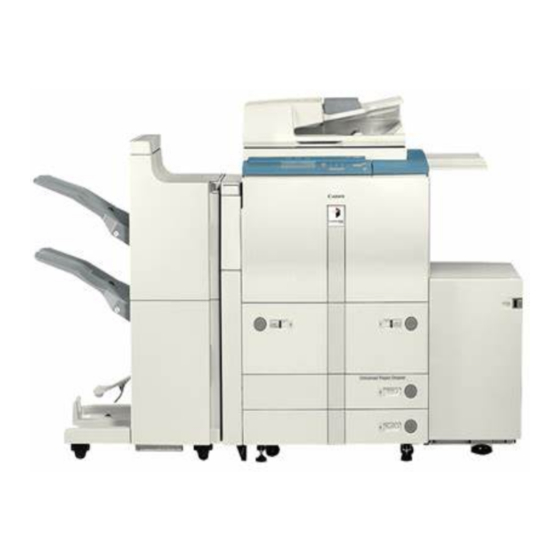
Parts and Their Functions External View Control panel (See “Control Panel Parts and Functions,” on p. 1-4.) Original supply tray Feeder Original output area Stack bypass Feeds transparencies and non-standard size paper stock. (See “Making Copies Using the Stack Bypass,” on p. 2-12.) Main power switch Press to the “I”... -
Page 54: Internal View
Internal View Rear side of platen glass cover Platen glass Toner supply cover Front cover Fixing Transport unit (Unit 1) Duplexing Transport unit (Unit 2) Breaker (See “Periodic Inspection of the Breaker,” on p. 26.) Rear side of platen glass cover Platen glass Toner supply cover Front cover... -
Page 55: Feeder
Feeder Feeder cover Original supply tray Feeder cover Original supply tray Slide guide Original output area Original set indicator Lights when originals are placed on the original supply tray. Slide guide Original output area IMPORTANT • If the paper delivery slot is blocked, printing may not be correctly performed. Therefore, do not place objects in the original output area. - Page 56 1: Counter Check key The value of the charging counter is displayed in the touch panel. 2: Display contrast Use to adjust the brightness of the touch panel display. dial 3: COPY key Press to use the Copy function. The Copy Basic Features screen appears in the touch panel display.
-
Page 57: Main Power And Control Panel Power
Main Power and Control Panel Power The machine is provided with two power switches, a main power switch and a control panel power switch. Turning the Power ON Make sure that the power plug is firmly inserted into the power outlet, and press the power switch to ON (“... - Page 58 The screen on the right is displayed when the machine becomes ready to scan. NOTE • In this status, jobs can be reserved. (See “Reserving a Job while the Machine is Warming Up,” on p. 5-5.) The machine becomes ready to print after about 5 minutes.
-
Page 59: Control Panel Power Switch
If the message “Enter the Department ID and Password using the numeric keys.” appears, enter the Department ID and Password. (See “Operations after Turning the Power ON,” on p. 10-4.) Control Panel Power Switch Press the control panel power switch to cancel the Sleep mode and resume normal machine operations. -
Page 60: Using The Touch Panel Display
Using the Touch Panel Display Frequently-used Keys on the Touch Panel Display The following keys on the touch panel display are used frequently. Press to close the current setting screen, retaining the programmed settings in the Cancel Key Next Key Additional Functions screen. -
Page 61: Touch Panel Key Display
Touch Panel Key Display When you press a key displayed on the screen, the key is highlighted and the corresponding function (mode) is set. Some keys may not be highlighted even when that function (mode) is set. CAUTION • Press the touch panel keys gently with a finger. Do not press the touch panel with a pencil, ball- point pen, or other sharp objects. -
Page 62: Placing Originals
Placing Originals Set the originals in one of the following places, depending on the size and type that you want to print and the settings that you have programed. Platen glass Place the originals on the platen glass when scanning bound originals, originals on heavy paper, lightweight paper, and transparencies. -
Page 63: Orientation Of Originals
Orientation of Originals You can place originals vertically or horizontally. Always align the top edge of your original with the back edge of the platen glass or the feeder. NOTE • If the top edge of the original is not aligned with the back edge of the platen glass, prints may not be made correctly depending on the mode you have set. -
Page 64: Placing An Original On The Platen Glass
Placing an Original on the Platen Glass You should use the platen glass when scanning books, originals on heavy or lightweight paper, transparencies etc., into memory. Lift up the feeder. IMPORTANT • Lift up the feeder about 11-7/8" (30 cm), so that the S-shaped sensor detaches from the feeder. - Page 65 Gently lower the feeder. CAUTION • Close the feeder gently to avoid catching your hand, as this may result in personal injury. • Do not press down the feeder hard when using the platen glass to scan thick books. This may damage the platen glass and cause personal injury.
-
Page 66: Placing Originals In The Feeder
Placing Originals in the Feeder Start Place a stack of originals in the feeder, then press the key, and the machine automatically scans them into memory. Two-sided originals can also be automatically scanned as two-sided image data. You can place the following originals in the original supply tray: •... - Page 67 Neatly place your originals face up in the origi- nal supply tray. IMPORTANT • Do not add or remove originals while the originals are being scanned. NOTE • When enlarging LTR/ STMT-size originals to 11"x17"/ LGL-size paper, place your originals hori- zontally.
-
Page 68: Available Paper Stock
Available Paper Stock Paper types available for this machine are as follows: When you store the paper type loaded in the paper drawers of this machine, the type of paper which can be set is indicated by the icons. (See “Identifying the Type of Paper in a Paper Drawer,” on p. - Page 69 Available Loading Place (Paper Set Place) Paper Size Length x Width Paper drawer 1, 2 Paper drawer 3, 4 Stack bypass Paper Deck 11"x17" 11" x 17" 8-1/2" x 14" 11" x 8-1/2" LTRR 8-1/2" x 11" STMTR 5-1/2" x 8-1/2" (4"...
-
Page 70: Basic Copying
Basic Copying C H A P T E R This chapter describes the basic copy functions. Flow of Copy Operations ..........2-3 Canceling a Copy Job . - Page 71 2. Basic Copying Collating Copies (Finisher) ..........2-48 Checking a Sample Set Before Copying (Sample Set).
-
Page 72: Flow Of Copy Operations
Flow of Copy Operations This section describes the flow of basic copy operations. NOTE • For details on the following items, see the indicated pages. - Main Power and Control Panel Power (See p. 1-6.) - Loading Paper and Adding Toner (See Chapter 7.) - Routine Cleaning (See p. - Page 73 Place your originals. (See “Placing Originals,” on p. 1-11.) NOTE • When Auto Collate is set to “On”, the Collate mode or the Offset Collate mode is automatically set at the point when you place the originals in the feeder. (See “Setting Automatic Collate On/ Off,” on p.
- Page 74 Start Press the key. If there is a current job, the machine scans the Stop original, then waits to print it. Start Printing starts when the current job is completed. IMPORTANT • You cannot change copy settings such as the copy Clear quantity, copy paper size and copy ratio during copying.
- Page 75 When you want to interrupt a copy job: To interrupt a copy job when you need to make Guide Interrupt priority copies, press the key. (See “Inter- rupting the Current Job to Make Priority Copies Additional Functions (Interrupt Mode),” on p. 5-3.) Clea Interrupt Processing...
-
Page 76: Canceling A Copy Job
Canceling a Copy Job NOTE See “Checking and Changing Print- • You can also cancel the copy job in the System Monitor screen. ( ing Status,” on p. 5-13. Canceling from the Touch Panel Display Press the [Cancel] key on the right screen which appears while the machine is waiting to print the document. - Page 77 Press the [Resume Copy] key. Canceling a Copy Job...
-
Page 78: Selecting The Copy Paper Size (Paper Select)
Selecting the Copy Paper Size (Paper Select) NOTE • When copying an original onto the same paper size at a 100% copy ratio, the periphery of the original may be cut slightly on the copy. For details of the size of the non-image areas, see “Non-image areas” in the “Specifications,”... -
Page 79: Manual Paper Selection
The screen on the right appears. Proceed to make copies in the usual way. IMPORTANT • In the Automatic Paper Selection mode, combined use with the Auto Copy Ratio, XY Auto Copy Ratio, Rotate Collating, Rotate Grouping, Saddle Stitch, Booklet, Image Combination, Image Separation, and Image Repeat (Auto) modes cannot be set. - Page 80 Select the desired paper size, and press the [Done] key. NOTE • The paper icon in the display indicates that the paper is loaded vertically, and the icon indicates that the paper is loaded horizontally in the paper drawers. Paper sizes with the suffix “R” (such as LTRR) indicate paper placed in the paper drawer or the stack bypass horizontally.
-
Page 81: Making Copies Using The Stack Bypass
Making Copies Using the Stack Bypass When making copies on transparencies or non-standard size paper stock, place the paper stock in the stack bypass. The following two kinds of paper can be copied using the stack bypass. Standard Size You can place standard inch paper, and A or B series paper. Free Size You can place non-standard size (4"x5-7/8"... - Page 82 Adjust the slide guides to the size of the paper. Slide Guide When feeding large-size paper, pull out the auxiliary tray. Auxiliary tray Place the paper in the stack bypass. Align the required number of sheets of paper with the slide guides. The surface that you want to copy on (opened surface) must be placed face up.
- Page 83 Select the paper size, and press the [Next] key. IMPORTANT • Set the paper size to the same size as the paper placed on the stack bypass. • When placing paper other than a standard size, press the [Free Size] key. NOTE •...
- Page 84 Press the [Done] key. Paper size loaded presently NOTE Paper size • When you press the [StackBypass Setting] key, you selected can set the paper size again. (See “Using the Stack Bypass while Reserving Print Jobs,” on p. 5-10. Place your originals and program the copy set- tings.
-
Page 85: Changing The Copy Ratio (Copy Ratio)
Changing the Copy Ratio (Copy Ratio) Enlarging/ Reducing Originals to a Standard Size (Preset Zoom) You can enlarge or reduce standard size originals to standard paper size. [Reduce] [Enlarge] LGL → LTR (78 %) Maximum ratio* (400%) 11"x17" → LGL, 11"x15" → LTR (73 %) STMT →... - Page 86 Press the [Copy Ratio] key. To reduce, select a reduction ratio. To enlarge, select an enlargement ratio. Press the [Done] key. The display returns to the Basic Features screen, and the selected copy ratio is displayed. Changing the Copy Ratio (Copy Ratio) 2-17...
-
Page 87: Specifying The Copy Ratio By % (Zoom Designation)
Proceed to make copies in the usual way. NOTE • To return the copy ratio to 100%, press the [Direct] key. Reset • You can cancel the mode by pressing the key. (The machine returns to the Standard mode.) Specifying the Copy Ratio by % (Zoom Designation) You can reduce or enlarge images by any copy ratio, in 1% increments. - Page 88 Press the [Done] key. NOTE • If you enter a value outside the setting range, a message prompting you to enter the appropriate value will appear on the screen. The display returns to the Basic Features screen, and the selected copy ratio is displayed. Proceed to make copies in the usual way.
-
Page 89: Automatically Setting The Copy Ratio Based On The Original And Copy Paper Sizes (Auto)
Automatically Setting the Copy Ratio Based on the Original and Copy Paper Sizes (Auto) The machine automatically selects the appropriate copy ratio based on the size of the originals and the selected paper. The available copy ratios are from 25% to 400% when the original is placed on the platen glass, and from 25% to 200% when the original is placed in the feeder. - Page 90 Select the paper size, and press the [Done] key. NOTE • Select a paper size other than “Auto”. When you select the [Auto] key, the paper loaded in the paper drawer 1 will be selected. Press the [Copy Ratio] key. Press the [Auto] key, and press the [Done] key.
-
Page 91: Slightly Reducing Images To Prevent The Original Periphery From Being Cut (Entire Image)
Slightly Reducing Images to Prevent the Original Periphery from Being Cut (Entire Image) When copying an original onto the same size of paper at a 100% copy ratio, the periphery of the original may be cut slightly on the copy. However, if you set the Entire Image mode, the copied image is automatically reduced slightly based on the copy paper size and copy image size. -
Page 92: Calculating The Copy Ratio Based On The Original And Copy Paper Sizes (Zoom Program)
Calculating the Copy Ratio Based on the Original and Copy Paper Sizes (Zoom Program) You can change the copy ratio by specifying the original size and paper size in inches. The following two Zoom Program modes are available. The available copy ratios are from 25% to 400% when the original is placed on the platen glass, and from 25% to 200% when the original is placed in the feeder. - Page 93 Making Copies with the Same XY Copy Ratio (Zoom) Place your originals and press the [Copy Ratio] key. Zoom Press the [Other Zoom] key. Press the [Zoom Program] key. 2-24 Changing the Copy Ratio (Copy Ratio)
- Page 94 Press the [Original Size] key and enter the original size, then press the [Copy Size] key and enter the copy size. Then press the [OK] key. NOTE • When entering values in millimeters, you can use Clear the Numeric keys ( ) and the key on the control panel.
- Page 95 Press the [Other Zoom] key. Press the [Zoom Program] key. Press the [XY Zoom] key. 2-26 Changing the Copy Ratio (Copy Ratio)
- Page 96 Press the [X] (horizontal direction) key and the [Y] (vertical direction) keys for both the origi- nal size and the copy size, and enter each value for X and Y. NOTE • When entering values in millimeters, you can use Clear the Numeric keys ( ) and the...
-
Page 97: Enlarging/Reducing Originals With Copy Ratios Set Independently For X And Y Axes (Xy Zoom)
Enlarging/Reducing Originals with Copy Ratios Set Indepen- dently for X and Y Axes (XY Zoom) If you set the XY Zoom mode, you can make enlarged or reduced copies with different XY copy ratios. The following two XY Zoom modes are available. The available copy ratios are from 25% to 400% when the original is placed on the platen glass, and from 25% to 200% when the original is placed in the feeder. - Page 98 Automatically specifying the copy ratio (Auto XY Zoom) The XY copy ratio is automatically set to suit the size of the selected paper. Original Copy LTRR selected Auto XY Zoom LTRR IMPORTANT • You cannot copy highly transparent originals, such as transparencies, in the Auto XY Zoom mode. To make copies, specify the copy ratio.
- Page 99 Press the [Other Zoom] key. Press the [XY Zoom] key. Press the [X] and [Y] keys and enter each value for X and Y. Then press the [OK] key. NOTE • If you select the [Auto XY Zoom] key, select a paper size other than the “Auto”.
- Page 100 The display returns to the Basic Features screen, and the selected copy ratio is displayed. NOTE • When you select the [Auto XY Zoom] key in the fol- lowing cases, X: Auto% and Y: Auto% are displayed as the copy ratios on the Basic Features screen. - When the original is placed in the feeder.
-
Page 101: Adjusting Exposure And Image Quality (Copy Exposure)
Adjusting Exposure and Image Quality (Copy Exposure) You can adjust the exposure and image quality when scanning the original you want to copy. NOTE • You can also change the exposure during printing. (See “Changing the Exposure During Printing,” on p. -
Page 102: Selecting Image Quality
Selecting Image Quality You can adjust image quality to the level best suited to the quality of text or photo originals. The following three modes are available for adjusting image quality. Text mode Text/Photo mode Photo mode The world’s coral reefs, where The world’s coral reefs, where brilliantly colored fish and a brilliantly colored fish and a... - Page 103 Place your original and press the [ ] key. Select the type of original (Text, Text/Photo, Photo). When the “Photo Mode” of Copy Settings is set to “On”, you can select the [Printed Img.] or [Photo] key. (See “Setting the Photo Mode of the Copy Function,”...
-
Page 104: Automatic Adjustment Of Exposure And Image Quality
Proceed to make copies in the usual way. NOTE • To cancel the setting, press the [A] key. Reset • You can cancel the mode by pressing the key. (The machine returns to the Standard mode.) Automatic Adjustment of Exposure and Image Quality Place your originals and press the [A] key. -
Page 105: Entering The Copy Quantity
Entering the Copy Quantity Specifying the Required Number of Copies NOTE • Up to 999 copies can be set. The maximum number of copies can also be changed. For details, contact your service representative. Press the Numeric keys ( ) to enter the desired copy quantity (1 to 999). -
Page 106: Changing The Copy Quantity
Changing the Copy Quantity Clear Press the key to clear the entered number. Stop Start Guide Then press the Numeric keys ( ) to enter the copy quantity again (1 to 999). nal Functions IMPORTANT Clear nterrupt • You cannot change the copy quantity during copy- ing. -
Page 107: Two-Sided Copying (Two-Sided Mode)
Two-sided Copying (Two-sided Mode) IMPORTANT • In the Two-sided Mode, combined use with the Two-page Separation, Booklet, Transparency Interleaving, Image Combination, and Image Separation modes cannot be set. • In the Book 2-Sided mode, combined use with the Cover/Sheet Insertion, Binding Erase, Different Size Originals, and Image Repeat modes in addition to the modes mentioned above cannot be set. - Page 108 Place your originals and press the [Two-sided Mode] key. Press the [1 2-Sided] key. When you select the [Option] key: Select the type of two-sided orientation, and press the [Done] key. Press the [OK] key. Two-sided Copying (Two-sided Mode) 2-39...
-
Page 109: Making Two-Sided Copies From Two-Sided Originals (2 2-Sided)
The display returns to the Basic Features screen, and “1 2-Sided” is displayed above the [Two-sided Mode] key. Proceed to make copies in the usual way. NOTE • When the original is placed on the platen glass, follow the instructions that appear on the screen and Start press the key once for each original. - Page 110 Place your originals in the feeder and press the [Two-sided Mode] key. NOTE • When Auto Collate is set to “On”, the Collate mode or the Offset Collate mode is automatically set at the point when you place the originals in the feeder.
- Page 111 Press the [OK] key. The display returns to the Basic Features screen, and “2 2-Sided” is displayed above the [Two-sided Mode] key. Proceed to make copies in the usual way. NOTE • When the original is placed on the platen glass, follow the instructions that appear on the screen and Start press the key once for each original.
-
Page 112: Making One-Sided Copies From Two-Sided Originals (2 1-Sided)
Making One-sided Copies from Two-sided Originals (2 1- Sided) This feature automatically turns over two-sided originals placed in the feeder to make one-sided copies. Original Copy 21-Sided IMPORTANT • Place the original horizontally when copying original such as LTRR/ STMTR-size original. If these origi- nals are placed vertically, the back side of the copy will be printed upside down. - Page 113 When you press the [Option] key: Select the type of original, and press the [Done] key. Press the [OK] key. The display returns to the Basic Features screen, and “2 1-Sided” is displayed above the [Two-sided Mode] key. Proceed to make copies in the usual way. NOTE •...
-
Page 114: Making Two-Sided Copies From Facing Pages In A Book (Book 2-Sided)
Making Two-sided Copies from Facing Pages in a Book (Book 2-Sided) This feature enables you to make two-sided copies from facing pages or front and back sides of a page in a bound original, such as a book or a magazine. Left/Right Two-sided Original Copy... - Page 115 Place your original on the platen glass and press the [Two-sided Mode] key. NOTE • If you want to make copies in page order, begin copying from the first page and work your way for- ward. • Place the original face down so that its top edge is aligned with the back edge of the platen glass.
- Page 116 Proceed to make copies in the usual way. To scan the next two facing pages, place the Start original and press the key again. When scanning is completed, press the [Done] key. NOTE • To cancel the setting, press the [Two-sided Mode] and [Cancel] keys in that order.
-
Page 117: Collating Copies (Finisher)
Collating Copies (Finisher) The Finisher mode can be selected to collate the copies in various ways by pages or copy sets. The copied papers are output face down. When “Collate” is set: Copies are automatically collated into sets arranged in page order, and output onto the trays as follows. - Page 118 When you select the [Double] (Left) key: Originals Copy set 1 Copy set 2 Copy set 3 Three sets of copies specified Staple When you select the [Saddle Stitch] key: Originals Copy set 2 Copy set 3 Copy set 1 Three sets of copies specified IMPORTANT...
-
Page 119: Collating Copies (Finisher)
When “Hole Punch” is set: Punches 2 or 3 holes in the copied sheets. When you select 11"x17"/ LTR-size paper: Original Copy Hole Punch IMPORTANT • [Hole Punch] can only be specified when the Finisher is equipped with the Puncher Unit-B1. •... - Page 120 Place your originals in the feeder and press the [Finisher] key. NOTE • When Auto Collate is set to “On”, the Offset Collate mode is automatically set at the point when you place the originals in the feeder. (See “Setting Automatic Collate On/ Off,”...
- Page 121 When you select the [Double] key: Select the staple position, and press the [OK] key. IMPORTANT • LGL/ LTRR/ STMTR-size papers cannot be double- stapled. When you select the [Saddle Stitch] key: Press the [Next] key. IMPORTANT • [Saddle Stitch] can only be specified when the Saddle Finisher-F2 (option) is attached.
- Page 122 When you select the [Hole Punch] key: Punches holes (2 or 3 holes) in the printed sheets. IMPORTANT • The machine automatically selects the type of hole punch (2 or 3 holes) depending on the selected paper size. - 2 holes: LGL/ LTRR - 3 holes: 11"x17"/ LTR •...
-
Page 123: Checking A Sample Set Before Copying (Sample Set)
Checking a Sample Set Before Copying (Sample Set) Before making multiple copies, the copying result can be checked using the Sample Set mode. NOTE • The machine’s counter counts the sample print as a print. Place your originals and program the copy set- tings. - Page 124 Check the output sheet, and select the [Start Print], [Cancel] or [Change Settings] key. NOTE • To make the remaining copies, press the [Start Print] key. • To cancel copying, press the [Cancel] key. • To change copy settings, press the [Change Set- tings] key.
-
Page 125: Checking The Copy Mode Settings (Setting Confirmation)
Checking the Copy Mode Settings (Setting Confirmation) When the copy mode settings are selected on the Special Features screen etc., you can check the current settings. Press the [Setting Confirmation] key on the Basic Features screen. The display shows the selected copy mode Setting Confirmation settings. -
Page 126: Changing Or Canceling A Selected Copy Mode
Changing or Canceling a Selected Copy Mode (Setting Confirmation/Cancel) From the Setting Confirmation screen, you can also change or cancel selected functions. Press the [Setting Confirmation] key on the Basic Features screen. The display shows the selected copy mode settings. Press the key for the copy mode you want to change or cancel. - Page 127 To cancel a mode Press the [Cancel] key. The display returns to the Setting Confirmation screen. Press the [Done] key. The display returns to the Basic Features screen. 2-58 Changing or Canceling a Selected Copy Mode (Setting Confirmation/Cancel)
-
Page 128: Useful Copy Functions
Useful Copy Functions C H A P T E R This chapter describes more advanced copy functions. Making Copies of Facing Pages in a Book onto Two Separate Copy Sheets (Two-page Separation) ........... 3-2 Adding Front and Back Covers, Insertion Sheets and Chapter Pages to Copy Sets (Cover/Sheet Insertion) . -
Page 129: Making Copies Of Facing Pages In A Book Onto Two Separate Copy Sheets (Two
Making Copies of Facing Pages in a Book onto Two Separate Copy Sheets (Two-page Separation) This feature enables you to copy facing pages in a book or a magazine on separate sheets of paper. Original Copy Two-page Separation IMPORTANT • In the Two-page Separation mode, combined use with the Two-sided, Cover/Sheet Insertion, Booklet, Transparency Interleaving, Binding Erase, Different Size Originals, Image Combination, Image Separa- tion, and Image Repeat modes cannot be set. - Page 130 Press the [Done] key. The display returns to the Basic Features screen. Proceed to make copies in the usual way. Start For the next two facing pages, place the original and press the key again. When scanning is completed, press the [Done] key. NOTE •...
-
Page 131: Adding Front And Back Covers, Insertion Sheets And Chapter
Adding Front and Back Covers, Insertion Sheets and Chapter Pages to Copy Sets (Cover/Sheet Insertion) This function enables you to program the machine to automatically add front and back covers, inser- tion sheets or chapter pages using a different type of paper stock from which is used for the main text. -
Page 132: Pages To Copy Sets (Cover/Sheet Insertion)
Sheet Insertion Adds insertion sheets between the pages of copy sets. It is useful when you want to divide your copy sets into different sections with a blank sheet. The insertion sheets can also be copied. Originals Copy R E P O R T R E P O R T Printed insertion sheets selected in the Cover/Sheet Insertion mode. - Page 133 Press the [Cover/Sheet Insertion] key. Select the Cover/Sheet Insertion feature you want to use, and press the [Next] key. When you select only the [Chapter Page] mode, proceed to step 5. (When you select the [Sheet Insertion] or [Chapter Page] mode.) NOTE •...
- Page 134 Make the following settings depending on the mode selected. NOTE • The display will vary depending on the mode selected. When you select the [Back Cover] key: Select the side to be copied onto, and press the [Next] key. When you select the [Sheet Insertion (Printed)], [Chapter Page] key: Set all positions where the sheet is to be inserted into the copies, and press the [Next]...
- Page 135 Select the side to be copied onto, and press the [Done] key. Select the paper source for each insertion sheet, and press the [OK] key. NOTE • Select the same paper size for the front and back cover, insertion sheets (or chapter page.) •...
-
Page 136: Making Copies For Use As A Booklet (Booklet)
Making Copies for Use as a Booklet (Booklet) You can copy one-sided or two-sided originals in such a way that the copies can be easily made into a booklet. Originals Copy Booklet When the Saddle Finisher-F2 is attached. IMPORTANT • In the Booklet mode, combined use with the Entire Image, Finisher, Two-sided, Two-page Separation, Cover/Sheet Insertion, Transparency Interleaving, Margin, Frame Erase, Different Size Originals, Image Combination, Image Separation, Image Repeat, and Mirror Image modes cannot be set. - Page 137 Press the [Booklet] key. Select the original size, and press the [Next] key. NOTE • To copy two-sided originals, also press the [2-Sided Original] key. • To select A or B series paper size, press the [A/B- size] key. When you select the [2-Sided Original] key: Select the type of the original, and press the [OK] key.
- Page 138 Select the paper size, and press the [Next] key. Press the [OK] key, and proceed to step 7 when the Saddle Finisher-F2 (option) is not attached. IMPORTANT • The paper used for the cover page must be the same size as the other pages. •...
- Page 139 Select whether or not to saddle stitch the booklet, and press the [OK] key. The display returns to the Special Features screen. IMPORTANT • The saddle stitching cannot be set when the Sad- dle Finisher-F2 (option) is not attached. • When the number of sheet exceeds 15, the sta- pling will not be performed, and the sheets will be output to the tray.
-
Page 140: Making Copies With Sheets Of Paper Interleaved Between Transparencies (Transparency Interleaving)
Making Copies with Sheets of Paper Interleaved between Transparencies (Transparency Interleaving) Use this mode when copying onto transparencies fed from the stack bypass. The machine automat- ically interleaves a sheet of paper between each transparency. The interleaf sheets protect the cop- ied surface of the transparencies. - Page 141 Place your originals in the feeder and press the [Special Features] key. NOTE • When Auto Collate is set to “On”, the Collate mode or the Offset Collate mode is automatically set at the point when you place the originals in the feeder.
- Page 142 Select whether or not to copy the image onto the interleaf sheet, and press the [OK] key. The display returns to the Special Features screen. NOTE • When copying interleaf sheets, those sheets are included in the count of the total number of copies. Press the [Done] key.
-
Page 143: Making Copies With Original Image Shifted (Shift)
Making Copies with Original Image Shifted (Shift) Center Shift Corner Shift Makes copies with the entire image shifted to the center or a corner. Copy with original image Copy with original image Original shifted to the center shifted to a corner Shift No Key Entry Makes copies with entire image shifted to a designated position with the Numeric keys. -
Page 144: Making Copies With Original Image Shifted To The Center Or A Corner
Making Copies with Original Image Shifted to the Center or a Corner Place your original and press the [Special Fea- tures] key. Press the [Shift] key. Press the [Center Shift Corner Shift] key. Making Copies with Original Image Shifted (Shift) 3-17... -
Page 145: Making Copies With Original Image Using The Numeric Keys
Select the shift direction by using the arrow keys, and press the [OK] key. The display returns to the Special Features screen. NOTE • “Shift direction” dose not refer to the direction in which the original is placed on the platen glass or in the feeder, but to the direction that you want the original shifted, if the original document that you want to scan is viewed as face up and situated in... - Page 146 Press the [Shift] key. Press the [No Key Entry] key. Select the shift direction, then enter the value using the Numeric keys ( NOTE • “Shift direction” does not refer to the direction in which the original is placed on the platen glass or in the feeder, but to the direction that you want the original shifted, if the original document that you want to scan is viewed as face up and situated in...
- Page 147 Example: To move the image to the left: Press the [ ] key on the left to enter the value, and press the [OK] key. NOTE • Follow the same procedure when shifting to the right ,upper and lower sides. Example: To move the image in a diagonal direction: Press the [...
-
Page 148: Making Copies With Margins (Margin)
Making Copies with Margins (Margin) This mode enables you to make copies with the entire original image shifted by a designated width to the left, right, top or bottom to create a margin on print sheets. Use this mode to make copies ready for placement in ring binders. - Page 149 Select the type of margin, and press the [Next] key. IMPORTANT • If you are using the Margin and Two-sided modes together and copying an original that already has a margin, follow the instructions below: - 1 2-sided: Set the margin for the back only. - 2 2-sided: You do not need to set the margin.
- Page 150 Press the [Done] key. The display returns to the Basic Features screen. Proceed to make copies in the usual way. NOTE • To cancel the setting, press the [Special Features], [Margin], and [Cancel] keys in that order. Reset • You can also cancel the mode by pressing the key.
-
Page 151: Erasing Shadows And Frame Lines From Copies (Frame Erase)
Erasing Shadows and Frame Lines from Copies (Frame Erase) This mode erases shadows and lines that appear when copying various types of originals. The fol- lowing three Frame Erase features are available. IMPORTANT • Combination of these three modes cannot be set. If you select one of these modes, the previously set mode is canceled. - Page 152 Book Frame Erase Erases the dark border as well as center and contour lines that appear when copying facing pages in a bound original onto a single print paper. IMPORTANT • In the Book Frame Erase, combined use with the Entire Image, Booklet, Image Combination, Image Separation, Image Repeat, and Mirror Image modes cannot be set.
-
Page 153: Making Copies Erasing The Frame Of The Originals
Making Copies Erasing the Frame of the Originals Place your originals and press the [Special Original Frame Features] key. Erase Press the [Frame Erase] key. Press the [Original Frame Erase] key, and press the [Next] key. Select the size of the original, and press the [Next] key. - Page 154 Set the desired original frame erase width using the [–] or [+] key, and press the [OK] key. The value set here is specified uniformly around the original. To set frame erase width values for the top, bottom, left and right sides of the original independently, press the [Adjust Each Dim.] key.
-
Page 155: Making Copies Erasing The Book Frame
Proceed to make copies in the usual way. NOTE • To cancel the setting, press the [Special Features], [Frame Erase], and [Cancel] keys in that order. Reset • You can also cancel the mode by pressing the key. (The machine returns to the Standard mode.) Making Copies Erasing the Book Frame Place your originals and press the [Special Features] key. - Page 156 Select the size of the book when opened, and press the [Next] key. NOTE • To select A or B series paper size, press the [A/B- size] key. Press each key (“Top”, “Left”, “Center”, “Right”, and “Bottom”) and set the desired book frame erase width using the [–] or [+] key, and press the [OK] key.
- Page 157 Press the [Done] key. The display returns to the Basic Features screen. Proceed to make copies in the usual way. NOTE • To cancel the setting, press the [Special Features], [Frame Erase], and [Cancel] keys in that order. Reset • You can also cancel the mode by pressing the key.
-
Page 158: Making Copies Erasing Binding Holes Etc
Making Copies Erasing Binding holes etc. Place your originals on the platen glass and Binding Erase press the [Special Features] key. Press the [Frame Erase] key. Press the [Binding Erase] key, and press the [Next] key. Specify the binding erase feature, and press the [Next] key. - Page 159 Set the desired binding erase width using the [–] or [+] key, and press the [OK] key. NOTE • When entering values in millimeters, you can use Clear the Numeric keys ( ) and the key on the control panel. •...
-
Page 160: Sheet (Image Combination)
Reducing Two, Four or Eight Originals to Fit on a Single Copy Sheet (Image Combination) This mode automatically reduces two, four, or eight originals, two-sided originals, or the facing pages of a book to fit on one side or both sides of a selected paper size. IMPORTANT •... - Page 161 8 On 1 Reduces eight 1-sided or four 2-sided originals to fit on one side or both sides of the sheet. Copy Originals R E P O R T R E P O R T R E P O R T Place your originals in the feeder and press the [Special Features] key.
- Page 162 Select the size of the originals, and press the [Next] key. NOTE • When copying the two-sided original with the Image Combination mode, press the [2-Sided Original] key after selecting the original size. • To select A or B series paper size, press the [A/B- size] key.
- Page 163 When you select the [Option] key: Select the image order, and press the [Done] key. 2 On 1 4 On 1, 8 On 1 Select the paper size, and press the [OK] key. The display returns to the Special Features screen.
- Page 164 Proceed to make copies in the usual way. NOTE • When the original is placed on the platen glass, follow the instructions that appear on the display and Start press the key once for each original. When scanning is completed, press the [Done] key. •...
- Page 165 Dividing an Original Into Equal Sections and Enlarging Each Section on a Separate Copy Sheet (Image Separation) This mode automatically divides an original into equal sections and copies each section in enlarged form on a separate sheet. IMPORTANT • In the Image Separation mode, combined use with the Entire Image, Two-sided, Two-page Separation, Cover/Sheet Insertion, Booklet, Transparency Interleaving, Frame Erase, Different Size Originals, Image Combination, and Image Repeat modes cannot be set.
- Page 166 1 to 4 Divides a one-sided original into four equal sections and outputs the sections in enlarged form as four 1-sided copies or two 2-sided copies. Original Copy NOTE • You can place LTR-size originals horizontally or vertically when using this feature. Place your originals on the platen glass and press the [Special Features] key.
- Page 167 Select the desired Image Separation feature, and press the [Next] key. NOTE • To make two-sided copy, press the [2-Sided Copy] key. When you select the [2-Sided Copy] key: Select the appropriate orientation, and press the [OK] key. Select the layout for the last original, and press the [Next] key.
- Page 168 When you select the [Option] key: Specify the image (print) order, and press the [Done] key. 1 To 2 1 To 4 Select the paper size, and press the [OK] key. The display returns to the Special Features screen. IMPORTANT •...
-
Page 169: Dividing An Original Into Equal Sections And Enlarging Each Section On A Separate Copy Sheet (Image Separation)
Proceed to make copies in the usual way. NOTE Start • When there are multiple originals, follow the instructions that appear on the display and press the key once for each original. When scanning is completed, press the [Done] key. •... -
Page 170: Feeding Different-Size Originals Together In The Feeder
Feeding Different-size Originals Together in the Feeder (Different Size Originals) This function enables you to copy different-size originals with the same width or different-size origi- nals with different widths, together in one group. IMPORTANT • In the Different Size Originals mode, combined use with the Book 2-sided, Two-page Separation, Book- let, Image Combination, Image Separation, and Image Repeat modes cannot be set. - Page 171 Select the type of the Different Size Originals, and press the [OK] key. The display returns to the Special Features screen. NOTE • When you set the same-width originals, press the [Same Width] key. • When you set the different-width originals, press the [Different Width] key.
-
Page 172: Copying Separately-Set Originals (Job Build)
Copying Separately-Set Originals (Job Build) This mode enables you to scan originals that are too many to set at once, by dividing them into mul- tiple batches. You can use both the feeder and the platen glass for scanning. The originals are cop- ied as one document after all the batches have been scanned. - Page 173 Press the [Job Build] key. Press the [Done] key. The display returns to the Basic Features screen. Start Press the key to start scanning the orig- inals. Stop Start NOTE • You can adjust the Exposure and the Image Qual- See “Adjusting Exposure and Image ity.
- Page 174 Select the type of two-sided original, and press the [OK] key. When scanning is completed, set the next original. Repeat steps 4 and 5 until the last original is scanned, then press the [Done] key. NOTE • To cancel the setting, press the [Special Features] and [Job Build] keys in that order.
-
Page 175: Storing/ Recalling Often Used Copy Settings In Memory
Storing/ Recalling Often Used Copy Settings in Memory (Mode Memory) You can store any possible combination of the Copy functions, up to nine settings, in a memory key, and name that key. It is useful when you want to store the Copy functions used frequently. NOTE •... - Page 176 Press the [Store] key. Select the desired memory key from among memory keys [M1] to [M9], and press the [Next] key. NOTE • The mode memory key where copy settings are already stored shows a small, black square [ ] in the lower right corner of the key.
- Page 177 If you selected a memory key to which a copy mode has already been stored: The message to confirm that you want to replace the old copy mode with the new copy mode is displayed. To overwrite: Select the [Yes] key. The contents of the memory key are replaced with the new copy setting.
-
Page 178: Storing A Memory Key Name
Press the [Done] key. The display returns to the Basic Features screen. Storing a Memory Key Name Press the [Special Features] key. Press the [Mode Memory] key. Storing/ Recalling Often Used Copy Settings in Memory (Mode Memory) 3-51... - Page 179 Press the [Store/Erase] key. Press the [Store Name] key. Select the memory key ([M1] to [M9]) for which you want to assign a name, and press the [Next] key. NOTE • The mode memory key where copy settings are already stored shows a small, black square [ ] in the lower right corner of the key.
-
Page 180: Recalling A Copy Mode
Press the [OK] key. The display returns to the Special Features screen. Press the [Done] key. The display returns to the Basic Features screen. Recalling a Copy Mode Press the [Special Features] key. Storing/ Recalling Often Used Copy Settings in Memory (Mode Memory) 3-53... - Page 181 Press the [Mode Memory] key. Select the memory key where the copy setting you want to recall is stored. Check the copy settings stored to the memory key. If the contents are correct, press the [OK] key. The display returns to the Special Features screen.
-
Page 182: Erasing A Copy Mode
Erasing a Copy Mode Press the [Special Features] key. Press the [Mode Memory] key. Press the [Store/Erase] key. Press the [Erase] key. Storing/ Recalling Often Used Copy Settings in Memory (Mode Memory) 3-55... - Page 183 Select the memory key of the copy mode that you want to erase, and press the [Next] key. IMPORTANT • Check the copy settings before you erase them. NOTE • The mode memory key where copy settings are already stored shows a small, black square [ ] in the lower right corner of the key.
- Page 184 Press the [Cancel] key. The display returns to the Special Features screen. Press the [Done] key. The display returns to the Basic Features screen. Storing/ Recalling Often Used Copy Settings in Memory (Mode Memory) 3-57...
-
Page 185: Recalling A Previous Copy Job (Recall)
Recalling a Previous Copy Job (Recall) You can recall up to three previously set copy modes and make copies using these settings. IMPORTANT Start • One copy job is defined by setting the number of copies, exposure, zoom etc., and pressing the Reset key when the Auto Clear function is on, or by calling up a copy job stored in memory. - Page 186 Select one of the [1 Before], [2 Before] or [3 Before] keys. Check that the copy settings are correct, and press the [OK] key. The display returns to the Special Features screen. NOTE • You can also check which copy modes are stored to memory other than the currently displayed copy mode by pressing the [ ] or [ ] key.
-
Page 187: Inverting Original Images (Nega/Posi)
Inverting Original Images (Nega/Posi) This function enables you to make copies of the original inverting the black and the white areas. Original Copy SCENE SCENE Nega/Posi Place your originals and press the [Special Features] key. Press the [ ] key to display the Special Fea- tures screen (2/2). - Page 188 Press the [Nega/Posi] key. Press the [Done] key. The display returns to the Basic Features screen. Proceed to make copies in the usual way. NOTE • To cancel the setting, press the [Special Features], [ ], and [Nega/Posi] keys in that order. Reset •...
-
Page 189: Making Copies With The Original Image Repeated (Image Repeat)
Making Copies with the Original Image Repeated (Image Repeat) You can repeatedly copy the image of an original in either the lengthwise or widthwise direction. The following two setting methods are available for the Image Repeat mode. Automatic setting The original image is copied so that the maximum possible of copies fit in the selected paper size. Original Copy CITY... - Page 190 Place your originals and press the [Special Features] key. Press the [ ] key to display the Special Fea- tures screen (2/2). Press the [Image Repeat] key. Set the number of Image repeat times for each of the lengthwise and widthwise directions. Automatic setting Press the [Auto] key.
- Page 191 Manual setting Press the [–] or [+] key to set the number of images. NOTE • The number of times that the image can be set to repeat is from 1 to 20. • Sometimes the designated image will overlap depending on how many times you have manually set it to be repeated.
-
Page 192: Making Copies With Image Reversed (Mirror Image)
Making Copies with Image Reversed (Mirror Image) This function copies images as if reflected in the mirror, reversing the right and left sides. Original Copy Mirror Image IMPORTANT • In the Mirror Image mode, combined use with the Cover/Sheet Insertion, Shift, Booklet, Margin, Frame Erase, Image Combination, and Image Repeat modes cannot be set. - Page 193 Press the [Mirror Image] key. Press the [Done] key. The display returns to the Basic Features screen. Proceed to make copies in the usual way. NOTE • To cancel the setting, press the [Special Features], [ ], and [Mirror Image] keys in that order. Reset •...
-
Page 194: Making Sharp Contrast Copies (Sharpness)
Making Sharp Contrast Copies (Sharpness) This mode allows you to make copies of original images with the contrast reproduced sharper or softer. To make copies with text or lines reproduced sharper, use the [High] key. To make copies with photographs or other half-tones reproduced softer, use the [Low] key. If you make copies of an original containing half-tones such as a printed photograph using the Photo mode, moiré... - Page 195 Place your originals and press the [Special Features] key. Press the [ ] key to display the Special Fea- tures screen (2/2). Press the [Sharpness] key. Use the [Low] or [High] key to adjust the sharpness, and press the [OK] key. The display returns to the Special Features screen (2/2).
- Page 196 Press the [Done] key. The display returns to the Basic Features screen. Proceed to make copies in the usual way. NOTE • To cancel the setting, press the [Special Features], [ ], [Sharpness], and [Cancel] keys in that order. Reset •...
- Page 197 3-70 Making Sharp Contrast Copies (Sharpness)
- Page 198 Using the Mail Box Functions C H A P T E R This chapter describes the Mail Box functions with which you can temporarily store data for later printing. Flow of Mail Box Operations ..........4-3 Storing Originals in the Box .
- Page 199 4. Using the Mail Box Functions Checking the Print Result or the Image of the Stored Document (Sample Print) ..4-88 Checking the Document’s Detailed Information .......4-90 Changing the Name of a Document .
-
Page 200: Flow Of Mail Box Operations
Flow of Mail Box Operations This section describes the flow of basic Mail Box operations dividing it in two parts; Scanning origi- nals and Printing. NOTE • For details on the following items, see the indicated pages. - Main Power and Control Panel Power (See p. 1-6.) - Loading Paper and Adding Toner (See Chapter 7.) - Routine Cleaning (See p. - Page 201 Enter the password, then press the [OK] key. NOTE • Enter the password used when the box was stored. (See “Setting/ Storing the Box,” on p. 6-46.) If a password has not been stored, this operation is not necessary. Press the [Scan] key. Place your originals.
- Page 202 Start Press the key. When scanning is completed, the display returns Stop to the screen in step 4. Start IMPORTANT • You cannot change the settings such as the scan- ning quantity and scanning paper size during scan- Clear ning. NOTE •...
-
Page 203: Printing Documents Stored In The Box
Printing Documents Stored in the Box You can print documents stored in a box from this machine. When the machine is used as a network printer, you can also specify printing from the computer. For details on how to operate the machine from personal computers, see the Remote UI Guide. - Page 204 Enter the password, then press the [OK] key. NOTE • Enter the password used when the box was stored. (See “Setting/ Storing the Box,” on p. 6-46.) If a password has not been stored, this operation is not necessary. Select the document you want to print. NOTE •...
- Page 205 Press the [Start Print] key. If there is a current job or a previously reserved job, the machine will start printing after that job is completed. NOTE • You can enter the printing quantity using the Numeric keys ( • If you make a mistake entering the quantity, press Clear key and enter the correct quantity.
-
Page 206: Scanning Originals Into A Box
Scanning Originals into a Box Giving a Name to the Document to be Scanned (Document Name) You can give a name to the document before scanning. Prepare to scan the original into the box following the procedure below. Select the desired box number Place the original MAIL BOX NOTE... -
Page 207: Specifying Document Size (Doc. Size Select)
Start scanning the original. (See “Storing Originals in the Box,” on p. 4-3.) NOTE • To cancel the settings, press the [Initial Settings] key. (The machine returns to the Standard Scanning mode.) Reset • When you press the key, the display returns to Box selection screen. Specifying Document Size (Doc. -
Page 208: Adjusting The Exposure And Image Quality Before Scanning The Originals (Scanning Exposure)
Select the document size, and press the [Done] key. IMPORTANT • In the Automatic Document Size Selection mode, combined use with the Booklet Scanning, Original Frame Erase, Book Frame Erase, and Image Com- bination modes cannot be set. • You cannot select the [Auto] key when scanning the following type of originals. - Page 209 Press the [Light] or [Dark] key. NOTE • Move the indicator above the [Light] and [Dark] keys to the left to make the exposure lighter or to Light Dark the right to make the exposure darker. Start scanning the original. (See “Storing Originals in the Box,”...
- Page 210 Prepare to scan the original into the box following the procedure below. Select the desired box number Place the original MAIL BOX NOTE • When you select a box set with a password, enter the password after selecting the box. Press the [ ] key.
- Page 211 Press the [Light] or [Dark] key to adjust the scanning exposure. NOTE • Move the indicator above the [Light] and [Dark] keys to the left to make the exposure lighter or to the right to make the exposure darker. Start scanning the original. (See “Storing Originals in the Box,”...
-
Page 212: Changing The Scanning Ratio (Copy Ratio)
Start scanning the original. (See “Storing Originals in the Box,” on p. 4-3.) NOTE • To cancel the settings, press the [Initial Settings] key. (The machine returns to the Standard Scanning mode.) Reset • When you press the key, the display returns to the Box selection screen. Changing the Scanning Ratio (Copy Ratio) Scanning Originals after Enlarging/ Reducing them to a Standard Record Size (Preset Zoom) - Page 213 Press the [Done] key. Start scanning the original. (See “Storing Originals in the Box,” on p. 4-3.) NOTE • To return the scanning ratio to 100%, press the [Direct] key. • To cancel the settings, press the [Initial Settings] key. (The machine returns to the Standard Scanning mode.) Reset •...
- Page 214 Enter the ratio using the Numeric keys ) or the [–] and [+] keys. NOTE • Even if you entered the ratio with the Numeric keys ), you can change the entered values with the [–] and [+] keys. • If you make a mistake when entering values, press Clear key, and enter the correct value.
- Page 215 Automatically Setting the Ratio Based on the Selected Record Size (Auto) In this mode, the machine automatically selects the appropriate scanning ratio based on the selected record size. The available scanning ratios are from 25% to 400% when the original is placed on the platen glass, and from 25% to 200% when the original is placed in the feeder.
- Page 216 Select the record size, and press the [OK] key. NOTE • To select A or B series paper size, press the [A/B-size] key. Start scanning the original. (See “Storing Originals in the Box,” on p. 4-3.) NOTE • To return the ratio to 100%, press the [Direct] key. •...
- Page 217 Scanning with the same XY scanning ratio (Zoom) Prepare to scan the original into the box following the procedure below. Select the desired box number Place the original MAIL BOX NOTE • When you select a box set with a password, enter the password after selecting the box. Press the [Copy Ratio] key.
- Page 218 Press the [Original Size] key and enter the original size, then press the [Record Size] key and enter the size to be recorded. Then press the [OK] key. NOTE • When entering values in millimeters, you can use Clear the Numeric keys ( ) and the key on the control panel.
- Page 219 Press the [Copy Ratio] key. Press the [Other Zoom] key. Press the [Zoom Program] key. Press the [XY Zoom] key. 4-22 Scanning Originals into a Box...
- Page 220 Press the [X] (horizontal direction) key and [Y] (vertical direction) keys for both the original size and record size, and enter the values for X and Y with the Numeric keys. NOTE • When entering values in millimeters, you can use Clear the Numeric keys ( ) and the...
- Page 221 Enlarging/Reducing Originals at Scanning Ratios Set Independently for X and Y Axes (XY Zoom) If you set the XY Zoom mode, you can scan an original enlarging or reducing it to different XY scanning ratios. The available scanning ratios are from 25% to 400% when the original is placed on the platen glass, and from 25% to 200% when the original is placed in the feeder.
-
Page 222: Scanning Two-Sided Originals (Two-Sided Original)
Press the [XY Zoom] key. Press the [X] and [Y] keys and enter each val- ues for X and Y. Then press the [OK] key. NOTE • You can enter the numbers using the Numeric keys ) on the control panel. •... - Page 223 Prepare to scan the original into the box following the procedure below. Select the desired box number Place the original MAIL BOX NOTE • When you select a box set with a password, enter the password after selecting the box. Press the [2-sided Original] key.
-
Page 224: Scanning Facing Pages In A Book Onto Two Separate Sheets In One Step (Two
Scanning Facing Pages in a Book onto Two Separate Sheets in One Step (Two-page Separation) This feature enables you to scan facing pages in a book or a magazine on separate sheets of paper. IMPORTANT • In the Two-page Separation mode, combined use with the Two-sided Original, Booklet Scanning, Different Size Originals, Binding Erase, and Image Combination modes cannot be set. -
Page 225: Scanning Originals For Use As A Booklet (Booklet Scanning)
Press the [Done] key. Start scanning the original. (See “Storing Originals in the Box,” on p. 4-3.) Start For the next two facing pages, place the original and press the key again. When scanning is completed, press the [Done] key. NOTE •... - Page 226 Press the [Special Features] key. Booklet Scan- ning Frame Erase Press the [Booklet Scanning] key. Select the original size, and press the [Next] key. NOTE • To scan two-sided originals, also press the [2-Sided Original] key. • To select A or B series paper size, press the [A/B-size] key.
- Page 227 Original Frame Erase Select the booklet layout size, and press the [OK] key. NOTE • The originals are recorded to match half the size of selected paper size. • To select A or B series paper size, press the [A/B-size] key. Press the [Done] key.
-
Page 228: Erasing Shadows And Frame Lines (Frame Erase)
Erasing Shadows and Frame Lines (Frame Erase) This mode erases shadows and lines that appear when scanning various types of originals. The following three Frame Erase features are available. IMPORTANT • Combinations of these three modes cannot be set. If you select one of these modes, the previously set mode is canceled. - Page 229 Erasing Frame Lines and Storing the Original (Original Frame Erase) Prepare to scan the original into the box following the procedure below. Select the desired box number Place the original MAIL BOX NOTE • When you select a box set with a password, enter the password after selecting the box. Press the [Special Features] key.
- Page 230 Select the size of the original, and press the [Next] key. NOTE • You can only set the Original Frame Erase mode for original sizes shown in the touch panel display. • To select A or B series paper size, press the [A/B-size] key.
- Page 231 Press the [Done] key. Start scanning the original. (See “Storing Originals in the Box,” on p. 4-3.) NOTE • To cancel the setting, press the [Special Features], [Frame Erase], and [Cancel] keys in that order. • To cancel the settings, press the [Initial Settings] key. (The machine returns to the Standard Scanning mode.) Reset •...
- Page 232 Press the [Frame Erase] key. Binding Erase Press the [Book Frame Erase] key, and press the [Next] key. Select the size of the book when opened, and press the [Next] key. NOTE • To select A or B series paper size, press the [A/B-size] key.
- Page 233 Press each key (“Top”, “Left”, “Center”, “Right”, and “Bottom”) and set the desired book frame erase width using the [–] or [+] key, and press the [OK] key. The values set here are specified independently around the original. To set a value uniformly around the original, press the [Adjust All At Once] key.
- Page 234 Start scanning the original. (See “Storing Originals in the Box,” on p. 4-3.) NOTE • To cancel the setting, press the [Special Features], [Frame Erase], and [Cancel] keys in that order. • To cancel the settings, press the [Initial Settings] key. (The machine returns to the Standard Scanning mode.) Reset •...
- Page 235 Press the [Binding Erase] key, and press the [Next] key. Specify the binding erase feature, and press the [Next] key. NOTE • The position of the binding holes does not refer to the position in which the original is placed on the platen glass, but to the position of the binding holes viewed when the surface of the original that you want to scan is face up, with the top edge at the...
-
Page 236: Reducing Two, Four Or Eight Originals To Fit On A Single Print Sheet And Storing It (Image Combination)
Press the [Done] key. Start scanning the original. (See “Storing Originals in the Box,” on p. 4-3.) NOTE • To cancel the setting, press the [Special Features], [Frame Erase], and [Cancel] keys in that order. • To cancel the settings, press the [Initial Settings] key. (The machine returns to the Standard Scanning mode.) Reset •... - Page 237 Prepare to scan the original into the box following the procedure below. Select the desired box number Place the original MAIL BOX NOTE • When you select a box set with a password, enter the password after selecting the box. Press the [Special Features] key.
- Page 238 When you select the [2-Sided Original] key: Select the type of original, and press the [OK] key. Select the desired Image Combination feature, and press the [Next] key. When you select the [Option] key: Select the image order, and press the [Done] key.
- Page 239 Select the record size, and press the [OK] key. NOTE • The document is scanned with the reduction ratio automatically set depending on the selected record size. • To select A or B series paper size, press the [A/B-size] key. Press the [Done] key.
-
Page 240: Scanning Different-Size Originals Together In The Feeder (Different Size Originals)
Scanning Different-size Originals Together in the Feeder (Different Size Originals) This function enables you to scan different-size originals with the same width, or different-size originals with different widths, together in one group. IMPORTANT • In the Different Size Originals mode, combined use with the Manual Document Size Select, Two-page Separation, Booklet Scanning, Original Frame Erase, Book Frame Erase, and Image Combination modes cannot be set. - Page 241 Select the type of the Different Size Originals, and press the [OK] key. NOTE • When you set the same-width originals, press the [Same Width] key. • When you set the different-width originals, press the [Different Width] key. Press the [Done] key Start scanning the original.
-
Page 242: Scanning Originals Separately Set As One Document (Job Build)
Scanning Originals Separately Set as One Document (Job Build) This mode enables you to scan originals that are too many to set at once, by dividing them into multiple batches. You can use both the feeder and the platen glass for scanning. The originals are stored as one document after all the batches have been scanned. - Page 243 Press the [Job Build] key. Press the [Done] key. Start Press the key to start scanning the origi- nals. Stop NOTE Start • You can adjust the Exposure and the Image Qual- ity. (See “Adjusting the Exposure and Image Qual- ity before Scanning the Originals (Scanning Clear Exposure),”...
-
Page 244: Inverting Original Images (Nega/Posi)
Select the type of two-sided original, and press the [OK] key. When scanning is completed, set the next original. Repeat steps 5 and 6 until the last original is scanned, then press the [Done] key. NOTE • To cancel the setting, press the [Special Features] and [Job Build] keys in that order. - Page 245 Press the [Special Features] key. Press the [Nega/Posi] key. Press the [Done] key. Start scanning the original. (See “Storing Originals in the Box,” on p. 4-3.) NOTE • To cancel the setting, press the [Special Features] and [Nega/Posi] keys in that order. •...
-
Page 246: Scanning Originals After Making Them Sharply Contrasted
Scanning Originals after Making them Sharply Contrasted (Sharpness) This mode allows you to scan original images with the contrast reproduced sharper or softer. To scan originals with text or lines reproduced sharper, use the [High] key. To scan originals with photographs or other half-tones reproduced softer, use the [Low] key. - Page 247 Use the [High] or [Low] key to adjust the sharpness, and press the [OK] key. NOTE • To scan text and lines clearly, the setting should be towards “High”. To scan photographs etc., the set- ting should be towards “Low”. Press the [Done] key.
-
Page 248: Storing/ Recalling Scanning Modes (Mode Memory)
Storing/ Recalling Scanning Modes (Mode Memory) You can store any possible combination of the Scanning functions, up to nine settings, in a memory key, and name that key. It is useful when you want to store the settings used frequently. NOTE •... - Page 249 Press the [Store/Erase] key. Press the [Store] key. Select the desired memory key from among memory keys [M1] to [M9], and press the [Next] key. NOTE • The mode memory key where scan settings are already stored shows a small, black square [ ] in the lower right corner of the key.
- Page 250 If you selected a memory key in which a scan- ning mode has already been stored: The message to confirm that you want to replace the old scanning setting with the new scanning settings is displayed. To overwrite: Select the [Yes] key. The contents of the memory key are replaced with the new scanning setting.
- Page 251 Storing a Memory Key Name Call up the Scanning screen as follows: Nega/Posi Select the desired box number MAIL BOX NOTE • When you select a box set with a password, enter the password after selecting the box. Press the [Special Features] key. Press the [Mode Memory] key.
- Page 252 Press the [Store Name] key. Select the memory key ([M1] to [M9]) for which you want to assign a name, and press the [Next] key. NOTE • The mode memory key where scan settings are already stored shows a small, black square [ ] in the lower right corner of the key.
- Page 253 Press the [Done] key. The display returns to the Scanning screen. Recalling a Scanning Mode Call up the Scanning screen as follows: Nega/Posi Select the desired box number MAIL BOX NOTE • When you select a box set with a password, enter the password after selecting the box. Press the [Special Features] key.
- Page 254 Select the memory key where the scan setting you want to recall is stored. Check the scan settings stored to the memory key. If the contents are correct, press the [OK] key. The display returns to the Special Features screen. NOTE •...
- Page 255 Press the [Special Features] key. Press the [Mode Memory] key. Press the [Store/Erase] key. Press the [Erase] key. 4-58 Scanning Originals into a Box...
- Page 256 Select the memory key of the scanning mode that you want to erase, and press the [Next] key. IMPORTANT • Check the scan settings before you erase them. NOTE • The mode memory key where scan settings are already stored shows a small, black square [ ] in the lower right corner of the key.
- Page 257 Press the [Cancel] key. The display returns to the Special Features screen. Press the [Done] key. The display returns to the Scanning screen. 4-60 Scanning Originals into a Box...
-
Page 258: Printing A Document Stored, In A Box After Changing The Settings
Printing a Document Stored, in a Box after Changing the Settings You can select the modes when printing documents stored in a box. Selecting the Print Paper Size (Paper Select) Specify the desired document following procedure below. Select the desired box number, then the desired document MAIL BOX NOTE •... - Page 259 Select the print paper size, and press the [Done] key. When you select the [StackBypass Setting] key: Select the paper size, and press the [Next] key. NOTE • If there is a current job or a previously reserved job which uses the stack bypass, select the [StackBy- pass Setting] key and set the desired paper.
-
Page 260: Collating Prints (Finisher)
Collating Prints (Finisher) Merge Docu- ments The Finisher mode can be selected to collate the prints in various ways by pages or print sets. (See “Collating Copies (Finisher),” on p. 2-48.) Specify the desired document following procedure below. Select the desired box number, then the desired document MAIL BOX NOTE •... - Page 261 Select the desired collate feature, and press the [OK] key. NOTE • When you selected the [Staple] key, press the [Next] key. • The [Staple] key only appears when the Finisher (option) is attached. • The [Rotate] key only appears when the Finisher (option) is not attached.
- Page 262 When you select the [Double] key: Select the staple position, and press the [OK] key. IMPORTANT • LGL/ LTRR/ STMTR-size paper cannot be dou- ble-stapled. When you select the [Saddle Stitch] key: Press the [Next] key. IMPORTANT • You cannot select the [Saddle Stitch] key when the Saddle Finisher-F2 (option) is not attached.
- Page 263 When you select the [Rotate] key: When the Automatic Paper Selection is set, press the [Next] key. Then select the LTR or LTRR-size paper, and press the [OK] key. NOTE • Press the [OK] key after selecting the [Rotate] key in the following case: - Available paper size is selected manually.
-
Page 264: Two-Sided Printing (Two-Sided Printing)
Two-sided Printing (Two-sided Printing) IMPORTANT • In the Two-sided Printing mode, combined use with the Booklet mode cannot be set. • Non-standard paper sizes cannot be used to make two-sided prints. NOTE • Print paper used to make two-sided prints must conform to the following specifications. - Paper size : 11"x17"/ LGL/ LTR/ LTRR/ STMTR - Paper weight : 17-lb bond to 110-lb index (64 g/m... - Page 265 Select the appropriate orientation, and press the [OK] key. NOTE • If you want to print the first page of each document on the front when documents are to be merged and also the Finisher mode (except for the Group mode) is selected, press the [Non Continuous] key.
-
Page 266: Adding Job Separator Sheets, Front And Back Covers To Printed Sets (Cover/Job Separator)
Adding Job Separator Sheets, Front and Back Covers to Printed Sets (Cover/Job Separator) When you select multiple documents and set the Merge Documents mode, you can program the machine to automatically add front and back covers, or job separator sheets to divide each document, using a different type of paper stock from which is used for the main text. - Page 267 Press the [Special Features] key. Press the [Cover/Job Separator] key. Select the desired Cover/Job Separator fea- ture, and press the [Next] key. NOTE • You cannot print on front covers, back covers, or job separator sheets. • You can cancel a mode by pressing the mode key again.
- Page 268 Press the [Done] key. Press the [Start Print] key. If there is a current job or a previously reserved job, the machine will start printing after that job is completed. (See “Printing Documents Stored in the Box,” on p. 4-6.) NOTE •...
-
Page 269: Making Prints For Use As A Booklet (Booklet)
Making Prints for Use as a Booklet (Booklet) You can make prints which can easily be made into a booklet. IMPORTANT • In the Booklet mode, combined use with the Collate, Two-sided Printing, and Cover/Job Separator modes cannot be set. •... - Page 270 Press the [Booklet] key. Select the paper size, and press the [Next] key. Press the [OK] key and proceed to step 6 when the Saddle Finisher-F2 (option) is not attached. IMPORTANT • The paper used for the cover page must be the same size as the other pages.
- Page 271 Select whether or not to saddle stitch the booklet, and press the [OK] key. IMPORTANT • The saddle stitching cannot be set when the Sad- dle Finisher-F2 (option) is not attached. • When the number of sheets exceeds 15, the sta- pling will not be performed, and the sheets will be output to the output tray.
-
Page 272: Printing Multiple Documents As One Document (Merge Documents)
Printing Multiple Documents as One Document (Merge Documents) You can print multiple documents, such as scanned documents and documents sent from a computer etc. as one document. This mode enables you to combine documents with different settings as one document, so it is useful when you want to print documents as the following: - When printing and stapling data created with different softwares, or data made by multiple people as one document. - Page 273 Press the [Change P Settings] key. Press the [Merge Documents] key. Press the [Start Print] key. If there is a current job or a previously reserved job, the machine will start printing after that job is completed. (See “Printing Documents Stored in the Box,” on p.
-
Page 274: Storing/ Recalling Often Used Print Setting In Memory (Mode Memory)
Storing/ Recalling Often Used Print Setting in Memory (Mode Memory) You can store any possible combination of the Print settings, up to nine settings, in a memory key, and name that key. It is useful when you want to store the settings used frequently. NOTE •... - Page 275 Press the [Special Features] key. Press the [Mode Memory] key. Press the [Store/Erase] key. Press the [Store] key. 4-78 Printing a Document Stored, in a Box after Changing the Settings...
- Page 276 Select the desired memory key from among memory keys [M1] to [M9], and press the [Next] key. NOTE • The mode memory key where print settings are already stored shows a small, black square [ ] in the lower right corner of the key. •...
- Page 277 Press the [OK] key. The display returns to the Special Features screen. Press the [Done] key. The display returns to the Print Settings screen. Storing a Memory Key Name Specify the desired document following procedure below. Select the desired box number, then the desired document MAIL BOX NOTE •...
- Page 278 Press the [Special Features] key. Press the [Mode Memory] key. Press the [Store/Erase] key. Press the [Store Name] key. Printing a Document Stored, in a Box after Changing the Settings 4-81...
- Page 279 Select the memory key ([M1] to [M9]) for which you want to assign a name, and press the [Next] key. NOTE • The mode memory key where print settings are already stored shows a small, black square [ ] in the lower right corner of the key.
- Page 280 Recalling a Printing Mode Specify the desired document following procedure below. Select the desired box number, then the desired document MAIL BOX NOTE • When you select a box set with a password, enter the password after selecting the box. Press the [Change P Settings] key.
- Page 281 Select the memory key where the print setting you want to recall is stored. Check the print settings stored to the memory key. If the contents are correct, press the [OK] key. The display returns to the Special Features screen. NOTE •...
- Page 282 Erasing a Printing Mode Specify the desired document following procedure below. Select the desired box number, then the desired document MAIL BOX NOTE • When you select a box set with a password, enter the password after selecting the box. Press the [Change P Settings] key.
- Page 283 Press the [Store/Erase] key. Press the [Erase] key. Select the memory key of the print mode that you want to erase, and press the [Next] key. IMPORTANT • Check the print settings before you erase them. NOTE • The mode memory key where print settings are already stored shows a small, black square [ ] in the lower right corner of the key.
- Page 284 The message on the right appears to confirm that you want to erase the print mode. Select the [Yes] key. The stored print mode is erased. NOTE • The name of the memory key is not erased. For details on how to change the name, see “Storing a Memory Key Name,”...
-
Page 285: Checking The Print Result Or The Image Of The Stored Document (Sample Print)
Checking the Print Result or the Image of the Stored Document ( Sample Print You can print one set of print output when you want to check the image before printing, or when you want to check the settings and the image data of the document stored in the box. IMPORTANT •... - Page 286 When you select the [Change Settings] key: Change the desired settings, then press the [Done] key. NOTE • When you made a sample print without changing the settings, press the [Change P Settings] key, then change the settings. • To cancel the settings, press the [Initial Settings] key.
-
Page 287: Checking The Document's Detailed Information
Checking the Document’s Detailed Information You can check the detailed information of documents stored in the box. Specify the desired document following procedure below. Select the desired box number Select the desired document MAIL BOX NOTE • When you select a box set with a password, enter the password after selecting the box. •... -
Page 288: Changing The Name Of A Document
Changing the Name of a Document You can change the name of a document stored in the box. Specify the desired document following procedure below. Select the desired box number Select the desired document MAIL BOX NOTE • When you select a box set with a password, enter the password after selecting the box. •... - Page 289 Press the [Done] key. Repeat this until the Box selection screen appears again. 4-92 Changing the Name of a Document...
-
Page 290: Moving A Document
Moving a Document You can move a desired document to a different box. Specify the desired document following procedure below. Select the desired box number Select the desired document MAIL BOX NOTE • When you select a box set with a password, enter the password after selecting the box. •... - Page 291 Press the [Start] key. The screen on the right appears. NOTE • If a document cannot be moved to the desired box, a message telling you that you cannot move the document will be displayed. • If a document cannot be moved, it will remain in the original box.
-
Page 292: Erasing A Document From A Box
Erasing a Document from a Box You can erase a document stored in a box. Specify the desired document following procedure below. Select the desired box number Select the desired document MAIL BOX NOTE • When you select a box set with a password, enter the password after selecting the box. •... - Page 294 Printing Efficiently C H A P T E R This chapter describes operations to make print jobs more efficient. Changing the Exposure During Printing........5-2 Interrupting the Current Job to Make Priority Copies (Interrupt Mode) .
-
Page 295: Changing The Exposure During Printing
Changing the Exposure During Printing You can change the copy or print exposure during printing. Press the [Light] or [Dark] key on the right screen which appears during printing. The printing exposure is changed. NOTE • Move the indicator above the [Light] and [Dark] keys to the left to make the exposure lighter or to the right to make the exposure darker. -
Page 296: Interrupting The Current Job To Make Priority Copies (Interrupt Mode)
Interrupting the Current Job to Make Priority Copies (Interrupt Mode) The Interrupt mode enables you to interrupt the reserved or current job long enough to make other priority copies. This mode is useful when making a rush copy during a long copy job. IMPORTANT •... -
Page 297: Interrupting The Current Job To Make Priority Copies (Interrupt Mode)
Start Press the key. Interrupt When the Interrupt copy job starts, the Stop stops flashing. Start Clear Once the original is scanned, remove it from the machine. IMPORTANT • When the interrupt copy job is completed, the inter- rupted printing operation restarts. •... -
Page 298: Reserving A Job While The Machine Is Warming Up
Reserving a Job while the Machine is Warming Up Even while the machine is warming up, an original can be scanned, or you can make print settings. IMPORTANT • If you scan originals while the machine is warming up, the time for the machine to warm up will be longer. NOTE •... -
Page 299: Reserving A Print Job Of A Document Stored In A Box While The Machine Is Warming Up (Auto Print)
After the machine has finished warming up, printing starts. NOTE • If warm up ends while scanning is still in progress, printing starts at that point. • You can change the exposure during printing. (See “Changing the Exposure During Printing,” on p. 5-2.) Reserving a Print Job of a Document Stored in a Box while the Machine is Warming Up (Auto Print) Specify the desired document with the procedure below. -
Page 300: Reserving The Next Job During Printing
Reserving the Next Job during Printing While the machine is printing, you can scan other originals or make print settings. You can print the reserved job as soon as the current job is completed, so that you can reduce the time and effort needed to scan the originals. - Page 301 Start Press the key and start scanning origi- nals. Stop Start Clear NOTE • If the screen on the right appears, press the [OK] key and repeat the operation after the current job is completed. Reserving the Next Job during Printing...
-
Page 302: Reserving A Box Print While Printing (Reserve Print)
Reserving a Box Print while Printing (Reserve Print) Press the [Done] key. NOTE Reserve • If the job displayed in the job monitor is the job of Print functions other than the Mail Box function, press key to display the Box selection screen. MAIL BOX Specify the desired document with the procedure below. -
Page 303: Using The Stack Bypass While Reserving Print Jobs
Using the Stack Bypass while Reserving Print Jobs When paper is fed from the stack bypass for the current print job or for a reserved job, you can des- ignate the paper to be placed in the stack bypass for the next reserved job. Press the [StackBypass Setting] key on the Paper Selection screen that appears when set- ting reserved print settings. - Page 304 The paper sizes previously set and the last set are Paper size loaded displayed as shown in the screen on the right. presently Paper size selected Press the [Done] key. Finish the reserved print settings. Start Press the key. NOTE Stop Start •...
- Page 305 Set the specified paper when its turn comes to print. NOTE • The specified paper size is displayed when its turn comes to print. Select the paper size, and press the [Next] key. NOTE • To select A or B series paper size, press the [A/B- size] key.
-
Page 306: Checking And Changing Printing Status
Checking and Changing Printing Status You can check and change the printing status (Stand-by, Printing, etc.) using the System Monitor screen. Checking Detailed Information for Printing Documents Press the [System Monitor] key. System Monitor Select the [Copy] or [Print] key. NOTE •... - Page 307 Select the document you want to check the detailed information for and press the [Details] key. NOTE • The status of each icon displayed in the screen is as follows: : Operating : Waiting : Error : Paused : Canceling : Secured job : Copy job : Mail Box job...
-
Page 308: Canceling Printing
Canceling Printing Press the [System Monitor] key. Select the [Copy] or [Print] key. NOTE • When checking the print status for copy jobs, press the [Copy] key. • When checking the print status for all jobs, press the [Print] key. Select the [Status] key. -
Page 309: Priority Printing
Press the [Yes] key. NOTE • To cancel the cancellation, press the [No] key. • The canceled document is displayed as “NG” on the Print Log screen. Press the [Done] key. Repeating this operation returns the display to the Basic Features screen. Priority Printing NOTE •... - Page 310 Press the [Print] key. Select the [Status] key. Select the document for priority printing and press the [Print Next] key. Press the [Done] key. The display returns to the Basic Features screen. Checking and Changing Printing Status 5-17...
-
Page 311: Operating Print Jobs Sent From A Computer
Operating Print Jobs Sent from a Computer You can temporarily stop the print job sent from a computer, or skip an error when a print error occurs. Press the [System Monitor] key. Press the [Print] key. Select the [Status] key. 5-18 Checking and Changing Printing Status... - Page 312 Select the desired document, and press the [Details] key. Press the [ ] key. Perform operations of the print job. When you finish operating the document, press the [Done] key. NOTE • When you press the [Pause] key, printing stops temporarily, and the key changes to the [Resume] key.
-
Page 313: Printing Secured Documents
Printing Secured Documents You can print documents with a password sent from a computer. Documents with a password are called secured documents. Secured documents waiting to be printed are displayed with a mark at the left of the job number. To print these documents, you need to enter a password, which prevents other people who do not know the password from observing the contents. -
Page 314: Checking And Canceling Spool Status
Select the desired secured document, and press the [Secured Print] key. Enter a password, and press the [OK] key. If there is a current job or a previously reserved job, the machine will start printing after that job is completed. IMPORTANT •... - Page 315 Press the [Print] key. Select the [Spool Status] key. Press the [ ] key. When you cancel spool job: Select the [Status] key. 5-22 Checking and Changing Printing Status...
- Page 316 Select the document to be canceled, and press the [Cancel] key. Press the [Yes] key. NOTE • To cancel the cancellation, press the [No] key. When you check the detailed information: Select the [Status] or [Log] key. Select the document you want to check the detailed information for and press the [Details] key.
- Page 317 √ Details of a status Details of a log Check the detailed information, and press the [Done] key. The display return to the Basic Features screen. 5-24 Checking and Changing Printing Status...
-
Page 318: Checking The Printing History
Checking the Printing History Press the [System Monitor] key. Press the [Print] key. Press the [Log] key. Press the [Job Type] key. Checking and Changing Printing Status 5-25... - Page 319 Select the type of job that you want to check the log. NOTE • The [Printer] key is displayed only when the net- work printer function is enabled. After checking the printing job history, press the [Done] key. The display returns to the Basic Features screen. NOTE •...
-
Page 320: Checking The Device Status
Checking the Device Status You can check the amount of paper remaining in each paper drawer, the remaining memory available, the location of a paper jam, and so on. Press the [System Monitor] key. Device Sta- Select the [Device] key. After checking the device status, press the [Done] key. - Page 321 5-28 Checking and Changing Printing Status...
-
Page 322: Setting And Adjusting Common Settings To Suit Your Needs
Setting and Adjusting Common Settings to Suit Your Needs C H A P T E R This chapter describes the initial settings and how to change them to suit your needs. Additional Functions Settings Table ......... 6-3 Setting Specifications that are Common to Each Function (Common Settings) . - Page 323 6. Setting and Adjusting Common Settings to Suit Your Needs Setting the Photo Mode of the Copy Function ......6-41 Changing the Current Standard Settings .
-
Page 324: Additional Functions Settings Table
Additional Functions Settings Table The following items can be stored or set in the Additional Functions screen. (* indicates factory default setting) NOTE • In addition to the modes listed below, the [Printer Settings], [Network Settings], and [Remote UI On/Off] modes are displayed when the network printer function is enabled. - Page 325 Applicable Additional Function Available settings page Common Settings Standard Local Print Settings Paper Select: Auto*/ Select paper supply p. 6-21 Copies: 1* to 2,000 sets Finisher: - With the Finisher Do not Collate/ Collate/ Offset Collate*/ Group/ Offset Group/ Staple (Corner (TopLeft/ BtmLeft/ TopRight/ BtmRight), Double (Left/ Right)) - With the Finisher+Puncher Unit-B1 Do not Collate/ Collate/ Offset Collate*/ Group/...
- Page 326 Applicable Additional Function Available settings page Copy Settings Standard Key 1, 2 Settings All modes (No setting*) p. 6-35 Auto Collate On*/ Off p. 6-37 Image Orientation Priority On/ Off* p. 6-38 Job Duration Display On/ Off* p. 6-39 Auto Orientation On*/ Off p.
-
Page 327: Setting Specifications That Are Common To Each Function
Setting Specifications that are Common to Each Function (Common Settings) NOTE • The Common Settings screen is made up of several screens. Use the [ ] and [ ] keys to scroll to the desired screen and make the required settings. •... -
Page 328: Selecting The Default Display After Auto Clear
Press the [Done] key. Repeat this until the Basic Features screen appears again. Selecting the Default Display After Auto Clear Gives you the choice of whether or not to display the screen set by this function after Auto Clear has taken place. -
Page 329: Setting Entry Tone, Error Tone, Job Done Tone
Setting Entry Tone, Error Tone, Job Done Tone Gives you the choice of whether or not to sound audible tones. The following tones sound at the following times: Entry Tone : When pressing keys on the control panel or keys in the touch panel display Error Tone : When a malfunction occurs (e.g. -
Page 330: Setting Inch Input
Setting Inch Input You can display the keys for entering values in inches in the numeric entry screen. NOTE • The default setting is “On”. Call up the desired screen as follows: Additional Functions Inch Entry Select the [On] or [Off] key, and press the [OK] key. -
Page 331: Setting A Paper Drawer For Auto Paper Selection/ Auto Drawer Switching
Setting a Paper Drawer for Auto Paper Selection/ Auto Drawer Switching The paper drawers to be used for Automatic Paper Selection and Auto Drawer Switching can be set. This setting can be made independently for Copy, Mail Box, and other functions. It is useful when different paper drawers are to be used for different purposes. - Page 332 Select the [On] or [Off] key for the stack bypass and each paper drawer, and press the [OK] key. When you select the [On] key: Makes the paper drawer eligible for APS/ ADS. When you select the [Off] key: Makes the paper drawer ineligible for APS/ ADS.
-
Page 333: Identifying The Type Of Paper In A Paper Drawer
Identifying the Type of Paper in a Paper Drawer You can store the paper type loaded to each paper drawer. Call up the desired screen as follows: Additional Functions Store Paper Type Select the paper drawer for which you want to store the paper type. - Page 334 Press the [Done] key. Repeat this until the Basic Features screen appears again. NOTE • The paper types stored here are displayed when selecting paper in each mode, as shown on the right. Setting Specifications that are Common to Each Function (Common Settings) 6-13...
-
Page 335: Changing The Energy Saver Mode Setting
Changing the Energy Saver Mode Setting You can change the Energy Saver mode that reduces the power consumed by the machine. NOTE • The default setting is “–10%”. Call up the desired screen as follows: Additional Functions Energy Saver Mode Select the [-10%], [-25%], [-50%] or [None] key, and press the [OK] key. -
Page 336: Setting The Functions Keys As Keys To Reactivate The Machine
Setting the Functions Keys as keys to Reactivate the Machine You can set the , and keys as the keys to reactivate the machine from the Energy COPY MAIL BOX SCAN Saver mode. NOTE • The default setting is “Off”. Call up the desired screen as follows: Additional Functions Function Key Wake Up... -
Page 337: Distinguishing Ltrr-Size And Stmt-Size Originals
Select the [Low] or [High] key, and press the [OK] key. Press the [Done] key. Repeat this until the Basic Features screen appears again. Distinguishing LTRR-Size and STMT-Size Originals When scanning LTRR size or STMT size originals set on the platen glass, you can make a setting to either distinguish the original sizes manually, or to scan originals of only one of these sizes. -
Page 338: Setting A Dedicated Tray For Each Function
Press the [Done] key. Repeat this until the Basic Features screen appears again. Setting a Dedicated Tray for Each Function You can select the function for which each output tray of the Finisher-F1 (option) or the Saddle Finisher-F2 (option) is to be used. IMPORTANT •... -
Page 339: Setting The Printing Priority
Setting the Printing Priority You can set the printing priority. A job that is set to a high priority is printed preferentially after the job currently being performed. NOTE • The default settings are as follows: - Copy: 1 (Priority) • Printer: 2 • Other: 3 (1, 2 and 3 indicate priority sequence.) •... -
Page 340: Setting The Standard Paper For The Stack Bypass
Setting the Standard Paper for the Stack bypass Stores the default settings for the StackBypass Setting. By pressing the [Stack Bypass] key when making reserved prints, you can reserve by the mode that you stored here. NOTE • The default setting is “Off”. •... - Page 341 Select the paper type, and press the [OK] key. Press the [OK] key. Press the [Done] key. Repeat this until the Basic Features screen appears again. 6-20 Setting Specifications that are Common to Each Function (Common Settings)
-
Page 342: Setting A Standard Mode For Local Printing
Setting a Standard Mode for Local Printing The machine prints documents with the standard Local Print settings set here when printing documents in the Mail Box without changing the settings set when documents were scanned, or when printing documents sent from a personal computer after pressing the [Change P Settings] key. It also prints with the standard Local Print settings when you merge documents. - Page 343 Set each mode. Paper Select Select the paper source. Copies Set the number of copies from 1 set to 2000 sets. Finisher Set the type of collating. Two-sided Print Set whether or not to perform two-sided print- ing. Erase Document After Printing Set whether or not to erase the document after printing.
-
Page 344: Returning The Common Settings To Their Defaults
Returning the Common Settings to Their Defaults This function allows you to return the common settings to their defaults (initial settings). Call up the desired screen as follows: Additional Functions Initialize Common Settings Select the [Yes] key. NOTE • To cancel initialization, select the [No] key. This screen is displayed for about two seconds. -
Page 345: Setting The Timer (Timer Settings)
Setting the Timer ( Timer Settings NOTE • The Timer Settings screen is made up of several screens. Use the [ ] and [ ] keys to scroll to the desired screen and make the required settings. • When the [ ] or [ ] key should be pressed, the indication is displayed in this manual. - Page 346 When setting the Daylight Saving Time Settings: Press the [Daylight Saving Time Setting] key, then press the [ON] key. Press both the [Start Date] and [End Date] keys to set the time. Set the month, week, day, time to start and end the Daylight Saving Time settings, and press the [OK] key.
-
Page 347: Setting The Time To Initiate Auto Sleep After Finishing Operations
Setting the Time to Initiate Auto Sleep after Finishing Opera- tions If the machine is not operated (no keys are pressed) for a certain period of time, the control panel power switch automatically switches OFF to save power. The machine then enters the Sleep mode. NOTE •... -
Page 348: Setting The Time Taken For Display To Return To Basic Screen After Finishing Operations
Setting the Time Taken for Display to Return to Basic Screen after Finishing Operations If the machine is not operated (no keys are pressed) for a certain period of time, the display returns to the Basic screen (Standard setting) of the selected function. This time is called “Auto Clear Time”. -
Page 349: Setting The Time Taken For The Unit To Quiet Down After Last Task
Setting the Time Taken for the Unit to Quiet Down after Last Task This machine enters the Quiet mode after a specified amount of time has elapsed following a print job or after a key has been pressed. On this screen you can specify the amount of time that must elapse prior to entering the Quiet mode. -
Page 350: Setting The Time That The Unit's Power Turns Off On Different Days Of The Week
Setting the Time That the Unit’s Power Turns OFF on Differ- ent Days of the Week You can set the time that the machine is automatically turned OFF for each day of the week. • Setting range: Daily from Sunday to Saturday, 00:00 to 23:59 in one-minute increments NOTE •... -
Page 351: Setting The Low-Power Mode Time
Setting the Low-Power Mode Time If the machine is not operated (no keys are pressed) for a certain period of time after prints have been made or a key operation performed, the machine automatically enters the Low-Power mode. You can easily change the time for the machine to enter the Low-Power mode. NOTE •... -
Page 352: Adjusting The Machine (Adjustment/Cleaning)
Adjusting the Machine (Adjustment/Cleaning) NOTE • The Adjustment/Cleaning screen is made up of several screens. Use the [ ] and [ ] keys to scroll to the desired screen and make the required settings. • When the [ ] or [ ] key should be pressed, the indication is displayed in this manual. -
Page 353: Staple Repositioning For Saddle Finisher
Staple Repositioning for Saddle Finisher After a staple jam in the Saddle Finisher Unit has been cleared or staples are loaded in the Saddle Finisher, this function feeds paper to the unit and staples a few times, so that staples will be immediately available for the next job. -
Page 354: Changing The Saddle Stitch Position
Changing the Saddle Stitch Position When the Saddle Finisher-F2 is attached, slight position differences in the saddle stitch position may occur. You can compensate for such differences. IMPORTANT • This function cannot be set when the Saddle Finisher-F2 is not attached. Call up the desired screen as follows: Additional Functions Saddle Stitch Position Adjustment... -
Page 355: Adjusting The Standard Exposure
Adjusting the Standard Exposure Adjusts the exposure adjustment scale to calibrate differences in exposure. Perform this adjustment if differences between the image in the original and the print occur when printing an original free from smudges or dirty marks with the exposure scale set in the middle. NOTE •... -
Page 356: Setting Specifications Of The Copy Function (Copy Settings)
Setting Specifications of the Copy Function (Copy Settings) NOTE • The Copy Settings screen is made up of several screens. Use the [ ] and [ ] keys to scroll to the desired screen and make the required settings. • When the [ ] or [ ] key should be pressed, the indication is displayed in this manual. - Page 357 Press the [Done] key. Selected mode Repeat this until the Basic Features screen appears again. Example: Standard keys 1 and 2 are displayed in the touch panel display as shown on the right. Standard key 2 Standard key 1 6-36 Setting Specifications of the Copy Function (Copy Settings)
-
Page 358: Setting Automatic Collate On/ Off
Setting Automatic Collate On/ Off This function allows automatic selection of the Collate (Offset Collate) mode when the original is placed in the feeder. This is helpful when making multiple copies, because the user does not need to remember to select the Finisher mode. NOTE •... -
Page 359: Setting Image Orientation Priority To On/ Off
Setting Image Orientation Priority to On/ Off The orientation of the image may be printed conversely depending on the copy mode set. You can set whether or not to copy the image in the same direction as the original. NOTE •... -
Page 360: Setting The Job Duration Display
Setting the Job Duration Display When the Job Duration Display is set to “On”, the time remaining until completion of the copy job (Job Duration Time) is indicated in minutes in the touch panel display. (The job duration time is not displayed for some copy modes.) NOTE •... -
Page 361: Setting Auto Orientation To On/ Off
Setting Auto Orientation to On/ Off Using parameters such as original size and zoom ratio, this function automatically rotates the image to the most suitable position for the set paper size. NOTE • The default setting is “On”. Call up the desired screen as follows: Additional Functions Auto Orientation Select the [On] or [Off] key, and press the [OK]... -
Page 362: Setting The Photo Mode Of The Copy Function
Setting the Photo Mode of the Copy Function You can set whether or not to use the Photo mode in the Copy function. When the Photo Mode is “On”, you can select the [Printed Img.] and [Photo] keys when making copies with the image quality setting. -
Page 363: Changing The Current Standard Settings
Changing the Current Standard Settings Standard Settings refers to a combination of copy modes that the machine is set to after the power is turned ON or when the key is pressed. Reset This section describes how to store the currently set copy settings as the Standard Settings. Standard Settings can also be returned to their default settings. - Page 364 Press the [Yes] key. The settings currently displayed are stored as the Standard Settings. NOTE • The settings displayed here are the currently set copy settings. Press the [ ] or [ ] key to display copy modes that do not fit in the display area. •...
- Page 365 Check the setting, and press the [Yes] key. The Standard Settings are initialized. NOTE • To cancel the initialization, press the [No] key. The display returns to the screen in step 2. This screen is displayed for about two seconds. Press the [Done] key.
-
Page 366: Restoring Settings To Default Copy Settings
Restoring Settings to Default Copy Settings Items that have been changed in the Copy Settings can be returned to their default settings. Call up the desired screen as follows: Additional Functions Initialize Copy Settings Press the [Yes] key. Proceed to step 3. NOTE •... -
Page 367: Setting Specifications Of The Mail Box Function (Mail Box Settings)
Setting Specifications of the Mail Box Function (Mail Box Settings) Setting/ Storing the Box When using the box, you can set and store each box item beforehand. NOTE • A box can store up to 100 items (Box number: 00 to 99). Call up the desired screen as follows: Additional Functions Box Set/ Store... - Page 368 Press the [Store Name] key. Enter the box name, and press the [OK] key. NOTE • For details on how to enter the characters, see “Entering Characters on the Touch Panel Display,” on p. 10-6. • The maximum number of characters you can assign for a name is 24.
- Page 369 Press the [Done] key. Press the [Done] key. Repeat this until the Basic Features screen appears again. 6-48 Setting Specifications of the Mail Box Function (Mail Box Settings)
-
Page 370: Initializing A Box
Initializing a Box IMPORTANT • You cannot initialize a box if there is data remaining in it. Call up the desired screen as follows: Additional Functions Select the box that you want to initialize. NOTE • When entering the box number using the Numeric keys ( ), press the [OK] key after entering the box number. - Page 371 Press the [Yes] key. The box is initialized. NOTE • To cancel the initialization, press the [No] key. Press the [Done] key. Press the [Done] key. Repeat this until the Basic Features screen appears again. 6-50 Setting Specifications of the Mail Box Function (Mail Box Settings)
-
Page 372: Setting The Photo Mode Of The Mail Box Function
Setting the Photo Mode of the Mail Box Function You can select whether or not to use the Photo Mode in the Mail Box Function. When the Photo Mode is “On”, you can select the [Printed Img.] and [Photo] keys when scanning documents with the image quality setting. -
Page 373: Setting The Standard Mode For Scanning
Setting the Standard mode for Scanning You can change the standard mode for when scanning originals into a box. You can also return the standard mode settings to their defaults. NOTE • The default settings are as follows: - Document Size: Auto - Record Size: Auto - Exposure/ Image quality: A Storing the Standard Settings for Scanning... - Page 374 This screen is displayed for about two seconds. Press the [Done] key. Repeat this until the Basic Features screen appears again. Initializing the Standard mode for Scanning Call up the desired screen as follows: Additional Functions Select the [Initialize] key. Check the settings, and press the [Yes] key.
- Page 375 This screen is displayed for about two seconds. Press the [Done] key. Repeat this until the Basic Features screen appears again. 6-54 Setting Specifications of the Mail Box Function (Mail Box Settings)
-
Page 376: Setting Specifications Of The System Management Id
Setting Specifications of the System Management (System Settings) Setting/ Changing the System Manager ID and Password You can set a password for the system manager. If the System Manager ID/ Password is set, restrictions can be placed on storing or changing the System Settings. IMPORTANT •... - Page 377 Press the [System Manager ID] key, and enter the number within seven digits with the Numeric keys ( ) as the new System Manager ID. NOTE • You cannot store a System Manager ID with only the number “0”, such as “0000000”. •...
- Page 378 Press the [Comment] key, then enter a com- ment for the system manager. Once you have completed all settings, press the [OK] key. Press the [Done] key. Repeat this until the Basic Features screen appears again. Setting Specifications of the System Management ID (System Settings) 6-57...
-
Page 379: Setting The Department Id Management
Setting the Department ID Management By storing a Department ID and Password for each department, you can set the machine so that its functions can be used only after the correct password has been entered. This is called “Department ID Management”. Department IDs and Passwords for up to 1000 departments can be stored. - Page 380 Press the [Store] key. Press the [Department ID] key and enter the Department ID with the Numeric keys ( NOTE • You cannot store a Department ID with only the number “0”, such as “0000000”. Press the [Password] key and enter the pass- word with the Numeric keys ( NOTE •...
- Page 381 Press the [OK] key. After setting the printing restrictions, and press the [Done] key. NOTE • To apply printing restrictions, press the [Limit Impress.] key. The impression limits set in step 6 are enabled. • To set the print restrictions, the Impression Limit needs to be specified in step 6.
- Page 382 Changing the Password and Impression Limit Call up the desired screen as follows: Additional Functions NOTE • When the System Manager ID/ Password is set, enter the System Manager ID and System Password after pressing the [System Settings] key. Then, press the key.
- Page 383 Press the [Password] key and enter the Pass- word with the Numeric keys ( NOTE • You cannot store a password with only the number “0”, such as “0000000”. Press the [Impression Limit] key and enter the impression limit with the Numeric keys ( ).
- Page 384 Press the [OK] key. NOTE • When you select the [On] key, Department ID Man- agement is enabled. (See “Entering the Depart- ment ID and Password,” on p. 10-4.) Press the [Done] key. Repeat this until the screen on the right appears. For details on how to enter the Department ID and Password, see “Entering the Department ID and Password,”...
- Page 385 Use the [ ] and [ ] keys to display the Depart- ment you want to erase. Then select the Department, and press the [Erase] key. Press the [Yes] key. The Department ID and Password are erased. NOTE • To cancel erasing, press the [No] key. Press the [Done] key.
- Page 386 Press the [Done] key. Repeat this until the screen on the right appears. For details on how to enter the Department ID and Password, see “Entering the Department ID and Password,” on p. 10-4. Checking and Printing Counter Information You can display and also print a list of the count of the paper that was used by each department. Call up the desired screen as follows: Additional Functions NOTE...
- Page 387 Check or print the count of print totals. The print total with the Department ID left blank (not displayed) is the total of prints from the driver not correspondent with a stored Department ID (unknown ID). When only checking the counter: Press the [ ] or [ ] key to display the desired Department, and check the print totals.
- Page 388 Press the [Done] key. Press the [OK] key. NOTE • When you select the [On] key, Department ID Man- agement is enabled. (See “Entering the Depart- ment ID and Password,” on p. 10-4.) Press the [Done] key. Repeat this until the screen on the right appears. For details on how to enter the Department ID and Password, see “Entering the Department ID and Password,”...
- Page 389 Erasing Print Totals The following instructions describe how to delete the print totals made so far for all departments. Call up the desired screen as follows: Additional Functions NOTE • When the System Manager ID/ Password is set, enter the System Manager ID and System Password after pressing the [System Settings] key.
- Page 390 When Erasing by Department Select the Department you want to erase, then press the [Clear] key. When Erasing All Counts Press the [Clear All Totals] key. Select the [Yes] key. NOTE • If you do not want to erase the counter, press the [No] key.
- Page 391 Press the [Done] key. Press the [OK] key. NOTE • When you select the [On] key, Department ID Man- agement is enabled. (See “Entering the Depart- ment ID and Password,” on p. 10-4.) Press the [Done] key. Repeat this until the screen on the right appears. For details on how to enter the Department ID and Password, see “Entering the Department ID and Password,”...
- Page 392 Selecting whether or not to Accept Print Jobs of Unknown ID You can set whether or not to print documents from a driver not correspondent with a stored Department ID. NOTE • The [Accept jobs with unknown ID] key is only displayed when the network printer function is enabled. •...
-
Page 393: Setting Device Information
Press the [Done] key. Repeat this until the screen on the right appears. For details on how to enter the Department ID and Password, see “Entering the Department ID and Password,” on p. 10-4. Setting Device Information You can set the name of this machine and the place where it is located. Call up the desired screen as follows: Additional Functions Device... -
Page 394: Erasing A Message Board
Erasing a Message Board A message board is used to display messages for the users of this machine. The messages are sent from the system manager using the utility software. You can erase a message displayed in the message board. NOTE •... -
Page 395: Setting The Auto Offline On/Off
Setting the Auto Offline On/Off When the network is online, scanning is not possible with the Copy or Mail Box functions. By setting Auto Offline is to "ON", the machine will automatically go Offline. NOTE • Auto Offline is only displayed when the Network Scan function is enabled. •... -
Page 396: Printing The Report
Printing the Report Printing the Contents of the Network Settings NOTE • For details of the contents of the User’s Data List, see the Network Guide. • You can print the contents only when the network printer function is enabled. Call up the desired screen as follows: Additional Functions Report Settings... - Page 397 6-76 Printing the Report...
-
Page 398: Loading Paper And Adding Toner
Loading Paper and Adding Toner C H A P T E R This chapter describes how to load paper and add toner. Loading Paper ............7-2 Loading Paper in the Paper Drawers. -
Page 399: Loading Paper
Loading Paper This section describes how to load paper in the paper drawers. IMPORTANT • When setting STMT-size paper, place it horizontally (STMTR). NOTE • The following size paper can be loaded in the paper drawers: - Paper drawer 1, 2 : LTR - Paper drawer 3, 4 : 11"x17"/ LGL/ LTR/ LTRR/ STMTR •... - Page 400 Press, then release the paper drawer release button of the paper drawer in which you want to load paper. Grip the handle and pull out the paper drawer until it stops. NOTE • If the drawer seems to be stuck halfway, do not pull it out by force.
- Page 401 • Paper drawers 3 and 4 hold up to about 550 sheets of paper each (20-lb bond (80 g/m • For high-quality prints, we recommend using paper recommended by Canon. Turn the paper stack over, and place it in the paper drawer.
- Page 402 Gently push the paper drawer back into the machine until it clicks. CAUTION • When returning the paper drawer to its original position, be careful not to get your fingers caught, as this may result in personal injury. IMPORTANT • Never place paper or any other items in the open part of the paper drawer next to the paper stack.
-
Page 403: Adjusting A Paper Drawer To Hold A Different Paper Size
Adjusting a Paper Drawer to Hold a Different Paper Size If you want to load a new paper size in a paper drawer, follow the procedure described below to adjust the paper drawer guides. You can adjust the paper drawers to hold the following standard paper size: 11"x17"/ LGL/ LTR/ LTRR/ STMTR. - Page 404 Squeeze the lever on the width guide as shown in the illustration. Without releasing the lever, slide the width guide to align it with the mark for the desired paper size. IMPORTANT • If the length and width guides are not adjusted properly for the paper size loaded in the paper drawer, then the correct paper sizes might not appear in the display.
-
Page 405: Adding Toner
NOTE • When this message appears, approximately 300 prints can still be made (LTR-size Canon Standard Chart). However, since this number may vary depending upon the original, it is recommended that the toner be added as soon as possible. - Page 406 Open the toner supply cover. Hold the toner bottle with both hands and turn it up and down a few times as shown in the illustration, to evenly distribute the toner inside the bottle. Align the protrusions of the toner bottle with the slots on the toner supply port.
- Page 407 Grip the shutter of the toner bottle, and pull it out slowly until it stops. Toner flows into the toner box. Lightly tap the top of the toner bottle to make sure that all of the toner empties into the toner box.
- Page 408 Remove the empty toner bottle from the toner supply port. WARNING • Do not throw used toner bottles into open flames, as this may ignite the toner remaining inside the bottle and result in burns or a fire. CAUTION • When removing used toner bottles from the toner supply port, remove the bottles carefully to prevent toner from scattering and entering your eyes or mouth.
-
Page 409: Consumables And Options
Consumables and Options The following consumables and accessories are available from Canon. For details, consult your ser- vice representative. Consumables Paper stock In addition to plain paper (11"x17"/ LGL/ LTR/ STMT), transparencies, labels and other types of paper stock are available. For details, consult your service representative. -
Page 410: Options
As such, for superior print quality, we recommend that you use Canon-GENUINE brand parts, supplies and GPR-4 Toner in this machine. Ask your authorized Canon dealer or service provider for Canon-GENUINE brand parts, supplies and GPR-4 Toner. We recommend that you order paper stock and toner from your service representative before they run out. -
Page 412: Troubleshooting
Troubleshooting C H A P T E R This chapter describes what to do when there is a paper jam or a problem with print quality. Removing Paper Jams ........... 8-2 Display Indicating How to Clear the Jam . -
Page 413: Removing Paper Jams
Removing Paper Jams If a paper jam occurs, the following display appears in the touch panel display. Display Indicating How to Clear the Jam The display indicating the location of the paper jam appears in the touch panel display, followed by instructions on how to clear the paper jam. - Page 414 Inspect all areas which appear in the touch panel display, and remove any jammed paper. See the appropriate pages for instructions on how to find and remove jammed paper. Display indicating locations of the paper jam and page number describing how to remove jammed paper.
- Page 415 After you have removed all paper jams at the locations indicated in the touch panel dis- play, restore all levers and covers to their original positions. Continue operations following the instructions displayed in the touch panel display. If there is remaining paper to be removed: The display indicating how to clear the paper jam appears in the touch panel display.
-
Page 416: Removing Paper Jams In The Main Unit
Removing Paper Jams in the Main Unit If a paper jam occurs in the main unit, a display similar to the one on the right appears in the touch panel display. Check where the jam occurred, and follow the procedure below and the procedure that appears in the touch panel display to remove the jammed paper. - Page 417 Remove any remaining jammed paper from the fixing unit. Open the left cover. Turn the green knob in the direction of the arrow, and remove any jammed paper. CAUTION • The parts located around the cover are subject to high temperatures. When removing jammed paper, take care not to touch anything in this area except this cover.
- Page 418 Close the cover. CAUTION • When closing the cover, be careful not to get your fingers caught, as this may result in per- sonal injury. Gently push the fixing unit back into its origi- nal position. CAUTION • When returning the fixing unit to its original position, be careful not to get your fingers caught, as this may result in personal injury.
- Page 419 Remove any jammed paper while opening the left cover as shown in the illustration. Remove any jammed paper while opening the right cover as shown in the illustration. Open the duplexing transport unit, and remove any jammed papers. Gently push the duplexing unit back to its original position.
- Page 420 Remove all jammed papers, and close the front cover. CAUTION • When closing the cover, be careful not to get your fingers caught, as this may result in per- sonal injury. Follow the instructions in the touch panel display. (See “Display Indicating How to Clear the Jam,” on p. 8-2.) Removing Paper Jams...
-
Page 421: Removing Paper Jams In The Right Cover
Removing Paper Jams in the Right Cover If a paper jam occurs in the right cover, a display similar to the one on the right appears in the touch panel display. Check where the jam occurred, and follow the procedure below and the procedure that appears in the touch panel display to remove the jammed paper. - Page 422 Open the right cover (lower) of the main unit. Remove any jammed paper. Close the right cover (lower). CAUTION • When closing the cover, be careful not to get your fingers caught, as this may result in per- sonal injury. Follow the instructions in the touch panel display.
-
Page 423: Removing Paper Jams In Paper Drawer 1
Removing Paper Jams in Paper Drawer 1 If a paper jam occurs in paper drawer 1, a display similar to the one on the right appears in the touch panel display. Check where the jam occurred, and follow the procedure below and the procedure that appears in the touch panel display to remove the jammed paper. - Page 424 Press, then release the paper drawer release button of the paper drawer indicated on the touch panel display until the paper drawer comes out. Pull out the paper drawer 1. NOTE • If the drawer seems to be stuck halfway, do not pull it out by force.
- Page 425 Follow the instructions in the touch panel display. (See “Display Indicating How to Clear the Jam,” on p. 8-2.) 8-14 Removing Paper Jams...
-
Page 426: Removing Paper Jams In Paper Drawer 2
Removing Paper Jams in Paper Drawer 2 If a paper jam occurs in paper drawer 2, a display similar to the one on the right appears in the touch panel display. Check where the jam occurred, and follow the procedure below and the procedure that appears in the touch panel display to remove the jammed paper. - Page 427 Open the duplexing transport unit, and remove any jammed paper. Gently push the duplexing unit back to its original position. CAUTION • When returning the duplexing unit to its origi- nal position, be careful not to get your fingers caught, as this may result in personal injury. Close the front cover of the main unit.
- Page 428 Pull out the paper drawer 2. NOTE • If the drawer seems to be stuck halfway, do not pull it out by force. Push it back into the copier, and then try pressing the release button and pulling it out again. Remove any jammed paper.
-
Page 429: Removing Paper Jams In Paper Drawer 3 Or 4
Removing Paper Jams in Paper Drawer 3 or 4 If a paper jam occurs in paper drawer 3 or 4, a display similar to the one on the right appears in the touch panel display. Check where the jam occurred, and follow the procedure below and the procedure that appears in the touch panel display to remove the jammed paper. - Page 430 Return the paper drawer to its original posi- tion. CAUTION • When returning the paper drawer to the original position, be careful not to catch your fingers between the top of the paper drawer and the main unit. Follow the instructions in the touch panel display. (See “Display Indicating How to Clear the Jam,”...
-
Page 431: Removing Paper Jams In The Stack Bypass
Removing Paper Jams in the Stack Bypass If a paper jam occurs in the stack bypass, a display similar to the one on the right appears in the touch panel display. Check where the jam occurred, and follow the procedure below and the procedure that appears in the touch panel display to remove the jammed paper. - Page 432 Close the right cover (upper). CAUTION • When closing the cover, be careful not to get your fingers caught, as this may result in per- sonal injury. Follow the instructions in the touch panel display. (See “Display Indicating How to Clear the Jam,” on p. 8-2.) Removing Paper Jams 8-21...
-
Page 433: Removing Paper Jams In The Feeder
Removing Paper Jams in the Feeder If a paper jam occurs in the feeder, a display similar to the one on the right appears in the touch panel display. Check where the jam occurred, and follow the procedure below and the procedure that appears in the touch panel display to remove the jammed paper. - Page 434 Remove the jammed original. Close the middle cover. CAUTION • When closing the cover, be careful not to get your fingers caught, as this may result in per- sonal injury. Turn the knob in the direction of the arrow, then remove the jammed original. Once you have removed the entire jammed original, close the upper cover of the feeder.
- Page 435 Open the feeder, and remove any jammed paper. Close the feeder. Follow the instructions in the touch panel display. (See “Display Indicating How to Clear the Jam,” on p. 8-2.) 8-24 Removing Paper Jams...
-
Page 436: Routine Cleaning
Routine Cleaning If the original is not scanned clearly, clean the following parts. For high-quality outputs, we recom- mend cleaning them once or twice a month. • Platen glass • Rear side of platen glass • Feeder Scanning area • White plate, Roller WARNING •... -
Page 437: Cleaning The Feeder
Cleaning the Rear Side of Platen Glass Clean the rear side of platen glass with a cloth dampened with water, then wipe with a dry cloth. Cleaning the Feeder Clean the feeder scanning area, white plate, and roller following the procedure below. IMPORTANT •... - Page 438 Clean the roller (total of 3 places) as shown in the illustration with a cloth dampened with water, then wipe with a dry cloth. Open the middle cover holding the knob in the back. Clean the roller (total of 5 places) with a cloth dampened with water, then wipe with a dry cloth.
- Page 439 Close the middle cover. CAUTION • When closing the cover, be careful not to get your fingers caught, as this may result in per- sonal injury. Close the feeder cover. CAUTION • When closing the cover, be careful not to get your fingers caught, as this may result in per- sonal injury.
- Page 440 Clean the white plate with a cloth dampened with water, then wipe with a dry cloth. IMPORTANT • Do not push the white plate hard since the white plate is soft. Close the feeder. Routine Cleaning 8-29...
-
Page 441: Original Scanned Using The Feeder Becomes Dirty (Feeder Cleaning)
Original Scanned Using the Feeder Becomes Dirty (Feeder Cleaning) If your originals have black streaks or appear dirty after feeding them in the feeder caused by the pencil powder etc. on the roller, perform the Feeder Cleaning. Cleaning is done by repeatedly feeding blank papers though the feeder. NOTE •... -
Page 442: Output Sheets Are Dirty (Wire Cleaning)
Output Sheets are Dirty (Wire Cleaning) If dirt appears on printed paper, clean the wire of the corona assemblies as the need arises. NOTE • It takes about 30 seconds to clean the wire. Call up the desired screen as follows: Additional Functions Wire Cleaning Press the [Start] key. -
Page 443: Self-Diagnostic (Error) Display
Self-diagnostic (Error) Display Self-diagnostic (error) messages appear in the touch panel display at the following times: • When printing cannot be performed because of an operational error. • When you need to make a judgment or take some action during scanning or printing. If a self-diagnostic message appears, follow the instructions in the touch panel display. - Page 444 Message/ Cause Remedy Remove the paper from the output tray. Prints from the previous job remain in the output Remove the prints from the output tray, then press Start tray. key. Attach the finisher to the main unit. The Finisher is not properly connected to the main Connect the Finisher to the main unit properly.
- Page 445 Message/ Cause Remedy Place the original on the platen glass. There is no original on the platen glass. The Place the originals on the platen glass. programed function (mode) requires the original to be placed in the feeder. Remove the original from the platen glass. The original remains on the platen glass.
-
Page 446: If Memory Becomes Full During Scanning
If memory becomes full during scanning of originals, the following messages appear on the touch- panel display. NOTE • The machine’s memory can hold about 3,700 originals (LTR-size Canon Standard Chart, Standard set- ting) scanned in standard mode. If the message asking whether to print the original pages scanned into memory appears, select the [Yes] or [No] key as appropriate. -
Page 447: When The Power Does Not Turn On
When the Power does not Turn ON If the main power indicator on the control panel does not light even though the main power switch and control panel switch are both ON, be sure to check the breaker on the main unit to see if it is OFF. -
Page 448: Service Call Message
Service Call Message If a malfunction occurs and the machine will not operate as normal, the message on the right (the service call message) will appear in the touch panel display. If this message appears, follow the procedure described below. WARNING •... - Page 449 If the machine still does not operate normally, carry out the following procedure, then con- tact your service representative: Turn the main power switch OFF. Unplug the power cable from the outlet. 8-38 Service Call Message...
- Page 450 Handling Options C H A P T E R This chapter describes the use of options and what to do if there is a paper jam in an optional unit. System Configuration........... . 9-2 Paper Deck-G1.
-
Page 451: System Configuration
System Configuration The following options can be attached to the machine. NOTE • Before using the touch panel, peel off the protective film from the display. Saddle Finisher-F2 Control Card IVN Main Unit Card Reader-C1 Paper Deck-G1 Finisher-F1 Copy Tray-C3 Puncher Unit-B1 System Configuration... -
Page 452: Paper Deck-G1
Paper Deck-G1 If you attach the Paper Deck-G1 to the machine, one extra size of paper can be used in addition to the paper sizes in the paper drawers of the main unit. Up to 3,500 sheets (20-lb bond (80 g/m )) of paper can be loaded in the paper deck. -
Page 453: Removing Paper Jams In The Paper Deck
Removing Paper Jams in the Paper Deck If a paper jam occurs in the Paper Deck-G1, a display similar to the one on the right appears in the touch panel display. Check where the jam occurred, and follow the procedure below and the procedure that appears in the touch panel display to remove the jammed paper. - Page 454 Press the Open button to open the Paper Deck. IMPORTANT • When the machine is in the Low-Power mode (the Energy Saver touch panel is not displayed, and only the key and the Main Power indicator are lit), you may not be able to open the paper deck.
-
Page 455: Loading Paper In The Paper Deck
(do not copy on the reverse side either). NOTE • The Paper Deck holds up to about 3,500 sheets of paper (20-lb bond (80 g/m • For high-quality prints, we recommend using paper recommended by Canon. Paper Deck-G1... - Page 456 Place it in the paper deck. IMPORTANT • If the paper is curled, curl it down before placing it in the paper drawer. • Make sure that the height of the paper stack does not exceed the limit mark at the back of the paper drawer.
-
Page 457: Finisher-F1/ Saddle Finisher-F2/ Puncher Unit-B1
Finisher-F1/ Saddle Finisher-F2/ Puncher Unit-B1 Parts and Their Functions Upper cover Open to removed jamed paper. (See “Removing Paper Jams in the Finisher,” on p. 9-13.) Top cover of the puncher unit Open this cover when a paper jam occurs in the puncher unit. (See “Removing Paper Jams in the Puncher Unit,”... -
Page 458: Collate Mode
Collate Mode This function automatically collates print sets into page order before they are delivered. Group Mode This function outputs all prints of the same page in one set and slightly shifts the output position of print sets to make them easier to handle. NOTE •... - Page 459 Copies are stapled at the following places. When an original is placed on the platen glass: Double staple area Corner staple area Upper left Upper right Left side Lower right Right side Lower left Upper left Upper right Left side Lower right Lower left Right side...
-
Page 460: Saddle Stitching Mode
Saddle Stitching Mode This function enables you to make booklets consisting of pages folded and stapled at the center. Copy Originals Saddle stitch The pages are folded with a roller to form a booklet. IMPORTANT • This function is only available with the Saddle Finisher-F2. •... -
Page 461: Punch Mode
Punch Mode This function punches holes (2 or 3 holes) in the printed sheets. The hole punched area is as shown in the illustration. Platen glass Feeder Hole punched area Hole punched area Hole punched area Hole punched area IMPORTANT •... -
Page 462: Removing Paper Jams In The Finisher
Removing Paper Jams in the Finisher If a paper jam occurs using the Finisher, a display similar to the one on the right appears in the touch panel display. Check where the jam occurred, and follow the procedure below and the procedure that appears in the touch panel display to remove the jammed paper. - Page 463 Lift cover 1 upward, and remove any jammed paper. Then, return cover 1 to its original posi- tion. CAUTION • When closing the cover, be careful not to get your fingers caught, as this may result in per- sonal injury. Lift cover 2 upward, and remove any jammed paper.
-
Page 464: Replacing The Staple Case In The Stapler Unit
Replacing the Staple Case in the Stapler Unit When the Finisher runs out of staples, the staple case must be replaced. The message on the right will appear in the touch panel display. Follow the procedure described below to replace the staple case. - Page 465 Pull out the empty staple case holding it by its left and right sides. NOTE • Place the staple cartridge as shown in the illustra- tion, then pull out the staple case. Insert the new staple case. NOTE • Only one staple case can be inserted at a time. •...
- Page 466 Make sure that the staple cartridge is firmly secured, then close the front cover (upper) of the Finisher. CAUTION • When closing the cover, be careful not to get your fingers caught, as this may result in per- sonal injury. NOTE •...
-
Page 467: Removing Jammed Staples From The Stapler Unit
Removing Jammed Staples from the Stapler Unit If a staple jam occurs, the screen on the right appears. Follow the procedure described below to remove any jammed staples. Open the front cover (upper) of the Finisher. Push down the green lever. The staple cartridge will slightly come out. - Page 468 Lower the knob of the staple cartridge. Remove all of the staples that slide from the staple case. Return the knob of the staple cartridge to its original position. Gently push the staple cartridge back into the Finisher until the green lever returns to its original position.
- Page 469 Make sure that the staple cartridge is firmly secured, then close the front cover (upper) of the Finisher. CAUTION • When closing the cover, be careful not to get your fingers caught, as this may result in per- sonal injury. NOTE •...
-
Page 470: Removing Paper Jams In The Saddle Stitcher Unit
Removing Paper Jams in the Saddle Stitcher Unit If a paper jam occurs when the booklet mode was set using Saddle Finisher-F2, the screen shown at right appears. Remove the jammed paper according to the instructions on the screen. NOTE •... - Page 471 Connect the Saddle Finisher-F2 to the main unit. CAUTION • When returning the Finisher to its original posi- tion, be careful not to catch your fingers between the edge of the Finisher and the main unit. Open the front cover (lower) of the Finisher. Turn the knob on the right.
- Page 472 Remove any jammed paper. Close the front cover (lower) of the Finisher. CAUTION • When closing the cover, be careful not to get your fingers caught, as this may result in per- sonal injury. Follow the instructions in the touch panel display. (See “Display Indicating How to Clear the Jam,”...
-
Page 473: Replacing The Saddle Stitcher Unit Staple Cartridge
Replacing the Saddle Stitcher Unit Staple Cartridge When the Finisher runs out of staples, the staple cartridge must be replaced. The screen on the right will appear in the touch panel display. Follow the procedure described below to replace the staple cartridge. - Page 474 Pull out the empty staple cartridge holding it by its left and right sides. Insert the new staple cartridge. IMPORTANT • Replace both the inner and outer staple cartridges at the same time. Pull the stapler unit of the saddle stitcher unit, then return it to its original position.
-
Page 475: Removing Jammed Staples From The Saddle Stitcher Unit
Removing Jammed Staples from the Saddle Stitcher Unit If a staple jam occurs, the screen on the right appears. Follow the procedure described below to remove any jammed staples. NOTE • This procedure is only required when the Saddle Fin- isher-F2 is attached. - Page 476 Grasp the left and right ends of the staple car- tridge, and remove the cartridge. Push down part A, then pull up knob B. Remove the jammed staples, then return knob B to its original position. Return the staple cartridge to its original posi- tion.
- Page 477 Pull the stapler unit of the saddle stitcher unit, then return it to its original position. Push back the saddle stitcher unit, then close the front cover (lower). CAUTION • When closing the cover, be careful not to get your fingers caught, as this may result in per- sonal injury.
-
Page 478: Removing Paper Jams In The Puncher Unit
Removing Paper Jams in the Puncher Unit When paper jams occur while the punch function is being used, the screen on the right is displayed. In addition to removing the paper jam in the main unit, also check the puncher unit with the following procedure and remove any jammed paper. - Page 479 Close the front cover of the puncher unit. CAUTION • When closing the cover, be careful not to get your fingers caught, as this may result in per- sonal injury. Open the top cover of the puncher unit. Remove any jammed paper. Close the top cover of the puncher unit.
- Page 480 Follow the instructions in the touch panel display. (See “Display Indicating How to Clear the Jam,” on p. 8-2.) Finisher-F1/ Saddle Finisher-F2/ Puncher Unit-B1 9-31...
-
Page 481: Removing Punch Waste
Removing Punch Waste When the punch waste tray becomes full with debris, the screen on the right appear in the display. Follow the procedure described below to remove the punch waste. NOTE • This procedure is only required when the Puncher Unit-B1 is attached. -
Page 482: Consumables
Return the punch waste tray to its original position. NOTE • If the tray is not returned securely in place, you cannot make prints with the Punch mode selected. Close the front cover of the puncher unit. CAUTION • When closing the cover, be careful not to get your fingers caught, as this may result in per- sonal injury. -
Page 483: Copy Tray-C3
Copy Tray-C3 The Copy Tray-C3 is equipped with the following functions: Collate Group Rotate IMPORTANT • The paper size which can be selected when you set the Rotate mode are LTR/ LTRR. Parts and Their Functions Copy Tray-C3 Papers are output here. NOTE •... -
Page 484: Removing Paper Jams In The Copy Tray-C3
Removing Paper Jams in the Copy Tray-C3 If a paper jam occurs in the Copy Tray-C3, a display similar to the one on the right appears in the touch panel display. Check where the jam occurred, and follow the procedure below and the procedure that appears in the touch panel display to remove the jammed paper. - Page 486 Operation When User Restrictions are Enabled and How to Enter Alphabet C H A P T E R Characters This chapter describes operations when user restrictions are enabled, the character entry method, etc. Operation When User Restrictions Are Enabled ......10-2 Inserting the Control Card .
-
Page 487: Operation When User Restrictions Are Enabled
Operation When User Restrictions Are Enabled Inserting the Control Card When the Control Card IVN or Card Reader-C1 (option) is attached to the machine, you must insert the control card before operating this machine. IMPORTANT • When the Basic Features screen does not appear in the touch panel display even if the control card is inserted, check the followings: - Make sure that the control card is inserted in the correct direction. -
Page 488: Operations Before Using Copy Or Mail Box Functions
Operations before Using Copy or Mail Box Functions NOTE • For details on how to turn the power ON, see “Main Power and Control Panel Power,” on p. 1-6. Insert the control card into the card slot mak- ing sure it is facing the correct direction. IMPORTANT •... -
Page 489: Entering The Department Id And Password
Entering the Department ID and Password When Department ID Management has been set, the Department ID and Password must be entered before operating this machine. NOTE • When you are using the control card, the message “You must insert a control card.” appears in the touch panel display. -
Page 490: Operations After Using Copy Functions
Press the key. Reset Guide Additional Functions Clear Interrupt The basic screen of the selected function is displayed. NOTE • If the Department ID and/or Password that you entered are wrong, the message “Wrong ID or password” appears. Repeat the procedure from step 1. -
Page 491: Entering Characters On The Touch Panel Display
Entering Characters on the Touch Panel Display At screens which require alphanumeric entry, enter characters using the alphabet keys displayed in the touch panel display as described below. Entering Alphabet Characters Example: Enter “canon”. Press the [Entry Mode] key, and select “Alpha- bet”. NOTE •... -
Page 492: Entering Special Letters
Entering Special Letters Example: Enter “é”. Press the [Entry Mode] key, and select “Other”. NOTE • Each press of the [Entry Mode] key switches the entry mode. Press the [ ] or [ ] key to display the desired special letter. Press the desired special letter in the touch panel display. -
Page 493: Setting In Inches
Setting in Inches When entering values in inches in the modes which require number entry, set the inch entry function to On in the Common Settings of the Additional Functions. You can make entry in inches when you press the [Inch] key on the screen which requires number entry. The example shows the inch entry in the Zoom Program mode. -
Page 494: Appendix
Appendix C H A P T E R Specifications ............11-2 Main Unit . -
Page 495: Specifications
Specifications Specifications are subject to change without notice for product improvement or future release. Main Unit Name Canon imageRUNNER 5000 Series Type Console Platen Stationary Photoconductive material A-si Copying system Electrostatic Transfer System Developing system Toner Projection System Fixing system... - Page 496 Non-image areas Leading edge: 1/8" (4.0 mm) Left and right side: 1/8" (2.5 mm) Trailing edge: 1/8" (2.0 mm) Warm-up time When main power is turned ON: 5 minutes max. Activation time from Sleep mode: 5 minutes max. Activation time from Energy Saver mode: None : 0 second –10% mode: approx.
- Page 497 Magnification Direct 1 : 1 (±0.5%) Reduction 1 : 0.789 (LGL→ LTR) 1 : 0.733 (11"x17"→ LGL/ 11"x15"→ LTR) 1 : 0.647 (11"x17"→ LTR) 1 : 0.500 (11"x17"→ STMT) 1 : 0.250 Enlargement 1 : 1.214 (LGL→ 11"x17") 1 : 1.294 (LTR→...
-
Page 498: Feeder
Feeder Originals 11" x 17"/ LGL/ LTR/ LTRR/ STMT Original paper weights 13-lb bond to 32-lb bond (50 g/m to 128 g/m Original tray capacity 100 sheets Original replacement speed 55 sheets/minute (LTR) Power source From main unit Power consumption When active : 48 W max. -
Page 499: Finisher-F1/ Saddle Finisher-F2
Finisher-F1/ Saddle Finisher-F2 Paper 17-lb bond to 110-lb index (64 g/m to 200 g/m Saddle Stitcher Unit* : 17-lb bond to 20-lb bond (64 g/m to 80 g/m (For cover sheets only* : 17-lb bond to 110-lb index (64 g/m to 200 g/m Capacity per tray [Non-collate mode]... - Page 500 Max. stapling capacity Staple Unit : 50 sheets 11"x17"/ LGL/ LTRR : 30 sheets Saddle Stitcher Unit * : 15 sheets Available offset size 11"x17"/ LGL/ LTR/ LTRR Available staple size Corner staple: 11"x17"/ LGL/ LTR/ LTRR Double staple: 11"x17"/ LTR Available saddle stitch size* 11"x17"/ LTRR Saddle Stitcher Folding Method* Roller pressure folding...
-
Page 501: Puncher Unit-B1
Puncher Unit-B1 Paper 17-lb bond to 110-lb index (64 g/m to 200 g/m Hole punching system Sequential processing system Punch hole quantity, hole diameter 2 holes/ 3 holes, 8±0.5 mm Distance between punch holes 3 holes: 4-1/4" (108mm) 2 holes: 2-3/4" (70 mm) Paper size in which holes can be punched 3 holes: 11"x17"/ LTR 2 holes: LGL/ LTRR... -
Page 502: Relation Of Original Orientation And Paper Orientation
Relation of Original Orientation and Paper Orientation When you set the left-side stapling NOTE • Please use this chart when printing on paper with logos etc., printed beforehand. Confidential Output Confidential Confidential example Confidential Confidential Confidential Confidential Original/ paper orientation, settings 11"x17", LGL 11"x17", LGL... -
Page 503: Chart Of Available Combination Of Functions
Chart of Available Combination of Functions The chart shows how the settings will be when you want to set a function different from a function already set. Copy Function Combination available Combination unavailable Priority to latter-set mode Priority to Image Combination, Image Separation, and Booklet mode (Ratio can be changed) Function intend to set... - Page 504 Combination available Combination unavailable Priority to latter-set mode Priority to Image Combination, Image Separation, and Booklet mode (Ratio can be changed) Function intend to set Two-page Separation Image Combination Image Separation Original Frame Erase Book Frame Erase Binding Erase Right Margin Left Margin Top Margin Bottom Margin...
- Page 505 Combination available Combination unavailable Priority to latter-set mode Priority to Image Combination, Image Separation, and Booklet mode (Ratio can be changed) Function intend to set Enlargement Zoom Designation XY Zoom Auto Zoom mode Zoom Program Entire Image Automatic Exposure Control Printed Image Photo Text...
- Page 506 Combination available Combination unavailable Priority to latter-set mode Priority to Image Combination, Image Separation, and Booklet mode (Ratio can be changed) Function intend to set Two-page Separation Image Combination Image Separation Original Frame Erase Book Frame Erase Binding Erase Right Margin Left Margin Top Margin Bottom Margin...
-
Page 507: Mail Box Function
Mail Box Function Combination available Combination unavailable Priority to latter-set mode Priority to Image Combination, Image Separation, and Booklet mode (Ratio can be changed) Function intend to set Platen glass scanning Feeder scanning Document size Auto Select Document size Manual Select Record size Auto Select Record size Manual Select Enlargement... -
Page 508: Index
Index 1 to 2..............3-38 1 to 4. - Page 509 Box Set/ Store ............. . 6-46 Breaker .
- Page 510 Energy Consumption in Sleep Mode ..........6-15 Energy Saver key .
- Page 511 Job Build ............. .3-45, 4-45 Job Duration Display .
- Page 512 Paper Deck-G1 ............. . 9-3 Paper drawer 1, 2 .
- Page 513 Slide guide ..............1-4 Special Features Screen 1/2 .
- Page 514 XY Zoom ............. . 2-25, 4-21 Zoom.
- Page 516 System Management Mode of the imageRUNNER 5000 Series The following pages regarding the use and operations of the System Management mode, should be cut out of the manual by the supervisor or the system manager. You can set restrictions to the System Settings of the Additional Functions or manage the settings set by other users by setting the System Settings of the Additional Functions.
- Page 517 Press the [System Settings] key. Enter the System Manager ID/ Password with the Numeric keys ( ), and press the key. The machine enters the System Management Mode. NOTE • Enter the number stored under System Manager Settings. (See “Setting/ Changing the System Man- ager ID and Password,”...
- Page 518 Managing Box in the System Management Mode You can operate the box documents stored by the users. For example, you can operate a box that the user has forgotten the password, erase unnecessary documents, or in case of need, access to box documents of other users.
- Page 519 Changing the Box Settings in the System Management Mode You can change the box settings restricted with a password. For example, you can initialize unnecessary box, or change the name of the box. Additional Functions Press the key. Reset NOTE •...
- Page 520 Enter the System Manager ID/ Password with the Numeric keys ( ), and press the key. The machine enters the System Management Mode. NOTE • Enter the number stored under System Manager Settings. (See “Setting/ Changing the System Man- ager ID and Password,” on p. 6-55.) Press the [Done] key.
- Page 522 How to Inspect the Breaker periodically Follow the procedure described in the “Periodic Inspection of the Breaker” on p. 26 of the imageRUNNER 5000 Series User’s Guide, once or twice a month. How to Fill in this Check Sheet Fill in the date of inspection, and the name of inspector.