Sign In
Upload
Manuals
Brands
ADIC Manuals
Storage
Scalar 100
ADIC Scalar 100 Tape Library Manuals
Manuals and User Guides for ADIC Scalar 100 Tape Library. We have
7
ADIC Scalar 100 Tape Library manuals available for free PDF download: User Manual, Installation And Operating Manual, Quick Start Manual, Release Note
ADIC Scalar 100 User Manual (346 pages)
Quantum Scalar 100: User Guide
Brand:
ADIC
| Category:
Storage
| Size: 3 MB
Table of Contents
Copyright Notice
2
Table of Contents
3
List of Figures
11
List of Tables
15
Chapter 1: Notices
17
ADIC Limited Product Warranty
17
Adic End User License Agreement
18
Safety Notices
22
Safety Inspection
22
Remove AC Power
22
External Machine Check
22
Internal Machine Check
23
Safety Label Check
23
Figure 1-1: Safety Label
24
Figure 1-2: Ground Test
24
Fusing Requirements
25
Figure 1-3: Fusing Label
25
AC Grounding
26
Environmental Notices and Statements
26
Figure 1-4: AC Grounding
26
Electronic Emission Statements
27
European Community Compliance Statement
28
Chapter 2: Introduction
29
Overview
29
Configuration Support
29
Address Mapping
29
Interface Protocol Awareness
29
ADIC Management Console
30
Access Security Capabilities
30
Virtual Private SAN™ Option
30
Data Mover
31
Virtual Private Map™ Option
31
Channel Zoning
31
Hardware Product Description and Features
31
Fibre Channel Interfaces
32
Table 2-1: Fibre Channel Connections
32
Ultra2 SCSI I/O Interfaces
33
Ultra SCSI I/O Modules
33
Ethernet
34
Service Port
34
Enclosure
34
Power Supply Unit
34
LED Indicators
35
Figure 2-1: Leds on Front Panel
35
Supported Platforms
36
Supported Devices
36
Operating Specifications
37
Installation Options
37
Physical Dimensions
37
Operating Environment
37
Power Consumption
38
AC Power Requirement
38
Agency Approvals
38
Introduction to the ADIC Management Console
38
Client/Server Model
39
Agent
39
Server
39
Figure 2-2: ADIC Management Console Application Model
39
Client
40
Features
40
Snmp
40
SNMP Community Support
41
Security
41
SAN Access Control
41
Host Registration Service
42
Saved Views
42
Network Discovery
42
Configuration Options
42
Software Updates
42
Event Logging
43
Health Checks
43
Views
43
Heartbeat
43
Chapter 3: Installation
45
Pre-Installation Checklist
45
Table 3-1: Pre-Installation Steps
45
Installation Checklist
48
Table 3-2: Installation Steps
48
Post-Installation Checklist
52
Table 3-3: Post-Installation Steps
52
ADIC Gateway Setup
53
Placing the ADIC Gateway
53
Desktop Configuration
54
Rack Mount Configuration
54
Figure 3-1: Installing the Rubber Feet for Desktop Use
54
Attaching SCSI Devices
55
Figure 3-2: Installation into a Rack
55
Maximum Number of LUNS
56
Transfer Rates: Ultra, Fast, and Asynchronous
56
Wide and Narrow SCSI Buses
56
Table of SCSI Terminology and Limitations
57
SCSI Bus Termination
58
Problems on the SCSI Bus
58
Connecting Power
59
Other Installation Issues
60
Host Adapter Setup
60
Installing the SAN Explorer and Host Registration Service
60
Power-Up and Boot Sequence Guidelines
61
Install the ADIC Management Console Software
62
Installation Requirements
62
Installing the Software on Windows Nt/Windows 2000
63
Startup and Configuration
63
Figure 3-3: Logon to Server
64
Figure 3-4: Add an Administrative User Account
64
ADIC Gateway Network Setup
65
Figure 3-5: Adding a User Account
65
Chapter 4: Understanding SAN Configurations
69
Device Configuration and Mapping
69
Figure 4-1: Basic SCSI Connection to System
69
Figure 4-2: System with ADIC Gateway Attached through Fibre Channel
70
Table 4-1: Target Device Map
70
Host System Considerations
71
Mapping Devices to Targets and Luns
71
Table 4-2: Host Device Map
71
Persistent Device Maps
72
Alternate SCSI Ids
72
Adding and Replacing SCSI Target Devices
73
Replacing an Existing SCSI Device
74
Setting up Access Control
74
Fibre Channel Port Modes and Connection Options
75
Port Mode Options
75
Connection Type Options
76
Preserving the ADIC Gateway Configurations
76
Updating the ADIC Gateway Software
77
Chapter 5: Using the ADIC Management Console
79
Starting the ADIC Management Console
80
Figure 5-1: Connect to Server
80
Figure 5-2: Logon to Server
80
Figure 5-3: Initial Tree View
81
File Menu Group
82
Save Current View
82
Save Current View as
82
Figure 5-4: File Menu
82
Open a Previous View
83
Figure 5-5: Save Current View as
83
Figure 5-6: Saved Views
83
Exit
84
View Menu Group
84
Figure 5-7: Exit
84
Figure 5-8: View Menu
84
Figure 5-9: Expanded Tree View
85
Figure 5-10: Icons for Channel Modes and Channel Types
86
Figure 5-11: Information about a Channel
87
Figure 5-12: Icons Used in Tree View
88
Figure 5-13: Information about a Selected Device
88
Information about a Selected Channel
88
Figure 5-14: Information about a Host
89
Figure 5-15: Front Panel View
90
SAN Gateway Front Panel
90
Refresh SAN Gateway
91
Admin Menu Group
91
Figure 5-16: Refresh View
91
Figure 5-17: Admin Menu
91
Change Password
92
Connect to Server
92
Figure 5-18: Connect to Server
92
Figure 5-19: Logon to Server
92
Logon
92
Add New User
93
Figure 5-20: Change Password
93
Figure 5-21: Add a User
93
Figure 5-22: Remove a User
94
If You Lose the Password
94
Remove User
94
Tools Menu Group
95
Discover Net
95
Figure 5-23: Tools Menu
95
Figure 5-24: Discover Net
95
Connect SAN Gateway
96
Figure 5-25: Connect to Server
96
Disconnect SAN Gateway
97
Figure 5-26: Right Click Menu for Connecting to Gateway
97
Figure 5-27: Disconnect Dialog Box
97
Health Check
98
Figure 5-28: Disconnect Via Right-Click
98
Figure 5-29: Health Check Submenu
98
Figure 5-30: Perform Health Check Via Right-Click
99
Figure 5-31: Health Check Settings
99
Table 5-1: Health Check Levels
100
Events
101
Figure 5-32: Events Submenu
101
Figure 5-33: Event Viewing Levels
102
Figure 5-34: Typical Event Log
102
Figure 5-35: Save Event Log Dialog Box
103
Figure 5-36: Clear Event Log
103
Figure 5-37: Set Event Threshold
104
Figure 5-38: Change Event Threshold Dialog Box
105
Save SAN Gateway Configuration
106
Figure 5-39: Received Event Trap Window
106
Figure 5-40: Save Gateway Configuration
106
Load SAN Gateway Configuration
107
Figure 5-41: Save Configuration Dialog
107
Figure 5-42: Load SAN Gateway Configuration
107
Figure 5-43: Warning before Loading a Configuration
108
Figure 5-44: Load a Local File
108
Figure 5-45: Load a File from the Server
109
Controls Menu Group
110
Feature Enable
110
Figure 5-46: Controls Menu
110
Feature Enable: Virtual Private SAN
111
Figure 5-47: Enabling Optional Features
111
Feature Enable: Virtual Private Map
112
Figure 5-48: Enter License Key to Enable VPS
112
Figure 5-49: Feature Enable: Virtual Private Map
112
Feature Enable: Data Mover
113
Access Options
113
Figure 5-50: Feature Enable: Data Mover
113
Access Options: Channel Zoning
114
Figure 5-51: Selecting an Access Control Option
114
Figure 5-52: Access Options: Channel Zoning
115
Access Options: Virtual Private SAN
116
Figure 5-53: Default Channel Zoning Settings
116
Figure 5-54: Right-Click Menu: VPS
117
Access Options: Virtual Private Map
118
Figure 5-55: VPS Access Settings
118
Figure 5-56: Right-Click Menu: VPM
119
Figure 5-57: SCSI Devices Available for Mapping with VPM
120
SNMP Community Strings
121
SCSI Channel
121
Figure 5-58: SNMP Community Strings
121
Figure 5-59: SCSI Channel Parameters Via the Right-Click Menu
122
Figure 5-60: SCSI Channel Controls
122
Fibre Channel
124
Figure 5-61: First SCSI Reset Warning
124
Figure 5-62: Second SCSI Reset Warning
124
Figure 5-63: Fibre Channel Parameters Via the Right-Click Menu
125
Device Mapping
126
Figure 5-64: Fibre Channel Default Settings
126
Figure 5-65: Device Mapping on the Right-Click Menu
127
Figure 5-66: Devices Available for Mapping
128
Figure 5-67: Device Mapping Window
129
Pre-Assigning Device Numbers
130
Figure 5-68: Devices that Have Been Remapped
130
Figure 5-69: Add New SCSI Device
131
Figure 5-70: Add New Fibre Channel Device
131
Figure 5-71: New SCSI Channel Device
132
Figure 5-72: Unmapped Devices Warning
132
Update Firmware
133
Figure 5-73: Update Firmware Via the Right-Click Menu
133
Restart SAN Gateway
134
Figure 5-74: Update Firmware
134
Figure 5-75: Using the Right-Click Menu to Restart a Gateway
134
Identify ADIC Gateway
135
Figure 5-76: Warning before Restarting an ADIC Gateway
135
Figure 5-77: Identify SAN Gateway
135
Chapter 6: Installing and Using Virtual Private SAN
137
Introduction to Virtual Private SAN
137
Host Registration
138
Installing the Host Registration Service
139
Installing Virtual Private SAN
140
Installation Instructions
140
Installation Steps for a New SAN Gateway Installation
140
Figure 6-1: One Registered Host Online
141
Figure 6-2: Detail of Host Information in Tree View Panel
142
Figure 6-3: Confirming that Two Registered Hosts Are Online
143
Figure 6-4: Determining the Assigned LUN
144
Figure 6-5: Initial VPS Window before Access Assignments
145
Figure 6-6: VPS Host Parameters Pop-Up
146
Figure 6-7: Assigning Host Access Permissions
147
Installation Steps for an Existing SAN Gateway
148
Figure 6-8: VPS Device Parameters Pop-Up
148
Figure 6-8: Two Hosts Online
150
Figure 6-9: Detail of Tree View Panel
151
Figure 6-10: Checking Access Settings Inherited from Hosts
152
Entering Host Parameters
153
Figure 6-11: Checking the Assigned LUN
153
Figure 6-12: Unknown Host Parameters
154
Changing Access Permissions
156
Figure 6-13: Entering Parameters for a Fibre Channel Switch
156
Figure 6-14: Changing Access Permissions
157
Determining LUN Assignments
158
Figure 6-15: Determining the Assigned LUN
158
Adding and Removing Hosts
159
Adding a Host to the SAN Configuration
159
Attaching a New Host to the SAN
159
Adding a Host before Attaching It to the SAN
160
Figure 6-16: Adding a New Host
160
Removing a Host from the SAN Configuration
161
Combining VPS with Channel Zoning
161
Chapter 7: Installing and Using Virtual Private Map
163
Introduction to Virtual Private Map
163
Enabling Virtual Private Map
164
Mapping Devices with VPM
164
Map Devices on a Fibre Channel to a SCSI Host
164
Figure 7-1:SCSI Channel Set to Target
165
Figure 7-2:Initial VPM Mapping Window (Fibre Devices)
166
Figure 7-3:VPM Mapping Changes Made (Fibre Devices)
167
Map Devices on a SCSI Channel to a SCSI Host
168
Figure 7-4:SCSI Devices Available for Mapping
168
Figure 7-5:Initial VPM Mapping Window (SCSI Devices)
169
Figure 7-6:VPM Mapping Changes Made (SCSI Devices)
170
Removing Devices from VPM
171
Figure 7-7:Device Removed from Virtual Private Map
171
Advertisement
ADIC Scalar 100 User Manual (286 pages)
Quantum Scalar 100: User Guide
Brand:
ADIC
| Category:
Storage
| Size: 3 MB
Table of Contents
User Manual
1
Copyright Notice
2
Table of Contents
3
List of Figures
9
Notices
15
ADIC Limited Product Warranty
15
ADIC End User License Agreement
16
Safety Notices
19
Safety Inspection
20
How to Power down the SNC
20
Environmental Notices and Statements
20
Regulatory Notices
21
SNC CE Notice
21
Copyright Notice
22
U.S. Government Rights Restricted
22
Technical Assistance
22
Documentation
22
Chapter 1: Introduction
23
Overview
23
Figure 1-1: Configuration Overview
23
Configuration Support
24
Address Mapping
24
Interface Protocol Awareness
24
ADIC Management Console
24
Figure 1-2: Configuration Detail
24
Access Security Capabilities
25
Scalar Firewall Manager Option
25
Channel Zoning
25
Data Mover Module
26
Hardware Product Description and Features
26
Fibre Channel Interfaces
26
Table 1-1: Fibre Channel Connections
26
Ultra2 SCSI I/O Interfaces
27
Ethernet
28
Service Port
28
LED Indicators
28
Figure 1-3: Leds
28
Supported Platforms
29
Supported Devices
30
Operating Specifications
30
Operating Environment
30
Power Consumption
30
Introduction to the ADIC Management Console
31
Client/Server Model
31
Agent
31
Server
31
Figure 1-4: Client Server Model
31
Client
32
Features
32
Snmp
32
SNMP Community Support
33
Security
33
SAN Access Control
33
Host Registration Service
34
Saved Views
34
Network Discovery
34
Configuration Options
34
Software Updates
34
Event Logging
35
Health Checks
35
Views
35
Figure 1-5: LED Indicators on Front Panel View
35
Heartbeat
36
Chapter 2: Installation
37
Pre-Installation Checklist
37
Table 2-1: Pre-Installation Steps
37
Installation Checklist
40
Figure 2-1: Placement of Thumbscrews on Unit
40
Table 2-2: Installation Steps
40
Library and Controller Cabling to Drives
42
Figure 2-2: SCSI Cabling for One Drive and One Channel
43
Figure 2-3: Channel Zoning for Two SCSI Channels
43
Figure 2-4: SCSI Cabling for Two Drives and Two Channels
44
Table 2-3: Cabling for Two or Three Drives over Two Channels
44
Figure 2-5: SCSI Cabling for Three Drives and Two Channels
45
Figure 2-6: Channel Zoning for Four SCSI Channels
45
Figure 2-7: SCSI Cabling for Four Drives and Two Channels
46
Table 2-4: Cabling for Four Drives over Two Channels
46
Figure 2-8: SCSI Cabling for Five Drives and Three Channels
47
Table 2-5: Cabling for Five or Six Drives over Four Channels
47
Figure 2-9: SCSI Cabling for Six Drives and Four Channels
48
Post-Installation Checklist
49
Table 2-6: Post-Installation Steps
49
Other Installation Issues
50
Host Bus Adapter Setup
50
Installing the SAN Explorer and Host Registration Service
51
Power-Up and Boot Sequence Guidelines
52
Install the ADIC Management Console Software
52
Installation Requirements
53
Installing the Software on Windows Nt/Windows 2000
53
Startup and Configuration
54
Figure 2-10: Logon to Server
54
Figure 2-11: Add New User
55
Chapter 3: Using the ADIC Management Console
57
Starting the ADIC Management Console
57
Figure 3-1: Connect to Server
58
Figure 3-2: Log on
58
Tree View
59
Figure 3-3: Initial Tree View
59
Figure 3-4: Expanded Tree View
60
Fibre Channel Port Modes and Connection Options
61
Figure 3-5: Icons for Channel Modes and Channel Type
61
Figure 3-6: Information about a Selected Channel
63
Figure 3-7: Icons Used in Tree View
64
Figure 3-8: Information about a Selected Device
64
Figure 3-9: Information about a Selected Host
65
File Menu Group
66
Save Current View
66
Figure 3-10: File Menu
66
Save Current View as
67
Open a Previous View
67
Figure 3-11: Save Current View as
67
Exit
68
Figure 3-12: Saved Views
68
Figure 3-13: File Menu: Exit Option
68
View Menu Group
69
SNC 5101 Front Panel
69
Refresh SNC 5101 Data
69
Figure 3-14: View Menu
69
Figure 3-15: Front Panel View
69
Admin Menu Group
70
Figure 3-16: Right-Click Menu: Refresh
70
Figure 3-17: Admin Menu Group Pull-Down
70
Change Password
71
Connect to Server
71
Figure 3-18: Connect to Server
71
Figure 3-19: Logon to Server
71
Logon
71
Add New User
72
Figure 3-20: Change Password
72
Figure 3-21: Logoff Verification
72
Logoff
72
Figure 3-22: Adding a User
73
Figure 3-23: Removing a User
73
Remove User
73
If You Lose the Password
74
Tools Menu Group
74
Discover Net
74
Figure 3-24: Tools Menu
74
Figure 3-25: Discover Net
74
Connect
75
Figure 3-26: Connect to an SNC
75
Disconnect
76
Figure 3-27: Right-Click Menu: Connect
76
Figure 3-28: Disconnect
76
Health Check
77
Figure 3-29: Right-Click Menu: Disconnect
77
Figure 3-30: Health Check Submenu
77
Figure 3-31: Right-Click Menu: Perform Health Check
78
Figure 3-32: Health Check Setting
78
Events
79
Figure 3-33: Events Submenu
79
Table 3-1: Health Check Levels
79
Figure 3-34: Event Reporting Level
80
Figure 3-35: View Event Log
80
Figure 3-36: Saving an Event Log
81
Figure 3-37: Clearing the Event Log
81
Figure 3-38: Event Trap Thresholds
82
Figure 3-39: Change Event Threshold Dialog Box
83
Save SNC 5101 Configuration
84
Figure 3-40: Event Trap Window
84
Figure 3-41: Saving a Configuration
84
Load SNC 5101 Configuration
85
Figure 3-42: Warning before a Configuration Is Loaded
85
Figure 3-43: Load a Configuration
85
Controls Menu Group
86
Figure 3-44: Loading a Configuration from the Server
86
Figure 3-45: Controls Menu
86
Feature Enable
87
Feature Enable: Scalar Firewall Manager
87
Figure 3-46: Enabling Optional Features
87
Figure 3-47: Enter License Key to Enable SFM
87
Access Options
88
Access Options: Channel Zoning
88
Feature Enable: Data Mover Module
88
Figure 3-48: Access Options
88
Figure 3-49: Right-Click Menu: Channel Zoning
89
Access Options: Scalar Firewall Manager
90
Figure 3-50: Default Channel Zoning Settings
90
Figure 3-51: Right-Click Menu: Scalar Firewall Manager
91
Figure 3-52: Scalar Firewall Manager Access Settings
92
Figure 3-53: SNMP Community Strings
93
SCSI Channel
93
SNMP Community Strings
93
Figure 3-54: Right-Click Menu: SCSI Channel Parameters
94
Figure 3-55: SCSI Channel Controls: Target to Initiator
94
Figure 3-56: First SCSI Reset Warning
95
Fibre Channel
96
Figure 3-57: Second SCSI Reset Warning
96
Figure 3-58: Right-Click Menu: Fibre Channel Parameters
96
Figure 3-59: Fibre Channel Default Settings
97
Device Mapping
98
Figure 3-60: Right-Click Menu: Device Mapping
98
Figure 3-61: Devices Available for Mapping
99
Figure 3-62: Device Mapping Window
100
Figure 3-63: Devices that Have Been Remapped
101
Pre-Assigning Device Numbers
101
Figure 3-64: Add New SCSI Device
102
Figure 3-65: Add New Fibre Channel Device
102
Figure 3-66: New SCSI Channel Device
103
Figure 3-67: Device Mapping Warning
103
Figure 3-68: Right-Click Menu: Update Firmware
104
Update Firmware
104
Figure 3-69: Update Firmware
105
Figure 3-70: Right-Click Menu: Restart
105
Restart SNC 5101
105
Identify SNC 5101
106
Remote Events and Notifications
106
Event Logging and Viewing
106
Figure 3-71: Warning before Restarting
106
Figure 3-72: Identify
106
Figure 3-73: Viewing Events in the Event Log
107
Table 3-2: Event Viewing Levels
107
Events and Traps
108
Heartbeats
108
Figure 3-74: Event Trap Displayed by Client
108
Health Check
109
Health Check Level Control
110
Figure 3-75: Successful Health Check
110
Health Check Interval
112
Performance Impact of Health Checks
112
Figure 3-76: Health Check Interval
112
Chapter 4: Scalar Firewall Manager
113
Introduction to Scalar Firewall Manager
113
Host Registration
114
Installing the Host Registration Service
114
Installing Scalar Firewall Manager
115
Installation Instructions
116
Installation Steps for a New SNC
116
Figure 4-1: One Registered Host Online
117
Figure 4-2: Detail of Host Information in Tree View Panel
117
Figure 4-3: Confirming that Two Registered Hosts Are Online
118
Figure 4-4: Determining the Assigned LUN
119
Figure 4-5: Initial SFM Window before Access Assignments
120
Figure 4-6: SFM Host Parameters Pop-Up
121
Figure 4-7: Assigning Host Access Permissions
122
Installation Steps for an Existing SNC
123
Figure 4-8: Device LUN Pop-Up Parameters
123
Figure 4-9: Two Hosts Online
125
Figure 4-10: Detail of Tree View Panel
125
Figure 4-11: Checking Access Settings Inherited from Hosts
126
Figure 4-12: Checking the Assigned LUN
127
Entering Host Parameters
128
Figure 4-13: Unknown Host Parameters
128
Figure 4-14: Entering Parameters for a Fibre Channel Switch
129
Changing Access Permissions
130
Figure 4-15: Changing Access Permissions
130
Determining LUN Assignments
131
Figure 4-16: Determining the Assigned LUN
131
Adding and Removing Hosts
132
Adding a Host to the SAN Configuration
132
Figure 4-17: Adding a New Host
133
Combining SFM with Channel Zoning
134
ADIC Scalar 100 User Manual (130 pages)
Intelligent Storage
Brand:
ADIC
| Category:
Storage
| Size: 1 MB
Table of Contents
Table of Contents
3
1 Safety
9
Intended Use
9
Other Documents Available
9
Intended Audience
9
Explanation of Symbols and Notes
10
Safety Caution and Warnings
10
Additional Safety Precautions
11
General Precautions
11
Precautions for Libraries and Appliances
13
Precautions for Rack-Mountable Products
13
Precautions for Products with Laser Devices
14
Protecting against Electrostatic Discharge
14
2 Description
15
Drive Support and Related Technologies
16
Front Panel Components
16
Front Power Switch
17
Door Lock
17
Mailbox
17
Operator Panel
17
Back Panel Components
18
Library Controller
18
Rear Power Switch
19
Remote Management Unit
19
Storage Networking Controllers (Sncs)
19
Drive Modules and Filler Plates
19
Internal Components
19
Robotic System and Barcode Scanner
20
Tape Magazines
20
Slot Numbering
20
Drive Module Numbering
21
SCSI Connections
22
3 Setting up Your Scalar 100
23
Quick Start Guide
23
Getting Started Road Map
23
Finding a Location
24
Unpacking Your Library
24
Connecting the Power and SCSI Cables
25
Preparing the Host
26
Host Coordinate System
27
Installing a SCSI Adapter
27
Installing Drivers
27
Installing Drivers for Microsoft Windows 2000 and Windows Server 2003 Systems
27
Installing Drivers for Microsoft Windows NT® 4.0 Systems
29
Verifying Communication with the Host
29
4 Installing and Removing Hardware
31
Rackmounting Your Library
31
Installing Side Panels
34
Installing Casters
35
Installing/Removing a Drive
35
Installing a Drive
35
Removing a Drive
36
Replacing a Drive
37
Installing a Secondary Power Supply
37
Installing Bulk Load Mailbox
38
Removing the Standard Mailbox
39
Installing the Bulk Load Mailbox
40
Installing a Storage Column
41
5 Using the Operator Panel
43
Understanding the Operator Panel
43
Getting General Library Information
44
Getting Drive Status Information
45
Working with Buttons
47
Getting Library Messages
47
Getting Mailbox Status
47
Menu Guidelines
49
Using the Main Menu
50
The Menu Tree
50
Using Commands that Require an Offline State
51
6 Getting Information
53
Viewing Library Information
53
Getting Library Statistics
53
Getting Firmware and Serial Number Information
54
Getting Sensor Information
55
Getting Slot Information
56
Getting Tape Cartridge Information
58
Viewing Drive Information
59
Getting Logs
59
Printing Logs (Hyperterminal)
59
Getting the Command Logs
60
Getting Error Logs
60
Getting Drive Logs
61
7 Running Your Library
63
Turning on the Library
63
Turning off the Library
63
Moving Tape Cartridges
64
Moving the Picker
65
Taking Inventory
65
Adding/Removing Tape Cartridges
66
Importing Tape Cartridges
67
Manually Inserting Tape Cartridges
67
Exporting a Tape Cartridge
67
Manually Removing Tape Cartridges
68
Working with Cleaning Cartridges
68
Viewing Cleaning Cartridge Status
68
Importing Cleaning Cartridges
69
Exporting Cleaning Cartridges
69
Working with Drives
70
Unloading a Drive
70
8 Configuring Your Library
71
Using AIT WORM Technology
71
Configuring General Characteristics
71
Configuring Library Characteristics
71
Configuring Additional Library Options
73
Reading Barcodes of Media in Tape Drives
74
Configuring Barcode Length
74
Configuring Drive Cleaning
75
Working with Autoclean
75
Enabling/Disabling Autoclean
75
Setting Drive SCSI Ids
76
Setting the Date and Time
76
Password Protecting the Operator Panel
77
Locking/Unlocking the Mailbox
78
9 Maintaining Your Library
79
Displaying Sacs (Advanced Vs Normal Service)
79
Updating Firmware
79
Preferred Methods
79
Updating Library Firmware
80
Updating Drive Firmware
80
Creating or Erasing a FUP Tape
80
Exercising the Picker Fingers
81
Getting and Putting Tape Cartridges
81
Opening/Closing and Extending/Retracting
82
Exercising the Barcode Scanner
83
Exercising the Picker Axes
83
Moving the Picker in a Motion Pattern
83
Moving the Picker in Increments
84
Sending the Picker to the Home Position
84
Exercising the Library
84
Running a Demo
84
Running a Self Test
85
Teaching the Library
85
Resetting a Drive
86
Servicing Drives
86
Preparing a Drive
86
Running Drive Diagnostic Tests
87
Advertisement
ADIC Scalar 100 User Manual (130 pages)
Quantum Scalar 100: User Guide
Brand:
ADIC
| Category:
Storage
| Size: 4 MB
Table of Contents
Table of Contents
3
1 About this Guide and Your Product
9
Product Safety Statements
9
Product Model Number
9
Explanation of Symbols and Notes
9
Other Documents You Might Need
10
Getting more Information or Help
10
2 Description
11
Drive Support and Related Technologies
12
Front Panel Components
12
Front Power Switch
13
Door Lock
13
Mailbox
13
Operator Panel
13
Back Panel Components
13
Library Controller (Library Control Path Only)
15
Rear Power Switch
15
Drive Modules and Filler Plates
16
Remote Management Unit
16
Storage Networking Controllers (Sncs)
16
Internal Components
16
Robotic System and Barcode Scanner
16
Slot Numbering
17
Tape Magazines
17
Drive Module Numbering
18
Host Attachment
19
Native Fibre Connections
19
SCSI Connections
19
3 Setting up Your Scalar 100
21
Quick Start Guide
21
Getting Started Road Map
21
Finding a Location
22
Unpacking Your Library
22
Cabling Library Control Path Libraries
23
Cabling Drive Control Path Libraries
24
Connecting the Power and Fibre Cables in a Drive Control Path Library
24
Connecting the Power and SCSI Cables in a Drive Control Path Library
25
Preparing the Host
26
Host Coordinate System
27
Installing a SCSI Adapter
27
Installing Drivers
27
Installing Drivers for Microsoft Windows 2000 and Windows Server 2003 Systems
27
Installing Drivers for Microsoft Windows NT 4.0 Systems
29
Verifying Communication with the Host
30
4 Using the Optional Features
31
Rackmounting Your Library
31
Installing Side Panels
34
Installing Casters
35
Installing/Removing Drives
35
Installing a Drive
35
Removing a Drive
36
Replacing a Drive
37
Installing a Secondary Power Supply
37
Installing Bulk Load Mailbox
38
Removing the Standard Mailbox
39
Installing the Bulk Load Mailbox
40
Installing a Storage Column
41
Partitioning Your Library
42
Control Path
42
Configuring Autocleaning
42
Working with Autoclean
43
Enabling/Disabling Autoclean
43
5 Using the Operator Panel
45
Understanding the Operator Panel
45
Getting General Library Information
46
Getting Drive Status Information
46
Working with Buttons
49
Getting Library Messages
49
Getting Mailbox Status
49
Menu Guidelines
51
Using the Main Menu
52
The Menu Tree
52
Using Commands that Require an Offline State
54
6 Getting Information
55
Viewing Library Information
55
Getting Library Statistics
55
Getting Firmware and Serial Number Information
56
Getting Sensor Information
57
Getting Slot Information
58
Getting Tape Cartridge Information
60
Viewing Drive Information
60
Getting Logs
61
Printing Logs (Hyperterminal)
61
Getting the Command Logs
62
Getting Error Logs
62
Getting Drive Logs
62
Clear Log
63
Force Dump
63
Copy Dump
64
Preserve Dump Dialog
64
7 Running Your Library
67
Turning on the Library
67
Turning off the Library
67
Moving Tape Cartridges
68
Moving the Picker
69
Taking Inventory
69
Adding/Removing Tape Cartridges
70
Importing Tape Cartridges
71
Manually Inserting Tape Cartridges
71
Exporting a Tape Cartridge
71
Manually Removing Tape Cartridges
72
Working with Cleaning Cartridges
72
Viewing Cleaning Cartridge Status
72
Importing Cleaning Cartridges
73
Exporting Cleaning Cartridges
73
Working with Drives
73
Unloading a Drive
74
8 Configuring Your Library
75
Using AIT WORM Technology
75
Configuring General Characteristics
75
Configuring Library Characteristics
75
Configuring Additional Library Options
77
Reading Barcodes of Media in Tape Drives
78
Configuring Barcode Length
78
Setting Drive SCSI Ids
79
Setting Drive Loop Ids
80
Setting the Date and Time
80
Password Protecting the Operator Panel
81
Locking/Unlocking the Mailbox
81
ADIC Scalar 100 Installation And Operating Manual (84 pages)
Scalar Series
Brand:
ADIC
| Category:
Storage
| Size: 2 MB
Table of Contents
Copyright Notice
2
EMI/RFI Compliance
4
Shielded Cables
4
Declaration of Conformity
5
Table of Contents
7
Safety Warnings
9
Precautions
10
Chapter 1: The Scalar Series
11
Features
13
Options
14
DLT Drives
14
Differential SCSI
14
Chapter 2: Getting Started
17
Requirements
18
Unpacking and Inspecting
18
Checking the Accessories
18
Preparing the Library for Installation
19
Prepare and Install the Data Cartridges
19
Barcode Labels
19
Write-Protect Switch
19
Install Data Cartridges
20
Install Cleaning Cartridge (Optional)
20
Close and Lock the Front Door
20
Setting the SCSI Ids
21
Preparing the Host Computer System
22
Power off the Computer
22
Confirm And/Or Install the SCSI Host Interface
22
Backup Software
22
Chapter 3: Connecting the Scalar Library
23
Installing SCSI Cables, Jumpers, and Terminators
24
Determining Your SCSI Configuration
24
Powering on the System
28
Installing the Backup Software
28
Chapter 4: Equipment Description
29
Front Panel Switches and Indicators
30
Rear Panel Switches and Connectors
32
Media Interchange Shelf (Mailbox)
33
Off-Line Mode Menus
34
Configuration Menu
35
Buzzer Configuration
35
Set SCSI ID
36
Product Sign-On
36
Off-Line Time
36
Initialize Map Slots
37
Initialize Scan Barcodes
37
Barcode Scanner
38
Diagnostics Menu
38
Write Flash Memory Mode
39
Serial Dnld Flash Mode
39
Chapter 5: Operation and Maintenance
41
Normal Operations
42
General Guidelines
42
Power up Checks
42
Opening the Front Door
42
What Happens When Door Is Opened
43
Resuming Operation
43
Drive Power-On Self-Test
43
Drive Status
44
Drive Operating Conditions
45
DLT Media
47
Using the Mailbox (Scalar 458 Only)
48
On-Line Mode
48
Off-Line Mode
49
Loading a Cartridge into Drive
49
Manually Loading/Unloading Cartridges To/From the Storage Shelves (Bulk Loading)
51
Normal Maintenance
52
Cleaning the Drive Head
52
Cleaning Tape
52
Head Cleaning Procedure
53
Causes of the Use Cleaning Tape Warning
54
Cleaning the Enclosure
55
ADIC Scalar 100 Release Note (2 pages)
Quantum Scalar 100: Release Note
Brand:
ADIC
| Category:
Storage
| Size: 0 MB
Table of Contents
Compatibility Matrix
1
Purpose of this Release
1
Resolved Issues
2
Documentation
2
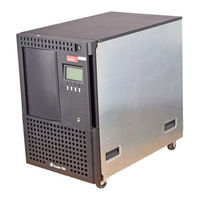
ADIC Scalar 100 Quick Start Manual (2 pages)
Quantum Scalar 100: Quick Start
Brand:
ADIC
| Category:
Storage
| Size: 0 MB
Advertisement
Related Products
ADIC DAT Autochanger 1200
ADIC DAT Autochanger 1200C
ADIC DAT Autochanger 1200D
ADIC DAT Autochanger 1200E
ADIC DAT Autochanger 1200G
ADIC Scalar Series
ADIC Scalar 218
ADIC Scalar 218FC
ADIC Scalar 24
ADIC Scalar 50
ADIC Categories
Storage
Network Router
Switch
Accessories
Control Unit
More ADIC Manuals
Login
Sign In
OR
Sign in with Facebook
Sign in with Google
Upload manual
Upload from disk
Upload from URL