ADIC Scalar 100 User Manual
Intelligent storage
Hide thumbs
Also See for Scalar 100:
- User manual (346 pages) ,
- Quick start manual (2 pages) ,
- Release note (2 pages)
Table of Contents
Advertisement
Quick Links
Download this manual
See also:
User Manual
Advertisement
Table of Contents

Related Manuals for ADIC Scalar 100


Summary of Contents for ADIC Scalar 100
- Page 1 Scalar 100 User’s Guide ® ADVANCED DIGITAL INFORMATION CORPORATION www.adic.com...
- Page 2 Further, ADIC Europe reserves the right to revise or change this publication without obligation on the part of ADIC Europe to notify any person or organization of such revision of change.
-
Page 3: Table Of Contents
SCSI Connections ..............22 3 Setting up your Scalar 100 Quick Start Guide . - Page 4 Finding a Location ..............24 Unpacking your Library.
- Page 5 Exercising the Picker Fingers ............81 Scalar 100 User’s Guide...
- Page 6 Getting and Putting Tape Cartridges ..........81 Opening/Closing and Extending/Retracting .
- Page 7 ADIC Technical Assistance Center ........
- Page 8 viii Contents...
-
Page 9: Safety
This equipment is designed for processing magnetic tape cartridges. Any other application is not considered the intended use. ADIC shall not be held liable for damage arising from unauthorized use of the library. The user assumes all risk in this aspect. -
Page 10: Explanation Of Symbols And Notes
• Prepare for operation • Set-up • Start-up • Operate • Shutdown • Maintenance • Restart Operation of the library by untrained personnel can lead to equipment CAUTION malfunction and can void the warranty. SOME WORK AND MODIFICATIONS CAN ONLY BE PERFORMED WARNING WITH THE APPROPRIATE QUALIFICATIONS AND TRAINING (FOR EXAMPLE, REPLACEMENT OF THE POWER SUPPLY). -
Page 11: Additional Safety Precautions
24 when positioning the library. • Observe and follow service markings. Do not service any ADIC product except as explained in your ADIC library documentation. Opening or removing covers that are marked with the triangular symbol with a lightning bolt may expose you to electrical shock. Components inside these compartments should be serviced only by an ADIC-authorized service technician. - Page 12 Do not push any objects into the openings of your library components. Doing so can cause fire or electric shock by shorting interior components. • Use the product only with ADIC products or other ADIC-approved equipment. • Allow the product to cool before removing covers or touching internal components.
-
Page 13: Precautions For Libraries And Appliances
• Do not move large racks by yourself. Due to the height and weight of the rack, ADIC recommends a minimum of two people to accomplish this task. -
Page 14: Precautions For Products With Laser Devices
Handle all sensitive components in a static-safe area. If possible, use antistatic floor pads and workbench pads. The following note may appear throughout your ADIC documentation to remind you of these precautions: Protecting Against Electrostatic Discharge on page 14 in the safety Note instructions at the front of this guide. -
Page 15: Description
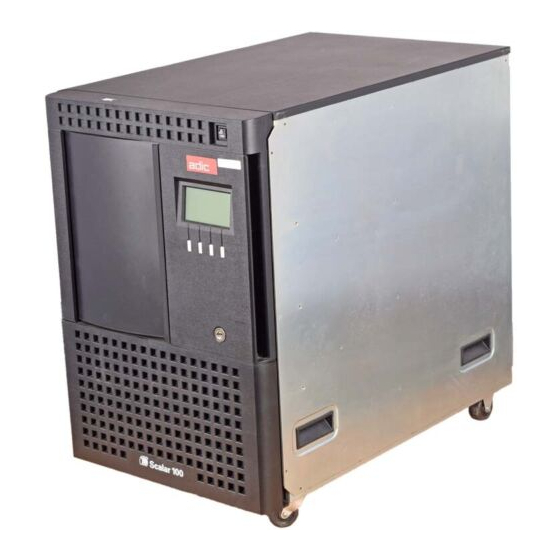
Description The Scalar 100 automates the retrieval, storage, and control of tape cartridges. It is designed for use in a standard office environment. It is designed with either a fully finished appearance or as a rackmounted unit. The library supports many different drive types and, depending on the type of drive, can contain up to eight drives. -
Page 16: Drive Support And Related Technologies
Drive Support and Related Technologies Your library supports the following tape drives: • AIT type drives (AIT-2 HVD & LVD, AIT-3 LVD) • DLT type drives (7000 HVD, 8000 HVD & LVD, SDLT 220 HVD & LVD, SDLT 320 LVD) •... -
Page 17: Front Power Switch
ELECTRICAL SOURCE. Door Lock The Scalar 100 door lock protects your data from the risk of tampering and prevents unauthorized personnel from entering the mechanical area of the Scalar 100 where serious injury could occur. When locked, the library door can only be opened from the outside with a key. Authorized personnel are responsible for the security of the key. -
Page 18: Back Panel Components
Back Panel Components The following graphic shows the back panel components. Following the graphic, the components are described in detail where appropriate . Figure 3 Back Panel Components Library Controller The Library Controller controls all operations in the library, including the interaction between the library and operators. -
Page 19: Rear Power Switch
However, except in emergencies, use the normal shutdown procedure before switching off the rear power switch. ADIC is not responsible for damage caused by improper use of the rear power switch. This risk lies entirely with the user. -
Page 20: Robotic System And Barcode Scanner
Robotic System and Barcode Scanner The robotic system identifies and moves cartridges between the storage slots, tape drives, and the Mailbox. The robotic arm (picker) has picker fingers that enable it to grab media cartridges and move them into position along X, Y, and Z motion coordinates. Each tape cartridge contains a barcode that is read by the barcode scanner during the inventory process. -
Page 21: Drive Module Numbering
Figure 4 Storage Slot Numbering Drive Module Numbering The drive modules are numbered 1 to N from bottom to top, where N is the number of drives allowed for that media type. Scalar 100 User’s Guide... -
Page 22: Scsi Connections
SCSI Connections The tape library is a SCSI target device that can be connected to either a SCSI-2 Low Voltage Differential or High Voltage Differential SCSI bus. You can set the SCSI device using the switch located on the Library Controller. -
Page 23: Setting Up Your Scalar 100
Quick Start Guide For simple setup instructions, refer to the Quick Start Guide available on the Scalar 100 Documentation and Software CD or as a printed document in your product box. For more detailed instructions, refer to the Getting Started Road Map on page 23. -
Page 24: Finding A Location
Complete either the written registration card or register the product on the ADIC website at www.adic.com. The Scalar 100 serial number is located on the product label on the back of the library and on the inside of the front door. -
Page 25: Connecting The Power And Scsi Cables
If you have more than two drives, split the drives between SCSI buses so that there are no more than two drives per SCSI bus. See the following steps. AIT libraries cannot have tape drives installed in the bottom-most or top- Note most drive module slots. Terminate the last device(s) on the SCSI bus(es). Scalar 100 User’s Guide... -
Page 26: Preparing The Host
• Prevent electrostatic discharge (ESD) by following proper procedures. Always use wrist-grounding straps and anti-static mats when handling internal components. • Make certain the host server system has an open expansion slot. Setting up your Scalar 100... -
Page 27: Host Coordinate System
Start Device Manager. In Device Manager, expand the Medium Changers node. Right-click Unknown Medium Changer Device and select Properties. On the Driver tab, select Update Driver. This will start the Upgrade Device Driver Wizard. Click Next. Scalar 100 User’s Guide... - Page 28 AIT-3: SONY SDX-700C Sequential Device • LTO-1: IBM ULTRIUM-TD2 SCSI Sequential Device • LTO-2: IBM ULTRIUM-TD1 SCSI Sequential Device • SDLT 220: Quantum SDLT1 SCSI Sequential Device • SDLT 320: Quantum SDLT320 SCSI Sequential Device Setting up your Scalar 100...
-
Page 29: Installing Drivers For Microsoft Windows Nt® 4.0 Systems
Ensure the library is powered on and fully booted. Connect the library to the host and then restart the host. Insert the Scalar 100 product CD into the CD drive. In the Control Panel, double-click the Tape Devices icon. If the host server or workstation already has drivers installed, continue with Note the next step, otherwise, skip the next two steps. - Page 30 In Microsoft Windows, this is done as follows: • In Windows NT: Settings > Control Panel > SCSI Devices • In Windows 2000: Settings > Control Panel > System > Hardware > Device Manager > Tape Drive or Medium Changers Setting up your Scalar 100...
-
Page 31: Installing And Removing Hardware
100 product CD or at www.adic.com. Rackmounting your Library If you are rackmounting your library, use the Rackmounting Kit that is available from ADIC. The Scalar 100 requires 14U space in a standard 19 inch rack. Before rackmounting your library, read the following guidelines: •... - Page 32 Tools required: • Phillips screwdriver • 3/8 nut driver • T20 Torx driver To rackmount your library Ensure space is available in the rack (14U space in a standard 19 inch rack). Measure and mark the holes to simplify the installation process. Install the rear rackmount hardware by attaching the sheet metal to the rear rack.
- Page 33 Secure the front hardware to the rear hardware by installing four screws on each side. Complete the rackmount hardware installation by attaching the rear bracket to the rackmount hardware. Remove the four rubber feet or casters from the bottom of the library by removing the securing screws. Scalar 100 User’s Guide...
-
Page 34: Installing Side Panels
TWO PERSONS TO PROPERLY LIFT AND POSITION IT IN A RACK. Standing at the front of the rack, use the handles on both sides of the Scalar 100 to lift and position the library onto the rackmount hardware. 10 Slide the library into the rack until it stops. -
Page 35: Installing Casters
Phillips screwdriver To install casters Place the Scalar 100 on its side for this procedure. Use the sling shipped with the library to tip the library onto its side. Using a Phillips screwdriver, remove the four rubber feet from the bottom of the library. -
Page 36: Removing A Drive
Slide the drive module into position and tighten the two captive thumbscrews. When cabling the library where you have more than two drives, split the Note drives between SCSI buses so that there are no more than two drives per SCSI bus. -
Page 37: Replacing A Drive
The drive will remain off the bus until the library has set the SCSI ID of the Note drive. Installing a Secondary Power Supply Use the following instructions to install a secondary power supply. Tools required: • none Scalar 100 User’s Guide... -
Page 38: Installing Bulk Load Mailbox
To install a secondary power supply On the rear of the library, find the secondary power supply slot. Loosen the two thumbscrews on the cover plate and remove the cover plate. LIVE AC VOLTAGE IS PRESENT ON THE DC POWER SUPPLY WARNING CONNECTOR AT THE REAR OF THE COMPARTMENT. -
Page 39: Removing The Standard Mailbox
(Left Side) To remove the standard Mailbox Turn off the Scalar 100 library. (Both the front and the rear power switches.) Open the library front door. Remove the tape cartridge(s) from the standard Mailbox. Remove the three Mailbox cable clamps. Two of the cable clamps are attached to the door with #2 Phillips screws and one is attached with a 11/32 nut. -
Page 40: Installing The Bulk Load Mailbox
Remove the 11/32 nut from the bottom of the plastic cover and loosen T20 torx screw under the Mailbox door. Remove the Standard Mailbox assembly. Remove the plastic cover by lifting it up and sliding it through the front door. Installing the Bulk Load Mailbox Figure 6 when installing the bulk load Mailbox. -
Page 41: Installing A Storage Column
Top Bolt (7/16) Magazine Bottom attachment for Bottom attachment for storage column 5 storage column 4 Access Holes Bottom Screws Bottom Bolt (7/16) Tools required: • 11mm or 7/16 nut driver • T20 Torx driver • flashlight Scalar 100 User’s Guide... - Page 42 To install a storage column Turn off the library by turning off both the front (first) and then the rear power switches. Open the library front door. If necessary, move the picker assembly up the Y-axis to allow room. Slide the storage column in place.
-
Page 43: Using The Operator Panel
In the following graphic, shaded areas are for reference only. Your screen may Note differ depending on the configuration and type of media installed in your library. For example, the Operator Panel below displays an LTO library with a bulk load Mailbox. Scalar 100 User’s Guide... -
Page 44: Getting General Library Information
Figure 8 Operator Panel Areas Getting General Library Information The information area provides general library information: • Library name • Media type (Although the media type is displayed, the drive type is not. For example, DLT is displayed for SDLT 320 libraries.) •... -
Page 45: Getting Drive Status Information
If a tape drive is present (in the drive module), the drive area is outlined. Power On If the tape drive is turned on, the Power On indication is displayed. Cleaning Required If the tape drive cleaning is required, the Cleaning Required indication is displayed. Scalar 100 User’s Guide... - Page 46 Table 2 Drive Status Area Indications (Continued) Indicator Description Error Code (LTO If a drive error condition exists, an Error Code indication is displayed. drives only) All errors are preceded by the character “!” followed by the drive error code. “!...” indicates drive failures detected by the library and the drive is not capable of reporting the error.
-
Page 47: Working With Buttons
Mailbox indicator area and their meanings are described in Table Table 3 Mailbox Indicator Area Icons Media Type Indicator Description This indicator is displayed if the host has issued a PREVENT/ALLOW MEDIUM REMOVAL SCSI command and locked the Mailbox. Scalar 100 User’s Guide... - Page 48 • The host issues a PREVENT/ALLOW MEDIUM REMOVAL SCSI command and locks the Mailbox • The Scalar 100 is accessing a Mailbox slot. • The Mailbox has been configured as all storage. This indicator is displayed if the Mailbox is unlocked.
-
Page 49: Menu Guidelines
Most fields on the menus, submenus, dialogs, and screens are read only. Those fields that are read/ write are shown in white type over a black background. For example, during Export operations, cartridge selection is indicated as Scalar 100 User’s Guide... -
Page 50: Using The Main Menu
Using the Main menu The Main menu is the first interactive menu displayed after you turn on the library. From this menu you can run all commands. Throughout this manual, all procedures begin from this menu. Figure 9 Main menu (initial screen) Pressing More displays additional options. -
Page 51: Using Commands That Require An Offline State
Alternatively, you can put the library into an offline state before you begin, by following the procedure below. You should also put your library into an Offline state before turning off the library. To place your library offline From the Main menu, select Online/Offline. Select OK. The information area displays the offline status. Scalar 100 User’s Guide... - Page 52 Using the Operator Panel...
-
Page 53: Getting Information
0 to 4,294,967,295 The lifetime number of slot to slot moves. IO accesses 0 to 65535 The lifetime number of Mailbox door openings. Get retries 0 to 65535 The lifetime number of recovery retries on a get command. Scalar 100 User’s Guide... -
Page 54: Getting Firmware And Serial Number Information
Table 4 Available Library Information (Continued) Put retries 0 to 65535 The lifetime number of recovery retries on a put command. Scan retries 0 to 65535 The lifetime number of recovery retries on scans. a. The storage slot, Mailbox slot, and drive maximum value may be different for your library, depending on your configuration and your drive type. -
Page 55: Getting Sensor Information
Mailbox is unlocked. IE Lock Mailbox is locked. IE Open Mailbox is closed. IE Open Mailbox is open. IE Closed Mailbox is open. IE Closed Mailbox is closed. DoorOpn Front door is closed. DoorOpn Front door is open. Scalar 100 User’s Guide... -
Page 56: Getting Slot Information
Getting Slot Information Use Slot to get statistical characteristics of a slot. The information available through this command is shown Table For more information on slot numbering, see Slot Numbering on page 20. Note Path: Main menu > Status > Library > Slot Table 5 Available Slot Information Field... - Page 57 With Magazine selected, select Change Magazine until the arrow points to the target magazine. Press Next. With Slot selected, press Change Slot until the arrow points to the target slot. The Select TARGET line displays the target slot. For example, the display below has slot 5C5 selected as the target. Scalar 100 User’s Guide...
-
Page 58: Getting Tape Cartridge Information
When the correct slot is selected, select OK. The slot information is displayed. Press Next to scroll through the available information. Getting Tape Cartridge Information Use Media to get information about the tape cartridges in the library. You can select the tape cartridge using the volser number and the current physical location of the tape cartridge. -
Page 59: Viewing Drive Information
Connect a straight through serial cable from the host to the serial port located on the Library Controller. (A null modem cable will not work in this procedure.) Start HyperTerminal and configure it with the following parameters: Scalar 100 User’s Guide... -
Page 60: Getting The Command Logs
• Bits per second: 38400 • Data bits: 8 • Parity: None • Stop bits: 1 • Flow control: None • Emulation: ANSI Refer to the HyperTerminal documentation for information on how to Note configure and run HyperTerminal. Getting the Command Logs The Command log is a history of all library operations. -
Page 61: Getting Drive Logs
After the teach and inventory processes, select OK. d. The tape is placed into a drive, and the log is copied to the tape cartridge. When done, the tape is placed back into slot 1A1. Select OK. Scalar 100 User’s Guide... - Page 62 Getting Information...
-
Page 63: Running Your Library
The library can be shut down normally or by the Emergency Shutdown method. Except in emergencies, stop the library with the normal shutdown procedure before switching the rear power switch off. ADIC is not responsible for damage caused by improper use of the rear power switch. All risk lies entirely with the user. -
Page 64: Moving Tape Cartridges
Turn off the front power switch. Turn off the rear power switch. Moving Tape Cartridges Use Move Media to move tape cartridges between slots. This is useful for instances where you want to group a series of cartridges in the library. Path: Main menu >... -
Page 65: Moving The Picker
Scan Barcode allows you to take inventory of the entire library or a specific set of tape cartridges. Scalar 100 User’s Guide... -
Page 66: Adding/Removing Tape Cartridges
Path: Main menu > Command > Move > Scan Barcode To scan a range of tape cartridges From the Main menu, select Command and then select Move. Select Scan Barcode. With Select Column selected, press Change Column until the arrow points to the start column. Press Next. -
Page 67: Importing Tape Cartridges
Mailbox so that you can remove it from your library. To use this procedure, the Mailbox cannot be configured as storage. Path: Main menu > Command > Mailbox > Export Scalar 100 User’s Guide... -
Page 68: Manually Removing Tape Cartridges
To export tape cartridges From the Main menu, select Command and then select Mailbox. Select Export. Select OK. The panel shows a list of tape cartridges in the library. Press Select to begin choosing the tape cartridge(s) you want to export. Use Next, Select, and Pages to choose the tape cartridge(s) you want to export. -
Page 69: Importing Cleaning Cartridges
To import cleaning cartridges From the Main menu, select Command and then select Mailbox. Select AutoClean. Select Export. Use Up and Down to select the desired cleaning cartridge. Press Select. When the command is complete, press OK. Scalar 100 User’s Guide... -
Page 70: Working With Drives
Working with Drives You can unload a drive, reset a drive, or update the drive firmware. Unloading a drive is addressed here. Maintaining your Library on page 79 for information on resetting drives and updating drive firmware. For information on cleaning drives, see Configuring Drive Cleaning on page 75. -
Page 71: Configuring Your Library
Using AIT WORM Technology ® The Scalar 100 with AIT-3 drives supports the Sony AIT™ WORM (write-once-read-many) technology. WORM technology provides extra data security by prohibiting accidental data erasure. Once written to, WORM recorded information cannot be erased or rewritten (but information can be appended to the end of existing data on a tape cartridge). - Page 72 Emulating a different library — You can configure your library to emulate other ADIC products. This is useful if your host software recognizes other ADIC products, but not the Scalar 100 (this may happen if, for example, you do not have the correct drivers installed). This feature allows the Scalar 100 to appear to be a different library so that the host knows how to communicate with it.
-
Page 73: Configuring Additional Library Options
Mailbox — Determines whether the Mailbox will be used to import and export tape cartridges or if the Mailbox will be used as storage slots. • Imprt/Exprt — Indicates the Mailbox is for importing or exporting tape cartridges. • Storage — Indicates the Mailbox is for storage. Select OK. Scalar 100 User’s Guide... -
Page 74: Reading Barcodes Of Media In Tape Drives
Reading Barcodes of Media in Tape Drives Use Scan Media to configure your library so that whenever it takes inventory, the barcode number of all media currently in tape drives is read and stored. With this command selected, when inventory is taken during power up or when the door is opened, the picker moves any tape cartridges that are in a drive to the first available storage slot and then reads the barcode. -
Page 75: Configuring Drive Cleaning
To enable/disable autoclean From the Main menu, select More. Select Setup and then select Library. Select AutoClean. Select Enable or Disable to check or uncheck the box. A checked box indicates AutoClean is enabled. Select OK. Scalar 100 User’s Guide... -
Page 76: Setting Drive Scsi Ids
Setting Drive SCSI IDs Use Drive to set drive SCSI IDs. The drive SCSI IDs must be different from other SCSI devices on the SCSI bus. Available SCSI IDs are 0 to 15. Path: Main menu > More > Setup > Drive > SCSI To set a drive SCSI ID From the Main menu, select More. -
Page 77: Password Protecting The Operator Panel
Path: Main menu > More > Setup > Utils > Secure To enable/disable or change a password From the Main menu, select More. Select Setup and then select Utils. Select Secure. Scalar 100 User’s Guide... -
Page 78: Locking/Unlocking The Mailbox
Do one of the following: • If you are enabling or disabling security: a. Use Yes/No to indicate whether or not you want to enable a password. A checked box means that the password feature is enabled. Selecting Yes/No displays a confirmation screen, showing security as ON or OFF. -
Page 79: Maintaining Your Library
Although some of these procedures are documented here, typically the Operator Panel options to update firmware are for use by Support personnel. To update your library, drive, and/or RMU firmware, use the Remote Management Unit or the Library Management Tool (available from www.adic.com). •... -
Page 80: Updating Library Firmware
Updating Library Firmware Firmware Update is used by Service personnel to update library firmware. Path: Main menu > More > Service > Library > Firmware Update Updating Drive Firmware You can update drive firmware by using the Firmware Update command. This method requires a Firmware Upgrade Tape (FUP tape). -
Page 81: Exercising The Picker Fingers
Number of slots — the number of slots to use in the cycles. Possible values are 0 to 96. 1. A scratch tape is a blank tape cartridge or a tape whose data can be overwritten. Scalar 100 User’s Guide... -
Page 82: Opening/Closing And Extending/Retracting
• Starting slot — indicates the starting slot. This field is read-only and only changes when New start slot is selected. • New start slot — indicates whether you want to change the start slot or use the currently indicated slot. -
Page 83: Exercising The Barcode Scanner
Use vertical — specifies whether or not to exercise the vertical axis during this test. Possible values are Yes and No. • Use horizontal — specifies whether or not to exercise the horizontal axis during this test. Possible values are Yes and No. With Use vertical or Use horizontal selected, press OK Scalar 100 User’s Guide... -
Page 84: Moving The Picker In Increments
While the exercise is running, the status is displayed on the Operator Panel. Moving the Picker in Increments Use Step to manipulate the vertical and rotary axes of the picker in incremental steps. This is an advanced diagnostic tool that is not intended for use during normal Note operation. -
Page 85: Running A Self Test
Path: Main menu > More > Service > Library > Exercise > Teach To run Teach From the Main menu, select More. Select Service and then select Library. Select Exercise and then Teach. Scalar 100 User’s Guide... -
Page 86: Resetting A Drive
Select OK. The library is calibrated. When this process is complete, select OK. Resetting a Drive Use the Reset command if you want to reset a drive and not interfere with other library functions. There are two reset options: soft reset and hard reset. A soft reset is used in instances where you want restart a drive, for example if you want to run a new SCSI ID. -
Page 87: Running Drive Diagnostic Tests
Power On Self Test — executes the drive power on self-test. • SCSI Wrap Test — executes a check on the SCSI circuitry. Path: Main menu > More > Service > Drives > (select drive) > Diags Scalar 100 User’s Guide... - Page 88 Maintaining your Library...
-
Page 89: Working With Tapes And Barcodes
To ensure that the library conforms with ADIC requirements for reliability, use only ADIC-supplied tape cartridges. Other certified media may be used, but they may not meet the standards of reliability established by ADIC. Write-Protecting Tape Cartridges All tape cartridges have a write-protect switch that prevents data from being accidentally erased or overwritten. -
Page 90: Using Barcode Labels
• Do not place a cartridge near electromagnetic interference sources, such as terminals, motors, and video or X-ray equipment. Data on the tape can be altered. • Store tape cartridges in a dust-free environment where the relative humidity is between 20% and 80%. - Page 91 Ergilaser 3000 High Density barcode measuring device, manufactured by the Laetus Company.) If you want to purchase barcode labels from a supplier other than ADIC, the Scalar 100 supports barcode labels purchased from Engineered Data Products.
- Page 92 Working with Tapes and Barcodes...
-
Page 93: Using The Remote Management Unit
Supports Simple Network Management Protocol (SNMP) and acts as a SNMP-server, generating SNMP traps and responding to SNMP requests. • Supports ADIC Library Management Information Base (MIB) version 2.0. • Detects a power loss and generates an SNMP trap for notification. -
Page 94: Supported Browsers
Supported Browsers The RMU supports the following browsers: • Microsoft Internet Explorer version 5.0 and above • Netscape Navigator versions 4.01 for Unix and 4.7X for all other environments In certain versions of Netscape, the Operator Panel may not appear correctly. Note RMU Requirements The RMU requires a network address that consists of an Internet Protocol (IP) address, subnet mask, and... -
Page 95: Starting The Rmu
SNMP Alerts — indicates whether the SNMP Alert notification feature is on or off. • Library Firmware — indicates the current level of library firmware. • RMU Firmware — indicates the current level of RMU firmware. Scalar 100 User’s Guide... -
Page 96: Configuring Network Parameters
Configuring Network Parameters You can reconfigure the hostname, IP address, subnet mask, and gateway address through the RMU. This feature requires you to log in to the RMU. See Logging into the RMU on page 95 for more information. To configure the network parameters Click the Configuration tab. -
Page 97: Configuring Rmu User Accounts
You can configure the date and time for the RMU. The date and time will be used in the RMU log file to report when events occurred. To configure the date and time Click the Configuration tab. Scalar 100 User’s Guide... -
Page 98: Synchronizing With An Ntp Server
You can update firmware for the RMU, library, and drives (LTO only). Before you update firmware, you need to have the firmware file in a location that is accessible from the RMU interface. Firmware updates can be found on www.adic.com. To update firmware Click the Firmware tab. -
Page 99: Viewing Diagnostic Files
Contents — Provides a description of each of the tabs on the RMU interface. • Documentation — Provides a link to the user documentation for the library. • SNMP MIB — Provides information on the SNMP MIB file. For more information, see Configuring SNMP on page 96. Scalar 100 User’s Guide... - Page 100 • Support — Provides information on contacting technical support. • Version — Provides the current revision level of the RMU firmware. To get help • Click on the item in the left pane of the RMU interface. The information will be displayed in a separate browser window. Using the Remote Management Unit...
-
Page 101: Troubleshooting And Help
Type 1 Software errors including Microcode and Operating System errors. 01 xx Power the Scalar 100 Library off and on to recover from the error. Use the Rear Switch to perform this action, wait at least one minute between power off and... - Page 102 02 xx Power the Scalar 100 Library off and on to recover from the error. Use the Rear Switch to perform this action, wait at least one minute between power off and Type 3 Software errors including Microcode Logic and Operating System errors.
- Page 103 71. 21 xx Power the Scalar 100 Library off and on a few times and see if the same error conditions re-appear. Use the Rear Switch to perform this action, wait at least one minute between power off and on.
- Page 104 An unknown library configuration is detected, the barcode scanner is unable to read the fiducial label located on the storage column or storage magazine during a Teach operation. Ensure that the Microcode level in the Scalar 100 supports the hardware 43 xx installed. Refer to Getting Firmware and Serial Number Information on page 54.
- Page 105 If this condition exists, push the cartridge into its slot and close the library door. Contact ATAC. Failures detected in the Picker Assembly during a Retract operation. 77 xx Contact ATAC. Scalar 100 User’s Guide...
- Page 106 Table 8 Service Action Code Descriptions Reported Error and Solution A Put command was issued but the sensor indicated that the cartridge is not present in the Picker Assembly. 78 xx Contact ATAC. Failures detected in the Picker Assembly Reach/Retract operations. Check to make sure that the Picker Assembly Flex cable is properly connected and seated at the Picker Control PCBA.
- Page 107 The “xx” part of the SAC identifies the drive 98 xx Replace the Tap Drive Module with a certified spare part. Communication is not established between the Main Controller PCBA and the auxiliary controller PCBA’s in the library. A0 xx Contact ATAC. Scalar 100 User’s Guide...
- Page 108 Table 8 Service Action Code Descriptions Reported Error and Solution Communication was established but has been lost between the Main Controller PCBA and the auxiliary controller PCBA’s in the library. A1 xx Contact ATAC. Communication was initially established but is now lost between the Main Controller PCBA and the Picker Control PCBA.
-
Page 109: Operator Intervention Messages
%X = 2 digit hex CALL FOR SERVICE %Y = 4 digit error modifier SAC :%X Code:0x%Y -=>PERM ERROR!<=- %X = 2 digit hex SYSTEM WILL REBOOT %Y = 4 digit error modifier SAC :%X Code:0x%Y Scalar 100 User’s Guide... - Page 110 Table 9 Operator Intervention Messages Message Lines Variables ->SYSTEM REBOOTED<- current version NEW CODE LOADED %X = 1 digit major rev %Y = 2 digit minor rev Version %X.%YY.%ZZZZ %Z = 4 digit minor rev ->SYSTEM REBOOTED<- %X = 2 digit hex RECOVERED FROM %Y = 4 digit error modifier ERROR...
- Page 111 Slot [%X %Y %Z] DUPLICATE LABEL %X = element address Please check volsers at %Y = element address element address %X and %Y SER NUMBER MISSING None Please enter the system serial number via the monitor. Scalar 100 User’s Guide...
- Page 112 Table 9 Operator Intervention Messages Message Lines Variables One or more drives has None downlevel firmware. You may wish to update these drives. See User’s Guide Your library firmware versions None do not match. Download the latest version to the library. The Use-Count must be less None than the...
-
Page 113: Operator Information Messages
Operator Information Messages are messages that display on the Operator Panel and give the library status. Table 10 explains the variables associated with the Operator Information messages. Table 10 Operator Information Messages Message Lines Variables INITIALIZING None OFFLINE None Scalar 100 User’s Guide... -
Page 114: Interpreting Drive Leds
If you want more informatoin about your Scalar 100, contact the ADIC Technical Assistance Center or go to the ADIC or Scalar 100 website. ADIC Technical Assistance Center If problems cannot be solved with the aid of this document or if training is desired, contact the ADIC Technical Assistance Center (ATAC). In the USA: 800.827.3822... -
Page 115: Scalar 100 Website
Scalar 100 Website For the latest information and accessories on the Scalar 100, visit the product website at www.adic.com/ scalar100. The most recent versions of all documents are also located here. Scalar 100 User’s Guide... - Page 116 Troubleshooting and Help...
-
Page 117: Specifications
Tape Cartridge Capacity The tape cartridge capacity of the Scalar 100 is determined by the media type. The maximum cartridge configuration includes a bulk load Mailbox feature. -
Page 118: Allowed Tape Cartridges And Storage Capacity
25 GB 50 GB 100 GB 100 GB AIT-3 LVD Supported. a. The Scalar 100 AIT-2 LVD library configuration does not support AIT WORM technology. b. The Scalar 100 AIT-2 HVD library configuration does not support AIT WORM technology. Specifications... -
Page 119: Sdlt/Dlt
The drive will read at whatever speed the data was originally written at. b. The drive will read at whatever speed the data was originally written at. c. The SDLT 320 drive will read and write to 220-formatted tapes at SDLT 220 speeds. Scalar 100 User’s Guide... -
Page 120: Lto
Refer to Table 15 for each LTO tape cartridge compatibility with each LTO tape drive and native storage capacity. Table 15 Allowed LTO Cartridges and Native Capacity LTO Tape Cartridge Types Generation 1 Generation 2 (LTO-1) (LTO-2) 100 GB Not Supported Ultrium Internal Tape Drive —... -
Page 121: Regulatory Notices
The regulatory notices for this library are provided below. Federal Communication Commission Notice (USA only) ADIC libraries are classified by the Federal Communications Commission (FCC) for Class B digital devices. However, the inclusion of certain options can change the rating of some configurations to Class A. To determine which classification applies to your library, examine all FCC registration labels located on the bottom or back panel of your library or on installable components. -
Page 122: Class A
Class A This equipment has been tested and found to comply with the limits for a Class A digital device pursuant to Part 15 of the FCC Rules. These limits are designed to provide reasonable protection against harmful interference when the equipment is operated in a commercial environment. This equipment generates, uses, and can radiate radio frequency energy and, if not installed and used in accordance with the manufacturer's instruction manual, may cause harmful interference with radio communications. -
Page 123: Ce Notice
Note that VCCI regulations provide that changes or modifications not expressly approved by the tape library manufacturer could void your authority to operate this equipment. Scalar 100 User’s Guide... -
Page 124: Declaration Of Conformity
Declaration of Conformity The signed Declaration of Conformity is on file with Advanced Digital Information Corporation, 17275 NE 67th Court, Redmond, Washington 98052, and ADIC Europe, ZAC des Basses Auges 1, rue Alfred de Vigny, 78112 Fourqueux, France. Regulatory Notices... - Page 125 Operator Panel representation ... 45 library ......117 Scalar 100 User’s Guide...
- Page 126 ......85 Scalar 100 ......23 SCSI Adapter .
- Page 127 Quick Start Guide ......23 moving picker .......65 Scalar 100 User’s Guide...
- Page 128 - R - native capacity ..... . 119 tape cartridge capacity ....117 rackmount model library tape cartridges, allowed .
- Page 129 ....71, 118 write-protecting tape cartridges ......89 Scalar 100 User’s Guide...
- Page 130 Index...
Need help?
Do you have a question about the Scalar 100 and is the answer not in the manual?
Questions and answers