
Related Manuals for Brainlab ExacTrac


Summary of Contents for Brainlab ExacTrac
- Page 1 EXACTRAC VARIAN TRUEBEAM LINACS Version 6.x Site Planning Manual Revision 1.0 Copyright 2016, Brainlab AG Germany. All rights reserved.
-
Page 3: Table Of Contents
Heat Dissipation FLOOR BOXES ..........................35 ........................35 12” Floor Boxes (Standard) Overview..............................35 Recess Dimensions and Side Views for 12” Floor Boxes ................37 Installation of 12“ X-Ray Floor Boxes ......................39 Customized Cable Outlet ...........................42 Site Planning Manual Rev. 1.0 ExacTrac Ver. 6.x... - Page 4 General Information ...........................82 Varian Emergency STOP Interlock ......................83 ....................84 System Power Emergency OFF - ETX Introduction ..............................84 Collision Detect Interlock and Motion Enable .....................85 ........................86 ExacTrac Warning Lights NETWORK REQUIREMENTS ..................89 ...............................89 Introduction Site Planning Manual Rev. 1.0 ExacTrac Ver. 6.x...
- Page 5 Types of Networks for Electricity Supply .........................115 IT Policy, Screen Saver .......................116 17” Floor Boxes for X-Ray Tubes PREINSTALLATION CHECKLISTS ................121 .............................121 Floor Boxes .............................122 Ceiling Brackets ........................123 Electrical Infrastructure ..............................125 Conduits ..............................126 Logistics INDEX ..............................127 Site Planning Manual Rev. 1.0 ExacTrac Ver. 6.x...
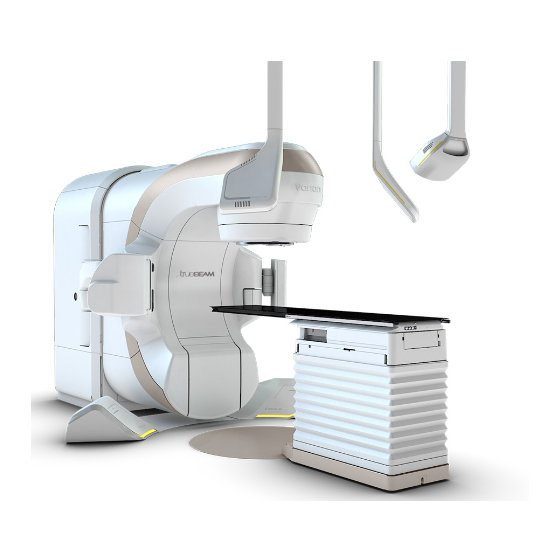
- Page 6 TABLE OF CONTENTS Site Planning Manual Rev. 1.0 ExacTrac Ver. 6.x...
-
Page 7: General Information
The Project Site Coordinator team for pre-installation can be contacted at: • rt.coordination@brainlab.com • us.rt.coordination@brainlab.com (for US customers only) Feedback Despite careful review, this manual may contain errors. Please contact us at oncology.manuals@brainlab.com if you have suggestions as to how we can improve this manual. Manufacturer Brainlab AG Olof-Palme-Str. 9... -
Page 8: Legal Information
European Council Directive 93/42/EEC, the Medical Device Di- rective (MDD). • According to the rules established by the MDD, ExacTrac is a Class IIb prod- uct. NOTE: The validity of the CE label can only be confirmed for products manufactured by Brainlab. -
Page 9: Symbols
Such problems include device malfunctions, device failure, damage to device or damage to property. Notes NOTE: Notes are formatted in italic type and indicate additional useful hints. Site Planning Manual Rev. 1.0 ExacTrac Ver. 6.x... -
Page 10: Hardware Symbols
Hardware Symbols Symbols on Hardware Components Symbol Explanation Type B Applied Part according to IEC 60601-1 Caution Serial number Article number Date of manufacture Manufacturer Follow the instructions for use Prescription only Site Planning Manual Rev. 1.0 ExacTrac Ver. 6.x... -
Page 11: Intended Use
Intended Use Indications for Use ExacTrac is intended for placing patients at an accurately defined point within the treatment beam of a medical accelerator for stereotactic radiosurgery or radiotherapy procedures. Treatment includes lesions, tumors and conditions anywhere in the body where radiation therapy is indicated. -
Page 12: Documentation
This Site Planning Manual is intended as a reference for the effective and correct implementation of ExacTrac in combination with a Varian TrueBeam Linear Accelerator. This guide is written for customers (in particular, customers who have purchased or intend to purchase an ExacTrac system), as well as all members of the clinical architectural, structural and consulting teams who are involved in the planning and implementation of an ExacTrac system or parts of it. -
Page 13: System Overview
SYSTEM OVERVIEW SYSTEM OVERVIEW Introduction Customer Responsibility All structural preparations, such as reinforcement and/or strengthening for roof mounted items, ceilings, superstructures, or any related objects are the responsibility of the customer. Site Planning Manual Rev. 1.0 ExacTrac Ver. 6.x... -
Page 14: Technical Key Features
X-Ray Components The X-ray components consist of the following: • Two X-ray tubes recessed into the linac room floor. • Two ceiling-mounted amorphous silicon detectors (ExacTrac Flat Panels). • ExacTrac Console. • Dual 65kW X-ray generator with integrated transformer unit. -
Page 15: Site Specifications
The system must not be exposed to humid environment. Humidity can destroy the system and can lead to short circuits. The ExacTrac system is not designed for use in areas where there is a danger of explosion. Moreover, the system must not be placed close to flammable materials, such as volatile anesthetics, detergents or endogenous gases. -
Page 16: Treatment Room Overview
3.1.2 Treatment Room Overview Sample Set-Up All major ExacTrac components and positions within the bunker have a dedicated numbered label for further reference. The following image shows an overview of the main system components in a treatment room (diagram not meant to scale):... - Page 17 2900 EXACT couchtop with foot extension radius 2670 EXACT couchtop w/o foot extension radius 1855 couch end Isocenter radius 2460 necessary distance for treating cranial cases (Couchmount+Headring+ Localizer or Frameless) Figure 2 Site Planning Manual Rev. 1.0 ExacTrac Ver. 6.x...
-
Page 18: Cabling
X-ray tubes. Calculate an extra 3 m for the cabling within the X-ray generator to avoid too much tension between the cables and the circuit points. In most hospitals, conduits are required for ExacTrac cables due to hospital and local electrical regulations and laws. Below is a table listing the requirements for these conduits. -
Page 19: Cable Conduits
Ø25mm Bluetooth Module ExacTrac Console Ø50mm Hospital Network Control-Room Ø25mm Warning Light Workspace 2.5a Ø75mm Computer Cabinet Control Room Ø75mm Distribution Box Control-Room Workplace = Ø25mm = Ø50mm = >Ø75mm Figure 3 Site Planning Manual Rev. 1.0 ExacTrac Ver. 6.x... - Page 20 Cabling Treatment Room Sample Side View The following image shows a side view of cable conduits (diagram not meant to scale): Figure 4 Site Planning Manual Rev. 1.0 ExacTrac Ver. 6.x...
- Page 21 25 mm (see page PE grounding spot 9 mm No plug inet 1 (2.0a) Computer cabi- External bluetooth 50 mm (low voltage 30 m 6 mm 35 mm net (1.0) module (3.2) cable) Site Planning Manual Rev. 1.0 ExacTrac Ver. 6.x...
- Page 22 2 (labeled “b”). If generators 1 and 2 are positioned directly next to each other, it is possible to place both X-ray tube cables into a single conduit. In this case, separate the high voltage cables from the data cables. Site Planning Manual Rev. 1.0 ExacTrac Ver. 6.x...
-
Page 23: Cabling System
SITE SPECIFICATIONS 3.2.3 Cabling System Functional Cabling for Varian TrueBeam Systems The following image shows an overview of the functional cabling (excluding mains, PE and building installation) for Varian TrueBeam systems: Figure 5 Site Planning Manual Rev. 1.0 ExacTrac Ver. 6.x... -
Page 24: Cable Specifications
ExacTrac Cables installed by the Contractor The following table provides an overview of all ExacTrac cables that need to be pulled by the contractor, their start and end point as well as their size and correct orientation. All other building installation cables for system interlocks are not listed here (for more information, see page 81). - Page 25 Power, 3x 2.5 Power Power, 3x 2.5 Power PEQ, 16 mm PEQ, 16 mm PEQ, 16 mm PEQ, 16 mm PEQ, 2.5 mm PEQ, 2.5 mm PEQ, 2.5 mm 2.3a 2.3b PEQ, 2.5 mm Site Planning Manual Rev. 1.0 ExacTrac Ver. 6.x...
- Page 26 • Cable 22: Minimum bend radius is 20 mm. • Cable 23: Minimum bend radius is 55 mm. NOTE: In some cases, cable direction is important. Refer to the column, “Note Cable Direction”. Site Planning Manual Rev. 1.0 ExacTrac Ver. 6.x...
-
Page 27: Dual X-Ray Generator Cabinets Hfe 601
NOTE: Use the same cable length for both tubes. • Possible cable length between the two generator cabinets: 5 m NOTE: Brainlab can provide an extension to 20 m on request only if there is absolutely no way to install the generators 5 m apart. - Page 28 • Dual generator with pre-transformer 420/440/480 V - 400 V: 370 Weight (including wheels) • Dual generator with pre-transformer Delta 200/210/220/208 V - star 400 V: 460 kg • Single cabinet without pre-transformer: 160 kg Site Planning Manual Rev. 1.0 ExacTrac Ver. 6.x...
- Page 29 When selecting the distance between the two cabinets, consider the length of the cable connecting the two cabinets: Location • Standard: 5 m • Optional: 20 m Do not place the cabinets in the primary beam of the linac. Site Planning Manual Rev. 1.0 ExacTrac Ver. 6.x...
-
Page 30: Exactrac Computer Cabinet
ExacTrac Computer Cabinet General Information The ExacTrac computer cabinet is a two-way accessible cabinet for storing the workstation, power supplies, electrical safety devices, interface electronics and excess cables. The following image shows front and back views of the ExacTrac computer cabinet: Figure 7 Site Planning Manual Rev. - Page 31 10 MV and above, do not place the computer cabinet in the treatment room as it is not designed for exposure to high neutron radiation. NOTE: Ensure sufficient spatial clearance before rigging the computer cabinet. Site Planning Manual Rev. 1.0 ExacTrac Ver. 6.x...
- Page 32 ExacTrac Computer Cabinet NOTE: If you have limited space, you may position the cabinet with the rear service door side next to a wall (100 mm clearance) after all cabling is finished. Site Planning Manual Rev. 1.0 ExacTrac Ver. 6.x...
-
Page 33: Heat Dissipation
For air condition layout, use 400 W (1365 BTU/h): 100 W for each generator (2 in total) plus 100 W for each tube (2 in total) = 400 W. Computer Cabinet and All System Components Measured: 406 W (1386 BTU/h) For air condition layout, use: 500 W (1706 BTU/h) Site Planning Manual Rev. 1.0 ExacTrac Ver. 6.x... - Page 34 Heat Dissipation Site Planning Manual Rev. 1.0 ExacTrac Ver. 6.x...
-
Page 35: Floor Boxes
① ② Description ① 12” floor box with aluminum cover on top of the wooden cover. 12” floor box showing the wooden cover that supports the aluminum cover from under- ② neath. Site Planning Manual Rev. 1.0 ExacTrac Ver. 6.x... - Page 36 12” Floor Boxes (Standard) Cable Outlet Only use the cable outlet ① provided: ① Figure 9 Top and Back Views Detail A 380mm "A" 668mm Top View Back View Figure 10 Site Planning Manual Rev. 1.0 ExacTrac Ver. 6.x...
-
Page 37: Recess Dimensions And Side Views For 12" Floor Boxes
10 mm stable concrete on all sides. • The absolute minimum depth of the pit over the whole surface is 310 mm. • The recess surface must be even for fine adjustment of the floor boxes. Site Planning Manual Rev. 1.0 ExacTrac Ver. 6.x... - Page 38 20 mm (finished floor line – isocenter). The exact value depends on the linac type. Please refer to the respective documentation. If the vertical isocenter position is not within the tolerance range, please contact Brainlab. Site Planning Manual Rev. 1.0 ExacTrac Ver. 6.x...
-
Page 39: Installation Of 12" X-Ray Floor Boxes
The determining measurement is the exact distance between isocenter and floor box tip at 45°. Installation Steps Steps Ensure that all the openings are sealed (taped) before pouring concrete. Concrete should not seep into the boxes. finished floor Place the floor boxes into the recesses. Site Planning Manual Rev. 1.0 ExacTrac Ver. 6.x... - Page 40 ③ attached to the wooden cover as it will be needed during installation. The aluminum window insert is delivered in bubble wrap. ③ You must fasten the wooden cover into place with screws. Site Planning Manual Rev. 1.0 ExacTrac Ver. 6.x...
- Page 41 (concrete) floor. The ET floor box must be fixed to the pit with anchors (not supplied by Brainlab) and be set in concrete. Use mineral material only. Do not use chemical filling. Site Planning Manual Rev. 1.0 ExacTrac Ver. 6.x...
-
Page 42: Customized Cable Outlet
It may be necessary (e.g., for updates) to widen the cable outlet on the 12” Floor Boxes. The following image shows the allowed area for customizing the cable outlet in the rear wall of the floor boxes. Site Planning Manual Rev. 1.0 ExacTrac Ver. 6.x... -
Page 43: On Floor Boxes (Optional)
12” floor boxes. ① ② Figure 14 ① A typical treatment room setup for on floor boxes. ②On floor box with a warning ramp and cable raceway. Site Planning Manual Rev. 1.0 ExacTrac Ver. 6.x... -
Page 44: External Dimensions Of The On Floor Boxes
On Floor Boxes (Optional) 4.2.2 External Dimensions of the On Floor Boxes Side View Figure 15 Top View 840mm Figure 16 Site Planning Manual Rev. 1.0 ExacTrac Ver. 6.x... -
Page 45: Recommended Position Of Above-Ground Floor Boxes
These markings will be used during installation. • Aluminum raceways (cable conduits) are available in multiple 1.5 m pieces. Please contact Brainlab if you require a total length of 9, 12 or 15m of raceway. Cable conduit*... - Page 46 On Floor Boxes (Optional) Site Planning Manual Rev. 1.0 ExacTrac Ver. 6.x...
-
Page 47: Ceiling And Wall Mounts
Introduction General Information Brainlab provides all hardware parts, except bolts for the concrete ceiling, as local conditions and building construction varies. The hospital or contractor is responsible for: • Installing all ceiling and wall mounts according to local work safety regulations. - Page 48 The minimum construction height (clearance between concrete ceiling and interface plate) of the ExacTrac ceiling mounts is 150 mm. If any parts of the ceiling mounts are visible due to suspended ceiling setup, you are responsible for covering these.
- Page 49 CEILING AND WALL MOUNTS The minimum plenum height (clearance between concrete ceiling and suspended ceiling) of the in-room distribution box is 175 mm, although 240 mm are recommended for optimal service access. Site Planning Manual Rev. 1.0 ExacTrac Ver. 6.x...
-
Page 50: Ceiling Mount Installation
The slots are perpendicular to the center line. If there are pipes, HVAC, med gas, or other fixed objects ob- structing the mounting position, the ExacTrac ceiling mount may not be moved closer to isocenter, but can be adjusted at a maximum of 30 mm further away from isocenter. - Page 51 • Define a mounting spot on the floor first. • Use a plumb bob or laser pointer to project the dimensions to the concrete ceiling. • Varian defines the distance between the isocenter and the Varian camera mount. Site Planning Manual Rev. 1.0 ExacTrac Ver. 6.x...
-
Page 52: How To Mount The Ceiling Interface Plate
The following image shows correct rope fixation of the upper interface plate to the ceiling mount: Figure 21 Incorrect Rope Fixation to the Upper Interface Plate The following image shows incorrect rope fixation of the upper interface plate to the ceiling mount: Figure 22 Site Planning Manual Rev. 1.0 ExacTrac Ver. 6.x... - Page 53 Figure 23 The clearance of y = 150 mm between the lower edge of the interface plate of the ExacTrac ceiling mount ① and the upper edge of the suspended ceiling must be reserved for the installation and adjustment of Brainlab devices.
- Page 54 • It is possible to leave out the tension ropes. However, you must install ropes on either side as additional mechanical protection. NOTE: Inform Brainlab if a is shorter than 150 mm because the construction could be visible. Do not use rope tighteners or apply tension to the safety rope.
- Page 55 NOTE: The angle between the rope tightener and ceiling can be smaller than 45° if necessary (e.g., angle brackets further away from the ceiling bracket). Fix the rope loop with at least three rope clamps. Fix the rope tighteners only after applying the proper tension. Site Planning Manual Rev. 1.0 ExacTrac Ver. 6.x...
- Page 56 • L only: Cut each vertical profile bar accordingly at the half-length distance be- tween the interface plate and concrete ceiling. Fix the rope loop with at least three rope clamps. Fix the rope tighteners only after applying proper tension. Site Planning Manual Rev. 1.0 ExacTrac Ver. 6.x...
- Page 57 Ceiling Custom made ceiling plate Figure 25 You are responsible for adhering to safety factors, local regulations and mounting the custom made interface plate and custom-made ceiling mount. Site Planning Manual Rev. 1.0 ExacTrac Ver. 6.x...
-
Page 58: Ceiling-Mounted Touch Screen Monitor (Optional)
A clearance between 2.1 m and 2.2 m requires consultation and customer agreement. NOTE: If you did not order the ceiling-mounted version, you will receive the wall mount for the touch screen monitor by default. Site Planning Manual Rev. 1.0 ExacTrac Ver. 6.x... - Page 59 Vertical parts Attached weight weight weight Figure 27 NOTE: The ceiling plate and upper tubes between the ceiling plate and interface plate are only applicable for a concrete ceiling height > 3400 mm. Site Planning Manual Rev. 1.0 ExacTrac Ver. 6.x...
- Page 60 523mm Figure 28 Dimensions of the Lower Ceiling Plate (Black) holes (6x) for threaded rods to ceiling plate M16(6x) holes (6x) for threaded rods Brainlab (installation of lower part) t=15mm Figure 29 Site Planning Manual Rev. 1.0 ExacTrac Ver. 6.x...
- Page 61 The position depends on other existing ceiling-mounted objects. • Brainlab recommends positioning the ceiling-mounted monitor on the side of the couch that is opposite to the bunker entry. • Risk of collision with gantry is still possible but not critical, as the spring arm will give way.
- Page 62 Ceiling-Mounted Touch Screen Monitor (Optional) The following image shows the recommended position of the ceiling mounted monitor: alternative Position 1250mm Figure 30 Site Planning Manual Rev. 1.0 ExacTrac Ver. 6.x...
-
Page 63: Ceiling Frame Installation
Screw the hexagon nut approximately 25 mm onto the threaded bolt and install the spring washer, then screw on the upper fixing disk. Screw the threaded bolts in completely, otherwise the ceiling arm can fall down. Site Planning Manual Rev. 1.0 ExacTrac Ver. 6.x... - Page 64 Tighten the hexagon nuts to a torque of 100 Nm. Use a size 24 torque wrench. For more detailed installation descrip- tions, refer to the included installation manual delivered with the package. Site Planning Manual Rev. 1.0 ExacTrac Ver. 6.x...
-
Page 65: Wall-Mounted Touch Screen Monitor (Standard)
Figure 31 How to Attach a Wall Mounted Touch Screen Monitor to a Drywall Steps Use anchors and screws (4x) appropriate for your wall (e.g., drywall anchors and screws for drywalls). Site Planning Manual Rev. 1.0 ExacTrac Ver. 6.x... - Page 66 Close the cable channel with the supplied covers (cut to fit). If you do not order the ceiling arm, the wall mount is delivered by default. Mount the wall mount for monitor to solid walls. Site Planning Manual Rev. 1.0 ExacTrac Ver. 6.x...
-
Page 67: Ceiling Mounted In-Room Distribution Box
(1.2). • Maximum 4.5 m away from the external blue- tooth module (3.2). If cables cannot be routed directly, plan the dis- tance between the two related devices respec- tively shorter. Site Planning Manual Rev. 1.0 ExacTrac Ver. 6.x... - Page 68 Do not place the in-room distribution box in the linac’s primary beam. To prevent injury during installation and service, do not place the in- room distribution box directly above the linac stand. Site Planning Manual Rev. 1.0 ExacTrac Ver. 6.x...
-
Page 69: Control Room
The following table provides information on the drilling pattern and required service space for the control room distribution box: Component Description Dimensions 450 x 300 x 170mm (length x width x height) Weight 6 kg (fully equipped) Site Planning Manual Rev. 1.0 ExacTrac Ver. 6.x... - Page 70 The control room distribution box should be close to the console control unit (e.g., under Location the desk). The cable length from power box to the workspace is 5 m maximum. Site Planning Manual Rev. 1.0 ExacTrac Ver. 6.x...
-
Page 71: Control Room Workspace
This allows smoother integration of workflows for the operators. Required Space Approximately 700 mm as pictured above. Power Supply/ Located in the control room distribution box. Data Connections Site Planning Manual Rev. 1.0 ExacTrac Ver. 6.x... - Page 72 Control Room Workspace Site Planning Manual Rev. 1.0 ExacTrac Ver. 6.x...
-
Page 73: Electrical Requirements
Power consumption is high when ExacTrac kV imaging runs simultaneously with MV delivery. Therefore, ensure the 2 systems are on separate circuit breakers. - Page 74 Nominal power consumption (for power provider): 35 kVA Exposure (max): 75 kVA Power factor cos φ (for power provider) Input current at full out- put rating per phase for 112 A @ 400 V 0.2 sec Site Planning Manual Rev. 1.0 ExacTrac Ver. 6.x...
-
Page 75: Computer Cabinet Power Supply
(L & N) is mandatory. The contact opening gap must be at least 3 mm. Major load on mains is the ExacTrac isolation transformer unit. The main switch should be able to manage high inrush currents when power is on, as it is required for intended inductive loads (e.g., transformers and electro motors). - Page 76 For additional surge/rush current protection, a lightning arrester CB (e.g., IEC 61643-1 class II) as shown below must be installed within the mains input power line (usually within the main room distribution box), if not already provided by your hospital’s main power supply. Figure 35 Site Planning Manual Rev. 1.0 ExacTrac Ver. 6.x...
-
Page 77: System Mains Power & Protective Earth Cabling
ELECTRICAL REQUIREMENTS System Mains Power & Protective Earth Cabling General Information The mains power/protective earth (PE) cabling material within the ExacTrac system (supplied by Brainlab) complies with worldwide harmonized certification “HAR” and dedicated certifications for the North American/Canadian market. In cases where the provided certifications are not sufficient for installation (e.g., regional regulatory or local installation aspects), the customer is responsible for providing adequate cabling material. - Page 78 24V AC or 60V DC (see comment 1 in Figure 36). NOTE: Correct PE grounding of the linac and couch is presumed. PE grounding is usually defined with the linac electrical cabling diagrams or was defined by a hospital electrician. Site Planning Manual Rev. 1.0 ExacTrac Ver. 6.x...
- Page 79 ELECTRICAL REQUIREMENTS Mains Power and Protective Earth Grounding Figure 36 Site Planning Manual Rev. 1.0 ExacTrac Ver. 6.x...
- Page 80 System Mains Power & Protective Earth Cabling Site Planning Manual Rev. 1.0 ExacTrac Ver. 6.x...
-
Page 81: System Interlocks And Status Signals
• Opt.: Optional. • (1) Linac 3rd Party Interface: Some linacs (depending on the model and age) offer a 3rd party interface that ExacTrac can use to read, and sometimes to write status signals and interlocks. For Varian TrueBeam linacs: •... -
Page 82: Emergency Stop Interlock
If a total system shut down (‘system power emergency OFF’) is desired or required by local regulations, an external circuit must be installed in addition to the mandatory emergency STOP circuit at the mains of the ExacTrac computer cabinet (1.0) and generator cabinet (2.0). For more information, see the following sections. -
Page 83: Varian Emergency Stop Interlock
SYSTEM INTERLOCKS AND STATUS SIGNALS 8.2.2 Varian Emergency STOP Interlock Specifications Intended use is to connect the ExacTrac system directly to the linac emergency OFF circuit if a Varian linac with 3rd party motion interface is present. Component Description Brainlab supplies a shielded 9pole SUB-D extension cable with max. 30 m... -
Page 84: System Power Emergency Off - Etx
A system power emergency OFF can additionally be installed, if local authorities request ExacTrac to completely shut the system down during an "emergency OFF". In this case, the ExacTrac system will immediately power down whenever an emergency button is pushed. -
Page 85: Collision Detect Interlock And Motion Enable
8a (see Figure 37). NOTE: If a collision is detected by the linac, the motion enable signal will not be activated with the Varian logic. In this case, collision detect is indirectly recognized by ExacTrac and not read as a separate signal. -
Page 86: Exactrac Warning Lights
ExacTrac Warning Lights The ExacTrac Warning Light Signal The ExacTrac warning lights warn the user with flashing light that X-ray exposure is enabled by the ExacTracsoftware in specific steps of the positioning workflow (e.g., when X-ray exposure is possible). Flashing warning lights indicate that X-rays can be emitted when you press the trigger or exposure button on ExacTrac’s X-ray console. - Page 87 If the warning light is expected to be flashing, you must provide an electric circuit to generate peri- odic phases. The ExacTrac X-ray warning light output is a permanent signal during active status. Signalization log- The interface provides an isolated switch with two contacts that are closed static in case of activated warning.
- Page 88 External warning light circuit ET ILK Insert XR Warning Output K(-) DOOR Input A(+) K(-) EMO Input A(+) MINUS 12V DC Output PLUS (internal switch, closed in case of x-ray active) Figure 40 Site Planning Manual Rev. 1.0 ExacTrac Ver. 6.x...
-
Page 89: Network Requirements
REQUIREMENTS Introduction General Information All ExacTrac workstations shall be connected to the hospital network with a standard 100 Mb/s LAN connection. Please supply a network wall jack close to the computer cabinet. Brainlab provides a 4 m long network cable. - Page 90 Virus Scanner Brainlab recommends the use of a state of the art virus scanner. You or a responsible organization is responsible for installation and maintenance and must consider Brainlab’s recommendations. For detailed information, refer to the Clinical User Guide.
-
Page 91: 10 Exactrac Robotics
General Information • ExacTrac Robotics requires the Brainlab imaging couch top. • ExacTrac Robotics and Brainlab imaging couch top are about 0.1 m higher than the original Varian Exact couch top. • Re-calibrate your Varian Exact couch after installing ExacTrac Robotics and Brainlab imaging couch top due to this height difference. -
Page 92: External Bluetooth Module
• Do not place metal parts between the external Bluetooth module and the Bluetooth antenna (receiving data) on the foot end of the ExacTrac Robotics. • The maximum distance from the external Bluetooth module to the foot end of the ExacTrac Robotics should be 5 m. - Page 93 EXACTRAC ROBOTICS Position of the External Bluetooth Module in the Treatment Room The following image shows the position of the Bluetooth module ① from two different views: ① ① 2600 Figure 43 Site Planning Manual Rev. 1.0 ExacTrac Ver. 6.x...
- Page 94 External Bluetooth Module Site Planning Manual Rev. 1.0 ExacTrac Ver. 6.x...
-
Page 95: 11 Compliances
Brainlab pre-installation parameters as described in the ExacTrac Site Planning Manual: ☐ ceiling mount of the IR camera (n/a for Varian TrueBeam systems) ☐... -
Page 96: Authorities
Authorities 11.2 Authorities Sweden The requirement from the Swedish authorities is that Brainlab must verify that the customer has a valid license from the authority (Strålsäkerhetsmyndigheten) complying with S-137 Tillstandsvilkor Site Planning Manual Rev. 1.0 ExacTrac Ver. 6.x... -
Page 97: 12 Appendix
Pre-Installation Kit General Information Check shipment for its completeness. Store surplus material carefully and hand out to Brainlab Support during ExacTrac system installation. IR/XR Pre-Installation Kit The following table provides a list of components included in the pre-installation kit IR/XR:... - Page 98 ET serial extension ca- 49025A Third cable only if you ordered ExacTrac Ro- botics) 49360A/-B ET ceiling mount ET ceiling arm fixation (optional) 49351 Only if you order ceil- ing mounted touch screen monitor. Site Planning Manual Rev. 1.0 ExacTrac Ver. 6.x...
- Page 99 ET wall mount for monitor (default) 10900-92A Not included if you or- der ceiling mounted touch screen monitor. ET touch VGA cable (default) 49341 Not included if you or- der ceiling mounted touch screen monitor. Site Planning Manual Rev. 1.0 ExacTrac Ver. 6.x...
- Page 100 ET touch power cable (default) 49301-09 Not included if you or- der ceiling mounted touch screen monitor. 49545 ET warning light ET flat panel data ca- 49554-30 Site Planning Manual Rev. 1.0 ExacTrac Ver. 6.x...
- Page 101 ET cable tie write on 49445-02 100 mm (1 pcs) RTM2 cross over ca- ble (optional) Only if you ordered ET Robotics/RTM. Mechanical specifica- 49776-10 tions: Diameter: 7.3mm Length: 30m Bending: 55mm min. Plug diameter: 35mm Site Planning Manual Rev. 1.0 ExacTrac Ver. 6.x...
- Page 102 ExacTrac X-Ray 12” Floor Casing ET Floor Box 12'' ba- 49373 ET Floor Box 12'' cov- 49374 er sheet IR Pre-Installation Kit ET power installation 49302B ET infrared USB 49367 adapter 30 m Site Planning Manual Rev. 1.0 ExacTrac Ver. 6.x...
- Page 103 ET ceiling arm fixation (optional) 49351 Only if you order ceil- ing mounted touch screen monitor. ET ceiling arm inter- face plate (optional) 49352 Only if you order ceil- ing mounted touch screen monitor. Site Planning Manual Rev. 1.0 ExacTrac Ver. 6.x...
- Page 104 ET touch VGA cable (default) 49341 Not included if you or- der ceiling mounted touch screen monitor. ET touch data cable (default) 49342 Not included if you or- der ceiling mounted touch screen monitor Site Planning Manual Rev. 1.0 ExacTrac Ver. 6.x...
- Page 105 APPENDIX ET touch power cable (default) 49301-09 Not included if you or- dered ceiling mounted touch screen monitor ET cable tie write on 49445-02 100 mm (1 pc) Site Planning Manual Rev. 1.0 ExacTrac Ver. 6.x...
-
Page 106: Standard Shipping List
1050 x 900 x 380 The X-ray tubes must be handled with care. Transport and store them always upwards (vertically) to protect the glass bulb from cracking through mechanical shock. Avoid mechanical shocks in general. Site Planning Manual Rev. 1.0 ExacTrac Ver. 6.x... -
Page 107: Cable Classifications
Class II light cable circuit cable ET console ca- Communica- 46133-01 24 VDC 250 V Class II tion RTM cross Communica- 49776-10 < 15 V 250 V Class II over cable tion Site Planning Manual Rev. 1.0 ExacTrac Ver. 6.x... - Page 108 Name Voltage Voltage Jacket UL List- UL Recog- ExacTrac Classifica- Applied Rating Type nized AWM Application tion styles CAT 5e patch Network com- 18562-37 < 15 V 125 V 2835 cable munication Site Planning Manual Rev. 1.0 ExacTrac Ver. 6.x...
-
Page 109: Facility Pre-Installation Summary
Overview of Mains Power Supply and Interlocks Installation Suggestion This overview provides suggestions on how to fulfill the ExacTrac requirements from the previous chapters. Local regulatory requirements and your specific needs can lead to a different solution for implementing power supply switching and interlock inputs and outputs. -
Page 110: Overview Of Wire Diameters In Grounding And Functional Cables
Overview of Wire Diameters in Grounding and Functional Cables Installation Suggestion This overview provides suggestions on how to fulfill the minimum ExacTrac requirements from the previous chapters. Local regulatory requirements and your specific needs can lead to a different solution for implementing wire diameters for supply lines, PE cables and interlock cables. The LAN cable must be provided for the appropriate Ethernet speed class. -
Page 111: Generator Power Supply (Distribution Box)
The following image shows a sample of the wiring plan of a distribution box according to German regulations. The design of this distribution box can be modified to accommodate local regulations: 0,03A L1 L2 L3 N PE X1 Generator Figure 46 Site Planning Manual Rev. 1.0 ExacTrac Ver. 6.x... - Page 112 The main neutral point bar is part of the building installation and is mounted in the distribution box. PE: Main Safety Earth Bar The main safety earth bar is part of the building installation and is mounted in the distribution box. Site Planning Manual Rev. 1.0 ExacTrac Ver. 6.x...
- Page 113 The cross-sectional area of the power cable that connects the distribution box to the X-ray generator cannot exceed 35 mm² because of the size of the input terminals on the generator connection panel. It is recommended to use a fine wire cable with cable end sleeves. Site Planning Manual Rev. 1.0 ExacTrac Ver. 6.x...
-
Page 114: Types Of Networks For Electricity Supply
EARTHED MID POINT OF PHASE EARTHED JUNCTION OF PHASES SINGLE-PHASE SINGLE-PHASE SINGLE-PHASE THREE-WIRE TWO-WIRE TWO-WIRE EARTHED MID POINT NON-EARTHED NEUTRAL EARTHED END OF PHASE SINGLE-WIRE d.c. EARTHED RETURN (SWER) THREE-WIRE Figure 47 Site Planning Manual Rev. 1.0 ExacTrac Ver. 6.x... -
Page 115: Policy, Screen Saver
ADI interruption. These settings are sometimes set via a group policy from your hospital’s IT department and thus are not accessible via the ExacTrac workstation. Site Planning Manual Rev. 1.0 ExacTrac Ver. 6.x... -
Page 116: 17" Floor Boxes For X-Ray Tubes
• One of the outlets is sufficient to induct all cables (lead conduit to any outlet). • The floor boxes are delivered with leveling feet for fine adjustment. • The tips of the cap nut define the external dimensions of the floor box. Site Planning Manual Rev. 1.0 ExacTrac Ver. 6.x... - Page 117 The following image shows recommended dimension for recess to fit in the floor box: TOP VIEW SIDE VIEW 483mm finished floor 45° 813mm Figure 50 Cutting of the floor box recesses severely influences building statics. A stress analyst approval/clearance is mandatory. Site Planning Manual Rev. 1.0 ExacTrac Ver. 6.x...
- Page 118 +/- 20 mm (finished floor line – isocenter). The exact value depends on the linac type. Please refer to the respective documentation. If the vertical isocenter position is not within the tolerance range, please contact Brainlab. Site Planning Manual Rev. 1.0 ExacTrac Ver. 6.x...
- Page 119 The maximal deviation of the line “floor box tip – midpoint rear wall of box” at the isocenter is 25 mm. The only (and determining) measurement is the exact distance between the isocenter and the floor box tip at 45°. Site Planning Manual Rev. 1.0 ExacTrac Ver. 6.x...
- Page 120 The floor box can be fixed with bolts (not included). The vertical position of the floor box can be leveled in with three adjustment screws and leveling feet. The leveling feet with screws and nuts are added in a separate package. Site Planning Manual Rev. 1.0 ExacTrac Ver. 6.x...
-
Page 121: Preinstallation Checklists
They must be kept in a safe stallation. place until installed by the Brainlab team. Site Planning Manual Rev. 1.0 ExacTrac Ver. 6.x... -
Page 122: Ceiling Brackets
Brainlab’s data cables are delivered together with the Storage of Brainlab’s cables until ceiling brackets. They must 2.14 final installation. be kept in a safe place until their installation or until they are pulled. Site Planning Manual Rev. 1.0 ExacTrac Ver. 6.x... -
Page 123: Electrical Infrastructure
PEQ 16 mm² cable between PEQ reference bar and X-ray genera- tor. Install a network plug RJ 45 close 3.10 to the computer cabinet (maxi- mum 2 m from the cabinet). Site Planning Manual Rev. 1.0 ExacTrac Ver. 6.x... - Page 124 3.18 the power to ExacTrac must be cut off. Provide a standard mains power 3.19 plug close to the computer cabi- net. Pull Brainlab cables to the correct 3.20 positions. Site Planning Manual Rev. 1.0 ExacTrac Ver. 6.x...
-
Page 125: Conduits
From computer cabinet to in-room distribution box. From computer cabinet to control- room distribution box. From computer cabinet to warning lights. From computer cabinet to linac. From computer cabinet to X-ray generators. Site Planning Manual Rev. 1.0 ExacTrac Ver. 6.x... -
Page 126: Logistics
Delivery area arranged. See standard shipping list. Delivery path free of obstacles. Security informed. Storage room arranged until in- stallation. Storage space at bunker for Ex- acTrac accessories. Collection of empty packaging ar- ranged. Site Planning Manual Rev. 1.0 ExacTrac Ver. 6.x... -
Page 127: Index
17 customer responsibility...............13 disposal instructions..............8 documentation................12 ExacTrac warning light............... 86 hospital provided warning light........... 87 Infrared components..............14 Optional components..............14 support..................7 virus scanner................90 WEEE...................8 X-ray components..............14 Site Planning Manual Rev. 1.0 ExacTrac Ver. 6.x... - Page 130 Art-No. 60912-92EN *60912-92EN*...
Need help?
Do you have a question about the ExacTrac and is the answer not in the manual?
Questions and answers