
Related Manuals for HID FARGO HDP 6600 X002200


Summary of Contents for HID FARGO HDP 6600 X002200
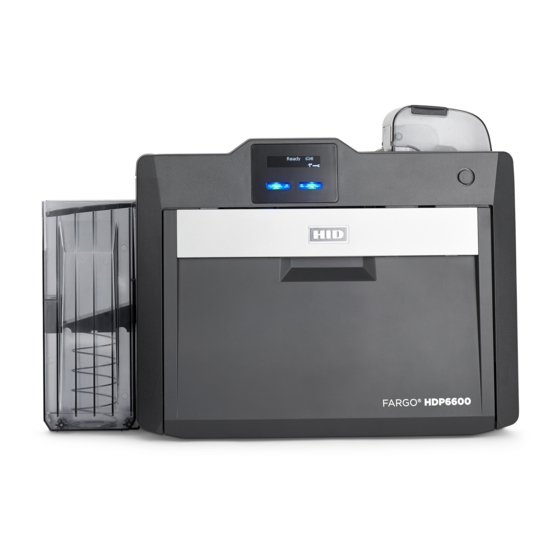
- Page 1 FARGO® HDP®6600 EFINITION RINTER NCODER X002200 ODEL UIDE PLT-02931, Rev. A.0 September 2018 hidglobal.com...
- Page 2 HID Global Corporation. Trademarks HID GLOBAL, HID, the HID Brick logo, the Chain Design, FARGO, POLYGUARD, HDP, SECUREMARK, ULTRACARD, INDALA, OMNIKEY, ICLASS SE, and ICLASS are trademarks or registered trademarks of HID Global, ASSA ABLOY AB, or its affiliate(s) in the US and other countries and may not be used without permission.
- Page 3 PLT-02931, Rev. A.0 September 2018...
- Page 4 PLT-02931, Rev. A.0 This page is intentionally left blank. September 2018...
-
Page 5: Table Of Contents
Contents Section 1: Specifications............. 9 Regulatory compliance . - Page 6 Section 4: HID Printer Status Monitor ........
- Page 7 PLT-02931, Rev. A.0 5.5.5 Preferences ..............97 5.5.5.1 Change password .
-
Page 8: Plt-02931, Rev. A
PLT-02931, Rev. A.0 This page is intentionally left blank. September 2018... -
Page 9: Section 1: Specifications
Section 1 Specifications This section provides specific information on the Regulatory Compliances, Agency Listings, Technical Specifications and Functional Specifications for the HDP®6600 card printer. 1.1 Regulatory compliance Agency Regulatory Compliance The card printer is listed under UL 60950-1 (2nd edition) Information Technology Equipment. -
Page 10: United States
Specifications PLT-02931, Rev. A.0 1.1.1 United States This device complies with Part 15 of the FCC rules. Operation is subject to the following conditions: This device may not cause harmful interference. This device must accept any interference received, including interference that may cause undesired operation. -
Page 11: Taiwan
PLT-02931, Rev. A.0 Specifications 1.1.3 Taiwan 1.1.4 Japan 1.1.5 Korea September 2018... -
Page 12: Safety Messages-United States
Specifications PLT-02931, Rev. A.0 1.2 Safety messages-United States Symbol Critical Instructions for Safety Purposes Failure to follow these guidelines results in personal injury or death. To prevent personal injury or death, Danger: reference the following safety messages before performing an operation: Always remove the power cord prior to performing repair procedures, unless otherwise specified. -
Page 13: Safety Messages-French Canada
PLT-02931, Rev. A.0 Specifications 1.3 Safety messages-French Canada Symbol Instructions critiques visant la Sécurité Si ces directives ne sont pas suivies les résultats peuvent être des lésions corporelles ou la mort. Danger: Pour éviter des lésions corporelles ou la mort: Rapportez-vous aux avis suivants de sécurité... -
Page 14: Safety Messages-Taiwan
Specifications PLT-02931, Rev. A.0 1.4 Safety messages-Taiwan September 2018... -
Page 15: Safety Messages-China
PLT-02931, Rev. A.0 Specifications 1.5 Safety messages-China Use only at altitudes not more than 2000m above sea level. 2000m Environmental Protection Use Period is based on the product being used in an office environment. September 2018... -
Page 16: Technical Specifications
HID Global certified supplies properly. To maximize printer life, reliability, printed card quality and durability, you must use only HID Global certified supplies. For this reason, your HID Global warranty is void, where not prohibited by law, if you use non-HID Global certified supplies. - Page 17 Three-year factory warranty Covers parts and depot repair First year On-Call-Express (loaner printer US only) Second year On-Call-Express available for a fee. This must be purchased before the first-year On-Call-Express expires. Printhead: Lifetime; unlimited pass with HID Global certified card September 2018...
- Page 18 Specifications PLT-02931, Rev. A.0 This page is intentionally left blank. September 2018...
-
Page 19: Section 2: Setup And Installation
Section 2 Setup and installation This section describes the setup and installation for the HDP®6600 card printer. 2.1 Selecting a good location The following guidelines help to ensure optimal printing performance: Place the unit in a location with adequate air circulation to prevent internal heat buildup. Use the dimensions of the printer as a guideline for the minimum clearances to the unit. -
Page 20: Unpacking And Inspection
Setup and installation PLT-02931, Rev. A.0 2.3 Unpacking and inspection While unpacking the printer, inspect the carton to ensure that damage did not occur during shipping. Make sure that all supplied accessories are included with the unit: US/EU power cable Card input cartridge Card output hopper Ferrite... - Page 21 PLT-02931, Rev. A.0 Setup and installation 2. Slide out the HDP film drawer by pulling on the gray handle. Caution: Be careful not to touch the hot holler surface identified with this symbol. 3. Unlatch and raise the accumulator unit. Twist the accumulator unit 90° to the right. 4.
- Page 22 Setup and installation PLT-02931, Rev. A.0 5. Load the HDP film, ensuring that each spool is correctly fitted to the corresponding color cartridge, and the film is not loose. Note: Used film should have used panels to the left of the purple roller and new panels to the right of the purple roller.
- Page 23 PLT-02931, Rev. A.0 Setup and installation 8. Slide the HDP film drawer in until the gray handle clicks/latches. 9. Close the printer front cover. September 2018...
-
Page 24: Installing The Print Ribbon
Setup and installation PLT-02931, Rev. A.0 2.5 Installing the print ribbon Important: Do not connect the power supply or communication cable (USB or Ethernet) at this stage. FARGO High Definition printers require highly specialized supplies to function properly. This printer uses a refillable ribbon drawer. - Page 25 PLT-02931, Rev. A.0 Setup and installation 3. Pull down the loading handle. 4. Load the ribbon, ensuring that each spool is correctly fitted to the corresponding color cartridge, and the ribbon is not loose. 5. Push up the ribbon loading handle. September 2018...
-
Page 26: Installing The Cleaning Roller
Setup and installation PLT-02931, Rev. A.0 6. Slide in the ribbon drawer until the handle clicks/latches. 7. Close the printer front cover. 2.6 Installing the cleaning roller Every HDP print ribbon contains a cleaning roller. Each time a new HDP print ribbon is inserted, a new cleaning roller should be installed. - Page 27 PLT-02931, Rev. A.0 Setup and installation 2. Insert the cleaning roller into the card input area. 3. Attach the card input cartridge to the printer. September 2018...
-
Page 28: Installing Blank Cards Into The Input Card Hopper
Setup and installation PLT-02931, Rev. A.0 2.7 Installing blank cards into the input card hopper Load the cards with the print side down and (if applicable) the magnetic stripe up and towards the front of the printer. Notes: FARGO UltraCard® Premium card types are recommended (see Section 2.7.1 General card information). Cards eject into the output hopper or reject hopper. -
Page 29: General Card Information
Suitable cards must have a polished PVC surface free of fingerprints, dust, or any other types of embedded contaminants. For best results, HID recommends UltraCard, UltraCard stock has a glossy PVC laminate on top and bottom and is optically inspected to provide the cleanest, most scratch and debris-reduced cards possible. -
Page 30: Printer Power
Setup and installation PLT-02931, Rev. A.0 2.8 Printer power Important: Do not connect the printer USB cable until prompted during the printer driver installation. To connect power to the printer: 1. Plug the power cable into the back of the printer. 2. -
Page 31: Driver Installation Instructions
PLT-02931, Rev. A.0 Setup and installation 2.9 Driver installation instructions To download and install the HDP6600 driver file: 1. Visit www.hidglobal.com/drivers and search for HDP6600. 2. Click DOWNLOAD from the search results and click I ACCEPT to accept the End User License Agreement. - Page 32 Setup and installation PLT-02931, Rev. A.0 6. Read the license terms and conditions. Select I accept the license agreement and click Next. September 2018...
- Page 33 PLT-02931, Rev. A.0 Setup and installation 7. Select the type of connection for the printer. If you are connecting to a local connection, select Local Connection (USB) and click Next. If you are connecting to a network, select Network Connection (Ethernet) and do the following: a.
- Page 34 Setup and installation PLT-02931, Rev. A.0 8. The HID Printer Status Monitor can be installed with the driver. This is recommended and the checkbox is selected by default. The HID Status Monitor is used to provide information about the printers connected to this computer.
- Page 35 PLT-02931, Rev. A.0 Setup and installation 9. The Ready to Install window is displayed. Click Next to begin the installation. 10. If you are using a local connection (USB), the Plug and Play window is displayed to prompt you to turn on the printer and connect the USB print cable.
- Page 36 Setup and installation PLT-02931, Rev. A.0 11. When the installation is completed, the PC may need to be restarted for the changes to take effect. If the check box to Reboot the computer is displayed, select the check box to restart your computer and click Finish.
-
Page 37: Section 3: Printing Preferences
Section 3 Printing preferences All print driver operations and printing preferences are managed through the HDP®6600 Card Printer Printing Preferences. Accessing the printing preferences varies by Microsoft Windows operating system. For example, if you are running Microsoft Windows 10, the printing preferences are accessed by selecting Settings > Devices >... -
Page 38: File Menu Tab
Printing preferences PLT-02931, Rev. A.0 3.1 File menu tab This tab allows you to view driver details and basic printer specifications. You can also restore driver default settings, save changes to your preferences, or discard changes before exiting the printing preferences. The File menu includes selections for the following pages and two exit options: Basic Setup - Displays selections for printer settings, ribbon specifications, card type, and a link for restoring driver defaults. -
Page 39: Basic Setup Page
PLT-02931, Rev. A.0 Printing preferences 3.1.1 Basic setup page This page displays selections for printing on one or both sides of a card, card orientation, ribbon colors, and card types. It also includes a Details pane and a link for restoring the driver defaults. Field Definition Defines whether to print on one side or both sides. - Page 40 Card Type FARGO® UltraCard® Premium (default card type) FARGO UltraCard FARGO UltraCard PC HID Tech Card Composite HID Tech Card PVC Displays a prompt to reset all selections in the driver file to the default settings. Restore Driver Defaults Click Yes to reset or No to cancel.
-
Page 41: Card View Page
PLT-02931, Rev. A.0 Printing preferences 3.1.2 Card view page This page displays a representation of the currently selected card options. September 2018... -
Page 42: Help Page
Printing preferences PLT-02931, Rev. A.0 3.1.3 Help page This page displays links to: Available help files for the printing preferences Order printing supplies Instructional videos for the maintenance of the HDP6600 card printer 3.1.4 Exit options To exit the Printing Preferences, choose one of the following: Save Changes and Exit - Saves any changes made within the HDP6600 card printer printing preferences screens and exits the program. -
Page 43: Details Window
PLT-02931, Rev. A.0 Printing preferences 3.1.5 Details window This window displays basic information about the driver and the printer connected to your PC. This information is also displayed on all pages and menu tabs throughout the interface. Field Definition Displays the driver and printer information. Details Driver: Version: The installed printer driver version. -
Page 44: Advanced Menu Tab
Printing preferences PLT-02931, Rev. A.0 3.2 Advanced menu tab This tab allows you to select page setup options, printing options, diagnostic settings, and calibration settings. Page Setup Menu option Description Sets the card orientation. Select Portrait to print the card vertically. Select Landscape to print Orientation horizontally. - Page 45 Type: Select the type of card to print: FARGO UltraCard Premium (default) FARGO Ultracard FARGO Ultracard PC HID Tech Card Composite HID Tech Card PVC More Card Settings: Opens the Page Setup window to define the card type and size. Select a Card Type to print:...
- Page 46 Printing preferences PLT-02931, Rev. A.0 Page Setup Menu option Description Select the Layout tab to set the Offset Length and Offset Width for the image placement on the front and back of the card. Note: If Duplexing is set to Single Sided, the Back tab is not available on this window. Adjust the image position values by clicking the Offset Length and Offset Width adjustment arrows.
- Page 47 PLT-02931, Rev. A.0 Printing preferences Device Settings Menu option Description Color Intensity Controls the overall darkness and lightness of the printed color. Dye-Sub (YMC): This slider controls the overall darkness and lightness of the dye-sub printed image. Any adjustments only affect those images printed with dye-sublimation (YMC-type) ribbon panels.
- Page 48 Printing preferences PLT-02931, Rev. A.0 Device Settings Menu option Description Image Transfer This setting controls the speed and temperature at which printed images are transferred from the film to the card. These settings may vary depending on the card type. When the Use Defaults Based on the Film and Selected Card Type option is selected, the printer driver automatically optimizes these settings according to the card type and film type previously selected.
- Page 49 PLT-02931, Rev. A.0 Printing preferences Device Settings Menu option Description Card Flattener This option is available only for single-sided card printing and is grayed out if a card flattener is not detected. Available options are: Enabled: Select this option to enable the flattener. Advanced Settings: This option is grayed out unless the Enabled option is selected.
- Page 50 Printing preferences PLT-02931, Rev. A.0 Print Image Menu option Description Ribbon Color This option allows the printer to automatically select the colors to print or allows you to specify card colors. This setting is determined by the ribbon detected in the printer and the selection of single- or dual-sided printing.
- Page 51 PLT-02931, Rev. A.0 Printing preferences Print Image Menu option Description K Resin Printing This option controls where the resin black (K) panel of a full-color ribbon is printed. Resin black text is desirable due to its sharp, saturated color. Available options are: Dither Type: Graphics Photos...
- Page 52 Printing preferences PLT-02931, Rev. A.0 Print Image Menu option Description Use K Resin to Print Black in Images: Prints black in images using K-panel resin (white or color backgrounds) and automatically selects Print YMC under K Resin. Print YMC under K Resin: Clear this check box to print black in image using K-panel resin (white or color backgrounds).
- Page 53 PLT-02931, Rev. A.0 Printing preferences Print Image Menu option Description Resize Selected Area: Defined areas can be moved or re-sized by selecting the area and either dragging one of the handles to the desired size or by manually setting the horizontal, vertical, X, and Y coordinates.
-
Page 54: Information Panel
Printing preferences PLT-02931, Rev. A.0 3.2.1 Information panel This panel is displayed on the left side of the Advanced, Encoding, and Utilities menu tabs. Field Definition Automatically detects the materials in the printer such as the ribbon, film, and cards. Media tab Ribbon Displays the reorder number, type, and remaining ribbon level detected. -
Page 55: Card Image Area
PLT-02931, Rev. A.0 Printing preferences 3.2.2 Card image area The card image area displays a representation of the card options currently selected. The options shown include card side, ribbon color descriptor, image transfer settings, defined areas legend (if specified), and single-sided or dual-sided print area images. -
Page 56: Encoding Menu Tab
Printing preferences PLT-02931, Rev. A.0 3.3 Encoding menu tab This tab contains the options for controlling the magnetic stripe encoding process. Field Definition Configuration Magnetic Encoder Setup Specifies magnetic encoder setup. Available options are: ISO (default) Custom JSII Raw Binary More Settings displays the Mag Encode window. -
Page 57: Magnetic Encoder Setup Configuration
Coercivity: Select the Coercivity option (Oersted [Oe]) for the Magnetic Stripe type for the Card Type. Super High Coercivity = 4,000 Oe High Coercivity = 2,750 Oe (HID high coercivity UltraCard IIIs are 2750 Oe) Medium Coercivity = 600 Oe Low Coercivity = 300 Oe Shift Data Left: This option shifts the recorded magnetic data to the left-hand side of the magnetic stripe on the card. -
Page 58: Iso Track Locations
Printing preferences PLT-02931, Rev. A.0 Field Description If these options are enabled, the user can specify how tracks are to be configured. All tracks Magnetic Track display the same options. Options Encoding Mode: Displays the encoding mode selected. Character Size: Sets the character data size (bits per character) used to encode the magnetic data on the currently selected track. -
Page 59: Sending Track Information
PLT-02931, Rev. A.0 Printing preferences 3.3.3 Sending track information Magnetic track data is sent in the form of text strings from the application software to the printer driver. The printer driver must be able to differentiate between magnetic track data and the rest of the printable objects, specific characters must be added to encode the magnetic data. - Page 60 Printing preferences PLT-02931, Rev. A.0 ASCII Code Character ASCII Code Character ASCII Code Character > ‘ September 2018...
-
Page 61: Test Magnetic Encoder
PLT-02931, Rev. A.0 Printing preferences 3.3.4 Test magnetic encoder Exercises the printer’s magnetic encoding functionality independent of image or application. Field Description Encode Track Data Magnetic Track Data: Track 1: Track 2: Track 3: Sentinels: Start: End: General Sample Data: Encode: Print encoding information on card: Read Track Data... -
Page 62: Test Smart Card Encoding
Printing preferences PLT-02931, Rev. A.0 3.3.5 Test smart card encoding Provides the ability to test the smart card encoder in the printer. Field Description Check SAM Firmware Compatibility Available options are: View installed technology PROX iCLASS/iCLASS SE MIFARE Contact Smart Card Seos DesFire Dock Card to Reader... - Page 63 PLT-02931, Rev. A.0 Printing preferences Field Description Select the test you wish to run. Available options are: Test Perform Reader Test Get Vendor Name Get Vendor IFD Version Get Vendor IFD Type Get Reader System Name Get Reader Friendly Name Get Reader Max Data Rate Click Run Test to perform the test.
-
Page 64: Utilities Tab
Printing preferences PLT-02931, Rev. A.0 3.4 Utilities tab This tab provides several maintenance, diagnostic, and configuration settings for your printer. Field Definition Maintenance Specifies how to clean the printer using a cleaning card. Clean Printer Calibrate Sensors Specifies how to calibrate the ribbon and film sensors. Checks, manages, and downloads updates for printer firmware and drivers. -
Page 65: Clean Printer
PLT-02931, Rev. A.0 Printing preferences 3.4.1 Clean printer Follow the instructions on the page to clean the printer. The cleaning routine begins after all current print jobs have completed. The CardPath option sends the cleaning routine to the printer. Follow the instructions on the page to clean the card path. - Page 66 Printing preferences PLT-02931, Rev. A.0 The Film Roller option sends the cleaning routine to the printer. Follow the instructions on the page to clean the film roller. September 2018...
-
Page 67: Calibrate Sensors
PLT-02931, Rev. A.0 Printing preferences 3.4.2 Calibrate sensors The Calibrate Ribbon option sends the calibrate ribbon command to the printer. Follow the instructions on the page for calibration of the ribbon sensor. The Calibrate Film option sends the calibrate film command to the printer. Follow the instructions on the page for calibration of the film sensor. -
Page 68: Update Manager
Opens a window to browse the updates folders stored on your PC or available Browse Updates Folder network. Lists available HID printers connected to your computer. Update Printer Firmware tab Firmware Update Process Describes the steps to update your printer firmware. -
Page 69: Test Print
PLT-02931, Rev. A.0 Printing preferences 3.4.4 Test print Print a sample card based on the selected settings. Field Description Front Click and drag a sample card from the left side of the screen to the card outline on the right side of the screen. -
Page 70: Self Tests
Printing preferences PLT-02931, Rev. A.0 Field Description Changes the font of the sample text on the card. This field is available when the Show Text Font option is selected. Color Changes the color of the sample text on the card. This field is available when the Show Text option is selected. - Page 71 PLT-02931, Rev. A.0 Printing preferences Field Description Shows the list of printer sensors and their default values. Sensor/Value Shows the current printer display. This window updates as the printer status changes. Printer Display Panel Mechanical Tests Lists the available mechanical tests. Raise the Printhead Lower the Printhead Home the Flipper Table...
-
Page 72: Prn Viewer
Printing preferences PLT-02931, Rev. A.0 3.4.6 PRN viewer The PRN viewer provides the ability to view a print file (PRN) as an image. You can send print files to the printer to view proper layout, determine if image defects are part of the file going to the printer, and verify the printer driver settings are the same as the PRN file. -
Page 73: Color Assist
PLT-02931, Rev. A.0 Printing preferences 3.4.7 Color assist Opens the Color Assist tab to define the RGB values to accurately depict the colors to print on your cards. Field Description Palette Resets your palette for new or future work. Reset Palette Generate Gradient Saturation Adjusts the intensity of the color. - Page 74 Printing preferences PLT-02931, Rev. A.0 Field Description Printing Select one of these options to print: Current Color Selected Swatches Current Color: Prints the currently selected color swatch. All Swatches Selected Swatches: Allows you to select multiple swatches from the visual list. All Swatches: Selects all the swatches in the visual list.
-
Page 75: Internal Printer Settings
3.4.8 Internal printer settings Use this option for adjusting the internal printer settings. These settings have been customized for the printer at the factory. These printer settings are HID advanced settings based on Electrically Erasable Programmable Read-Only Memory (EEPROM). Note: Any changes affect the settings for the firmware. - Page 76 Printing preferences PLT-02931, Rev. A.0 To change a setting, click the Edit Settings link. In the value column, change the numeric value in the row. When all updates are correct, click the Save Settings link. Setting Description Head Resistance This is factory set. If the main board or the printhead is replaced, then adjust this number.
- Page 77 PLT-02931, Rev. A.0 Printing preferences Setting Description This option is only for the built-in magnetic stripe encoder. Mag Top of Form Use this option to shift the starting point of where the printer begins encoding the magnetic track data on a magnetic stripe of the card. When adjusting this value, keep in mind that a card and its magnetic stripe always remains in the same relative position as the card travels through the printer.
- Page 78 Printing preferences PLT-02931, Rev. A.0 Setting Description Print the alignment self-test card. Transfer EOF Setting the Transfer EOF to a positive number causes the image length to grow. Setting the Transfer EOF to a negative number causes the image length to shorten. Transfer Temp Offset Both the printer and the printer software driver control the built-in transfer roller.
- Page 79 PLT-02931, Rev. A.0 Printing preferences Setting Description When printing, the position of the image on the film can vary depending on whether Film Stretch Compensation the previous film panel is used or not. Adjust this setting if the first card after an error is shifted from the rest.
- Page 80 Printing preferences PLT-02931, Rev. A.0 Setting Description Adjusts the position of the card when the flattener roller engages. Flattener TOF offset Slower PCs can have difficulty canceling all print jobs. Increase this value if all print Job Canceling Timeout Period jobs do not get canceled and instead some restart printing.
-
Page 81: Driver Defaults
PLT-02931, Rev. A.0 Printing preferences 3.4.9 Driver defaults This setting allows you to save the current settings for this printer instance as the default. The settings can be saved to a file and be applied to other printer instances of the same printer model. Field Description Save Defaults... - Page 82 Printing preferences PLT-02931, Rev. A.0 This page is intentionally left blank. September 2018...
-
Page 83: Section 4: Hid Printer Status Monitor
After installation, the Status Monitor is set to launch on start up. It can be accessed through a short cut in your startup folder or an icon in the notification area (which may be hidden). To make the HID Status Monitor icon be more visible on your PC, you can pin it to your taskbar or use the Windows settings to always show the icon on the taskbar. -
Page 84: Configuration Tab
Cancel All removes all jobs waiting in the print queue area. Saves the selected options for this printer instance. Save Save: Saves the settings that are currently set. Save And Exit: Saves the settings and closes the HID Printer Status Monitor. September 2018... -
Page 85: System Event Log Tab
PLT-02931, Rev. A.0 HID Printer Status Monitor 4.2 System event log tab This tab lists all of the printing events (error, warning, information, or password) since the last time the log has been cleared. The event log can be saved as an EVTX file that can be viewed with the Windows Event Viewer. -
Page 86: Support Tab
Opens a link to the online help file. Help About Opens a window that displays the print driver version and copyright information for the HID Status Monitor. Technical Support Opens a link to HID Technical Support to submit a technical support case. September 2018... -
Page 87: Section 5: Ethernet Option
Section 5 Ethernet option 5.1 Introduction The Ethernet option for the FARGO® HDP®6600 High Definition Card Printer/Encoder includes the Ethernet port and the internal printer server. Printer Management: The printer driver provides bi-directional status information so you can monitor and manage the printer just as you would any other networked printer. -
Page 88: Functional Specification
Ethernet option PLT-02931, Rev. A.0 Function Requirement Windows 7 (32- and 64-bit) Host computer Windows 8 / 8.1 (32- and 64-bit) Windows 10 (32- and 64-bit) Windows Server 2008 R1 (32- and 64-bit) Windows Server 2008 R2 (64-bit only) Windows Server 2012 Windows Server 2012 R2 Windows Server 2016 Host printer driver... -
Page 89: Network Services
PLT-02931, Rev. A.0 Ethernet option 5.4 Network services The Ethernet option provides the following services: Print server Web server Note: Other services include a Ping client, address assignment, and printer discovery. 5.4.1 Print server The print server provides printing services via the local area network (LAN) to the client PC (in the same way as a printer connected directly to a USB interface). -
Page 90: Home Page
Ethernet option PLT-02931, Rev. A.0 5.5.2 Home page The Home page displays general information about the printer. Field Description Printer Information Displays the unique fixed serial number of the printer. Serial Number Displays the current firmware version. Firmware Version Hardware Address Displays the unique fixed hardware address (MAC) of the printer, which is the unique Ethernet device identifier. -
Page 91: Changes To The Settings
PLT-02931, Rev. A.0 Ethernet option 5.5.3 Changes to the settings When you change any setting, you may need to confirm your administrative rights by entering the user name and password. You may also need to restart the printer to continue. Note: The windows displayed for the user name and password varies by the browser you are using. -
Page 92: Configuring The Network Settings
Ethernet option PLT-02931, Rev. A.0 5.5.4 Configuring the network settings Select the Network Settings tab. The Network Settings page displays the current network settings. Field Description Modify the network communications using the transmission control and internet protocol TCP/IP (TCP/IP) settings. Enables or disables the simple network management protocol (SNMP) and modify settings SNMP Enable or change device discovery settings. -
Page 93: Tcp/Ip Settings
PLT-02931, Rev. A.0 Ethernet option 5.5.4.1 TCP/IP settings 1. Select the TCP/IP link to display the current TCP/IP network settings. Field Description Sets either a dynamic host configuration protocol or maintains a permanently assigned IPv4 IP address for the HDP6600 card printer network parameters. Available options are: DHCP or Static. -
Page 94: Snmp Settings
Ethernet option PLT-02931, Rev. A.0 5.5.4.2 SNMP settings 1. Select the SNMP link to display the current SNMP network settings. September 2018... - Page 95 PLT-02931, Rev. A.0 Ethernet option Field Description Enable or disable simple network management protocol (SNMP). Select the version you SNMP Settings wish to use. Available options are SNMP v1/v2c and SNMP v3. Also specify the UDP Port Setting. Enter the Read Community Name and the Write Community Name for the SNMP v1/v2c SNMP v1/v2c setting.
-
Page 96: Discovery Settings
Ethernet option PLT-02931, Rev. A.0 5.5.4.3 Discovery settings 1. Select the Discovery link to display the current device discovery network settings. Field Description Turns device discovery on or off. Device Discovery 2. Make any necessary changes and click Save. Note: You may need to confirm your administrative rights by entering a valid user name and password. You may also need to restart the printer to save any changes. -
Page 97: Preferences
PLT-02931, Rev. A.0 Ethernet option 5.5.5 Preferences The Preferences can be accessed from any of the pages of the interface. Using the Preferences page, you can change your web interface log in password and your language selection. September 2018... -
Page 98: Change Password
Ethernet option PLT-02931, Rev. A.0 5.5.5.1 Change password 1. Click the Password link. The Change Web Interface Password window is displayed. 2. Enter a new password. This field is required. 3. Re-enter the new password to confirm. This field is required. 4. -
Page 99: Language Selection
PLT-02931, Rev. A.0 Ethernet option 5.5.5.2 Language selection 1. Click the Language Selection link. The Language Selection window is displayed. 2. Select a language. 3. Click Save. Note: You may need to confirm your administrative rights by entering a valid user name and password. You may also need to restart the printer to save any changes. -
Page 100: Troubleshooting
Ethernet option PLT-02931, Rev. A.0 5.6 Troubleshooting If you are having trouble connecting to your Ethernet printer or printing to it, you should go through each of the following procedures. 5.6.1 Accessing the IP address of the printer The additional printer display menus for an Ethernet-enabled printers are provided to view its IP address. Follow these procedures to access the IP address of your printer. -
Page 101: Verifying That The Pc Can Access The Printer Using The Ping Command
PLT-02931, Rev. A.0 Ethernet option 5.6.4 Verifying that the PC can access the printer using the ping command Follow these instructions to issue a ping command to the printer. 1. At a Command Prompt window, enter “ping [IP address]”: For example: C:\>ping 10.244.69.144 2. -
Page 102: Frequently Asked Questions
Ethernet option PLT-02931, Rev. A.0 5.7 Frequently asked questions Question Answer How do I know if my printer has the All printer models come with Ethernet installed as standard equipment. Ethernet option installed? What PC operating systems work Windows 7 (32- and 64-bit) with my Ethernet printer? Windows 8 / 8.1 (32- and 64-bit) Windows 10 (32- and 64-bit) - Page 103 PLT-02931, Rev. A.0 Ethernet option Question Answer How do I upgrade the printer This is done in the same way as a USB-connected printer. The PC doing the firmware in my Ethernet-enabled upgrade must have a driver installed for the printer to be upgraded. This varies by printer? the level of Microsoft Windows you are running.
- Page 104 Ethernet option PLT-02931, Rev. A.0 Question Answer How do I choose a static IP address Use the Network Settings page if you know the current IP address. for my printer? The printer also allows you to save the current network settings as static settings using the printer display menu (Network Settings >...
-
Page 105: Glossary Of Terms
PLT-02931, Rev. A.0 Ethernet option 5.8 Glossary of terms Term Definition Default gateway Specifies the address of the router (in a network using subnets) that forwards traffic to a destination outside of the subnet of the transmitting device. DHCP (Dynamic Host The protocol used by a network to automatically assign network settings to connected Configuration Protocol) devices so that they work together. - Page 106 Ethernet option PLT-02931, Rev. A.0 This page is intentionally left blank. September 2018...
-
Page 107: Section 6: Troubleshooting
You can also view the error information in the HID Status Monitor by clicking the icons on the error messages when they are displayed on your PC. These icons open the Configuration tab or the system Event Log tab of the status monitor, where you can view additional information. -
Page 108: Troubleshooting With The Printer Display Error Message Table
Troubleshooting PLT-02931, Rev. A.0 6.1.2 Troubleshooting with the printer display error message table The printer display shows the current status of the printer. Printer Display Error Message Cause Solution Film or ribbon calibration has failed. Verify the film is installed correctly Calibrate Failed and there is not a ribbon installed. - Page 109 Press Resume on the printer display to continue printing. To cancel the print, click Cancel Print from the HID Printer Status Monitor. Head Resistance The EE setting in printer driver for Enter a value for Head Resistance in head resistance is out of range.
- Page 110 Error Message No. 492 To cancel the print, press Cancel on the printer display or click Cancel Film RFID tag is bad. Print from the HID Printer Status Monitor. No Flip Module Two-sided job sent to a one-sided Using the printer display, verify the printer.
- Page 111 PLT-02931, Rev. A.0 Troubleshooting Printer Display Error Message Cause Solution Unspecified system error detected Reset the printer and try again. Reboot Required by the printer firmware. Error Message No. 430 If this problem persists, call for technical assistance. Remove Card A card is jammed in the print station Clear the jam and press Cancel.
- Page 112 Troubleshooting PLT-02931, Rev. A.0 Printer Display Error Message Cause Solution The ribbon installed in the printer Replace the ribbon in the printer with Wrong Ribbon does not match the ribbon type the type specified by the printer Error Message No. 520 selected in the printer driver.
-
Page 113: Troubleshooting The Printer Error Message Table
Cause Solution See Manual A general printer error has occurred. Press Cancel on the printer or click Cancel Print from the HID Printer Fail To Initialize Status Monitor. Card Not Found The printer is unable to find the card. Check the printer for the card or other obstruction. - Page 114 Press Resume on the printer display to continue printing. To cancel the print, press Cancel on the printer display or click Cancel Print from the HID Printer Status Monitor. The printer does not have flipping Verify the printer has flipper No Flip Module capabilities.
- Page 115 To cancel the print, press Cancel on the printer display or click Cancel Print from the HID Printer Status Monitor. A film break/jam has been detected Open the printer cover and remove Check Film inside the printer.
- Page 116 Troubleshooting PLT-02931, Rev. A.0 Printer Error Message Cause Solution A print job with magnetic encoding Ensure that encoding data is not No Mag Module was sent with no magnetic encoder being sent with the print job and installed in the printer. reprint the card.
-
Page 117: Resolving Common Errors
PLT-02931, Rev. A.0 Troubleshooting 6.2 Resolving common errors Confirm that the system meets the minimum requirements. Access and search for your Microsoft OS system requirements. https://www.support.microsoft.com Confirm the correct installation of the printer driver: Close the software program and check the printer driver. Reboot the computer. - Page 118 Troubleshooting PLT-02931, Rev. A.0 This page is intentionally left blank. September 2018...
- Page 119 PLT-02931, Rev. A.0 This page is intentionally left blank. September 2018...
- Page 120 hidglobal.com...
Need help?
Do you have a question about the FARGO HDP 6600 X002200 and is the answer not in the manual?
Questions and answers