
Related Manuals for HID Fargo DTC1250


Summary of Contents for HID Fargo DTC1250
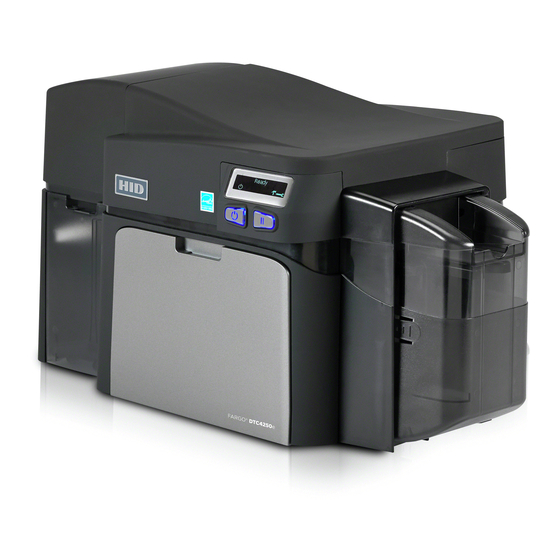
- Page 1 15370 Barranca Parkway Irvine, CA 92618 FARGO ® DTC1250e/DTC1000Me/DTC4250e Card Printer USER GUIDE PLT-01668, 1.0 October 2013 © 2013 HID Global Corporation/ASSA ABLOY AB. All rights reserved.
-
Page 2: Liability Statement
HID Global Corporation without notice. Trademarks HID GLOBAL, HID, the HID logo, DTC and FARGO are the trademarks or registered trademarks of HID Global Corporation or its licensors in the U.S. and other countries. - Page 3 Fax: 55 11 5514-7109 Tech Support 852 3160 4895 M-F 9am – 6pm GMT +8 Tech Support: 55 11 5514-7110 M-F 9am – 6pm ATC support.hidglobal.com October 2013 Page 3 © 2013 HID Global Corporation/ASSA ABLOY AB. All rights reserved.
-
Page 4: Table Of Contents
Configuration ........................31 4.4.2 Calibrate Ribbon ....................... 33 4.4.3 Clean Printer ........................34 4.4.4 Advanced Settings ......................41 Device Options ........................45 4.5.1 Supplies ..........................46 Page 4 October 2013 © 2013 HID Global Corporation/ASSA ABLOY AB. All rights reserved. - Page 5 Selecting the Fluorescent Panel Ribbon Type (DTC4250e only) ........77 8.1.1 Creating a Custom Fluorescent Image using the YMCFKO Ribbon ......... 78 8.1.2 Configuring Fluorescent Data using the Application ............78 October 2013 Page 5 © 2013 HID Global Corporation/ASSA ABLOY AB. All rights reserved.
-
Page 6: Specifications
This device complies with Part 15 of the FCC rules. Operation is subject to the following two conditions: (1) This device may not cause harmful interference. (2) This device must accept any interference received, including interference that may cause undesired operation. Page 6 October 2013 © 2013 HID Global Corporation/ASSA ABLOY AB. All rights reserved. -
Page 7: Canada
この装置は総務省の型式指定を受けています。" (総務省指定番号は第AC-xxxxx号です) 本製品は電波を使用したRFID 機器の読み取り・書き込み装置です。 そのため使用する用途・場所によっては、医療機器に影響を与える恐れがあります 1.1.6 Korea 이 기기는 업무용(A급) 전자파 적합기기로서 판매자 또는 사용자는 이 점을 주의하시길 바라며, 가정 외의 지역에서 사용하는 것을 목적으로 합니다. October 2013 Page 7 © 2013 HID Global Corporation/ASSA ABLOY AB. All rights reserved. -
Page 8: Safety Messages (Review Carefully)
This symbol warns of an electrical hazard that could result in personal injury or death. For safety purposes, do not use Ethernet for a direct connection outside of the building. Page 8 October 2013 © 2013 HID Global Corporation/ASSA ABLOY AB. All rights reserved. -
Page 9: Safety Messages - Taiwan
Safety Messages - Taiwan 繁體中文 射頻發射及安全指令 安全訊息(小心檢查) 標記 重要的安全事項說明 危險: 未按照說明安裝可能造成人員傷亡。 在可能產生潛在安全問題的地方有警示標記。 (如左圖所示)。 為了避免人員傷害,在進行有此警示標記的操作前,請先參考安全資訊提示。 為了避免人員傷害,在沒有特別說明的情況下,修理前請關掉電源開關。 小心: 此設備對靜電很敏感。如果受到靜電放電,設備會損壞。 在可能產生潛在靜電安全問題的地方有警示標記。 (如左圖所示)。 為了避免損壞設備,在進行有此警示標記的操作前,請先參考安全資訊提示。 為了避免損壞設備,在排放電路板和印刷頭聯合裝置裡面或附近的電線時,請注意觀察 所有的靜電放電設備。 為了避免損壞設備,請隨時佩戴合適的接地裝置(比如:手腕上戴一個高品質的接地手 腕帶以免受到可能的傷害)。 為了避免損壞設備,如果沒有特殊說明,在做任何修理前,請取下印表機上的色帶和卡 。 為了避免損壞設備,在使用印表機之前,請摘下戒指和手上飾品,並仔細清洗手上的油 脂。 October 2013 Page 9 © 2013 HID Global Corporation/ASSA ABLOY AB. All rights reserved. -
Page 10: Safety Messages - China
Use only at altitudes not more than 2000m above sea level. 仅适用于非热带气候条件下安全使用 环境保护(中国-RoHS) 环保使用期是基于本产品用于办公环境。 Environmental Protection Use Period is based on the product being used in an office environment. Page 10 October 2013 © 2013 HID Global Corporation/ASSA ABLOY AB. All rights reserved. -
Page 11: Technical Specifications
CR-80 edge-to-edge (3.36"L x 2.11"W/85.3mmL x 53.7mmW) Card Sizes • CR-79 (3.3”L x 2.04”W/83.8mmL x 51.8mmW) Accepted Card .009” - .040” / 9 mil – 40 mil/.229mm – 1.016mm Thickness October 2013 Page 11 © 2013 HID Global Corporation/ASSA ABLOY AB. All rights reserved. - Page 12 1/2/3/4 memory and microprocessor smart cards (T=0, T=1) as well as synchronous cards • ISO Magnetic Stripe Encoding, dual high- and low-coercivity, Tracks 1,2 and 3 Page 12 October 2013 © 2013 HID Global Corporation/ASSA ABLOY AB. All rights reserved.
-
Page 13: Functional Specifications
= Dye-Sublimation Yellow Panel = Dye-Sublimation Magenta Panel = Dye-Sublimation Cyan Panel = Resin Black Panel (Premium unless otherwise stated) = Clear Protective Overlay Panel = Fluorescing Panel October 2013 Page 13 © 2013 HID Global Corporation/ASSA ABLOY AB. All rights reserved. -
Page 14: Printer Components: Blank Cards
Certain types of smart card chips are raised slightly above the cards surface which also results in poor color transfer. UltraCard™ The UltraCard™ product line, available exclusively as part of HID's Global's Brand Cards FARGObrand secure card issuance solutions, has a long standing reputation among dealers and end-Users for consistent quality in construction. -
Page 15: Setup And Installation Procedures
Check that the following items are included: • Power Supply • US/EU Power Cable USB cable (2.0) • • Software Installation CD • Card Printer User Guide • Warranty Statement, Compliancy Document October 2013 Page 15 © 2013 HID Global Corporation/ASSA ABLOY AB. All rights reserved. -
Page 16: Installing The Print Ribbon Cartridge
(O) is provided because resin images do not require the protection of an overlay. 2.2.1.1 Installing the Ribbon Step Procedure Insert the Print Ribbon Cartridge into the Printer. DTC1250e/DTC1000Me DTC4250e with Flipper Module Page 16 October 2013 © 2013 HID Global Corporation/ASSA ABLOY AB. All rights reserved. - Page 17 DTC1250e/DTC1000Me/DTC4250e Card Printer User Guide, PLT-01668, 1.0 Step Procedure Close the Front Cover. DTC1250e/DTC1000Me DTC4250e with Flipper Module October 2013 Page 17 © 2013 HID Global Corporation/ASSA ABLOY AB. All rights reserved.
-
Page 18: Installing Blank Cards Into The Input Card Hopper
To print using single feed, remove all cards from the input card hopper, leave its door closed. Place a card in the single feed card slot (which can be used repeatedly). Open the input card hopper door. Page 18 October 2013 © 2013 HID Global Corporation/ASSA ABLOY AB. All rights reserved. - Page 19 If using cards with a magnetic stripe, the magnetic stripe should be loaded with the stripe up and to the front of the Printer. Close the input card hopper door to release the lever to the printing position. October 2013 Page 19 © 2013 HID Global Corporation/ASSA ABLOY AB. All rights reserved.
-
Page 20: Setting The Card Size For Cr-79 And Cr-80
Follow this procedure in the printer and in the printer driver to setup the card size. Step Procedure Open the front door and locate the slide bar. Page 20 October 2013 © 2013 HID Global Corporation/ASSA ABLOY AB. All rights reserved. - Page 21 DTC1250e/DTC1000Me/DTC4250e Card Printer User Guide, PLT-01668, 1.0 Step Procedure If using the CR-79 card, push the slide bar to the LEFT. October 2013 Page 21 © 2013 HID Global Corporation/ASSA ABLOY AB. All rights reserved.
- Page 22 DTC1250e/DTC1000Me/DTC4250e Card Printer User Guide, PLT-01668, 1.0 Step Procedure If using the CR-80 card, push the slide bar to the RIGHT. Page 22 October 2013 © 2013 HID Global Corporation/ASSA ABLOY AB. All rights reserved.
- Page 23 DTC1250e/DTC1000Me/DTC4250e Card Printer User Guide, PLT-01668, 1.0 Step Procedure From the Driver Printing Preferences, select the correct card size. October 2013 Page 23 © 2013 HID Global Corporation/ASSA ABLOY AB. All rights reserved.
-
Page 24: Connecting The Printer Power
Press the printer’s power button to power on the printer. Note: The printer powers down during the ‘sleep time’ but automatically powers up when a print job is sent. Page 24 October 2013 © 2013 HID Global Corporation/ASSA ABLOY AB. All rights reserved. -
Page 25: Print Driver Installation
If this selection is not accessible, this is because the HID EEM Driver that Swift ID uses to connect via a USB connection has not been installed. • This driver can be found on the installation CD or it can be downloaded from the HID Global support page. •... -
Page 26: Swift Id Installation Instructions
Note: When this box is checked, the Ethernet connection (if applicable) on the printer is disabled. If this flag or selection is not accessible, the HID USB driver (that Swift ID uses to connect via a USB connection) has not been installed. -
Page 27: Installing Swift Id
Perform this procedure for a printer installed on a network. Step Procedure Connect the printer to the network. Find the IP Address for a DTC4250E by navigating through the printer display. October 2013 Page 27 © 2013 HID Global Corporation/ASSA ABLOY AB. All rights reserved. -
Page 28: Printer Connected Via Usb Connection
Follow the on-screen instructions during the Printer Driver installation process to install all the required components to access Swift ID via a USB connection. Note: The HID EEM Driver installs. A shortcut appears on the desktop, which allows you to easily launch the application. -
Page 29: Uninstalling Swift Id
3.1.3.4 Additional Swift ID Rules The following apply when (a) the HID EEM driver for Swift ID is installed on the PC for a printer and (b) a second printer with the EEM flag enabled is connected to the PC: •... -
Page 30: Printer Preferences
Print Width – Displays width dimension of the card. • Print Length – Displays length dimension of the card. • Card Thickness (mil) – Select the card thickness in mils. Page 30 October 2013 © 2013 HID Global Corporation/ASSA ABLOY AB. All rights reserved. -
Page 31: Orientation
4.4.1 Configuration This option is used to show the currently installed Optional Printer features, Event Monitoring, to set the Printer Driver language and Printer Display language. October 2013 Page 31 © 2013 HID Global Corporation/ASSA ABLOY AB. All rights reserved. -
Page 32: Set Language
DTC1250e/DTC1000Me/DTC4250e Card Printer User Guide, PLT-01668, 1.0 4.4.1.1 Set Language To switch between languages, select the preferred language, select OK twice and then open the driver in the preferred language. Page 32 October 2013 © 2013 HID Global Corporation/ASSA ABLOY AB. All rights reserved. -
Page 33: Calibrate Ribbon
The Calibrate button sends the Calibrate Ribbon command to printer. Follow the procedure below to setup the printer. Step Procedure Remove the ribbon cartridge from the printer. Close the printer’s front cover. Select the Calibrate Ribbon tab. Click Calibrate. October 2013 Page 33 © 2013 HID Global Corporation/ASSA ABLOY AB. All rights reserved. -
Page 34: Clean Printer
The button for the Clean Printer tab is described below. • Clean Button: Launches the cleaning routine. Follow the instruction on the page for setting up the Printer. Page 34 October 2013 © 2013 HID Global Corporation/ASSA ABLOY AB. All rights reserved. - Page 35 To prevent equipment or media damage, take jewelry off of fingers and hands, as well as thoroughly clean hands to remove oil and debris before working on the Printer. October 2013 Page 35 © 2013 HID Global Corporation/ASSA ABLOY AB. All rights reserved.
-
Page 36: Cleaning Kit
Ten (10) Cleaning Cards are provided with adhesive backing for cleaning your printer’s platen and card feed rollers. Page 36 October 2013 © 2013 HID Global Corporation/ASSA ABLOY AB. All rights reserved. -
Page 37: Printhead Cleaning
Open the Printhead Cleaning Swabs. Break it to moisten the tip. Swab the tip back and forth across the top of the printhead. Allow to dry thoroughly before sending a print job. October 2013 Page 37 © 2013 HID Global Corporation/ASSA ABLOY AB. All rights reserved. - Page 38 From your computer, open the printer driver and select Printing Preferences. Page 38 October 2013 © 2013 HID Global Corporation/ASSA ABLOY AB. All rights reserved.
- Page 39 DTC1250e/DTC1000Me/DTC4250e Card Printer User Guide, PLT-01668, 1.0 Step Procedure Click Toolbox. October 2013 Page 39 © 2013 HID Global Corporation/ASSA ABLOY AB. All rights reserved.
- Page 40 The printer pulls in the cleaning card. The printer performs the automated cleaning procedure. • This procedure is designed to thoroughly clean the platen and the card feed rollers inside the printer. Page 40 October 2013 © 2013 HID Global Corporation/ASSA ABLOY AB. All rights reserved.
-
Page 41: Advanced Settings
Enable Swift ID over a USB connection: Check this box to use Swift ID when your printer is • connected using USB. • Enable Mag Verify: Check this box to verify that the data is written to the tracks correctly. October 2013 Page 41 © 2013 HID Global Corporation/ASSA ABLOY AB. All rights reserved. - Page 42 Sleep Time The Sleep Time setting adjusts the number of minutes of inactivity before the Printer enters a low power sleep state. Page 42 October 2013 © 2013 HID Global Corporation/ASSA ABLOY AB. All rights reserved.
- Page 43 Note: Write Heat Offset provides user capability to control the printhead heat level when the Write Operation is performed. Appropriate heat levels should be applied for the proper writing process. October 2013 Page 43 © 2013 HID Global Corporation/ASSA ABLOY AB. All rights reserved.
- Page 44 Overlay Heat Adjust Adjusts the input queue for use with thick cards. 10 Mil Card Queue Offset Adjusts the speed of the erasure process. Erase Speed Page 44 October 2013 © 2013 HID Global Corporation/ASSA ABLOY AB. All rights reserved.
-
Page 45: Device Options
Ethernet connection (if applicable) on the connection printer will not be operational. • If the USB selection is not be accessible, the HID EEM driver that Swift ID uses to connect via a USB connection has not been installed. •... -
Page 46: Supplies
Disable Printing – Click to prevent the printer from printing. • Invert F-panel Image – Click to change the portion of an image that is printed using a fluorescent film panel. Page 46 October 2013 © 2013 HID Global Corporation/ASSA ABLOY AB. All rights reserved. -
Page 47: Image Color
Image Color Use the Image Color tab to improve the quality of the image on the card. Image Color includes two areas, Image Quality and Heat. October 2013 Page 47 © 2013 HID Global Corporation/ASSA ABLOY AB. All rights reserved. -
Page 48: Image Quality
Overlay Heat (O) – Move the slider to the left to use less heat in the printing process. Move the slider to the right to use more heat. 4.9.3 Default Click the Default button to return all options to their factory settings. Page 48 October 2013 © 2013 HID Global Corporation/ASSA ABLOY AB. All rights reserved. - Page 49 Cyan Balance – Move the slider to the right to increase the amount of yellow in the cyan. Move the slider to the left to decrease the amount of cyan. Click the Default button to return all options to their factory settings. October 2013 Page 49 © 2013 HID Global Corporation/ASSA ABLOY AB. All rights reserved.
-
Page 50: Image Calibrate
Horizontal – Use the Horizontal adjustment to move the image toward the card output side of the • printer, if the adjustment is a positive number. Enter a negative number to move the image toward the input side of the printer. Page 50 October 2013 © 2013 HID Global Corporation/ASSA ABLOY AB. All rights reserved. -
Page 51: Magnetic Encoding
The Magnetic Encoding tab includes two areas, Encoding Options and Magnetic Track Options. 4.11.1 Encoding Options Two encoding modes are available, ISO Encoding and Custom Encoding or Raw Binary Encoding Mode. October 2013 Page 51 © 2013 HID Global Corporation/ASSA ABLOY AB. All rights reserved. - Page 52 This is useful in situations the recorded magnetic that require cards to be data to the left-hand side readable with insert type of the card's Magnetic readers. Stripe. Page 52 October 2013 © 2013 HID Global Corporation/ASSA ABLOY AB. All rights reserved.
- Page 53 Character Parity to none. the Character Parity to Odd Parity. Select Even Parity to change the Note: This is the default for all Character Parity to Even Parity. tracks. October 2013 Page 53 © 2013 HID Global Corporation/ASSA ABLOY AB. All rights reserved.
-
Page 54: Magnetic Track Options
Separator Characters ASCII 32-95 Track 1 (See the table below.) ASCII 48-63 Track 2 (See the table below.) ASCII 48-63 Track 3 (See the table below.) Page 54 October 2013 © 2013 HID Global Corporation/ASSA ABLOY AB. All rights reserved. - Page 55 When segmenting track data, the appropriate Field Separator (FS) must be used. The table below shows the SS, ES, FS and the valid characters defined for each track. October 2013 Page 55 © 2013 HID Global Corporation/ASSA ABLOY AB. All rights reserved.
- Page 56 DTC1250e/DTC1000Me/DTC4250e Card Printer User Guide, PLT-01668, 1.0 Reviewing the ASCII Code and Character Table ASCII Code Character ASCII Code Character ASCII Code Character space < > Page 56 October 2013 © 2013 HID Global Corporation/ASSA ABLOY AB. All rights reserved.
-
Page 57: Overlay / Print Area
Omit Mag Strip Area – Select this option to overlay and/or print only in the space outside the standard location of an ISO-standard magnetic stripe. October 2013 Page 57 © 2013 HID Global Corporation/ASSA ABLOY AB. All rights reserved. - Page 58 DTC1250e/DTC1000Me/DTC4250e Card Printer User Guide, PLT-01668, 1.0 Omit Signature Area – Select this option to overlay and/or print only in the space outside the standard location of a signature panel. Page 58 October 2013 © 2013 HID Global Corporation/ASSA ABLOY AB. All rights reserved.
- Page 59 DTC1250e/DTC1000Me/DTC4250e Card Printer User Guide, PLT-01668, 1.0 3. When you select an option, a default blacked area appears on the card design area grid. October 2013 Page 59 © 2013 HID Global Corporation/ASSA ABLOY AB. All rights reserved.
- Page 60 4. Click and drag to enlarge the area and move it to the preferred location on the card. The size and coordinates of the area update in the number fields using the units you specify, inches or mm. Page 60 October 2013 © 2013 HID Global Corporation/ASSA ABLOY AB. All rights reserved.
-
Page 61: Security Options
D – Lower Right • Portrait designs offer: E – Upper Left F – Upper Right G – Lower Left • HoloMark – Use this option for hologram security. October 2013 Page 61 © 2013 HID Global Corporation/ASSA ABLOY AB. All rights reserved. -
Page 62: K Panel Resin
Select Print YMC under K to print all black in the designated areas with the yellow (Y), magenta (M) and cyan (C) ribbon panels directly beneath the resin black (K) panel. Theis combination provides a gradual transition between the resin black text or bar code. Page 62 October 2013 © 2013 HID Global Corporation/ASSA ABLOY AB. All rights reserved. -
Page 63: Printer Info
Use the options on this tab to view information about the medias installed on the printer: • Ribbon • Card Count • Printer Serial # • Firmware Version • Reorder Number October 2013 Page 63 © 2013 HID Global Corporation/ASSA ABLOY AB. All rights reserved. -
Page 64: System Overview - Troubleshooting
Either the card is ejected from the singled-sided printer or the card feed stepper engages to queue the card for the flipper table for the dual-sided printer. All stop. Page 64 October 2013 © 2013 HID Global Corporation/ASSA ABLOY AB. All rights reserved. -
Page 65: Troubleshooting
DTC4250E: If a language (other than English) is currently selected, you can press and hold the Pause ( ) button during the power-up sequence to change the language back to English. October 2013 Page 65 © 2013 HID Global Corporation/ASSA ABLOY AB. All rights reserved. -
Page 66: Error Message Table
Check for card slippage. If necessary, run the Printer cleaning routine. • Verify that your cards are within the accepted card size range. • Verify the cards are not sticking together. Page 66 October 2013 © 2013 HID Global Corporation/ASSA ABLOY AB. All rights reserved. -
Page 67: Troubleshooting With The Error Message Table
Default button to reset these # 40 numbers. Reset the printer and try again. If this EEPROM Corrupt problem persists, call for technical EEPROM Read Error assistance. October 2013 Page 67 © 2013 HID Global Corporation/ASSA ABLOY AB. All rights reserved. - Page 68 A card is jammed magnetic station Clear any cards in the magnetic station # 82 Mag Jam using the buttons to move the card out. Press the Pause button to continue. Page 68 October 2013 © 2013 HID Global Corporation/ASSA ABLOY AB. All rights reserved.
- Page 69 A card is jammed in the print station or Clear the jam. Press the Pause button # 110 card flipping area of the printer. to continue. Card Jam/Align error October 2013 Page 69 © 2013 HID Global Corporation/ASSA ABLOY AB. All rights reserved.
- Page 70 Printer is not configured with this sent with the print job and reprint the Encoder not installed Encoder type. card. iCLASS,Prox,Mifare,SmartCard Install an encoding module. Page 70 October 2013 © 2013 HID Global Corporation/ASSA ABLOY AB. All rights reserved.
-
Page 71: Printer-Specific Tools (Dtc1250E, Dtc4250E)
This icon is only displayed for printers with an attached dual-input card hopper and indicates that the bottom input hopper is currently selected. October 2013 Page 71 © 2013 HID Global Corporation/ASSA ABLOY AB. All rights reserved. -
Page 72: Additional Printer Specific Tools
Select this to print a RESIN test card. Rewritable: Select this to ERASE the Rewritable card. Magnetic: Select this to test Magnetic encoding. (Hi-Co only) Lamination: Select this to laminate a test card. Page 72 October 2013 © 2013 HID Global Corporation/ASSA ABLOY AB. All rights reserved. - Page 73 Select this to configure network options. Language Language: Select this choice to change the Printer Displayed Language. Exit Exit: Select this choice to exit the Printer Tool options. October 2013 Page 73 © 2013 HID Global Corporation/ASSA ABLOY AB. All rights reserved.
-
Page 74: Firmware Upgrades
Open the FARGO Workbench Printer Utility or use the Diagnostics button from the Card tab of the Printing Preference page. Note: Workbench is also available from the FARGO Folder in the Windows Program folder. Page 74 October 2013 © 2013 HID Global Corporation/ASSA ABLOY AB. All rights reserved. - Page 75 Click Upgrade to start the upgrade process. The LOADING FIRMWARE message displays while the Firmware is updating. Reboot the printer if it does not reboot automatically. October 2013 Page 75 © 2013 HID Global Corporation/ASSA ABLOY AB. All rights reserved.
-
Page 76: Technical Support
DTC1250e/DTC1000Me/DTC4250e Card Printer User Guide, PLT-01668, 1.0 Technical Support This section provides you with an efficient, step-by-step procedure to be used when contacting HID GLOBAL Technical Support, as needed, for this card printer. Step Procedure Contact the HID Global Technical Support Group by phone at (866)607-7339 Ext #6 or by fax at (952) 946-8492 for additional technical assistance. -
Page 77: Appendix A
By default, the dark areas of the image fluoresce on the card. Lighter or white areas have no dye applied. October 2013 Page 77 © 2013 HID Global Corporation/ASSA ABLOY AB. All rights reserved. -
Page 78: Creating A Custom Fluorescent Image Using The Ymcfko Ribbon
Note: You can now print a unique fluorescent image, such as the card holder’s picture on each card. • Asure ID Method: This method is described in the Asure ID Software User Guide. See the procedure relating to the Fluorescent Panel Ribbon. For more information about , please visit the HID Global support website. •... - Page 79 BMP Image located at c:\globe.bmp Set the Ribbon for YMCFKO in the Printing Preferences. Note: The Automatically detect the installed Ribbon for every print job button may also be used. October 2013 Page 79 © 2013 HID Global Corporation/ASSA ABLOY AB. All rights reserved.
- Page 80 By default, the dark areas of the image will fluoresce on the card and the lighter or white areas will have no dye applied. Note: This may improve the look of the person’s image if used for the Logo. Page 80 October 2013 © 2013 HID Global Corporation/ASSA ABLOY AB. All rights reserved.
Need help?
Do you have a question about the Fargo DTC1250 and is the answer not in the manual?
Questions and answers
Hello, how can you open the top of the DTC 1250e to see the printer head?