
Related Manuals for HID FARGO C50


Summary of Contents for HID FARGO C50
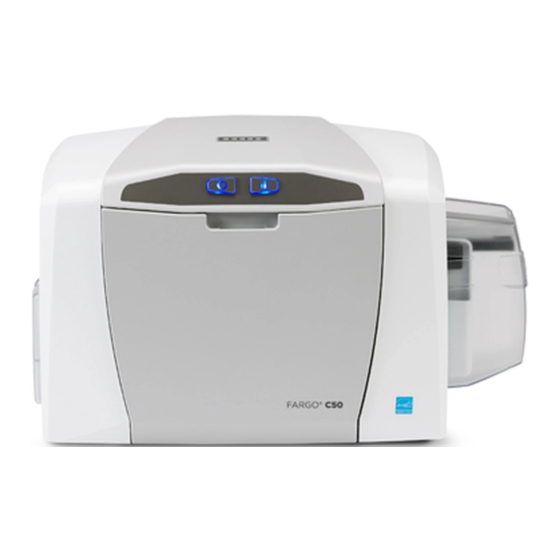
- Page 1 FARGO® C50 Card Printer User Guide PLT-01277 Version: 1.2 November 2014 hidglobal.com...
- Page 2 This document may not be reproduced, disseminated or republished in any form without the prior written permission of HID Global Corporation. Trademarks HID GLOBAL, HID, the HID logo, and FARGO are the trademarks or registered trademarks of HID Global Corporation, or its licensors, in the U.S. and other countries. Contacts For additional offices around the world, see corporate offices.
-
Page 3: Table Of Contents
Contents Chapter 1: Introduction and Specifications ..........1-1 Using this Document . - Page 4 Page iv Overlay / Print Area Tab............3-12 3.6.1 Defining an Overlay or Print Area .
-
Page 5: Chapter 1: Introduction And Specifications
Chapter Introduction and Specifications FARGO C50 Card Printer User Guide At a Glance This User Guide covers the information required to setup, install, and configure the printer driver options. The following topics are covered in this User Guide: Chapter 1: Introduction and Specifications... -
Page 6: Specifications
Introduction and Specifications Page 1-2 Specifications This section provides specific information on the Regulatory Compliances, Agency Listings, Technical Specifications and Functional Specifications for the C50 Card Printer. 1.2.1 Regulatory Compliance The Card Printer is listed under UL 60950-1 (2 edition) Information Technology Equipment File Number: E145118 Note: This product is intended to be supplied by a Listed Power Unit marked Class 2... -
Page 7: United States
Page 1-3 Introduction and Specifications 1.2.1.2 United States This device complies with Part 15 of the FCC rules. Operation is subject to the following two conditions: This device may not cause harmful interference. 2. This device must accept any interference received, including interference that may cause undesired operation. -
Page 8: Safety Messages
Introduction and Specifications Page 1-4 Safety Messages 1.3.1 Safety Messages - United States Symbol Critical Instructions for Safety Purposes Failure to follow these guidelines results in personal injury or death. Danger: To prevent personal injury or death: • Reference the following safety messages before performing an operation. •... -
Page 9: Safety Messages - French
Page 1-5 Introduction and Specifications 1.3.2 Safety Messages - French Symbole Instructions critiques visant la Sécurité Si ces directives ne sont pas suivies les résultats peuvent être des lésions corporelles ou la mort. Danger: Pour éviter des lésions corporelles ou la mort: •... -
Page 10: Safety Messages - Taiwan
Introduction and Specifications Page 1-6 1.3.3 Safety Messages - Taiwan PLT-01277, Version: 1.2 November 2014... -
Page 11: Safety Messages - China
Page 1-7 Introduction and Specifications 1.3.4 Safety Messages - China Use only at altitudes not more than 2000m above sea level. Environmental Protection Use Period is based on the product being used in an office environment. November 2014 PLT-01277, Version: 1.2... -
Page 12: Technical Specifications
Introduction and Specifications Page 1-8 Technical Specifications Term Function Dye Sublimation / Resin Thermal Transfer Print Method 300 dpi (11.8 dots/mm); continuous tone Print resolution Up to 16.7 million colors / 256 shades per pixel Colors • Full-color with resin black and overlay panel, YMCKO*, 250 prints •... - Page 13 Page 1-9 Introduction and Specifications Term Function 65° F to 80° F (18° C to 27°C) Operating Temperature 20-80% non-condensing Humidity 8.8 in. H x 13.7 in. W x 7.9 in. D (224mm H x 348mm W x 201mm D) Dimensions Weight 7.5 lbs.
-
Page 14: Functional Specifications
Introduction and Specifications Page 1-10 Functional Specifications This card printer utilizes two different, yet closely related printing technologies to achieve its remarkable direct-to-card print quality for dye-sublimation and resin thermal transfer. Printer Components - Print Ribbons Print ribbons are available in several versions to meet a variety of requirements: •... -
Page 15: Printer Components - Blank Cards
Some types of smart card chips are raised slightly above the card’s surface, which also results in poor color transfer. The UltraCard product line, available exclusively as part of HID Global's Fargo brand secure card issuance solutions, has a long standing reputation among dealers and end-users for consistent quality in construction. - Page 16 Introduction and Specifications Page 1-12 This page intentionally left blank. PLT-01277, Version: 1.2 November 2014...
-
Page 17: Chapter 2: Hardware User Interface
Chapter Hardware User Interface The Card Printer has two hardware user-interface features: buttons and beeps. Card Printer Buttons Card Printer Buttons The card printer has two buttons that perform multiple functions. The light color of the buttons is blue, except when there is an error condition, which will be indicated in red. Pause/Resume Power 2.1.1... -
Page 18: Card Printer Beeps
Hardware User Interface Page 2-2 2.1.3 Card Printer Beeps The card printer beeps to indicate the successful completion of a setting or activity. A single beep generally indicates a successful change. One or more beeps signals the restoration of default values for settings on the Advanced ... -
Page 19: Chapter 3: Printer Preferences
Chapter Printer Preferences This section provides an overview of the Printing Preferences tabs. There are some common buttons displayed on all screens: Button Description Closes the dialog box and saves the driver configuration changes since the dialog box opened. Closes the dialog box and discards configuration changes made since the dialog box Cancel opened. -
Page 20: Card Tab
Printer Preferences Page 3-2 Card Tab The Card tab has the options for the card type and positions, as well as access to diagnostics and calibrations. Note: Never run cards with a contaminated, dull or uneven surface through the printer. Printing onto such cards will ultimately lead to poor print quality. - Page 21 Page 3-3 Printer Preferences Group or Field Description Select the Card Size option: CR-80: This is the default card size selection for the Card Printer with a print area 53.6mm x 85.5mm x 30mil (3.375 in. x 2.125 in. x 30 mil). CR-79: Use this selection to print to cards with a print area 53.6mm X 85.5mm X 30 mil (2.110 in.
-
Page 22: Device Options Tab
Printer Preferences Page 3-4 Device Options Tab The Device Options tab has the ribbon options as well as image printing position on the card. Group or Field Description Supplies Automatically detect the installed ribbon for every print job The printer driver automatically detects the installed ribbon. To manually select the ribbon type, clear the checkbox option and select the ribbon from the Ribbon Type drop-down menu. -
Page 23: Write Only
Page 3-5 Printer Preferences Group or Field Description Select the ribbon type that is loaded in the printer. • YMCKO: Yellow, Magenta, Cyan, Resin Black, Overlay • YMCKOK: Yellow, Magenta, Cyan, Resin Black (2 Panels), Overlay Ribbon Type • K: Black Standard Resin •... - Page 24 Printer Preferences Page 3-6 3.2.1 Write Only Select this option to use rewritable cards. The default setup is for the printer to first erase the entire card then write new information on the card. There is no option to select specific areas to erase. To print or erase a section, use the Overlay/Print Area tab.
-
Page 25: Image Color Tab
Page 3-7 Printer Preferences Image Color Tab The Image Color tab has the options for adjusting the color printed onto the card. November 2014 PLT-01277, Version: 1.2... - Page 26 Printer Preferences Page 3-8 Group or Field Description Image Quality Select one of the following options from the drop-down menu. None: • If interested in print speed rather than print color • If color correcting an image that has been previously printed •...
- Page 27 Page 3-9 Printer Preferences Group or Field Description Adjust the sliders as needed to improve image quality. • Move the slide to the left (-) for less sharpness / contrast / gamma / color. • Move the slide to the right (+) for more sharpness / contrast / gamma / color. Click OK to accept any variance from the default values and return to the Image Color tab window.
-
Page 28: Image Calibrate Tab
Printer Preferences Page 3-10 Image Calibrate Tab The Image Calibrate tab has the adjustments to the image position on the card. Group or Field Description Image Position Adjust the image position values by clicking the arrow buttons next to the Vertical and Horizontal fields. These values ensure that the cards always remain in the same position as they travel through the printer (regardless of image orientation). -
Page 29: Magnetic Encoding Tab
Page 3-11 Printer Preferences Use the Vertical adjustment to move the image toward the top or bottom of the card. • A positive number moves the image toward the top. Vertical • A negative number moves the image toward the bottom. The maximum value for the Vertical adjustments is ±100 Pixels (10 Pixels = 0.03inches (.8mm). -
Page 30: Overlay / Print Area Tab
Printer Preferences Page 3-12 Overlay / Print Area Tab The Overlay / Print Area tab contains the options to control and customize where the overlay (O) panel and/or the print area appear on the card. By default, this option is set to print and overlay the entire card. - Page 31 Page 3-13 Printer Preferences Group or Field Description To define an overlay or print area, select that option in the overlay / print field. • Full Card: Select this option to overlay and/or print the entire card. • Defined Area(s): Select this option to overlay and/or print only in the selected and defined area(s).
-
Page 32: Defining An Overlay Or Print Area
Printer Preferences Page 3-14 3.6.1 Defining an Overlay or Print Area To define an overlay or print area: 1. Click the drop-down list in the Overlay / Print Area field and select the option. 2. When an option is selected, a default black area displays on the card design area grid. 3. -
Page 33: Defining Additional Areas
Page 3-15 Printer Preferences 3.6.2 Defining additional areas 1. After the first area is defined, select 2 in the Defined Areas spin box. 2. The second area begins again at the 0,0 location. 3. Click and drag to enlarge the area and move it to the preferred location on the card. 4. -
Page 34: Visual Security Solutions
Printer Preferences Page 3-16 3.6.4 Visual Security Solutions This field presents options based on the orientation of the card in the template. Landscape designs offer A – Upper Left B – Upper Right C – Lower Left D –... -
Page 35: K-Panel Resin Tab
Page 3-17 Printer Preferences K-Panel Resin Tab The K-Panel Resin tab contains the controls for indicating the position where the resin black (K) panel of a full-color ribbon is printed. If a ribbon without a resin black panel is installed in the printer, these options are grayed out and unavailable. - Page 36 Printer Preferences Page 3-18 Group or Field Description Select this option to overlay and/or print only in the selected and defined area(s). Defined Area(s) Select this option to overlay and/or print in the space outside the selected and Undefined defined area. Area(s) Select “Print YMC under K”...
-
Page 37: Printer Info Tab
Page 3-19 Printer Preferences Printer Info Tab The Printer Info tab contains the supply information about the medias installed on the printer: Ribbon Type Reorder Number Card Count Printer Serial # Firmware Version Note: Graphic for information ONLY. DO NOT use to order supplies. November 2014 PLT-01277, Version: 1.2... - Page 38 Printer Preferences Page 3-20 PLT-01277, Version: 1.2 November 2014...
-
Page 39: Chapter 4: Toolbox
Chapter ToolBox This section provides an overview of the ToolBox tabs. There are some common buttons displayed on screens: Button Description Closes the dialog box and saves the driver configuration changes since the dialog box opened. Closes the dialog box and discards configuration changes made since the dialog box Cancel opened. -
Page 40: Configuration Tab
ToolBox Page 4-2 Configuration Tab The Configuration tab has two sections: Event Monitoring and Set Language. Group or Field Description Event Monitoring This section selects events that result in notification or displays prompt for the user. The default setting is to monitor four conditions: Notifies the user that the amount of ribbon remaining for use in the cartridge is diminishing. - Page 41 Page 4-3 ToolBox Group or Field Description Notifies the user the printer requires cleaning and provides a Clean button to start the cleaning process. Note: The printer cleaning notification dialog displays when 3000 cards have Clean Printer been printed. The number of cards can be changed on the Advanced Settings tab.
-
Page 42: Calibrate Ribbon Tab
ToolBox Page 4-4 Calibrate Ribbon Tab The Calibrate Ribbon tab enables the user to start the ribbon calibration. Follow the directions on the screen to perform this procedure. PLT-01277, Version: 1.2 November 2014... -
Page 43: Clean Printer Tab
Page 4-5 ToolBox Clean Printer Tab The Clean Printer tab has the instructions to clean the printer. Additional cleaning can be done as needed. See Chapter 6: Cleaning. November 2014 PLT-01277, Version: 1.2... -
Page 44: Advanced Settings Tab
ToolBox Page 4-6 Advanced Settings Tab The Advanced Settings tab contain the adjustments for the internal printer settings. Adjustment is typically required in connection with troubleshooting. Customize the settings for each printer and save the settings within the printer memory. CAUTION: In general, do not adjust these settings. -
Page 45: Settings And Troubleshooting
Page 4-7 ToolBox Group or Field Description This option applies the changed values. Change the current value by clicking the field Apply to activate the control, enter the new value, and click Apply or OK to apply the change. The change to the firmware value is confirmed by one beep from the printer. This option restores all factory default values. - Page 46 ToolBox Page 4-8 Setting Description Troubleshooting Adjusts the number of cards The default value is 3000. To increase the frequency of printed before the printer cleaning, lower the value. Cleaning Rate displays a message to Note: The card count on the Printer Info tab does not indicate cleaning is needed.
-
Page 47: Chapter 5: Troubleshooting
Chapter Troubleshooting The purpose of this section is to provide the user with specific procedures for recovering the printer from an error condition. If problems are encountered beyond the situations described below, contact support.hidglobal.com. Communications Errors Symptom(s): Incorrect output, communications error on PC, stalling, no response from Printer or no job printed. -
Page 48: Error And Status Messages
Troubleshooting Page 5-2 5.1.1 Error and Status Messages Error Message Description Troubleshooting A card is not successfully Press the Power button repeatedly to move the card toward Card Eject Error ejected from the printer. the output hopper. Card Hopper No cards are loaded in the Place cards in the input hopper. - Page 49 Page 5-3 Troubleshooting Error Message Description Troubleshooting 1. Open the cover and check for a ribbon cartridge. If no No ribbon is installed. cartridge is present, install a ribbon and close the cover. 2. If a ribbon cartridge is present, remove the cartridge and The ribbon is jammed in verify the ribbon can move freely and is not upside-down No Ribbon...
- Page 50 Troubleshooting Page 5-4 Error Message Description Troubleshooting 1. Click OK. The Supply 2. Click Device Options. The printer driver does not information is 3. Clear the Automatically detect the installed Ribbon for automatically detect the unavailable at every print job check box. ribbon type.
-
Page 51: Chapter 6: Cleaning
Chapter Cleaning Important: Clean the printer on a regular basis to ensure that the printer consistently produces high quality output. WARNING: Disconnect the printer's power cord whenever performing any type of maintenance procedure unless otherwise directed. AVERTISSEMENT: Débranchez le cordon d'alimentation de l'imprimante à chaque fois d'effectuer tout type de procédure de maintenance, sauf indication contraire. -
Page 52: Cleaning The Printer
Cleaning Page 6-2 Cleaning the Printer 6.2.1 Cleaning Inside the Printer Open the cover. 2. Remove the ribbon cartridge from the printer. 3. With compressed air, blow out all visible areas of the printer interior to remove debris. Note: If there is not a can of compressed air, use a cleaning pad from the printer cleaning kit to wipe out all visible areas inside the printer. - Page 53 Page 6-3 Cleaning Remove watches, rings, bracelets and other jewelry. 2. Unplug the power cord from the electrical outlet. 3. Open the cover and remove the ribbon cartridge. 4. Use an alcohol swab (squeeze to saturate the tip) from the printer cleaning kit to firmly wipe back and forth across the surface of the printhead.
- Page 54 Cleaning Page 6-4 This page intentionally left blank. PLT-01277, Version: 1.2 November 2014...
-
Page 55: Chapter 7: Firmware Updates
Chapter Firmware Updates New firmware releases provide enhancements, such as improved reliability, added features or better print quality. Updates are available for download from the Internet at support.hidglobal.com. Refer to the Workbench Printer Utility User Guide to download and install firmware updates. Upgrade Information To upgrade the printer’s firmware, perform the following steps: Run the FARGO Workbench Printer Utility. - Page 56 Firmware Updates Page 7-2 This page intentionally left blank. PLT-01277, Version: 1.2 November 2014...
-
Page 57: Revision History
Revision History Date Description Version Updated liability and trademark acknowledgments and copyright November 2014 statements. Updated Japan cert. Updated to current format. Updated global customer support information. July 2013 Ribbon print count change. April 2013 First Release PLT-01277, Version: 1.2 November 2014... - Page 58 hidglobal.com...
Need help?
Do you have a question about the FARGO C50 and is the answer not in the manual?
Questions and answers