Table of Contents
Advertisement
Quick Links
Advertisement
Table of Contents
Troubleshooting

Related Manuals for HID Fargo HDP8500


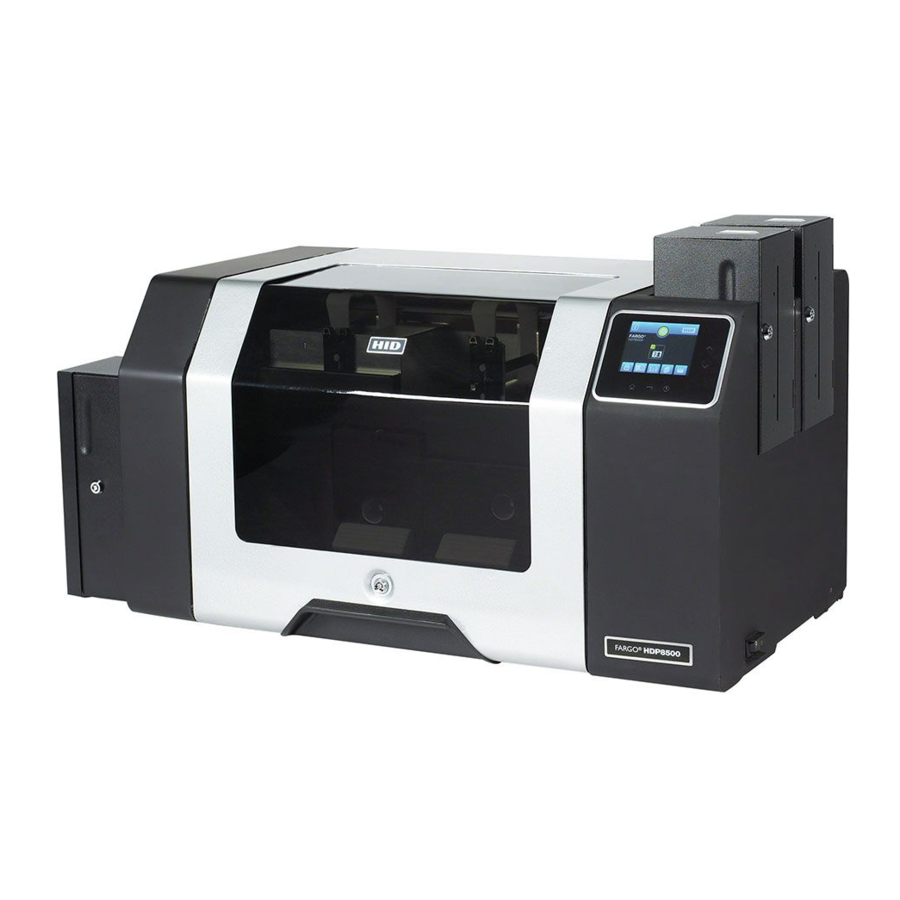
Summary of Contents for HID Fargo HDP8500
-
Page 1: User Guide
© 2012 HID Global Corporation. All rights reserved. Printing and Encoding Solutions ® FARGO HDP8500 Industrial Card Printer/Encoder User Guide © 2012 HID Global Corporation. All rights reserved. HDP8500 Industrial Card Printer/Encoder User Guide L001617 rev 1.1... -
Page 2: Table Of Contents
Loading the Card Cleaning Roller __________________________________________________________ 47 Loading the Overlaminate ________________________________________________________________ 49 Loading the Blank Cards _________________________________________________________________ 51 Installing the Card Output Hopper _________________________________________________________ 53 Connecting Power to HDP8500 Printer and/or Lamination Module _______________________________ 53 HDP8500 Industrial Card Printer/Encoder User Guide L001617 rev 1.1... - Page 3 Using the Bit Density dropdown list ________________________________________________________ 98 Using the LRC Generation dropdown list ____________________________________________________ 99 Using the Character Parity Mode dropdown list _____________________________________________ 100 Reviewing the ISO Track Locations ________________________________________________________ 101 Sending the Track Information ___________________________________________________________ 102 HDP8500 Industrial Card Printer/Encoder User Guide L001617 rev 1.1...
- Page 4 Using the Blush Point Option ____________________________________________________________ 135 Using the LCD Contrast Option ___________________________________________________________ 135 Using the Film Supply Transfer Tension Option ______________________________________________ 135 Using the Film Take-up Transfer Tension Option _____________________________________________ 135 HDP8500 Industrial Card Printer/Encoder User Guide L001617 rev 1.1...
- Page 5 Configuring Fluorescent Data (F-Panel for YMCFK Ribbon) using the Application _____________________ 148 Section 7: Inhibit Panel Usage ______________________________________________________ 150 Using Inhibit Panel (via the Fargo Workbench Printer Utility) _____________________________________ 150 Using Inhibit Panel with an Application _______________________________________________________ 152 Generating Text Objects ________________________________________________________________ 152...
- Page 6 Upgrading the Main Firmware with the Workbench Printer Utility _________________________________ 191 Section 11: HID Global Technical Support _____________________________________________ 193 Contacting Technical Support ____________________________________________________________ 193 Finding out when a Fargo Card Printer was manufactured _____________________________________ 193 HDP8500 Industrial Card Printer/Encoder User Guide L001617 rev 1.1...
- Page 7 HID Global Corporation, or its licensors, in the U.S. and other countries. Revision History Date Description Document Version 05//2012 HDP8500 Industrial Card Printer/Encoder User Guide Contacts North America Europe, Middle East and Africa 15370 Barranca Parkway Phoenix Road Irvine, CA 92618...
-
Page 8: Section 1: Specifications
FCC Part 15 Class A, RSS-GEN, RSS 210 ,CNS 13438, EMC 2004/108/EC, R&TTE 1999/5/EC,GB9254-2008, GB 17625 Safety Standards UL IEC 60950-1 (2nd edition), CSA C22.2 No. 60950-1-07 2 edition, LVD 2006/95/EC,GB4943, CNS14336 HDP8500 Industrial Card Printer/Encoder User Guide L001617 rev 1.1... -
Page 9: United States
Caution: Changes or modifications not expressly approved by the party responsible for compliance could void the user‟s authority to operate the equipment. HDP8500 Industrial Card Printer/Encoder User Guide L001617 rev 1.1... -
Page 10: Environmental Protection (China-Rohs)
© 2012 HID Global Corporation. All rights reserved. Environmental Protection (China-RoHS) Environmental Protection Use Period is based on the product being used in an office environment. HDP8500 Industrial Card Printer/Encoder User Guide L001617 rev 1.1... -
Page 11: Traditional Chinese Rf Emissions And Safety Statements
© 2012 HID Global Corporation. All rights reserved. Traditional Chinese RF Emissions and Safety Statements HDP8500 Industrial Card Printer/Encoder User Guide L001617 rev 1.1... -
Page 12: Taiwan Traditional Chinese
© 2012 HID Global Corporation. All rights reserved. Taiwan Traditional Chinese 經型式認證合格之低功率射頻電機,非經許可,公司、商號或使用者均不得 擅自變 更頻率、加大功率或變更原設計之特性及功能。低功率射頻電機之使用不得 影響飛 航安全及干擾合法通信;經發現有干擾現象時,應立即停用,並改善至無干 擾時方 得繼續使用。前項合法通信,指依電信法規定作業之無線電通信。低功率射 頻電機 須忍受合法通信或工業、科學及醫療用電波輻射性電機設備之干擾。 China Simplified Chinese 安全消息(请仔细阅读) 符号 涉及安全的重要过程 危险: 如果不遵循这些安装指南进行操作,可能会导致重伤,甚 至死亡。 可能引发安全问题的信息由警告符号(如左图所示)来表 示。 为了确保人身安全,在执行前面带有此符号的操作之 前,请先阅读下面的安全消息。 为了确保人身安全,除非另有规定,否则在执行维修过 HDP8500 Industrial Card Printer/Encoder User Guide L001617 rev 1.1... - Page 13 © 2012 HID Global Corporation. All rights reserved. 程前,始终应断开电源。 小心: 此设备为静电敏感设备。如果暴露在静电电流下,可能会 损坏设备。 可能引发静电安全问题的信息由警告符号(如左图所示) 来表示。 为了防止设备或介质受损,在执行前面带有此符号的操 作之前,请先阅读下面的安全消息。 为了防止设备或介质受损,请在处理电路板和打印头部 件中或附近的电缆时,遵守所有规定的静电放电 (ESD) 过程。 为了防止设备或介质受损,请始终佩带适当的个人接地 设备(例如,已接地避免出现潜在损坏的高质量腕 带)。 为了防止设备或介质受损,除非另有规定,否则在执行 任何维修过程前,始终应将色带和证卡与打印机分离。 为了防止设备或介质受损,在操作打印机前,请取下手 指和手上的珠宝饰物,并将手上的油渍和污渍彻底清洗 干净。 HDP8500 Industrial Card Printer/Encoder User Guide L001617 rev 1.1...
-
Page 14: Japan
© 2012 HID Global Corporation. All rights reserved. Japan この装置は総務省の型式指定を受けています。" (総務省指定番号は第 AC-xxxxx号です) 本製品は電波を使用した RFID 機器の読み取り・書き込み装置です。 そのため使用する用途・場所によっては、医療機器に影響を与える恐れが あります Korean HDP8500 Industrial Card Printer/Encoder User Guide L001617 rev 1.1... -
Page 15: Technical Specifications
PolyGuard® Overlaminate, 1.0 mil and .6 mil thick, 250 prints (PolyGuard available in a CR-80 patch size) All overlaminates available in clear, standard holographic design or custom holographic design Print Speed in Batch Batch Mode: Mode-Normal mode Performance Normal HDP8500 Industrial Card Printer/Encoder User Guide L001617 rev 1.1... - Page 16 (Dual input Hoppers with 200 cards each) Card Output Capacity Concealed/tinted output bin, lockable access and attachment to printer , 200 card minimum .030” ( 30 mil) to .050” (50 mil) (.762 mm to 1.27 mm) HDP8500 Industrial Card Printer/Encoder User Guide L001617 rev 1.1...
- Page 17 3.2 “ Touchscreen Graphical Display Display MS Windows Windows XP Compatibility Server 2003 Vista (32 & 64 bit) Windows Server (32 & 64 bit) Windows 7 (32 & 64 bit) Windows 2008 R1 R2 HDP8500 Industrial Card Printer/Encoder User Guide L001617 rev 1.1...
- Page 18 28.2 “ width x 14.0 “ depth x 15.5” height –Printer only Dimensions Ship Weight Printer: 61 lbs. Laminator: 30 lbs. Warranty Printer- 3 years Printhead Lifetime ; unlimited passes Extended Warranty available No On-Call Express offered HDP8500 Industrial Card Printer/Encoder User Guide L001617 rev 1.1...
-
Page 19: Functional Specifications
Resin Scramble The system can hide any information printed with the resin panel. (OPTIONAL) Edge-to-Edge Prints over the edge on CR-80 cards. Printing Color Profile System Color Management & None HDP8500 Industrial Card Printer/Encoder User Guide L001617 rev 1.1... - Page 20 Blue: Printer has run out of materials (film, ribbon or cards) Green: Normal Printer operation. Orange: User intervention is needed soon. Printer materials are low or the printer needs to be cleaned. HDP8500 Industrial Card Printer/Encoder User Guide L001617 rev 1.1...
-
Page 21: Section 2: Graphical Display
Click this icon to get to the System Information Screen System Information Screen Option. This is the Notification Icon which shows status and error messages Notification Icons These are the icons displayed in the notification area. HDP8500 Industrial Card Printer/Encoder User Guide L001617 rev 1.1... - Page 22 © 2012 HID Global Corporation. All rights reserved. HDP8500 Industrial Card Printer/Encoder User Guide L001617 rev 1.1...
- Page 23 Icon shows status is READY Press the Station icon to open the Station Details screen, which provides more detail about the station status. HDP8500 Industrial Card Printer/Encoder User Guide L001617 rev 1.1...
- Page 24 © 2012 HID Global Corporation. All rights reserved. Home Screen ( continued) Printer lock Hopper Select Ribbon Film Laminate levels shown Card Count Setup Menu HDP8500 Industrial Card Printer/Encoder User Guide L001617 rev 1.1...
- Page 25 © 2012 HID Global Corporation. All rights reserved. Home Screen ( continued) Home Screen Back one level HELP The side buttons allow vertical scrolling when the current screen accommodates multiple lines. HDP8500 Industrial Card Printer/Encoder User Guide L001617 rev 1.1...
-
Page 26: System Information Screen Option
MAC Address IP Address Ribbon Type Film Type Lam 1 Type Lam 2 Type Mag Encoder Smart Encoder Prox Encoder Mifare Encoder iCLASS Encoder Laminator Flipper Card Count Pass Count Transfer Count HDP8500 Industrial Card Printer/Encoder User Guide L001617 rev 1.1... -
Page 27: Process Status
While the printer is working, the Notification icon shows a moving gear . Each Station icon shows a progress bar with its current progress in the job A global pause button is shown. HDP8500 Industrial Card Printer/Encoder User Guide L001617 rev 1.1... -
Page 28: Main Menu
Self Test (see Display B below for details) Mechanical Test (see Display C below for details) Cleaning the Printer Firmware Upgrade (use the Workbench Utility Program) Sensor Calibration Calibration ( see Display D below for details) Ribbon Sensor HDP8500 Industrial Card Printer/Encoder User Guide L001617 rev 1.1... -
Page 29: Hopper Selection
Main Menu (continued) Hopper Selection Display A Hopper selection screen allows the user to change the hopper where cards are fed from. Green indicates the selected hopper, also shows cancel and save buttons. HDP8500 Industrial Card Printer/Encoder User Guide L001617 rev 1.1... -
Page 30: Tools -Diagnostic Self Test Options
© 2012 HID Global Corporation. All rights reserved. Main Menu (continued) Display B Tools –Diagnostic Self Test Options Alignment Test YMC Color Bar Test Magnetic Test YMCK Test Standard Resin Test Printer Settings card Color Photo Test HDP8500 Industrial Card Printer/Encoder User Guide L001617 rev 1.1... -
Page 31: Tools -Diagnostic Mechanical Test Options
Lower Printhead Raise Printhead Home Flipper Table Run ribbon take-up motor Run ribbon supply motor Run Printhead lift motor Cycle transfer head lift motor Run film supply motor Run film take-up motor HDP8500 Industrial Card Printer/Encoder User Guide L001617 rev 1.1... -
Page 32: Sensor Calibration Options
NOTE: Calibrating sensors may be done through the Driver Printing Preferences Toolbox OR through the LCD DISPLAY. Both options use the same printer setup information. Ribbon Sensor Calibration Film Sensor Calibration Magnetic TOF ( Top of Form) Lamination Sensor Calibration HDP8500 Industrial Card Printer/Encoder User Guide L001617 rev 1.1... -
Page 33: Sleep And Lock Settings
Select to desired option and use the + and – button to adjust the number. Cancel revert save buttons Sleep Time Standby Time Standby Temp Display Sleep Time Change Password Case Open HDP8500 Industrial Card Printer/Encoder User Guide L001617 rev 1.1... -
Page 34: Station Error
) move the rollers back and forth. This is used if a card jam occurs. Station Error When an error occurs a details screen appears, containing details about the specific error that occurred. The keys to the right are: Job Cancel HDP8500 Industrial Card Printer/Encoder User Guide L001617 rev 1.1... -
Page 35: Boolean Setting
© 2012 HID Global Corporation. All rights reserved. Retry Help Boolean Setting While adjusting settings in the setting menu, the Boolean setting can be set by pressing the desired value. Green indicates the selected setting. Settings Keypad HDP8500 Industrial Card Printer/Encoder User Guide L001617 rev 1.1... -
Page 36: Pin Keypad
Pin Keypad Blue instructions says: "Enter Current PIN" Button says: "Next >" Blue instructions says: "Enter New PIN" Button says: "Next >" Blue instructions says: "Confirm New PIN" Button says: "Enter" HDP8500 Industrial Card Printer/Encoder User Guide L001617 rev 1.1... -
Page 37: Security Keypad
Enter the PIN and press Enter. Text Button Select While setting a value in the settings menu that requires a selection, this screen will be presented. Current value is highlighted in green. Cancel and save buttons HDP8500 Industrial Card Printer/Encoder User Guide L001617 rev 1.1... -
Page 38: Notification List
Menu Detail List Navigate to a printer settings menu, a list of all settings will be displayed. Scroll up and down using the side buttons, make selections by pressing the specific setting‟s button. HDP8500 Industrial Card Printer/Encoder User Guide L001617 rev 1.1... -
Page 39: Consumable Status
While setting a value in the settings menu that requires an integer input, this screen will be presented. Current value is displayed and can be incremented or decremented by the + or – keys respectively. HDP8500 Industrial Card Printer/Encoder User Guide L001617 rev 1.1... -
Page 40: Confirmation
Decline or to Accept. Card Counter Card counter screen allows the user to view the total number of cards printed as well as the Current count for a particular batch. HDP8500 Industrial Card Printer/Encoder User Guide L001617 rev 1.1... -
Page 41: Help Screen
© 2012 HID Global Corporation. All rights reserved. The current count can be reset to zero by pressing the reset key. Help Screen Help screen (in the future) will provide detailed information for recovering from common errors. HDP8500 Industrial Card Printer/Encoder User Guide L001617 rev 1.1... -
Page 42: Section 3: Setup And Installation Procedures
This is included with the HDP8500-LC Only: Card Lamination Module (Important: Please use the original packaging when shipping the HDP8500 Printer/Laminator. This will require the Laminator Module to be detached from the Printer prior to shipping.) Choosing a Good Location Follow these guidelines: Place the unit in a location with adequate air circulation to prevent internal heat build-up. -
Page 43: Loading The Hdp Transfer Film
Note: Fargo Card Printers require highly specialized supplies to function properly. To maximize Printer life, reliability, printed card quality and durability, you must use only Fargo Certified Supplies. For this reason, your Fargo warranty is void, where not prohibited by law, if you use non- Fargo Certified Supplies. Step Procedure Unlock and open the Printer cover . - Page 44 The green take-up spool goes on the left side, the full roll goes on the right side. Tighten the HDP Film. Insert the HDP Film cartridge back into the printer and click into place. HDP8500 Industrial Card Printer/Encoder User Guide L001617 rev 1.1...
-
Page 45: Loading The Ribbon
Remove the HDP Ribbon Cartridge. Load the HDP Ribbon into the Cartridge and click into place. The blue take-up spool goes on the left side, the full roll goes on the right side. HDP8500 Industrial Card Printer/Encoder User Guide L001617 rev 1.1... - Page 46 © 2012 HID Global Corporation. All rights reserved. Tighten the Ribbon . Insert the HDP Ribbon cartridge back into the printer and click into place. Insert the HDP Ribbon cartridge back into the printer and click into place. HDP8500 Industrial Card Printer/Encoder User Guide L001617 rev 1.1...
-
Page 47: Loading The Card Cleaning Roller
© 2012 HID Global Corporation. All rights reserved. Loading the Card Cleaning Roller The HDP8500 contains 2 card cleaning assemblies in the Printer and 1 cleaning assembly in the Lamination Module. Use the same procedure for both. Step Procedure Unlock and open the Printer cover . - Page 48 © 2012 HID Global Corporation. All rights reserved. Insert the Card Cleaning Roller assembly into the card cleaning slot. Follow the same procedure for the second cleaning assembly. Follow the same procedures for the Lamination Module assembly. HDP8500 Industrial Card Printer/Encoder User Guide L001617 rev 1.1...
-
Page 49: Loading The Overlaminate
© 2012 HID Global Corporation. All rights reserved. Loading the Overlaminate (Note: This procedure only applies to the HDP8500-LC.) The loading process for both the Thermal Transfer Overlaminate and the PolyGuard™ Overlaminate material is the same. Refer to the following steps to load either type of overlaminate into the Printer. - Page 50 © 2012 HID Global Corporation. All rights reserved. Insert the HDP cartridge back into the printer and click into place. HDP8500 Industrial Card Printer/Encoder User Guide L001617 rev 1.1...
-
Page 51: Loading The Blank Cards
Important: The front of the card must face DOWN. The back of the card or the magnetic stripe on the card must face UP. The Smart Chip is loaded on the bottom. Place the Card Weight on top of each stack of cards. HDP8500 Industrial Card Printer/Encoder User Guide L001617 rev 1.1... - Page 52 © 2012 HID Global Corporation. All rights reserved. Close and lock the Card Input Cartridge. To completely remove the Card Input Hopper unlock the Printer Top Cover and release the BLUE lever to unlock the individual hopper. HDP8500 Industrial Card Printer/Encoder User Guide L001617 rev 1.1...
-
Page 53: Installing The Card Output Hopper
Connecting Power to HDP8500 Printer and/or Lamination Module Important! Do not plug in the USB cable until prompted to do so during the installation of the HDP8500 Printer Driver. Refer to the Driver installation procedure below. Step Procedure Insert the power cord into the Printer as shown below. -
Page 54: Printer Driver Installation Procedures
“Windows Explorer” to view the contents of the CD. Then, double-click on the Setup.exe file listed on the CD.) Click NEXT and follow the screen prompts to complete the driver installation. HDP8500 Industrial Card Printer/Encoder User Guide L001617 rev 1.1... -
Page 55: Section 4: Printer Driver Operations
© 2012 HID Global Corporation. All rights reserved. Section 4: Printer Driver Operations See this section for printer adjustments. Using the Card tab HDP8500 Industrial Card Printer/Encoder User Guide L001617 rev 1.1... -
Page 56: Selecting The Card Size
These Card Printers accept standard CR80 sized cards (3.452L x 2.204W / 87.7 mmL x 56 mmW) CR-80: This selection is the default form size for the HDP8500 Custom: This selection is used to create a custom form size from 1.0 x 3.0 to 2.204 to 3.452 (25.4 X 76.2 mm to 56 X 87.7 mm). -
Page 57: Selecting The Card Type
Procedure Card Type You have these selections (to choose from): Fargo UltraCard Premium III (Default Card Type) = 180˚ and 2 Fargo Ultracard = 175˚and 2.0 sec HID Tech Card Composite = 190˚ and 2 sec HID Tech Card PVC =180˚and 2.0 sec Indala FlexISO –... - Page 58 Printer Driver setup window is closed.) c. Custom Card stock: To determine the proper settings for custom card stock, apply the Tape adhesion Test. Conducting the Tape Adhesion Test. HDP8500 Industrial Card Printer/Encoder User Guide L001617 rev 1.1...
-
Page 59: Printing On Alternate Card Stocks
The best-looking card always starts with the cleanest card surface. Dirt and debris on a card can show up as blemishes on the card surface and may reduce the life of the image itself. HDP8500 Industrial Card Printer/Encoder User Guide L001617 rev 1.1... -
Page 60: Conducting The Tape Adhesion Test
© 2012 HID Global Corporation. All rights reserved. Conducting the Tape Adhesion Test It is important to conduct tape adhesion tests because Fargo cannot be certain which transfer temperature and Dwell Time will work best (when printing cards other than UltraCard III). (Note: The optimal transfer settings may vary from card type to card type.) - Page 61 Repeat this process until adequate adhesion is achieved. Ensure that the cards (in use) have a surface roughness (Ra) of 60 micro inches or less. This information should be available from the card manufacturer. HDP8500 Industrial Card Printer/Encoder User Guide L001617 rev 1.1...
-
Page 62: Using The Card Hopper Selection
From the Printer Ready screen select the HOPPER icon Cycle between Hopper 1 and Hopper 2 by selecting 1 or 2 from the Printers Display Control Panel. Click to save HDP8500 Industrial Card Printer/Encoder User Guide L001617 rev 1.1... -
Page 63: Setting The Orientation
Select either the Portrait or Landscape radio buttons for Orientation. Step Procedure Select Portrait to cause the card to print in a vertical orientation. Select Landscape to cause the card to print in a horizontal orientation. HDP8500 Industrial Card Printer/Encoder User Guide L001617 rev 1.1... -
Page 64: Specifying The Number Of Copies
This will launch the Diagnostic tool (if installed). The Workbench Utility Program is included on the driver CD. Also see the Workbench Utility Program User Guide located on the driver CD.. HDP8500 Industrial Card Printer/Encoder User Guide L001617 rev 1.1... -
Page 65: Printing A Test Print Image
Printing a Test Print Image Step Procedure Install a HDP8500 compatible ribbon in the Printer for the Test Print. The ribbon installed determines the Test Print PRN file sent to the printer. Open the Driver settings. a. From your computer‟s startup menu, select Settings > Printers and Faxes. -
Page 66: Selecting The About Button
Select the About button to open a dialog box containing the copyright information as well as the Driver‟s version number and date code. Selecting the Toolbox button Select the Toolbox button. See the Section 5: Accessing the Toolbox HELP section for more information and procedures. HDP8500 Industrial Card Printer/Encoder User Guide L001617 rev 1.1... -
Page 67: Using The Device Options Tab
© 2012 HID Global Corporation. All rights reserved. Using the Device Options tab This section describes the use of the Device Options tab. HDP8500 Industrial Card Printer/Encoder User Guide L001617 rev 1.1... -
Page 68: Detecting Supplies At Print Time Function
When the Supplies checkbox is not checked or it is de-selected (cleared) from a selected state, the Ribbon and Film dropdown boxes become active and auto selected Ribbon and Film types remain (until manually changed). HDP8500 Industrial Card Printer/Encoder User Guide L001617 rev 1.1... -
Page 69: Adjusting The Ribbon Type
Resin Black, and Heat Seal YMCFK (Full Color/ Fluorescing /Resin Black): Yellow, Magenta, Cyan, UV Fluorescing, and Resin Black YMCKI (Full Color/Resin Black/Inhibit): Yellow, Magenta, Cyan, Resin Black, Inhibit K Resin Black: Resin Black HDP8500 Industrial Card Printer/Encoder User Guide L001617 rev 1.1... -
Page 70: Adjusting The Film Type
The Dual Sided group checkboxes (shown below) are grayed out if no Flipper is automatically found or if the Dual Sided is manually turned off. See the procedures in this section for more instructions. HDP8500 Industrial Card Printer/Encoder User Guide L001617 rev 1.1... -
Page 71: Using The Dual Sided - Print Both Sides Option
If using a YMCKK Ribbon, the front of the card is printed with the YMCK Panels and the back is printed with the second K Panel. (Note #1: This option is automatically enabled when a YMCKK Ribbon type is selected.) HDP8500 Industrial Card Printer/Encoder User Guide L001617 rev 1.1... -
Page 72: Using The Print Both Sides - Print Back Image On Front Of Card Option
Step Procedure Select this option to print only onto the backside of preprinted cards that must have their Magnetic Stripe or smart card chip encoded. (Note: Load the HDP8500 Industrial Card Printer/Encoder User Guide L001617 rev 1.1... -
Page 73: Using The Print Quality
The second page of the document will then be printed on the back of a second card. Using the Print Quality Normal print mode (default) Performance print mode is faster with lower image quality and is most suitable for minimal color with mostly resin text. HDP8500 Industrial Card Printer/Encoder User Guide L001617 rev 1.1... -
Page 74: Using The Options Group
Select the Rotate Front 180 Degrees option to rotate the image on the front of the card by 180 degrees when printed. Select the Rotate Back 180 Degrees option to rotate the image on the back of the card by 180 degrees when printed. HDP8500 Industrial Card Printer/Encoder User Guide L001617 rev 1.1... - Page 75 © 2012 HID Global Corporation. All rights reserved. HDP8500 Industrial Card Printer/Encoder User Guide L001617 rev 1.1...
-
Page 76: Using The Disable Printing Option
Select this option to ensure no print data will be sent to the Printer (while all encoding instructions will be sent according to how they are configured within the software). This option also allows you to laminate ONLY. HDP8500 Industrial Card Printer/Encoder User Guide L001617 rev 1.1... -
Page 77: Using The Dual Pass And Invert F-Panel Image Options
Using the Dual Pass and Invert F-Panel Image options See Configuring Fluorescent Data (F-Panel for YMCFK Ribbon) using the Workbench procedure in the Fargo Workbench Printer Utility section. Dual Pass option: This refers to the fact that the fluorescing dye can be applied to a separate panel of HDP Film. -
Page 78: Using The Encrypt Job Data
YMC ribbon panel, the second page is printed on the front of the card with the F ribbon panel , HDP8500 Industrial Card Printer/Encoder User Guide L001617 rev 1.1... - Page 79 YMC ribbon panel, the fourth page is printed on the back of the card with the F ribbon panel. HDP8500 Industrial Card Printer/Encoder User Guide L001617 rev 1.1...
-
Page 80: Using The Image Color Tab
Yellow, Magenta and Cyan. See both displays in this section. Proceed to related procedures (provided below). Display A – Image Color tab HDP8500 Industrial Card Printer/Encoder User Guide L001617 rev 1.1... -
Page 81: Using The Image Quality - Color Matching Dropdown
Move the slide to the right to cause more heat to be used, thus generating a darker print. (Note: This slide only affects those images printed with dye-sublimation Ribbon Panels (YMC).) HDP8500 Industrial Card Printer/Encoder User Guide L001617 rev 1.1... - Page 82 Move the slide to the right to cause more heat to be used, causing resin images to be darker or more saturated. (Note: This control can be helpful for fine-tuning the sharpness of resin text and bar codes.) HDP8500 Industrial Card Printer/Encoder User Guide L001617 rev 1.1...
-
Page 83: Adjusting For The Resin Dither
Step Procedure Select Optimized for Graphics when printing lower quality images (e.g., clipart, logos, etc.) with resin. Select Optimized for Photo when printing photo quality images with resin. HDP8500 Industrial Card Printer/Encoder User Guide L001617 rev 1.1... -
Page 84: Using The Advanced Image Color Window
Gamma (Default, 0%): Move the slide to the left for (-) or less gamma. Move the slide to the right (+) or more gamma of the printed image. Study the image (on the right) to determine correct gamma. HDP8500 Industrial Card Printer/Encoder User Guide L001617 rev 1.1... - Page 85 Move the slide to the right (+) or more cyan as an individual color balance. Study the image (on the right) to determine correct color cyan balance effect. HDP8500 Industrial Card Printer/Encoder User Guide L001617 rev 1.1...
- Page 86 © 2012 HID Global Corporation. All rights reserved. Step Procedure Click on the Default button to clear changes back to the default settings for this window only and NOT for the Advanced Image Color dialog box HDP8500 Industrial Card Printer/Encoder User Guide L001617 rev 1.1...
-
Page 87: Using The Image Transfer Tab
Using the Image Transfer tab Use this tab to adjust the Image Position, Transfer Dwell Time and Transfer Temperature. (Note: The HDP8500 Printing Preferences window has the same Image Color tab functionality as the HDP8500-LC Printing Preferences window.) HDP8500 Industrial Card Printer/Encoder User Guide... -
Page 88: Adjusting The Image Position Controls
The Card Illustration (shown in the Image Position box) will flip and rotate according to the selection of Portrait, Landscape or Rotate 180 Degrees. The outline around the illustration will always remain in the same Landscape orientation. HDP8500 Industrial Card Printer/Encoder User Guide L001617 rev 1.1... - Page 89 Printer if a positive number is entered and toward the card input side of the Printer if a negative number is entered. (Note: The maximum value for the Vertical and Horizontal adjustments is ±100 Pixels (10 Pixels = 0.03 (.8mm).) HDP8500 Industrial Card Printer/Encoder User Guide L001617 rev 1.1...
-
Page 90: Adjusting The Transfer Dwell Time And Temperature
Adjust the dwell time and temperature settings to ensure proper image transfer. Determine the appropriate settings for the card stock by setting the Transfer Dwell Time and Transfer Temperature to the default settings. HDP8500 Industrial Card Printer/Encoder User Guide L001617 rev 1.1... -
Page 91: Using The Flattener Settings
The driver will disable the card flattener, if a dual sided job is sent. Use the Default button to reset the Flattener to the default ,- zero, setting. HDP8500 Industrial Card Printer/Encoder User Guide L001617 rev 1.1... -
Page 92: Using The Default Button
© 2012 HID Global Corporation. All rights reserved. Using the Default button Step Procedure Use the Default button to reset the Transfer Dwell Time and Transfer Temperature to defaults for current Card Type choice. HDP8500 Industrial Card Printer/Encoder User Guide L001617 rev 1.1... -
Page 93: Using The Magnetic Encoding Tab
If no Encoder is detected, the tab is active but all functions are grayed out.) Step Procedure Select the Magnetic Encoding tab to display options for controlling the Magnetic Stripe encoding process. (Note: The following describes these options and the Printer's magnetic encoding process.) HDP8500 Industrial Card Printer/Encoder User Guide L001617 rev 1.1... -
Page 94: Using The Encoding Mode Dropdown List
The User can select the Configurable Bit Density option. This option supports these standard configurable bit densities: 75 Bits Per Inch (BPI) 210 BPI Raw Bit Density Per Track The User can select the Configurable Bit Density, Character Size, HDP8500 Industrial Card Printer/Encoder User Guide L001617 rev 1.1... - Page 95 (active and This selection disables all the Magnetic Track Options tabs. It also inactive functions) disables the Coercivity dropdown function and Shift Data Left checkbox option.) The default Coercivity is 600 Oe. HDP8500 Industrial Card Printer/Encoder User Guide L001617 rev 1.1...
-
Page 96: Selecting The Coercivity/Magnetic Track
Super High Coercivity =4000 Oerstad High Coercivity = 2750Oersted (Fargo‟s High Coercivity UltraCard IIIs are 2750 Oe) Medium Coercivity = 600 Oersted Low Coercivity = 300 Oersted Select the Magnetic Track Selection option to specify which track is to be configured through the Magnetic Track Options (if the application being used requires customization of the standard ISO encoding process). -
Page 97: Reviewing The Shift Data Left Function
Select 7 Bits to change the bits per character to 7 BPC. (Note: This is the default for Track 1). Select 8 Bits to change the bits per character to 8 BPC. HDP8500 Industrial Card Printer/Encoder User Guide L001617 rev 1.1... -
Page 98: Using The Ascii Offset Dropdown List
Use this option to customize the Bit Recording Density (Bits per Inch) used to encode the magnetic data on the currently selected track. The default ISO Standard selections for this option are as follows: HDP8500 Industrial Card Printer/Encoder User Guide L001617 rev 1.1... -
Page 99: Using The Lrc Generation Dropdown List
Select No LRC to change the LRC Generation to none. Select Even Parity to change the LRC Generation to Even Parity. (Note: This is the default for all tracks.) Select Odd Parity to change the LRC Generation to Odd Parity. HDP8500 Industrial Card Printer/Encoder User Guide L001617 rev 1.1... -
Page 100: Using The Character Parity Mode Dropdown List
Select No Parity to change the Character Parity to none. Select Even Parity to change the Character Parity to Even Parity. Select Odd Parity to change the Character Parity to Odd Parity. (Note: This is the default for all tracks.) HDP8500 Industrial Card Printer/Encoder User Guide L001617 rev 1.1... -
Page 101: Reviewing The Iso Track Locations
The magnetic Encoding Module encodes onto tracks in accordance with an ISO 7811-2 Magnetic Stripe. For track locations, review the display below. 0.223" 0.353" 0.493" TRACK1 0.110" 0.130" TRACK2 0.110" 0.140" TRACK3 0.110" HDP8500 Industrial Card Printer/Encoder User Guide L001617 rev 1.1... -
Page 102: Sending The Track Information
When segmenting track data, the appropriate Field Separator (FS) must be used. The table below shows the SS, ES, FS and the valid characters defined for each track. HDP8500 Industrial Card Printer/Encoder User Guide L001617 rev 1.1... -
Page 103: Reviewing The Sample String
Valid Characters Number of Sentinel Sentinel Separator Characters ASCII 32-95 Track 1 (See the table below.) ASCII 48-63 Track 2 (See the table below.) ASCII 48-63 Track 3 (See the table below.) HDP8500 Industrial Card Printer/Encoder User Guide L001617 rev 1.1... -
Page 104: Reviewing The Ascii Code And Character Table
© 2012 HID Global Corporation. All rights reserved. Reviewing the ASCII Code and Character Table ASCII Code Character ASCII Code Character ASCII Code Character space < > HDP8500 Industrial Card Printer/Encoder User Guide L001617 rev 1.1... -
Page 105: Using The Default Button
© 2012 HID Global Corporation. All rights reserved. Using the Default button Step Procedure Use the Default button to reset defaults for the current Track tab only. See below. HDP8500 Industrial Card Printer/Encoder User Guide L001617 rev 1.1... -
Page 106: Using The Lamination Tab
To maximize Printer life, reliability, printed card quality and durability, you must use only FARGO Certified Supplies. For this reason, the FARGO warranty is void, where not prohibited by law, if you use non-FARGO Certified Supplies. To order additional materials, please contact an authorized reseller. -
Page 107: Selecting The Lamination Position
Select the No Lamination option if you do not want to use the Printer's built-in Laminator. b. Select Laminate Front Side, Laminate Back Side, Laminate Both Sides or Laminate Opposite Sides to specify the side(s) of the card to laminate. HDP8500 Industrial Card Printer/Encoder User Guide L001617 rev 1.1... -
Page 108: Selecting The Lamination Type
The Firmware compares the Ribbon and, Film values in the PRN file to the values (it holds regarding the currently installed consumables). If the values do not match, the LCD displays Wrong Laminate Error. HDP8500 Industrial Card Printer/Encoder User Guide L001617 rev 1.1... -
Page 109: Using The K Panel Resin Tab
Print All Black with K Panel (see the next page). (Note: The Printer Driver will print areas of the image where it finds black coloring with the Print Ribbon's resin black (K) Panel as specified by each of the following options.) HDP8500 Industrial Card Printer/Encoder User Guide L001617 rev 1.1... -
Page 110: Using The Click And Drag Capability
(Note: Intersecting/overlapping areas do not cancel each other out; instead, they act as one area.) Using the Delete button to delete the area with focus from the graphic. HDP8500 Industrial Card Printer/Encoder User Guide L001617 rev 1.1... -
Page 111: Selecting The Full Card
The card image becomes black with the grid and one area (available for the User to start with). The defined area does not print black with resin. HDP8500 Industrial Card Printer/Encoder User Guide L001617 rev 1.1... -
Page 112: Selecting The Print Ymc Under The K And Print K Only Options
Select the Print K Only option to print all black in the designated Defined/Undefined areas only with the resin black (K) Panel or to print resin black onto a white background to maximize the sharpness of printed text and barcodes. HDP8500 Industrial Card Printer/Encoder User Guide L001617 rev 1.1... -
Page 113: Using The Printer Supplies Tab
Using the Printer Supplies tab Use the options on this tab to view information about the Ribbon, HDP Film, Laminate (Cartridge 1) and Laminate (Cartridge 2) installed in the Printer. (Note: The gauges are horizontal.) HDP8500 Industrial Card Printer/Encoder User Guide L001617 rev 1.1... -
Page 114: Reviewing Information On The Supplies Tab
Indicator. (Note: This is visible only when the Laminate – Cartridge 1 is detected.) Lamination – Cartridge 2 Level: Type, Reorder Number and Gauge Indicator. (Note: This is visible only when the Laminate – Cartridge 2 is detected.) HDP8500 Industrial Card Printer/Encoder User Guide L001617 rev 1.1... -
Page 115: Section 5: Accessing The Toolbox
Cancel button: Closes the dialog box and cancels the Toolbox changes since the Driver dialog box has been opened. Help button: Launches Help specific to the active tab. HDP8500 Industrial Card Printer/Encoder User Guide L001617 rev 1.1... -
Page 116: Selecting The Configuration Tab
Under Event Monitoring, select events to be monitored. (Note: The Driver will notify or prompt the User when the selected events occur.) Under Set Language for Printer LCD Display, select a language. HDP8500 Industrial Card Printer/Encoder User Guide L001617 rev 1.1... -
Page 117: Using The Optional Printer Features Group Box
If the Driver is reinstalled, it resets to the default of checked. Using the Event Monitoring Group Box This Event Monitoring group box displays the Low Supplies (Ribbon, Laminate and Film). HDP8500 Industrial Card Printer/Encoder User Guide L001617 rev 1.1... -
Page 118: Reviewing The Ribbon Low Message
Default = unchecked. Using the Film Low message The default setting is checked. If checked, Film Low message box is displayed with every print job when Printer reports low Ribbon to the Driver. HDP8500 Industrial Card Printer/Encoder User Guide L001617 rev 1.1... -
Page 119: Selecting The Lcd Display Language
Languages (available in drop down list) are the languages available in the language set (currently resident in the Firmware). Using the Printer LCD Display to set the language Select the Folder icon Select the Settings icon Use the arrow to select the language. HDP8500 Industrial Card Printer/Encoder User Guide L001617 rev 1.1... -
Page 120: Using The Driver To Set The Language
© 2012 HID Global Corporation. All rights reserved. Using the Driver to set the language Select the Toolbox option Select the Configuration Tab Select the Printer LCD Display language Click OK HDP8500 Industrial Card Printer/Encoder User Guide L001617 rev 1.1... -
Page 121: Selecting The Calibrate Laminator Tab
DISPLAY ICON. Remove the Laminate Cartridge b. Ensure the Laminator Cover is closed. c. Select Lam Calibrate option from the Display. d. If successful the printer‟s LCD will reset to ready. HDP8500 Industrial Card Printer/Encoder User Guide L001617 rev 1.1... -
Page 122: Selecting The Calibrate Film Tab
DISPLAY ICON. a. Leave the Film Cartridge installed b. Close the Printer‟s Cover. c. Select Film Calibrate option from the Display. d. If successful the printer‟s LCD will reset to ready. HDP8500 Industrial Card Printer/Encoder User Guide L001617 rev 1.1... -
Page 123: Selecting The Calibrate Ribbon Tab
DISPLAY ICON. Leave the Ribbon Cartridge installed a. Close the Printer Cover. b. Select Ribbon Calibrate option from the Display. c. If successful the printer‟s LCD will reset to ready HDP8500 Industrial Card Printer/Encoder User Guide L001617 rev 1.1... -
Page 124: Selecting The Clean Printer Tab
NOT remove the left liner if a Magnetic Encoding Module is installed in your printer.) Card Hopper 2 c. Insert the Cleaning Card into the d. Click on the Clean button. e. Guide the Cleaning Card into the Printer as needed. HDP8500 Industrial Card Printer/Encoder User Guide L001617 rev 1.1... - Page 125 Using the LCD Display option Set up the printer as in option 1. From the HOME Menu Select the MENU SETUP icon Select the TOOLS icon Select the CLEAN PRINTER option HDP8500 Industrial Card Printer/Encoder User Guide L001617 rev 1.1...
-
Page 126: Selecting The Advanced Settings Tab
Current Column: Displays current value for setting Change the value by clicking on the value to activate spin control or type. Apply Button: Applies changed values. Restore Defaults Button: Restores default values. HDP8500 Industrial Card Printer/Encoder User Guide L001617 rev 1.1... -
Page 127: Setting The Printhead Resistance
Measure the density square, as shown below. b. Adjust the image density to 65% ± 1%. Note – the 500 Series Densitometer is to be used for this measurement. HDP8500 Industrial Card Printer/Encoder User Guide L001617 rev 1.1... -
Page 128: Using The Image Darkness Option
Darken the image by clicking the up arrow to enter a positive value and increase the amount of Printhead heat. IMPORTANT: If the value is set too high, the Ribbon may jam or even break. HDP8500 Industrial Card Printer/Encoder User Guide L001617 rev 1.1... -
Page 129: Using The Print Tof (Top Of Form) Option
Transfer Alignment Block is shown in the center of the card. Note – due to variation in roller alignment, the green border may appear at a slight angle on the top of the card. HDP8500 Industrial Card Printer/Encoder User Guide L001617 rev 1.1... -
Page 130: Using The Mag Top Of Form Option
99. As a rule, 20 equals about .030"/. 8mm.) (Note: Keep this in mind when adjusting this option to avoid over-adjusting.) IMPORTANT: If the negative value is set too high, the Printer may start encoding before the card's Magnetic Stripe reaches the encoding head. HDP8500 Industrial Card Printer/Encoder User Guide L001617 rev 1.1... -
Page 131: Using The Transfer Tof (Top Of Form) Option
Using the Transfer TOF (Top of Form) Option Follow this instruction. Step Procedure Print the Alignment Card Self-test. Adjust the Transfer TOF until the TOF Zero Line is located on the edge of the card as shown below. HDP8500 Industrial Card Printer/Encoder User Guide L001617 rev 1.1... -
Page 132: Using The Transfer Eof (End Of Form) Option
Danger: The Printer‟s Transfer Roller can reach temperatures exceeding 350 degree F (175 C). Use extreme caution when operating the Transfer Roller. Never touch the Transfer Roller unless the Printer Power has been turned off for at least 20 minutes. Type Description HDP8500 Industrial Card Printer/Encoder User Guide L001617 rev 1.1... -
Page 133: Using The Encoder Flip Angle Option
This procedure controls the tension of the color Ribbon during printing. Adjust the Ribbon tension if the Ribbon wrinkle is appearing on the card. (Note: Adjustments moderately change the image length. “+” Adjustments can eliminate some cases of wrinkle.) HDP8500 Industrial Card Printer/Encoder User Guide L001617 rev 1.1... -
Page 134: Using The Film Print Take-Up Tension Option
This setting adjusts the time until printer stops energizing the transfer roller conserve energy. A setting of “0” will disable. (Note: The counter for this setting starts after Standby Time has elapsed.) HDP8500 Industrial Card Printer/Encoder User Guide L001617 rev 1.1... -
Page 135: Using The Blush Point Option
(Note: Adjustments affect flash and smudge.) Using the Film Take-up Transfer Tension Option “-” Adjustments can cause card jams (Note: “+” Adjustments can help stop jamming. Adjustments affect flash and smudge.) HDP8500 Industrial Card Printer/Encoder User Guide L001617 rev 1.1... -
Page 136: Using The Film Print Supply Tension Option
Using the Film Transfer Cooling Level Option This controls the default speed of the cooling fan for the transfer process. Adjusts fan speeds and on times during transferring. This setting affects both flash and smudge. HDP8500 Industrial Card Printer/Encoder User Guide L001617 rev 1.1... -
Page 137: Using The Eat Disable Option
Using the Holo Transfer Offset Option This option changes the Hologram Overlamiate Offset for placement parameters. Using the Standby Temp Option This option changes the temperature used when the printer is in standby mode. HDP8500 Industrial Card Printer/Encoder User Guide L001617 rev 1.1... -
Page 138: Using The Mag Hi-Co Voltage Offset Option
This option changes Lamination Roller temperature. Using the Lamination Bottom Takeup Option This option changes tension of Laminate roll 1. Using the Lamination Top Takeup Option This option changes tension of Laminate rolls 2 (if equipped) HDP8500 Industrial Card Printer/Encoder User Guide L001617 rev 1.1... -
Page 139: Using The Lamination Card Backup Option
Reviewing the No Printer Connected error message If there is no Printer connected or if the Driver is unable to communicate with the Printer, the following error will be displayed and the grid will be blank. HDP8500 Industrial Card Printer/Encoder User Guide L001617 rev 1.1... -
Page 140: Warming Time Delay
This setting adjusts the delay (in seconds) before transferring the second side of the card. It has a range of 0 to 180. The larger the number, the longer the delay in seconds.. HDP8500 Industrial Card Printer/Encoder User Guide L001617 rev 1.1... -
Page 141: Ribbon Factory Take-Up
Reviewing the Value outside the Range error message If typing a value outside the range, an error message will display specific to the setting when leaving the spin control to click any other spin control, button or tab. HDP8500 Industrial Card Printer/Encoder User Guide L001617 rev 1.1... -
Page 142: Section 6: Fluorescent Panel Usage
© 2012 HID Global Corporation. All rights reserved. Section 6: Fluorescent Panel Usage YMCFK Ribbon for HDP8500 is an economical way to add a fully customizable, incremental level of security to your photo identification cards. This process allows the user to configure the data that is printed with the fluorescent panel of an YMCFK Ribbon. - Page 143 Click on the Secure ID box on the left. b. Click and drag a box onto the Template. c. Move and size as needed. Step Procedure On the Template, right click on the Secure ID box for the options. HDP8500 Industrial Card Printer/Encoder User Guide L001617 rev 1.1...
- Page 144 Click on the Logo box on the left. b. Click and drag a box onto the Template. c. Move and size (as needed) by grabbing the corner of the box. HDP8500 Industrial Card Printer/Encoder User Guide L001617 rev 1.1...
- Page 145 This is set up in the background.) Step Procedure a. Click on the Text box on the left. b. Click and drag a box onto the Template. c. Move and size as needed. HDP8500 Industrial Card Printer/Encoder User Guide L001617 rev 1.1...
- Page 146 © 2012 HID Global Corporation. All rights reserved. Step Procedure On the Template, right click on the Text box for the options shown below. HDP8500 Industrial Card Printer/Encoder User Guide L001617 rev 1.1...
- Page 147 “Invert F panel Image” option is selected) Check Invert F-Panel Image to create a negative of the fluorescent image. (Note: This may improve the look of the person‟s image if used for the Logo.) HDP8500 Industrial Card Printer/Encoder User Guide L001617 rev 1.1...
-
Page 148: Configuring Fluorescent Data (F-Panel For Ymcfk Ribbon) Using The Application
Printer will print the fluorescent BMP IMAGE at the ~I position on the card. Printer will print the fluorescent TEXT at the ~T position on the card. (See Display B below) Display A Display B Card as seen in badge application Card as Printed HDP8500 Industrial Card Printer/Encoder User Guide L001617 rev 1.1... - Page 149 Check Invert F-Panel Image to create a negative of the fluorescent image. (Note: This may improve the look of the person‟s image if used for the Logo.) Display C : BMP Image located at c:\globe.bmp HDP8500 Industrial Card Printer/Encoder User Guide L001617 rev 1.1...
-
Page 150: Section 7: Inhibit Panel Usage
Using Inhibit Panel (via the Fargo Workbench Printer Utility) You can use the Fargo Workbench Printer Utility to generate an Inhibit Panel Layout. (Note: This utility allows the operator to add a rectangular area(s) that define which areas are to be inhibited.) - Page 151 Save the file. Failure to save will not allow the Inhibit Panel to work You are now ready to print from your application. Any image file will print with the inhibit panel until that image file is deleted. HDP8500 Industrial Card Printer/Encoder User Guide L001617 rev 1.1...
-
Page 152: Using Inhibit Panel With An Application
(Note: Compatible applications will allow you to edit text strings after the file has been saved. Examples of compatible applications are Corel Draw, Microsoft Word, and Microsoft WordPad.) HDP8500 Industrial Card Printer/Encoder User Guide L001617 rev 1.1... -
Page 153: Rendering Print Jobs
1035 pixels in width and 661 pixels in length. The size for portrait orientation is 661 pixels in width and 1035 pixels in length. Set this under Paint –Image –Attributes. Select “black and white” under COLORS. HDP8500 Industrial Card Printer/Encoder User Guide L001617 rev 1.1... - Page 154 © 2012 HID Global Corporation. All rights reserved. Landscape Orientation (see below) Portrait Orientation (see below) Step Procedure Place objects on the image, which correspond to the exact areas that are being inhibited. HDP8500 Industrial Card Printer/Encoder User Guide L001617 rev 1.1...
- Page 155 © 2012 HID Global Corporation. All rights reserved. Step Procedure Fill the inhibit areas with black color. Step Procedure Save the file as a BMP from within Microsoft Paint. HDP8500 Industrial Card Printer/Encoder User Guide L001617 rev 1.1...
- Page 156 © 2012 HID Global Corporation. All rights reserved. Step Procedure Add the „~i‟ command to the application file. (Note: In this case, Microsoft WordPad was used. With WordPad the „~‟ must be left justified.) HDP8500 Industrial Card Printer/Encoder User Guide L001617 rev 1.1...
- Page 157 © 2012 HID Global Corporation. All rights reserved. Step Procedure Create the rest of the card using the application. HDP8500 Industrial Card Printer/Encoder User Guide L001617 rev 1.1...
-
Page 158: Using The Test Print
Bring up the Printer Preferences dialog via Start -> Settings -> Printers and Faxes. Right click on the HDP5000 printer instance; then left click on Printer Preferences to select the Card tab. Click on the Test Print button. HDP8500 Industrial Card Printer/Encoder User Guide L001617 rev 1.1... -
Page 159: Troubleshooting The Inhibit Panel
In some applications, such as Microsoft WordPad, the „~‟ must be left justified or it may print on the card and the inhibit functionality will not work. HDP8500 Industrial Card Printer/Encoder User Guide L001617 rev 1.1... -
Page 160: Section 8: General Troubleshooting
Printer life, reliability, printed card quality and durability, you must use only Fargo Certified Supplies. For this reason, your Fargo warranty is void, where not prohibited by law, if you use non-Fargo Certified Supplies. To order additional materials, please contact your authorized reseller. -
Page 161: How To Use The Lcd Error Message Table (Example Provided)
Verify cards are not stuck together or jammed, and they Matches with the are the correct thickness. screenshot below. Display – Unable to Feed Card (screenshot; Lower Left Corner Number, 14) HDP8500 Industrial Card Printer/Encoder User Guide L001617 rev 1.1... -
Page 162: Troubleshooting With The Lcd Error Message Table
(PC Error Message the Printer. No. 85) Card Not Found Card cannot be found in the Verify card not jammed in Printer and Printer. select Cancel. (PC Error Message HDP8500 Industrial Card Printer/Encoder User Guide L001617 rev 1.1... - Page 163 (PC Error Message technical assistance. Timeout, Timeout No. 314, 315, 316) EEPROM Error Reset the Printer and try again. (PC Error Message If this problem persists, call for No. 38,39,40,44,52) technical assistance. HDP8500 Industrial Card Printer/Encoder User Guide L001617 rev 1.1...
- Page 164 If this problem persists, call for technical assistance. Head Voltage Err A hardware fault has Reset the Printer and try again. prevented setting the correct (PC Error Message If this problem persists, call for HDP8500 Industrial Card Printer/Encoder User Guide L001617 rev 1.1...
- Page 165 (PC Error Message Sensor, and recalibrate the Sensor. Nos. 213 ) Lam Async Error The Printer timed out waiting Check Lam power/connections and for communication from the HDP8500 Industrial Card Printer/Encoder User Guide L001617 rev 1.1...
- Page 166 Laminator. No. 233, 235, 227, 225, 223,263, 261, The wrong Securemark lam 249) material was installed in cartridge. The wrong OEM material was installed in cartridge one. The wrong grade material HDP8500 Industrial Card Printer/Encoder User Guide L001617 rev 1.1...
- Page 167 (PC Error Message No. 208) Laminate 2 Out The Laminate in Cartridge 2 Replace it with a new roll of material. has run out. (PC Error Message No. 209) HDP8500 Industrial Card Printer/Encoder User Guide L001617 rev 1.1...
- Page 168 No. 28, 167) Print button or the Cancel button Film RFID tag is bad. located on the Printer. No Flip Module Two-sided job sent to a one- Verify the Printer has flipper HDP8500 Industrial Card Printer/Encoder User Guide L001617 rev 1.1...
- Page 169 Nos. 9,67) technical assistance. Remove Card A card is jammed in the Print Clear the jam and press Cancel. Station or card flipping area (PC Error Message of the Printer. No. 68) HDP8500 Industrial Card Printer/Encoder User Guide L001617 rev 1.1...
- Page 170 (PC Error Message Clear any cards in the Shuttle Module No. 308) by opening the Printers and follow this direction. #Case Open Press the Resume button on the Printer‟s Front Cover to continue HDP8500 Industrial Card Printer/Encoder User Guide L001617 rev 1.1...
- Page 171 Nos. 162 and 163) A reboot is required. Printer Driver. A Self-test job cannot be printed with the print media installed. An invalid OEM film was installed in the printer. HDP8500 Industrial Card Printer/Encoder User Guide L001617 rev 1.1...
- Page 172 Undefined or fatal Reboot Printer. Error Codes If this problem persists, call for (PC Error Message technical assistance No.267, 268, 269, 271, 272, 273, 274, 275, 276, 277, 282, 283, 284, 285,287) HDP8500 Industrial Card Printer/Encoder User Guide L001617 rev 1.1...
-
Page 173: Troubleshooting The Printer Error Message Table
Printer's LCD display to continue printing. e. To Cancel the print, press the Cancel Print button from the Driver's display dialog and the Cancel button located on the HDP8500 Industrial Card Printer/Encoder User Guide L001617 rev 1.1... - Page 174 Printer's and the Flipper Module Cover. Flipper Table. b. Clear any cards in the Flipper Table by using the Forward and/or Back buttons located on the Printer's LCD display. HDP8500 Industrial Card Printer/Encoder User Guide L001617 rev 1.1...
- Page 175 Driver's display dialog or the Cancel button located on the Printer's LCD display. Flipper Jam The Flipper Table has a. Open the Printer's Flipper jammed while either Module Cover. aligning itself or flipping a HDP8500 Industrial Card Printer/Encoder User Guide L001617 rev 1.1...
- Page 176 Printer's LCD display to continue printing. To cancel the print, press the Cancel Print button from the Driver‟s display dialog, or the Cancel button located on the Printer's LCD display. HDP8500 Industrial Card Printer/Encoder User Guide L001617 rev 1.1...
- Page 177 Print Ribbon, close the Printer‟s Cover and press the Resume button on the Printer to continue printing. b. If the Print Ribbon is broken, tape the ends of the Print HDP8500 Industrial Card Printer/Encoder User Guide L001617 rev 1.1...
- Page 178 Check the Cards and click on Present find a Magnetic stripe on Cancel Print. the card. No Smart Card No Smart Card Encoder is To cancel, click on Cancel Print. Encoder installed in the printer. HDP8500 Industrial Card Printer/Encoder User Guide L001617 rev 1.1...
- Page 179 Laminator settings to the factory default. c. Resend the print job. d. To cancel, press the Cancel Print button or the Cancel button located on the Printer. HDP8500 Industrial Card Printer/Encoder User Guide L001617 rev 1.1...
- Page 180 Cancel Print button from the Driver's display dialog and the Cancel button located on the Printer's LCD display. Laminator Film The Laminator cannot find Check that the Film is installed the next panel on the HDP8500 Industrial Card Printer/Encoder User Guide L001617 rev 1.1...
- Page 181 Cancel button. Invalid Film An unauthorized film is Get the correct Film from your installed in the Printer. dealer. Hopper Full Output Card Hopper is full Empty the Hopper. to capacity HDP8500 Industrial Card Printer/Encoder User Guide L001617 rev 1.1...
- Page 182 © 2012 HID Global Corporation. All rights reserved. Hopper Empty No cards in the Input Add cards to the Input hopper Hopper. HDP8500 Industrial Card Printer/Encoder User Guide L001617 rev 1.1...
-
Page 183: Communications Errors
See the next procedure. b. Print the Windows test page that is located in the General tab of the Driver. c. Use WordPad (a Windows 2000/XP word processing program in the Accessories Program Group). HDP8500 Industrial Card Printer/Encoder User Guide L001617 rev 1.1... - Page 184 © 2012 HID Global Corporation. All rights reserved. 1) Go to the File menu and select Page Setup. 2) Click on the Printer button and select the HDP8500 Card Printer. 3) Click OK and reset all four margins to zero. (Note: The WordPad will automatically replace the values with its minimum margins.)
-
Page 185: Printing A Test Image Using The Workbench Diagnostic
Select Self Tests (Note: These images help to determine if the Printer is functioning properly.) Scroll to the desired Self Test image from the Choose Test window options and press the Run Test button. HDP8500 Industrial Card Printer/Encoder User Guide L001617 rev 1.1... -
Page 186: Reviewing The Alignment Self Test Card
This option only applies if a Magnetic Encoding Module is installed in the Printer. (Note: The Printer will feed, encode and eject a card. Be sure to have high coercivity cards installed when running this test.) HDP8500 Industrial Card Printer/Encoder User Guide L001617 rev 1.1... -
Page 187: Reviewing The Ymck Self Test
Use this card to confirm that image colors are properly reproduced. Image consists of sixteen graduated steps of RGB and YMCK. (Note: This print will provide maximum image size, giving complete card Coverage on a CR-80 sized card.) HDP8500 Industrial Card Printer/Encoder User Guide L001617 rev 1.1... -
Page 188: Reviewing The Device Settings Self Test
The Card Count is the total number of cards the Printer has produced. Reviewing the Resin Self Test Step Procedure Use this card to determine that the Resin Panel is printing properly. HDP8500 Industrial Card Printer/Encoder User Guide L001617 rev 1.1... -
Page 189: Using The Test Print
Install the YMCKI ribbon. ( or other applicable ribbon) Bring up the Printer Preferences dialog via Start -> Settings -> Printers and Faxes. Right click on the HDP8500 printer instance; then left click on Printer Preferences to select the Card tab. -
Page 190: Section 9: Packing The Card Printer
Clean the inside of the Printer with deionized air. Wipe it down with a lint-free cloth. Clean the Printhead with a Printhead swab. Pack the Printer in the original carton and packing materials. Be sure to enclose any necessary paperwork, test cards, etc. HDP8500 Industrial Card Printer/Encoder User Guide L001617 rev 1.1... -
Page 191: Section 10: Firmware Updates
Printer Utility The Main Printer Firmware upgrades are done with the same procedure as the USB-connected Printer. The PC doing the upgrade must have a Driver installed for the Fargo Printer to be upgraded. Step Procedure Run the Fargo Workbench Printer Utility by selecting from the start menu the following: Start ->... - Page 192 © 2012 HID Global Corporation. All rights reserved. Select the New Firmware File by clicking Browse and selecting the Firmware file from the appropriate folder. Begin the upgrade by clicking OK. HDP8500 Industrial Card Printer/Encoder User Guide L001617 rev 1.1...
-
Page 193: Section 11: Hid Global Technical Support
© 2012 HID Global Corporation. All rights reserved. Section 11: HID Global Technical Support The purpose of this section to provide the User with an efficient, step-by-step procedure to be used when contacting Fargo Technical Support as needed for the HDP8500. Contacting Technical Support Step...
Need help?
Do you have a question about the Fargo HDP8500 and is the answer not in the manual?
Questions and answers