Sign In
Upload
Manuals
Brands
Fronius Manuals
Welding System
Robacta Reamer Twin
Fronius Robacta Reamer Twin Manuals
Manuals and User Guides for Fronius Robacta Reamer Twin. We have
3
Fronius Robacta Reamer Twin manuals available for free PDF download: Operating Instructions Manual, Manual
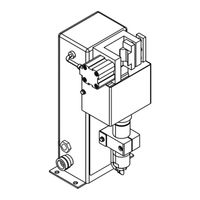
Fronius Robacta Reamer Twin Manual (96 pages)
Welding torch cleaning
Brand:
Fronius
| Category:
Welding System
| Size: 4 MB
Table of Contents
Table of Contents
5
Safety Rules
9
General
9
Proper Use
9
Environmental Conditions
9
Obligations of the Operator
10
Obligations of Personnel
10
Specific Hazards
10
Protecting Yourself and Others
11
EMC Device Classifications
11
EMC Measures
11
EMF Measures
12
Safety Measures at the Installation Location and During Transport
12
Safety Measures in Normal Operation
12
Commissioning, Maintenance and Repair
13
Safety Inspection
13
Disposal
13
Safety Symbols
13
Copyright
13
General
15
General
17
Principle
17
Device Concept
17
Application Areas
17
Illustration of the Various Device Types
17
Scope of Supply and Options
18
General
18
Robacta Reamer Alu Edition Scope of Supply
18
Robacta Reamer Alu Edition Options
18
Robacta Reamer Alu 3000Upm Scope of Supply
19
Robacta Reamer Alu 3000Upm Options
19
Robacta Reamer Twin Scope of Supply
19
Robacta Reamer Twin Options
20
Warning Notices on the Device
21
Warning Notices on the Cleaning Device
21
Transport
23
Vehicles
23
Transport Notices on the Packaging
23
Controls, Connections and Mechanical Components
25
Safety
27
Control Elements, Connections and Mechanical Components of the Robacta Reamer Alu Edition and Robacta Reamer Alu 3000Upm
28
Control Elements, Connections and Mechanical Components
28
Robacta Reamer Twin Control Elements, Connections and Mechanical Components
29
Control Elements, Connections and Mechanical Components
29
Harting Han6P Connecting Plug Pin Assignment (X1) for Robot Control
31
General
31
Harting Han6P Connecting Plug Pin Assignment (X1)
31
Installation and Commissioning
33
Safety
35
Ensuring that the Cleaning Device Is Depressurised
36
Before Commissioning
37
Proper Use
37
Operators, Maintenance Personnel
37
Setup Regulations
37
Compressed Air Supply Specifications
37
Measures for the Safe Operation of the Device with Untrained Personnel
37
Screwing the Cleaning Device to the Underlying Surface
38
Screwing the Cleaning Device and Installation Stand to the Underlying Surface
38
Torch Cleaning Position
40
Welding Torch Cleaning Position - Robacta Reamer Alu Edition
40
Welding Torch Cleaning Position - Robacta Reamer Alu 3000Upm
40
Welding Torch Cleaning Position - Robacta Reamer Twin
40
Adjusting the Gas Nozzle Clamping Device on the Robacta Reamer Alu Edition and Robacta Reamer Alu 3000Upm
41
Adjusting the Gas Nozzle Clamping Device
41
Fitting the Cleaning Brush on the Robacta Reamer Alu Edition
42
Fitting the Cleaning Brush
42
Fitting the Cleaning Cutter on the Robacta Reamer Alu 3000Upm
43
Fitting the Cleaning Cutter
43
Fitting the Cleaning Cutter on the Robacta Reamer Twin
44
Fitting the Cleaning Cutter
44
Adjusting the Robacta Reamer Alu Edition Lifting Device
45
Adjusting the Lifting Device
45
Adjusting the Robacta Reamer Alu 3000Upm Lifting Device
46
Adjusting the Lifting Device
46
Adjusting the Robacta Reamer Twin Lifting Device
47
Adjusting the Lifting Device
47
Starting up the Robacta Reamer Twin Parting Agent Nebuliser
48
Starting up the Parting Agent Nebuliser
48
Correct Adjustment of the Parting Agent Spray Nozzles on the Robacta Reamer Twin
49
Installing Mechanically-Controlled Wire Cutter on the Robacta Reamer Alu Edition and Robacta Reamer Alu 3000Upm (Optional)
50
Installing the Mechanically-Controlled Wire Cutter
50
Installing the Electrically-Controlled Wire Cutter on the Robacta Reamer Alu Edition and Robacta Reamer Alu 3000Upm (Optional)
54
Installing the Electrically-Controlled Wire Cutter
54
Wire Cutter Function
56
Maximum Wire Diameter
56
How the Mechanically-Controlled Wire Cutter Works
56
How the Electrically-Controlled Wire Cutter Works
56
Installing the Compressed Air Supply
57
Valve
57
Starting up the Cleaning Device
58
Prerequisites for Start-Up
58
Start-Up
58
Programme Sequence and Signal Waveform on the Robacta Reamer Alu Edition and Robacta Reamer Alu 3000Upm
59
Cleaning Program Sequence
59
Signal Waveform
62
Robacta Reamer Twin Programme Sequence and Signal Waveform
63
Cleaning Program Sequence
63
Signal Waveform
67
Care, Maintenance and Disposal
69
Safety
71
Ensuring that the Cleaning Device Is Depressurised
72
Care, Maintenance and Disposal
73
General
73
Before each Start-Up
73
Daily
73
Weekly
73
Every 6 Months
73
If Necessary
73
Disposal
73
Troubleshooting
75
Safety
77
Ensuring that the Cleaning Device Is Depressurised
78
Troubleshooting
79
Errors in Program Sequence
79
Technical Data
81
Technical Data
83
Robacta Reamer Alu Edition and Robacta Reamer Alu 3000Upm
83
Robacta Reamer Twin
83
Appendix
85
Spare Parts List: Robacta Reamer Alu Edition
86
Spare Parts List: Robacta Reamer Alu 3000Upm
87
Spare Parts List: Robacta Reamer Twin
88
Spare Parts List: Robacta Reamer Twin
89
Circuit Diagrams: Robacta Reamer Alu Edition / Robacta Reamer Alu 3000Upm
90
Circuit Diagrams: Robacta Reamer Twin
91
Robacta Reamer Twin Pneumatic Diagram
92
Declarations of Conformity
93
Advertisement
Fronius Robacta Reamer Twin Operating Instructions Manual (92 pages)
Brand:
Fronius
| Category:
Welding System
| Size: 4 MB
Table of Contents
Table of Contents
3
Safety Rules
6
Explanation of Safety Notices
6
General
6
Proper Use
7
Environmental Conditions
7
Obligations of the Operator
7
Obligations of Personnel
7
Specific Hazards
7
Protecting Yourself and Others
8
EMC Device Classifications
8
EMC Measures
9
EMF Measures
9
Safety Measures at the Installation Location and During Transport
9
Safety Measures in Normal Operation
10
Commissioning, Maintenance and Repair
10
Safety Inspection
10
Disposal
11
Safety Symbols
11
Copyright
11
General
13
General
15
Principle
15
Device Concept
15
Application Areas
15
Illustration of the Various Device Types
16
Scope of Supply and Options
17
General
17
Robacta Reamer Alu Edition Scope of Supply
17
Robacta Reamer Alu Edition Options
17
Robacta Reamer Alu 3000Upm Scope of Supply
18
Robacta Reamer Alu 3000Upm Options
18
Robacta Reamer Twin Scope of Supply
18
Robacta Reamer Twin Options
19
Warning Notices on the Device
20
Warning Notices on the Cleaning Device
20
Transport
22
Transport Devices
22
Transport Notices on the Packaging
22
Controls, Connections and Mechanical Components
23
Safety
25
Control Elements, Connections and Mechanical Components of the Robacta Reamer Alu Edi
26
Control Elements, Connections and Mechanical Components
26
Robacta Reamer Twin Control Elements, Connections and Mechanical Components
27
Control Elements, Connections and Mechanical Components
27
Harting Han6P Connecting Plug Pin Assignment (X1) for Robot Control
29
General
29
Harting Han6P Connecting Plug Pin Assignment (X1)
29
Installation and Commissioning
31
Safety
33
Ensuring that the Cleaning Device Is Depressurised
34
Before Commissioning
36
Proper Use
36
Operators, Maintenance Personnel
36
Setup Regulations
36
Compressed Air Supply Specifications
36
Measures for the Safe Operation of the Device with Untrained Personnel
37
Screwing the Cleaning Device to the Underlying Surface
38
Screwing the Cleaning Device and Installation Stand to the Underlying Surface
38
Screwing the Cleaning Device to the Underlying Surface
39
Torch Cleaning Position
41
Welding Torch Cleaning Position - Robacta Reamer Alu Edition
41
Welding Torch Cleaning Position - Robacta Reamer Alu 3000Upm
41
Welding Torch Cleaning Position - Robacta Reamer Twin
41
Adjusting the Gas Nozzle Clamping Device on the Robacta Reamer Alu Edition and Robacta
42
Adjusting the Gas Nozzle Clamping Device
42
Fitting the Cleaning Brush on the Robacta Reamer Alu Edition
43
Fitting the Cleaning Brush
43
Fitting the Cleaning Cutter on the Robacta Reamer Alu 3000Upm
44
Fitting the Cleaning Cutter
44
Fitting the Cleaning Cutter on the Robacta Reamer Twin
45
Fitting the Cleaning Cutter
45
Adjusting the Robacta Reamer Alu Edition Lifting Device
46
Adjusting the Lifting Device
46
Adjusting the Robacta Reamer Alu 3000Upm Lifting Device
47
Adjusting the Lifting Device
47
Adjusting the Robacta Reamer Twin Lifting Device
48
Adjusting the Lifting Device
48
Starting up the Robacta Reamer Twin Parting Agent Nebuliser
49
Starting up the Parting Agent Nebuliser
49
Installing Mechanically-Controlled Wire Cutter on the Robacta Reamer Alu Edition and
51
Installing the Mechanically-Controlled Wire Cutter
51
Installing the Electrically-Controlled Wire Cutter on the Robacta Reamer Alu Edition and
55
Installing the Electrically-Controlled Wire Cutter
55
Wire Cutter Function
57
Maximum Wire Diameter
57
How the Mechanically Controlled Wire Cutter Works
57
How the Electrically-Controlled Wire Cutter Works
57
Installing the Compressed Air Supply
58
Establishing the Compressed Air Supply for the Cleaning Device, Function of the Com
58
Starting up the Cleaning Device
59
Prerequisites for Start-Up
59
Programme Sequence and Signal Waveform on the Robacta Reamer Alu Edition and Robacta
60
Cleaning Programme Sequence
60
Signal Waveform
62
Robacta Reamer Twin Programme Sequence and Signal Waveform
63
Cleaning Programme Sequence
63
Signal Waveform
66
Care, Maintenance and Disposal
67
Safety
69
Ensuring that the Cleaning Device Is Depressurised
70
Care, Maintenance and Disposal
72
General
72
Before each Start-Up
72
Daily
72
Weekly
72
Every 6 Months
72
As Necessary
72
Disposal
72
Troubleshooting
73
Safety
75
Ensuring that the Cleaning Device Is Depressurised
76
Troubleshooting
78
Errors in Program Sequence
78
Technical Data
81
Technical Data
83
Robacta Reamer Alu Edition and Robacta Reamer Alu 3000Upm
83
Robacta Reamer Twin
83
Appendix
85
Circuit Diagram Robacta Reamer, Robacta Reamer Alu Edition, Robacta Reamer Alu Edition
87
3000Rpm
87
Circuit Diagram Robacta Reamer Twin
88
Robacta Reamer Twin Pneumatic Diagram
89
Declarations of Conformity
90
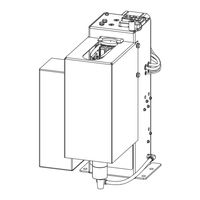
Fronius Robacta Reamer Twin Operating Instructions Manual (96 pages)
Brand:
Fronius
| Category:
Welding Accessories
| Size: 3 MB
Table of Contents
Table of Contents
3
Safety Instructions
5
Explanation of Safety Instructions
5
General
5
Intended Use
6
Environmental Conditions
6
Obligations of the Operating Company
6
Obligations of Personnel
6
Particular Hazard Areas
6
Personal Protection and Protection of Others
7
EMC Device Classifications
7
EMC Measures
8
EMF Measures
8
Safety Measures at the Setup Location and During Transport
8
Safety Measures in Normal Operation
9
Maintenance and Repair
9
Safety Inspection
9
Safety Symbols
10
Copyright
10
General
11
General
13
Device Concept
13
Functionality of the Cleaning Device
13
Application Areas
13
Warning Notices on the Cleaning Device
13
Transport
16
Transport Equipment
16
Transport Instructions on the Packaging
16
Scope of Supply and Options
17
Scope of Supply
17
Available Options
17
Operating Controls, Connections and Mechanical Components
19
Safety
21
Operating Controls, Connections and Mechanical Components
22
Harting Han12P (X1) Connecting Plug Configuration for the Robot Control
24
General
24
Harting Han12P (X1) Connecting Plug Configuration
24
Installation and Startup
25
Safety
27
Ensuring that the Cleaning Device Is Depressurized
28
Before Installation
29
Intended Use
29
Operating Personnel, Maintenance Personnel
29
Setup Regulations
29
Measures to Ensure Safe Operation of the Device When Operating Personnel Are Untrained
29
Screwing the Cleaning Device to the Solid Surface
30
Screwing the Cleaning Device to the Base
30
Screwing the Cleaning Device and Work Stand to the Surface
31
Installing/Removing the Protective Cover
33
Fitting the Protective Cover
33
Removing the Protective Cover
33
Mounting the Gas Nozzle Clamping Device
34
Welding Torch Cleaning Position
35
Twin Welding Torch Cleaning Position
35
Cleaning Position of the Single Welding Torch
36
Fitting the Cleaning Cutter
38
Adjusting the Position of the Cleaning Motor
39
Setting the Position of the Cleaning Motor for Twin Welding Torches
39
Setting the Position of the Cleaning Motor for Single Welding Torches
40
Compressed Air Supply
41
Specifications for the Compressed Air Supply
41
Mounting the Compressed Air Relief Valve
41
Operation of the Compressed Air Relief Valve
42
Starting up the Parting Agent Atomizer
43
Filling the Parting Agent Container (1 Liter) and Connecting It to the Cleaning Device
43
Connecting the Parting Agent Container (10 Liter) to the Cleaning Device
44
Positioning of the Parting Agent Container (10 Liters)
45
Opt/I TSS TCP Touch Sense
47
Mount Opt/I TSS TCP Touch Sense
47
Manually Checking the Cleaning Device Functions
48
Safety
48
Start up the Cleaning Device
51
Requirements for Commissioning
51
Commissioning
51
Program Sequence
52
Safety
52
Cleaning Program Sequence for Twin Welding Torches
53
Program Sequence of Cleaning for Single Welding Torches
61
Cleaning Signal Sequence
67
Signal Input
67
Signal Input and Output
67
Signal Output
68
Service, Maintenance and Disposal
69
Safety
71
Ensuring that the Cleaning Device Is Depressurized
72
Service, Maintenance and Disposal
73
Before Every Start-Up
73
Daily
73
Weekly
73
Every 6 Months
73
Whenever Required
73
Disposal
73
Troubleshooting
75
Safety
77
Ensuring that the Cleaning Device Is Depressurized
78
Troubleshooting
79
Errors in the Program Sequence
79
Technical Data
81
Technical Data
83
Robacta Reamer Single/Twin
83
Appendix
85
Declaration of Conformity
87
UKCA Conformity Assesment
89
UKCA Conformity Assesment
91
Advertisement
Advertisement
Related Products
Fronius Robacta Reamer V Easy
Fronius Robacta Reamer V
Fronius Robacta Reamer Alu Edition
Fronius Robacta Reamer V Comfort
Fronius Robacta-USC Series
Fronius Robacta Single Pipe
Fronius Robacta Twin Pipe Arctic
Fronius Robacta 2500
Fronius Robacta 5000
Fronius Robacta Twin Compact PRO
Fronius Categories
Inverter
Welding System
Welding Accessories
Battery Charger
Measuring Instruments
More Fronius Manuals
Login
Sign In
OR
Sign in with Facebook
Sign in with Google
Upload manual
Upload from disk
Upload from URL