Sign In
Upload
Manuals
Brands
Dell Manuals
Server
EMC PowerEdge R640
Dell EMC PowerEdge R640 Manuals
Manuals and User Guides for Dell EMC PowerEdge R640. We have
7
Dell EMC PowerEdge R640 manuals available for free PDF download: Owner's Manual, Installation And Service Manual, Deployment Manual, Manual, Hardware Installation Manual
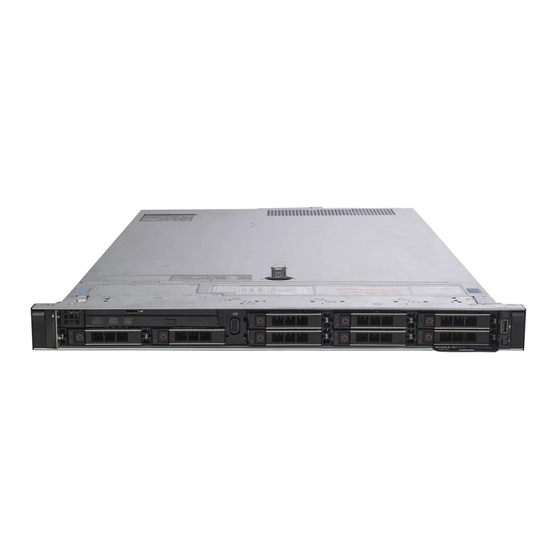
Dell EMC PowerEdge R640 Owner's Manual (206 pages)
Brand:
Dell
| Category:
Server
| Size: 3 MB
Table of Contents
Table of Contents
3
Dell Poweredge R830 Overview
7
Diagnostic Indicators on the Front Panel
7
Hard Drive Indicator Codes
9
NIC Indicator Codes
10
Power Supply Unit Indicator Codes
11
Locating Service Tag of Your System
14
Documentation Resources
15
Technical Specifications
17
System Dimensions
17
Chassis Weight
17
Processor Specifications
18
PSU Specifications
18
System Battery Specifications
18
Expansion Bus Specifications
18
Memory Specifications
18
Drive Specifications
19
Hard Drives
19
Optical Drive
19
Ports and Connectors Specifications
19
USB Ports
19
NIC Ports
20
Serial Connector
20
VGA Ports
21
Internal Dual SD Module
21
Video Specifications
21
Environmental Specifications
21
Particulate and Gaseous Contamination Specifications
22
Standard Operating Temperature
23
Expanded Operating Temperature
23
Expanded Operating Temperature Restrictions
24
Initial System Setup and Configuration
25
Setting up Your System
25
Idrac Configuration
25
Options to Set up Idracbmc IP Address
25
Options to Install the Operating System
26
Methods to Download Firmware and Drivers
27
Downloading the Drivers and Firmware
27
Pre-Operating System Management Applications
28
Options to Manage the Pre-Operating System Applications
28
System Setup
28
Viewing System Setup
29
System Setup Details
29
System BIOS
29
Viewing System BIOS
29
System BIOS Settings Details
30
Viewing Boot Settings
30
Boot Settings Details
30
Choosing the System Boot Mode
31
Changing the Boot Order
32
Viewing Network Settings
32
Network Settings Screen Details
32
Viewing System Security
33
System Security Settings Details
33
Creating a System and Setup Password
35
Operating with a Setup Password Enabled
36
Viewing System Information
37
System Information Details
37
Viewing Memory Settings
38
Memory Settings Details
38
Viewing Processor Settings
40
Processor Settings Details
40
Viewing SATA Settings
42
SATA Settings Details
42
Viewing Integrated Devices
47
Integrated Devices Details
47
Viewing Serial Communication
49
Serial Communication Details
49
Viewing System Profile Settings
50
System Profile Settings Details
50
Viewing Miscellaneous Settings
52
Miscellaneous Settings Details
52
Idrac Settings Utility
53
Entering the Idrac Settings Utility
53
Changing the Thermal Settings
53
Device Settings
53
Dell Lifecycle Controller
54
Embedded Systems Management
54
Boot Manager
54
Viewing Boot Manager
54
Boot Manager Main Menu
54
One-Shot BIOS Boot Menu
55
System Utilities
55
PXE Boot
55
Installing and Removing System Components
56
Safety Instructions
56
Before Working Inside Your Appliance
56
After Working Inside Your Appliance
57
Recommended Tools
57
Front Bezel (Optional)
58
Removing the Optional Front Bezel
58
Installing the Optional Front Bezel
62
System Cover
66
Removing the System Cover
66
Installing the System Cover
71
Inside the System
76
Cooling Shroud
78
Removing the Cooling Shroud
79
Installing the Cooling Shroud
86
System Memory
91
General Memory Module Installation Guidelines
97
Mode-Specific Guidelines
98
Memory Sparing
100
Memory Mirroring
100
Sample Memory Configurations
100
Removing Memory Modules
105
Installing Memory Modules
106
Hard Drives
109
Removing a 2.5-Inch Hard Drive Blank
109
Installing a 2.5-Inch Hard Drive Blank
110
Removing a 1.8-Inch Hard Drive Blank
111
Installing a 1.8-Inch Hard Drive Blank
111
Removing a Hot Swappable Hard Drive or Solid State Drive
112
Installing a Hot Swappable Hard Drive
114
Removing a Hard Drive or a Solid State Drive from a Hard Drive Carrier
115
Installing a Hot Swappable Hard Drive into a Hot Swappable Hard Drive Carrier
116
Removing a 1.8-Inch Hard Drive from a Hard Drive Carrier
116
Installing a 1.8-Inch Hard Drive into a Hard Drive Carrier
117
Optical Drive (Optional)
118
Removing the Optional Optical Drive
118
Installing the Optional Optical Drive
119
Removing the Slim Optical Drive Blank
120
Installing the Slim Optical Drive Blank
121
Cooling Fans
122
Removing a Cooling Fan
122
Installing a Cooling Fan
123
Internal USB Memory Key (Optional)
124
Replacing the Optional Internal USB Memory Key
125
Expansion Cards and Expansion Card Riser
126
Expansion Card Installation Guidelines
126
Removing Expansion Card Risers
128
Removing an Expansion Card
130
Installing an Expansion Card
131
Installing Expansion Card Risers
132
SD Vflash Card (Optional)
133
Replacing an SD Vflash Card
133
Internal Dual SD Module (Optional)
134
Removing an Internal SD Card
135
Installing an Internal SD Card
135
Removing the Optional Internal Dual SD Module
135
Installing the Optional Internal Dual SD Module
138
Integrated Storage Controller Card
141
Removing the Integrated Storage Controller Card
141
Installing the Integrated Storage Controller Card
142
Network Daughter Card
143
Removing the Network Daughter Card
144
Installing the Network Daughter Card
145
Processors and Heat Sinks
146
Removing a Heat Sink
146
Removing a Processor
151
Installing a Processor
154
Installing a Heat Sink
157
Power Supply Units (PSU)
162
Hot Spare Feature
163
Removing the Power Supply Unit Blank
163
Installing the Power Supply Unit Blank
164
Removing an AC Power Supply Unit
165
Installing an AC Power Supply Unit
166
Wiring Instructions for a DC Power Supply Unit
167
Assembling the DC Input Power Wires
169
Removing a DC Power Supply Unit
171
Installing a DC Power Supply Unit
171
System Batterybattery
172
Replacing the System Battery
172
Hard Drive Backplane
174
Removing the Hard Drive Backplane
174
Installing the Hard Drive Backplane
180
Control Panel Assembly
182
Removing the Control Panel Board-Eight Hard Drive System
182
Installing the Control Panel Board-Eight Hard Drive System
183
Removing the Control Panel-Eight Hard Drive System
184
Installing the Control Panel-Eight Hard Drive System
185
Removing the Control Panel-10 Hard Drive and 24 Hard Drive System
186
Installing the Control Panel-10 Hard Drive System and 24 Hard Drive System
187
VGA Module
188
Removing the VGA Module
188
Installing the VGA Module
189
System Board
190
Removing the System Board
190
Installing the System Board
192
Restoring the Service Tag by Using the Easy Restore Feature
194
Trusted Platform Module
195
Installing the Trusted Platform Module
195
Initializing the TPM for Bitlocker Users
196
Initializing the TPM for TXT Users
197
Using System Diagnostics
198
Dell Embedded System Diagnostics
198
When to Use the Embedded System Diagnostics
198
Running the Embedded System Diagnostics from Boot Manager
198
Running the Embedded System Diagnostics from the Dell Lifecycle Controller
198
System Diagnostic Controls
199
Jumpers and Connectors
200
System Board Jumper Settings
200
System Board Connectors
201
Disabling Forgotten Password
203
Getting Help
205
Contacting Dell
205
Documentation Feedback
205
Accessing System Information by Using QRL
205
Advertisement
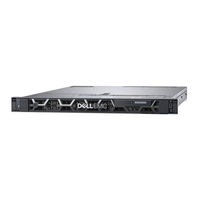
Dell EMC PowerEdge R640 Installation And Service Manual (175 pages)
Brand:
Dell
| Category:
Server
| Size: 69 MB
Table of Contents
Table of Contents
3
Dell EMC Poweredge R640 System Overview
8
Supported Configurations for Poweredge R640
8
Front View of the System
10
Left Control Panel View
13
Right Control Panel View
16
Back View of the System
18
NIC Indicator Codes
22
Power Supply Unit Indicator Codes
22
Drive Indicator Codes
25
LCD Panel
25
Viewing Home Screen
26
Setup Menu
27
View Menu
27
Locating the Service Tag of Your System
27
System Information Label
28
Poweredge R640 - Front System Information Label
28
Poweredge R640 - Service Information
29
Documentation Resources
31
Technical Specifications
33
System Dimensions
33
Chassis Weight
34
Processor Specifications
34
Supported Operating Systems
34
Cooling Fan Specifications
34
PSU Specifications
34
System Battery Specifications
35
Expansion Bus Specifications
35
Memory Specifications
35
Storage Controller Specifications
36
Drives
36
Hard Drive Specifications
36
Optical Drive
36
Ports and Connectors Specifications
36
USB Ports
36
NIC Ports
37
Serial Port
37
VGA Ports
38
IDSDM or Vflash Card
38
Environmental Specifications
38
Standard Operating Temperature
40
Expanded Operating Temperature
40
Particulate and Gaseous Contamination Specifications
42
Initial System Setup and Configuration
44
Setting up Your System
44
Idrac Configuration
44
Options to Set up Idrac IP Address
44
Log in to Idrac
45
Options to Install the Operating System
45
Methods to Download Firmware and Drivers
45
Downloading Drivers and Firmware
46
Pre-Operating System Management Applications
47
Options to Manage the Pre-Operating System Applications
47
System Setup
47
Viewing System Setup
47
System Setup Details
48
System BIOS
48
Idrac Settings Utility
68
Device Settings
68
Dell Lifecycle Controller
68
Embedded System Management
68
Boot Manager
68
Viewing Boot Manager
68
Boot Manager Main Menu
69
One-Shot UEFI Boot Menu
69
System Utilities
69
PXE Boot
69
Installing and Removing System Components
70
Safety Instructions
70
Before Working Inside Your System
70
After Working Inside Your System
70
Recommended Tools
70
Optional Front Bezel
71
Removing the Front Bezel
71
Installing the Front Bezel
72
System Cover
72
Removing the System Cover
72
Installing the System Cover
73
Backplane Cover
74
Removing the Backplane Cover
74
Installing the Backplane Cover
75
Inside the System
76
Air Shroud
79
Removing the Air Shroud
79
Installing the Air Shroud
80
Cooling Fans
81
Removing a Cooling Fan
81
Installing a Cooling Fan
82
System Memory
83
System Memory Guidelines
83
General Memory Module Installation Guidelines
85
NVDIMM-N Memory Module Installation Guidelines
86
Mode-Specific Guidelines
87
Removing a Memory Module
90
Installing a Memory Module
91
NVDIMM-N Battery
92
Removing the NVDIMM-N Battery
92
Installing the NVDIMM-N Battery
93
Processors and Heat Sinks
93
Removing a Processor and Heat Sink Module
93
Removing the Processor from the Processor and Heat Sink Module
95
Installing the Processor into a Processor and Heat Sink Module
97
Installing a Processor and Heat Sink Module
99
Expansion Cards and Expansion Card Risers
100
Expansion Bus Specifications
100
Removing an Expansion Card Riser
106
Installing an Expansion Card Riser
108
Removing Expansion Card from the Expansion Card Riser
110
Installing an Expansion Card into Expansion Card Riser
113
M.2 SSD Module
116
Removing the M.2 SSD Module
116
Installing the M.2 SSD Module
116
Optional IDSDM or Vflash Module
117
Removing the Microsd Card
117
Installing the Microsd Card
118
Removing the Optional IDSDM or Vflash Card
118
Installing Optional IDSDM or Vflash Card
119
Network Daughter Card
120
Removing the Network Daughter Card
120
Installing the Network Daughter Card
121
Integrated Storage Controller Card
122
Removing the Integrated Storage Controller Card
122
Installing the Integrated Storage Controller Card
124
Drives
125
Removing a Drive Blank
125
Installing a Drive Blank
126
Removing a Drive Carrier
127
Installing a Drive Carrier
128
Removing the Drive from the Drive Carrier
129
Installing a Drive into the Drive Carrier
129
Backplane
130
Backplane Details
130
Removing the Backplane Cover
131
Installing the Backplane
132
Removing the 2.5 Inch Drive Rear Backplane
133
Installing the 2.5 Inch Drive Rear Backplane
134
Cable Routing
136
SAS Expander Card
141
Removing the SAS Expander Card
141
Installing the SAS Expander Card
142
Rear Drive Cage
143
Removing the Rear Drive Cage
143
Installing the Rear Drive Cage
144
System Battery
145
Replacing the System Battery
145
USB Module
146
Removing the USB Module
146
Installing the USB Module
147
VGA Module
148
Removing the VGA Module
148
Installing the VGA Module
149
Optional Internal USB Memory Key
150
Replacing the Optional Internal USB Memory Key
150
Optical Drive (Optional)
151
Removing the Optical Drive
151
Installing the Optical Drive
152
Power Supply Units
152
Hot Spare Feature
153
Removing a Power Supply Unit Blank
153
Installing a Power Supply Unit Blank
154
Removing a Power Supply Unit
154
Installing a Power Supply Unit
155
Removing a DC Power Supply Unit
156
Installing DC Power Supply Unit
157
Wiring Instructions for a DC Power Supply Unit
157
System Board
158
Removing the System Board
158
Installing the System Board
159
Trusted Platform Module
162
Upgrading the Trusted Platform Module
162
Initializing TPM for Bitlocker Users
163
Initializing the TPM 1.2 for TXT Users
163
Control Panel
163
Removing the Left Control Panel
163
Installing the Left Control Panel
164
Removing the Right Control Panel
165
Installing the Right Control Panel
166
Using System Diagnostics
168
Dell Embedded System Diagnostics
168
Running the Embedded System Diagnostics from Boot Manager
168
Running the Embedded System Diagnostics from the Dell Lifecycle Controller
168
System Diagnostic Controls
169
Jumpers and Connectors
170
System Board Jumpers and Connectors
171
System Board Jumper Settings
172
Disabling Forgotten Password
173
Getting Help
174
Contacting Dell EMC
174
Documentation Feedback
174
Accessing System Information by Using QRL
174
Quick Resource Locator for R640
175
Receiving Automated Support with Supportassist
175
Recycling or End-Of-Life Service Information
175
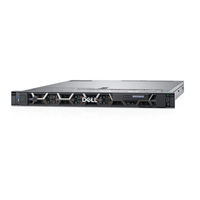
Dell EMC PowerEdge R640 Installation And Service Manual (173 pages)
Brand:
Dell
| Category:
Server
| Size: 64 MB
Table of Contents
Table of Contents
3
Chapter 1: Dell EMC Poweredge R640 Overview
8
Supported Configurations for Poweredge R640
8
Front View of the System
10
Left Control Panel View
13
Right Control Panel View
16
Back View of the System
17
NIC Indicator Codes
20
Power Supply Unit Indicator Codes
21
Drive Indicator Codes
23
LCD Panel
23
Viewing Home Screen
24
Setup Menu
24
View Menu
25
Locating the Service Tag of Your System
25
System Information Label
26
Chapter 2: Documentation Resources
29
Chapter 3: Technical Specifications
31
System Dimensions
31
Chassis Weight
32
Processor Specifications
32
Supported Operating Systems
32
Cooling Fan Specifications
32
PSU Specifications
33
System Battery Specifications
33
Expansion Bus Specifications
33
Memory Specifications
34
Storage Controller Specifications
34
Drives
35
Hard Drive Specifications
35
Optical Drive
35
Ports and Connectors Specifications
35
USB Ports
35
NIC Ports
36
Serial Port
36
VGA Ports
36
IDSDM or Vflash Card
37
Environmental Specifications
37
Standard Operating Temperature
38
Expanded Operating Temperature
38
Particulate and Gaseous Contamination Specifications
41
Chapter 4: Initial System Setup and Configuration
43
Setting up Your System
43
Idrac Configuration
43
Options to Set up Idrac IP Address
43
Log in to Idrac
44
Options to Install the Operating System
44
Methods to Download Firmware and Drivers
44
Downloading Drivers and Firmware
45
Chapter 5: Pre-Operating System Management Applications
46
Options to Manage the Pre-Operating System Applications
46
System Setup
46
Viewing System Setup
46
System Setup Details
47
System BIOS
47
Idrac Settings Utility
69
Device Settings
69
Dell Lifecycle Controller
69
Embedded System Management
69
Boot Manager
70
Viewing Boot Manager
70
Boot Manager Main Menu
70
One-Shot UEFI Boot Menu
70
System Utilities
70
PXE Boot
70
Chapter 6: Installing and Removing System Components
71
Safety Instructions
71
Before Working Inside Your System
72
After Working Inside Your System
72
Recommended Tools
72
Optional Front Bezel
73
Removing the Front Bezel
73
Installing the Front Bezel
73
System Cover
74
Removing the System Cover
74
Installing the System Cover
75
Drives
76
Removing a Drive Blank
76
Installing a Drive Blank
77
Removing a Drive Carrier
77
Installing a Drive Carrier
78
Removing the Drive from the Drive Carrier
79
Installing a Drive into the Drive Carrier
80
Backplane Cover
81
Removing the Backplane Cover
81
Installing the Backplane Cover
82
Inside the System
83
Air Shroud
86
Removing the Air Shroud
86
Installing the Air Shroud
86
Cooling Fans
87
Removing a Cooling Fan
87
Installing a Cooling Fan
88
System Memory
89
System Memory Guidelines
89
General Memory Module Installation Guidelines
90
NVDIMM-N Memory Module Installation Guidelines
91
DCPMM Installation Guidelines
94
Mode-Specific Guidelines
96
Removing a Memory Module
99
Installing a Memory Module
100
NVDIMM-N Battery
101
Removing the NVDIMM-N Battery
101
Installing the NVDIMM-N Battery
102
Processors and Heat Sinks
102
Removing a Processor and Heat Sink Module
102
Removing the Processor from the Processor and Heat Sink Module
103
Installing the Processor into a Processor and Heat Sink Module
105
Installing a Processor and Heat Sink Module
107
Expansion Cards and Expansion Card Risers
108
Expansion Bus Specifications
108
Removing an Expansion Card Riser
113
Installing an Expansion Card Riser
115
Removing Expansion Card from the Expansion Card Riser
117
Installing an Expansion Card into Expansion Card Riser
120
M.2 SSD Module
122
Removing the M.2 SSD Module
122
Installing the M.2 SSD Module
123
Optional IDSDM or Vflash Module
124
Removing the Optional IDSDM or Vflash Card
124
Installing Optional IDSDM or Vflash Card
125
Optional IDSDM or Vflash Module
126
Removing the Microsd Card
126
Installing the Microsd Card
127
Network Daughter Card
128
Removing the Network Daughter Card
128
Installing the Network Daughter Card
129
Integrated Storage Controller Card
130
Removing the Integrated Storage Controller Card
130
Installing the Integrated Storage Controller Card
131
Backplane
133
Backplane Details
133
Removing the Backplane Cover
134
Installing the Backplane
134
Removing the 2.5 Inch Drive Rear Backplane
135
Installing the 2.5 Inch Drive Rear Backplane
136
Cable Routing
138
SAS Expander Card
142
Removing the SAS Expander Card
142
Installing the SAS Expander Card
143
Rear Drive Cage
144
Removing the Rear Drive Cage
144
Installing the Rear Drive Cage
145
System Battery
146
Replacing the System Battery
146
USB Module
147
Removing the USB Module
147
Installing the USB Module
148
VGA Module
148
Removing the VGA Module
148
Installing the VGA Module
149
Optional Internal USB Memory Key
150
Replacing the Optional Internal USB Memory Key
150
Optical Drive (Optional)
151
Removing the Optical Drive
151
Installing the Optical Drive
151
Power Supply Units
152
Hot Spare Feature
153
Removing a Power Supply Unit Blank
153
Installing a Power Supply Unit Blank
153
Removing a Power Supply Unit
154
Installing a Power Supply Unit
155
Removing a DC Power Supply Unit
155
Installing DC Power Supply Unit
156
Wiring Instructions for a DC Power Supply Unit
156
System Board
157
Removing the System Board
157
Installing the System Board
158
Trusted Platform Module
161
Upgrading the Trusted Platform Module
161
Initializing TPM for Bitlocker Users
162
Initializing the TPM 1.2 for TXT Users
162
Initializing the TPM 2.0 for TXT Users
162
Control Panel
163
Removing the Left Control Panel
163
Installing the Left Control Panel
164
Removing the Right Control Panel
165
Installing the Right Control Panel
166
Chapter 7: System Diagnostics
167
Dell Embedded System Diagnostics
167
Running the Embedded System Diagnostics from Boot Manager
167
Running the Embedded System Diagnostics from the Dell Lifecycle Controller
167
System Diagnostic Controls
168
Chapter 8: Jumpers and Connectors
169
System Board Jumpers and Connectors
169
System Board Jumper Settings
171
Disabling Forgotten Password
171
Chapter 9: Getting Help
172
Contacting Dell EMC
172
Documentation Feedback
172
Accessing System Information by Using QRL
172
Quick Resource Locator for R640
173
Receiving Automated Support with Supportassist
173
Recycling or End-Of-Life Service Information
173
Advertisement
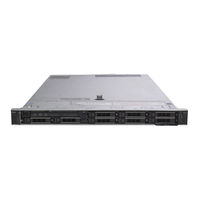
Dell EMC PowerEdge R640 Installation And Service Manual (164 pages)
Brand:
Dell
| Category:
Server
| Size: 64 MB
Table of Contents
Table of Contents
3
1 Poweredge R640 System Overview
8
Supported Configurations for Poweredge R640
8
Front View of the System
10
Left Control Panel View
11
Status Led Indicators
12
Right Control Panel View
14
Idrac Direct Led Indicator Codes
15
Back View of the System
16
NIC Indicator Codes
17
Power Supply Unit Indicator Codes
18
Hard Drive Indicator Codes
20
LCD Panel
21
Viewing Home Screen
21
Setup Menu
22
View Menu
22
Locating Service Tag of Your System
22
2 Documentation Resources
24
3 Technical Specifications
26
System Dimensions
27
Chassis Weight
28
Processor Specifications
28
PSU Specifications
28
System Battery Specifications
28
Expansion Bus Specifications
29
Memory Specifications
29
Storage Controller Specifications
29
Hard Drive Specifications
29
Hard Drives
29
Optical Drive
30
Ports and Connectors Specifications
30
USB Ports
30
NIC Ports
31
Serial Port
31
VGA Ports
31
Idsdm/Vflash Card
32
Environmental Specifications
32
Standard Operating Temperature
33
Expanded Operating Temperature
34
Particulate and Gaseous Contamination Specifications
36
4 Initial System Setup and Configuration
38
Setting up Your System
38
Idrac Configuration
38
Options to Set up Idrac IP Address
38
Log in to Idrac
39
Options to Install the Operating System
39
Methods to Download Firmware and Drivers
39
Downloading Drivers and Firmware
40
5 Pre-Operating System Management Applications
41
Options to Manage the Pre-Operating System Applications
41
System Setup
41
Viewing System Setup
42
System Setup Details
42
System BIOS
43
System Information
44
Viewing System Information
44
Processor Settings
47
Boot Settings
49
Network Settings
51
Network Settings Screen Details
52
System Security
58
Using Your System Password to Secure Your System
60
Idrac Settings Utility
62
Device Settings
63
Dell Lifecycle Controller
63
Embedded System Management
63
Boot Manager
63
Viewing Boot Manager
63
Boot Manager Main Menu
64
One-Shot BIOS Boot Menu
64
System Utilities
64
PXE Boot
64
6 Installing and Removing System Components
65
Safety Instructions
65
Before Working Inside Your System
65
After Working Inside Your System
65
Recommended Tools
66
Front Bezel (Optional)
66
Removing the Optional Front Bezel
66
Installing the Optional Front Bezel
67
System Cover
68
Removing the System Cover
68
Installing the System Cover
69
Backplane Cover
70
Removing the Backplane Cover
70
Installing the Backplane Cover
71
Inside the System
72
Air Shroud
75
Removing the Air Shroud
75
Installing the Air Shroud
76
Cooling Fans
77
Removing a Cooling Fan
77
Installing a Cooling Fan
78
System Memory
79
General Memory Module Installation Guidelines
81
NVDIMM-N Memory Module Installation Guidelines
81
Mode-Specific Guidelines
83
Removing a Memory Module
84
Installing a Memory Module
85
NVDIMM-N Battery
86
Removing the NVDIMM-N Battery
86
Installing the NVDIMM-N Battery
87
Processors and Heat Sinks
88
Removing a Processor and Heat Sink Module
88
Removing the Processor from the Processor and Heat Sink Module
89
Installing the Processor into a Processor and Heat Sink Module
91
Installing a Processor and Heat Sink Module
93
Expansion Cards and Expansion Card Risers
94
Expansion Bus Specifications
94
Expansion Card Installation Guidelines
95
Removing an Expansion Card Riser
100
Installing an Expansion Card Riser
102
Removing an Expansion Card from the Expansion Card Riser
105
Installing an Expansion Card into Expansion Card Riser
108
Idsdm/Vflash Card (Optional)
111
Removing the Micro SD Card
111
Installing the Micro SD Card
112
Removing the Optional Idsdm/Vflash Card
112
Installing the Optional Idsdm/Vflash Card
113
Network Daughter Card
114
Removing the Network Daughter Card
114
Installing the Network Daughter Card
115
Integrated Storage Controller Card
116
Removing the Integrated Storage Controller Card
116
Installing the Integrated Storage Controller Card
118
Hard Drives
119
Removing a Hard Drive Blank
119
Installing a Hard Drive Blank
120
Removing a Hard Drive
121
Installing a Hard Drive
122
Removing the Hard Drive from the Hard Drive Carrier
123
Installing a Hard Drive into the Hard Drive Carrier
123
Hard Drive Backplane
124
Removing the Hard Drive Backplane
124
Installing the Hard Drive Backplane
126
Removing the 2.5 Inch Hard Drive Backplane (Rear)
127
Installing the 2.5 Inch Hard Drive Backplane (Rear)
128
Cable Routing
130
Hard Drive Cage (Rear)
134
Removing the Rear Hard Drive Cage
134
Installing the Rear Hard Drive Cage
135
System Battery
136
Replacing the System Battery
136
USB Module
137
Removing the USB Module
137
Installing the USB Module
138
Internal USB Memory Key (Optional)
139
Replacing Optional Internal USB Memory Key
140
Optical Drive (Optional)
140
Removing the Optical Drive
140
Installing the Optical Drive
141
Power Supply Units
142
Hot Spare Feature
142
Removing a Power Supply Unit Blank
142
Installing a Power Supply Unit Blank
143
Removing a Power Supply Unit
143
Installing a Power Supply Unit
144
Wiring Instructions for a DC Power Supply Unit
145
Kit Contents
146
Required Tools
146
System Board
147
Removing the System Board
147
Installing the System Board
148
Trusted Platform Module
150
Replacing the Trusted Platform Module
151
Initializing TPM for Bitlocker Users
151
Initializing the TPM 1.2 for TXT Users
152
Control Panel
152
Removing the Left Control Panel
152
Installing the Left Control Panel
153
Removing the Right Control Panel
154
Installing the Right Control Panel
155
7 Using System Diagnostics
157
Dell Embedded System Diagnostics
157
Running the Embedded System Diagnostics from Boot Manager
157
Running the Embedded System Diagnostics from the Dell Lifecycle Controller
157
System Diagnostic Controls
158
8 Jumpers and Connectors
159
System Board Jumper Settings
159
System Board Jumpers and Connectors
160
Disabling Forgotten Password
161
9 Getting Help
163
Receiving Automated Support with Supportassist
163
Contacting Dell
163
Documentation Feedback
164
Dell EMC PowerEdge R640 Deployment Manual (78 pages)
EMC Networking with Isilon Front-End Deployment and Best Practices Guide
Brand:
Dell
| Category:
Switch
| Size: 2 MB
Table of Contents
Table of Contents
3
1 Introduction
5
Typographical Conventions
7
Attachments
7
2 Hardware Overview
8
Dell EMC Networking S3048-ON
8
Dell EMC Networking S4048-ON
8
Dell EMC Networking Z9100-ON
8
Dell EMC Poweredge R730Xd
8
Dell EMC Poweredge R640
9
Isilon X210
9
3 Management
10
4 Leaf-Spine Overview
11
Design Considerations
11
Oversubscription
12
Scaling
13
Layer 3 Leaf-Spine Topology
14
Layer 2 Leaf-Spine Topology
15
5 Layer 3 Topology Preparation
16
BGP ASN Configuration
16
Loopback Addresses
16
Point-To-Point Interfaces
17
6 Configuration of Layer 3 Topology
19
Configuration of Z9100-ON OS10EE Spine Switches
19
Configuration of S4048-ON OS10EE Leaf Switches
23
Configuration of S4048-ON OS9 Leaf Switches
32
7 Configuration of Layer 2 Topology
41
Configuration of Z9100-ON OS10EE Spine Switches
41
Configuration of S4048-ON OS10EE Leaf Switches
45
Configuration of S4048-ON OS9 Leaf Switches
50
8 Validation
58
OS10EE Validation Commands
58
OS9 Validation Commands
63
Show Vrrp Brief
66
9 Isilon Configuration
67
Building the Cluster
67
Configuring LACP to each Node
69
Configuring SMB Share
72
Setting up DNS for Smartconnect
73
Validation
74
A Validated Hardware and Components
76
Dell EMC Networking Switches
76
Dell EMC Isilon Array
76
Dell EMC Poweredge Servers
76
Product Manuals and Technical Guides
77
C Support and Feedback
78
Dell EMC PowerEdge R640 Manual (49 pages)
Brand:
Dell
| Category:
Server
| Size: 5 MB
Table of Contents
Table of Contents
3
1 System Overview
5
Introduction
5
New Technologies
5
2 System Features
7
Product Comparison
7
Technical Specifications
9
3 Chassis Views and Features
11
Front Panel View and Features
11
Back Panel View and Features
11
Internal Chassis View
12
Security Features
13
4 Processors
15
Processor Features
15
Supported Processors
15
Processor Configurationssingle CPU Configurationprocessor Installation
17
Chipset
17
5 Memory
19
Dimms Supported
19
Memory Configurations
20
Memory Population Guidelines
20
Memory RAS Features
20
6 Storage
22
Storage Controllers
22
Supported Drives
22
External Storage
23
Idsdm/Vflash Card
23
Optical Drives
24
Tape Drives
24
7 Networking and Pcie
25
Pcie Expansion Cards
25
Pcie Expansion Card Riser Configurations
25
8 Power, Thermal, and Acoustics
27
Power Consumption and Energy Efficiency
27
Thermal and Acoustics
28
Power Supply Units
28
Acoustical Design
28
9 Rack Rails
30
10 Dell EMC Openmanage Systems Management
32
Openmanage Systems Management
33
Idrac Lifecycle Controller
33
Idrac Features and Comparison
33
Agent-Free Management
38
Agent-Based Management
38
Dell EMC Consoles
38
Openmanage Systems Management Tools, Utilities and Protocols
38
Integration with Third-Party Consoles
39
Openmanage Connections with Third-Party Consoles
39
Dell EMC Server Management Operations
39
11 Appendix A. Additional Specifications
41
Power Supply Specifications
41
Chassis Dimensions
42
Environmental Specifications
43
Video Specifications
43
12 Appendix B. Standards Compliance
44
13 Appendix C Additional Resources
45
14 Appendix D. Support and Deployment Services
46
Server Deployment Services
46
Remote Consulting Services
47
Data Migration Service
47
Prosupport
47
Prosupport Plus (for Business-Critical Servers)
47
Prosupport Flex for Data Center
47
Prosupport Enterprise Suite
48
Additional Professional Services
49
Dell EMC Education Services
49
Dell EMC Global Infrastructure Consulting Services
49
Dell EMC Managed Services
49
Dell EMC PowerEdge R640 Hardware Installation Manual (2 pages)
Metro node
Brand:
Dell
| Category:
Server
| Size: 1 MB
Table of Contents
Before You Begin
1
Install Metro Node Servers
1
Install Cable Management Arm Kit
1
Connect CMA Kit Cables to the Server Nodes
1
Connect the MGMT Ethernet Cables to the Two MGMT Ports on each Node
2
Connect the AC Power Cables to the Power Supply Units on each Node
2
Connect Power Cables to Redundant Utility Power Sources
2
Check Metro Node Interconnections and Power
2
Establish Local Customer Connections
2
Establish Metro Customer Connections
2
Next Steps
2
Advertisement
Related Products
Dell PowerEdge R640XL
Dell EMC PowerEdge R640 WNW58
Dell PowerEdge R620
Dell EMC PowerEdge R650
Dell EMC PowerEdge R6515
Dell EMC PowerEdge R650xs
Dell PowerEdge R6625
Dell PowerEdge R650XS M4JNT
Dell PowerEdge R6725
Dell PowerEdge R660xs 6JN0K
Dell Categories
Laptop
Desktop
Monitor
Server
Storage
More Dell Manuals
Login
Sign In
OR
Sign in with Facebook
Sign in with Google
Upload manual
Upload from disk
Upload from URL