Sign In
Upload
Download
Table of Contents
Contents
Add to my manuals
Delete from my manuals
Share
URL of this page:
HTML Link:
Bookmark this page
Add
Manual will be automatically added to "My Manuals"
Print this page
×
Bookmark added
×
Added to my manuals
Manuals
Brands
Dell Manuals
Server
EMC E39S Series
Installation and service manual
Dell EMC E39S Series Installation And Service Manual
Hide thumbs
1
2
Table Of Contents
3
4
5
6
7
8
9
10
11
12
13
14
15
16
17
18
19
20
21
22
23
24
25
26
27
28
29
30
31
32
33
34
35
36
37
38
39
40
41
42
43
44
45
46
47
48
49
50
51
52
53
54
55
56
57
58
59
60
61
62
63
64
65
66
67
68
69
70
71
72
73
74
75
76
77
78
79
80
81
82
83
84
85
86
87
88
89
90
91
92
93
94
95
96
97
98
99
100
101
102
103
104
105
106
107
108
109
110
111
112
113
114
115
116
117
118
119
120
121
122
123
124
125
126
127
128
129
130
131
132
133
134
135
136
137
138
139
140
141
142
143
144
145
146
147
148
149
150
151
152
153
154
155
156
157
158
159
160
161
162
163
164
165
166
167
168
169
170
171
172
173
page
of
173
Go
/
173
Contents
Table of Contents
Bookmarks
Table of Contents
Table of Contents
Chapter 1: Dell EMC Poweredge R640 Overview
Supported Configurations for Poweredge R640
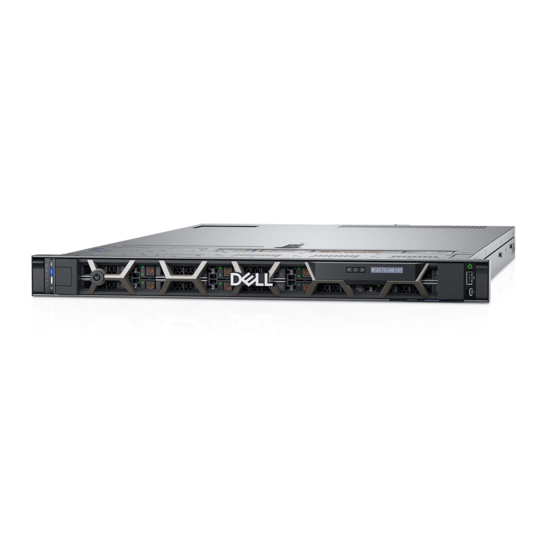
Front View of the System
Left Control Panel View
Right Control Panel View
Back View of the System
NIC Indicator Codes
Power Supply Unit Indicator Codes
Drive Indicator Codes
LCD Panel
Viewing Home Screen
Setup Menu
View Menu
Locating the Service Tag of Your System
System Information Label
Chapter 2: Documentation Resources
Chapter 3: Technical Specifications
System Dimensions
Chassis Weight
Processor Specifications
Supported Operating Systems
Cooling Fan Specifications
PSU Specifications
System Battery Specifications
Expansion Bus Specifications
Memory Specifications
Storage Controller Specifications
Drives
Hard Drive Specifications
Optical Drive
Ports and Connectors Specifications
USB Ports
NIC Ports
Serial Port
VGA Ports
IDSDM or Vflash Card
Environmental Specifications
Standard Operating Temperature
Expanded Operating Temperature
Particulate and Gaseous Contamination Specifications
Chapter 4: Initial System Setup and Configuration
Setting up Your System
Idrac Configuration
Options to Set up Idrac IP Address
Log in to Idrac
Options to Install the Operating System
Methods to Download Firmware and Drivers
Downloading Drivers and Firmware
Chapter 5: Pre-Operating System Management Applications
Options to Manage the Pre-Operating System Applications
System Setup
Viewing System Setup
System Setup Details
System BIOS
Idrac Settings Utility
Device Settings
Dell Lifecycle Controller
Embedded System Management
Boot Manager
Viewing Boot Manager
Boot Manager Main Menu
One-Shot UEFI Boot Menu
System Utilities
PXE Boot
Chapter 6: Installing and Removing System Components
Safety Instructions
Before Working Inside Your System
After Working Inside Your System
Recommended Tools
Optional Front Bezel
Removing the Front Bezel
Installing the Front Bezel
System Cover
Removing the System Cover
Installing the System Cover
Drives
Removing a Drive Blank
Installing a Drive Blank
Removing a Drive Carrier
Installing a Drive Carrier
Removing the Drive from the Drive Carrier
Installing a Drive into the Drive Carrier
Backplane Cover
Removing the Backplane Cover
Installing the Backplane Cover
Inside the System
Air Shroud
Removing the Air Shroud
Installing the Air Shroud
Cooling Fans
Removing a Cooling Fan
Installing a Cooling Fan
System Memory
System Memory Guidelines
General Memory Module Installation Guidelines
NVDIMM-N Memory Module Installation Guidelines
DCPMM Installation Guidelines
Mode-Specific Guidelines
Removing a Memory Module
Installing a Memory Module
NVDIMM-N Battery
Removing the NVDIMM-N Battery
Installing the NVDIMM-N Battery
Processors and Heat Sinks
Removing a Processor and Heat Sink Module
Removing the Processor from the Processor and Heat Sink Module
Installing the Processor into a Processor and Heat Sink Module
Installing a Processor and Heat Sink Module
Expansion Cards and Expansion Card Risers
Expansion Bus Specifications
Removing an Expansion Card Riser
Installing an Expansion Card Riser
Removing Expansion Card from the Expansion Card Riser
Installing an Expansion Card into Expansion Card Riser
M.2 SSD Module
Removing the M.2 SSD Module
Installing the M.2 SSD Module
Optional IDSDM or Vflash Module
Removing the Optional IDSDM or Vflash Card
Installing Optional IDSDM or Vflash Card
Optional IDSDM or Vflash Module
Removing the Microsd Card
Installing the Microsd Card
Network Daughter Card
Removing the Network Daughter Card
Installing the Network Daughter Card
Integrated Storage Controller Card
Removing the Integrated Storage Controller Card
Installing the Integrated Storage Controller Card
Backplane
Backplane Details
Removing the Backplane Cover
Installing the Backplane
Removing the 2.5 Inch Drive Rear Backplane
Installing the 2.5 Inch Drive Rear Backplane
Cable Routing
SAS Expander Card
Removing the SAS Expander Card
Installing the SAS Expander Card
Rear Drive Cage
Removing the Rear Drive Cage
Installing the Rear Drive Cage
System Battery
Replacing the System Battery
USB Module
Removing the USB Module
Installing the USB Module
VGA Module
Removing the VGA Module
Installing the VGA Module
Optional Internal USB Memory Key
Replacing the Optional Internal USB Memory Key
Optical Drive (Optional)
Removing the Optical Drive
Installing the Optical Drive
Power Supply Units
Hot Spare Feature
Removing a Power Supply Unit Blank
Installing a Power Supply Unit Blank
Removing a Power Supply Unit
Installing a Power Supply Unit
Removing a DC Power Supply Unit
Installing DC Power Supply Unit
Wiring Instructions for a DC Power Supply Unit
System Board
Removing the System Board
Installing the System Board
Trusted Platform Module
Upgrading the Trusted Platform Module
Initializing TPM for Bitlocker Users
Initializing the TPM 1.2 for TXT Users
Initializing the TPM 2.0 for TXT Users
Control Panel
Removing the Left Control Panel
Installing the Left Control Panel
Removing the Right Control Panel
Installing the Right Control Panel
Chapter 7: System Diagnostics
Dell Embedded System Diagnostics
Running the Embedded System Diagnostics from Boot Manager
Running the Embedded System Diagnostics from the Dell Lifecycle Controller
System Diagnostic Controls
Chapter 8: Jumpers and Connectors
System Board Jumpers and Connectors
System Board Jumper Settings
Disabling Forgotten Password
Chapter 9: Getting Help
Contacting Dell EMC
Documentation Feedback
Accessing System Information by Using QRL
Quick Resource Locator for R640
Receiving Automated Support with Supportassist
Recycling or End-Of-Life Service Information
Advertisement
Quick Links
1
Supported Configurations for Poweredge R640
2
Front View of the System
3
Memory Specifications
Download this manual
Dell EMC PowerEdge R640
Installation and Service Manual
Regulatory Model: E39S Series
Regulatory Type: E39S001
July 2020
Rev. A09
Table of
Contents
Previous
Page
Next
Page
1
2
3
4
5
Advertisement
Table of Contents
Need help?
Do you have a question about the EMC E39S Series and is the answer not in the manual?
Ask a question
Questions and answers
Related Manuals for Dell EMC E39S Series
Server Dell PowerEdge R640 Owner's Manual
(206 pages)
Server Dell 0G8DW Installation And Service Manual
(175 pages)
Server Dell EMC PowerEdge R640 Installation And Service Manual
(164 pages)
Switch Dell PowerEdge R730xd Deployment Manual
Emc networking with isilon front-end deployment and best practices guide (78 pages)
Server Dell PowerEdge R640 Manual
(49 pages)
Server Dell EMC Poweredge R640 Hardware Installation Manual
Metro node (2 pages)
Server Dell PowerEdge 2970 Getting Started Manual
Dell server hardware getting started guide (51 pages)
Server Dell POWEREDGE EMU01 Hardware Owner's Manual
Dell personal computer user manual (166 pages)
Server Dell EMC VxFlex Series Owner's Manual
(46 pages)
Server Dell EMC VxFlex Ready Node 14G Manual
(76 pages)
Server Dell EMC VxFlex Ready Node User Manual
(354 pages)
Server Dell EMC VxFlex Ready Node Installation Manual
(92 pages)
Server Dell EMC PowerEdge XE8545 Installation And Service Manual
(134 pages)
Server Dell EMC ScaleIO Ready Node 14G Inspection Manual
(8 pages)
Server Dell EMC VxRail E560 Series Owner's Manual
Appliances on poweredge servers (35 pages)
Server Dell EMC PowerEdge R450 FHYWN Installation And Service Manual
(121 pages)
This manual is also suitable for:
Emc poweredge r640
E39s001
85hd7
06m4f
Pdf30/634-bsfx
Pdf30
...
Show all
Rfgmp
Table of Contents
Save PDF
Print
Rename the bookmark
Delete bookmark?
Delete from my manuals?
Login
Sign In
OR
Sign in with Facebook
Sign in with Google
Upload manual
Upload from disk
Upload from URL


Need help?
Do you have a question about the EMC E39S Series and is the answer not in the manual?
Questions and answers