Sign In
Upload
Manuals
Brands
Cisco Manuals
Conference System
3200 Series
Cisco 3200 Series Manuals
Manuals and User Guides for Cisco 3200 Series. We have
5
Cisco 3200 Series manuals available for free PDF download: Software Configuration Manual, Use And Care Manual, Hardware Reference Manual, Upgrade Manual, Datasheet
Cisco 3200 Series Software Configuration Manual (314 pages)
Wireless MIC
Brand:
Cisco
| Category:
Wireless Router
| Size: 5.71 MB
Table of Contents
4
Table of Contents
15
Roles and the Associations of Wireless Devices
16
Radio Channel Frequencies
16
Radio Transmit Power
19
Related Documentation
20
Obtaining Documentation
20
Ordering Documentation
20
Documentation Feedback
23
Obtaining Additional Publications and Information
34
Management Options
16
Service Set Identifiers
16
Supported Mibs
16
MIB List
35
Configuring the WMIC for the First Time
35
Before You Start
35
Connecting to the WMIC
36
Using the Console Port to Access the Privileged Exec Mode
36
Using a Telnet Session to Access the Privileged Exec Mode
36
Opening the CLI with Secure Shell
37
Obtaining and Assigning an IP Address
37
Assigning an IP Address By Using the Exec
38
Protecting Your Wireless LAN
38
Configuring Basic Security Settings
38
Using Vlans
39
Express Security Types
40
CLI Security Configuration Examples
40
Example: No Security
40
Example: Static WEP
41
Example: EAP Authentication
42
Example: WPA
45
Understanding Wireless Device Network Roles
46
Access Point Role
46
Bridge Role
47
Point-To-Point Bridging
48
Point-To-Multipoint Bridging
49
Redundant Bridging
50
Workgroup Bridge Role
52
Universal Workgroup Bridge (2.4-Ghz Radios Only)
56
Assigning Dynamic MAC Address for Universal Workgroup Bridge
56
World Mode (2.4 Ghz Radio Only)
57
Supported Country Codes
62
Additional Information
65
Administering the WMIC
65
Configuring a System Name and Prompt
66
Default DNS Configuration
66
Managing DNS
66
Setting Up DNS
67
Creating a Banner
68
Default Banner Configuration
68
Configuring a Message-Of-The-Day Login Banner
69
Configuring a Login Banner
67
Displaying the DNS Configuration
69
Protecting Access to Privileged EXEC Commands
70
Default Password and Privilege Level Configuration
70
Setting or Changing a Static Enable Password
71
Protecting Enable and Enable Secret Passwords with Encryption
73
Configuring Username and Password Pairs
74
Configuring Multiple Privilege Levels
74
Setting the Privilege Level for a Command
75
Logging Into and Exiting a Privilege Level
75
Protecting the Wireless LAN
75
Using Vlans
76
Express Security Types
78
Security Configuration Examples
83
Configuring and Enabling RADIUS
83
Understanding RADIUS
84
RADIUS Operation
85
Controlling WMIC Access with RADIUS
85
Identifying the RADIUS Server Host
88
Configuring RADIUS Login Authentication
89
Defining AAA Server Groups
91
Configuring RADIUS Authorization for User Privileged Access and Network Services
92
Starting RADIUS Accounting
92
Configuring Settings for All RADIUS Servers
93
Configuring the Bridge to Use Vendor-Specific RADIUS Attributes
94
Configuring the Bridge for Vendor-Proprietary RADIUS Server Communication
95
Displaying the RADIUS Configuration
96
Controlling WMIC Access with TACACS+
96
Understanding TACACS+
97
TACACS+ Operation
97
Default TACACS+ Configuration
98
Configuring TACACS+ Login Authentication
98
Identifying the TACACS+ Server Host and Setting the Authentication Key
99
Configuring TACACS+ Login Authentication
100
Configuring TACACS+ Authorization for Privileged EXEC Access and Network Services
101
Starting TACACS+ Accounting
102
Displaying the TACACS+ Configuration
102
Configuring the WMIC for Local Authentication and Authorization
103
Configuring the WMIC for Secure Shell
103
Understanding SSH
104
Configuring SSH
104
Managing Aironet Extensions
105
Managing the System Time and Date
105
Understanding the System Clock
105
Understanding Network Time Protocol
108
Configuring Time and Date Manually
108
Setting the System Clock
108
Displaying the Time and Date Configuration
109
Configuring the Time Zone
110
Configuring Summer Time (Daylight Saving Time)
111
Configuring NTP
111
Default NTP Configuration
111
Configuring NTP Authentication
113
Configuring NTP Associations
114
Configuring NTP Broadcast Service
116
Configuring NTP Access Restrictions
117
Disabling NTP Services On a Specific Interface
118
Configuring the Source IP Address for NTP Packets
118
Displaying the NTP Configuration
121
Radio Channel and Transmit Frequency Configuration
121
Understanding Radio Channels and Frequencies
122
Determining the Radio Type
122
Configuring a Channel or Frequency
122
Configuring the Radio Channel or Frequency
123
Configuring the Radio Channel Spacing
123
Additional Information
125
IEEE 802.11N (5-Ghz Band)
125
IEEE 802.11B (2.4-Ghz Band)
125
IEEE 802.11G (2.4-Ghz Band)
125
IEEE 802.11A (5-Ghz Band)
131
Dynamic Frequency Selection
131
Understanding Dynamic Frequency Selection
132
DFS Actions
132
Dynamic Frequency Selection Channels
133
Configuring a Preferred Channel
134
Configuring Radar Detection By Clients
134
Configuring an SNMP Trap for Radar Detection
135
Additional Information
137
Understanding Radio Transmit Power
138
Determine the Radio Type
138
Configuring Radio Transmit Power
139
Configuring Client Radio Transmit Power
140
IEEE 802.11G (2.4 Ghz Band)
140
Maximum Power Levels and Antenna Gains
141
Configuring Radio Data Rates
142
Speed Command
143
Speed Command Examples
144
Verify Settings
145
Multiple Client Profiles
145
MCP Support in the 12.3(8)JK Release
145
MCP Support in 12.4(3)JK and Later Releases
146
Setting Priority in 12.4(3)JK and Later Releases
146
Dynamic Channel Width (4.9Ghz WMIC Only)
147
Configuring a WMIC for MCP (12.4(3)JK or Later Releases)
148
Configuration Examples
149
Configuring a WMIC for MCP (12.3(8)JK Only)
150
Configuration Examples
153
Understanding Ssids
154
Configuring the SSID
154
Creating an SSID
155
Configuring Any SSID
155
Configuring Multiple Basic Ssids
155
Requirements for Configuring Multiple Bssids
156
Guidelines for Using Multiple Bssids
156
CLI Configuration Example
156
Displaying Configured Bssids
157
Cipher Suites and WEP
157
Understanding Cipher Suites and WEP
158
Configuring Cipher Suites
158
Configuring WEP
158
Configuring WEP with 12.4(3)JK or Later Releases
159
Configuring WEP with 12.3(8)JK or Earlier Releases
160
WEP Key Restrictions
160
Example WEP Key Setup
161
Enabling Cipher Suite
161
Enabling Cipher Suite with 12.4(3)JK or Later Releases
163
Enabling Cipher Suite with 12.3(8)JK or Earlier Releases
164
Matching Cipher Suites with WPA
165
Spanning Tree Protocol in a Wireless Environment
165
Understanding Spanning Tree Protocol
166
STP Overview
166
STP Support
167
Bridge Protocol Data Units
168
Election of the Spanning-Tree Root
168
Spanning-Tree Timers
168
Creating the Spanning-Tree Topology
169
Spanning-Tree Interface States
170
Blocking State
171
Listening State
171
Learning State
171
Forwarding State
171
Disabled State
172
Configuring STP Features
172
Default STP Configuration
172
Configuring STP Settings
173
STP Configuration Examples
173
Root Bridge Without Vlans
174
Non-Root Bridge Without Vlans
175
Root Bridge with Vlans
176
Non-Root Bridge with Vlans
178
Displaying Spanning-Tree Status
179
Cisco Discovery Protocol
179
Understanding CDP
179
Configuring CDP
179
Default CDP Configuration
179
Configuring the CDP Characteristics
180
Default Cdp Configuration
180
Configuring the Cdp Characteristics
185
Authentication Types
185
Understanding Authentication Types
186
Open Authentication to the WMIC
186
Shared Key Authentication to the WMIC
187
EAP Authentication to the Network
189
Eap-Tls
189
Eap-Fast
189
Eap-Ttls
190
MAC Address Authentication to the Network
190
Using CCKM Key Management
190
Using WPA Key Management
191
Configuring Certificates Using the Crypto Pki CLI
191
Configuration Using the Cut and Paste Method
195
Configuration Using the TFTP Method
196
Configuration Using SCEP
198
Adding the Trustpoint to the Dot1X Credentials
199
Configuring Authentication Types
199
Default Authentication Settings
200
Assigning Authentication Types to an SSID
203
Configuring Up 2.4 the WMIC Radio As an EAP Client
205
Setting Up a Non-Root Bridge As a LEAP Client for 4.9 WMIC Radios
207
Configuring the Root Device to Interact with the WDS Device
207
Configuring Additional WPA Settings
208
Configuring Authentication Holdoffs, Timeouts, and Intervals
209
Matching Authentication Types On Root Devices and Non-Root Bridges
211
Qos in a Wireless Environment
211
Understanding Qos for Wireless Lans
212
Qos for Wireless Lans Versus Qos On Wired Lans
212
Impact of Qos On a Wireless LAN
213
Precedence of Qos Settings
213
Using Wi-Fi Multimedia Mode
214
Configuring Qos
214
Qos Configuration Examples
214
Qos Example Configuration for VLAN
215
Qos Example of IP DSCP and IP Precedence
217
Configuring Vlans
217
Understanding Vlans
218
Related Documents
219
Incorporating Wireless Bridges Into Vlans
219
Configuring Vlans
219
Configuring a VLAN
219
Viewing Vlans Configured On the WMIC
222
Viewing Vlans Configured On the Wmic
223
System Message Logging
223
Understanding System Message Logging
224
Configuring System Message Logging
224
System Log Message Format
225
Default System Message Logging Configuration
226
Disabling and Enabling Message Logging
227
Setting the Message Display Destination Device
228
Enabling and Disabling Timestamps On Log Messages
228
Enabling and Disabling Sequence Numbers in Log Messages
229
Defining the Message Severity Level
230
Limiting Syslog Messages Sent to the History Table and to SNMP
231
Setting a Logging Rate Limit
231
Configuring UNIX Syslog Servers
232
Logging Messages to a UNIX Syslog Daemon
232
Configuring the UNIX System Logging Facility
233
Displaying the Logging Configuration
235
Tunnel Templates
235
Applying the Tunnel Template On the Home Agent
236
Applying the Tunnel Template On the Mobile Router
237
Example Configuration
238
Applying Tunnel Templates to the Ipsec Two-Box Solution
241
Related Documents
243
WIMIC Troubleshooting
243
Checking the LED Indicators
245
Checking Basic Settings
245
Ssid
245
WEP Keys
245
Security Settings
245
Resetting to the Default Configuration
246
Using the CLI
247
Reloading the Image
249
Obtaining the Image Files
249
Obtaining TFTP Server Software
249
Reloading the Bootloader Image
250
Error and Event Messages
255
Protocol Filters
255
Understanding Filters
255
Configuring Filters
256
Configuring Filters
257
Simple Network Management Protocol
257
Understanding SNMP
258
SNMP Versions
258
SNMP Manager Functions
259
SNMP Agent Functions
259
SNMP Community Strings
259
Using SNMP to Access MIB Variables
260
Configuring SNMP
260
Default SNMP Configuration
260
Enabling the SNMP Agent
260
Configuring Community Strings
262
Configuring Trap Managers and Enabling Traps
265
Setting the Agent Contact and Location Information
265
Using the Snmp-Server View Command
265
SNMP Examples
266
Displaying SNMP Status
267
Maximum Power Levels
267
IEEE 802.11G (2.4-Ghz Band)
269
Using FTP to Access the MIB Files
270
Using Ftp to Access the Mib Files
273
Protocol Filters
279
WDS, Fast Secure Roaming, and Radio Management
279
Understanding WDS
280
Role of the WDS Access Point
280
Role of Access Points Using the WDS Access Point
280
Understanding Fast Secure Roaming
282
Understanding Radio Management
282
Configuring WDS and Fast Secure Roaming
282
Guidelines for WDS
283
Requirements for WDS and Fast Secure Roaming
283
Configuring the WMIC to Use the WDS Access Point
283
Configuring the Authentication Server to Support Fast Secure Roaming
287
Using CLI Commands to Enable the WDS Server
288
Using CLI Commands to Enable the Root Device
289
Viewing WDS Information
289
Using Debug Messages
290
Using CLI Commands to Enable Roaming
291
Management Frame Protection
291
Understanding Management Frame Protection
292
Protection of Unicast Management Frames
292
Protection of Broadcast Management Frames
292
Client MFP for Access Points in Root Mode
292
Configuring Client MFP
293
Configuring Infrastructure MFP
Advertisement
Cisco 3200 Series Use And Care Manual (282 pages)
Cisco Systems TelePresence System Installation Guide
Brand:
Cisco
| Category:
Conference System
| Size: 54.54 MB
Table of Contents
3
Table of Contents
9
Preface
10
Related Documentation
11
Chapter 1 Overview
11
Overview Chapter Organization
12
Appendix A: Parts List Sorted By Carton
12
Overview
13
Conventions and Terminology
13
Tools and Equipment List
15
Parts List
17
Chapter 2 Building the Display Assembly
17
Parts List
20
Chapter 3 Mounting and Leveling the Plasma Displays
25
Parts List
26
Parts List
27
Purpose of Leveling the Plasma Displays
28
Leveling Alignment Points
28
Leveling Goals
35
Parts List
36
Chapter 4 Building the Display Shelf Assembly
36
Parts List
44
Chapter 5 Building the Lighting Assembly
44
Parts List
70
Chapter 6 Building the First Row Table Assembly
73
Chapter 9 Routing Power and Signal Cables
89
Parts List
90
Chapter 7 Building the Second Row Table Assembly
90
Parts List
139
C H a P T E R 8 Assembling the Remaining Cisco Telepresence Elements
139
Parts List
156
Power Requirements for the Cisco Telepresence 3200
183
First-Time Setup
183
Parts List
183
Loading CTS Administration Software
184
Chapter 10 First-Time Setup
186
Configuring an Alternate TFTP Server (Optional)
186
Setting Up CTS Components
187
Setting Up the Displays
188
Setting Up the Cameras
189
Starting the Software Setup
191
Adjusting the Zoom
194
Focusing the Camera
197
Attaching the Camera Hood Assembly
200
Setting Up the Speakers
200
Setting Up the Microphones
202
Setting Up the Projector
204
Troubleshooting Presentation Devices
205
Other Devices
207
Use & Care Guide
207
Maintaining the Tabletop
207
Cleaning the Plasma Displays
208
Cleaning the Camera Lens
208
Maintaining the Projector
209
Field-Replaceable Unit Guide
209
Complete List of Spares for the Cisco Telepresence System 3200
210
C H a P T E R 12 Field-Replaceable Unit Guide
212
Powering On the System
213
Replacing the Camera Cluster-Part Number CTS3K-CAM-CLST-G2
213
Required Information, Tools, and Equipment
213
Removing and Replacing the Camera Cluster
214
Replacing a Plasma Display-Part Number CTS-DISP-65-GEN4
214
Required Information, Tools, and Equipment
215
Removing Audio Components
216
Removing the Camera Cluster
216
Removing the Left Door
216
Removing a Display Shelf
217
Removing the Display Screen and Completing the Procedure
222
Replacing a Speaker-Part Number CTS-LDSPKR
222
Required Information, Tools, and Equipment
223
Removing and Replacing a Speaker
224
Replacing a Codec Unit-Part Number CTS-CODEC-PRI-G2= (Primary Codec) or CTS-CODEC-SEC= (Secondary Codec)
224
Removing and Replacing a Codec
224
Required Information, Tools, and Equipment
226
Replacing a Microphone-Part Number CTS-MIC
226
Required Information, Tools, and Equipment
226
Powering Off the System
227
Removing and Replacing a Microphone
227
Replacing a Microphone Without a Microphone Extension Cable
228
Replacing a Microphone with a Microphone Extension Cable
230
Replacing a Light Fixture-Part Number CTS-LIGHT-FIXT
230
Required Information, Tools, and Equipment
230
Replacement Bulbs
231
Replacing the Audio/Video Extension Unit-Part Number CTS-AV-EXP
232
Replacing the Auxiliary Control Unit-Part Number CTS-LIGHT-CTRL
233
Replacing the Cisco Unified IP Phone-Part Number CP-7975G-CTS
233
Replacing the Projector Lamp-Part Number CTS-PRJTR-BL-GEN1= or CTS-PRJTR-GEN2-CH (China)
235
Replacing a Pdu-Part Number CTS-PWR-PDU
236
Replacing a Display Shelf
236
Required Information, Tools, and Equipment
237
Removing and Replacing a Display Shelf Row Table Section
238
Replacing a First Row Table Top Section
238
Required Information, Tools, and Equipment
239
Removing and Replacing a First Row Table Top Section
240
Replacing a Second Row Table Top Section
240
Required Information, Tools, and Equipment
241
Removing and Replacing a Second Row Table Top Section
245
Carton 1 of 58: Mechanical Accessory Kit, CTS3K-ACC-KIT, 53-2855-XX
235
Replacing the Projector-Part Number CTS-PRJTR-GEN1
247
Carton 3 of 58: Primary Codec, Cts-Codec-Pri-G2, 800-30638-XX
248
Carton 5 of 58: Secondary Codec, 800-28202-XX, Cts-Codec-Sec
248
Carton 6 of 58: Secondary Codec, 800-28202-XX, Cts-Codec-Sec
249
Carton 10 of 58: Speaker, 74-4740-XX, Cts-Ldspkr
249
Carton 11 of 58: Power Cord, 37-08Xx-XX, Pwr-Cord10-XX
249
Carton 7 of 58: Projector, 74-4824-XX, Cts-Prjtr-Gen
249
Carton 8 of 58: Speaker, 74-4740-XX, Cts-Ldspkr
249
Carton 9 of 58: Speaker, 74-4740-XX, Cts-Ldspkr
253
Carton 24 of 58: Plasma Display, 74-4881-XX, Cts-Disp-65-Gen
253
Carton 25 of 58: Plasma Display, 74-4881-XX, Cts-Disp-65-Gen
254
Carton 27 of 58: Light Fixture, 74-5361-XX, Cts-Light-Fixt
254
Carton 28 of 58: Light Fixture, 74-5361-XX, Cts-Light-Fixt
254
Carton 29 of 58: Light Fixture, 74-5361-XX, Cts-Light-Fixt
255
Carton 30 of 58: Light Fixture, 74-5362-XX, Cts-Light-Fixt
255
Carton 31 of 58: Light Fixture, 74-5362-XX, Cts-Light-Fixt
255
Carton 32 of 58: Camera Target, 69-1674-XX, Cts-Cam-Tool
256
Carton 34 of 58: Privacy Panels, 69-1629-XX, Cts3K-Structure
261
Carton 50 of 58: Cisco Telepresence 3200 Structure—Addition to Standard CTS
267
Argentina B
269
Central Europe B
271
India, UAE, South Africa B
273
Italy B-
275
North America B
277
United Kingdom B
277
Cisco Telepresence System
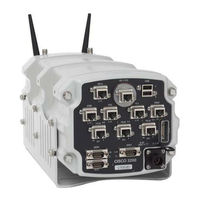
Cisco 3200 Series Hardware Reference Manual (146 pages)
Brand:
Cisco
| Category:
Network Router
| Size: 8.21 MB
Table of Contents
3
Table of Contents
7
Introduction to the Cisco 3200 Series Routers
8
Audience and Scope
8
Related Documentation
9
Conventions
9
Obtaining Documentation and Submitting a Service Request
13
Cisco 3200 Rugged Enclosures
14
Chapter 1 Cisco 3200 Rugged Enclosure
15
Cisco 3270 Rugged Enclosure
16
Cisco 3270 Router Card Stack
17
Cisco 3230 Rugged Enclosure
18
Cisco 3230 Router Card Stack
19
Rugged Enclosure End Caps
19
Antenna End Cap
20
I/O End Caps for the Cisco 3200 Rugged Enclosures
20
End Cap Fast Ethernet and WMIC Console Ports
21
Cisco 3270 Router I/O End Cap
24
Cisco 3230 Router I/O End Cap
25
Protective End Cap Cover
27
I/O End Cap Port Signals
27
Gigabit Ethernet Signal Limitations
27
Fast Ethernet Signals
28
Fast Ethernet Port Cabling for the Cisco 3250 and Cisco 3230 Routers
29
Console Port Signals
29
AUX Port Signals
30
Cisco 3200 Rugged Enclosure LED Indications
30
Cisco 3270 Rugged Enclosure I/O End Cap LED Indications
31
Cisco 3230 Rugged Enclosure I/O End Cap LED Indications
31
WMIC Console Leds
32
Thermal Plates
33
Mounting Brackets
37
Cisco 3270 Rugged Router Card
38
Cisco 3270 Rugged Router Card Component Systems
40
Cisco 3270 Rugged Router Card Power Requirements
40
Power Connections (AUX)
40
Hardware Encryption Processor
42
Ethernet Port Speed and Duplex Mode
43
Cisco 3270 Rugged Router Card Encryption Module
43
Security Engine Features
44
Temperature Sensor
44
Cisco 3270 Rugged Router Card MAC Address Allocation
45
Chapter 3 Mobile Access Router Card
46
Chapter 3 Mobile Acces Router Card
46
MARC Component Systems
47
MARC Power Requirements
47
MARC Router Signals
47
Fast Ethernet Signals On the MARC
48
Console and Auxiliary Signals
49
Chapter 4 Fast Ethernet Switch Mobile Interface Card
50
Autonegotiation and Auto-MDI/MDIX
50
MAC Address Allocation
51
FESMIC Component Systems
52
Signals for the FESMIC
53
FESMIC Rotary Switch Positions
55
Chapter 5 Serial Mobile Interface Card
56
SMIC Component Systems
57
Signals for the SMIC
57
4-Port SMIC Rotary Switch Positions
58
2-Port SMIC Rotary Switch Positions
58
SMIC LED Signals
59
SMIC Power Consumption
61
Chapter 6 Wireless Mobile Interface Cards
61
WMIC Component Systems
62
Antenna Connector
62
Chapter 6 Wireles Mobile Interface Card
62
WMIC Console and Fast Ethernet Ports
63
Fast Ethernet Signals On the WMIC
64
LED Behavior
65
Key Features
67
MAC Address Allocation
67
WMIC Power Requirement
67
Mean Time Between Failure
67
Differences Between Wmics
69
2.4-Ghz (802.11B/G) WMIC Features
71
Universal Workgroup Bridge Limitations
71
4.9-Ghz (Public Safety) WMIC Features
72
4.9-Ghz Channels
73
Throughput
73
Modulation
73
Receive Sensitivity
74
5.0-Ghz (802.11H) Radio Features
74
5.0-Ghz (802.11H) Channels
74
Throughput
75
Modulation
75
Receive Sensitivity
75
Transmit Sensitivity
77
Related Documentation
79
Working with the Flash File System
79
Displaying Available File Systems
80
Setting the Default File System
81
Displaying Information about Files On a File System
81
Changing Directories and Displaying the Working Directory
81
Creating and Removing Directories
82
Copying Files
83
Deleting Files
84
Extracting a Tar File
85
Displaying the Contents of a File
85
Working with Configuration Files
86
Guidelines for Creating and Using Configuration Files
87
Configuration File Types and Location
87
Creating a Configuration File By Using a Text Editor
87
Copying Configuration Files By Using Tftp
89
Copying Configuration Files By Using Ftp
91
Uploading a Configuration File By Using Ftp
92
Copying Configuration Files By Using Rcp
94
Uploading a Configuration File By Using Rcp
95
Clearing Configuration Information
95
Deleting a Stored Configuration File
96
Working with Software Images
97
Copying Image Files By Using Tftp
100
Copying Image Files By Using Ftp
105
Copying Image Files By Using Rcp
120
Replacing SFP Modules Into SFP Module Slots
121
Diagnosing SFP Problems
122
Error Messages
134
Enabling Ip Pim On Layer 3 Interfaces
137
Storm Control
138
Storm Control Configuration
139
Igmp Snooping
139
Igmp Snooping Configuration
145
Receive Sensitivity
Advertisement
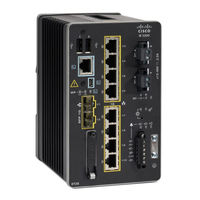
Cisco 3200 Series Upgrade Manual (60 pages)
Hardware Upgrade Guide
Brand:
Cisco
| Category:
Network Router
| Size: 8.37 MB
Table of Contents
3
Table of Contents
5
About This Guide
5
Audience and Scope
5
Related Documentation
6
Obtaining Documentation and Submitting a Service Request
7
Introduction
7
Cisco 3230 Rugged Enclosure
8
Chapter 1 Introduction
8
Fully Assembled Cisco 3230 Rugged Enclosure
8
Exploded View of the Cisco 3230 Rugged Enclosure
10
Cisco 3230 Router Card Stack
11
Cisco 3270 Rugged ISR
11
Fully Assembled Cisco 3270 Rugged Enclosure
12
Exploded View of the Cisco 3270 Rugged Enclosure
13
Cisco 3270 Router Card Stack
14
Wiring Cards
15
What You Can Upgrade or Replace
15
Required Tools
17
Replacing Cards in the Cisco 3230 ISR Rugged Enclosure
17
Card Replacement Process
18
C H a P T E R 2 Replacing Cards in the Cisco 3230 ISR Rugged Enclosure
18
Disconnecting All Cables From the Enclosure
18
Removing the Antenna End Cap
21
Removing the I/O End Cap
22
Removing the Card Stack
22
Removing the Wiring Card
23
Replacing or Adding a New Card
23
Adding a New WMIC
24
Replacing a WMIC
25
Replacing the FESMIC
26
Replacing the SMIC
26
Replacing the MARC
26
Replacing the MRPC
27
Inserting the Card Stack Into the Extrusion
29
Attaching Version 1 of the Wiring Card
29
Reattaching the Wiring Card
30
Attaching the Version 2 of the Wiring Card
33
Reattaching the I/O End Cap
35
Reattaching the Antenna End Cap
35
Applying New I/O End Cap Function Labels
37
Chapter 3 Replacing Cards in the Cisco ISR 3270 Rugged Enclosure
37
Card Replacement Process
38
Disconnecting All Cables From the Enclosure
38
Removing the Antenna End Cap
40
Removing the I/O End Cap
41
Removing the Wiring Card
41
Removing the Card Stack
43
Replacing or Adding a New Card
43
Inserting the Card Stack Into the Enclosure
47
Reattaching the Wiring Card
50
Adjusting the WMIC Jumper Settings
51
Reattaching the I/O End Cap
52
Reattaching the Antenna End Cap
53
Applying New I/O End Cap Function Labels
55
Chapter 4 Replacing the SFP Module
56
SFP Module Replacement Process
59
I N D E X
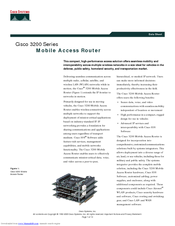
Cisco 3200 Series Datasheet (13 pages)
Mobile Access Router
Brand:
Cisco
| Category:
Network Router
| Size: 0.19 MB
Share and save
Advertisement
Related Products
Cisco Catalyst 3000
Cisco Aironet 3500 Series
Cisco 3515 MCU12
Cisco 3515 MCU24
Cisco 3545 MCU
Cisco 3545 Serial
Cisco 3500 MCU
Cisco TelePresence System 3210
Cisco TelePresence 3000 MXP
Cisco 3202
Cisco Categories
Switch
Network Router
IP Phone
Conference System
Wireless Access Point
More Cisco Manuals
Login
Sign In
OR
Sign in with Facebook
Sign in with Google
Upload manual
Upload from disk
Upload from URL