Sign In
Upload
Manuals
Brands
AudioCodes Manuals
Adapter
MP-20x
AudioCodes MP-20x Manuals
Manuals and User Guides for AudioCodes MP-20x. We have
2
AudioCodes MP-20x manuals available for free PDF download: User Manual
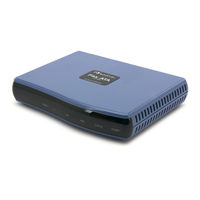
AudioCodes MP-20x User Manual (270 pages)
MediaPack MP-20 Series Telephone Adapters with Integrated Router
Brand:
AudioCodes
| Category:
Adapter
| Size: 4 MB
Table of Contents
Table of Contents
3
Version 3.0.1
13
Abbreviations and Terminology
15
Customer Support
15
Regulatory Information
15
IC Radiation Exposure Statement
16
Related Documentation
16
1 Introducing Audiocodes' MP-20X Telephone Adapter
17
Table 1-1: MP-20X Models
17
Figure 1-1: Rear Panel of MP-20Xb Models
18
Figure 1-2: Rear Panel of MP-202C Models
18
2 Cabling the MP-20X Telephone Adapter
19
Figure 2-1: Cabling the Device (Example Using MP-202C-W)
19
Table 2-1: MP-20X Leds Description
20
3 Setting up a Network Connection
21
Defining Your Pc's Network Connection
21
Figure 3-1: IP and DNS Configuration
21
Linux
22
Windows XP
22
Figure 3-2: Available Wireless Networks
23
Wireless LAN Connection
23
Configuring the MP-20X's Network Connection
24
Logging in to MP-20X Web Interface
24
Figure 3-3: Logging in
24
Configuring 'Quick Setup' Screen Parameters
25
Figure 3-4: Quick Setup Screen
25
Configuring Your Internet Connection
26
Figure 3-5: Internet Connection - Automatic IP Address Ethernet Connection
26
Figure 3-6: Internet Connection - Manual IP Address Ethernet Connection
27
Figure 3-7: Internet Connection - Pppoe
28
Figure 3-8: Internet Connection - Point-To-Point Tunneling Protocol
28
Figure 3-10: Internet Connection - no Internet Connection
29
Figure 3-9: Layer 2 Tunneling Protocol
29
Enabling Wireless LAN Connection
30
Configuring Automatic Internet Dialer Detection
31
4 Using the MP-20X's Web Interface
33
Your Home Network Map
33
Figure 4-1: Network Map
33
Table 4-1: Network Map Icons
34
Web Interface Menus
35
Table 4-2: Sidebar Menu Description
35
Managing Tables
36
Figure 4-2: Typical Table Structure
36
Table 4-3: Table Action Icons Description
36
5 Configuring Voip Parameters
37
Configuring Signaling Protocol Parameters
38
Figure 5-1: Voip - Signaling Protocol
38
Table 5-1: Signaling Protocol Tab Parameters Description
39
Configuring Proxy Redundancy
42
Figure 5-2: Configuring Proxy Redundancy
43
Configuring Dialing Parameters
44
Figure 5-3: Voice over IP - Dialing Screen
44
Table 5-2: Dialing Tab Parameters Description
45
Configuring Media Streaming Parameters
48
Figure 5-4: Voip - Media Streaming - Advanced
48
Configuring Codecs
49
Supported Codecs
49
Table 5-3: Media Streaming Tab Parameters Description
49
Packetization Time
50
Configuring Voice and Fax Parameters
50
Figure 5-5: Voice over IP - Voice and Fax Screen
50
Table 5-4: Voice and Fax Tab Parameters Description
51
Configuring Services Parameters
54
Figure 5-6: Voice over IP - Services Screen
54
Table 5-5: Services Tab Parameters Description
55
Configuring Line Settings Screen
57
Figure 5-7: Voice over IP - Line Settings Screen
57
Figure 5-8: Voip - Line Settings - Defining a New Line
58
Table 5-6: Line Settings Tab Parameters Description
58
Configuring Speed Dial Settings
60
Figure 5-10: Voip - Speed Dial Settings
60
Figure 5-9: Voice over IP - Speed Dial Screen
60
Figure 5-11: Voip - Speed Dial - Local Line
61
Figure 5-12: Voip - Speed Dial Settings - Local Line
61
Table 5-7: Speed Dial Settings - Via Proxy
61
Figure 5-13: Voip - Speed Dial - Direct Call
62
Table 5-8: 'Speed Dial Settings' - Direct Call
62
Configuring Telephone Interfaces
63
Figure 5-14: Voice over IP - Telephone Interface Screen
63
6 Connecting MP-20X to a Voip Service Provider
65
Opening a SIP Account
65
Configuring Voip Parameters
65
Figure 6-1: Voice over IP - Line Settings Screen
65
Figure 6-2: Voip - Line Settings - Defining a New Line
66
7 Making Voip Calls
67
Placing a Call
67
Answering a Waiting Call
67
Putting a Call on Hold
68
Performing a Call Transfer
68
Establishing a 3-Way Conference
69
Forwarding Calls to Another Phone
70
8 Quality of Service (Qos)
71
Qos Wizard
71
Figure 8-1: Qos Wizard Tab Screen
71
Traffic Shaping
72
Device Traffic Shaping
73
Figure 8-2: Qos - Add Device Traffic Shaping
73
Figure 8-3: Qos - Edit Device Traffic Shaping
73
Shaping Classes
74
Table 8-1: Edit TraffiC Shaping - Parameter Descriptions
74
Figure 8-4: Qos - Edit Device Traffic Shaping - Add Class
75
Figure 8-5: Qos - Edit Device Traffic Shaping - Edit Class
75
Table 8-2: Edit Shaping Class - Parameter Descriptions
75
Class Rules
76
Traffic Priority
77
Figure 8-6: Qos - Traffic Shaping
78
Figure 8-7: Qos - Add Traffic Priority Rule
79
Table 8-3: Add TraffiC Priority Rule - Parameter Descriptions
79
DSCP Mapping
80
Figure 8-8: Qos - DSCP Settings
81
Mapping
82
Figure 8-9: Qos - Edit DSCP Settings
82
Table 8-4: Edit DSCP Settings- Parameter Descriptions
82
Figure 8-10: Qos - 802.1P Settings
83
Class Statistics
84
Configuring Basic Voip Qos
84
Figure 8-11: Qos - Class Statistics
84
Figure 8-12: Qos - Edit Device Traffic Shaping
85
Figure 8-13: Qos - Edit Device Traffic Shaping - Submitting the Configuration
86
9 LAN Wireless Connection
87
Figure 9-1: Network Connections Screen Listing LAN Wireless Interface
87
General Tab
88
Figure 9-2: 'LAN Wireless 802.11G Access Point Properties - General' Screen
88
Settings Tab
89
Figure 9-3: LAN Wireless 802.11G Access Point Properties - Settings Screen
89
Table 9-1: LAN Wireless Settings Tab Parameter Descriptions
89
Wireless Tab
90
Figure 9-4: LAN Wireless 802.11G Access Point Properties - Wireless Screen
90
Table 9-2: Wireless Tab Parameter Descriptions
91
Figure 9-5: MAC Filtering Settings Screen
92
Figure 9-6: MAC Address Added to MAC Filtering Table
92
MAC Filtering
92
Figure 9-7: Configuring WPA Security
93
Wireless Security
93
Figure 9-8: Configuring WPA2 Security
94
Figure 9-9: Configuring 802.1X WEP Security
94
Figure 9-10: Configuring Non-WEP Security
95
Figure 9-11: Configuring Encryption Key in Windows Wireless Client
96
Figure 9-12: Configuring Authentication Only Security
96
Figure 9-13: Wireless Qos (WMM)
97
Wireless Qos (WMM)
97
Figure 9-14: Transmission Properties
98
Table 9-3: Wireless Tab - Transmission Parameter Descriptions
98
Transmission Properties
98
Figure 9-15: Virtual Aps Table
99
Figure 9-16: Virtual AP Warning
99
Virtual Access Points
99
Figure 9-17: New Virtual AP
100
Figure 9-18: Firewall Blocking Access to All Other Lans
100
Figure 9-19: Example Virtual AP
101
Figure 9-20: Wireless WDS
102
Figure 9-21: WDS Settings Screen
102
Wireless Distribution System
102
Figure 9-22: New WDS in WDS List Table
103
Figure 9-23: LAN Wireless 802.11G WDS Properties Screen
103
Advanced Tab
104
10 WAN Settings
105
WAN Ethernet
105
Figure 10-1: WAN Ethernet Properties
105
Figure 10-2: WAN Ethernet Configuration
106
Table 10-1: Settings Tab - Parameter Descriptions
106
Figure 10-3: Automatically Obtaining an IP Address
107
Internet Protocol Settings
107
DNS Server
108
Settings Tab
106
Figure 10-4: Manually Defining DNS Server
108
Figure 10-5: Routing Tab (WAN)
108
Routing Tab
108
Table 10-2: Routing Parameters
108
Advanced Tab
109
Figure 10-6: Internet Connection Firewall
109
WAN Pppoe
110
General
110
Figure 10-7: General Pppoe Settings
110
Table 10-3: Pppoe Parameter Descriptions
110
PPP Tab
111
Table 10-4: PPP Configuration Parameter Descriptions
111
PPP Authentication
112
Table 10-5: PPP Authentication Parameter Descriptions
112
PPP Compression
113
PPP Encryption
113
Internet Protocol
113
DNS Server
113
Routing
113
Internet Connection Firewall
113
Table 10-6: PPP Encryption Parameter Descriptions
113
Table 10-7: PPP Compression Parameter Descriptions
113
Wan Pptp
114
Creating a PPTP Connection with the Connection Wizard
114
Document #: LTRT
114
Figure 10-8: Network Connections Screen
114
Figure 10-10: Advanced Connection
115
Figure 10-9: Connection Wizard Screen
115
Figure 10-11: Point-To-Point Tunneling Protocol (PPTP) Screen
116
Figure 10-12: Connection Summary
116
Figure 10-13: General PPTP Settings
117
General
117
Internet Protocol
117
PPP Authentication
117
PPP Configuration
117
PPP Encryption
117
Table 10-8: General PPTP Settings
117
DNS Server
118
Internet Connection Firewall
118
Routing
118
Wan L2Tp
118
Figure 10-14: VPN Client or Point-To-Point
119
Figure 10-15: Layer 2 Tunneling Protocol (L2TP)
119
Figure 10-16: Connection Summary
120
General
120
Table 10-9: General Settings
120
DNS Server
121
Internet Connection Firewall
121
Internet Protocol
121
PPP Authentication
121
PPP Compression
121
PPP Configuration
121
PPP Encryption
121
Routing
121
11 VLAN and Bridge Settings
123
Virtual LAN Interface (VLAN)
123
Creating with the Connection Wizard
123
Figure 11-1: Connection Wizard Screen
123
Figure 11-2: VPN Client or Point-To-Point
124
Figure 11-3: VLAN Interface
124
Settings Tab
125
Figure 11-4: Connection Summary
125
Table 11-1: VLAN Interface - General Communication Parameters
125
Table 11-2: IP Address Distribution Parameters
126
Figure 11-5: IP Address Distribution - DHCP Server
127
Figure 11-6: IP Address Distribution - DHCP Relay
127
Figure 11-7: DHCP Relay Server Address
127
Table 11-3: DHCP Relay
127
Figure 11-8: IP Address Distribution - Disable DHCP
128
Routing Tab
128
Figure 11-9: Advanced Routing Properties
128
Table 11-4: Assigning Static IP Addresses to Network Computers
128
Table 11-5: Routing Parameters
128
Advanced Tab
129
Figure 11-10: Internet Connection Firewall
129
Example of Configuring 3 Vlans: Voip, Data and Management
130
Figure 11-11: Using VLAN - Setup
130
Figure 11-12: Example of Using VLAN - VLAN Interface Screen
131
Figure 11-13: Verifying a New Interface on the WAN Side
131
Figure 11-14: Configuring WAN Ethernet
132
Figure 11-15: Use the Following IP Address
132
Figure 11-16: Routing
133
Figure 11-17: Route Settings
133
Figure 11-18: Input Rule Sets
134
Figure 11-19: Edit Advanced Filter
134
Figure 11-20: Testing the Setup
135
Figure 11-21: Testing the Setup
135
Figure 11-22: Testing the Setup
135
LAN-WAN Bridging
136
Creating with the Connection Wizard
136
Figure 11-23: Connection Wizard Screen
136
Figure 11-24: Advanced Connection Wizard Screen
137
Figure 11-25: Bridge Options
137
Figure 11-26: Network Bridging
138
Figure 11-27: WLAN-LAN - Network Bridging
138
Figure 11-28: Connection Summary - Configure Existing Bridge
139
Settings Tab
140
Bridge Tab
140
Figure 11-29: Bridge Settings
140
Examples of Configuring Vlans in Bridge Mode
141
Example 1 - Configuring 3 Vlans: Voip, Data and Management
141
Figure 11-30: Example of Using Bridge Mode and Configuring Vlans
141
Figure 11-31: Configuring WAN Ethernet
142
Figure 11-32: Network Bridging
143
Figure 11-33: no IP Address
143
Example 2: Configuring Tagged Voip, Untagged Data Traffic
144
Figure 11-34: Example of Tagging Voice and Untagging Data
144
Figure 11-35: WAN/LAN Bridge
145
Figure 11-36: VLAN Interface Screen
145
Figure 11-37: Bridge Section of the Screen
145
Figure 11-38: VLAN Settings
146
Figure 11-39: no IP Address
146
Figure 11-40: Configuring WAN Ethernet
146
Figure 11-41: Testing the Setup
147
Figure 11-42: Testing the Setup
147
Example 3 - Configuring Voip and Data in the same VLAN
148
Figure 11-43: Configuring WAN Ethernet
148
Figure 11-44: Voip and Data on same VLAN
148
Figure 11-45: no IP Address
149
12 Remote MP-20X Telephone Adapter Management
151
Overview
151
Remote Configuration
151
Figure 12-1: Remote Management Interfaces
152
Table 12-1: Main Configuration Parameter Groups
152
Remote Management
153
Firmware Upgrade
153
Figure 12-2: Firmware Upgrade Mechanism
153
Status and Performance Monitoring
154
Alarms, Notifications and Logging
154
Table 12-2: Status and Performance Monitoring Parameters
154
Table 12-3: Notifications and Logged Events
154
Remote Configuration and Management Interfaces
155
Table 12-4: Severity of Logged Events
155
Table 12-5: Operations Per Configuration/Management Interface
155
And TR-104 CPE WAN Management Protocol
156
Figure 12-3: TR-069 CPE WAN Management Protocol
157
Configuring MP-20X Via TR-069 and TR-104
158
Table 12-6: Internetgatewaydevice.wandevice.I.wanconnectiondevice.I.wanipconnection.I
158
Table 12-7: Internetgatewaydevice.landevice.I.lanethernetinterfaceconfig
160
Table 12-8: Internetgatewaydevice.landevice.I.lanhostconfigmanagement
160
Table 12-9: Internetgatewaydevice.services.voiceservice.I.capabilities
161
Table 12-10: Internetgatewaydevice.services.voiceservice.I.capabilities.codecs
164
Table 12-11: Internetgatewaydevice.services.voiceservice.I.voiceprofile
164
Table 12-12: Internetgatewaydevice.services.voiceservice.I.voiceprofile.I.sip
165
Monitoring MP-20X Status Via TR-069 and TR-104
166
Table 12-13: Internetgatewaydevice.deviceinfo
166
Table 12-14: Internetgatewaydevice.wandevice.I.wanconnectiondevice.I. Wanipconnection.I.stats
168
Table 12-15: Internetgatewaydevice.landevice.I.lanethernetinterfaceconfig.I.stats
168
Table 12-16: Internetgatewaydevice.services.voiceservice.I.voiceprofile.I.line.I.stats
169
Security Concerns and Measures
170
Embedded Web Server
156
Snmp
171
Configuring MP-20X Via SNMP
171
Figure 12-4: SNMP Network Architecture
171
Monitoring the MP-20X Via SNMP
172
Security Concerns and Measures
173
Table 12-17: Table 3-13: Information Elements Available Via MIB-II
173
Automatic File Download
174
Firmware File Download
174
Configuration File Download
174
Security Concerns and Measures
175
Syslog
174
Telnet CLI
176
13 Security
177
Figure 13-1: Firewall in Action
177
General Security Level Settings
178
Figure 13-2: General Security Level Settings
178
Table 13-1: Behavior for the Three Security Levels
179
Access Control
180
Figure 13-3: Access Control
180
Figure 13-4: Add Access Control Rule
181
Port Forwarding
182
Figure 13-5: Port Forwarding Screen
183
Figure 13-6: Add Port Forwarding Rule
183
Figure 13-7: Add a Specific Protocol
183
Figure 13-8: Add a Specific Protocol
184
Figure 13-9: Add Specific Ports
184
Figure 13-10: Port Forwarding Rule
184
DMZ Host
185
Port Triggering
186
Figure 13-11: DMZ Host
186
Figure 13-12: Port Triggering
187
Figure 13-13: Adding Port Triggering Rules
187
Figure 13-14: Edit Service Server Ports
188
Figure 13-15: Edit Service Server Ports
188
Figure 13-16: Edit Service Opened Ports
188
Figure 13-17: New Port Triggering Rule
189
Website Restrictions
190
Figure 13-18: Website Restrictions
190
Figure 13-19: Restricted Website
190
Figure 13-20: Add a Specific Host
191
Figure 13-21: Add a Specific Schedule
191
Nat
192
Figure 13-22: NAT Screen
193
Figure 13-23: Adding a NAT IP Address
193
Figure 13-24: Adding NAT/NAPT Rule
194
Connections
196
Figure 13-25: Connections Screen
196
Advanced Filtering
197
Figure 13-26: Advanced Filtering
197
Figure 13-27: Add Advanced Filter
198
Figure 13-28: Add a Specific Host
199
Figure 13-29: Set Priority Rule
199
Security Log
200
Figure 13-30: Security Log
200
Figure 13-31: Security Log Settings
201
14 Advanced Settings
207
Figure 14-1: Advanced Screen
207
Table 14-1: Icon Description in the Advanced Screen
207
About the MP-20X
210
Certificates
210
Figure 14-2: Advanced - about the Gateway
210
Figure 14-3: New Certificates Screen
211
Figure 14-4: Create Self Signed X509 Certificate Screen
211
Figure 14-5: New Self Signed X509 Certificate Screen
212
Figure 14-6: File Download Window
212
Figure 14-7: Load Gateway's Local Certificate
213
Figure 14-8: Ca's Certificates
213
Configuration File
214
Figure 14-9: Load Ca's Certificate
214
Figure 14-10: Contents of the Configuration File
215
Figure 14-11: Upload Configuration File
216
Uploading from a PC on the Network
216
Figure 14-12: Advanced - Loading Configuration File from a PC on the Network
217
Figure 14-13: Successful Configuration File Loading
217
Figure 14-14: Reboot after Configuration File Load
217
Figure 14-15: Upload Configuration File
218
Figure 14-16: Upload from Remote Server
218
Uploading from a Remote Server
218
Automatic Upload Using SIP NOTIFY Message
220
Encrypting a Configuration File Using CLI
220
DNS Server
222
Viewing and Modifying the DNS Table
222
Figure 14-17: DNS Server
222
Figure 14-18: DNS Entry
223
Diagnostics
224
Diagnosing Network Connectivity
224
Figure 14-19: Advanced - Diagnostics
224
Performing an ARP Test
225
Figure 14-20: Advanced - Diagnostics - Statistics
225
Performing a Traceroute
226
Firmware Upgrade
226
Figure 14-21: Traceroute Results
226
Figure 14-22: MP-20X Firmware Upgrade Screen
227
Upgrading from a Computer on the Network
227
Figure 14-23: Upgrade from a Computer in the Network Screen
228
Figure 14-24: Confirming Firmware Upgrade Screen
228
Figure 14-25: Advanced - Firmware and Configuration Upgrade
229
Upgrading from the Internet
229
IP Address Distribution
230
Figure 14-26: DHCP Server Summary
231
DHCP Server Parameters
232
Figure 14-27: DHCP Settings Screen
232
DHCP Relay Parameters
233
Figure 14-28: DHCP Settings
233
Figure 14-29: DHCP Relay Server Address Screen
233
DHCP Connections
234
Figure 14-30: Advanced - IP Address Distribution - Connection List
234
Figure 14-31: Advanced - IP Address Distribution - Connection List - New Static Connection
234
Figure 14-32: Advanced - MAC Cloning Settings
235
MAC Cloning
235
Figure 14-33: Network Objects Screen
236
Figure 14-34: Edit Network Objects Screen
236
Network Objects
236
Figure 14-35: Edit Item Screen
237
Figure 14-36: Pppoe Relay Screen
237
Pppoe Relay
237
Dynamic DNS
238
Opening a Dynamic DNS Account
238
Figure 14-37: Personal Domain Name (Dynamic DNS) Screen
238
Figure 14-38: Personal Domain Name (Dynamic DNS) - Adding
239
Table 14-2: Dynamic DNS Parameter Descriptions
239
Figure 14-39: Advanced - Protocols
241
Protocols
241
Figure 14-40: Advanced - Protocols - Edit Service
242
Figure 14-41: Advanced - Protocols - Edit Service - Server Ports
242
Figure 14-42: Reboot Screen
242
Reboot
242
Figure 14-43: Regional Settings
243
Regional Settings
243
Remote Administration
243
Figure 14-44: Remote Administration Screen
244
Figure 14-45: Restore Factory Settings Screen
245
Restoring Factory Settings
245
Routing
246
Managing Routing Table Rules
246
Figure 14-46: Routing Rules
246
Routing Protocols
247
Figure 14-47: Routing Rule Settings
247
Table 14-3: Adding a Routing Rule - Parameter Descriptions
247
Figure 14-48: Advanced - Scheduler Rules
248
S Cheduler Rules
248
Figure 14-49: Edit Scheduler Rule Screen
249
Figure 14-50: Edit Time Segment Screen
249
Figure 14-51: Advanced - SNMP
250
Snmp
250
Table 14-4: SNMP Parameters Description
251
Figure 14-52: System Settings Screen
252
System Settings
252
Date & Time
254
Figure 14-53: Date and Time Screen
254
Configuring Users
255
Figure 14-54: Users Screen
255
Figure 14-55: Users Settings Screen
256
Figure 14-56: Group Settings Screen
257
Figure 14-57: Advanced - Universal Plug N Play
258
Universal Plug and Play
258
15 System Monitoring
259
Network Connections
259
Figure 15-1: System Monitoring - Connections
260
System Log
261
Figure 15-2: System Monitoring - System Log
261
Cpu
262
Figure 15-3: CPU Screen
262
Voice over IP
263
Figure 15-4: Advanced - System Monitoring - Voip
263
16 Syntax for Digit Maps and Dial Plans
265
Table 16-1: Dial Plan (for Left of '=' Sign) and Digit Map Syntax
265
17 Software and Hardware Specifications
267
Table 17-1: MP-20X Telephone Adapter Software Specifications
267
Advertisement
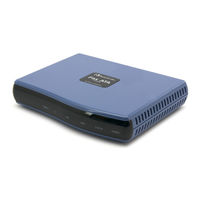
AudioCodes MP-20x User Manual (346 pages)
CPE & Access Gateway Products, Multimedia Home Gateway
Brand:
AudioCodes
| Category:
Adapter
| Size: 6 MB
Table of Contents
Table of Contents
3
Abbreviations and Terminology
15
Customer Support
15
Documentation Feedback
16
1 Introduction
17
Figure 1-1: Rear Panel MP-20Xb Models
17
Table 1-1: MP-20X Models
17
2 Cabling the MP-20X Telephone Adapter
19
Figure 2-1: Cabling the Device (Example Using MP-204B)
19
Table 2-1: MP-204B Leds Description
20
3 Setting up a Network Connection
21
Defining Your Pc's Network Connection
21
Windows XP
22
Linux
22
Figure 3-1: IP and DNS Configuration
22
Configuring the MP-20X's Network Connection
23
Logging in to MP-20X Web Interface
23
Figure 3-2: Logging in
23
Configuring 'Quick Setup' Screen Parameters
24
Configuring Your Internet Connection
24
Figure 3-3: Quick Setup Screen
24
Figure 3-4: Internet Connection - Automatic IP Address Ethernet Connection
25
Figure 3-5: Internet Connection - Manual IP Address Ethernet Connection
26
Figure 3-6: Internet Connection - Pppoe
27
Figure 3-7: Internet Connection - Point-To-Point Tunneling Protocol
27
Figure 3-8: Layer 2 Tunneling Protocol
28
Figure 3-9: Internet Connection - no Internet Connection
28
Configuring 3G/LTE USB Modem
29
Figure 3-10: WAN 3G USB Modem
29
Figure 3-11: WAN 3G USB Modem Properties
29
Figure 3-12: WAN 3G USB Modem Properties - Settings
30
Configuring Automatic Internet Dialer Detection
31
4 Device Quick Setup
33
Preparing Initial Configuration
33
Figure 4-1: Login Screen
33
Table 4-1: Login Parameters Description
33
Configuring SIP Signaling Protocol
34
Figure 4-2: Signaling Protocol
34
Figure 4-3: Line Settings
34
Figure 4-4: Line Settings
35
5 Getting Started with the Web Interface
37
Logging into the Web Interface
37
Figure 5-1: Login Screen
37
Menu Bar Description
38
Table 5-1: Menu Description
38
Managing Tables
41
Figure 5-2: Typical Table Structure
41
Table 5-2: Table Action Icons Description
41
Configuring Users
42
Figure 5-3: Users Screen
42
Figure 5-4: Users Settings Screen
43
Web User Permissions
45
Figure 5-5: Group Settings Screen
45
Print Commands
45
Set Commands
54
Associated Elements
55
Configuring Scheduler Rules
55
Figure 5-6: Scheduler Rules Screen
55
Figure 5-7: Edit Scheduler Rule Screen
55
Figure 5-8: Edit Time Segment Screen
56
Figure 5-9: Edit Hour Range Screen
56
Configuring Network Objects
57
Figure 5-10: Network Objects Screen
57
Figure 5-11: Edit Network Objects Screen
57
Figure 5-12: Edit Item Screen
57
Configuring Protocols
59
Figure 5-13: Advanced - Protocols
59
Logging out the Web Interface
60
Figure 5-14: Advanced - Protocols - Edit Service
60
Figure 5-15: Advanced - Protocols - Edit Service - Server Ports
60
6 Viewing a Graphical Display of the Device's Network
61
Figure 6-1: Map View Screen
61
Table 6-1: Map View Icon Description
62
7 Configuring Computers for Connecting to Device's Network
63
Wired Computers
63
Configuring Computers Running on Windows 7
63
Configuring Computers Running on Linux
64
Figure 7-1: Internet Protocol (TCP/IP) Properties Dialog Box
64
8 Setting up Your Device
65
Setting up an Internet Connection Using the Web Interface
65
Figure 8-1: Internet Connection
65
WAN Ethernet
66
Figure 8-2: WAN Ethernet - Manual IP Address Ethernet Connection
66
Manual IP Address Ethernet Connection
66
Automatic IP Address Ethernet Connection
67
Figure 8-3: Automatic IP Address WAN Ethernet Connection
67
Figure 8-4: Pppoe WAN Ethernet Connection
67
Pppoe
67
Figure 8-5: PPTP WAN Ethernet Connection
68
Pptp
68
Figure 8-6: L2TP WAN Ethernet Connection
69
L2Tp
69
Using the Automatic Dialer for Internet Connection
70
Recommended Configuration
70
Setting up and Starting the Automatic Dialer
71
Quitting Automatic Dialer for Manual Configuration
71
9 Configuring Voip Parameters
73
Configuring the SIP Signaling Protocol
74
Figure 9-1: Signaling Protocol Tab Screen
74
Table 9-1: Signaling Protocol Tab Parameters Description
74
Configuring Proxy Redundancy
79
Figure 9-2: Configuring Proxy Redundancy
80
Configuring Dialing Parameters
82
Figure 9-3: Dialing Tab Screen
82
Table 9-2: Dialing Tab Parameters Description
83
Syntax for Digit Maps and Dial Plans
86
Table 9-3: Dial Plan (for Left of '=' Sign) and Digit Map Syntax
86
Table 9-4: Digit Map Example
87
Configuring Media Streaming
88
Figure 9-4: Media Streaming Tab Screen
88
Configuring Codecs
89
Supported Codecs
89
Table 9-5: Media Streaming Tab Parameters Description
89
Packetization Time
90
Configuring Voice and Fax
91
Figure 9-5: Voice and Fax Tab Screen
91
Table 9-6: Voice and Fax Tab Parameters Description
91
Configuring Supplementary Services
96
Figure 9-6: Services Tab Screen
96
Table 9-7: Services Tab Parameters Description
97
Voice Menu Guidance
100
Configuring Voice Menu
100
Configuring Voice Menu through the CLI
100
Configuring Voice Menu through the Web Interface
100
Voice Menu Configuration Parameters
100
Configuring Micro PBX Line Settings
102
Figure 9-7: Line Settings Tab Screen
102
Figure 9-8: Line Settings Screen for a New Line
103
Configuring Line Extensions
105
Figure 9-9: Extension Settings Tab Screen
105
Figure 9-10: Extension Settings Screen
105
Configuring Speed Dialing
107
Figure 9-11: Speed Dial Tab Screen
107
Figure 9-12: Speed Dial Settings Screen (Proxy Destination)
107
Figure 9-13: Speed Dial Settings Screen (Local Line Destination)
108
Figure 9-14: Speed Dial Settings Screen (Direct Call Destination)
108
Enabling Polarity Reversal
109
Figure 9-15: Telephone Interface Tab Screen
109
10 Making Voip Calls with Your Analog Telephones
111
Making a Call
111
Answering a Waiting Call
111
Putting a Call on Hold
112
Transferring a Call
112
Forwarding Calls to Another Phone
113
Establishing a 3-Way Conference Call
114
11 Quality of Service
115
Qos Wizard
116
Figure 11-1: Qos Wizard Tab Screen
116
Configuring Traffic Shaping
117
Configuring Traffic Shaping
118
Figure 11-4: Edit Device Traffic Shaping Screen
119
Configuring Shaping Classes
120
Class Rules
121
Configuring Traffic Priority
123
Figure 11-7: Traffic Priority Screen
124
Figure 11-8: Add Traffic Priority Rule Screen
125
Configuring DSCP Mapping
127
Figure 11-10: Edit DSCP Settings
128
Configuring 802.1P Mapping
129
Configuring Class Statistics
130
Configuring Basic Voip Qos Example
131
Figure 11-14: Qos - Edit Device Traffic Shaping - Submitting the Configuration
132
12 Network Connections
133
Configuring a WAN Connection
133
Figure 12-1: Network Connections Screen
134
WAN Ethernet Connections
135
External DSL Modem Using Pppoe
135
Figure 12-4: Internet Connection – External DSL Modem
136
External Cable Modem/Fiber Transceiver Without Authentication
137
Figure 12-8: Internet Connection – External Cable Modem
138
Figure 12-10: Ethernet Connection Summary
139
External Cable Modem/Fiber Transceiver with L2TP
140
Figure 12-13: Internet Cable Modem Connection - L2TP
141
Figure 12-15: L2TP Connection Summary
142
Dhcp
143
Manual IP Address
144
Figure 12-20: Internet Connection – Ethernet Connection
145
Figure 12-22: Manual IP Address Configuration Screen
146
LAN Connection
147
LAN Ethernet
147
General Tab
148
Settings Tab
148
Advanced Tab
150
Routing Tab
150
WAN Connection
151
General Tab
151
Settings Tab
152
Internet Protocol Settings
153
Table 12-1: Settings Tab - Parameter Descriptions
153
Figure 12-32: Manually Defining DNS Server
154
Figure 12-33: IP Address Distribution - DHCP Server
155
Routing Tab
156
Table 12-2: Routing Parameters
156
Figure 12-37: Route Settings Screen
157
PPP Tab
158
Table 12-3: PPP Tab Parameter Descriptions
158
PPTP Tab
160
Table 12-4: PPTP Tab Parameter Descriptions
160
Advanced Tab
161
VLAN Settings
162
Figure 12-43: Advanced Connection
163
Figure 12-45: Connection Summary
164
Settings Tab
165
Table 12-5: VLAN Interface - General Communication Parameters
165
IP Address Distribution
166
Table 12-6: IP Address Distribution Parameters
166
Table 12-7: DHCP Relay
166
Figure 12-47: IP Address Distribution - DHCP Relay
167
Table 12-8: Assigning Static IP Addresses to Network Computers
167
Routing Tab
168
Table 12-9: Routing Parameters
168
Advanced Tab
169
LAN-WAN Bridge Settings
170
Figure 12-54: Adding New Network Bridging
171
Editing LAN-WAN Bridging
172
Figure 12-57: VLAN Settings Screen
173
13 Add-On Servers and Disk Management
175
External File Server
175
Automatic File Sharing
176
Figure 13-3: User Screen
177
Print Server
178
Connecting and Setting up a Printer on Windows
179
Print Protocols
180
Table 13-1: IPP, Samba, and LPD Specifications
180
Internet Printing Protocol
181
Figure 13-10: Specify a Printer
182
Figure 13-11: Printer Screen – IPP URL (Linux)
183
Figure 13-13: Add Printer
184
Figure 13-15: Printing Protocol
185
Figure 13-17: Print & Fax
186
Figure 13-18: Printer Browser – IP Printer
187
Figure 13-19: Print & Fax – New IPP Printer
188
Microsoft Shared Printing (Samba)
189
Figure 13-21: Printer Browser – Default Browser
190
Figure 13-23: Printer Browser – MP264
191
Line Printer Daemon (LPD)
192
Figure 13-26: Local Printer
193
Figure 13-28: Add Port
194
Figure 13-30: Printer Port Monitor Configuration
195
Figure 13-31: Add Printer Wizard
196
Figure 13-32: Print & Fax
197
Figure 13-33: Printer Browser – LPD Printer
198
Figure 13-34: Print & Fax – New LPD Printer
199
Storing and Using Printer Drivers
200
14 Remote Device Management
201
Overview
201
Remote Configuration
201
Table 14-1: Main Configuration Parameter Groups
202
Figure 14-1: Remote Management Interfaces
202
Remote Management
203
Firmware Upgrade
203
Status and Performance Monitoring
204
Table 14-2: Status and Performance Monitoring Parameters
204
Alarms, Notifications and Logging
205
Table 14-3: Notifications and Logged Events
205
Table 14-4: Severity of Logged Events
205
Enabling Remote Management
206
Figure 14-2: Remote Administration Screen
207
Securing Remote Management with Certificates
209
Figure 14-4: Create Self Signed X509 Certificate Screen
210
Figure 14-7: File Download Window
211
Figure 14-9: Ca's Certificates
212
Remote Configuration and Management Interfaces
213
Embedded Web Server
213
Table 14-5: Operations Per Configuration/Management Interface
213
And TR-104 CPE WAN Management Protocol
214
Configuring the Device Via TR-069 and TR-104
215
Table 14-6: Internetgatewaydevice.wandevice.I.wanconnectiondevice.I.wanipconnection.I
215
Table 14-7: Internetgatewaydevice.landevice.I.lanethernetinterfaceconfig
217
Table 14-8: Internetgatewaydevice.landevice.I.lanhostconfigmanagement
217
Table 14-9: Internetgatewaydevice.services.voiceservice.I.capabilities
218
Table 14-10: Internetgatewaydevice.services.voiceservice.I.capabilities.codecs
221
Table 14-11: Internetgatewaydevice.services.voiceservice.I.voiceprofile
221
Table 14-12: Internetgatewaydevice.services.voiceservice.I.voiceprofile.I.sip
222
Monitoring the Device Status Via TR-069 and TR-104
223
Table 14-13: Internetgatewaydevice.deviceinfo
223
Table 14-14: Internetgatewaydevice.wandevice.I.wanconnectiondevice.I
224
Wanipconnection.I.stats
224
Table 14-15: Internetgatewaydevice.landevice.I.lanethernetinterfaceconfig.I.stats
225
Table 14-16: Internetgatewaydevice.services.voiceservice.I.voiceprofile.I.line.I.stats
225
Security Concerns and Measures
227
Snmp
227
Enabling SNMP in the Web Interface
228
Configuring the Device Via SNMP
229
Status Monitoring of System and Network Interfaces Via SNMP
229
Table 14-17: Table 3-13: Information Elements Available Via MIB-II
229
Security Concerns and Measures
230
Automatic File Download
231
Configuration File Download
231
Firmware File Download
231
Syslog
231
Redirect Server
232
Security Concerns and Measures
232
Telnet CLI
232
Figure 14-14: Redirect Server Configuration Process
233
Broadsoft Broadworks DMS Provisioning
234
Default Behavior
234
Disabling DHCP Options 66 and 67
234
Provisioning Using DHCP Options 66/67 and TFTP
234
Table 14-18: DHCP Options 66/67 Descriptions
234
15 Security
237
General Security Level Settings
238
Table 15-1: Behavior for the Three Security Levels
239
Configuring Access Control
240
Configuring Port Forwarding
242
Figure 15-5: Port Forwarding Screen
243
Figure 15-8: Specifying Public IP Address
244
Figure 15-9: Select Check Box of Port Forwarding Rule (Active)
245
Configuring a DMZ Host
246
Configuring Port Triggering
247
Figure 15-12: Adding Port Triggering Rules
248
Figure 15-15: Edit Service Opened Ports
249
Configuring Website Restrictions
250
Figure 15-19: Add a Specific Host
251
Configuring NAT
253
Figure 15-23: Adding NAT/NAPT Rule
254
Viewing Current Connections
256
Configuring Advanced Filtering
257
Figure 15-26: Add Advanced Filter
258
Figure 15-27: Add a Specific Host
259
Viewing the Security Log
261
Figure 15-30: Security Log Settings
262
16 Advanced Networking Features
265
IP Address Distribution
265
Figure 16-1: DHCP Server Summary
266
Configuring the DHCP Server
267
Configuring DHCP Relay
268
Viewing DHCP Clients
269
Configuring Static DHCP Clients
270
Configuring a DNS Server
271
Configuring Dynamic DNS
273
Figure 16-10: Personal Domain Name (Dynamic DNS) - Adding
274
Configuring Routing Rules
276
Managing Routing Table Rules
277
Configuring Routing Protocols
278
Enabling Pppoe Relay
279
Selecting Regional Settings for Analog Lines
280
Installation Wizard
281
17 Home Media
283
Universal Plug and Play
283
Enabling Universal Plug and Play on the Device
283
Adding Upnp-Enabled PC to Home Network
284
Monitoring Connection between the Device and Internet
285
Making Local Services Available to Pcs on Internet
286
Figure 17-5: Advanced Settings
287
Figure 17-7: Service Settings – Add Service
288
18 Configuring the Device for Packetsmart
289
Configuring Packetsmart through the Web Interface
289
Figure 18-2: Packetsmart Configuration
290
Table 18-1: Packetsmart Configuration Parameters Description
291
Configuring Packetsmart through the CLI
292
Accessing the Packetsmart Web Portal
293
Figure 18-4: Packetsmart Web Portal – Selecting the Device
294
19 Media Sharing
295
Share Music, Pictures and Video on My Local Network
296
Automatically Share Media in All Folders
297
Figure 19-4: Shared Partitions
298
20 Maintenance
299
Enabling the Feature Key
299
Figure 20-2: Reboot Screen
300
Viewing the Device Software Version
301
Configuring Date and Time
302
Figure 20-5: Daylight Saving Time
303
Figure 20-7: Time Server Settings Screen
304
Configuration File
305
Uploading Configuration File from PC on the Network
307
Figure 20-11: Successful Configuration File Uploading
308
Uploading Configuration File from a Remote Server
309
Encrypting the Configuration File Using CLI
312
Automatic Upload Using SIP NOTIFY Message
313
Firmware Upgrade
314
Upgrading the Device from a Computer on the Network
315
Figure 20-14: Firmware Upgrade Screen – Check Disabled
316
Figure 20-16: Confirming Firmware Upgrade Screen
317
Upgrading the Device from the Internet
318
Configuring System Settings
320
Rebooting the Device
323
Restoring Factory Settings
324
21 Diagnostics and Performance Monitoring
325
Running Diagnostics
325
Running the Ping Test
326
Running the ARP Test
326
Running a Traceroute
327
Running Debug
328
Running Packet Recording
329
Running SIP Debug Log
330
Running Tcpdump
331
Running Tcpdump with Destination Port 7555
331
Updating Wireshark
331
Defining a Different Destination Port (Other than Port 7555)
332
Running Generic Commands
333
Commands Output and Report
334
Figure 21-12: Report Commands Example - Download
335
Figure 21-15: Report Commands Example – Winzip Report
336
System Monitoring
337
Viewing Network Connections Status
337
Viewing the System Log
338
Viewing CPU Statistics
339
Viewing Voip Traffic Statistics
340
Viewing Internet Connection Utilization
341
A Technical Specifications
343
Device Gateway Specifications
343
Table A-1: MP-20X Telephone Adapter Software Specifications
343
Advertisement
Related Products
AudioCodes MewdiaPack MP-202
AudioCodes MediaPack MP-202B
AudioCodes MediaPack MP-203B
AudioCodes MediaPack MP-201B
AudioCodes MediaPack MP-202C-A
AudioCodes MediaPack MP-201B1FXS
AudioCodes MediaPack MP-201BSIP
AudioCodes MediaPack MP-202B2FXS
AudioCodes MediaPack MP-204BSIP
AudioCodes MediaPack MP-203BSIP
AudioCodes Categories
Gateway
IP Phone
Controller
Network Router
Conference System
More AudioCodes Manuals
Login
Sign In
OR
Sign in with Facebook
Sign in with Google
Upload manual
Upload from disk
Upload from URL