Quantum DXi8500 User Manual
Quantum dxi8500 disk backup solution user's guide
Hide thumbs
Also See for DXi8500:
- Upgrade instructions (116 pages) ,
- Command manual (344 pages) ,
- Manual (162 pages)
Table of Contents
Advertisement
Quick Links
Advertisement
Table of Contents
Troubleshooting

Related Manuals for Quantum DXi8500


Summary of Contents for Quantum DXi8500
- Page 1 User’s Guide Quantum DXi8500 with DXi 2.2.1 Software 6-67205-04 Rev B...
- Page 2 Quantum DXi8500 User’s Guide, 6-67205-04 Rev B, January 2013, Product of USA. This document is for DXi 2.2.1 Software. Quantum Corporation provides this publication “as is” without warranty of any kind, either express or implied, including but not limited to the implied warranties of merchantability or fitness for a particular purpose.
-
Page 3: Table Of Contents
DXi8500 System ........ - Page 4 OpenStorage (OST) ....... . . 21 DXi8500 Storage Systems ........22 System Node.
- Page 5 Main Menu ........106 DXi8500 Management Pages ......107...
- Page 6 DXi8500 Home Page DXi8500 System Overview....... . . 154 Disk Usage Overview ........155 Data Reduction Statistics Overview .
- Page 7 VTL ..........243 Quantum DXi8500 User’s Guide...
- Page 8 Manage Users ........333 Manage Remote Users ......336 viii Quantum DXi8500 User’s Guide...
- Page 9 Feature Keys ........442 Quantum DXi8500 User’s Guide...
- Page 10 Troubleshooting DXi8500 Status and Problem Reporting ..... . 469 General Troubleshooting Actions ......470 Viewing Service Tickets .
- Page 11 Figure 2 DXi8500 Base Rack and Expansion Rack (3TB Systems) ..16 Figure 3 DXi8500 Hard Drives ......18 Figure 4 VTL Example.
- Page 12 Figures Figure 18 DXi8500 System Node Buttons/LED Indicators..37 Figure 19 Hard-Drive Indicators ......39 Figure 20 System Node (1TB and 2TB) –...
- Page 13 Figure 54 Turning off the Power Strips (Un-racked System)..90 Figure 55 Serial Number on the DXi8500 Home Page ... . 97 Figure 56 Login Window ....... . . 101 Figure 57 Home Page .
- Page 14 Figure 94 Home Page ........154 Figure 95 DXi8500 System Overview ......155 Figure 96 Disk Usage Overview .
- Page 15 Figure 127 Network Ports Page ......228 Figure 128 Storage Arrays Page......229 Quantum DXi8500 User’s Guide...
- Page 16 Figure 156 Share Access Page (Active Directory) ....275 Figure 157 Add Workgroup User Page ..... . 276 Quantum DXi8500 User’s Guide...
- Page 17 Figure 185 Add User Credential......335 Figure 186 Edit User Credentials ......336 Quantum DXi8500 User’s Guide xvii...
- Page 18 Figure 215 SSL Page ........388 xviii Quantum DXi8500 User’s Guide...
- Page 19 Figure 243 Settings Page ....... . . 433 Figure 244 Disk Analyzer Page......434 Quantum DXi8500 User’s Guide...
- Page 20 Figure 249 Secure Shred Mode Interface ..... 445 Figure 250 Reboot & Shutdown Page ..... . . 447 Quantum DXi8500 User’s Guide...
- Page 21 Table 16 Array Module LEDs and Buttons (3TB) ....66 Table 17 Expansion Module LEDs and Buttons (3TB) ... . . 69 Quantum DXi8500 User’s Guide...
- Page 22 Table 25 Supported Tape Drives in Backup Application Specific..94 Table 26 DXi8500 Model Number ......105 Table 27 Physical Characteristics .
- Page 23 Preface This manual introduces the Quantum DXi8500 disk backup solution and discusses: • System operations • Configuration • Web interface • Basic troubleshooting Audience This manual is written for DXi8500 operators and administrators. Note: It is useful for the audience to have a basic understanding of Windows, Linux, and UNIX®...
-
Page 24: Notational Conventions
Appendix A, DXi8500 System Specifications provides system specifications for the DXi8500. • Appendix B, Troubleshooting discusses problems you may encounter during the setup and operation of the DXi8500. • Appendix C, Regulatory Statements provides regulatory information for the DXi8500. •... - Page 25 • 1 GB = 1,000,000,000 bytes • 1 TB = 1,000,000,000,000 bytes Product Safety Quantum will not be held liable for damage arising from unauthorized Statements use of the product. The user assumes all risk in this aspect. This unit is engineered and manufactured to meet all safety and regulatory requirements.
- Page 26 Preface Related Documents The following Quantum documents are also available for the DXi8500: xxvi Quantum DXi8500 User’s Guide...
- Page 27 Provides information Reporting User’s Guide about using DXi Advanced Reporting features. For the most up-to-date documentation for the DXi8500, go to: http://www.quantum.com/ServiceandSupport/Index.aspx Contacts Quantum company contacts are listed below. Quantum Corporate Headquarters To order documentation on the DXi8500 or other products contact:...
- Page 28 Quantum’s Knowledge Base, a comprehensive repository of product support information. Sign up today at: http://www.quantum.com/osr For further assistance, or if training is desired, contact the Quantum Customer Support Center: United States 1-800-284-5101 (toll free)
- Page 29 Preface For worldwide support: http://www.quantum.com/ServiceandSupport/Index.aspx Worldwide End-User For more information on the Quantum Worldwide End-User Standard Product Warranty Limited Product Warranty: http://www.quantum.com/pdf/QuantumWarranty.pdf Quantum DXi8500 User’s Guide xxix...
- Page 30 Preface Quantum DXi8500 User’s Guide...
-
Page 31: Dxi8500 System Description
Chapter 1 DXi8500 System Description This chapter describes the DXi8500 system and its components and includes the following sections: • Overview • Features and Benefits • What’s New in DXi 2.2.1 Software • Data Reduction • Space Reclamation • Remote Replication •... -
Page 32: Overview
The DXi8500 leverages Quantum’s patented data deduplication technology (U.S. Pat. No.: 5,990,810) to dramatically increase the role that disk can play in the protection of critical data. With the DXi8500 solution, users can retain 10 to 50 times more backup data on fast recovery disk than with conventional arrays. -
Page 33: Features And Benefits
In addition, DXi8500 systems support Data-at-Rest Encryption to secure all data stored on the DXi8500. Data-at-Rest Encryption ensures that a hard drive that is physically removed from the DXi8500 cannot be read using another system or device Features and Benefits The DXi8500 system provides the following features and benefits: •... - Page 34 • EMC Networker Note: When the path to tape feature is enabled and configured, backup data can be moved directly from the DXi8500 system to a tape library. For a list of supported tape libraries and tape drives, see Table 24...
-
Page 35: What's New In Dxi 2.2.1 Software
• Supported by every major backup software vendor • Installs in a standard rack with a minimum depth of 30 in (76.2 cm) Note: The DXi8500 system must be installed in a restricted access location per specification CSA C22.2 / UL 60950 or EN 60950- 1. - Page 36 Chapter 1: DXi8500 System Description What’s New in DXi 2.2.1 Software 90 days. You can view the user who performed the activity, the time the activity was performed, and other information. You can also download the activity log to an XML file (see Activity Log page 249).
-
Page 37: Enhancements In Previous Releases
The following enhancement was introduced in DXi 2.1.2 Software: Previous Releases • Data-at-Rest Encryption - Data-at-Rest Encryption secures all data stored on the DXi8500, including file data and metadata, configuration files, and the DXi software and operating system. Data-at-Rest Encryption ensures that a hard drive that is physically... -
Page 38: Data Reduction
Network page 366). • Configuration Wizards - New wizards provide guided assistance to help users configure key features of the DXi8500, such as storage presentation and data replication. Each wizard leads you step-by- step through the configuration process (see DXi8500 Configuration Wizards on page 111). -
Page 39: Data Deduplication
Adding a VTL Partition on page 284. Compression The DXi8500 systems use compression technology after duplicate blocks have been identified and replaced as part of the deduplication process. With compression, unique data that has been through the data deduplication process can be compressed at a typical ratio of approximately 2:1. -
Page 40: Space Reclamation
For correct system operation, space reclamation be run at regular intervals (at least once a week). Quantum recommends creating a schedule to automatically run space reclamation (see Scheduling Space Reclamation on page 362). -
Page 41: Dxi8500 System
For more information on implementing a replication plan, see Chapter 6, DXi8500 Replication. DXi8500 System The DXi8500 is a disk appliance designed to work with leading backup applications (see Figure 1 Figure 2). DXi8500 systems are available with 40TB–320TB native usable capacity (with 2TB drives) or 45TB–... -
Page 42: Dxi8500 Capacity Upgrades
• The second Array module is required for 6 or more Expansion modules. • A second metadata module is required for 2 Array modules. DXi8500 Capacity Customers can expand the capacity of their DXi8500 system by adding Upgrades Array modules and Expansion modules. Expanding 2TB Base Systems For capacity upgrades, Array and Expansion modules can be purchased with 2TB or 3TB drives. - Page 43 3TB Array and Expansion modules only. Note: To add a 3TB Array module or Expansion modules to a 2TB base system, the DXi8500 must be running DXi 2.1.2_85 Software or higher. Quantum DXi8500 User’s Guide...
- Page 44 Chapter 1: DXi8500 System Description DXi8500 System Expanding 3TB Base Systems For capacity upgrades, Array and Expansion modules can be purchased with 3TB drives. • A second 3TB Array module is required for 6 or more 3TB Expansion modules. • If the system has only a single Metadata module, you must add a second Metadata module when adding the second 3TB Array module.
-
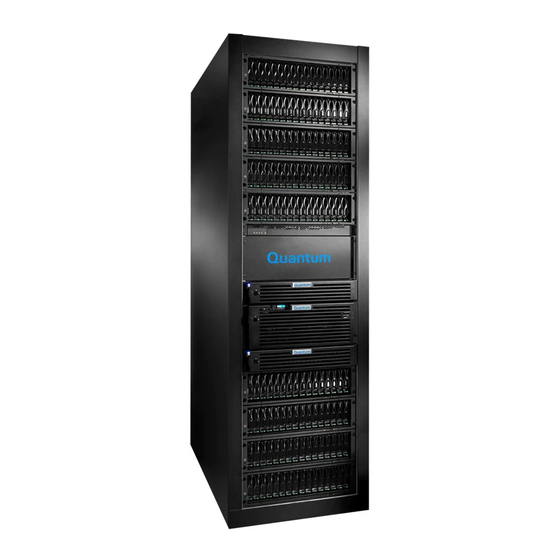
Page 45: Figure 1 Dxi8500 Base Rack And Expansion Rack
Chapter 1: DXi8500 System Description DXi8500 System Figure 1 DXi8500 Base Rack DXi8500 Base Rack DXi8500 Expansion Rack and Expansion Rack (1TB and 2B Systems) DXi-85ER DXi-85BR Quantum DXi8500 User’s Guide... -
Page 46: Figure 2 Dxi8500 Base Rack And Expansion Rack (3Tb Systems)
Chapter 1: DXi8500 System Description DXi8500 System Figure 2 DXi8500 Base Rack DXi8500 Base Rack (3TB) and Expansion Rack (3TB Systems) Quantum DXi8500 User’s Guide... -
Page 47: Dxi8500 System Components
Note: (2TB systems only) An expansion rack is required for all Expansion modules and the 10th Array module. Hard Drive Storage Serial Attached SCSI hard drives are the heart of the DXi8500 system (see Figure 3). User data is stored on dedicated arrays of serial-attached drives in RAID 6 configurations. -
Page 48: Figure 3 Dxi8500 Hard Drives
The storage in the DXi8500 can be presented to host systems as virtual tape storage inside a virtual tape library (VTL), as a NAS mount point, or, in Symantec OpenStorage (OST) API environments as a Logical Storage Unit (LSU). -
Page 49: Virtual Tape Storage
(DLT or LTO). Data is stored on the hard drives through an interface that appears as a tape library, with virtual cartridges, virtual drives, and a virtual changer mechanism. A DXi8500 can be configured to present multiple VTL interfaces of different sizes and types at once. -
Page 50: Network Attached Storage (Nas)
Chapter 1: DXi8500 System Description Hard Drive Storage Network Attached The DXi8500 system has the ability to present itself as NAS backup Storage (NAS) systems (see Figure 5) where the following protocols are supported: • CIFS Protocol • NFS Protocol... -
Page 51: Openstorage (Ost)
Backup Exec 2010 or later host application and the OST Plug-in client installation on the media server. Plug-in clients are host-OS dependent and are supplied by Quantum. To use the DXi in OST mode, you must configure an OST storage server and LSUs on the DXi. You must also map the LSUs on the NetBackup server so that NetBackup can perform backups and restore from them. -
Page 52: Dxi8500 Storage Systems
Note: The Quantum OST Plug-in, as well as installation instructions, can be downloaded from: http://www.quantum.com/ ServiceandSupport/SoftwareandDocumentationDownloads/ OSTClientPlugin/Index.aspx Figure 6 OpenStorage (OST) Example DXi8500 Storage Systems This section describes the storage systems for the following DXi8500 system components: • System Node • Metadata Modules Quantum DXi8500 User’s Guide... - Page 53 Chapter 1: DXi8500 System Description DXi8500 Storage Systems • Array Modules (1TB and 2TB Hard Drives) • Array Modules (3TB Hard Drives) • Expansion Modules (1TB and 2TB Hard Drives) • Expansion Modules (3TB Hard Drives) Quantum DXi8500 User’s Guide...
-
Page 54: System Node
DXi8500 Storage Systems System Node The DXi8500 System Node contains thirteen 146GB SAS hard drives (1TB and 2TB systems) or fifteen 300GB SAS hard drives (3TB systems) and supports RAID 10 or RAID 1 configurations (depending on the type of data being stored on the drives—boot software or Metadata storage) -
Page 55: Metadata Modules
SNFS metadata — RAID 1 (1 + 1) Drive Blank Metadata Modules DXi8500 Metadata modules contain seventeen SAS hard drives, and every module supports RAID 1 with one hot spare per tray. Hard drives are supplied in hot-swappable drive carriers that fit in the hard-drive bays. -
Page 56: Figure 9 Metadata Module Raid Sets
Chapter 1: DXi8500 System Description DXi8500 Storage Systems of each Metadata module, are used to store the blockpool metadata (see Figure Metadata modules — RAID set characteristics: • The first drive in each Metadata module (Drive 0) is the global hot spare for that enclosure. -
Page 57: Array Modules (1Tb And 2Tb Hard Drives)
10TB (with 1TB drives) or 20TB (with 2TB drives). Up to nine Array modules can be added in the base rack. A tenth Array module can be added in an expansion rack. For DXi8500 systems with 1TB drives, from 1 to 10 Expansion modules can be added to an expansion rack. -
Page 58: Array Modules (3Tb Hard Drives)
Chapter 1: DXi8500 System Description DXi8500 Storage Systems Array Modules (3TB Each Array module (RBOD) contains 12 SATA hard drives (3TB each) and Hard Drives) provides a usable capacity of 15TB. Up to two Array modules can exist in the base rack. -
Page 59: Expansion Modules (3Tb Hard Drives)
Chapter 1: DXi8500 System Description DXi8500 Storage Systems Expansion modules — RAID set characteristics: • The first two drives in each Expansion module (Drive 1 and Drive 2) are the global hot spares for that enclosure. • The remaining hard drives in each Expansion module are configured into two RAID sets: •... -
Page 60: Dxi Advanced Reporting
Drive 12 RAID set (10 + 2) DXi Advanced Reporting Quantum DXi Advanced Reporting works with all DXi-Series disk backup systems. DXi Advanced Reporting combines comprehensive performance data logging with powerful visual reporting and analysis tools to help you identify potential problems and optimize system DXi Advanced Reporting operation. -
Page 61: Basic Operations
DXi8500 Remote Management on page 99, basic system operations include: • DXi8500 Components and Operations on page 32 • Powering on the DXi8500 System on page 80 • Shutting Down the DXi8500 System on page 87 • Relocating the DXi8500 System on page 90 •... -
Page 62: Dxi8500 Components And Operations
70 • Ethernet Switch on page 76 • RPS for Ethernet Switch on page 78 For examples of the DXi8500 base and expansion rack component locations, see Figure 14 (1TB and 2TB base rack), Figure 15 (1TB expansion rack),... -
Page 63: Figure 14 Dxi8500 (1Tb And 2Tb) Base Rack Component Locations
Chapter 2: Basic Operations DXi8500 Components and Operations Figure 14 DXi8500 (1TB and 2TB) Base Rack Component Locations Quantum DXi8500 User’s Guide... -
Page 64: Figure 15 Dxi8500 (1Tb) Expansion Rack Component Locations
Chapter 2: Basic Operations DXi8500 Components and Operations Figure 15 DXi8500 (1TB) Expansion Rack Component Locations (EXPANSION RACK) 4U PANEL 3U PANEL Expansion Module 10 Expansion Module 9 Expansion Module 8 Expansion Module 7 Expansion Module 6 Expansion Module 5... -
Page 65: Figure 16 Dxi8500 (2Tb) Expansion Rack Component Locations
Chapter 2: Basic Operations DXi8500 Components and Operations Figure 16 DXi8500 (2TB) Expansion Rack Component Locations Quantum DXi8500 User’s Guide... -
Page 66: Figure 17 Dxi8500 (3Tb) Base Rack
Chapter 2: Basic Operations DXi8500 Components and Operations Figure 17 DXi8500 (3TB) Base Rack Expansion Module 2-5 Expansion Module 2-4 Expansion Module 2-3 Expansion Module 2-2 Expansion Module 2-1 Array Module 2 Ethernet Switch with RPS Metadata Module 2 System Node... -
Page 67: System Node
The System Node contains dual hard drives in a RAID 1 configuration ensuring high availability of the system software. System Node – Front Panel The front of the DXi8500 System Node has a series of LED indicators and buttons (see Figure 18 and Table 1). - Page 68 NMI button Use this button only when directed by Quantum Customer Support. USB Connectors (2) Used to connect USB devices to the system. The ports are USB 2.0- compliant.
-
Page 69: Figure 19 Hard-Drive Indicators
Hard drives Up to thirteen (1TB and 2TB systems) or fifteen (3TB systems) 2.5-inch, external hot-swappable SAS hard drives. System Node – Hard-Drive Indicator Patterns This section describes the DXi8500 System Node hard-drive indicator patterns. Figure 19 Hard-Drive Indicators Quantum DXi8500 User’s Guide... -
Page 70: Table 2 System Node - Hard-Drive Activity And Status Indicators
Blinks green three seconds, amber Rebuild aborted three seconds, and off six seconds System Node – Rear Panel The back of the DXi8500 System Node has a series of LED indicators and buttons (see Figure 20, Figure 21, and Table 3). Quantum DXi8500 User’s Guide... -
Page 71: Figure 20 System Node (1Tb And 2Tb) - Rear Panel Buttons/Led
Chapter 2: Basic Operations DXi8500 Components and Operations Figure 20 System Node (1TB and 2TB) – Rear Panel Buttons/ LED Indicators Quantum DXi8500 User’s Guide... -
Page 72: Figure 21 System Node (3Tb) - Rear Panel Buttons/Led Indicators
Not for customer use. USB connectors (2) The ports are USB 2.0-compliant. Not for customer use. Ethernet The DXi8500 system has two standard 10 GbE ports. connectors (1TB and 2TB Connects the internal Fibre Channel network to the Fibre Systems) Fibre Channel switch. - Page 73 The DXi8500 system has four 1 GbE ports. connectors SAS connectors Connects to the Metadata modules. Ethernet The DXi8500 system has two optional 10 GbE ports. connectors System The identification buttons on the front and back panels can identification be used to locate a particular system within a rack. When...
-
Page 74: Figure 22 System Node - Nic Indicators
Chapter 2: Basic Operations DXi8500 Components and Operations System Node – NIC Indicator Codes This section describes the DXi8500 System Node NIC indicator codes. Figure 22 System Node – NIC Indicators 1 Link indicator 2 Activity indicator Table 4 System Node – NIC... -
Page 75: Metadata Module
This section describes the DXi8500 Metadata module, which is used to store the deduplication metadata for the stored data. Metadata Module – Front Panel The front of the DXi8500 Metadata module has a series of LED indicators and buttons (see Figure 23). Figure 23 Metadata Module –... -
Page 76: Figure 24 Metadata Module - Front Panel Indicators And Features
Chapter 2: Basic Operations DXi8500 Components and Operations Metadata Module – Front Panel Indicators and Features This section describes the DXi8500 Metadata module front panel indicators and features (see Figure 24 and Table 5). Figure 24 Metadata Module – Front Panel Indicators and Features Table 5 Metadata Module –... - Page 77 Chapter 2: Basic Operations DXi8500 Components and Operations Indicator, Button, Item or Connector Icon Description Power LED The power LED lights when at least one power supply is supplying power to the enclosure. Split model LED The split mode LED lights when the enclosure is in a split- mode configuration.
-
Page 78: Figure 25 Metadata Module - Hard Drive Indicators
Chapter 2: Basic Operations DXi8500 Components and Operations Metadata Module – Hard-Drive Indicators This section describes the DXi8500 Metadata module hard drive activity and status indicators (see Figure 25 and Table 6). Figure 25 Metadata Module – Hard Drive Indicators 1 Hard-drive activity indicator (green) 2 Hard-drive status indicator (green and amber) Table 6 Metadata Module –... -
Page 79: Figure 26 Metadata Module - Rear Panel Led Indicators And
Blinks green three seconds, amber Rebuild aborted three seconds, and off six seconds. Metadata Module – Rear Panel The rear panel of the DXi8500 Metadata module has a series of LED indicators and buttons (see Figure 26 and Table 7). Figure 26 Metadata Module –... -
Page 80: Figure 27 Metadata Module - Emm Indicators And Features
Chapter 2: Basic Operations DXi8500 Components and Operations Item Indicator, Button, or Connector Description Secondary EMM Provides a data path between the enclosure and the host server and enclosure management functions for your enclosure. Power switches (2) Controls the power supply output to the enclosure. -
Page 81: Table 8 Metadata Module - Emm Indicators And Features
Chapter 2: Basic Operations DXi8500 Components and Operations Table 8 Metadata Module – EMM Indicators and Features Indicator, Button, Item or Connector Icon Description System Status Blinks blue when the system identification button is Indicator pushed. You can identify a particular enclosure in a rack using the system identification indicator. - Page 82 Chapter 2: Basic Operations DXi8500 Components and Operations Indicator, Button, Item or Connector Icon Description EMM Status LED • Lights green when the EMM is functioning properly. • Lights amber when the enclosure does not boot or is not properly configured.
-
Page 83: Figure 28 Metadata Module - Power Indicator Codes
Chapter 2: Basic Operations DXi8500 Components and Operations Metadata Module – Power Indicator Codes This section describes the DXi8500 Metadata module power indicator codes (see Figure 28 and Table 9). Figure 28 Metadata Module - Power Indicator Codes Table 9 Metadata Module –... -
Page 84: Array Modules And Expansion Modules
RAID sets on the Array modules and Expansion modules. Each Array and Expansion module contains 16 SATA hard drive sleds. The DXi8500 Array and Expansion modules have a series of LED indicators and buttons located on the front and back of each component: •... -
Page 85: Figure 29 Array And Expansion Module Led Indicators - Front Panel
Chapter 2: Basic Operations DXi8500 Components and Operations Figure 29 Array and Expansion Module LED Indicators – Front Panel (1TB and 2TB) Global summary fault Alarm Link rate mute switch Global locate Global power Table 10 Array and Expansion Button/LED... -
Page 86: Figure 30 Hard Drive Sled Leds (1Tb And 2Tb)
Chapter 2: Basic Operations DXi8500 Components and Operations Button/LED Description Link rate switch This switch sets the Fibre Channel link speed from 2 GB to 4 GB. This switch should remain in the 4 GB position. Array and Expansion Module – Hard Drive Sled LEDs... - Page 87 Chapter 2: Basic Operations DXi8500 Components and Operations Description Drive fault Solid – The hard drive has failed. Contact Quantum customer support. Blinking – Drive volume or Array module locate function. Drive active LED Solid – No activity on the hard drive.
-
Page 88: Figure 31 Array Module Led Indicators - Rear Panel (1Tb And 2Tb)
Chapter 2: Basic Operations DXi8500 Components and Operations Figure 31 Array Module LED Indicators – Rear Panel (1TB and 2TB) DC port 2 DC port 2 DC port 1 DC port 1 bypass speed speed bypass Host channel Host channel... - Page 89 Chapter 2: Basic Operations DXi8500 Components and Operations Button/LED Description Cache active Solid - unwritten data is stored in cache. Diagnostic (light in Solid - LED indicates diagnostic code is corner of LED) displayed. Off - LED indicates tray ID.
-
Page 90: Figure 32 Expansion Module Led Indicators - Rear Panel
Chapter 2: Basic Operations DXi8500 Components and Operations Expansion Module LED Indicators – Rear Panel LED indicators and buttons are located on the back of the Expansion modules (see Figure 32 and Table 13). Figure 32 Expansion Module LED Indicators – Rear Panel... -
Page 91: Table 13 Expansion Module Leds And Buttons (1Tb And 2Tb)
Chapter 2: Basic Operations DXi8500 Components and Operations Table 13 Expansion Module Button/LED Description LEDs and Buttons (1TB and 2TB) Service action allowed Solid - failed component ok to remove. (OK to remove) Solid - component has failed and requires Service action required attention. -
Page 92: Array Modules And Expansion Modules (3Tb Hard Drives)
RAID sets on the Array modules and Expansion modules. Each Array and Expansion module contains 12 SATA hard drive sleds. The DXi8500 Array and Expansion modules have a series of LED indicators and buttons located on the front and back of each component: •... -
Page 93: Figure 33 Array And Expansion Module Led Indicators - Front Panel
Chapter 2: Basic Operations DXi8500 Components and Operations Figure 33 Array and Expansion Module LED Indicators – Front Panel (3TB) Enclosure locate Service action required Over temperature Power Standby power Table 14 Array and Expansion Button/LED Description Module LEDs and Buttons... -
Page 94: Figure 34 Hard Drive Sled Leds (3Tb)
Chapter 2: Basic Operations DXi8500 Components and Operations Array and Expansion Module – Hard Drive Sled LEDs The individual hard drive sleds contain LEDs that indicate the health condition of the hard drive (see Figure 34 and Table 15). Figure 34 Hard Drive Sled LEDs... -
Page 95: Figure 35 Array Module Led Indicators - Rear Panel (3Tb)
Chapter 2: Basic Operations DXi8500 Components and Operations Array Module LED Indicators – Rear Panel LED indicators and buttons are located on the back of the Array modules (see Figure 35 and Table 16). Figure 35 Array Module LED Indicators – Rear Panel (3TB) -
Page 96: Table 16 Array Module Leds And Buttons (3Tb)
(green) On - battery is fully charged. Off - battery fault or no battery. Service action allowed Solid - safe for Quantum field service. to (blue) remove controller from slot. Service action required Solid - controller has failed and requires (amber) attention. - Page 97 Chapter 2: Basic Operations DXi8500 Components and Operations Button/LED Description Service action allowed Solid - safe for Quantum field service. to (blue) remove power supply from slot. Solid - power supply has failed and Service action required (amber) requires attention.
-
Page 98: Figure 36 Expansion Module Led Indicators - Rear Panel (3Tb)
Chapter 2: Basic Operations DXi8500 Components and Operations Expansion Module LED Indicators – Rear Panel LED indicators and buttons are located on the back of the Expansion modules (see Figure 36 and Table 17). Figure 36 Expansion Module LED Indicators – Rear Panel... -
Page 99: Table 17 Expansion Module Leds And Buttons (3Tb)
Off - port speed 10/100MB/sec. Ethernet activity Solid - link established. (green) Blinking - indicates port activity. Solid - safe for Quantum field service. to Service action allowed (blue) remove ESM from slot. Service action required Solid - ESM has failed and requires (amber) attention. -
Page 100: Fibre Channel Switch (1Tb And 2Tb Systems Only)
Chapter 2: Basic Operations DXi8500 Components and Operations Fibre Channel Switch The DXi8500 Fibre Channel switch is used to create an internal Fibre (1TB and 2TB Systems Channel network (or SAN) used to connect all Array modules and Expansion modules within the system. The Ethernet port located on the... -
Page 101: Figure 37 Fibre Channel Switch Led Indicators - Front Panel
Chapter 2: Basic Operations DXi8500 Components and Operations Figure 37 Fibre Channel Switch LED Indicators – Front Panel (1TB and 2TB) Table 18 Fibre Channel Switch Item Description LEDs – Front Panel System status LED (top) and System power (bottom) -
Page 102: Figure 38 Fibre Channel Switch Led Indicators - Rear Panel
Chapter 2: Basic Operations DXi8500 Components and Operations Figure 38 Fibre Channel Switch LED Indicators – Rear Panel (1TB and 2TB) Table 19 Fibre Channel Switch Item Description LED Indicators – Rear Panel Power supply status LED. Power supply status LED. -
Page 103: Table 20 Fibre Channel Switch Led Patterns (1Tb And 2Tb)
Chapter 2: Basic Operations DXi8500 Components and Operations Table 20 Fibre Channel Switch LED Patterns (1TB and 2TB) LED Name LED Color Status of Hardware Recommended Action Power Supply No light Primary power cord is Verify the power supply is on... - Page 104 Chapter 2: Basic Operations DXi8500 Components and Operations LED Name LED Color Status of Hardware Recommended Action Ethernet No light Port speed is 10 Mbps. No action required. Speed Steady green Port speed is 100 Mbps. No action required. Ethernet Link No light There is no link.
- Page 105 Chapter 2: Basic Operations DXi8500 Components and Operations LED Name LED Color Status of Hardware Recommended Action Port Status No light No signal or light carrier (media Check transceiver and cable. or cable) detected. Slow flashing Port is online but segmented No action required.
-
Page 106: Ethernet Switch
• Head of line blocking prevention: On (Enabled) • Flow Control: Off • Back Pressure: Off The front of the DXi8500 Ethernet switch contains a series of LEDs that indicates the status of the switch (see to Figure 39 and Table 21). -
Page 107: Figure 39 Ethernet Switch Led Indicators
Chapter 2: Basic Operations DXi8500 Components and Operations Figure 39 Ethernet Switch LED Indicators Link/Duplex/ Speed LED Activity LED 3/8 Unit 7-12 MASTER DIAG Temp 4/10 8/12 RESET 6/11 LNK/ACT LNK/ACT LNK/ACT LNK/ACT Table 21 Ethernet Switch LED Description Indicators... -
Page 108: Rps For Ethernet Switch
Off - half duplex mode. RPS for Ethernet Switch The DXi8500 redundant power supply (RPS) is used to provide high availability redundant power for the DXi8500 Ethernet switch. The front of the RPS contains a series of LEDs that indicate the status of the switch (see to Figure 40... -
Page 109: Power Strips
Solid Red - one or more fans have failed. Power Strips The DXi8500 power strips are used to provide redundant power to all DXi8500 system components. The power strips for pre-racked systems do not have any LED indicators, but the front side of the power strips... -
Page 110: Powering On The Dxi8500 System
Chapter 2: Basic Operations Powering on the DXi8500 System Powering on the DXi8500 System The DXi8500 system is powered-on in the following sequence: 1 Power strips 2 Expansion modules (if using) 3 Array modules 4 Metadata module(s) 5 System Node... -
Page 111: Figure 42 Turning On The Dxi8500 Power Strips (Pre-Racked System)
(circuit 2) Primary AC power source (circuit 1) Primary Secondary Secondary AC power source (circuit 2) Note: To continue the power-on sequence for the DXi8500 pre- racked system, skip the following step and continue to Step Quantum DXi8500 User’s Guide... -
Page 112: Figure 43 Turning On The Power Strips (Un-Racked System)
Chapter 2: Basic Operations Powering on the DXi8500 System 3 On the back of the un-racked system rack(s), turn on ALL of the power switches on the power strips. Figure 43 shows the location of the power strips in the back of the base rack. -
Page 113: Figure 44 Turning On The Expansion Modules (2Tb)
Chapter 2: Basic Operations Powering on the DXi8500 System Note: Do NOT turn on any of the Array modules until all of the Expansion modules have been powered on. After all of the Expansion modules have been powered on, wait at least 2... -
Page 114: Figure 46 Turning On The Array Modules (2Tb)
Chapter 2: Basic Operations Powering on the DXi8500 System Note: Do NOT continue to Step 6 until the initialization is complete. Figure 46 Turning on the Array Modules (2TB) Array Module Power Switches Figure 47 Turning on the Array modules (3TB) -
Page 115: Figure 48 Turning On The Metadata Module(S)
Chapter 2: Basic Operations Powering on the DXi8500 System Figure 48 Turning on the Metadata Module Power Switches Metadata Module(s) 7 Remove the front bezel from the System Node. Note: If the bezel is locked, the bezel keys are located in the accessory kit. - Page 116 System Node has booted successfully. 9 Replace the front bezel on the System Node. After the System Node has completed the boot process, the DXi8500 is ready for use. Quantum DXi8500 User’s Guide...
-
Page 117: Shutting Down The Dxi8500 System
Chapter 2: Basic Operations Shutting Down the DXi8500 System Shutting Down the DXi8500 System To shut down the DXi8500 system, you must use the remote management console (see Reboot & Shutdown on page 446). Shutting down the system should take less than 5 minutes. Only the System Node will completely shut down. -
Page 118: Figure 51 Turning Off The Expansion Modules
Note: Wait approximately 2 minutes before proceeding with the next step. 6 Turn off the power strips by choosing one of these options: • For a pre-racked DXi8500 system, continue to Step • For an un-racked DXi8500 system, continue to Step 7 Turn off the (pre-racked system) power strips (see Figure 53). -
Page 119: Figure 53 Turning Off The Dxi8500 Power Strips (Pre-Racked System)
Primary AC power source (circuit 1) Secondary AC power source (circuit 2) Primary AC power source (circuit 1) Primary Secondary Secondary AC power source (circuit 2) Note: This completes the power-off sequence for the DXi8500 pre-racked system. Quantum DXi8500 User’s Guide... -
Page 120: Relocating The Dxi8500 System
Power strip 1 The DXi8500 system is now completely powered down. Relocating the DXi8500 System If you ever need to install the DXi8500 system to a different location, please contact Quantum Customer Support for additional information. Quantum DXi8500 User’s Guide... -
Page 121: Best Practices
Chapter 2: Basic Operations Best Practices The DXi8500 system must be relocated by a qualified Quantum field service engineer. Best Practices There are several items that should be considered when installing and configuring your DXi8500 system. By reviewing this information, you can help shorten the installation and configuration time for your system. - Page 122 Backup Application Specific license allows you to export virtual media directly to an attached physical tape library. This option must be enabled before you can configure the DXi8500 for communication with an attached physical library. This option is supported by: •...
-
Page 123: Table 24 Supported Tape Libraries In Backup Application Specific
CD. When the Path to Tape feature is enabled and configured, backup data can be moved directly from the DXi8500 system to a tape library. For a list of supported tape libraries and tape drives for Backup Application... -
Page 124: Table 25 Supported Tape Drives In Backup Application Specific
Replication can be configured. Replication Replication license allows the DXi8500 to replicate data to up to twenty target systems. This option must be enabled before you can configure the DXi8500 system for replication. The deduplication option must also be enabled before replication can be configured. -
Page 125: Virtual Media - How Many And What Size
To purchase the Data-at-Rest Encryption license, contact your Quantum Sales Representative. Data-at-Rest Encryption uses Self Encrypting Drive (SED) technology to secure all data stored on the DXi8500. This ensures that a drive that is physically removed from the DXi cannot be read using another system or device. -
Page 126: Locating The Dxi8500 System Serial Number
Locating the DXi8500 System Serial Number When contacting customer support or enabling a license, you might be asked for the DXi8500 system serial number, which can be found in the System Details Home... -
Page 127: Figure 55 Serial Number On The Dxi8500 Home Page
Chapter 2: Basic Operations Locating the DXi8500 System Serial Number Figure 55 Serial Number on the DXi8500 Home Page Serial number Quantum DXi8500 User’s Guide... - Page 128 Chapter 2: Basic Operations Locating the DXi8500 System Serial Number Quantum DXi8500 User’s Guide...
-
Page 129: Dxi8500 Remote Management
DXi8500. Use the DXi8500 remote management console to perform the following tasks: • Set up the DXi8500 using guided procedures (see... -
Page 130: Accessing Remote Management
DXi8500 1 Launch a supported Web browser on a workstation that has network access to the DXi8500. 2 In the browser address box, type the IP address of the DXi8500, and then press <Enter>. The Login window displays (see Figure 56). -
Page 131: Figure 56 Login Window
Figure 56 Login Window If the Login window does not display, verify that the IP address is correct and that the network path to the DXi8500 is valid. Also verify that you are using a supported Web browser. Then try again. -
Page 132: Figure 57 Home Page
Figure 57 Home Page If you are unable to log on, verify that the password is correct, then try again. If you are still unable to log on, contact your DXi8500 administrator. Caution: More than one Administrator can log on to the DXi at a time. -
Page 133: Logging Off Of The Dxi8500
Logout on the upper right of the remote management console to end your session. Note: If the DXi8500 remote management console is idle for more than 30 minutes (default setting), the system logs off the user. The inactivity timeout can be changed on the Login Session... -
Page 134: Figure 58 System Banner
Ticket Logout Admin System Banner The following items display on the system banner: • Model Number - The model number of the DXi8500 (see Model Number on page 105). • State - Displays the operating state of the DXi8500: • Normal - (Green) The system is operating correctly. -
Page 135: Table 26 Dxi8500 Model Number
• Logout - Click to end your remote management session. • Help - Click to display the online help. Model Number The Model Number displays in the DXi8500 System Overview section on the Home page. The model number indicates the specific hardware configuration of the DXi8500. -
Page 136: Main Menu
When this occurs, all system I/O stops until free disk space rises above 250 GB. Main Menu The main menu displays on the left side of the DXi8500 remote management console (see Figure 59). Click a menu item to display the corresponding management page. -
Page 137: Dxi8500 Management
Main Menu DXi Advanced Reporting DXi8500 Management Use the DXi8500 management pages to view information as well as Pages configure and manage the system. To navigate to a page, first click a menu item, then click a tab to display the corresponding page. Some pages include sub-tabs that display pages with additional information and options. - Page 138 Chapter 3: DXi8500 Remote Management The Remote Management Console Caution: Unless directed to do so by the documentation, do not use your Web browser’s Back, Forward, or Refresh buttons when navigating in the remote management console. Doing so may have unintended effects. Instead, always use the main menu and tabs to navigate in the remote management console.
-
Page 139: Figure 60 Remote Management Pages Map
Chapter 3: DXi8500 Remote Management The Remote Management Console Figure 60 Remote Management Pages Map Click a page name to navigate to that page Quantum DXi8500 User’s Guide... - Page 140 Chapter 3: DXi8500 Remote Management The Remote Management Console Quantum DXi8500 User’s Guide...
-
Page 141: Dxi8500 Configuration Wizards
Storage) appliance for use on a Windows or UNIX/Linux network (see NAS Wizard on page 112). • VTL - Helps you configure the DXi8500 to present its storage as one or more VTL (Virtual Tape Library) partitions for use with a backup application (see VTL Wizard on page 119). -
Page 142: Nas Wizard
NAS (Network Attached Storage) appliance. The wizard helps you determine if the NAS shares will be used on a Windows or UNIX/Linux network, and if necessary helps you join the DXi8500 to a Windows domain. Then the wizard guides you through the process of adding one or more NAS shares to receive backup data. -
Page 143: Step 1: About
Figure 62 NAS Wizard: About Step 2: Protocol 1 Select the type of host the DXi8500 will present NAS shares to (see Figure 63): • Windows (CIFS) - All hosts that will interact with the DXi8500 run Windows. -
Page 144: Step 3: Windows
Note: If you selected the UNIX/Linux (NFS) option in the previous step, the wizard automatically skips this step. Continue with Step 5: Add Share on page 117. 1 Select an option for joining the DXi8500 to the Windows network (see Figure 64): •... -
Page 145: Figure 64 Nas Wizard: Windows
• Organization Unit - (Optional) Enter the name of the organizational unit in the domain. The DXi8500 will become a member of this organization. • Administrator Name - Enter Administrator or any user that has the right to join the domain. -
Page 146: Step 4: Share Access
Chapter 4: DXi8500 Configuration Wizards NAS Wizard Step 4: Share Access 1 Do one of the following depending on whether the DXi8500 is joining a Windows Workgroup or an Active Directory Domain: • Windows Workgroup - Enter information about the workgroup user: •... -
Page 147: Step 5: Add Share
• Description - (Optional) Enter a brief description of the share. • Enable deduplication - Select the check box to enable data deduplication. Quantum recommends that you enable data deduplication to optimize disk usage. Note: Data deduplication is enabled by default. You cannot enable or disable data deduplication after the share is added. -
Page 148: Step 6: Confirm
Select the incorrect item and click Delete to remove it, and then add a new item. 3 After you have confirmed all settings, click Finish. The wizard configures the DXi8500 with the settings you selected. Quantum DXi8500 User’s Guide... -
Page 149: Vtl Wizard
Figure 67 NAS Wizard: Confirm VTL Wizard The VTL wizard provides guided assistance for configuring the DXi8500 to present its storage as one or more VTL (Virtual Tape Library) partitions for use with a backup application. The wizard guides you through the process of adding one or more VTL partitions, adding virtual media, discovering hosts, and mapping partitions to hosts. -
Page 150: Step 1: About
• Name - Enter the name of the VTL partition. • Library Model - Select the library model emulated by the partition. The library model determines the inquiry string returned to the host by the DXi8500. The following library models are available: • Quantum DXi7500 •... - Page 151 • ATL M2500, ATL P1000, or ATL P7000 If you select a library such as the ATL P1000 or ATL P7000, the DXi8500 appears as the selected library to the host and backup application. If you select Quantum DXi8500, the host and backup application recognize the device as a Quantum DXi8500.
-
Page 152: Step 3: Add Media
• Enable deduplication - Select the check box to enable data deduplication. Quantum recommends that you enable data deduplication to optimize disk usage. Note: Data deduplication is enabled by default. You cannot enable or disable data deduplication after the partition is added. - Page 153 Chapter 4: DXi8500 Configuration Wizards VTL Wizard • Initial Location - The initial location for cartridges after they are created (Storage Slot or I/E Slot). Note: You cannot create more cartridges than the number of available slots in the initial location. For example, if 50 I/E slots are available, you cannot create more than 50 cartridges if the initial location is set to I/E Slot.
-
Page 154: Step 4: Discover Hosts
(see Figure 70). A host is made known to the DXi8500 if you enter the host ID on this page, or if the host logs on to one or more Fibre Channel target ports. If you do not see the world wide name (WWN) of the host, make sure the host is connected to a Fibre Channel port on the DXi8500 and click Discover Hosts again. -
Page 155: Step 5: Map Hosts
Chapter 4: DXi8500 Configuration Wizards VTL Wizard 5 Click Next to continue. Figure 71 VTL Wizard: Discover Hosts Step 5: Map Hosts 1 Enter information about the host access group (see Figure 72): • Group Name - Enter a name for the group. -
Page 156: Step 6: Confirm
SAN. The CCL is accessible to hosts only through LUN Caution: If you are not sure if you should use CCL, contact Quantum Customer Support before you enable this option. 3 Click Add. -
Page 157: Ost Wizard
Figure 73 VTL Wizard: Confirm OST Wizard The OST wizard provides guided assistance for configuring the DXi8500 to present its storage as one or more OST (OpenStorage) storage servers for use with a backup application. The wizard guides you through the process of adding one or more OST storage servers, configuring LSUs (logical storage units), and adding OST users. -
Page 158: Step 1: About
Chapter 4: DXi8500 Configuration Wizards OST Wizard To begin the OST wizard, on the Wizards menu, click OST. Step 1: About 1 Read the information about the wizard (see Figure 74). The About page displays the status of the OST service. OST settings can be configured in Ready, Stopped, or Verifying state. - Page 159 • Max Connections - Enter the maximum number of connections allowed to the storage server (3 to 65536). Note: Quantum recommends setting Max Connections to 300. • Enable Concurrent Optimized Duplication - Select the check box to enable optimized duplication during OST ingest.
-
Page 160: Step 3: Add Lsus
Chapter 4: DXi8500 Configuration Wizards OST Wizard Figure 75 OST Wizard: Add Storage Servers Step 3: Add LSUs 1 Enter information about the LSU (see Figure 76). • Storage Server - Select the storage server that will contain the new LSU. -
Page 161: Step 4: Add Users
Chapter 4: DXi8500 Configuration Wizards OST Wizard 2 Click Add. The LSU displays in the LSUs Added table. 3 (Optional) To add additional LSUs, repeat Steps 1–2. To remove an LSU, select it in the LSUs Added table and click Delete. -
Page 162: Step 5: Confirm
Delete to remove it, and then add a new item. 3 After you have confirmed all settings, click Finish. The wizard configures the DXi8500 with the settings you selected. 4 Click Yes to continue with downloading the OST Plug-in. -
Page 163: Step 6: Download Ost Client Plug-In
Chapter 4: DXi8500 Configuration Wizards OST Wizard Figure 78 OST Wizard: Confirm Step 6: Download OST To download the OST Plug-in, click Client Plug-in Download (see Client Plug-In Figure 79). On the download page, download the correct OST Plug-in for your backup application and operating system. -
Page 164: Replication Wizard
Replication Wizard The Replication wizard provides guided assistance for configuring the DXi8500 to send replicated data to another DXi system as part of disaster recovery plan. The wizard can also help you configure the DXi8500 to receive replicated data from another DXi system. -
Page 165: Step 1: About
Figure 80 Replication Wizard: About Step 2: System 1 If data on this DXi8500 will be replicated to another DXi system, enter the following information under Target DXi (see Figure 81): a In the Target Hostname or IP Address box, enter the hostname or IP address of the system that will receive the replicated data. - Page 166 Encrypt data before replication check box. 2 If data on other DXi systems will be replicated to this DXi8500, enter the following information under Source DXis: a In the Source Hostnames or IP Addresses box, enter the hostname or IP address of the system that will send the replicated data to the DXi8500.
-
Page 167: Step 3: Nas Shares
(up to 24). During scheduled or manual data replication, the DXi8500 receives a snapshot from the source system. A snapshot contains all of the data necessary to fully recover or failback a NAS share or VTL partition to the point in time when the snapshot was saved. - Page 168 Chapter 4: DXi8500 Configuration Wizards Replication Wizard b (Optional) Select the Enable Directory/File based replication to target check box to enable Directory/File Based Replication for the share, and then enter a Sync ID in the box. With Directory/File Based Replication, a file is automatically replicated when it is closed or a period of time after it is modified.
-
Page 169: Step 4: Vtl Partition
Chapter 4: DXi8500 Configuration Wizards Replication Wizard Figure 82 Replication Wizard: NAS Shares Step 4: VTL Partition 1 Select a VTL partition in the Replication Settings for VTL Partitions section to manage its replication settings (see Figure 83). Note: For help adding VTL partitions to the system, use the VTL... - Page 170 Chapter 4: DXi8500 Configuration Wizards Replication Wizard 3 To configure the partition to receive replicated data from another DXi system, enter the following information under Receive: a (Optional) Select the Enable Cartridge based replication to this DXi check box to enable Cartridge Based Replication for the partition, and then enter a Sync ID in the box.
-
Page 171: Step 5: Confirm
Previous to return to a previous step to make changes (see Figure 84). 2 After you have confirmed all settings, click Finish. The wizard configures the DXi8500 with the settings you selected. Figure 84 Replication Wizard: Confirm Quantum DXi8500 User’s Guide... -
Page 172: Email Alerts Wizard
Email Alerts Wizard The Email Alerts wizard provides guided assistance for configuring the DXi8500 to automatically send notifications and reports to selected recipients. The wizard helps you configure an outgoing e-mail server. Then the wizard guides you through the process of specifying e-mail recipients and selecting the notifications and reports to send to the recipients. -
Page 173: Step 2: Server
Network page 366). 2 In the From Email Address box, enter the return e-mail address displayed in e-mails sent by the DXi8500. Specify a return address that lets you easily identify the system that generated the e-mail (for example, systemname@any- ). -
Page 174: Step 3: Recipients
High service tickets indicate that a critical problem has occurred and needs to be resolved immediately. The operation and performance of the DXi8500 are degraded, and there is a risk of system failure or data loss. • High and Medium - Send e-mail notifications for High and Medium service tickets. -
Page 175: Step 4: Confirm
Delete to delete the recipient. Then click Previous to return to the previous step and add a new recipient. 3 After you have confirmed all settings, click Finish. The wizard configures the DXi8500 with the settings you selected. Quantum DXi8500 User’s Guide... -
Page 176: Support Wizard
The Support wizard provides guided assistance to help you enable licensed features on the DXi8500 and register your system with Quantum. The wizard also guides you through other tasks that will aid Quantum customer support in assisting you, such as downloading StorageCare Guardian and creating a system log. -
Page 177: Step 2: Registration
Chapter 4: DXi8500 Configuration Wizards Support Wizard Figure 89 Support Wizard: About Step 2: Registration You must register your DXi8500 to receive service and support from Quantum. 1 Click the link for Quantum’s Product Registration site (see Figure 90). 2 Follow the onscreen instructions to register your system. -
Page 178: Step 3: Guardian
Registration Step 3: Guardian StorageCare Guardian is a remote monitoring and diagnostic solution that enables Quantum to monitor the health of Quantum systems over the Internet and use the intelligent diagnostics data to remotely service the equipment if issues arise. -
Page 179: Step 4: System Log
The diagnostic files are helpful when troubleshooting problems on the DXi8500. You should generate a system diagnostic file after setting up your DXi8500 and save it for future reference. 1 Click Generate New to generate a new system diagnostics file (see Figure 92). -
Page 180: Step 5: Licensed Features
Support Wizard Figure 92 Support Wizard: System Log Step 5: Licensed Add a license key to enable new functionality on the DXi8500. To install Features a license key, you must first obtain a License Certificate containing an authorization code. Contact your Quantum sales representative to purchase a license. After you purchase the license, you will receive a License Certificate containing an authorization code. -
Page 181: Figure 93 Support Wizard: Licensed Features
Chapter 4: DXi8500 Configuration Wizards Support Wizard 5 Enter the authorization code (printed on the License Certificate) and click Get License Key. The Licensed Feature page returns a license key. Select the license key and press <Ctrl+C> to copy it. You should also print out or write down the license key, or save it to a text file, for future use. -
Page 182: Chapter 4 Dxi8500 Configuration Wizards
Chapter 4: DXi8500 Configuration Wizards Support Wizard Quantum DXi8500 User’s Guide... -
Page 183: Dxi8500 Home Page
Chapter 5 DXi8500 Home Page The first page that displays after you log on to the DXi8500 remote management console is the Home page (see 94). Use the Home Figure page to see important performance information at a glance, including disk usage, data reduction statistics, and replication activity. -
Page 184: Dxi8500 System Overview
• Hostname - The hostname of the DXi8500. Click to change the hostname (see Network on page 366). • IP Address - The IP address of the DXi8500. Click to change the IP address (see Network on page 366). • Version - The software version installed on the DXi8500. (To update... -
Page 185: Disk Usage Overview
Disk Usage on page 240). • Disk Capacity - The total usable disk capacity of the DXi8500. • Available Disk Space - The disk space available for data storage (free space). On the disk space meter, blue (left side of meter) indicates used disk space and gray (right side of meter) indicates available disk space. - Page 186 (see Space Reclamation on page 435). Note: For optimal system performance, Quantum recommends keeping the amount of Available Disk Space (free space) at 20% or more. Click Show More to display additional information: •...
-
Page 187: Data Reduction Statistics Overview
Chapter 5: DXi8500 Home Page Data Reduction Statistics Overview Figure 96 Disk Usage Overview Data Reduction Statistics Overview The Data Reduction Statistics overview on the Home page (see Figure 97) displays the following information about the results of data reduction:... -
Page 188: Replication Overview
98) displays the following information about target and source replication activity: • Status - The replication status of the DXi8500. • Ready - (Green) The system is ready to perform replication. • In Progress - (Blue) A replication job is currently in progress. - Page 189 Replication Actions page (see Replication Performance page 219). • Target DXi - The hostname or IP address of the target system that the DXi8500 is configured to replicate data to. Click to specify a replication target (see Replication Send on page 309).
- Page 190 Clear Receive on the Replication Actions page (see Replication Performance on page 219). • Source DXis - The number of source systems configured to replicate data to the DXi8500. Click to specify replication sources (see Replication Receive on page 312).
-
Page 191: Current Activity Overview
Chapter 5: DXi8500 Home Page Current Activity Overview Figure 98 Replication Overview Current Activity Overview The Current Activity overview on the Home page (see Figure displays the following information about system activity that occurred in the previous minute: • Inline - The inline data flow throughput (in MB/s). Inline data flow includes deduplicated and non-deduplicated backup data as well as received replication data. - Page 192 Chapter 5: DXi8500 Home Page Current Activity Overview • OST Service - The status of the OST service. OST settings can be configured in Ready, Stopped, or Verifying state. The OST server is available for backup only in Ready state.
-
Page 193: Figure 99 Current Activity Overview
Chapter 5: DXi8500 Home Page Current Activity Overview Figure 99 Current Activity Overview Quantum DXi8500 User’s Guide... - Page 194 Chapter 5: DXi8500 Home Page Current Activity Overview Quantum DXi8500 User’s Guide...
-
Page 195: Dxi8500 Replication
The DXi8500 provides data replication capabilities that you can use as an integral part of a disaster recovery plan. Replication allows you to configure the DXi8500 to create a copy of your data on another DXi system at scheduled intervals (or manually as needed). -
Page 196: Understanding Data Replication
In addition, a data block is transmitted only if the target does not already have a copy of the block. Finally, data can optionally be encrypted before it is transmitted. The DXi8500 can perform the following types of replication: • Replication •... -
Page 197: Directory/File Or Cartridge Based Replication
Chapter 6: DXi8500 Replication Understanding Data Replication Caution: A saved snapshot is necessary to recover your data at a later time. For this reason, it is not enough to simply enable replication for a share or partition. You must also configure... -
Page 198: Ost Optimized Duplication
DXi. If you do not want to retain the share on the target DXi, you can manually delete it. OST Optimized The DXi8500 can duplicate the data on an LSU (logical storage unit) to Duplication another location using the OST optimized duplication (OST replication) feature supported by Symantec NetBackup and Backup Exec. -
Page 199: Task Overview: Setting Up And Performing Replication
• Actions • Reports Use the DXi8500 data replication features to perform the following tasks: • Replicate all data on a share or partition to another system where it can be recovered at a later time (see Task Overview: Setting Up and Performing Replication on page 169). - Page 200 179 or Replicating a Partition on page 188). Quantum recommends that you always replicate a new share or partition immediately after creating it. This establishes the initial data structure on the target system and greatly increases the speed of the first replication.
-
Page 201: Task Overview: Setting Up And Performing Directory/File Or
Chapter 6: DXi8500 Replication Performing Data Replication Task Overview: Setting To automatically replicate directories and files or cartridges from a Up and Performing source system and immediately recover them for use on a target system: Directory/File or 1 Perform the following steps on the target system:... -
Page 202: Task Overview: Recovering A Replicated Share Or Partition
Chapter 6: DXi8500 Replication Performing Data Replication Note: To limit the amount of network bandwidth used for replication, enable a constant throttle (see Replication Send on page 309), or schedule replication throttling (see Scheduling Replication Throttling on page 359). Task Overview:... -
Page 203: Send Nas
Send NAS The Send NAS page allows you to manage outgoing replication activity for NAS shares. You can replicate shares on the DXi8500 (the source) to another DXi system that supports NAS (the target). Note: Before you can replicate shares, you must specify the... -
Page 204: Shares Eligible For Replication
The Shares Eligible for Replication section displays replication statistics Replication for all NAS shares on the DXi8500 that are eligible for replication. To be eligible for replication, a share must have data deduplication enabled at the time it is created. - Page 205 Send NAS The Shares Eligible for Replication section displays the following information: • Replication Service - The replication status of the DXi8500. Click Pause to pause replication activity. Click Resume to resume replication activity. Note: For a detailed description of all possible replication...
- Page 206 Chapter 6: DXi8500 Replication Send NAS or Partition for Replication on page 358). • Sync ID - The Sync ID of the share if Directory/File Based Replication is enabled. • Last Job Type - The type of the most recent replication job (Replication or Synchronization).
-
Page 207: Enabling Replication For A Share
Chapter 6: DXi8500 Replication Send NAS • Queued - The synchronization job is queued and will continue when the system is ready. • Success - The synchronization job was completed successfully. • Recovering - The recover operation is in process. -
Page 208: Configuring A Source Share For Directory/File Based
However, if you do not specify a Sync ID, the source and target shares must have identical names. Quantum recommends that you assign a matching Sync ID to the source and target shares. -
Page 209: Replicating A Share
Chapter 6: DXi8500 Replication Send NAS 1 Select the share and click Edit. The Edit NAS Share page displays (see Figure 101). 2 If it is not already selected, select the Enable replication check box to enable replication for the share. -
Page 210: Directory/File Based Queue
Chapter 6: DXi8500 Replication Send NAS a Source Share for Directory/File Based Replication on page 178). Synchronizing a share ensures that the contents of the source share are the same as the target share. The synchronization verifies that the same files exist in both locations, and that no additional files exist in either location. -
Page 211: Figure 102 Directory/File Based Queue
Chapter 6: DXi8500 Replication Send NAS Figure 102 Directory/File Based Queue The Directory/File Based Queue displays the following information for the share: • File/Directory - The file or directory to be replicated. • State - The replication state for the file or directory. -
Page 212: Send Vtl
Send VTL The Send VTL page allows you to manage outgoing replication activity for VTL partitions. You can replicate partitions on the DXi8500 (the source) to another DXi system that supports VTL (the target). Note: Before you can replicate partitions, you must specify the... -
Page 213: Partitions Eligible For Replication
The Partitions Eligible for Replication section displays replication Replication statistics for all VTL partitions on the DXi8500 that are eligible for replication. To be eligible for replication, a partition must have data deduplication enabled at the time it is created. - Page 214 Chapter 6: DXi8500 Replication Send VTL much less than the Original Data Size due to the benefits of data deduplication and compression. • Average Send Rate - The average send rate (in MB/s) of data sent over the network during replication or failback (Actual Data Sent divided by the amount of time required to complete replication or failback).
-
Page 215: Enabling Replication For A Partition
Chapter 6: DXi8500 Replication Send VTL Replication and Synchronization Status A replication job can have one of the following statuses: • In Progress - The replication job is in progress. • Partial - The replication job was partially completed. Generate a... -
Page 216: Figure 104 Edit Vtl Partition Page
Or clear the Enable replication check box to disable replication for the partition. 3 Click Apply. Note: Quantum recommends scheduling replication to run after backups are complete (see Scheduling a Share or Partition for Replication on page 358). If you do not enable scheduled... -
Page 217: Replication
However, if you do not specify a Sync ID, the source and target partitions must have identical names. Quantum recommends that you assign a matching Sync ID to the source and target partitions. -
Page 218: Replicating A Partition
Chapter 6: DXi8500 Replication Send VTL Note: After you configure a partition for Cartridge Based Replication, you should periodically synchronize it to keep it in sync with the target partition (see Synchronizing a Partition page 188). Replicating a Partition Replicate a VTL partition to send a snapshot of the partition to the target system. -
Page 219: Cartridge Based Queue
Chapter 6: DXi8500 Replication Send VTL Note: Even when replication is paused, the system continues to queue Cartridge Based Replication operations. Each time an operation is queued, the system logs an administration alert that reports the total number of queued Cartridge Based Replication requests. -
Page 220: Figure 105 Cartridge Based Queue
Chapter 6: DXi8500 Replication Send VTL Figure 105 Cartridge Based Queue The Cartridge Based Queue displays the following information for the partition: • Bacode - The barcode of the cartridge to be replicated. • State - The replication state for the cartridge. -
Page 221: Receive Nas
Chapter 6: DXi8500 Replication Receive NAS Receive NAS The Receive NAS page allows you to manage incoming replication activity for NAS shares. You can recover a replicated share on the target system if the source system is unavailable. Once the source system becomes available, you can failback the share to make it available on the source system again. -
Page 222: Figure 106 Received Snapshots Page
Chapter 6: DXi8500 Replication Receive NAS Figure 106 Received Snapshots Page Use the Received Snapshots page to perform the following tasks: • View information about received snapshots (see Snapshots List page 192). • Recover a share on the target system (see Recovering a Share page 193). - Page 223 Recover a NAS share if the source system is unavailable and you need to access the share (for example, to continue performing backups). When you recover a share, you select a received snapshot. The DXi8500 uses the snapshot to recreate the share on the target system just as it was at the point in time when the snapshot was saved.
-
Page 224: Figure 107 Recovered Share Name Page
Perform a failback of a NAS share if a source system that was previously unavailable becomes available again. When you failback a share, you select a received snapshot. The DXi8500 copies the snapshot from the target system back to the source system. You can then perform a recover operation to recreate the share on the source system just as it was at the point in time when the snapshot was saved. -
Page 225: Figure 108 Failback Target Page
Chapter 6: DXi8500 Replication Receive NAS Note: Before you can failback a share, on the original source system, you must add the original target system to the list of allowed replication sources (see Replication Receive on page 312). This is because, during failback, the original target is acting as a source when it sends a snapshot to the original source. - Page 226 Chapter 6: DXi8500 Replication Receive NAS If encryption is enabled, select an encryption strength (128-bit or 256-bit). Using 256-bit encryption (default) provides a stronger level of security but may have an impact on system performance in some situations. Caution: Select 128-bit encryption if you are sending data to a DXi running a system software version prior to DXi 2.1...
-
Page 227: Recovery Jobs
Chapter 6: DXi8500 Replication Receive NAS Note: You cannot delete a snapshot if a failback operation is in progress for the snapshot. Wait for the failback operation to complete, or abort the operation (see Failback Jobs page 198). To delete a snapshot: 1 Do one of the following actions: •... -
Page 228: Failback Jobs
Chapter 6: DXi8500 Replication Receive NAS Figure 109 Recovery Jobs Page The Snapshot Recovery Jobs section displays the following information about recovery jobs: • Original Share Name - The name of the share the snapshot was created from. • New Share Name - The name of the share the snapshot was recovered to. -
Page 229: Directory/File Based
Chapter 6: DXi8500 Replication Receive NAS Figure 110 Failback Jobs Page The Snapshot Failback Jobs section displays the following information about failback jobs: • Share Name - The name of the share the snapshot was created from. • Destination DXi - The hostname of the system that the snapshot was sent to. -
Page 230: Figure 111 Directory/File Based Page
Shares Eligible to Receive Directory/File Based Data The Shares Eligible to Receive Directory/File Based Data section displays information for all NAS shares on the DXi8500 that are eligible to receive Directory/File Based Replication data from a source share. To be eligible to receive Directory/File Based Replication data, a share must have data deduplication enabled at the time it is created. - Page 231 Chapter 6: DXi8500 Replication Receive NAS The Shares Eligible for Replication section displays the following information: • Share Name - The name of the share. • State - The state of Directory/File Based Replication for the share (Enabled or Disabled).
-
Page 232: Figure 112 Edit Share Settings Page
Chapter 6: DXi8500 Replication Receive NAS Figure 112 Edit Share Settings Page 2 Select the Enable to receive Directory/File Based replication data check box to enable Directory/File Based Replication for the share. Or clear the Enable to receive Directory/File Based replication data check box to disable Directory/File Based Replication for the share. -
Page 233: Receive Vtl
Chapter 6: DXi8500 Replication Receive VTL Unpack Queue Use the Unpack Queue to view Directory/File Based Replication statistics for data received from the source system. To view the Unpack Queue, select a share and click View Unpack Queue (see Figure 113). -
Page 234: Received Snapshots
Chapter 6: DXi8500 Replication Receive VTL Note: Before you can receive replicated partitions, you must specify one or more replication sources (see Replication Receive page 312). To access the Receive VTL page, click the Replication menu, and then click the Receive > VTL tab. -
Page 235: Figure 114 Received Snapshots Page
Chapter 6: DXi8500 Replication Receive VTL Figure 114 Received Snapshots Page Use the Received Snapshots page to perform the following tasks: • View information about received snapshots (see Snapshots List page 205). • Recover a partition on the target system (see Recovering a Partition on page 206). - Page 236 (for example, to continue performing backups). When you recover a partition, you select a received snapshot. The DXi8500 uses the snapshot to recreate the partition on the target system just as it was at the point in time when the snapshot was saved.
-
Page 237: Figure 115 Recovered Partition Name Page
Chapter 6: DXi8500 Replication Receive VTL Figure 115 Recovered Partition Name Page 2 (Optional) In the Recovered Partition Name box, type a new name for the recovered partition. (The default name is the original partition name.) 3 Click Apply. The partition and its cartridges are recovered on the target system. All data stored on the partition at the time the snapshot was saved is available. - Page 238 Perform a failback of a VTL partition if a source system that was previously unavailable becomes available again. When you failback a partition, you select a received snapshot. The DXi8500 copies the snapshot from the target system back to the source system. You can then perform a recover operation to recreate the partition on the source system just as it was at the point in time when the snapshot was saved.
-
Page 239: Figure 116 Failback Target Page
Chapter 6: DXi8500 Replication Receive VTL Figure 116 Failback Target Page 2 (Optional) In the Failback Destination DXi box, type the hostname or IP address of a new destination system to failback the partition to. (The default destination is the original source system.) - Page 240 Chapter 6: DXi8500 Replication Receive VTL 4 Click Apply. The snapshot is sent to the source system. 5 On the source system, in the Snapshots List, select the snapshot that was sent during the failback operation and click Recover. The Recovered Partition Name page displays (see Figure 115).
-
Page 241: Recovery Jobs
Chapter 6: DXi8500 Replication Receive VTL To delete a snapshot: 1 Do one of the following actions: • On the source system, disable replication for the partition associated with the snapshot (see Enabling Replication For a Partition on page 185). -
Page 242: Failback Jobs
Chapter 6: DXi8500 Replication Receive VTL The Snapshot Recovery Jobs section displays the following information about recovery jobs: • Original Partition Name - The name of the partition the snapshot was created from. • New Partition Name - The name of the partition the snapshot was recovered to. -
Page 243: Cartridge Based
Chapter 6: DXi8500 Replication Receive VTL The Snapshot Failback Jobs section displays the following information about failback jobs: • Partition Name - The name of the partition the snapshot was created from. • Destination DXi - The hostname of the system that the snapshot was sent to. -
Page 244: Figure 119 Cartridge Based Page
Partitions Eligible to Receive Cartridge Based Data The Partitions Eligible to Receive Cartridge Based Data section displays information for all VTL partitions on the DXi8500 that are eligible to receive Cartridge Based Replication data from a source partition. To be eligible to receive Cartridge Based Replication data, a partition must have data deduplication enabled at the time it is created. -
Page 245: Figure 120 Edit Partition Settings Page
Chapter 6: DXi8500 Replication Receive VTL • Access - The selected access option for the partition (Locked or Unlocked). Note: Click the Information button [i] next to a partition to display detailed information about the partition and recent replication activity. - Page 246 Chapter 6: DXi8500 Replication Receive VTL 2 Select the Enable to receive Cartridge Based replication data check box to enable Cartridge Based Replication for the partition. Or clear the Enable to receive Cartridge Based replication data check box to disable Cartridge Based Replication for the partition.
-
Page 247: Actions
Cartridge Based page. Actions The Actions page allows you to manage replication activity on the DXi8500. You can pause the replication service, enable the replication state, and clear performance statistics. To access the Actions page, click the Replication menu, and then click... -
Page 248: Replication Service
Chapter 6: DXi8500 Replication Actions Figure 122 Actions Page Use the Actions page to perform the following tasks: • Pause or resume the replication service (see Replication Service page 218). • Enable or disable the replication state (see Replication State page 219). -
Page 249: Replication State
Replication State The replication state applies to all NAS shares or VTL partitions on the DXi8500 that are eligible for replication (that is, all deduplicated shares or partitions). Note: The Replication Actions page may appear busy for a few moments when enabling or disabling the replication state. -
Page 250: Reports
Chapter 6: DXi8500 Replication Reports • Click Clear Receive to reset cumulative performance statistics gathered while receiving replicated shares or partitions from source systems, or when receiving a snapshot during a failback operation. Reports The Reports page allows you to generate and download a replication report. - Page 251 Chapter 6: DXi8500 Replication Reports Quantum DXi8500 User’s Guide...
- Page 252 Chapter 6: DXi8500 Replication Reports Quantum DXi8500 User’s Guide...
-
Page 253: Dxi8500 Status
Chapter 7 DXi8500 Status The Status page allows you to view status information for the DXi8500 hardware as well as performance and disk usage information. Note: Status information is gathered by the system every two minutes. To access the Status pages, click the Status menu. -
Page 254: Hardware
Hardware The Hardware page allows you to view information about the hardware components of the DXi8500. You can view the overall status of the node as well as detailed status information for components such as the system board, host bus adapters, network ports, and storage arrays. -
Page 255: Details
Details The Details page allows you to view detailed information about the hardware components of the DXi8500. To access the Details page, on the Hardware page, click the Details tab. Use the Details page to view information for the following components: •... -
Page 256: Figure 125 System Board Page
Chapter 7: DXi8500 Status Hardware • Storage Arrays • FC Switches • Ethernet Switches System Board The System Board page allows you to view information reported by the main system board in the node, such as temperature, voltage, fan, and power supply information. -
Page 257: Figure 126 Host Bus Adapters Page
Chapter 7: DXi8500 Status Hardware Host Bus Adapters The Host Bus Adapters page allows you to view information about installed Fibre Channel or SAS cards and their ports. To access the Host Bus Adapters page, on the Details page, click the... -
Page 258: Figure 127 Network Ports Page
Network Ports The Network Ports page allows you to view information about Ethernet ports in the system. The DXi8500 includes six or eight Ethernet ports (depending on the configuration). To access the Network Ports page, on the Details page, click the... -
Page 259: Figure 128 Storage Arrays Page
Chapter 7: DXi8500 Status Hardware Storage Arrays The Storage Arrays page allows you to view information about storage arrays and controllers in the DXi8500. To access the Storage Arrays page, on the Details page, click the Storage Arrays tab (see Figure 128). - Page 260 • Failed - (Red) The component has failed. FC Switches The FC Switches page allows you to view information about Fibre Channel switches in the DXi8500. To access the FC Switches page, on the Details page, click the FC Switches tab (see Figure 129).
-
Page 261: Figure 129 Fc Switches Page
Chapter 7: DXi8500 Status Hardware Figure 129 FC Switches Page The FC Switches section displays the following information about each Fibre Channel switch: • Component - The name of the Fibre Channel switch. Click the name of the Fibre Channel switch to view detailed information for the switch in the Details section. -
Page 262: Figure 130 Ethernet Switches Page
• Down - (Green) The port is not connected. Ethernet Switches The Ethernet Switches page allows you to view information about Ethernet switches in the DXi8500. To access the Ethernet Switches page, on the Details page, click the Ethernet Switches tab (see Figure 130). -
Page 263: Firmware Version
• Down - (Green) The port is not connected. Firmware Version The Firmware Version page allows you to view information about hardware components installed in the DXi8500, such as the firmware version, hardware revision, and manufacturer. To access the Firmware Version page, on the Hardware page, click the... -
Page 264: Performance
Chapter 7: DXi8500 Status Performance The Firmware Version page displays the following information: • Name - Displays a hardware component or a property of the component (for example, Manufacturer, Version, or Release Date). Note: The properties that are listed vary depending on the hardware component. -
Page 265: Inline
Chapter 7: DXi8500 Status Performance Inline The Inline page allows you to view throughput performance for inline data flow. Inline data flow includes deduplicated and non-deduplicated backup data as well as received replication data. To access the Inline page, on the Performance page, click the Inline tab... -
Page 266: Figure 133 Ethernet Page
Avg to display an average of all ports. • The horizontal axis displays time (0–100 seconds). • The vertical axis displays data throughput (0–125 MB/s). Note: For DXi8500, the vertical axis displays data throughput as 0–1.25 GB/s. Quantum DXi8500 User’s Guide... -
Page 267: Raid
Chapter 7: DXi8500 Status Performance • Values that exceed the maximum value of the vertical axis are shown in lighter green. • Each bar on the graph represents approximately 1 second of time. • Hold the cursor over a bar to display the value of the bar. -
Page 268: Fibre Channel
Chapter 7: DXi8500 Status Performance • Values that exceed the maximum value of the vertical axis are shown in lighter green. • Each bar on the graph represents approximately 1 second of time. • Hold the cursor over a bar to display the value of the bar. -
Page 269: Cpu
Chapter 7: DXi8500 Status Performance • The horizontal axis displays time (0–100 seconds). • The vertical axis displays data throughput (0–500 MB/s). • Values that exceed the maximum value of the vertical axis are shown in lighter green. • Each bar on the graph represents approximately 1 second of time. -
Page 270: Disk Usage
Chapter 7: DXi8500 Status Disk Usage • Each bar on the graph represents approximately 1 second of time. • Hold the cursor over a bar to display the value of the bar. Disk Usage The Disk Usage page allows you to view information about free and used disk space on the system. -
Page 271: Available
If the DXi is configured with non-deduplicated shares, the DXi will automatically compact reclaimable space to create more free space as needed. Note: For optimal system performance, Quantum recommends keeping the amount of Available disk space at 20% or more. Used Used space is the area that already holds data. -
Page 272: Data After Reduction
Chapter 7: DXi8500 Status Disk Usage Data before reduction is divided into the following categories: • Incoming Replication - The amount of data stored on the DXi via replication from another DXi. This does include incoming data from Directory/File or Cartridge Based Replication, or incoming data from Failback replication. -
Page 273: Vtl
Chapter 7: DXi8500 Status The VTL page allows you to view information about virtual tape library (VTL) components, including tape drives, storage slots, and cartridges. You can view a physical or logical representation of VTL components, or view VTL performance statistics. -
Page 274: Figure 138 Physical View Page
Chapter 7: DXi8500 Status Figure 138 Physical View Page Use the controls in the VTL Physical View Information section to select the information to display: • Select the VTL to display in the Partition drop-down box. • Click Hide Drives or Show Drives to hide or show the virtual tape... -
Page 275: Logical View
Chapter 7: DXi8500 Status Storage and I/E Slots The Storage Slots and I/E Slots sections displays information about the virtual cartridges located in the storage and I/E slots: • The following information is displayed for each cartridge: • Slot - The slot where the cartridge is located. -
Page 276: Performance View
Chapter 7: DXi8500 Status Figure 139 Logical View Page The Partitions section displays the following information about VTL partitions: • Partition - The name of the partition. • Number of Drives - The number of virtual tape drives in the partition. -
Page 277: Figure 140 Performance View Page
Chapter 7: DXi8500 Status To access the Performance View page, on the VTL page, click the Performance View tab (see Figure 140). Figure 140 Performance View Page The Partition Throughput section displays the following information about VTL partitions: • Partition - The name of the partition. -
Page 278: Dxi Accent Status
Chapter 7: DXi8500 Status DXi Accent Status DXi Accent Status Use the Accent Status page to view information about recent DXi Accent activity. Note: The Accent Status page displays only if DXi Accent is currently enabled or was previously enabled (see DXi Accent page 343). -
Page 279: Activity Log
Chapter 7: DXi8500 Status Activity Log size of the data protected by the DXi (after deduplication and compression on the media servers). • Accent Bandwidth Reduction - The percentage by which network bandwidth utilization was reduced by enabling Accent. • Media Server - The IP address of the media server. -
Page 280: Viewing Logged Activities
Chapter 7: DXi8500 Status Activity Log Figure 142 Activity Log Page Activity log toolbar Navigation controls Use the Activity Log page to perform the following tasks: • View information about activities that have been recorded in the log (see Viewing Logged Activities on page 250). -
Page 281: Enabling Or Disabling Activity Logging
Page backward or forward Controls Refresh Enter page number Enabling or Disabling By default, activity logging is enabled on the DXi8500. Use the toolbar Activity Logging above the Administrative Activity Log list to enable or disable activity Quantum DXi8500 User’s Guide... -
Page 282: Deleting Logged Activities
Chapter 7: DXi8500 Status Activity Log logging (see Figure 144). • To enable the logging of administrative and service actions, click Enable Logging on the toolbar. • To disable the logging of administrative and service actions, click Disable Logging on the toolbar. -
Page 283: Dxi8500 Alerts
DXi8500 Alerts The Alerts page allows you to view and work with administration alerts and service tickets. The DXi8500 generates administration alerts and service tickets when a hardware or software event occurs. To access the Alerts page, click the Alerts menu. -
Page 284: Figure 145 Admin Alerts Page
Chapter 8: DXi8500 Alerts Admin Alerts To access the Admin Alerts page, click the Alerts menu, and then click the Admin Alerts tab (see Figure 145). Figure 145 Admin Alerts Page The Admin Alerts page displays the following information about administration alerts: •... -
Page 285: Service Tickets
A service ticket contains detailed information about the problem and, if appropriate, steps you can take to resolve it. If the DXi8500 detects that the problem is resolved, the system automatically closes the service ticket. -
Page 286: Recommended Actions
Perform the recommended actions to try to resolve the problem before contacting Quantum customer support. If you are able to resolve the problem, you can close the service ticket. Note: The recommended actions should be performed by a user who is familiar with operating the DXi8500. - Page 287 Chapter 8: DXi8500 Alerts Service Tickets • Priority - The priority level of the service ticket (Low, Middle, or High). • Last Update - The date when the service ticket was last updated by the system. • Details - A brief description of the service ticket.
-
Page 288: Figure 147 Ticket Details
Chapter 8: DXi8500 Alerts Service Tickets Note: The time indicated in the service ticket may not match the DXi8500 system time. Figure 147 Ticket Details Ticket Details View Recommended Actions 2 (Optional) Click View Recommended Actions to view instructions for resolving the problem. -
Page 289: Figure 148 Recommended Actions
Modify a service ticket to add additional information to the ticket, for example, troubleshooting steps you have taken or a record of calls made to Quantum customer support. The additional information is saved with the service ticket and remains associated with the ticket even after it is closed. -
Page 290: Figure 149 Ticket Analysis
Sending a Service Ticket Send a service ticket to send the ticket details to an e-mail address. You can also add optional comments to the e-mail. Note: To enable the DXi8500 to send e-mail, you must specify an outgoing e-mail server (see Server on page 404). -
Page 291: Figure 150 Email Ticket Information
Chapter 8: DXi8500 Alerts Service Tickets Figure 150 Email Ticket Information Email Ticket 3 In the Email Recipient box, enter the e-mail address where you want to send the ticket details. 4 (Optional) In the Comment box, enter additional information to send with the ticket. - Page 292 Chapter 8: DXi8500 Alerts Service Tickets 3 Select the Close Ticket check box. 4 Click Apply. Quantum DXi8500 User’s Guide...
-
Page 293: Dxi8500 Configuration
Chapter 9 DXi8500 Configuration The Configuration page allows you to configure the features of the DXi8500, including storage presentation, data replication, path to tape, system settings, and notifications. To access the Configuration page, click the Configuration menu. The Configuration page contains the following tabs: •... -
Page 294: Nas
Chapter 9: DXi8500 Configuration The NAS page allows you to configure the DXi8500 to present its storage capacity as NAS (network attached storage) shares that are compatible with standard backup applications. You can create NAS shares for use with Windows or Linux networks. You can also join the DXi8500 to a Windows domain or workgroup and manage users. -
Page 295: Figure 151 Nas Summary Page
NAS Shares List The NAS Shares List section displays the following information for all NAS shares on the DXi8500: • Shares - The number of shares that have been added to the system. • Maximum - The maximum number of shares that can be added to the system. - Page 296 Adding a NAS Share Add a NAS share to present the storage capacity of the DXi8500 as a NAS share that is compatible with standard backup applications. You can add up to 128 shares. When you add a share, you must specify...
-
Page 297: Figure 152 Add Nas Share Page
If selected, you cannot see the share when browsing the network. • Enable data deduplication - Select the check box to enable data deduplication. Quantum recommends that you enable data deduplication to optimize disk usage. Quantum DXi8500 User’s Guide... - Page 298 Chapter 9: DXi8500 Configuration Note: Data deduplication is enabled by default. You cannot enable or disable data deduplication after the share is added. If data duplication is disabled, then data compression is also disabled. • Export Protocol - Select the export protocol for the share: •...
-
Page 299: Figure 153 Edit Nas Share & Replication Settings Page
Chapter 9: DXi8500 Configuration Figure 153 Edit NAS Share & Replication Settings Page 2 Under NAS Share Settings, enter information about the share: Note: If you are editing a share, only the Description, Enforce read-only access, Hide from network browsing, and Allow all users to access this share options can be changed. - Page 300 Chapter 9: DXi8500 Configuration Note: To modify the users that are available in the Workgroup User list, see Share Access on page 274. Note: After you add a user or host to the access list, you cannot change their permissions. Instead, select the user or host in the access list and click Delete to remove them from the list.
-
Page 301: Windows Domain
Windows workgroup or a Windows domain using SMB. To use a NAS share configured for the CIFS protocol on a Windows network, you must first join the DXi8500 to a workgroup or a domain. After you join the DXi8500 to a workgroup or a domain, CIFS shares are available for use on the Windows network. - Page 302 Chapter 9: DXi8500 Configuration Joining a Windows Workgroup Join a Windows workgroup to add the DXi8500 to a workgroup on a Windows network. After you join a workgroup, CIFS shares are available for use on the Windows network. To join a Windows workgroup: 1 Enter the following information about the Windows domain: •...
- Page 303 MMC. Disjoining a Workgroup or Domain Disjoin a workgroup or a domain to remove the DXi8500 from a Windows workgroup or domain. After you disjoin the workgroup or domain, CIFS shares are no longer available for use on the Windows network To disjoin a workgroup or domain, click Disjoin.
-
Page 304: Share Access
Share Access The Share Access page allows you to manage workgroup users when the DXi8500 is joined to a Windows workgroup, or manage share administrators when the DXi8500 is joined to a Windows domain using Active Directory. You can add users or administrators, change user privileges, and delete users or administrators. -
Page 305: Figure 156 Share Access Page (Active Directory)
(Yes if the user has administrator privileges, No if they do not.) • Description - A brief description of the workgroup user (if available). If the DXi8500 is joined to a Windows domain using Active Directory, the Share Administrators section displays the following information about share administrators:... -
Page 306: Figure 157 Add Workgroup User Page
Chapter 9: DXi8500 Configuration • User or Group Name - The fully qualified name of the user or group. Adding a Workgroup User or Share Administrator Add a workgroup user or share administrator to be able to grant that user or administrator access to CIFS shares. -
Page 307: Figure 158 Add Share Administrator Page
Chapter 9: DXi8500 Configuration This allows the workgroup user to override certain permissions settings and prevents the workgroup user from being locked out of shares or directories. 3 Click Apply. After you create a workgroup user, you can grant the user access to a... -
Page 308: Figure 159 Edit Workgroup User Page
Chapter 9: DXi8500 Configuration Note: You cannot edit a share administrator. Instead, delete the share administrator, then add a new share administrator. To edit a workgroup user: 1 Select the user and click Edit. The Edit Workgroup User page displays (see Figure 159). - Page 309 Note: You can select multiple users or administrators to delete at once. ADS Share Permissions To manage user access to CIFS shares when the DXi8500 is joined to a Windows domain, use the MMC (Microsoft Management Console). Log onto the MMC on the domain controller and access a share's properties to set share permissions for users.
-
Page 310: Advanced Setting
Windows networks by requiring clients to provide a security signature to connect to a server. If the DXi8500 is joined to a Windows domain that is configured to require signing, you should enable SMB server signing. -
Page 311: Vtl
Chapter 9: DXi8500 Configuration 2 Click Apply. The VTL page allows you to configure the DXi8500 to present its storage capacity as VTL (virtual tape library) partitions that are compatible with standard backup applications. You can add virtual tape drives and storage slots to VTL partitions, as well as create and work with virtual tape cartridges. -
Page 312: Figure 161 Partitions Summary Page
Chapter 9: DXi8500 Configuration Partitions Summary The Partitions Summary page allows you to view information about existing partitions. You can also add or edit partitions, and delete partitions. To access the Partitions Summary page, on the Partitions page, click the Summary tab (see Figure 161). - Page 313 Chapter 9: DXi8500 Configuration Partition List The Partition List section displays the following information for all VTL partitions on the DXi8500: • Available Partitions - The number of partitions that have been added to the system and the maximum number of partitions that can be added.
- Page 314 Adding a VTL Partition Add a VTL partition to present the storage capacity of the DXi8500 as a VTL partition that is compatible with standard backup applications. You can add up to 64 partitions. When you add a partition, you must specify the type of physical library to emulate and configure virtual tape drives and storage slots.
-
Page 315: Figure 162 Add Vtl Partition & Replication Settings Page
Note: If you plan to replicate partitions to another DXi, make sure that every partition name and barcode number on each DXi is unique. There cannot be duplicate partition names or barcode numbers on the DXi8500 or on a DXi receiving a replicated partition. To add a VTL partition: 1 Click Add. - Page 316 • ATL M2500, ATL P1000, or ATL P7000 If you select a library such as the ATL P1000 or ATL P7000, the DXi8500 appears as the selected library to the host and backup application. If you select Quantum DXi8500, the host and backup application recognize the device as a Quantum DXi8500.
- Page 317 • Enable deduplication - Select the check box to enable data deduplication. Quantum recommends that you enable data deduplication to optimize disk usage. Note: Data deduplication is enabled by default. You cannot enable or disable data deduplication after the partition is added.
-
Page 318: Figure 163 Edit Vtl Partition & Replication Settings Page
Drives options can be changed. • Library Model - Select the library model emulated by the partition. The library model determines the inquiry string returned to the host by the DXi8500. The following library models are available: • Quantum DXi7500 •... - Page 319 Chapter 9: DXi8500 Configuration If you select a library such as the ATL P1000 or ATL P7000, the DXi8500 appears as the selected library to the host and backup application. If you select Quantum DXi8500, the host and backup application recognize the device as a Quantum DXi8500.
- Page 320 Chapter 9: DXi8500 Configuration Note: If you delete a partition configured for Cartridge Based Replication on the source DXi, the partition is automatically deleted on the target DXi. If you do not want to retain the partition on the target DXi, you can manually delete it.
-
Page 321: Media
Media The Media page allows you to manage virtual tape cartridges in VTL partitions on the DXi8500. Backup applications can write data to virtual tape cartridges just as they would to physical media. To access the Media page, on the VTL page, click the Media tab. -
Page 322: Figure 165 Media Add Page
After the cartridges are created, they are available for backing up data. Note: It is possible to oversubscribe space on the DXi8500. In this case, the total capacity of all media is more than the capacity of the DXi. - Page 323 Chapter 9: DXi8500 Configuration Note: You cannot create more cartridges than the number of available slots in the initial location. For example, if 50 I/E slots are available, you cannot create more than 50 cartridges if the initial location is set to I/E Slot.
-
Page 324: Figure 166 Media Actions Page
Chapter 9: DXi8500 Configuration Figure 166 Media Actions Page To perform actions on virtual tape cartridges: 1 In the Partition drop-down box, select the partition that contains the cartridges to work with. Note: Select UNASSIGNED to work with cartridges that are not assigned to any partition. - Page 325 • Exported - Virtual media with no data that has been exported from a partition. Media has to be in this state before it can be deleted from the DXi8500. • Pool - The type of cartridge pool such as application, cleaning, service, or unknown.
- Page 326 Chapter 9: DXi8500 Configuration 3 (Optional) To reduce the number of cartridges displayed in the table, enter a barcode or barcode range in the Barcode Filter box and click Apply Filter. Use a hyphen (-) to indicate a range, and use an asterisk (*) to indicate a wildcard.
-
Page 327: Figure 167 Media Move Page
Chapter 9: DXi8500 Configuration Figure 167 Media Move Page To move a virtual tape cartridge: 1 In the Partition drop-down box, select the partition that contains the cartridge to move. 2 If the partition is online, click Offline to take the partition offline. To move media, the partition must be offline. - Page 328 Chapter 9: DXi8500 Configuration Note: If necessary, use the controls at the bottom of the table to navigate between multiple pages of results. Select the number of rows to display in the Show drop-down box. 7 In the Destination Location drop-down box, select the type of location you want to move the cartridge to (Drive, Storage Slot, I/E Slot).
-
Page 329: Figure 168 Media Unload Page
Chapter 9: DXi8500 Configuration Figure 168 Media Unload Page To unload virtual tape cartridges: 1 In the Partition drop-down box, select the partition that contains the cartridges to unload. 2 If the partition is online, click Offline to take the partition offline. To unload media, the partition must be offline. -
Page 330: Host Access
You can also add or edit groups, and delete groups. Host access groups allow backup hosts to access virtual devices on a DXi8500. A host access group is associated with a partition, a host (a Fibre Channel initiator on the SAN), and a target (a Fibre Channel port on the DXi8500). -
Page 331: Figure 169 Host Mapping Page
Host Mapping And Groups The Host Mapping And Groups section displays the following information for all host access groups on the DXi8500: • Group Name - The name of the group. • Host - The host (initiator) associated with the group. -
Page 332: Figure 170 Map Hosts, Define Groups Page
Chapter 9: DXi8500 Configuration • Partition Name - The VTL partition associated with the group. • Devices - The number of virtual media changers (VMCs) and virtual tape drives (VTDs) associated with the group. Note: Click a column heading to sort the rows in the table by that column. - Page 333 SAN. The CCL is accessible to hosts only through LUN Caution: If you are not sure if you should use CCL, contact Quantum Customer Support before you enable this option. 4 Select the check boxes for the media changer and tape drives to add to the host access group.
-
Page 334: Figure 171 Edit Host Mapping Page
SAN. The CCL is accessible to hosts only through LUN Caution: If you are not sure if you should use CCL, contact Quantum Customer Support before you enable this option. 3 Select the check boxes for the media changer and tape drives to add to the host access group. - Page 335 (see Adding a Host Access Group page 302). Caution: If you are connecting the DXi8500 directly to a host without using a Fibre Channel switch, you must know the WWPN connecting to each DXi8500 port. If you do not specify this information, the virtual medium changer and tape drives will not display on the device manager.
-
Page 336: Figure 172 Hosts Page
1 Click Discover Hosts to list all hosts that are know to the DXi8500 in the table. A host is made known to the DXi8500 if you enter the host ID on this page, or if the host logs on to one or more Fibre Channel target ports. -
Page 337: Figure 173 Targets Page
Chapter 9: DXi8500 Configuration Note: To delete a host that is no longer needed, click Delete next to the host. You cannot delete a host of it is currently assigned to a host access group. Targets Use the Targets page to view the current target (Fibre Channel) configuration. -
Page 338: Figure 174 Target Usage Page
Chapter 9: DXi8500 Configuration Target Usage Use the Target Usage page to view current target and device mappings for the DXi8500. To access the Target Usage page, on the Host Access page, click the Target Usage tab (see Figure 174). -
Page 339: Replication
10 sources. A DXi8500 can act as both a source and a target. Note: For more information about data replication, or to perform data replication, see DXi8500 Replication on page 165. -
Page 340: Figure 175 Replication Send Page
1 If you have previously specified a replication target, you must pause the replication service before changing the target. Replication Service displays the replication status of the DXi8500. Click Pause to pause replication activity. Click Resume to resume replication activity. - Page 341 Chapter 9: DXi8500 Configuration Replication 3 In the Source IP Address field, enter the IP address that is used to uniquely identify the source DXi to the target. This may be different than the actual network IP address of the source DXi.
-
Page 342: Replication Receive
Replication Receive The Replication Receive page allows you to specify the source systems the DXi8500 will receive replicated data from. You must add a source system to the list of allowed replication sources before you configure the source to send replicated data to the DXi8500. The DXi8500 can receive replicated data from up to 10 sources. -
Page 343: Figure 176 Replication Receive Page
DXi. This is because complete replication data is sent to the target before old data is deleted. For optimal performance, if the DXi is a replication target, Quantum recommends keeping the amount of free space at 20% or more (see Disk Usage on page 240). - Page 344 Home page. Adding a Replication Source Add a system to the list of replication sources to allow it to send replicated data to the DXi8500. You can specify up to 10 replication sources. To add a replication source:...
-
Page 345: Ost
NAS share or VTL partition to the point in time when the snapshot was saved. The DXi8500 can retain up to 24 snapshots for each replicated share or partition. Once the maximum number of snapshots have been saved, the oldest snapshot is deleted to make room for each new snapshot that is received. -
Page 346: Replicating Ost Data
• OST Client Plug-In Replicating OST Data The DXi8500 can replicate (duplicate) OST data to another DXi using the following methods: • Optimized Duplication - With optimized duplication, backup images on a storage server can be replicated to another storage server on a DXi that resides in the same NetBackup domain. - Page 347 LSUs the same residing within NetBackup domain. Note: For more information about configuring the DXi8500 for optimized duplication or Automatic Image Replication, see the DXi-Series NetBackup and Backup Exec OST Configuration Guide (6-67079).
- Page 348 Chapter 9: DXi8500 Configuration Note: Quantum recommends selecting the Available Capacity option when creating an LSU for use with Automatic Image Replication. 4 On the source system, specify the target system that will receive the replicated data (see Replication Send on page 309).
-
Page 349: Storage Servers
Storage Servers The Storage Servers page allows you to manage OST storage servers on the DXi8500. You can view information about existing storage servers, add or edit storage servers, and delete storage servers. To access the Storage Servers page, on the OST page, click the Storage... -
Page 350: Figure 178 Storage Servers Page
326). Storage Server List The Storage Server List displays the following information for all storage servers on the DXi8500: • Storage Servers - The number of storage servers that have been added to the system. • Maximum Storage Servers - The maximum number of storage servers that can be added to the system. - Page 351 Adding a Storage Server Add a storage server to present the storage capacity of the DXi8500 as LSUs that are compatible with backup applications that support OST. You can add up to 100 storage servers. When adding a storage server, you must also add an LSU to the storage server.
-
Page 352: Figure 179 Add Storage Server Page
• Max Connections - Enter the maximum number of connections allowed to the storage server (3 to 65536). Note: Quantum recommends setting Max Connections to 300. • Enable Concurrent Optimized Duplication - Select the check box to enable optimized duplication during OST ingest. - Page 353 • LSU Name - Enter the name of the LSU. • Physical Capacity - Enter the physical capacity of the LSU (1 to 1048576 GB). Note: Quantum recommends setting LSUs to maximum size (1048576 GB) because spanning them on a backup is not possible.
- Page 354 Chapter 9: DXi8500 Configuration 4 (Optional) In the Description box, enter a brief description of the LSU. 5 (Optional) Select the Enable Automatic Image Replication check box to automatically replicate (duplicate) data on the LSU to a remote LSU on another DXi.
-
Page 355: Figure 180 Edit Storage Server Page
Chapter 9: DXi8500 Configuration Editing a Storage Server Edit a storage server to change the description of the storage server or the maximum number of allowed connections. To edit a storage server: 1 Select the storage server and click Edit. - Page 356 Note: If you deleted the storage server from Symantec NetBackup or Symantec Backup Exec, you must wait several minutes before deleting the storage server from the DXi8500. To delete a storage server: 1 Select the storage server in the Storage Server List.
-
Page 357: Lsu
2 Click Delete. The LSU page allows you to manage the logical storage units (LSUs) contained on OST storage servers on the DXi8500. You can view information about existing LSUs, add or edit LSUs, and delete LSUs. To access the LSU page, on the OST page, click the LSU tab (see Figure 181). - Page 358 Adding an LSU Add an LSU to a storage server to present the storage capacity of the DXi8500 as an LSU that is compatible with backup applications that support OST. You can add an LSU with a specific capacity, or you can add an LSU that uses the available capacity of the DXi8500.
-
Page 359: Figure 182 Add Logical Storage Unit Page
Chapter 9: DXi8500 Configuration The Add Logical Storage Unit page displays (see Figure 182). Figure 182 Add Logical Storage Unit Page 2 Enter information about the LSU. • Storage Server - Select the storage server that will contain the new LSU. - Page 360 Chapter 9: DXi8500 Configuration • Physical Capacity - Enter the physical capacity of the LSU (1 to 1048576 GB). Note: Quantum recommends setting LSUs to maximum size (1048576 GB) because spanning them on a backup is not possible. 3 (Optional) In the Description box, enter a brief description of the LSU.
-
Page 361: Figure 183 Edit Logical Storage Unit Page
Chapter 9: DXi8500 Configuration must user match a local user on the Configuration > OST > Manage Users page on the target DXi (see Manage Users page 333). 5 Click Apply. Editing an LSU Edit an LSU to change the description of the storage server or the maximum number of allowed connections. - Page 362 Chapter 9: DXi8500 Configuration Unit List on page 328). • Description - (Optional) Enter a brief description of the LSU. 3 (Optional) Select the Enable Automatic Image Replication check box to automatically replicate (duplicate) data on the LSU to a remote LSU on another DXi.
-
Page 363: Manage Users
Chapter 9: DXi8500 Configuration Deleting an LSU Delete an LSU if it is no longer needed. When you delete an LSU, all data stored on the LSU is lost. Note: If you deleted the LSU from Symantec NetBackup or Symantec Backup Exec, you must wait several minutes before deleting the LSU from the DXi8500. -
Page 364: Figure 184 Manage Users Page
Chapter 9: DXi8500 Configuration Figure 184 Manage Users Page Use the Manage Users page to perform the following tasks: • View information about local authenticated users (see Manage Local Users List on page 334). • Add a local authenticated user (see Adding an Authenticated User on page 334). -
Page 365: Figure 185 Add User Credential
Chapter 9: DXi8500 Configuration To add an authenticated user: 1 Click Add. The Add User Credential window displays (see Figure 185). Figure 185 Add User Credential 2 Enter information about the authenticated user: • User name - Enter the name of the authenticated user. -
Page 366: Manage Remote Users
Chapter 9: DXi8500 Configuration Figure 186 Edit User Credentials 2 Enter information about the authenticated user: Note: If you are editing an authenticated user, you cannot change the User name. • New Password - Enter the password for the authenticated user. -
Page 367: Figure 187 Manage Remote Users Page
Chapter 9: DXi8500 Configuration remote user credentials specified on the source DXi must match the local user credentials on the target (remote) DXi. To access the Manage Remote Users page, on the OST page, click the Manage Remote Users tab (see Figure 187). -
Page 368: Figure 188 Add Remote Air Credential
Chapter 9: DXi8500 Configuration Adding a Remote User Add a remote user to create OST user credentials for use with OST AIR. When you enable Automatic Image Replication for an LSU, you specify a remote user. The remote user credentials on the source DXi must match the local user credentials on the target (remote) DXi. -
Page 369: Target Ip Mapping
Chapter 9: DXi8500 Configuration The Edit Remote Credentials window displays (see Figure 189). Figure 189 Edit Remote Credentials 2 Enter information about the remote user: Note: If you are editing a remote user, you cannot change the User name. • New Password - Enter the password for the remote user. -
Page 370: Figure 190 Target Ip Mapping Page
DXi and target DXi. Note: Quantum does not recommend mapping multiple data IP addresses to a single replication IP address. If you have mapped multiple data IP addresses and the routing is not working, try removing the additional data IP addresses, and map only a single data IP address. -
Page 371: Figure 191 Add Target Data Ip Mapping
Chapter 9: DXi8500 Configuration • View information about mapped data and replication IP addresses (see Target IP Mapping List on page 341). • Map a target data IP address to a replication IP address (see Mapping a Target IP Address on page 341). -
Page 372: Figure 192 Edit Target Data Ip Mapping
Chapter 9: DXi8500 Configuration 2 Enter information about the mapping: • Target Data IP - The target data IP address to map. • Target Replication IP - The replication IP address to map the data IP address to. 3 Click Apply. -
Page 373: Dxi Accent
Note: You can select multiple mapped IP addresses to delete at once. DXi Accent Use the Accent page to enable or disable DXi Accent. Quantum’s DXi Accent software accelerates backups and reduces network bandwidth requirements by distributing deduplication between the backup server and the DXi. - Page 374 Chapter 9: DXi8500 Configuration • Default AES 128 - OST data is encrypted using AES 128-bit encryption. • Default AES 256 - OST data is encrypted using AES 256-bit encryption. • TLS with AES 256 - OST data is encrypted using AES 256-bit encryption with Transport Layer Security (TLS).
-
Page 375: Ost Client Plug-In
Chapter 9: DXi8500 Configuration Note: To use DXi Accent, you must install the Quantum OST Client Plug-in on the media server. For information about installing Symantec the OST Plug-in and using DXi Accent, see the NetBackup OST Configuration Guide (6-67079). -
Page 376: Physical Device Discovery
Chapter 9: DXi8500 Configuration • OST path to tape (also called Direct To Tape) allows you to use Symantec NetBackup to copy LSUs from a storage server on the DXi to a physical tape library. For information about working with storage servers and LSUs, see on page 315. - Page 377 Note: To use a tape drive, it must be enabled. To enable a drive, the parent library must be enabled. • To remove a physical library from the Medium Changers list, first disconnect the Fibre Channel cables that connect the library to the DXi8500, and then click Scan. Quantum DXi8500 User’s Guide...
-
Page 378: Backup Application Specific
• EMC Networker • Oracle Secure Backup • Atempo Time Navigator Note: You must dedicate a partition within the DXi8500 for use with NetBackup Direct to Tape (Path to Tape). The partition cannot be shared with another backup application. must... - Page 379 Chapter 9: DXi8500 Configuration Use the Backup Application Specific page to perform the following tasks: • View information about backup application specific users (see Backup Application Specific User List on page 349). • Add a backup application specific user (see...
-
Page 380: Figure 196 Add Backup Application Specific User Page
Chapter 9: DXi8500 Configuration Figure 196 Add Backup Application Specific User Page 2 Enter information about the backup application specific user: • Username - Enter the name of the backup application specific user. • Password - Enter the password for the backup application specific user. -
Page 381: Figure 197 Edit Backup Application Specific User Page
Chapter 9: DXi8500 Configuration Figure 197 Edit Backup Application Specific User Page 2 Enter information about the backup application specific user: Note: If you are editing a backup application specific user, you cannot change the Username. • Username - (Optional) Select a different backup application specific user to edit. -
Page 382: Fc Initiators And Targets
Chapter 9: DXi8500 Configuration FC Initiators and The FC Initiators & Targets page allows you to see all path to tape Targets initiator and target ports and their associated World Wide Port Numbers (WWPNs). You can also change a Fibre Channel port to initiator or target mode. -
Page 383: Scheduler
3 Click Update. Scheduler The Scheduler page allows you to manage scheduled events on the DXi8500, including replication and replication throttling, e-mail reports, healthchecks, and space reclamation. With schedules, you specify when certain events should occur, and the system automatically performs those events at the specified time. -
Page 384: Scheduler Calendar
Scheduler VTL Scheduler Calendar The Scheduler Calendar page presents all currently scheduled events on the DXi8500 in a calendar view. You can view events for a particular day, week, or month. You can also add, modify, and delete scheduled events. - Page 385 Chapter 9: DXi8500 Configuration Scheduler • Configure replication throttle events (see Scheduling Replication Throttling on page 359). • Configure the DXi8500 to send status and configuration reports (see Scheduling E-mail Reports on page 361). • Configure the DXi8500 to run healthchecks (see Scheduling Healthchecks on page 361).
-
Page 386: Figure 200 Scheduler View Controls
Chapter 9: DXi8500 Configuration Scheduler Note: If you see an error indicating there is not enough memory to complete the request, try using daily or weekly view, and use the arrows to move forward or backward in time. Figure 200 Scheduler View... -
Page 387: Figure 201 Adding A New Event
Chapter 9: DXi8500 Configuration Scheduler Figure 201 Adding a New Event Click and drag to add a new event Double-click to edit an existing event 2 Define the start and, if applicable, the end of the event. • Specify the Start Date and Start Time using the pop-up calendar and drop-down box. - Page 388 Disable scheduled replication if you do not want to automatically replicate the share or partition data to the target. Note: For more information about configuring the DXi8500 for replication, see DXi8500 Replication on page 165.
- Page 389 363). 6 Click Apply. Scheduling Replication Throttling During replication throttling, the DXi8500 limits the amount of source replication data it sends to not exceed a specified maximum bandwidth. Schedule replication throttling to control the amount of network bandwidth used by source replication at certain times. For example, you might configure replication throttling to occur during planned backup times to avoid network contention.
- Page 390 Chapter 9: DXi8500 Configuration Scheduler During the replication throttle event, the DXi will limit the amount of data it sends during source replication so that it does not exceed the specified bandwidth. After the replication throttle event ends, the DXi will no longer throttle the sending of source replication data (until the next replication throttle event occurs).
- Page 391 Kb/s or Mb/s in order to correctly compare it to the observed values. Scheduling E-mail Reports The DXi8500 can automatically generate a report with system status data or with configuration data and send it to all configured e-mail recipients.
- Page 392 Also, recurrence is required. 3 Click Apply. Scheduling Space Reclamation During space reclamation, the DXi8500 deletes unneeded tags from the blockpool to free up disk space. Schedule space reclamation regularly to make sure there is enough disk space to store data.
- Page 393 Chapter 9: DXi8500 Configuration Scheduler Setting Recurrence for a Scheduled Event To specify when and how often the event reoccurs: 1 On the Scheduler Calendar page, add or edit an event (see Adding or Editing a Scheduled Event on page 356).
-
Page 394: Scheduler Nas
Scheduler NAS The Scheduler NAS page allows you to view a list of upcoming events for scheduled NAS replication activity on the DXi8500. To access the Scheduler NAS page, on the Scheduler page, click the NAS tab (see Figure 202). -
Page 395: Scheduler Vtl
Scheduler VTL The Scheduler VTL page allows you to view a list of upcoming events for scheduled VTL replication activity on the DXi8500. To access the Scheduler VTL page, on the Scheduler page, click the VTL tab (see Figure 203). -
Page 396: System
System The System page allows you to configure system settings for the DXi8500, including network settings, system date and time, and security settings. To access the System page, click the Configuration menu, and then click the System tab. - Page 397 Chapter 9: DXi8500 Configuration System Caution: Changing the network configuration requires a system reboot to allow all system services to function correctly. Changing the network configuration requires a system reboot immediately after the changes are applied. Note: Rebooting the system can take several minutes. After the new network configuration is saved, close your Web browser and wait 15 minutes before logging in again.
-
Page 398: Figure 204 Network Configuration
Chapter 9: DXi8500 Configuration System Figure 204 Network Configuration Quantum DXi8500 User’s Guide... -
Page 399: Configuring The Network
Configuring the network includes the following major steps: Note: Before configuring the network, work with your network administrator to determine the network settings that will be required to properly integrate the DXi8500 with your company’s network. Configuring General Network Settings... -
Page 400: Figure 205 Network Page: General
• Default Gateway - The default gateway IP address. Specifying a default gateway is optional if all access is local to a particular subnet. For example, if the DXi8500 and all of its clients are on the same subnet, you do not need to specify a default gateway. -
Page 401: Figure 206 Network Page: Bonding Details
Note: The DNS Suffix Search List and DNS IP Addresses cannot be modified if the DXi8500 is currently joined to a Windows domain. To disjoin a Windows domain, see Windows Domain on page 271. - Page 402 3 For each bonded device, specify the bonding mode: Note: To maintain network connectivity, the switch connected to the DXi8500 must be configured to use the same bonding mode. The best time to change the bonding mode on the switch is during the next reboot of your system, after saving the new network settings.
-
Page 403: Figure 207 Network Page: Interface Details
Chapter 9: DXi8500 Configuration System Click Undo to revert to all current Bonding Details changes to the last update. Configuring Interface Details Under IP Address Configuration > Interface Details, configure VLAN tagging and jumbo Ethernet frame settings for each port or device (see... -
Page 404: Figure 208 Network Page: Ip Address Table
Chapter 9: DXi8500 Configuration System Caution: If VLAN tagging is enabled for a device, DXi Advanced Reporting is unable to collect and record statistics for traffic moving over the VLAN device (for example, eth1.400). Statistics are still collected for the base device (for example, eth1.) - Page 405 • IP Address - The IP address of the interface. • Netmask - The network mask of the interface. • Gateway - The gateway of the DXi8500. (This is usually not the same as the default gateway.) 3 Select the check box for each type of network traffic allowed on the interface (segmentation): Note: At least one interface must allow management traffic.
-
Page 406: Figure 209 Network Page: Routing Details
Chapter 9: DXi8500 Configuration System Click Delete to remove IP address information for the selected interface. Or click Undo to revert all current IP Address Table changes to the last update. Note: When you add a network interface, a default route (via the default gateway) is automatically created for the interface after network settings are applied and the DXi reboots. - Page 407 For network changes to take effect, you must apply the changes, finalize the confirmation, and reboot the system. To apply all changed settings on the Network page to the DXi8500, click Apply at the bottom of the page. Follow the prompts to confirm the changes and reboot the system.
- Page 408 Chapter 9: DXi8500 Configuration System Understanding Interface Routing For a network on the interface to communicate with a host located on a different subnet, you must specify routing information in the Routing Details section. Routing is used to direct outgoing traffic from a network interface on the DXi to an IP address in another subnet by means of a destination gateway.
-
Page 409: Figure 210 Interface Routing: Example 1
Chapter 9: DXi8500 Configuration System Note: The gateway specified in the IP Address Table section is for incoming traffic to the interface. The gateway specified in the outgoing Routing Details section is for traffic from the interface. Figure 210 Interface Routing:... -
Page 410: Figure 211 Interface Routing: Example 2
Chapter 9: DXi8500 Configuration System • The source DXi management/data IP address, the source DXi replication IP address, and the target DXi IP address are all on the same subnet (192.168.10.x). • To make sure the replication segment is used when communicating with the target DXi, you must add a host route in the Routing Details section on the source DXi. -
Page 411: Figure 212 Interface Routing: Example 3
Chapter 9: DXi8500 Configuration System • To make sure the replication segment is used when communicating with the target DXi, you must add a network route in the Routing Details section on the source DXi. In this example, you would specify the following routing details for the replication interface on the source DXi: •... -
Page 412: Date & Time
Wait for at least 15 minutes before logging back in. Note: If you intend to join the DXi8500 to a Windows network using Active Directory for NAS storage, Quantum recommends using an NTP Server to set the system date and time (see... -
Page 413: Figure 213 Date & Time Page
NTP server or pool. (See http://support.ntp.org information about publicly available NTP servers) To verify that the DXi8500 can communicate with the NTP server or pool, click Test NTP. • Manual Date & Time Settings - Select this option to manually set the system date and time. -
Page 414: Security
(CLI). You can also enable or disable the CLI account. The DXi8500 has two access levels for logging onto the remote management console or the CLI: • Monitor - Allowed to view information on the DXi8500 remote management console or the CLI but cannot make changes. -
Page 415: Figure 214 Web & Cli Passwords Page
Chapter 9: DXi8500 Configuration System Figure 214 Web & CLI Passwords Page Use the Web & CLI Passwords page to perform the following tasks: • Change the administrator or monitor password for Web access (see Changing Web Passwords on page 385). - Page 416 ( _ ) and hyphens ( - ). 2 Click Apply. Enabling CLI Accounts The CLI accounts provide access to the DXi8500 command line interface as an administrator or monitor. DXi8500 Note: For more information about using the CLI, see the...
- Page 417 Login Settings, select the Reset password to factory default option. 2 Click Apply. The SSL page allows you to enable or disable SSL on the DXi8500. You can also install a new SSL certificate to replace the Quantum default SSL certificate.
-
Page 418: Figure 215 Ssl Page
Internet by negotiating encryption keys before transmitting data between a client and a server. To establish a secure connection, the DXi8500 must have an encryption key assigned to it by a Certification Authority in the form of a certificate file, private key file, and pass phrase. - Page 419 To suppress server authentication warnings for the default certificate: • Internet Explorer - If a dialog box displays warning you of a possible certificate error, add the IP address for the DXi8500 to the Trusted Sites list (Tools > Internet Options > Security > Trusted Sites).
-
Page 420: Figure 216 Install New Certificate Page
The certificate displays in the Certificate section. Login Session The Login Session page allows you to specify the inactivity timeout for the DXi8500 remote management console. The default timeout is 30 minutes. When the remote management console is inactive for the specified... -
Page 421: Figure 217 Login Session Page
Chapter 9: DXi8500 Configuration System Figure 217 Login Session Page To specify the inactivity timeout: 1 In the Inactivity Timeout box, enter the number of minutes of inactivity before a user is automatically logged off (1–60 minutes). 2 Click Apply. -
Page 422: Figure 218 Security Notice Page
DXi8500 and manage security keys. Data-at-Rest Encryption uses Self Encrypting Drive (SED) technology to secure all data stored on the DXi8500. This includes file data and metadata, configuration files, and the DXi software and operating system. When Data-at-Rest Encryption is enabled, all hard drives in the DXi are paired with the disk controllers using encryption keys. -
Page 423: Figure 219 Data-At-Rest Page
Chapter 9: DXi8500 Configuration System Note: The Data-at-Rest page displays only if the Data-at-Rest Encryption feature is supported on the DXi8500 and is licensed for use. For information about installing the Data-at-Rest Encryption license, see Licensing Data-at-Rest Encryption and Obtaining Premium Feature Keys on page 442. - Page 424 Checking Data-at-Rest Encryption Status The current status of Data-at-Rest Encryption can be Disabled (default) or Enabled. If it is enabled, all drives in the DXi8500 are securely encrypted and cannot be read if removed from the system. Click Check Status to view detailed information about the status of Data-at-Rest Encryption and to see if the DXi8500 supports all requirements for enabling the feature.
- Page 425 3 Enter the passphrase again in the Confirm Passphrase box. 4 Click Enable. Data-at-Rest Encryption is now enabled, and all hard drives are secured so that, if they are removed from the DXi8500, they cannot be read using another system or device. Quantum DXi8500 User’s Guide...
- Page 426 • Email - Sends a copy of the recovery file using e-mail. If selecting this option, type the e-mail address where you want to send the recovery file in the Email Recipient box. Note: For the DXi8500 to send an e-mail, you must specify an outgoing e-mail server (see Server on page 404).
- Page 427 Uploading a PFK File To enable Data-at-Rest Encryption, a Premium Feature Key (PFK) file is required for each Array module in the DXi8500. After you have uploaded a PFK file to an Array module, it can be enabled for Data-at- Rest Encryption.
-
Page 428: Notifications
The PFK file is uploaded to the selected Array module. The module can now be enabled for Data-at-Rest Encryption. Notifications The Notifications page allows you to manage the methods the DXi8500 uses to send notifications. The DXi8500 can send notifications by e-mail, or using SNMP (Simple Network Management Protocol). -
Page 429: Email
The Recipients page allows you to manage the e-mail recipients the DXi8500 sends notifications to. You can add, edit, and delete e-mail recipients, and you can specify the types of notifications to send. Note: To enable the DXi8500 to send e-mail, you must specify an outgoing e-mail server (see Server on page 404). -
Page 430: Figure 220 Recipients Page
Chapter 9: DXi8500 Configuration Notifications Figure 220 Recipients Page Use the Recipients page to perform the following tasks: • View information about e-mail recipients (see Email Recipient List on page 400). • Add an e-mail recipient (see Adding an E-mail Recipient page 401). -
Page 431: Figure 221 Add Email Recipient Page
High service tickets indicate that a critical problem has occurred and needs to be resolved immediately. The operation and performance of the DXi8500 are degraded, and there is a risk of system failure or data loss. • High and Medium - Send e-mail notifications for High and Medium service tickets. -
Page 432: Figure 222 Edit Email Recipient Page
Low service tickets indicate that a minor problem occurred and needs to be resolved, but the operation and performance of the DXi8500 are not significantly affected. 3 Select the Enable notification check box to enable sending of notifications to the recipient. - Page 433 4 Click Apply. Deleting an E-mail Recipient Delete an e-mail recipient if you no longer want the DXi8500 to send e- mail notifications to the recipient. To delete an e-mail recipient, select the recipient and click Delete.
-
Page 434: Figure 223 Server Page
Server The Server page allows you to specify the server for outgoing e-mail. The DXi8500 cannot send e-mail notifications until you specify the outgoing e-mail server. To access the Server page, on the Email page, click the Server tab (see Figure 223). -
Page 435: Figure 224 Email Test Page
3 Click Apply. Test The Email Test page allows you to send a test e-mail to verify that e-mail notifications are correctly configured on the DXi8500. To access the Email Test page, on the Email page, click the Test tab (see Figure 224). - Page 436 Each report also includes the system serial number, date and time, and a message that informs the recipient that the e-mail is automated and they should not respond to it. Note: To enable the DXi8500 to send e-mail, you must specify an outgoing e-mail server (see Server on page 404).
-
Page 437: Figure 225 Recipients Page
Chapter 9: DXi8500 Configuration Notifications Figure 225 Recipients Page Enter the e-mail addresses of up to three recipients in the boxes, and then click Apply. When the DXi generates scheduled e-mail reports, they will be sent to the specified addresses. -
Page 438: Figure 226 On Demand Page
Chapter 9: DXi8500 Configuration Notifications Figure 226 On Demand Page Use the On Demand page to perform the following tasks: • Manually send a status data or configuration data report (see Sending a Report on page 408). • View a configuration data report (see Viewing Configuration Data on page 408). -
Page 439: Snmp
Management Information Bases (MIBs) and return this data to the SNMP requesters. You can configure the DXi8500 to act as an agent and send traps to a specified destination. You can also add SNMP community information. -
Page 440: Figure 227 Destinations Page
SNMP destinations: • IP Address - The IP address of the destination. • Name - The name of the destination. • Selected Traps - The traps the DXi8500 sends to the destination (Failure, Warning, Informational, Available, or Unavailable). Adding a Destination Add an SNMP destination to send traps from the DXi8500 to the destination. -
Page 441: Figure 228 Add Trap Destination Page
2 Enter information about the destination: • IP Address - Enter the IP address of the system that will receive the traps generated by the DXi8500. Note: When entering IP addresses, never use an address that is in a reserved IP address range. To see a list of reserved IP address ranges, click the quick tip icon [?] located near the IP address field. -
Page 442: Figure 229 Edit Trap Destination Page
4 Click Apply. Editing a Destination Edit an SNMP destination to change the name of the destination or the types of traps the DXi8500 sends to the destination. To edit a destination: 1 Click Edit. The Edit Trap Destination page displays (see Figure 229). - Page 443 4 Click Apply. Deleting a Destination Delete an SNMP destination if you no longer want the DXi8500 to send traps to the destination. To delete a destination, select the destination and click Delete. Note: You can select multiple destinations to delete at once.
-
Page 444: Figure 230 Community Page
• Community Status - The status of the community (Enabled or Disabled). Adding a Community Add an SNMP community to include the DXi8500 in a group of devices that are monitored by a common management station. Quantum DXi8500 User’s Guide... -
Page 445: Figure 231 Add Snmp Community Page
Chapter 9: DXi8500 Configuration Notifications Note: If no communities are defined, the SNMP agent is not accessible. To add a community: 1 Click Add. The Add SNMP Community page displays (see Figure 231). Figure 231 Add SNMP Community Page 2 In the Name box, enter a unique Name for the community (up to 20 characters). - Page 446 Chapter 9: DXi8500 Configuration Notifications IP Address / Network Mask Result 10.40.166.87 Invalid because the logical bitwise operation (address 10.40.166.0 AND mask) is not equal to the address 10.40.166.87 Invalid because the logical bitwise operation (address 255.255.0.0 AND mask) is not equal to the address 10.40.0.0...
-
Page 447: Figure 232 Edit Snmp Community Page
Chapter 9: DXi8500 Configuration Notifications 1 Click Edit. The Edit SNMP Community page displays (see Figure 231). Figure 232 Edit SNMP Community Page 2 (Optional) In the Name box, select a different community to edit. 3 Enter a valid IP Address and Network Mask pair. - Page 448 6 Click Apply. Deleting a Community Delete an SNMP community if you no longer want the DXi8500 to belong to a group of devices that are monitored by a common management station. To delete a community, select the community and click Delete.
-
Page 449: Contacts
Contacts Test The SNMP Test page allows you to send a test SNMP trap to verify that SNMP is correctly configured on the DXi8500. To access the SNMP Test page, on the SNMP page, click the Test tab (see Figure 233). -
Page 450: Company
• State - Enter the company state. • Postal Code - Enter the company postal code. • Country - Enter the company country. • DXi8500 Location - Enter the physical location of the DXi8500 (for example, data center). Quantum DXi8500 User’s Guide... -
Page 451: Primary And Secondary
Primary and Secondary The Primary and Secondary pages allow you to enter information about the primary and secondary contacts for the DXi8500. To access the Primary or Secondary page, on the Contacts page, click the Primary or Secondary tab (see Figure 235). - Page 452 Chapter 9: DXi8500 Configuration Contacts • Postal Code - Enter the contact postal code. • Country - Enter the contact country. 2 Click Apply. Quantum DXi8500 User’s Guide...
-
Page 453: Dxi8500 Utilities
Chapter 10 DXi8500 Utilities The Utilities pages to perform maintenance tasks on the DXi8500, such as generating and downloading diagnostic files, analyzing disk and network performance, managing space reclamation, and securely erasing the system. You can also install license keys, upgrade the system software, and reboot or shut down the DXi8500. -
Page 454: Diagnostics
The diagnostic files are helpful when troubleshooting problems on the DXi8500. Generate and download the diagnostic files before contacting Quantum customer support. To access the Diagnostics page, click the Utilities menu, and then click the Diagnostics tab. -
Page 455: Storage Array Diag File
Chapter 10: DXi8500 Utilities Diagnostics Figure 236 System Diag File Page To generate and download a system diagnostics file: 1 Click Generate New to generate a new system diagnostics file. The system generates a new diagnostics file. This can take several minutes. -
Page 456: Dset
DXi8500 hardware. A Quantum customer support representative can use this information to help identify and diagnose problems. Note: Generate a DSET report only if directed to do so by a Quantum customer support representative. Quantum DXi8500 User’s Guide... -
Page 457: Figure 238 Dset Page
3 Click Save or OK to download the file. The DSET report is saved as a compressed zip file to the specified location. 4 Locate the DSET report you downloaded and send it to the e-mail or FTP address provided by Quantum Customer Support. Quantum DXi8500 User’s Guide... -
Page 458: Healthchecks
The Healthchecks page allows you to perform tests that verify the health and integrity of the data deduplication blockpool. You can also enable and disable healthchecks. Note: To configure the DXi8500 to automatically run the healthchecks at specified intervals, use the Configuration > Scheduler page (see Scheduling Healthchecks on page 361). - Page 459 Chapter 10: DXi8500 Utilities Diagnostics The General page displays the following information about the most recently run healthchecks: • Status - The status of the healthchecks (In Progress, Success, Failed, or Interrupted). • Progress - The percentage complete of the healthchecks.
-
Page 460: Figure 240 Status Page
Chapter 10: DXi8500 Utilities Diagnostics Figure 240 Status Page The Status page displays the following information about the most recently run test for each healthcheck: • Healthcheck Name - The name of the healthcheck. • State - The state of the healthcheck (enabled or disabled). -
Page 461: Analyzer
Caution: If a healthcheck fails when it is run, there may be a problem in the blockpool that could cause replication or restore operations to fail. Contact Quantum customer support if a healthcheck fails. Analyzer The Analyzer page allows you to analyze the network and disk performance of the DXi8500. -
Page 462: Network
Disk Network The Network Analyzer page allows you to analyze network performance by measuring network throughput between the DXi8500 and another system (such as another DXi system). To access the Network Analyzer page, on the Analyzer page, click the Network tab. -
Page 463: Figure 243 Settings Page
Note: It takes approximately 5 seconds to refresh the results. Settings The Settings page allows you to enable or disable NetServer on the DXi8500. NetServer must be enabled on the target DXi system to perform network analysis with the system (see Performance page 432). -
Page 464: Disk
Chapter 10: DXi8500 Utilities Analyzer 2 Click Apply. Note: You should disable NetServer on the target system when you are done analyzing network performance. Disk The Disk Analyzer page allows you to analyze disk performance by measuring disk read and write throughput. -
Page 465: Space Reclamation
Space Reclamation The Space Reclamation page allows you to manage space reclamation activity on the DXi8500. You can start or stop space reclamation. You can also monitor the progress of space reclamation activity. During space reclamation, the DXi8500 searches the blockpool for tags that are no longer referenced and then deletes the unneeded tags to free up space. -
Page 466: Figure 245 Space Reclamation Page
Chapter 10: DXi8500 Utilities Space Reclamation Figure 245 Space Reclamation Page The Space Reclamation page displays the following information about the current or most recent space reclamation activity: • Status - The status of space reclamation (see Space Reclamation Status on page 437). - Page 467 Chapter 10: DXi8500 Utilities Space Reclamation • To stop space reclamation, click Stop. • To update the display while space reclamation is running, click Refresh. Space Reclamation Status Space reclamation can have one of the following statuses: • Reclamation Completed - Space reclamation completed without errors.
-
Page 468: License Keys
License Keys License Keys The License Keys page allows you to add a license key to the DXi8500 to enable new functionality. You can also view a list of available licenses and see the licenses that are installed on the system. -
Page 469: License Key Information
DXi8500: • Name - The name of the license. To display details for a license, click the license name. For a description of the licenses that are available on the DXi8500, see Available Licenses on page 439. -
Page 470: Adding A License Key
Obtaining Premium Feature Keys on page 442. Adding a License Key Add a license key to enable new functionality on the DXi8500. To install a license key, you must first obtain a License Certificate containing an authorization code. Contact your Quantum sales representative to purchase a license. After you purchase the license, you will receive a License Certificate containing an authorization code. -
Page 471: Figure 247 License Key Management Page
Chapter 10: DXi8500 Utilities License Keys Figure 247 License Key Management Page 3 Enter the DXi system serial number in the Serial Number box and click Submit. The Licensed Feature page displays. Note: The serial number displays on the License Keys page, above the New Key box. -
Page 472: Licensing Data-At-Rest Encryption And Obtaining Premium
Encryption license. After you obtain the license, you will receive a License Certificate containing an authorization code. To add the license key and required PFK files to the DXi8500, locate the License Certificate, and then perform the following steps: 1 Open two Web browser windows on a computer with Internet access. -
Page 473: Secure Shred
Secure Shred The Secure Shred page allows you to securely and permanently erase sensitive data stored on the DXi8500. To securely erase data, first delete files on NAS shares or storage servers, or erase tape cartridges on VTL partitions, then start secure shred. During secure shred, all residual data associated with the deleted files or cartridges is securely erased from the disk drives by performing a single-pass overwrite with zeros. -
Page 474: Figure 248 Secure Shred Page
Security tab (see Figure 248). Figure 248 Secure Shred Page To securely erase data on the DXi8500: 1 Delete the data you want to securely erase: • Delete files on NAS shares, or delete the shares (see page 264). -
Page 475: Figure 249 Secure Shred Mode Interface
Secure Shred The system reboots and begins the secure shred process. This process can take multiple days to complete. 5 To check the status of secure shred, log onto the DXi8500 to view the limited Secure Shred Mode interface (see Figure 249). -
Page 476: Software Upgrade
Software Upgrade The Software Upgrade page allows you to upload a new software image to update the system software on the DXi8500. To see if a software upgrade is available for your DXi, contact Quantum Customer Support (see Getting More Information or Help on page xxviii). -
Page 477: Figure 250 Reboot & Shutdown Page
Rebooting the system closes the Web browser connection. You must log on again after the system has rebooted. • Shutdown - Shuts down the DXi8500. • Reset from diagnostic state - (Only available when the node is in degraded mode) Restarts the services on the node without rebooting the system. - Page 478 Chapter 10: DXi8500 Utilities Reboot & Shutdown Quantum DXi8500 User’s Guide...
-
Page 479: Dxi8500 System Specifications
Appendix A DXi8500 System Specifications This appendix lists DXi8500 characteristics and specifications that are categorized as follows: • Physical Characteristics • Environmental Specifications Note: For hard drive specifications see the appropriate hard drive product manual. Physical Characteristics The following tables provide dimensions and other physical characteristics of the DXi8500 system components: •... -
Page 480: Table 32 Cable Drops
330 pounds (149.7 kg) Note: As seen in Table 28 on page 453, the weight for each rack varies depending on the selected DXi8500 system component configurations. Note: There are no slide rails installed over 1 meter in height. DXi8500 System Node Bezel width 19 inches (48.3 cm) - Page 481 Appendix A: DXi8500 System Specifications Physical Characteristics DXi8500 Metadata Modules Bezel width 19 inches (48.3 cm) Chassis width 17.6 inches (44.7 cm) Chassis depth 20 inches (50.8 cm) Chassis height 3.4 inches (8.6 cm) Weight 58.8 pounds (26.7 kg) DXi8500 Array Modules Bezel width 2TB drives —...
- Page 482 Appendix A: DXi8500 System Specifications Physical Characteristics Ethernet Switch Chassis width 17.3 inches (43.9 cm) Chassis depth 15.2 inches (38.6 cm) Chassis height 1.7 inches (4.3 cm) Weight 12.2 pounds (5.5 kg) Fibre Channel Switch (2TB configurations only) Chassis width 16.9 inches (42.9 cm)
- Page 483 A fully-configured base rack with 3TB drives weighs approximately 1720 pounds (780 kg). Note: The DXi8500 rack is supported by 4 hard rubber casters which are spaced approximately 18 inches apart, 24 inches front to back. With a fully configured system, the maximum load per caster will not exceed 300 kg.
- Page 484 Appendix A: DXi8500 System Specifications Physical Characteristics Components (Quantity) Total Weight 886.1 401.9 1,031.9 468.1 1,118.9 507.5 1,205.9 547.0 1,292.9 586.4 1,379.9 625.9 1,796.9 815.1 1,886.4 855.7 1,975.9 896.3 2,065.4 936.8 2,154.9 977.4 2,244.4 1,018.0 2,333.9 1,058.6 2,423.4 1,099.2 2,512.9 1,139.8...
- Page 485 Appendix A: DXi8500 System Specifications Physical Characteristics Note: For 1TB un-racked systems, up to 8 Array modules can be used in the base rack due to space requirements for the PDUs, and a maximum of 2 Array modules and 10 Expansion modules can be used in the expansion rack.
- Page 486 Appendix A: DXi8500 System Specifications Physical Characteristics Components (Quantity) Total Weight 2,189.9 993.2 2,281.9 1,034.9 2,373.9 1,076.6 Note: For 2TB un-racked systems, up to 8 Array modules can be used in the base rack due to space requirements for the PDUs, and a maximum of 2 Array modules and 6 Expansion modules can be used in the expansion rack.
- Page 487 Appendix A: DXi8500 System Specifications Physical Characteristics Components (Quantity) Total Weight 1250.0 567.0 1360.0 616.9 1420.0 644.1 1480.0 671.3 1540.0 698.5 1600.0 725.7 1660.0 753.0 1720.0 780.2 Table 31 Storage Capacity DXi8500 System Capacity (RAID 6) Nominal Capacity 2TB drives — From 64 to 512TB (factory configurations) 3TB drives —...
- Page 488 The 10 GbE is available in an optical or copper (Twinax) type, but only one type of cable can be used. Note: The 10 GbE copper (Twinax) cable options that Quantum provides do not support all switches. Please note the...
- Page 489 Different partitions in same appliance can present different interfaces simultaneously Number of virtual drives DXi8500 with 64 GB RAM - 160 VTDs DXi8500 with 128 GB RAM - 512 VTDs (no more than 160 VTDs active at any one time) Number of partitions 64 maximum...
- Page 490 Data-at-Rest Encryption Data-at-Rest Encryption uses Self Encrypting Drive (SED) technology to secure all data stored on the DXi8500, including file data and metadata, configuration files, and the DXi software and operating system Quantum DXi8500 User’s Guide...
- Page 491 Appendix A: DXi8500 System Specifications Physical Characteristics Table 35 Rack Power Specifications Total AC Line Voltage Required Delivered Line Cords For Each Single Phase Protective Power Cord Location Rack 50-60 hz Service Connector Amps North America 200–240 30 amp NEMA L6-30P...
- Page 492 Appendix A: DXi8500 System Specifications Physical Characteristics Table 36 Power Requirements (1TB Drives) Number of Number of Total Racked Primary AC Secondary AC Total Primary Secondary AC Power Capacity Connections Connections AC Current Current @220 (TB) (Watts) Required Required @220 Vac...
- Page 493 Appendix A: DXi8500 System Specifications Physical Characteristics Table 37 Power Requirements (2TB Drives) Number of Number of Total Racked Primary AC Secondary AC Total Primary Secondary AC Power Capacity Connections Connections AC Current Current @220 (TB) (Watts) Required Required @220 Vac...
- Page 494 Power cable routed through the BOTTOM of the rack: • 6 feet (1.82 meters) If the power source is further away than the above mentioned distances, contact Quantum Sales for an available 10 feet (3.04 meters) extension cable. Quantum DXi8500 User’s Guide...
-
Page 495: Environmental Specifications
Appendix A: DXi8500 System Specifications Environmental Specifications Power Connector Types North America: Each 30Amp power strip contains a single NEMA L6-30P power cord (Default power cord) Outside North America and Europe: Each 32Amp power strip contains a single IEC60309 power cord Note: It is highly recommended that at least one power source has UPS protection. - Page 496 Appendix A: DXi8500 System Specifications Environmental Specifications Temperature Operating 10° to 30°C (50° to 86°F)* Note: The maximum temperature gradient is 10° per hour. Note: Air entry (cool air) is to the front of the rack, and air exit (hot air) is to the rear of the rack.
- Page 497 Appendix A: DXi8500 System Specifications Environmental Specifications * 35°C (95°F) is the maximum temperature for the DXi8500 at sea level. For every 1000 feet (305 meters) of altitude, the maximum temperature is reduced by 1° (example: the maximum temperature for a DXi8500 at 1000 feet (305 meters) is 34°C (93°F)).
- Page 498 Appendix A: DXi8500 System Specifications Environmental Specifications Quantum DXi8500 User’s Guide...
-
Page 499: Appendix B Troubleshooting
Appendix B Troubleshooting This appendix describes the status and problem reporting features of the DXi8500 as well as problems you might encounter during setup and operation of the system. Corrective information is provided to help you resolve these problems. For for information about troubleshooting the DXi8500, see the following sections: •... -
Page 500: General Troubleshooting Actions
DXi8500 opens a service ticket for the component and reports the problem in a service ticket. • If the problem reoccurs, the DXi8500 logs the number of times that it detects the problem in the existing report. -
Page 501: Checking Hardware Status
The Hardware page allows you to view information about the hardware Status components of the DXi8500. You can view the overall status of the node as well as detailed status information for components such as the system board, Fibre Channel adapters, network ports and storage arrays. -
Page 502: Hardware Problems
Appendix B: Troubleshooting Common Problems and Solutions Table 41 Start-up Problems Problem Corrective Action FATAL ERROR Unable Contact your Quantum Customer Support to start SNFS! representative (see Getting More Information or Help on page xxviii). Message displays. FATAL ERROR Unable... -
Page 503: Ethernet Network Problems
One fan is not Determine which fan has failed by reading operating. the service ticket generated by the system. Contact your Quantum Customer Support representative to arrange for service (see Getting More Information or Help page xxviii). Multiple fans are not Caution: Turn the system off immediately! operating. -
Page 504: Table 43 Ethernet Network Problems
Getting More Information or Help on page xxviii). DXi8500 system is not Try to ping the DXi8500 system IP address visible on the Ethernet from a host on the same network. If the network. ping reports round trip times, the DXi8500 system is active. -
Page 505: Replication Problems
Appendix B: Troubleshooting Common Problems and Solutions Problem Corrective Action DXi8500 remote IF you cannot connect to the DXi8500 management pages remote management pages, verify that the are not visible. following network settings for the DXi8500 are correct: • Hostname •... -
Page 506: Temperature Problems
Use the following procedure if a temperature problem is reported: 1 Check the ambient temperature of the room containing the DXi8500 system to verify that the temperature falls within the specified range. 2 Inspect for adequate air circulation inside the rack. Some racks may provide additional fans to improve air circulations. - Page 507 Appendix B: Troubleshooting Common Problems and Solutions 3 If a component reports a temperature problem, verify that the associated fan is operating correctly. If necessary, contact Quantum customer support to replace the fan (see Getting More Information or Help on page xxviii).
- Page 508 Appendix B: Troubleshooting Common Problems and Solutions Quantum DXi8500 User’s Guide...
-
Page 509: Appendix C Regulatory Statements
This device complies with Part 15 of the FCC Rules. Operation is subject to the following conditions: 1 This device may not cause harmful interference, and 2 This device must accept any interference received, including interference that may cause undesired operation. Quantum DXi8500 User’s Guide... - Page 510 This is a Class A product. In a domestic environment this product may cause radio interference in which case the user may be required to take adequate measures. ACHTUNG! Dieses ist ein Gerät der Funkstörgrenzwertklasse A. In Wohnbereichen können bei Betrieb dieses Gerätes Rundfunkstörungen auftreten, in Quantum DXi8500 User’s Guide...
-
Page 511: Notice For Usa And Canada Only
En cas d'envoi aux États-Unis, utiliser le cordon d'alimentation CERTIFIÉ UL et convenant pour 100-120 V. En cas d'envoi au Canada, utiliser le cordon d'alimentation CERTIFIÉ CSA et convenant pour 100-120 V. FicheBroches parallèles avec une broche de mise à la terre (configuration NEMA 5-15P) Quantum DXi8500 User’s Guide... -
Page 512: Battery Statement
VAROITUS Tuote sisältää litiumpariston. Pariston vaihtaminen vääräntyyppiseen paristoon voi aiheuttaa räjähdyksen. Käytetyt paristot on hävitettävä ohjeiden mukaisesti. Litiumia voidaan pitää vaarallisena aineena. Paristo on hävitettävä asianomaisten lakien ja määräysten mukaisesti. Quantum DXi8500 User’s Guide... - Page 513 Denna produkt innehåller ett litiumbatteri. Om batteriet byts ut mot ett nytt av fel typ föreligger risk för explosion. Begagnade batterier ska hanteras i enlighet med gällande föreskrifter. Litium kan betraktas som ett riskmaterial. Kassera batteriet i enlighet med gällande lokal och nationell lagstiftning. Quantum DXi8500 User’s Guide...
- Page 514 Vor der Wartung alle Netzkabel abziehen. Attenzione Prima di effettuare qualsiasi intervento di manutenzione, scollegare tutti i cavi di alimentazione. Advertencia Desconecte todos los cables de alimentación antes de dar mantenimiento. Varning Koppla bort alla nätsladdar innan service utförs. Quantum DXi8500 User’s Guide...
-
Page 515: Disposal Of Electrical And Electronic Equipment
Quantum DXi8500 User’s Guide... -
Page 516: Declaration Of Conformity
Appendix C: Regulatory Statements Declaration of Conformity Quantum DXi8500 User’s Guide... -
Page 517: Glossary
When you select Enable Data Deduplication for a NAS share or VTL partition, data deduplication is running all of the time. Backup data is sent to the DXi8500 and data deduplication is performed on Quantum DXi8500 User’s Guide... - Page 518 OpenStorage API. An interface specific to Symantec NetBackup and Backup Exec for writing data to disk backup appliances, replicating it, and, in the case of NetBackup, writing data directly to disk, under control of the backup application. Quantum DXi8500 User’s Guide...
- Page 519 The Sync ID must of the source share and the target share be identical. Terabyte A unit of measure for digital data equal to 1,000 gigabytes. Quantum DXi8500 User’s Guide...
- Page 520 Glossary Quantum DXi8500 User’s Guide...
Need help?
Do you have a question about the DXi8500 and is the answer not in the manual?
Questions and answers