Quantum DXi6701 Installation And Configuration Manual
Hide thumbs
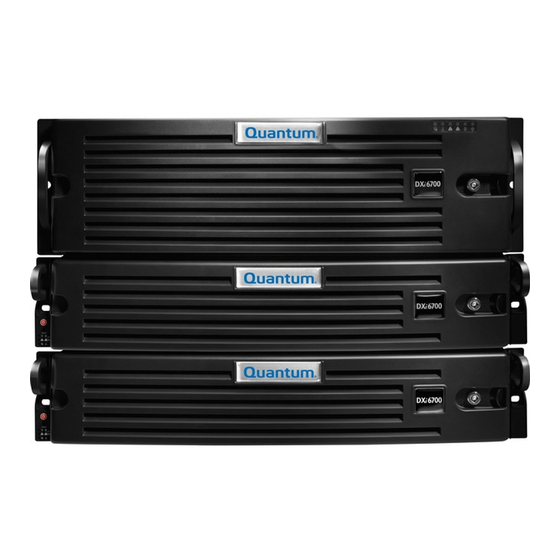
Also See for DXi6701:
- Planning manual (22 pages) ,
- Planning manual (18 pages) ,
- Planning manual (18 pages)

Subscribe to Our Youtube Channel
Related Manuals for Quantum DXi6701


Summary of Contents for Quantum DXi6701
- Page 1 READ THIS FIRST THIS DOCUMENT PROVIDES INSTALLATION INSTRUCTIONS FOR YOUR DXi6701 OR DXi6702 SYSTEM. IMPORTANT: READ THIS ENTIRE INSTALLATION DOCUMENT BEFORE YOU START TO UNPACK OR INSTALL YOUR DXi6701 OR DXi6702 SYSTEM.
-
Page 3: Table Of Contents
(PN 6-67199). Node..........11 Installing the DXi6701 and DXi6702 Note: Make sure to take the online training for the DXi6701 and Expansion Module ......16 DXi6702 in order to make the best use of your product. The online training is available at www.quantum.com/ServiceandSupport/... -
Page 4: Dxi6701 And Dxi6702 Configurations
– 80 TB * DXi6701 and DXi6702 configurations with 0 or 1 expansion modules include 2 RAID controller cards. All other configurations include 4 RAID controller cards. ** Any combination of expansion modules (with 1 TB drives or 2 TB drives) may be ordered or used for field capacity upgrades as long as the total capacity does not exceed 80 TB. -
Page 5: Choosing A Location
Quantum recommends installing the DXi6701/DXi6702 system in a controlled or restricted area to prevent access by untrained personnel. In addition, Quantum recommends that system installation be performed only by qualified IT personnel. When choosing an installation site for the DXi6701/DXi6702 system, consider the following requirements: •... -
Page 6: Preparing For The Installation
• Taking ESD Precautions on page 4 Necessary Tools Provide the following tools for unpacking and installing the DXi6701/DXi6702 system: • #2 PHILLIPS screwdriver • Notebook PC (for setting up initial system configuration) Taking ESD Precautions Some components within the DXi6701/DXi6702 system contain static-sensitive parts. To... -
Page 7: Unpacking The Dxi6701/Dxi6702
Caution: Do NOT discard the packing materials after the system is unpacked. The packaging materials must be used if the system is relocated. WARNING: The DXi6701/DXi6702 node and expansion module weighs 72 lbs. (32.7 kg) and 52 lbs. (23.6 kg) respectively. A minimum of two people are required to lift either chassis. - Page 8 DXi6701/DXi6702 Installation and Configuration Guide • Cable Kit Dual 10 GbE NIC — DXi6702 Optical: • Cable, 10 GbE, 10 meter (2) • Cable Kit Dual 10 GbE NIC — DXi6702 Twinax: • Cable, 10 GbE, 5 meter (2) • Cable Kit DUAL FC HBA : •...
- Page 9 DXi6701/DXi6702 Figure 1 Unpacking the DXi6701/DXi6702 Node Bezel shipping bag Front bezel Rack mount rails Foam Accessory kit DXi6701/DXi6702 Node Foam Unpacking the DXi6701/DXi6702...
-
Page 10: Dxi6701/Dxi6702 Expansion Module Packaging
DXi6701/DXi6702 Installation and Configuration Guide DXi6701/DXi6702 The box containing the DXi6701/DXi6702 expansion module contains the following Expansion Module items: Packaging • DXi6701/DXi6702 expansion module • Rack mount rails • Bezel shipping bag (contains the front bezel) • Accessory kit, which includes the following: •... - Page 11 DXi6701/DXi6702 Figure 2 Unpacking the DXi6701 and DXi6702 Expansion Module Bezel shipping bag Front bezel Rack mount rails Foam Accessory kit Expansion module Foam Unpacking the DXi6701/DXi6702...
-
Page 12: Installing The Dxi6701 Or Dxi6702 System
You must allow 3U (5.2 in. / 13.2 cm) of vertical space for the DXi6701 and DXi6702 node and 2U (3.5in. / 8.9 cm) of vertical space for each expansion module installed in the rack. -
Page 13: Installing The Dxi6701 And Dxi6702 Node
15.9 mm (0.625 inch) 12.7 mm (0.5 inch) WARNING: If the rack is empty at the time of installation, do NOT install the DXi6701/ DXi6702 chassis too high in the rack. The weight of the chassis may cause the rack to become “top heavy” and unstable if installed in the top of an empty rack. - Page 14 2 Install the internal chassis rails on the chassis tabs (see Figure a Slide the internal chassis rail toward the front of the chassis to engage the chassis tabs. b Secure with a single Phillips screw on each side of the node chassis. Installing the DXi6701 or DXi6702 System...
- Page 15 If the rack rails have round holes, use the adapter bracket provided in the accessory kit (see Figure Note: The rack mounting rails extend to support rack depths from 26.5 to 36.4 inches (67.3 to 92.5 cm). Installing the DXi6701 or DXi6702 System...
- Page 16 Figure 7 Installing the Rack Mounting Rails Rack rail hole pattern (square holes) Rack mounting rail tabs Rack mounting rail tabs Slide release latch Rack mounting rails Adapter bracket Phillips screws Rack rail hole pattern (round holes) Installing the DXi6701 or DXi6702 System...
- Page 17 DXi6701/DXi6702 Installing the DXi6701/DXi6702 Node 1 Install the DXi6701/DXi6702 node chassis onto the extended inner rack mounting rails. Secure the chassis to the front of the rack with one Phillips screw (included on the rack rails) on each side of the chassis (see...
-
Page 18: Installing The Dxi6701 And Dxi6702 Expansion Module
DXi6701/DXi6702 Installation and Configuration Guide Installing the DXi6701 Installing the DXi6701/DXi6702 expansion module consists of the following steps: and DXi6702 Expansion Installing the Expansion Module Rack Mounting Rails on page 16 Module Installing the Expansion Module Chassis on page 19... - Page 19 If the rack rails have round holes, use the adapter bracket provided in the accessory kit (see Figure 11). Note: The rack mounting rails extend to support rack depths from 26.5 to 36.4 inches (67.3 to 92.5 cm). Installing the DXi6701 or DXi6702 System...
- Page 20 Figure 11 Installing the Rack Mounting Rails Rack rail hole pattern (square holes) Rack mounting rail tabs Rack mounting rail tabs Slide release latch Adapter bracket Rack mounting rails Phillips screws Rack rail hole pattern (round holes) Installing the DXi6701 or DXi6702 System...
- Page 21 Figure 12). Caution: Quantum recommends that you do not remove the hard drives from the chassis. If they have been removed for any reason during or after the installation, you MUST install the hard drives in the same position in DXi6701 and DXi6702 Drive which they were removed.
-
Page 22: Cabling The Dxi6701/Dxi6702
Connect the SAS and Ethernet cables to open ports only, not to ports with plugs. Ports with plugs are only used for Fibre Channel ports. a SAS connector 1 on the DXi6701/DXi6702 node is connected to SAS connector 0 on expansion module 1. - Page 23 4 Connect Fibre Channel cables to each Fibre Channel port (up to four). Note: FC ports 1 and 3 are used for VTL host connections, and FC ports 0 and 2 are used for Path to Tape (PTT) connections. Installing the DXi6701 or DXi6702 System...
- Page 24 1 GbE Ethernet Fibre Channel ports ports 0 and 2 for PTT 1 and 3 for VTL Expansion Module 1 Expansion Module 2 Expansion Module 3 Expansion Module 4 Expansion Module 5 Expansion Module 6 Installing the DXi6701 or DXi6702 System...
- Page 25 (not for (1 through 6) customer use) Not used 1 GbE Ethernet Fibre ports Channel ports Expansion Module 1 Expansion Module 2 Expansion Module 3 Expansion Module 4 Expansion Module 5 Expansion Module 6 Installing the DXi6701 or DXi6702 System...
- Page 26 DXi6701/DXi6702 Installation and Configuration Guide Figure 15 Cabling the Expansion Modules (7 through Expansion Module 4 Expansion Module 5 Expansion Module 6 Expansion Module 7 Expansion Module 8 Expansion Module 9 Installing the DXi6701 or DXi6702 System...
-
Page 27: Initial Configuration
Accessing the DXi6701/ To access the DXi6701/DXi6702 remote management interface: DXi6702 Remote 1 Turn on the DXi6701/DXi6702 system by pressing the power buttons located on the Management Interface front of each chassis (see Figure 16) in the following order: a Turn on the expansion module(s). - Page 28 Power button 2 Using an Ethernet cable, connect the Ethernet port on the computer to Ethernet port 0 on the back of the DXi6701/DXi6702 (see Figure 13 Figure 14). Ethernet port 0 is in the upper, right-hand portion of the motherboard as you face the back of the system.
- Page 29 The Login window displays (see Figure 18). Note: For Web browsers, DXi6701 and DXi6702 support Firefox 10 or higher, Chrome 21 or higher, or Internet Explorer 8 or higher (use compatibility mode for Internet Explorer 10). Note: If the Login window does not display, verify that you entered the correct IP address (10.1.1.1) and that the network settings on the computer are...
-
Page 30: Completing The Getting Started Wizard
DXi6701/DXi6702 Installation and Configuration Guide Figure 18 Login Window Completing the Getting To complete the DXi6701/DXi6702 Getting Started wizard: Started Wizard 1 On the Login window, select Administrator, type password for the password, and click Login. The Welcome page displays (see Figure 19). - Page 31 Wizard: License Agreement 3 Select the I have read and accept this License Agreement check box, and then click Next to continue. Note: If you do not accept the license agreement, the DXi6701/DXi6702 will not function. The Network page displays (see Figure 21).
- Page 32 DXi6701/DXi6702 Installation and Configuration Guide Caution: For effective bonded network use, a properly configured network switch is required. (A network switch is not supplied with the DXi6701/ DXi6702.) The DXi6701/DXi6702 bonding settings must match the switch settings. If the switch settings and the DXi6701/DXi6702 settings do not match, your system may become inaccessible through the switch.
- Page 33 DXi6701/DXi6702 Figure 21 Getting Started Wizard: Network Initial Configuration...
- Page 34 (Optional) Enter the Default Gateway IP address. Specifying a default gateway is optional if all access is local to a particular subnet. For example, if the DXi6701/DXi6702 and all of its clients are on the same subnet, you do not need to specify a default gateway.
- Page 35 • IP Address - The IP address of the DXi6701/DXi6702. • Netmask - The network mask of the DXi6701/DXi6702. • Gateway - The gateway of the DXi6701/DXi6702. (This is usually not the same as the default gateway.) d Select the Any check box to allow all traffic types (management, replication, and data) on the interface.
- Page 36 For more information, see the User’s Guide (6-67199). 11 In the Timezone drop-down box, select the time zone where the DXi6701/DXi6702 is located. 12 Next to Time Format, select the format to use when displaying times (24 hours or 12 hours).
- Page 37 A message appears stating that completing the setup will restart the system. 16 Click Yes to restart the system. 17 Disconnect the computer from the DXi6701/DXi6702. Reset the computer network settings back to its default values. 18 Wait for the system to fully restart. This can take up to 30 minutes.
-
Page 38: Connecting The Ethernet Cables
Admin Alert indicator to display on the GUI. 1 Connect up to two Ethernet cables to the motherboard ports (ports 0 and 1). 2 (DXi6701 Only) Connect up to four Ethernet cables to the quad port NIC (ports 2, 3, 4, and 5). - Page 39 1GbE Motherboard ports 4 Install a bezel on the front of the DXi6701/DXi6702 node and expansion module(s). The bezel snaps into place on the front of the DXi6701/DXi6702 node to prevent the removal of the system from the rack (see Figure 26).
-
Page 40: Creating A Typical Backup Configuration
• Storage Capacity License (8 to 80 TB) • License Certificate for OST Note: To verify the licenses that are installed on the DXi6701/DXi6702 system, in the remote management console, navigate to the Utilities > License Keys page. Using the VTL Wizard... - Page 41 • Quantum PX500 or Quantum PX720 • ATL M2500, ATL P1000, or ATL P7000 If you select a library such as the ATL P1000 or ATL P7000, the DXi6701/DXi6702 appears as the selected library to the host and backup application. If you select Quantum DXi6701/DXi6702, the host and backup application recognize the device as a Quantum DXi6701/DXi6702.
- Page 42 • Enable deduplication - Select the check box to enable data deduplication. Quantum recommends that you enable data deduplication to optimize disk usage. Note: Data deduplication is enabled by default. You cannot enable or disable data deduplication after the partition is added.
- Page 43 DXi6701/DXi6702 Figure 28 VTL Wizard: Add Partition Step 3: Add Media 1 In the Partition drop-down box, select the partition where the media will be created (see Figure 29). 2 Under Add Contiguous Media, enter information about the media: • Initial Location - The initial location for cartridges after they are created (Storage Slot or I/E Slot).
- Page 44 Figure 29). A host is made known to the DXi6701/DXi6702 if you enter the host ID on this page, or if the host logs on to one or more Fibre Channel target ports. If you do not see the world wide name (WWN) of the host, make sure the host is connected to a Fibre Channel port on the DXi6701/DXi6702 and click Discover Remote Hosts again.
- Page 45 It can also be used if hosts that are not assigned to any host access group exist in the SAN. The CCL is accessible to hosts only through LUN 0. Caution: If you are not sure if you should use CCL, contact Quantum Customer Support before you enable this option.
- Page 46 Delete to delete it. Then click Previous to return to the appropriate step and add a new item. 3 After you have confirmed all settings, click Finish. The wizard configures the DXi6701/DXi6702 with the settings you selected. Initial Configuration...
- Page 47 DXi6701/DXi6702 Figure 32 VTL Wizard: Confirm Next Steps The DXi6701/DXi6702 is now ready to use for backup operation. The installation is successful when you are able to backup data to the system. Here are the next steps you can take: •...
- Page 48 ©2013 Quantum Corporation. All rights reserved. Quantum and the Quantum logo are registered trademarks of Quantum Corporation and its affliates in the United States and/or other countries. All other trademarks are the property of their respective owners. Protected by Pending and Issued U.S.
Need help?
Do you have a question about the DXi6701 and is the answer not in the manual?
Questions and answers