Table of Contents
Advertisement
Quick Links
Advertisement
Table of Contents
Troubleshooting

Related Manuals for Sun Microsystems Sun Fire V60x


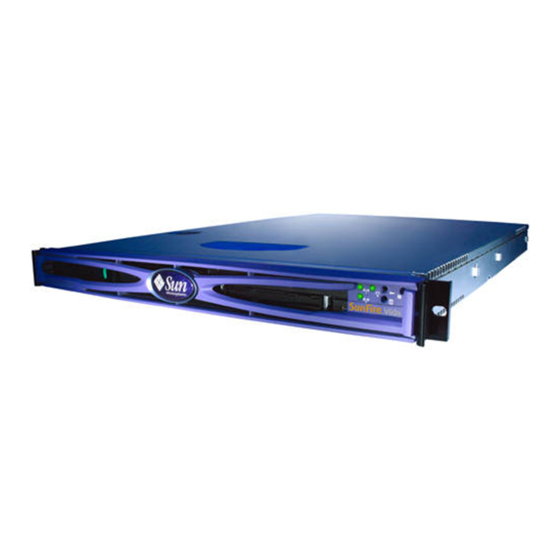
Summary of Contents for Sun Microsystems Sun Fire V60x
-
Page 1: Troubleshooting Guide
Sun Fire V60x and Sun Fire V65x Servers—Troubleshooting Guide Troubleshooting Guide Sun Microsystems, Inc. 4150 Network Circle Santa Clara, CA 95054 U.S.A. 650-960-1300 Part No. 817-2024-12 November 2003, Revision A Submit comments about this document at: http://www.sun.com/hwdocs/feedback... - Page 2 Copyright 2003 Sun Microsystems, Inc., 4150 Network Circle, Santa Clara, California 95054, États-Unis. Tous droits réservés. Sun Microsystems, Inc. a les droits de propriété intellectuelle relatants à la technologie qui est décrite dans ce document. En particulier, et sans la limitation, ces droits de propriété...
-
Page 3: Table Of Contents
Contents Safety and Compliance Information xvii Who Should Use This Book xviii How This Manual is Organized xviii Typographic Conventions xviii Related Documentation Ordering Sun Documents xix Shell Prompts in Command Examples xix Notice xx Support xx Sun Welcomes Your Comments xxi Troubleshooting Guidelines 1–1 Startup-related Issues 1–1 1.1.1... - Page 4 Server Beeps at Power On or When Booting 2–5 2.2.1.4 Some Hard Drives Do Not Show Up During POST 2–5 2.2.1.5 Server Starts Booting Automatically at Power On 2–7 Sun Fire V60x and Sun Fire V65x Servers—Troubleshooting Guide • November 2003...
- Page 5 2.2.1.6 Power-On Self-Test (POST) 2–7 2.2.1.7 Verifying Proper Operation of Key System LEDs 2–8 2.2.1.8 Confirming Loading of the Operating System 2–8 2.2.1.9 KVM (PS/2 Keyboard-Video-Mouse) Unit Causes System To Hang During POST 2–8 2.2.2 Power LED Does Not Light 2–9 2.2.3 Video Problems 2–10 2.2.3.1...
- Page 6 Jumper Locations 4–2 Setting the Serial COM2 Port Jumper 4–4 Powering On 4–5 Clearing CMOS 4–6 4.4.1 Using the Front Panel 4–6 4.4.2 Using the Clear CMOS Jumper 4–7 Sun Fire V60x and Sun Fire V65x Servers—Troubleshooting Guide • November 2003...
- Page 7 Booting Up 4–8 4.5.1 Boot Options 4–9 4.5.1.1 BIOS Setup Utility <F2> 4–9 4.5.1.2 Service Partition <F4> 4–12 4.5.1.3 Network Boot <F12> 4–13 4.5.1.4 Choose Boot Device <ESC> 4–13 4.5.2 Other Bootup Items 4–14 4.5.2.1 Ethernet Port Delay 4–14 4.5.2.2 USB-Connected External CD-ROM Drives 4–14 4.5.2.3 Booting the Server When an External SCSI Hard Drive is...
- Page 8 Safety: Before You Remove the Cover 5–2 Removing and Replacing the Cover 5–3 Customer Replaceable Unit (CRU) Procedures 5–4 5.5.1 Front Bezel 5–5 5.5.2 Floppy/DVD/CD-ROM Combo Module 5–7 viii Sun Fire V60x and Sun Fire V65x Servers—Troubleshooting Guide • November 2003...
- Page 9 Sun Fire V65x Server Heatsink and Processor Removal 5–22 5.5.4.5 Sun Fire V65x Server Heatsink and Processor Replacement 5–24 5.5.5 Sun Fire V60x and Sun Fire V65x Servers New CPU and Heatsink Installation 5–27 5.5.5.1 Safety Precautions 5–27 5.5.6 Power Supply Unit 5–32 5.5.6.1...
- Page 10 Sun Fire V65x Server Cable Kit Removal 5–66 5.6.2.4 Sun Fire V65x Server Cable Kit Installation 5–69 5.6.3 System FRU 5–71 5.6.3.1 Sun Fire V60x and Sun Fire V65x Servers System FRU Installation 5–71 Sun Fire V60x and Sun Fire V65x Servers—Troubleshooting Guide • November 2003...
- Page 11 Rear Panel LEDs 3–7 FIGURE 3-2 Location of Front-Panel System Status LED 3–9 FIGURE 3-3 Location of Sun Fire V60x and Sun Fire V65x Servers Rear-Panel Power Supply Status FIGURE 3-4 LEDs 3–11 Fault and Status LEDs on the Server Board 3–13 FIGURE 3-5 Location of Front-Panel ID Pushbutton and LED 3–15...
- Page 12 Verifying the BIOS Version 4–52 FIGURE 4-39 Location of Recovery Boot Jumper 4–53 FIGURE 4-40 Removing the Cover 5–3 FIGURE 5-1 Sun Fire V60x Server Bezel Replacement 5–5 FIGURE 5-2 Sun Fire V60x and Sun Fire V65x servers • November 2003...
- Page 13 FIGURE 5-7 Vertical Fan Support Bar Location 5–14 FIGURE 5-8 Connecting the DIMM Fan Power Cable 5–15 FIGURE 5-9 Sun Fire V60x Server Heatsink and Processor Removal 5–18 FIGURE 5-10 Opening the Socket Lever 5–19 FIGURE 5-11 Inserting the Processor 5–20 FIGURE 5-12 Closing the Socket Lever 5–20...
- Page 14 Installing the Flex Cable 5–69 FIGURE 5-45 Installing the Backplane Retention Clip 5–70 FIGURE 5-46 Sun Fire V60x and Sun Fire V65x Servers System FRU Installation 5–72 FIGURE 5-47 Sun Fire V60x and Sun Fire V65x servers • November 2003...
- Page 15 Tables Jumper Function Summary 1–6 TABLE 1-1 Supported Processors and Heatsinks 1–7 TABLE 1-2 Index to Problems 2–2 TABLE 2-1 Bootup Beep Codes 2–5 TABLE 2-2 Server LEDs 3–3 TABLE 3-1 Front Panel LEDs 3–5 TABLE 3-2 Front Panel Pushbuttons 3–6 TABLE 3-3 Rear Panel LEDs 3–8 TABLE 3-4...
- Page 16 Sun Fire V60x and Sun Fire V65x servers • November 2003...
-
Page 17: Safety And Compliance Information
Preface This Troubleshooting Guide provides information on how to identify, isolate, and fix problems with the Sun Fire V60x and Sun Fire V65x servers. It also explains how to remove and replace certain key server components. Topics in this chapter include: “Safety and Compliance Information”... -
Page 18: Who Should Use This Book
You must be root to do this; Variables that you replace with a real value; To delete a file, type rm filename. boldface courier font What you type machine_name% su xviii Sun Fire V60x and Sun Fire V65x Servers—Troubleshooting Guide • November 2003... -
Page 19: Related Documentation
Related Documentation These documents contain information related to the tasks described in this book: Sun Fire V60x and Sun Fire V65x Server User Guide Sun Fire V60x Setup Poster Sun Fire V65x Setup Poster Ordering Sun Documents The SunDocsSM program provides more than 250 manuals from Sun Microsystems, Inc. -
Page 20: Notice
See the following link for US, Europe, South America, Africa, and APAC local country telephone numbers: http://www.sun.com/service/contacting/solution.html For general support and documentation on the Sun Fire V60x and Sun Fire V65x servers, see the following link: http://www.sun.com/supporttraining/ xx Sun Fire V60x and Sun Fire V65x Servers—Troubleshooting Guide • November 2003... -
Page 21: Sun Welcomes Your Comments
Sun Welcomes Your Comments Sun is interested in improving its documentation and welcomes your comments and suggestions. You can email your comments to Sun at: docfeedback@sun.com Please include the part number (817-2024-xx) of your document in the subject line of your email. - Page 22 Sun Fire V60x and Sun Fire V65x Servers—Troubleshooting Guide • November 2003...
-
Page 23: Troubleshooting Guidelines
This chapter gives general guidelines and checklists to help you troubleshoot problems with the Sun Fire V60x and Sun Fire V65x servers in an efficient, organized manner. Following these guidelines will save you time and lead you more quickly to problem resolution. -
Page 24: Usb-Connected External Cd-Rom Drive Will Not Function
1.1.2 USB-Connected External CD-ROM Drive Will Not Function Some USB-connected CD-ROM devices perform unreliably on the Sun Fire V60x and Sun Fire V65x servers. Use the internal CD-ROM device when possible. 1.1.3 Inability to Boot Server When an External SCSI Hard Drive is Connected The external SCSI bus is scanned for disk devices before the internal bus is scanned. -
Page 25: Resetting The Server
Quite often, a problem can be solved merely be resetting the server or shutting it down and powering it back up. You may restart or shut down the Sun Fire V60x and Sun Fire V65x servers using software or hardware. -
Page 26: Hardware Mechanisms
Onboard controllers can be disabled through the server board BIOS setup. To enter BIOS setup, press <F2> when prompted during the boot up process. For more information, see “BIOS Setup Utility <F2>” on page 4-9. Sun Fire V60x and Sun Fire V65x Servers—Troubleshooting Guide • November 2003... -
Page 27: Setting Main Board Jumpers
Setting Main Board Jumpers You should not normally need to set any of the baseboard jumpers. They are set at the factory to default positions for optimal operation. However, if you should need to change them, their locations and functions are shown in Figure 1-1 and Table 1-1. Recover Normal RCVR\BOOT... -
Page 28: Processor And Heatsink Configurations
Configures either a DSR or a DCD signal to the connector. Configuration See “Rear Panel RJ-45 Serial COM2 Connector” in Chapter 2 of the Sun Fire V60x and Sun Fire V65x Server User Guide and “Setting the Serial COM2 Port Jumper” on page 4-4 in this document. -
Page 29: Supported Processors
1.5.2 Supported Processors The server main board supports the 2.8 and 3.06 GHz Intel® Xeon™ self-terminating processors (see Table 1-2). Supported Processors and Heatsinks TABLE 1-2 Marketing Part Number Sun FG Part Number Sun Description 595-6943-01 2.8 GHz Processor with heatsink 595-6944-01 3.06 GHz Processor with heatsink 1.5.3... -
Page 30: Hyper-Threading Tm Cpu Feature
V65x servers causes the operating system to recognize four distinct processors. Hyper-threading may be enabled or disabled in the system BIOS configuration menu. Refer to the Sun Fire V60x and Sun Fire V65x Server User Guide, Chapter 4, for instructions on how to enable or disable this feature. -
Page 31: Problems With Snmp
Problems With SNMP Unless the dmi2snmp service is configured correctly, failure errors may appear if and when the service is attempted to be shut down. By default, the dmi2snmp service is not configured robustly enough to be started/stopped successfully. Note – The dmisnmp2 service is not supported in the SOlaris OS. Chapter 1 Troubleshooting Guidelines... -
Page 32: Problems With Initial System Startup
Are there any POST LEDs illuminated? If so check “Power-On Self Test (POST)” ■ on page 3-15. Are there any POST beep codes? If so check “POST Error Beep Codes” on page 3-19 ■ 1-10 Sun Fire V60x and Sun Fire V65x Servers—Troubleshooting Guide • November 2003... -
Page 33: Problems With New Application Software
Problems With New Application Software Problems that occur when you run new application software are usually related to the software. Faulty equipment is much less likely, especially if other software runs correctly. Use this checklist: Does the system meet the minimum hardware requirements for the software? See ■... -
Page 34: Problems After The System Has Been Running Correctly
If you are experiencing any of the above symptoms that might indicate voltage spikes on the power line, install a surge suppressor between the power outlet and the system power cord. 1-12 Sun Fire V60x and Sun Fire V65x Servers—Troubleshooting Guide • November 2003... -
Page 35: Troubleshooting Specific Problems
C H A P T E R Troubleshooting Specific Problems This chapter instructs you on how to solve specific problems with the Sun Fire V60x and Sun Fire V65x servers. It contains the following sections: “Preparing the System for Diagnostic Testing” on page 2-1 ■... -
Page 36: Specific Problems And Corrective Actions
2-14 “Memory Configuration Errors” page 2-15 Try the solutions in the order given. If you cannot correct the problem, contact your service representative or authorized dealer for help. Sun Fire V60x and Sun Fire V65x Servers—Troubleshooting Guide • November 2003... -
Page 37: Problems Starting Up
And are any retention clips used to hold the cable in place properly installed? If you are using a Sun Fire V60x server, make sure that the power supply is fully ■ seated in the power distribution board connector. -
Page 38: Front Panel Is Unresponsive And Video Is Disabled
Note – A corded PS/2 keyboard (not a wireless one) must be plugged into the keyboard/mouse connector at the back of the server. When the front panel is locked, the lights on the keyboard flash, but the server is still fully functional. Sun Fire V60x and Sun Fire V65x Servers—Troubleshooting Guide • November 2003... -
Page 39: Server Beeps At Power On Or When Booting
2.2.1.3 Server Beeps at Power On or When Booting The server indicates problems with “beep codes” during Power-On Self Test (POST) in the event there is no displayed video. A complete list of beep codes is given in “POST Error Beep Codes” on page 3-19. The following beep codes identify system events during POST in case video fails to display. - Page 40 5. In the Advanced Configuration menu, go to SCSI Controller Int 13 Support and select the Enabled option if it is not already enabled. 6. Save the settings before exiting the menu. Sun Fire V60x and Sun Fire V65x Servers—Troubleshooting Guide • November 2003...
-
Page 41: Server Starts Booting Automatically At Power On
2.2.1.5 Server Starts Booting Automatically at Power On The server board saves the last known power state in the event of a power failure. If you remove power before powering down the system using the power switch on the front panel, your system might automatically attempt to restore itself back to the state it was in after you restore power. -
Page 42: Verifying Proper Operation Of Key System Leds
The system may hang, causing the watchdog timer to expire. This in turn causes ■ a FRB-2 (Fault Resilient Booting) event. By default, if a FRB-2 event occurs (on redundant processor systems), the Boot-Strap-Processor will be disabled on the next boot. Sun Fire V60x and Sun Fire V65x Servers—Troubleshooting Guide • November 2003... -
Page 43: Power Led Does Not Light
To return a system with redundant processors to normal operation after an FRB2 event, follow the instructions below: 1. Reset or turn on the system. 2. Press the F2 key to select SETUP as soon as the option appears on the screen. 3. -
Page 44: Video Problems
(either through the serial COM2 port or the LAN connector) and redirect the BIOS setup screen to a remote console to check. For details on how to do this, refer to “Configuring an External Serial Console” on page 4-17. 2-10 Sun Fire V60x and Sun Fire V65x Servers—Troubleshooting Guide • November 2003... -
Page 45: Xserver Has Not Started
If the preceding steps do not solve the problem, check the following: Is the keyboard functioning? Check to see that the “Num Lock” light is ■ functioning. Is the video monitor plugged in and turned on? ■ Are the brightness and contrast controls on the video monitor properly adjusted? ■... -
Page 46: System Cooling Fans Do Not Rotate Properly
Is the drive properly configured? ■ Is the onboard IDE controller enabled? ■ Is the flex cable between the server board and the backplane installed properly? ■ 2-12 Sun Fire V60x and Sun Fire V65x Servers—Troubleshooting Guide • November 2003... -
Page 47: Cannot Connect To A Server
Verify that the CD-ROM drive works correctly in another system. ■ Check to see if the BIOS detects the CD-ROM during bootup. ■ Check the BIOS setup menu to see if the CD-ROM is present and set up as a boot ■... -
Page 48: Problems With Application Software
Is the BIOS set to allow the CD-ROM to be the first bootable device? ■ Check cable connections. ■ Verify CD is bootable in another known good CD-ROM drive, especially if the CD ■ is a copy. 2-14 Sun Fire V60x and Sun Fire V65x Servers—Troubleshooting Guide • November 2003... -
Page 49: Memory Configuration Errors
2.2.11.1 Memory DIMM Population Order If you install modules with mixed memory sizes in your Sun Fire V60x or V65x server, you must install the single-wide memory modules (256 MB or 512 MB) in the lower numbered slots and the double-wide memory modules (1 GB or 2 GB) in the higher numbered slots. -
Page 50: Soft Reboot Errors
2. Press the F2 key to select SETUP when the option appears on the screen. 3. In the main page of the SETUP menu, use the arrow keys to select the Advanced menu. 2-16 Sun Fire V60x and Sun Fire V65x Servers—Troubleshooting Guide • November 2003... - Page 51 4. In the Memory Configuration screen, select Memory Retest, then select Enabled. 5. Press the F10 key to exit the SETUP menu and save the changes. The system will now boot correctly. For Systems With Only Two DIMMs 1. Open the top cover and move the existing two DIMMs from their current bank to one of the other two banks.
-
Page 52: Faulty Memory Dimms
5. Choose the Exit option from the File menu of the SEL manager. 6. Exit out of the SSU menu and Diagnostics CD main menu. 7. Turn off the system. 8. Open the top cover. 2-18 Sun Fire V60x and Sun Fire V65x Servers—Troubleshooting Guide • November 2003... - Page 53 9. Remove the faulty DIMM and replace it with the good DIMM (read the silkscreen on the motherboard for the DIMM position). Refer to the Sun Fire V60x and Sun Fire V65x Server User Guide (817-2023-xx) for information on how to correctly replace the DIMMs.
-
Page 54: Other Problems
Over clocking is generally not possible and may damage components and void the warranty of your server board and your boxed or tray processor. Memory must be of the approved type and be properly seated. ■ 2-20 Sun Fire V60x and Sun Fire V65x Servers—Troubleshooting Guide • November 2003... -
Page 55: General Board And Feature Issues
Verify that all chassis and power supply fans are properly installed and ■ functioning. Approved heat sinks must be properly installed on the processors. Do not attempt ■ to run the processors without a heat sink for even a few moments. If the system is running slowly or you receive a processor error message, enter ■... - Page 56 You must select the proper package for your chassis type and configuration. For integration into the Sun Fire V60x server, the 1U version of the packaged processor must be used. For the Sun Fire V65x server chassis, the 2U/ Pedestal version of the processor package must be used.
-
Page 57: Troubleshooting The Server Using Built-In Tools
C H A P T E R Troubleshooting the Server Using Built-In Tools This chapter explains how to detect and isolate faulty components within the Sun Fire V60x and Sun Fire V65x Servers. The chapter contains these sections: “Diagnosing System Errors” on page 3-1 ■... -
Page 58: Beep Codes
4-31. 3.1.4.2 System Setup Utility (SSU) The SSU is intended to help with troubleshooting system errors, and can be used to read the System Event log (SEL). Sun Fire V60x and Sun Fire V65x Servers—Troubleshooting Guide • November 2003... -
Page 59: Leds And Pushbuttons
For information on how to run the SSU, see “Using the Service Partition Menu” on page 4-24. LEDs and Pushbuttons This section describes the LEDs and pushbuttons on the Sun Fire V60x and Sun Fire V65x servers. Server LEDs TABLE 3-1... -
Page 60: Front Panel Leds And Pushbuttons
NIC1 and NIC2 Activity LEDs Power/Sleep Pushbutton Power/Sleep LED System Status LED ID LED ID Pushbutton Hard Disk Status LED Reset Pushbutton NMI Pushbutton Front Panel Pushbuttons and LEDs FIGURE 3-1 Sun Fire V60x and Sun Fire V65x Servers—Troubleshooting Guide • November 2003... -
Page 61: Front Panel Leds
3.2.1.1 Front Panel LEDs The front panel LEDs are summarized in Table 3-2. Front Panel LEDs TABLE 3-2 Color Function Power Green This LED is controlled by software. It turns steady when the server is powered up and is off when the system is off or in sleep mode. NIC1 and NIC2 Green These LEDs are on when a good network link has been established. -
Page 62: Front Panel Pushbuttons
LED. The Main Board ID LED is visible through the rear of the chassis and allows you to locate a particular server from behind a rack of servers. Sun Fire V60x and Sun Fire V65x Servers—Troubleshooting Guide • November 2003... -
Page 63: Rear Panel Leds
3.2.2 Rear Panel LEDs The rear panel contains the LEDs shown in Figure 3-2. NIC2 Network NIC2 Network Power Supply Status LED Activity LED Speed LED System Status LED* NIC1 Network ID LED* NIC1 Network Activity LED Speed LED POST LEDs (4)* *LEDs are on main board, visible through rear of chassis NIC2 Network... -
Page 64: Table 3-4 Rear Panel Leds
This is a bi-color LED that can be on, off, green, amber, or blinking, or combination thereof. See “Rear Panel Power Supply Status LED” on page 3-11 for more detailed information. Sun Fire V60x and Sun Fire V65x Servers—Troubleshooting Guide • November 2003... -
Page 65: Front-Panel System Status Led
3.2.3 Front-Panel System Status LED The front-panel system status LED is located as shown in Figure 3-3. System Status LED Location of Front-Panel System Status LED FIGURE 3-3 The front-panel system status LED has the states indicated in Table 3-5. System Status LED States TABLE 3-5 System Status LED State... - Page 66 This Troubleshooting Guide gives information on how to isolate the server component responsible for any of the critical, non-critical, or degraded conditions listed above. 1. Baseboard refers to the server Main Board. 3-10 Sun Fire V60x and Sun Fire V65x Servers—Troubleshooting Guide • November 2003...
-
Page 67: Rear Panel Power Supply Status Led
Power Supply Status LED (Single Power Supply) Power Supply Status LEDs (Redundant Power Supplies) Location of Sun Fire V60x and Sun Fire V65x Servers Rear-Panel Power Supply Status LEDs FIGURE 3-4 Chapter 3 Troubleshooting the Server Using Built-In Tools 3-11... -
Page 68: Table 3-6 Power Supply Status Led States
Both LEDs solid green = server is fully powered on and power supplies are good. One LED solid green and one LED amber = AC power missing from one of the power supplies. 3-12 Sun Fire V60x and Sun Fire V65x Servers—Troubleshooting Guide • November 2003... -
Page 69: Server Main Board Fault Leds
3.2.5 Server Main Board Fault LEDs There are several fault and status LEDs built into the server board (see Figure 3-5). Some of these LEDs are visible only when the chassis cover is removed. The LEDs are explained in this section. POST ID LED LEDs... - Page 70 System ID LED. This blue LED can be illuminated to identify the server when it ■ is part of a large stack of servers. See “System ID LEDs” on page 3-15 for details. 3-14 Sun Fire V60x and Sun Fire V65x Servers—Troubleshooting Guide • November 2003...
-
Page 71: System Id Leds
3.2.6 System ID LEDs A pair of blue LEDs, one at the rear of the server, and one on the front panel, can be used to easily identify the server when it is part of a large stack of servers. A single blue LED located at the back edge of the server board next to the backup battery is visible through the rear panel. -
Page 72: Post Screen Messages
Keyboard locked message Keyboard stuck key Keyboard interface error System memory size error External cache failure Floppy controller error Floppy A: error Floppy B: error Hard disk 0 error 3-16 Sun Fire V60x and Sun Fire V65x Servers—Troubleshooting Guide • November 2003... -
Page 73: Table 3-8 Extended Post Error Messages And Codes
Standard POST Error Messages and Codes (Continued) TABLE 3-7 Error Code Error Message Pause On Boot Hard disk 1 error Hard disk 2 error Hard disk 3 error CD-ROM disk 0 error CD-ROM disk 1 error CD-ROM disk 2 error CD-ROM disk 3 error Date/time not set Cache memory bad... - Page 74 84F4 Sensor Data Record (SDR) empty 84FF System event log full 8500 Bad or missing memory in slot 3A 8501 Bad or missing memory in slot 2A 3-18 Sun Fire V60x and Sun Fire V65x Servers—Troubleshooting Guide • November 2003...
-
Page 75: Post Error Beep Codes
Extended POST Error Messages and Codes (Continued) TABLE 3-8 Error Code Error Message Pause On Boot 8502 Bad or missing memory in slot 1A 8504 Bad or missing memory in slot 3B 8505 Bad or missing memory in slot 2B 8506 Bad or missing memory in slot 1B 8601... -
Page 76: Table 3-10 Bios-Generated Boot Block Post Beep Codes
This is not a fatal error. ROM checksum error System BIOS ROM checksum error Shutdown register error Shutdown CMOS register read/write error detected Invalid BIOS General BIOS ROM error 3-20 Sun Fire V60x and Sun Fire V65x Servers—Troubleshooting Guide • November 2003... -
Page 77: Bios Recovery Beep Codes
Memory 3-Beep and LED POST Error Codes TABLE 3-11 Debug Port 80h Error Diagnostic LED Decoder Beep Code Indicator (G = green, R = red, A = amber) Meaning No memory was found in the system Memory mixed type detected EDO is not supported First row memory test failure Mismatched DIMMs in a row... -
Page 78: Post Progress Code Led Indicators
LEDs are lit, resulting in an amber color. Likewise, if both bits are clear, the red and green LEDs are off. 3-22 Sun Fire V60x and Sun Fire V65x Servers—Troubleshooting Guide • November 2003... -
Page 79: Figure 3-7 Examples Of Post Led Coding
Figure 3-7 shows examples of how the POST LEDs are coded. POST LEDs (as viewed from back of server) = upper nibble bits = lower nibble bits POST Code = 95h AMBER GREEN upper nibble = 1001 = 9h lower nibble = 0101 = 5h high bits low bits (on left) -
Page 80: Table 3-13 Boot Block Post Progress Led Code Table (Port 80H Codes)
Initialize extra module if present. Initialize floppy controller. Try to boot floppy diskette. If floppy boot fails, initialize ATAPI hardware. Try booting from ATAPI CD-ROM drive. Jump to boot sector. 3-24 Sun Fire V60x and Sun Fire V65x Servers—Troubleshooting Guide • November 2003... -
Page 81: Table 3-14 Post Progress Led Code Table (Port 80H Codes)
POST Progress LED Code Table (Port 80h Codes) TABLE 3-14 POST Diagnostic LED Decoder Code (G = green, R = red, A = amber) Description Uncompress various BIOS modules. Verify password checksum. Verify CMOS checksum. Read microcode updates from BIOS ROM. Initializing the processors. - Page 82 Display setup message: the new cursor position has been read and saved. Displaying the hit setup message next. Ensure timer keyboard interrupts are on. Extended background memory test start. Disable parity and NMI reporting. 3-26 Sun Fire V60x and Sun Fire V65x Servers—Troubleshooting Guide • November 2003...
- Page 83 POST Progress LED Code Table (Port 80h Codes) (Continued) TABLE 3-14 POST Diagnostic LED Decoder Code (G = green, R = red, A = amber) Description Test 8237 DMA controller: the DMA page register test passed. Performing the DMA controller 1 base register test next. Initialize 8237 DMA controller: the DMA controller 2 base register test passed.
- Page 84 Prepare USB controllers for operating system. One beep to indicate end of POST. No beep if silent boot is enabled. 000h POST completed. Passing control to INT 19h boot loader next. 3-28 Sun Fire V60x and Sun Fire V65x Servers—Troubleshooting Guide • November 2003...
-
Page 85: Contacting Technical Support
Contacting Technical Support For technical support, call the phone numbers listed below, according to your location. United States1-800-USA-4SUN (1-800-872-4786) Tel: +44 870-600-3222 France Tel: +33 1 34 03 5080 Germany Tel: +49 1805 20 2241 Italy Tel: +39 02 92595228, Toll Free 800 605228 Spain Tel: +011 3491 767 6000 See the following link for US, Europe, South America, Africa, and APAC local... - Page 86 3-30 Sun Fire V60x and Sun Fire V65x Servers—Troubleshooting Guide • November 2003...
-
Page 87: Powering On And Configuring The Server
This chapter explains how to use the Power On switch to apply power to the server, boot to the operating system, use the serial console, update system software, and validate the operation of the Sun Fire V60x and Sun Fire V65x servers. The chapter contains these sections: “Jumper Locations”... -
Page 88: Jumper Locations
Recover Normal RCVR\BOOT Clear CLR\PSWD Normal Clear CLR\CMOS Normal Write En Normal BMC BB WE J5A2 3-4 = DSR 1-2 = DCD Main Board Jumper Locations FIGURE 4-1 Sun Fire V60x and Sun Fire V65x Servers—Troubleshooting Guide • November 2003... -
Page 89: Table 4-1 Jumper Function Summary
Configures either a DSR or a DCD signal to the connector. See Configuration “Rear Panel RJ-45 Serial COM2 Connector” in Chapter 2 of the Sun Fire V60x and Sun Fire V65x Server User Guide and “Setting the Serial COM2 Port Jumper” on page 4-4 of this document. CLR\CMOS Clear CMOS If these pins are jumpered, the CMOS settings are cleared. -
Page 90: Setting The Serial Com2 Port Jumper
1 and 2 as shown in Figure 4-3. J5A2 Jumper Block (viewed from front of server) J5A2 Jumper Block Configured for DCD Signal (pin 7 connected to DCD) FIGURE 4-3 Sun Fire V60x and Sun Fire V65x Servers—Troubleshooting Guide • November 2003... -
Page 91: Powering On
Powering On Caution – The power switch on the front of the server is an On/Off switch, but it does not isolate the equipment from the AC power being supplied through the AC power cord. The location of the switch is shown in Figure 4-4. Power/Sleep Pushbutton Reset Pushbutton Power and Reset Switches on the Front Panel... -
Page 92: Clearing Cmos
Caution – As shipped, the Sun Fire V60x and Sun Fire V65x servers do not have Advanced Configuration and Power (ACPI) enabled. As a result, the front panel power switch operates as a normal power switch. In this configuration, press the switch once and power comes on;... -
Page 93: Using The Clear Cmos Jumper
3. Hold down the reset button for at least 4 seconds. 4. While the reset button is still depressed, press the power on/off button and hold for at least 2 seconds. 5. Simultaneously release both the power on/off and reset buttons. Upon completion of these steps, the BMC asserts the clear CMOS signal to emulate the movement of the Clear CMOS jumper. -
Page 94: Booting Up
Note – The USB ports may be disabled until the OS is booted and the USB drivers are installed. A PS/2 keyboard is required if a keyboard is necessary for initial bootup and configuration. Sun Fire V60x and Sun Fire V65x Servers—Troubleshooting Guide • November 2003... -
Page 95: Boot Options
4.5.1 Boot Options The first bootup screen is shown in Figure 4-6. First BIOS Bootup Screen FIGURE 4-6 At the bottom of the screen, you are given the option to press the following function keys: F2 to enter the BIOS Setup Utility ■... -
Page 96: Figure 4-7 Bios Setup Utility Main Screen
Boot menu item on the top of the BIOS screen, then pressing Enter. The boot sequence is then displayed. The default boot sequence is as shown in Figure 4-8. 4-10 Sun Fire V60x and Sun Fire V65x Servers—Troubleshooting Guide • November 2003... -
Page 97: Figure 4-8 Default Boot Sequence
Default Boot Sequence FIGURE 4-8 You can always restore all of the default BIOS settings by scrolling to the Exit menu item along the top of the screen. The BIOS Setup screen then appears as shown in Figure 4-9. BIOS Setup Utility Exit Screen FIGURE 4-9 Chapter 4 Powering On and Configuring the Server 4-11... -
Page 98: Service Partition
4.5.1.2 Service Partition <F4> Note – If you have a Sun Fire V60x server or Sun Fire V65x server with the Solaris operating environment preinstalled, the Service Partition is also preinstalled. If your server does not have a preinstalled operating system, the Service Partition is not installed. -
Page 99: Network Boot
4.5.1.3 Network Boot <F12> If you press F12 to boot from the network, the server software looks for a valid boot file name on the network. If it finds such a file name, it boots from the network. If it cannot find a valid file name, it gives up and continues to boot from the hard disk. -
Page 100: Other Bootup Items
USB-Connected External CD-ROM Drives Some USB-connected CD-ROM devices perform unreliably on the Sun Fire V60x server and Sun Fire V65x server. Use the internal CD-ROM device when possible. 4-14 Sun Fire V60x and Sun Fire V65x Servers—Troubleshooting Guide • November 2003... -
Page 101: Booting The Server When An External Scsi Hard Drive Is Connected
4.5.2.3 Booting the Server When an External SCSI Hard Drive is Connected The external SCSI bus is scanned for disk devices before the internal bus is scanned. As a result, Linux will label external drives before internal drives. Exercise caution when adding and removing external devices because Linux drive device names (such as “/dev/sea”) may change, leaving the system unable to boot because the external SCSI device may not be a boot drive. -
Page 102: Loading The Operating System
The bootup process eventually takes you to the point where the operating system loads. Note – If you have a Sun Fire V60x server or a Sun Fire V65x server with the Solaris operating environment preinstalled, the operating system loads during the bootup process. -
Page 103: Configuring An External Serial Console
Configuring an External Serial Console The RJ-45 serial COM2 port on the Sun Fire V60x and Sun Fire V65x servers rear panel (see Figure 4-12) can be used to direct boot messages to a serial console (for example, a laptop running HyperTerminal). -
Page 104: Figure 4-13 Console Redirection Bios Setup
An ANSI 500 terminal emulator is needed to have the display appear properly during BIOS setup and when using the Sun Fire V60x and Sun Fire V65x servers Diagnostics CD or Service Partition tools. To set up the server to direct messages to an external serial console: 1. -
Page 105: Fault Resilient Booting (Frb)
6. Exit the BIOS setup utility saving the changes you have made. The boot messages are now directed to your external serial console. In this example, the BIOS setup allows the messages to be directed to COM1 of an external PC running HyperTerminal. -
Page 106: Frb3
Watchdog expiration event showing an FRB2 timeout (if so configured). It then hard resets the system, assuming Reset was selected as the watchdog timeout action. 4-20 Sun Fire V60x and Sun Fire V65x Servers—Troubleshooting Guide • November 2003... - Page 107 The BIOS is responsible for disabling the FRB2 timeout before initiating the option ROM scan, prior to displaying a request for a Boot Password or prior to an Extensive Memory Test. The BIOS re-enables the FRB2 timer after the Extensive Memory Test. The BIOS provides a user-configurable option to change the FRB2 response behavior.
- Page 108 Processor failed. The processor may have failed FRB-2 or FRB-3, and it has been ■ disabled. Processor not installed (status only, indicates the processor slot has no processor ■ in it). 4-22 Sun Fire V60x and Sun Fire V65x Servers—Troubleshooting Guide • November 2003...
-
Page 109: Enabling Usb Keyboard And Mouse Operation
4.10 Enabling USB Keyboard and Mouse Operation In order to use the Diagnostic CD or Service Partition with a USB keyboard and mouse, you will need to set up the BIOS to recognize the USB devices. USB support for these functions is disabled by default. Note –... -
Page 110: Using The Service Partition Menu
4.11 Using the Service Partition Menu Note – By default, the Sun Fire V60x and Sun Fire V65x servers are shipped without the Service Partition installed. It can be installed as described in “Service Partition” on page 4-47. If the Service Partition is installed, when you press F4 at the initial bootup screen, the Service Partition Menu appears (see Figure 4-14). -
Page 111: Create Diskettes
System Setup Utility (SSU) in the same way that you run it from the service partition or from the Sun Fire V60x and Sun Fire V65x servers Diagnostics CD. With the two diskette set, you can perform the functions described in “Run System Setup Utility”... -
Page 112: System Utilities
Run BMC Firmware Update ■ Run HSC Firmware Update ■ Run FRU/SDR Update ■ Run BIOS Update (reboot required) ■ Reboot to Service Partition ■ Reboot System ■ 4-26 Sun Fire V60x and Sun Fire V65x Servers—Troubleshooting Guide • November 2003... -
Page 113: Run System Setup Utility
4.11.2.1 Run System Setup Utility If installed, the Service Partition on the hard disk of the Sun Fire V60x and Sun Fire V65x servers allows you to perform server management, configuration, and validation testing. To bring up the service partition, reboot and press the <F4>... -
Page 114: Figure 4-18 Multiboot Add-In Window
To change boot priorities, select a boot device and use the Move Down and Move Up buttons to move the device boot priority. Note – This menu allows you to change the boot order without going into the BIOS setup. 4-28 Sun Fire V60x and Sun Fire V65x Servers—Troubleshooting Guide • November 2003... -
Page 115: Figure 4-19 Security Main Window
Configuring Security The Password Authorization feature of the SSU allow you to set BIOS passwords and other security options. To configure server security, double-click the PWA Security menu item in the Available Tasks pane of the SSU main window. The main Security window appears (see Figure 4-19). -
Page 116: Using The Ssu To Manage Logs, Records, Hardware, And Events
SDR Manager menu item on the Available Tasks pane of the main SSU window. The SDR Manager main window appears, and you can use the menu bar at the top of the window to manage SDR data. 4-30 Sun Fire V60x and Sun Fire V65x Servers—Troubleshooting Guide • November 2003... -
Page 117: Run Platform Confidence Test (Pct)
Managing the Field Replaceable Units The Field Replaceable Unit (FRU) Manager allows you to view the FRU information stored in the managed server. The FRU records contain information about the system components, such as manufacturer’s name, product name, part number, version number, product and chassis serial number, and asset tags. -
Page 118: Figure 4-20 Reboot Prompt
Note that it is advisable to save the System Event Log to a floppy before running the PCT and that it is recommended that testing not be interrupted during the hardware probe or during the BMC test. 4-32 Sun Fire V60x and Sun Fire V65x Servers—Troubleshooting Guide • November 2003... -
Page 119: Figure 4-21 Warning Prompt
Warning Prompt FIGURE 4-21 3. Press Enter to continue or Esc to exit. If you press Enter, the screen shown in Figure 4-22 appears. Platform Confidence Test Menu FIGURE 4-22 You can use this menu to perform the following tests: Quick Test ■... - Page 120 Platform Confidence Quick Test (first screen) FIGURE 4-23 More screen entries appear as the test progresses. Eventually the screen shown in Figure 4-24 appears. 4-34 Sun Fire V60x and Sun Fire V65x Servers—Troubleshooting Guide • November 2003...
- Page 121 Platform Confidence Quick Test Hardware Test Configuration (last screen) FIGURE 4-24 This screen indicates the hardware configuration that has been determined from the initial tests. 2. If the hardware configuration does not match the configuration of your server, press the Ctrl and Break keys simultaneously (Ctrl + Break). You are prompted to check all the cables and your server configuration, then you are exited to the Platform Confidence Test main menu.
- Page 122 Platform Confidence Quick Test Progress FIGURE 4-25 When the testing is done, the results are summarized (see Figure 4-26). Platform Confidence Quick Test Results Summary FIGURE 4-26 4-36 Sun Fire V60x and Sun Fire V65x Servers—Troubleshooting Guide • November 2003...
- Page 123 4. Press any key to see the analog sensor readings (see Figure 4-27). Platform Confidence Quick Test Sensor Readings (first screen) FIGURE 4-27 5. Press any key to see the remaining sensor readings (see Figure 4-28). Platform Confidence Quick Test Sensor Readings (second screen) FIGURE 4-28 Chapter 4 Powering On and Configuring the Server 4-37...
- Page 124 Test Summary ■ Analog Sensor Readings ■ file is overwritten each time you run a test. A sample of the RESULT.LOG file is shown in Figure 4-29. RESULT.LOG 4-38 Sun Fire V60x and Sun Fire V65x Servers—Troubleshooting Guide • November 2003...
-
Page 125: Figure 4-29 Sample Result.log
Sample RESULT.LOG FIGURE 4-29 Chapter 4 Powering On and Configuring the Server 4-39... - Page 126 You are prompted to check all the cables and your server configuration, then you are exited to the Platform Confidence Test main menu. 3. If the configuration is correct, press Enter to continue. 4-40 Sun Fire V60x and Sun Fire V65x Servers—Troubleshooting Guide • November 2003...
- Page 127 Several entries are displayed and scroll past on the screen, showing the test progress (see Figure 4-30). The information is much more detailed than that displayed for the Quick Test. Platform Confidence Comprehensive Test Progress FIGURE 4-30 When the testing is done, the results are summarized (see Figure 4-31). Chapter 4 Powering On and Configuring the Server 4-41...
- Page 128 6. After the analog sensor readings are displayed, press any key to return to the main Platform Confidence Test menu. 7. You can view the file in a similar fashion to that previously RESULT.LOG explained. 4-42 Sun Fire V60x and Sun Fire V65x Servers—Troubleshooting Guide • November 2003...
-
Page 129: Run Baseboard Management Controller (Bmc) Firmware Update
Management Controller (BMC) Firmware Update Use this menu selection to update the Baseboard Management Controller (BMC) firmware. The BMC code resides both on the Sun Fire V60x and Sun Fire V65x servers Diagnostics CD and on the Service Partition in the directory. The C: /BMC BMC firmware can also be updated from a standalone, bootable floppy diskette... -
Page 130: Run Field Replaceable Unit/Sensor Data Record
BIOS becomes corrupted or if you want to set the BIOS settings back to their defaults. A reboot occurs automatically after the update is complete. The BIOS code resides both on the Sun Fire V60x and Sun Fire V65x servers Diagnostics CD and on the Service Partition in the directory. -
Page 131: Using The Sun Diagnostics Cd
The CD ships with all Sun Fire V60x and Sun Fire V65x servers and can used by Sun service personnel as well as end customers. -
Page 132: Create Diskettes
For more information on creating diskettes, see “Create Diskettes” on page 4-25. 4.12.2 Run System Utilities For more information on running system utilities, see “System Utilities” on page 4- 4-46 Sun Fire V60x and Sun Fire V65x Servers—Troubleshooting Guide • November 2003... -
Page 133: Service Partition
This menu item (see Figure 4-32) allows you to find, create, format, or remove a service partition on the hard disk of the Sun Fire V60x and Sun Fire V65x servers. Caution – If you remove the service partition, it possible that you may have to reformat the hard disk to create it again. -
Page 134: Restoring The Service Partition
Boot Complete from the Diagnostics CD FIGURE 4-33 2. Select Service Partition > Run Service Partition Administrator. The Service Partition Administration Menu shown in Figure 4-34 appears. 4-48 Sun Fire V60x and Sun Fire V65x Servers—Troubleshooting Guide • November 2003... -
Page 135: Figure 4-34 Service Partition Administration Menu
The partition will be reformatted and the diagnostic software will be loaded on the partition. For instructions on installing the service partition in a the Sun Fire V60x and Sun Fire V65x servers running the Solaris operating environment, refer to the Sun Fire V60x and Sun Fire V65x Server Solaris Operating Environment Installation Guide (817-2875-xx). -
Page 136: Updating The Server Configuration
The floppy disk activity light is illuminated during the update as the BIOS image is copied to the server’s flash memory. BIOS Update in Progress Prompt FIGURE 4-36 4-50 Sun Fire V60x and Sun Fire V65x Servers—Troubleshooting Guide • November 2003... -
Page 137: Figure 4-37 First Bios Update Finished
Caution – Do not attempt to reboot or power down the server while the BIOS is being updated. You may get unpredictable results. When the first update pass is finished, the screen shown in Figure 4-37 appears. First BIOS Update Finished FIGURE 4-37 Chapter 4 Powering On and Configuring the Server 4-51... -
Page 138: Figure 4-38 Second Bios Update Pass
9. To verify the BIOS has been updated, observe the BIOS Build number as the server boots up (see Figure 4-39). Verifying the BIOS Version FIGURE 4-39 4-52 Sun Fire V60x and Sun Fire V65x Servers—Troubleshooting Guide • November 2003... -
Page 139: Recovering The Bios
4.13.2 Recovering the BIOS If an update to the system BIOS is not successful or if the system fails to complete POST and BIOS is unable to boot an operating system, it may be necessary to run the BIOS recovery procedure. Note –... - Page 140 2. Remove the floppy diskette. 3. Restore the RCVR\BOOT jumper to its original position. 4. Turn on the system power. The system should now boot normally using the updated system BIOS. 4-54 Sun Fire V60x and Sun Fire V65x Servers—Troubleshooting Guide • November 2003...
-
Page 141: Restarting And Shutting Down
4.14 Restarting and Shutting Down You may restart or shut down the Sun Fire V60x and Sun Fire V65x servers using software or hardware. 4.14.1 Software Mechanisms This section describes the software shutdown commands supported by Linux and Solaris. 4.14.1.1... -
Page 142: Hardware Mechanisms
Press the Power button: the server is immediately forced to power down. ■ However, you may lose data. Caution – These hardware mechanisms are not recommended and should be used only as a last resort. 4-56 Sun Fire V60x and Sun Fire V65x Servers—Troubleshooting Guide • November 2003... -
Page 143: Maintaining The Server
C H A P T E R Maintaining the Server This chapter describes how to replace components in the Sun Fire V60x and Sun Fire V65x servers after they have been set up. It contains the following sections: “Tools and Supplies Needed” on page 5-2 ■... -
Page 144: Tools And Supplies Needed
I/O connectors or ports on the back of the system. 4. Before handling components, attach a wrist strap to a chassis ground of the system (any unpainted metal surface). Sun Fire V60x and Sun Fire V65x Servers—Troubleshooting Guide • November 2003... -
Page 145: Removing And Replacing The Cover
Removing and Replacing the Cover Many of the equipment replacement procedures require that you remove the chassis cover. Before you remove the cover, observe the safety instructions in the section titled “Safety: Before You Remove the Cover” on page 5-2 To remove the cover, follow these steps: 1. -
Page 146: Customer Replaceable Unit (Cru) Procedures
BIOS settings, regardless of how the server boot options have been set up using the System Setup Utility or the BIOS setup. Sun Fire V60x and Sun Fire V65x Servers—Troubleshooting Guide • November 2003... -
Page 147: Front Bezel
Replace the bezel using the reverse process (see Figure 5-2 and Figure 5-3). 1 Chassis Handle 2 Bezel Locating Tab Sun Fire V60x Server Bezel Replacement FIGURE 5-2 Chapter 5 Maintaining the Server... -
Page 148: Figure 5-3 Sun Fire V65X Server Bezel Replacement
1 Chassis Handle 2 Bezel Locating Tab Sun Fire V65x Server Bezel Replacement FIGURE 5-3 Sun Fire V60x and Sun Fire V65x Servers—Troubleshooting Guide • November 2003... -
Page 149: Floppy/Dvd/Cd-Rom Combo Module
AC power cord from the system or wall outlet. Note – In the Sun Fire V60x server, the floppy/DVD/CD-ROM module may be replaced with a hard disk drive. If you do this, you need to install a small plastic cover to cover the gap at the right side of the drive that is left by removal of the (larger size) floppy/CD-ROM module. -
Page 150: Figure 5-4 Floppy/Cd-Rom Module Replacement
FIGURE 5-4 Note – The Comprehensive Test should be run after changing any FRU, CRU, or adding an optional component. See “Run Platform Confidence Test (PCT)” on page 4-31. Sun Fire V60x and Sun Fire V65x Servers—Troubleshooting Guide • November 2003... -
Page 151: Memory
The memory system on the main board has the following features: The maximum memory capacity is 12 GB on the Sun Fire V65x server and 6 GB on ■ the Sun Fire V60x server. The minimum memory capacity is 256 MB ■... -
Page 152: Sun Fire V60X Server Dimm Replacement
5.5.3.1 Sun Fire V60x Server DIMM Replacement To replace DIMMs in a Sun Fire V60x server, follow these steps while referring to Figure 5-5: 1. Before removing the cover to work inside the system, observe the safety guidelines previously stated. -
Page 153: Figure 5-5 Dimm Installation
Ejector bar Connector slot notch DIMM Installation FIGURE 5-5 Chapter 5 Maintaining the Server 5-11... -
Page 154: Figure 5-6 Dimm Pair Locations
Note – The Comprehensive Test should be run after changing any FRU, CRU, or adding an optional component. See “Run Platform Confidence Test (PCT)” on page 4-31. 5-12 Sun Fire V60x and Sun Fire V65x Servers—Troubleshooting Guide • November 2003... -
Page 155: Sun Fire V65X Server Dimm Replacement
5.5.3.2 Sun Fire V65x Server DIMM Replacement 1. Observe all safety precautions and remove the server top cover. 2. Remove the DIMM fan assembly by disconnecting the DIMM fan cable from the main fan module, then squeezing the vertical fan support bars to release the DIMM fan (see Figure 5-7). -
Page 156: Installing The Dimm Fan (Sun Fire V65X Server Only)
2. Slide the DIMM fan assembly over the vertical support bars until the assembly snaps into place (see Figure 5-8 and follow steps a through d below). Vertical Fan Support Bar Location FIGURE 5-8 5-14 Sun Fire V60x and Sun Fire V65x Servers—Troubleshooting Guide • November 2003... -
Page 157: Figure 5-9 Connecting The Dimm Fan Power Cable
a. Orient the support bars so that the curved bottom aligns with the notches in the two middle DIMM ejector bars. b. Gently push each support bar onto the two ejector bars until they are held firmly in place. Make sure the DIMMs stay securely seated in their sockets. c. -
Page 158: Replacing A Server Cpu And Heatsink
Replacing a Server CPU and Heatsink Caution – The procedure below is for the attention of qualified service engineers only. Before touching or replacing any component inside the Sun Fire V60x and Sun Fire V65x servers, disconnect all external cables and follow the instructions in “Safety: Before You Remove the Cover”... -
Page 159: Sun Fire V60X Server Heatsink And Processor Removal
Push release tab c. Slide left and up. Note – In the Sun Fire V60x server, the fan module must be removed to access the retention clip nearest the front of the server. 5. As shown in panel 3 of Figure 5-10, insert the heatsink retention clip removal tool into the hole in the end of one of the retention clips and then: a. -
Page 160: Figure 5-10 Sun Fire V60X Server Heatsink And Processor Removal
CPU 1 CPU 2 Sun Fire V60x Server Heatsink and Processor Removal FIGURE 5-10 5-18 Sun Fire V60x and Sun Fire V65x Servers—Troubleshooting Guide • November 2003... -
Page 161: Sun Fire V60X Server Heatsink And Processor Replacement
5.5.4.3 Sun Fire V60x Server Heatsink and Processor Replacement Installing a replacement heatsink and processor is essentially the reverse of the procedure given in the previous section. Note – When a processor kit includes new heatsink retention clips, use them in place of the old ones. -
Page 162: Figure 5-12 Inserting The Processor
Caution – Misorientation of the heatsink will result in poor contact between heatsink and processor. Not only will the processor overheat, but both processor and socket may be damaged when securing the heatsink with the metal retention clips. 5-20 Sun Fire V60x and Sun Fire V65x Servers—Troubleshooting Guide • November 2003... -
Page 163: Figure 5-14 Installing The Heatsink (Retention Clip Details)
9. Install the heatsink retention clips using the retention clip tool. Note – Make sure to install both retention clips. Installing the Heatsink (Retention Clip Details) FIGURE 5-14 Warning – Incorrect use of the tool can cause the tool to slip from the retention clip and strike the server board, possibly causing severe damage to the board or board components. -
Page 164: Sun Fire V65X Server Heatsink And Processor Removal
Release the other end of the clip and slide the clip in a horizontal direction to free it from the middle tab. 4. Remove both retention clips and the heatsink as shown in panel 3. 5-22 Sun Fire V60x and Sun Fire V65x Servers—Troubleshooting Guide • November 2003... -
Page 165: Figure 5-15 Sun Fire V65X Server Heatsink And Processor Removal
5. As shown in panel 4: a. Grasp the end of the socket lever and raise it to disengage the processor pins. b. Lift the processor straight up out of the socket. Caution – Do not place the thermal-pasted side of the processor or heatsink on any surface, as it may pick up contaminants, causing incorrect processor mating and possible overheating. -
Page 166: Sun Fire V65X Server Heatsink And Processor Replacement
FIGURE 5-16 3. Align the corner mark on the processor with the mark on the socket. 4. Insert the processor into the socket as shown in Figure 5-17. 5-24 Sun Fire V60x and Sun Fire V65x Servers—Troubleshooting Guide • November 2003... -
Page 167: Figure 5-17 Inserting The Processor
Inserting the Processor FIGURE 5-17 5. Verify that the processor sits flush and level on the socket. 6. Close the socket lever until it locks and secures the processor in the socket. Closing the Socket Lever FIGURE 5-18 Caution – Move the socket lever slowly and make sure that it is engaged on the locking tab on the side of the socket. -
Page 168: Figure 5-19 Installing The Heatsink (Retention Clip Details)
Gradually move the top of the tool handle back toward the heatsink in such as manner as to slide the center of the clip over the retainer tab, securing it in place. 5-26 Sun Fire V60x and Sun Fire V65x Servers—Troubleshooting Guide • November 2003... -
Page 169: Sun Fire V60X And Sun Fire V65X Servers New Cpu And Heatsink Installation
Caution – The procedure below is for the attention of qualified service engineers only. Before touching or replacing any component inside the Sun Fire V60x and Sun Fire V65x servers, disconnect all external cables and follow the instructions in “Safety: Before You Remove the Cover”... -
Page 170: Figure 5-20 Opening The Socket Lever
FIGURE 5-20 4. Align the corner mark on the processor with the mark on the socket. 5. Insert the processor into the socket as shown in Figure 5-21. 5-28 Sun Fire V60x and Sun Fire V65x Servers—Troubleshooting Guide • November 2003... -
Page 171: Figure 5-21 Inserting The Processor
Inserting the Processor FIGURE 5-21 6. Verify that the processor sits flush and level on the socket. 7. Close the socket lever until it locks and secures the processor in the socket. Closing the Socket Lever FIGURE 5-22 Caution – Move the socket lever slowly and make sure that it is engaged on the locking tab on the side of the socket. -
Page 172: Figure 5-23 Applying Thermal Conducting Material
Caution – Misorientation of the heatsink will result in poor contact between heatsink and processor. Not only will the processor overheat, but both processor and socket may be damaged when clamping the heatsink down. 5-30 Sun Fire V60x and Sun Fire V65x Servers—Troubleshooting Guide • November 2003... -
Page 173: Figure 5-25 Installing The Heatsink (Retention Clip Details)
11. Install the heatsink retention clips using the retention clip tool. Note – Make sure to install both retention clips. Installing the Heatsink (Retention Clip Details) FIGURE 5-25 Warning – Incorrect use of the tool can cause the tool to slip from the retention clip and strike the server board, possibly causing severe damage to the board or board components. -
Page 174: Power Supply Unit
5.5.6 Power Supply Unit Caution – The Sun Fire V60x server does not have a redundant power supply. Before replacing the power supply, you must take the server out of service. The Sun Fire V65x server, however, may be optionally equipped with a redundant power supply. -
Page 175: Figure 5-26 Removing The Power Supply
3. Push the module to the rear of the chassis until it disengages from the power distribution board. 4. Lift the module out of the chassis. Raised Metal Removing the Power Supply FIGURE 5-26 Chapter 5 Maintaining the Server 5-33... -
Page 176: Sun Fire V65X Server Power Supply
6. When the module is nearly all of the way in, the handle will rotate up. At this time, push firmly on the front of the handle to lock the latch. 5-34 Sun Fire V60x and Sun Fire V65x Servers—Troubleshooting Guide • November 2003... -
Page 177: Figure 5-27 Replacing The Power Supply
Replacing the Power Supply FIGURE 5-27 Chapter 5 Maintaining the Server 5-35... -
Page 178: Hard Disk Drives
7. Reinstall a carrier in any bays where you are not reinstalling a HDD assembly. 5-36 Sun Fire V60x and Sun Fire V65x Servers—Troubleshooting Guide • November 2003... -
Page 179: Figure 5-28 Removing A Hdd Assembly From A Bay
1 Bezel 2 Chassis Handle 3 Bezel Locating Tabs 4 Retention Lever Removing a HDD Assembly From a Bay FIGURE 5-28 Note – The Comprehensive Test should be run after changing any FRU, CRU, or adding an optional component. See “Run Platform Confidence Test (PCT)” on page 4-31. -
Page 180: Air Baffle
This section explains how to remove and replace the air baffles for the servers. Caution – Before touching or replacing any component inside the Sun Fire V60x and Sun Fire V65x servers, disconnect all external cables and follow the instructions in “Safety: Before You Remove the Cover”... -
Page 181: Sun Fire V60X Server Air Baffle Installation
5.5.8.2 Sun Fire V60x Server Air Baffle Installation Follow these steps to install the air baffle: 1. Ensure the flex cable, auxiliary power cable, USB ribbon cable, and SCSI cables are routed under where you will be installing the air baffle. -
Page 182: Sun Fire V65X Server Air Baffle Removal
2. Route the SCSI cable through the slot on the top of the air baffle. 3. Secure the air baffle to the backplane using the blue thumbscrew. 5-40 Sun Fire V60x and Sun Fire V65x Servers—Troubleshooting Guide • November 2003... -
Page 183: Fan Module
5.5.9 Fan Module Caution – Before touching or replacing any component inside the Sun Fire V60x and Sun Fire V65x servers, disconnect all external cables and follow the instructions in “Safety: Before You Remove the Cover” on page 5-2 and “Removing and Replacing the Cover”... -
Page 184: Figure 5-32 Removing The Fan Module
Removing the Fan Module FIGURE 5-32 5-42 Sun Fire V60x and Sun Fire V65x Servers—Troubleshooting Guide • November 2003... -
Page 185: Sun Fire V60X Server Fan Module Replacement
Sun Fire V60x Server Fan Module Replacement Replacing the fan module is essentially the reverse of the procedure described in “Sun Fire V60x Server Fan Module Removal” on page 5-41. 1. Remove the air baffle. 2. Remove the processor air duct. -
Page 186: Sun Fire V65X Server Fan Module Removal
5.5.9.3 Sun Fire V65x Server Fan Module Removal Unlike the fan module in the Sun Fire V60x server, the fans in the Sun Fire V65x server are individually replaceable. To replace an individual fan, first remove the fan module according to the instructions below while referring to Figure 5-33. -
Page 187: Figure 5-33 Removing The Fan Module
Front panel USB Ribbon Cable Cable Retention Clip Floppy/FP/IDE Cable Reverse view to DIMM fan Removing the Fan Module FIGURE 5-33 Chapter 5 Maintaining the Server 5-45... -
Page 188: Sun Fire V65X Server Fan Module Replacement
Note – The Comprehensive Test should be run after changing any FRU, CRU, or adding an optional component. See “Run Platform Confidence Test (PCT)” on page 4-31. 5-46 Sun Fire V60x and Sun Fire V65x Servers—Troubleshooting Guide • November 2003... -
Page 189: Pci Cards
The server supports 3V only and Universal PCI cards. It does not support 5V only cards. Caution – Before touching or replacing any component inside the Sun Fire V60x and Sun Fire V65x servers, disconnect all external cables and follow the instructions in “Safety: Before You Remove the Cover”... -
Page 190: Figure 5-34 Removing A Pci Card
Note – Hardware detection on startup (Kudzu) reports the on-board Intel Ethernet interfaces as Generic e1000 devices, rather than detecting the actual brand name of the device that is installed. Removing a PCI Card FIGURE 5-34 5-48 Sun Fire V60x and Sun Fire V65x Servers—Troubleshooting Guide • November 2003... -
Page 191: Battery
5.5.11 Battery Caution – Before touching or replacing any component inside the Sun Fire V60x and Sun Fire V65x servers, disconnect all external cables and follow the instructions in “Safety: Before You Remove the Cover” on page 5-2 and “Removing and Replacing the Cover”... -
Page 192: Figure 5-35 Replacing The Backup Battery
Note – The Comprehensive Test should be run after changing any FRU, CRU, or adding an optional component. See “Run Platform Confidence Test (PCT)” on page 4-31. 5-50 Sun Fire V60x and Sun Fire V65x Servers—Troubleshooting Guide • November 2003... -
Page 193: Keyboard/Mouse "Y" Adapter
5.5.12 Keyboard/Mouse “Y” Adapter To install the PS/2 keyboard/mouse “Y” adapter, install the adapter into the round keyboard/mouse connector as shown in Figure 5-36. Installing the PS/2 Keyboard/Mouse “Y” Adapter FIGURE 5-36 Chapter 5 Maintaining the Server 5-51... -
Page 194: Emergency Management Port Cable
1. Plug the DCD Modem cable into the rear panel RJ-45 Serial COM2 connector as shown in Figure 5-37. 2. Configure the J5A2 jumper as shown in Figure 5-37. 5-52 Sun Fire V60x and Sun Fire V65x Servers—Troubleshooting Guide • November 2003... -
Page 195: Figure 5-37 Installing The Emp Cable
Rear RJ-45 connector DSR Peripherals cable DCD Modem cable DSR signal configuration (RJ-45 pin 7 connected to DSR pin 6 of DB9) J5A2 J5A2 J5A2 Jumper Block (viewed from front of server) J5A2 Jumper Block (viewed from front of server) DCD signal configuration (RJ-45 pin 7 connected to DCD pin 1 of DB9) -
Page 196: Field Replaceable Unit (Fru) Procedures
Field Replaceable Unit (FRU) Procedures This section explains how to replace the FRUs in the Sun Fire V60x and Sun Fire V65x servers. 5.6.1 Server Main Board Note – The Main Board contains no DIMMs or CPUs, and is packaged in an ESD bag with two foam pieces and an ESD wrist strap. - Page 197 6. Remove the power supply. 7. Remove the air baffle. 8. Unscrew and remove the blue plastic retention clip that holds down the flex cable onto the server board. 9. At the backplane board, disconnect the ribbon cable from the front panel board. 10.
-
Page 198: Figure 5-38 Location Of The Mounting Screws
23. While placing the board on the chassis standoffs, carefully align the board I/O connectors with the rear chassis I/O openings. 24. Adjust the board’s position so that the three mounting holes rest securely on the shouldered standoffs. 5-56 Sun Fire V60x and Sun Fire V65x Servers—Troubleshooting Guide • November 2003... - Page 199 25. Reattach the board to the chassis using the three mounting screws. Note – The server board uses three holes to mount the board to the chassis standoffs. 26. Install the processor retention mechanisms using the eight screws you removed earlier, along with the processor(s), heatsink(s), and DIMMs that you wish to use with the new board.
-
Page 200: Sun Fire V65X Server Main Board Replacement
Note – Some cables may be soldered at one end. Remove only the connectorized end. 12. Remove the heat sink, processor air dam, and any processors and memory DIMMs that you wish to use with the new board. 5-58 Sun Fire V60x and Sun Fire V65x Servers—Troubleshooting Guide • November 2003... -
Page 201: Figure 5-39 Location Of The Mounting Screws
13. Remove the eight screws that secure the processor retention mechanisms and the three mounting screws that secure the server board to the chassis (see Figure 5-39). Caution – Make sure that all 11 screws have been removed before attempting to take out the board. - Page 202 Note – The Comprehensive Test should be run after changing any FRU, CRU, or adding an optional component. See “Run Platform Confidence Test (PCT)” on page 4-31. 5-60 Sun Fire V60x and Sun Fire V65x Servers—Troubleshooting Guide • November 2003...
-
Page 203: Cable Kit
Cable Kit Caution – The procedure below is for the attention of qualified service engineers only. Before touching or replacing any component inside the Sun Fire V60x and Sun Fire V65x servers, disconnect all external cables and follow the instructions in “Safety: Before You Remove the Cover”... -
Page 204: Figure 5-40 Sun Fire V60X Server Cable Kit Removal
SCSI Cable Floppy/ FP/IDE cable Backplane Ribbon Cable Backplane Board USB Ribbon Cable Sun Fire V60x Server Cable Kit Removal FIGURE 5-40 5-62 Sun Fire V60x and Sun Fire V65x Servers—Troubleshooting Guide • November 2003... - Page 205 Backplane board board to the backplane Server board G. From the fan module to the server board fan connector H. To the server board Auxiliary Power connector Sun Fire V60x Server Cable Routing FIGURE 5-41 Chapter 5 Maintaining the Server 5-63...
-
Page 206: Sun Fire V60X Server Cable Kit Installation
1. If you previously removed the SCSI backplane board to remove the USB cable: a. Replace the USB cable by connecting it from the front panel board to the USB connector (Figure 5-41, E) on the server board. 5-64 Sun Fire V60x and Sun Fire V65x Servers—Troubleshooting Guide • November 2003... - Page 207 b. Replace the SCSI backplane board: i. Place the board over all six of the round standoff posts. ii. Slide the board to the left until it is fully secured by the standoffs. iii. Install the thumbscrew at the right side of the board. 2.
-
Page 208: Sun Fire V65X Server Cable Kit Removal
8. Remove the SCSI cable that runs from the SCSI backplane to the server board. 5-66 Sun Fire V60x and Sun Fire V65x Servers—Troubleshooting Guide • November 2003... -
Page 209: Figure 5-43 Sun Fire V65X Server Cable Kit Removal
1 SCSI Cable 2 Floppy/FP/IDE cable 3 Backplane ribbon cable 4 USB ribbon cable Sun Fire V65x Server Cable Kit Removal FIGURE 5-43 Chapter 5 Maintaining the Server 5-67... -
Page 210: Figure 5-44 Sun Fire V65X Server Cable Routing
To server board auxiliary power connector from power supply Serial cable from server board to knockout on back of chassis (optional) Sun Fire V65x Server Cable Routing FIGURE 5-44 5-68 Sun Fire V60x and Sun Fire V65x Servers—Troubleshooting Guide • November 2003... -
Page 211: Sun Fire V65X Server Cable Kit Installation
5.6.2.4 Sun Fire V65x Server Cable Kit Installation Before removing the cover to work inside the system, observe the safety guidelines previously given. To replace cables, remove the cover and refer to Figure 5-43 through Figure 5-46 when following these steps: 1. -
Page 212: Figure 5-46 Installing The Backplane Retention Clip
Note – The Comprehensive Test should be run after changing any FRU, CRU, or adding an optional component. See “Run Platform Confidence Test (PCT)” on page 4-31 5-70 Sun Fire V60x and Sun Fire V65x Servers—Troubleshooting Guide • November 2003... -
Page 213: System Fru
A System FRU is the Main Board with SCSI backplane, power supply, power supply distribution board (Sun Fire V60x server), front-panel board, fan module and all cables, in a Sun Fire V60x server or Sun Fire V65x server chassis. The System FRU contains no CPU(s), HDDs, Floppy/CD-ROM/DVD combo or DIMMs. The field engineer transfers the customer's CPU(s), HDDs, Floppy/CD-ROM/DVD combo and DIMMs to the new assembly. -
Page 214: Figure 5-47 Sun Fire V60X And Sun Fire V65X Servers System Fru Installation
Connector slot notch Sun Fire V60x and Sun Fire V65x Servers System FRU Installation FIGURE 5-47 5-72 Sun Fire V60x and Sun Fire V65x Servers—Troubleshooting Guide • November 2003... - Page 215 Index NUMERICS disk drive activity light off, 2-12 distorted characters on video screen, 2-11 5V Standby LED, 2-3 hard drives don’t show up, 2-5 network problem, 2-13 no video on screen, 2-10 power LED does not light, 2-9 server does not power on, 2-3 add-in cards, 2-2 server starts to boot at power on, 2-7 clearing CMOS, 4-6...
- Page 216 J5A2 jumper block, 4-4 after system has been running correctly, 1-12 jumpers, main board, 1-5 application software, 2-14 bootable CD-ROM not detected, 2-14 cannot connect to network server, 2-13 Sun Fire V60x and Sun Fire V65x Servers—Troubleshooting Guide • November 2003...
- Page 217 CD-ROM drive activity light, 2-12 reboot system, 4-44 characters on screen are distorted or incorrect, 2- reboot to service partition, 4-44 restoring, 4-48 confirm OS loading, 2-8 run Baseboard Management Controller (BMC) diskette drive light, 2-12 firmware update, 4-43 initial system startup, 1-10 run BIOS update, 4-44 key system LEDs, 2-8 run Field Replaceable Unit/Sensor Data Record...
- Page 218 2-1 Watchdog timers, 4-19 Sun Fire V60x and Sun Fire V65x Servers—Troubleshooting Guide • November 2003...
Need help?
Do you have a question about the Sun Fire V60x and is the answer not in the manual?
Questions and answers