SoftBank Whiz Operational Manual
Hide thumbs
Also See for Whiz:
- Operational manual (147 pages) ,
- Operation manual (123 pages) ,
- Manual (15 pages)
Table of Contents
Advertisement
Quick Links
Advertisement
Table of Contents

Related Manuals for SoftBank Whiz


Summary of Contents for SoftBank Whiz
-
Page 2: Table Of Contents
TABLE OF CONTENTS Introduction Safety Warnings About Safety Warnings Description of Symbols Description of Pictorial Indications Handling the Machine, Battery Charger, Battery and Notification Pager (Common) Handling the Machine Handling the Battery Charger Handling the Notification Pager Handling the Battery Handling near Electronic Medical Devices Lasers and Infrared Light Sensor Detection Range... - Page 3 Operation Main Power Switch Turning the Power On Turning the Power Off Secondary Battery Power Button LED Lights Touch Display Indications on the Touch Display Lock the Touch Display Vacuum Power Button Max Power Mode Button Steering Handle Using the Steering Handle Stowing the Steering Handle Notification Pager Autonomous Clean Start/Stop Button...
- Page 4 Carrying Out Autonomous Cleaning (Multiples Routes) Carrying Out Autonomous Cleaning Using Delay Start Deleting Cleaning Routes Manual Cleaning Notification Pager Notification Pager Functions Notification Pager Functions & Usage Alert display and its notification timing Turning the Notification Pager On/Off Turning the Notification Pager On Turning the Notification Pager Off Pairing the Notification Pager Recharging the Notification Pager...
- Page 5 Stopping the Machine in an Emergency Releasing the Machine from Emergency Stop Checking Machine Alerts Machine Specifications Glossary...
-
Page 6: Introduction
Whiz Operational Manual Introduction Whiz is an industrial-purpose robot vacuum machine developed by SoftBank Robotics and which features onboard BrainOS. It is able to clean in two different modes (autonomous cleaning mode/manual cleaning mode). In autonomous cleaning mode, the machine cleans automatically, controlled by the BrainOS. -
Page 7: Safety Warnings
Always adhere to warnings regarding machine installation, maintenance, and use and store this manual where it can always be referred to. Whiz operators are advised to take normal health and safety precautions suitable to their environment. -
Page 8: Handling The Machine, Battery Charger, Battery And Notification Pager (Common)
Servicing, disassembly, modification, soldering, replacement or other repair work may not be undertaken by persons other than by SoftBank Robotics or other authorized service staff. Use only the battery charger and battery that came with the machine when recharging the machine. - Page 9 Do not expose to warm air from a dryer or hot water. Doing so may cause fire, injury, electric shock, damage, malfunction, overheating, leakage chemical explosion, or other damage to the machine, battery charger, battery or notification pager. Do not allow liquid or quasi-liquid substance or any foreign objects to touch the charging terminals or external connection terminals of the battery charger or battery, or to otherwise enter the machine.
-
Page 10: Handling The Machine
Handling the Machine DANGER Use the machine within an ambient temperature range of 5°C to 40°C, humidity of 10% to 80%. Also, store in a dry environment with no dust in an ambient temperature range of 5°C to 40°C. Failure to do so may result in fire, injury, electric shock, damage, malfunction, overheating, leakage, chemical explosion, or other damage to the machine, battery charger, battery or notification pager. - Page 11 WARNING Do not use the machine with the grounding chain not in contact with the floor. If the grounding chain breaks or comes off, contact customer support. Failure to do so may cause electric shock or injury to the operator or damage to the machine. If the secondary battery is off/low, do not remove the battery with the main power switch on the machine on.
- Page 12 The machine cannot vacuum liquid. Operating the machine on a wet (moist) floor may cause malfunction. Only use the machine on a dry floor. CAUTION If the machine has fallen over, press the emergency stop button and then turn off the main power switch on the machine.
-
Page 13: Handling The Battery Charger
Handling the Battery Charger DANGER Do not use the battery charger at or near a place with dust, salt, corrosive gas, or flammable gas. Using the battery charger at or near a place with dust, salt, corrosive gas or flammable gas could cause fire, injury, electric shock, damage, malfunction, chemical explosion, or other damage to the machine, battery charger, battery or notification pager or surrounding individuals or property. - Page 14 The battery charger is specifically for being placed sideways. Do not use it placed standing or upside down. Doing so may cause fire, injury, electric shock, damage, malfunction, overheating, leakage, chemical explosion, or other damage to the machine, battery charger, battery or notification pager. Always unplug the battery charger from the outlet if not using it for a long time or when carrying out maintenance on it.
-
Page 15: Handling The Notification Pager
Handling the Notification Pager DANGER Do not drop or throw. Subjecting it to strong impact may cause the battery pack in the notification pager to leak, overheat, rupture, or ignite, and otherwise result in injury, electric shock, damage, malfunction, overheating, leakage, chemical explosion, or other damage to the machine, battery charger, battery or notification pager. -
Page 16: Handling The Battery
Handling the Battery DANGER Use the machine within an ambient temperature range of 0°C to 45°C. Also store in a dry environment with no dust in an ambient temperature range of 0°C to 45°C. Failure to do so may cause fire, injury, electric shock, damage, malfunction, overheating, leakage, chemical explosion, or other damage to the machine, battery charger, battery or notification pager. -
Page 17: Handling Near Electronic Medical Devices
(compliant with JIS C6802). For information on lasers, see “Sensor Detection Range”. For details, please see “Product Certifications for Whiz/ Product Certifications for Whiz Notification Pager”. You can check latest data on "Whiz Connect". -
Page 18: Pictorial Symbols
FCC Compliance Statement The Whiz Vacuum and the Notification Pager comply with part 15 of the FCC rules. Note with respect to the Whiz Vacuum: This equipment has been tested and found to comply with the limits for a Class A digital device, pursuant to part 15 of the FCC Rules. -
Page 19: Machine Disposal And Recycling
CHANGES OR MODIFICATIONS TO THE WHIZ VACUUM AND ANY COMPONENTS THEREOF (INCLUDING THE NOTIFICATION PAGER) NOT EXPRESSLY APPROVED BY SOFTBANK ROBOTICS MAY VOID THE USER’S ABILITY TO OPERATE THE EQUIPMENT. IC Compliance This device complies with Innovation, Science and Economic Development Canada S licence-exempt RSSs Operation is subject to the following conditions: 1. -
Page 20: Warning Labels
Warning Labels A warning label is stuck inside of the battery door of the machine. Refer to the laws and regulations on this link https://ushelp.softbankrobotics.com/whiz for details on the warning labels. -
Page 21: Supplied Accessories
Whiz Operational Manual Supplied Accessories Items delivered with / inside the accessory box All accessories besides the brush are stored in the accessory box inside the battery compartment (⇒see "Names of Parts"). Brush×1 Notification Pager×1 Notification pager Charger×1 Micro USB cable×1 Micro-fiber cloth×1... -
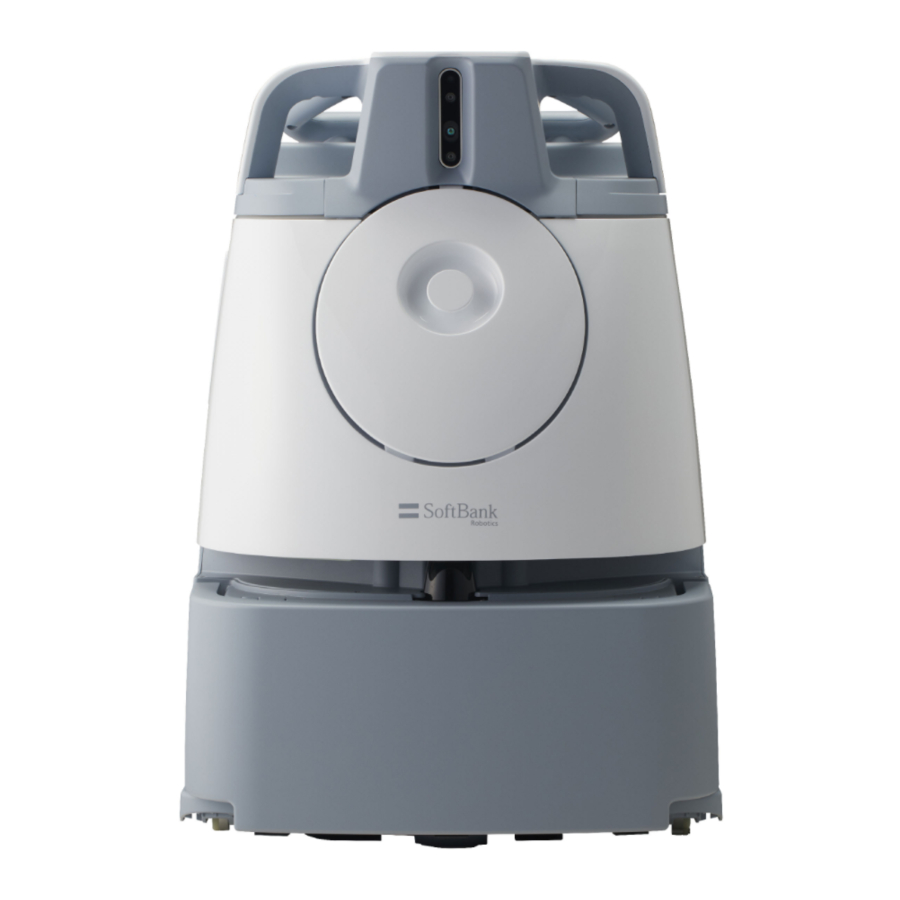
Page 22: Names Of Parts
Whiz Operational Manual Names of Parts Machine Front/Side, Back Item Lift handles LED light Pager compartment Wheel 2D/3D camera (sensor) Dustbin LIDAR sensor Bumper Steering handle Main power switch Filter cover Battery compartment Rubber pad... - Page 23 Machine Top, Bottom Item Emergency stop button Touch display Max power mode button Autonomous clean start/stop button Vacuum power button Front wheel Brush compartment Hopper tray Secondary battery power button Rear caster Grounding chain Cliff sensor...
-
Page 24: Machine Setup And Parts Installation
Whiz Operational Manual Machine Setup and Parts Installation Unpacking the Machine For your safety, work with more than two people when unpacking the machine. Check that the packaging is not damaged; if damaged, immediately contact customer support. Do not discard the packaging box or packing material, and store it safely. - Page 25 Remove the outer box Also remove the brush that is attached inside the outer box. Remove the cushioning material Take the machine out of the inner box...
- Page 26 Remove the plastic bag Remove the cushioning materialAbetween the bumper and the machine Either hold the lift handles (C) or use the steering handle (D) to bring the machine to the cleaning location...
-
Page 27: Preparing To Use The Machine
Whiz Operational Manual Preparing to Use the Machine Check the Emergency Stop Button Check that the Emergency Stop Button is not pressed. If pressed, turn it to the right to release. -
Page 28: Check The Dustbag
Check the Dustbag Make sure the dustbag is properly installed to the machine. If it has not been properly installed or if the dustbin cover does not close, reinstall the dustbag by following the dustbag installment procedure (⇒see “Dustbag”). Hold the dustbin access handle and pull it down Remove the dustbin cover Check that the dustbin pin is afloat If the dustbag is correctly set, the pin will float. - Page 29 Insert the catches at the bottom of the cover in the bottom of the dustbin ① and close the cover while pushing down on the dustbin access handle ②...
-
Page 30: Check The Hepa Filters
Check the HEPA Filters Make sure the HEPA filter is properly installed to the machine. If they have not been properly installed, reinstall the filters by following the HEPA filter installment procedure (⇒see “HEPA Filters”). Remove the cover by turning it to the left Check that the HEPA filter is properly installed Attach the cover back on to the machine and turn it to the right until it clicks to close Check the other HEPA Filter with the same procedure... -
Page 31: Check The Hopper Tray
Check the Hopper Tray Check that the Hopper Tray is properly installed. If it is not installed properly, reinstall the Hopper Tray (⇒see “Hopper Tray”). From the back of the machine, check if the Hopper tray is installed correctly... -
Page 32: Installing The Brush
Installing the Brush Stow the steering handle ( ⇒ see “Steering handle”) Hold the lift handle with one hand, and hold the steering handle down with another hand Please operate with two people. - Page 33 Gently lay the machine down so that the dustbin faces upward The Rubber pad will support and stabilize the machine. Please ensure that the steering handle does not stick out of the machine. Take care not to let the machine fall forcefully or to turn. A concrete or other hard surface will scratch the machine;...
- Page 34 Check the marks on the left and right ends of the new brush The mark on the left The mark on the right When the machine is laid down, with the front side facing up, you will see the sockets of the brush compartment.
- Page 35 Hold the lift handle with one hand, and hold the steering handle down with another hand Please operate with two people. Holding the lift handles by each set of hands, gently raise the machine using two people Please ensure that the steering handle is not sticking out of the machine.
-
Page 36: Charging The Battery And Installing It Into The Machine
Charging the Battery and Installing it into the Machine Charge the battery ( ⇒ see "Recharging the Battery") Pull the bottom left of the battery door toward you to open Remove the accessory box from inside the battery compartment. Insert a fully charged battery as far as it can go When the battery is locked in, you will hear a “click”... -
Page 37: Removing The Protective Film
Removing the Protective Film Remove the protective film on 2D/3D Camera (sensor) Please be careful not to damage the sensor when removing the film. -
Page 38: Turning The Notification Pager Power On
Turning the Notification Pager Power On Before turning the power On, check that the notification pager is fully charged. If the notification pager battery is low, charge the battery fully before using the pager (⇒see “Recharging the Notification Pager”). Turn the notification pager On ( ⇒ see “Turning the Notification Pager On/Off”) After turning notification pager On, pair the pager (⇒see “Pairing the Notification Pager”). -
Page 39: Connecting To Robot Operations Center (Roc)
Connecting to Robot Operations Center (ROC) When turning the main power switch On, the machine will automatically connect to the network and Robot Operations Center (ROC). Press the main power switch (I/O) to set it on (I) Loading screen will be shown on the touch display. Check the Robot Operations Center indicator at the top right of the touch display ( ⇒... -
Page 40: Operation
Whiz Operational Manual Operation Main Power Switch Turning the Power On Press the main power switch (I/O) to set it on (I) Loading screen will be shown on the touch display. Home screen will be displayed when the Power button is turned On. Do not turn the power Off until the Home screen is displayed. -
Page 41: Secondary Battery Power Button
Secondary Battery Power Button Be sure to turn off the secondary battery power button when using this machine. When replacing the battery during autonomous cleaning, turn on the secondary battery power button before replacing the battery. Autonomous cleaning can be continued without turning the power off. After replacing the battery, turn off the secondary battery power button. - Page 42 Hold the lift handles with both hands, and gently lay the machine on its side so that the side with the dustbin is facing upwards The Rubber pad will support and stabilize the machine. Please ensure that the steering handle is not sticking out of the machine. Take care not to let the machine fall forcefully or to turn.
-
Page 43: Led Lights
LED Lights The LED lights notify you about the state of the machine, error information, etc. The LED lights on the front and back of the machine light in different colors and patterns. Color and pattern Appearance Description Lighting in each color The machine’s system is starting up. - Page 44 Color and pattern Appearance Description Flashing bright red rapidly Emergency stopped. Flashing red rapidly An alert has occurred on the machine. (For instance, this can occur if the machine has been lifted while the system is starting up)
-
Page 45: Touch Display
Touch Display You can check battery level, connection to the Robot Operations Center, error messages, and other information on the touch display. Teaching and selection of cleaning routes necessary for performing autonomous cleaning (⇒see “Autonomous Cleaning (Robot)”) are also done from the touch display. Indications on the Touch Display Main menu screen Item... - Page 46 Main menu screen Item Description Route sync icon It shows synchronization status with the Robot Operations Center when you add or delete new cleaning routes. Route sync icon Robot Operations Center (ROC) display connection status It is the status of synchronization with the Robot Operations Center (ROC) after adding or deleting cleaning routes.
- Page 47 Settings screen Item Description ROUTES Displays a list of Home Location Codes. LANGUAGE Set the language displayed on the touch display. ABOUT Check information such as the software version and the RIN(serial number) of the machine and the network connection status. PIN CODE Change / reset the PIN code.
- Page 48 Error message screen Item Description Notification Appears at upper left of the touch display. For alerts concerning machine components, follow instructions on the touch display to remedy problems. Alert screen You can check the alert by tapping on the notification in “11”. If there are several alerts, tap “>”...
-
Page 49: Lock The Touch Display
Lock the Touch Display You can lock the screen to prevent the touch display from being operated if no screen operation is performed for a certain period of time. You will need to enter a PIN code to unlock it. You can also change and reset the PIN code. - Page 50 Check if “SCREEN LOCKED” is displayed To unlock, tap the lock screen and enter the PIN code.
-
Page 51: Vacuum Power Button
Vacuum Power Button Press the vacuum power button to start vacuuming. Press the button again to stop vacuuming. Pressing the vacuum power button stops vacuuming in either normal mode or max power mode. Max Power Mode Button Press the max power mode button to change the cleaning mode from normal mode to max power mode. To clean in max power mode, check that the vacuum power button is on, and press the max power mode button. -
Page 52: Steering Handle
Steering Handle Use the steering handle to move and change the direction of the machine during manual cleaning, to teach route, and to transport the machine. Observe the following when using the steering handle. Check if the steering handle is unstable (not firmly attached). Avoid abruptly turning with the steering handle. -
Page 53: Using The Steering Handle
Using the Steering Handle n Extend the steering handle to move the machine forward and to change directions. To extend the steering handle, hold with both hands and pull it straight up. When you see the white line at the base of the handle, lower the steering handle toward you. -
Page 54: Notification Pager
Notification Pager If the machine stops operating during autonomous cleaning or the battery becomes low, the notification pager (⇒see “Notification Pager”) is alerted by the machine, and the notification pager emits an alert and vibrates to notify the operator. -
Page 55: Autonomous Clean Start/Stop Button
Autonomous Clean Start/Stop Button Press the autonomous clean start/stop button to start autonomous cleaning mode(⇒see “Autonomous Cleaning (Robot)”), pause the machine, or restart cleaning. The autonomous clean start/stop button is used only in autonomous cleaning mode. Press the autonomous clean start/stop button Autonomous cleaning starts. -
Page 56: Inspection Before Operating The Machine
Whiz Operational Manual Inspection Before Operating the Machine Before starting manual cleaning mode/autonomous cleaning mode, be sure to perform the following inspection. Inspecting the Machine n Check that the emergency stop button is not pressed. n Check that the grounding chain on the bottom of the machine is in contact with the floor. -
Page 57: Autonomous Cleaning (Robot)
Whiz Operational Manual Autonomous Cleaning (Robot) Overview The machine is capable of automatically cleaning on a saved cleaning route (autonomous cleaning mode). To clean in autonomous cleaning mode, you must first teach a cleaning route to the machine either automatically ( see “Teaching a Cleaning Route Automatically”) or manually ( see “Teaching a Cleaning Route Manually”) -
Page 58: Home Location Codes
Home Location Codes Home Location Codes are markers indicating where cleaning routes start and stop. They are used for establishing the machine’s home location, and according to the size of the cleaning area, one or several Home Location Codes are used (6 cleaning routes can be saved for 1 Home Location Code). In a building with several floors, a Home Location Code specific to each floor must be placed. -
Page 59: Locations For Placing Home Location Codes
Locations for Placing Home Location Codes n Place Home Location Codes on walls, columns, etc. near areas that are frequently cleaned. n The back of Home Location Codes is sticky, allowing them to be placed directly on walls, etc. Replace with new Home Location Codes if they have lost their stickiness. -
Page 60: Group Function And Cleaning Routes
The machine communicates with the Robot Operations Center (ROC) and taught cleaning routes are saved to the cloud. By assigning multiple robots to the same group through the Whiz Connect Portal*, the robots can share the cleaning routes. When one robot scans the Home location code, all the robots display the same cleaning route. -
Page 61: Cleaning Routes
Cleaning Routes n When teaching a cleaning route, divide the area into zones using floor material and stepped portions as boundaries. n The recommended cleaning route area per one cleaning is about 500 5500 ft when teaching a cleaning route manually (⇒see “Teaching a Cleaning Route Manually”). A cleaning route of over 500 5500 ft may have obstacles that could cause the machine to stop during autonomous cleaning or that could prevent the machine from saving the cleaning route. - Page 62 n Remove any obstacles, cables, etc. from the cleaning route that could be a hindrance to cleaning. If the machine detects an obstacle during autonomous cleaning and slows down/stops, it may be unable to completely clean away all dirt. n Please do not include any of the following locations in the cleaning route. If there are any obstacles, please remove them in advance.
-
Page 63: Robot Operations Center (Roc)
n If the cleaning area is exposed to direct sunlight or strong light, close curtains and blinds to block out light. n Use manual cleaning in the vicinity of automatic doors, window glass, and reflective products such as mirrors. * An error may occur if autonomous cleaning is used. n Some objects laying on a floor may not be detected as obstacles depending on their size (slippers, cords, retracting electrical outlets). -
Page 64: Teaching A Cleaning Route Manually
Teaching a Cleaning Route Manually Planning a Cleaning Route Teach a route that will allow the cleaning area to be cleaned the most optimally and efficiently, taking into consideration its layout and size (area). During autonomous cleaning, the machine will operate at a relatively low speed for safety. Time from start to completion of autonomous cleaning will be longer than the time required to teach the cleaning route. -
Page 65: Teaching And Saving A Cleaning Route
Teaching and Saving a Cleaning Route Before teaching a cleaning route, check “Precautions when Teaching a Cleaning Route”. Pull the steering handle up as far as it will go, and lower it toward you Move the machine to the Home Location Code where cleaning is to be carried out ( ⇒ see “Locations for Placing Home Location Codes”) Press the main power switch (I/O) to set it on (I) A warning screen about escalators, steps or other moving platforms appears on the touch display (⇒see... - Page 66 Check the warning message and tap “CONFIRM” A screen appears on the touch display for selecting “TEACH/CLEAN/SETTINGS”. On the touch display, tap “TEACH” A screen for scanning a Home Location Code appears (⇒see “Home Location Codes”).
- Page 67 Place the machine so that the machine’s sensor and the Home Location Code are parallel, and scan the Home Location Code When the machine has scanned the Home Location Code correctly, a green frame appears. Otherwise, a red frame appears. Check that the Home Location Code is placed in the correct location (⇒see “Locations for Placing Home Location Codes”), or that the Home Location Code and machine are distanced about 80 cm 2.6ft apart.
- Page 68 Check for any escalators, steps or other moving platforms in the cleaning area and tap “NO” Tap “YES” and a barrier warning screen appears. Check the warning message and tap “CONFIRM”. Tap “CANCEL” and a cautionary screen of autonomous cleaning appears. Tap “TEACH ROUTE”...
- Page 69 Use the steering handle to move the machine, and clean the entire cleaning route (teaching route) Changing between normal mode and max power mode ( see “Max Power Mode Button”) is also learned in a cleaning route. Teaching a cleaning route with few detours allows the machine to travel with fewer decreases in speed for more efficient cleaning.
- Page 70 Return to the Home Location Code scanned at step 6 Scan the Home Location Code The cleaning route is saved. Make sure the ROC indicator is displayed and the Route sync icon is see “Touch Display”). ⇒ If the ROC indicator and the Route sync icon are not lit, the taught cleaning route will not be saved in the cloud.
-
Page 71: Teaching A Cleaning Route Automatically
Teaching a Cleaning Route Automatically You can create a cleaning route automatically by only training the perimeter of the cleaning area (within specified limitations). Before teaching a cleaning route, check “Precautions when Teaching a Cleaning Route”. Pull the steering handle up as far as it will go, and lower it toward you Move the machine to the Home Location Code where cleaning is to be carried out ( ⇒... - Page 72 Check the warning message and tap “CONFIRM” A screen appears on the touch display for selecting “TEACH/CLEAN/SETTINGS”. On the touch display, tap “TEACH” A screen for scanning a Home Location Code appears (⇒see “Home Location Codes”).
- Page 73 Place the machine so that the machine’s sensor and the Home Location Code are parallel, and scan the Home Location Code When the machine has scanned the Home Location Code correctly, a green frame appears. Otherwise, a red frame appears. Check that the Home Location Code is placed in the correct location (⇒see “L ocations for Placing Home Location Codes ”), or that the Home Location Code and machine are distanced about 80 cm 2.6ft apart.
- Page 74 Check for any escalators, steps or other moving platforms in the cleaning area and tap “NO” Tap “YES” and a barrier warning screen appears. Check the warning message and tap “CONFIRM”. Tap “CANCEL” and a cautionary screen of autonomous cleaning appears. Tap “TEACH BOUNDARY”...
- Page 75 Use the steering handle to move the machine, and clean the boundary of the cleaning area (teaching route) Clean around the boundary once so that one side of the perimeter of the cleaning area is 10 m or less and another side is 100 m or less.
- Page 76 Press the Vacuum power button Cleaning mode will turn off. Return to the Home Location Code scanned at step 6 Scan the Home Location Code The cleaning route is saved. Make sure the ROC indicator is displayed and the Route sync icon is see “Touch Display”).
-
Page 77: Carrying Out Autonomous Cleaning (One Route)
Carrying Out Autonomous Cleaning (One Route) Select a previously taught cleaning route to start autonomous cleaning ( see “Teaching a Cleaning Route Manually” or “Teaching a Cleaning Route Automatically”) and carry out autonomous cleaning. Before carrying out autonomous cleaning, always inspect the machine ( see “Inspection Before Operating the Machine”). Carry out autonomous cleaning at a time with the fewest number of people passing through and the least number of objects nearby. - Page 78 Scan the Home Location Code When the Home Location Code is recognized correctly, it will turn green, and a screen for selecting a route appears on the touch display. On the touch display, select cleaning ROUTE/AREA A screen appears for checking whether there are any escalators, steps or other moving platforms in the cleaning area.
- Page 79 Check for any escalators, steps or other moving platforms in the cleaning area and tap “NO” Tap “YES” and a barrier warning screen appears. Check the warning message and tap “CONFIRM”. Tap “CANCEL” and a cautionary screen of autonomous cleaning appears. Stow the steering handle Remove the notification pager from the machine ( ⇒...
- Page 80 Check that all functions are operating properly Once autonomous cleaning completes, the machine returns to the Home Location Code, and notification arrives on the notification pager. The pager will notify you when cleaning is completed Check “CLEANING COMPLETE”, and tap “HOME” Return to the main menu screen.
-
Page 81: Carrying Out Autonomous Cleaning (Multiples Routes)
Carrying Out Autonomous Cleaning (Multiples Routes) Select a previously taught cleaning route to start autonomous cleaning ( see “Teaching a Cleaning Route Manually” or “Teaching a Cleaning Route Automatically”) and carry out autonomous cleaning. Before carrying out autonomous cleaning, always inspect the machine ( see “Inspection Before Operating the Machine”). Carry out autonomous cleaning at a time with the fewest number of people passing through and the least number of objects nearby. - Page 82 Scan the Home Location Code When the Home Location Code is recognized correctly, it will turn green, and a screen for selecting a route appears on the touch display. Tap the routes to select in which order you want to carry out autonomous cleaning.
- Page 83 “ ” Check for any escalators, steps or other moving platforms in the cleaning area and tap “NO” Tap “YES” and a barrier warning screen appears. Check the warning message and tap “CONFIRM”. Tap “CANCEL” and a cautionary screen of autonomous cleaning appears. Stow the steering handle Remove the notification pager from the machine ( ⇒...
- Page 84 Press the autonomous clean start/stop button ( ⇒ see “Autonomous Clean Start/Stop Button”) Autonomous cleaning begins. Remove the notification pager (⇒see “Notification Pager”) from the machine and carry it with you. During autonomous cleaning, the LED light flashes orange twice in the direction the machine is turning. (example: when the machine is going to turn right, the LED light on the right side will flash).
-
Page 85: Carrying Out Autonomous Cleaning Using Delay Start
Carrying Out Autonomous Cleaning Using Delay Start After setting the starting time of autonomous cleaning beforehand, autonomous cleaning will start automatically at the set time. Make sure the machine is fully charged when carrying out autonomous cleaning using Delay Start. Carry out autonomous cleaning as much as possible when there are few people and obstacles in the cleaning area. - Page 86 Scan the Home Location Code When the Home Location Code is recognized correctly, it will turn green, and a screen for selecting a route appears on the touch display. On the touch display, select cleaning ROUTE/AREA A screen appears for checking whether there are any escalators, steps or other moving platforms in the cleaning area.
- Page 87 Make sure the battery is fully charged and tap “CONFIRM” Scroll the digits up and down to set the desired time. The remaining time until autonomous cleaning starts is displayed after you tap “NEXT”. The delayed time can be set up to 7 hours in advance. Autonomous cleaning starts automatically when the set time has come.
- Page 88 Stow the steering handle Remove the notification pager from the machine ( ⇒ see “Notification Pager”) Check that all functions are operating properly During autonomous cleaning, the LED light flashes orange twice in the direction the machine is turning. (example: when the machine is going to turn right, the LED light on the right side will flash). During autonomous cleaning, the machine travels somewhat away from the edges of walls at a certain distance so as not to scratch walls, etc.
-
Page 89: Deleting Cleaning Routes
Deleting Cleaning Routes On the touch display, tap “SETTINGS” The settings menu appears. Tap “ROUTES” A list of saved Home Location Codes appears. Select the Home Location Code with the ROUTE/AREA to delete A list of cleaning routes appears. - Page 90 Select cleaning routes/areas to delete The selected cleaning routes/areas are checked. Tap "DELETE" confirmation is displayed Tap "YES-DELETE" The selected cleaning routes/areas are deleted.
-
Page 91: Manual Cleaning
Whiz Operational Manual Manual Cleaning In order to clean areas that cannot be cleaned in autonomous mode, (along a wall, etc.), you can use manual mode. Before carrying out manual cleaning, be sure to check “Inspection Before Operating the Machine”... - Page 92 Use the vacuum power button and max power mode button to start cleaning ( ⇒ see “Vacuum Power Button”, “Max Power Mode Button”) The machine is designed to be moved forward to clean floors; do not move the machine backward. During cleaning, do not bring the machine near slopes, platforms, elevators, escalators, steps, stairs or other obstacles.
-
Page 93: Notification Pager
Whiz Operational Manual Notification Pager FCC Compliance Statement Note: This equipment has been tested and found to comply with the limits for a Class B digital device, pursuant to part 15v of the FCC Rules. These limits are designed to provide reasonable protection against harmful interference in a residential installation. -
Page 94: Notification Pager Functions
Notification Pager Functions The Notification pager will alert the operator via sound and/or vibration when irregularities occur during autonomous cleaning, or when the machine encounters obstacles. When using the notification pager for the first time, please take the pager out of the battery box and charge the pager (⇒see “Recharging the Notification Pager”). -
Page 95: Notification Pager Functions & Usage
Notification Pager Functions & Usage When the machine detects danger or detects an obstacle, an alert will be displayed on the notification pager (⇒see "Alert display and its notification timing") and it notifies the operator by emitting an alert and vibrating. It emits an alert and vibrates for 15 seconds then stops for 5 seconds, which it repeats for 10 minutes. -
Page 96: Alert Display And Its Notification Timing
Alert display and its notification timing Appearing on display Description Appearing on display Description Standby (within the Autonomous cleaning communication complete range/paired) Machine battery level low No machine battery remaining Dustbag full Connected for wireless communication Connection for wireless Error alert communication not When danger has been possible (outside... -
Page 97: Turning The Notification Pager On/Off
Turning the Notification Pager On/Off When using the notification pager for the first time, use the supplied pin to turn the power On. Turning the Notification Pager On Insert the supplied pin in the power button on the side of the notification pager Keep the inserted pin pressed until the notification pager vibrates. -
Page 98: Turning The Notification Pager Off
Turning the Notification Pager Off Insert the supplied pin in the power button on the side of the notification pager The display turns off. Press the pager main button, and check that nothing appears on the display... -
Page 99: Pairing The Notification Pager
Pairing the Notification Pager In order to receive the alert on the notification pager, the pager must be paired with the machine itself. Turn On the notification pager and the machine Check if the machine is connected to the Robot Operations Center (ROC) Please check your mobile phone cellular connection in advance. - Page 100 Press the pager main button to turn the pager's display On Press again the pager main button for at least 5 seconds and release it The message "Wireless connection in process" will be shown on the pager's display. While the message is shown on the pager's display, attach the pager onto the pager compartment on the side of the machine Carry out autonomous cleaning and check if you will receive the alerts (⇒see "Carrying Out Autonomous Cleaning One Route ").
-
Page 101: Recharging The Notification Pager
Recharging the Notification Pager If notification pager battery is running low, charge the pager fully before using it. Insert the Micro USB plug on the cable in the terminal on the back of the notification pager charger Connect the USB plug on the cable in the USB AC adapter, and plug the adapter into an outlet The customer must purchase a USB AC adapter themselves. -
Page 102: Machine Battery; Recharging The Machine's Battery
Whiz Operational Manual Machine Battery; Recharging the Machine’s Battery About Battery and Recharging n The battery operates for about 3 hours when cleaning in normal mode. n About 4 hours are required for the battery to fully recharge. n Use only batteries designed for the machine. -
Page 103: Recharging The Battery
Recharging the Battery Before using the machine, set the main power switch on the machine off and remove the battery. Then place the battery in the charger until fully charged. When replacing the battery during autonomous cleaning, turn the Secondary Battery Power Button on (⇒see "Secondary Battery Power Button"). - Page 104 Hold the grip on the battery in your right hand, and press the battery lock with your thumb Pull the battery out toward you as you release your thumb from the lock Be careful not to let your thumb get caught. Using the handles, pull the battery out Be sure to hold the grips with both hands when pulling the battery out.
- Page 105 Insert the battery straight into the charger all the way Recharging starts when the battery is properly inserted in the charger. Slide the battery gently into the charging slot. Inserting it from above may damage the charging terminal. After inserting the battery, check that the terminals on the battery and the charger are connected firmly. After recharging the battery, check that the charging status light is flashing in green Once the battery is recharged, pull it straight out of the charger and then lift it up Slide the battery out of the charging slot.
-
Page 106: Battery Charger Status Indicator
Battery Charger Status Indicator Charging status is indicated by the light on the charger. Status Charge light Battery capacity light Battery capacity: less Lit orange One lit green than 5% Recharging Battery capacity: 5 to Lit orange Two lit green Battery capacity: Lit orange Three lit green... -
Page 107: Maintenance And Safety
HEPA filter (⇒see “HEPA Filters”) Hopper tray (⇒see “Hopper Tray”) Machine repair should only be carried out by technical staff approved by SoftBank Robotics. Turn off the main power beforehand to disinfect the machine with alcohol. Use the amount of alcohol to some degree that a soft cloth is slightly wet. -
Page 108: Brush
Brush Remove the brush, and remove any dirt or hair caught in it as necessary. If the brush is damaged, replace with a new brush following the steps below. When cleaning the brush, do not pull the brush forcefully. Doing so may damage the brush. If the bottom of the machine is dirty, wipe with a dry cloth. - Page 109 Gently lay the machine down so that the dustbin faces upward Rubber pad will support and stabilize the machine Please ensure that the steering handle does not stick out of the machine. Try to avoid letting the machine fall or turn over on its side. A concrete or other hard surface will scratch the machine;...
- Page 110 Mounting a new brush Check the marks on the left and right ends of the new brush The mark on the left The mark on the right When the machine is laid down, with the front side facing up, you will see the sockets of the brush compartment.
- Page 111 Hold the lift handle with one hand, and hold the steering handle down with another hand Holding the lift handles by both hands, gently raise the machine Please ensure that the steering handle does not stick out of the machine.
-
Page 112: Hepa Filters
HEPA Filters Check that dirt has not accumulated in the HEPA filters and that they are not damaged. If dirt has collected or they are damaged, replace them with new filters following the steps below. Do not wash the HEPA filters with water. When disinfecting around the HEPA filters with alcohol, avoid the rubber parts. -
Page 113: Dustbag
Dustbag Replace with a new dustbag when it gets full. Remove the dustbag Hold by the dustbin access handle and pull down Pull the cover toward you to remove Pull out the attachment sheet for the dustbag inside the dustbin... - Page 114 Remove the used dustbag from the dustbin...
- Page 115 Attach the new dustbag Spread the new dustbag out and inflate Please be careful not to rip the dustbag With a new dustbag, hook the left side of the attachment sheet to the catch on the left side of the suction port Follow the illustration on the dustbag and make sure that the side of the illustration faces upwards.
- Page 116 Check that the dustbin pin is afloat If the dustbag is attached properly, the stopper in the dustbin is raised away as shown below. If the dustbag is not attached properly, the stopper will prevent the dustbin cover from being closed. Closing the cover forcefully may cause damage.
-
Page 117: Hopper Tray
Hopper Tray Empty the hopper tray after every cleaning. Remove and replace the hopper tray following the steps below. The hopper tray is shaped as below, and is located on the bottom of the machine (⇒see “Names of Parts”). Do not remove the hopper tray while the machine is laying on its side. Doing so will allow dirt in the hopper tray to scatter. - Page 118 Press the hopper tray all the way in...
-
Page 119: Battery Charger
Battery Charger Before recharging the battery, check that no dust or dirt is present in the air vents on the charger. Remove any dust or dirt from the air vents Check visually for anything abnormal (discoloration, corrosion) and for any abnormal sound, etc. from inside the charger... -
Page 120: Sensors
Sensors If dust or dirt is on the sensor, remove by using a micro-fiber cloth. 2D/3D Camera (sensor), LIDAR sensor Wipe the 2D/3D camera (sensor) and LIDAR sensor with the micro-fiber cloth Check that nothing is caught in the gaps around the bumper, and that the machine moves back several centimeters when the bumper is pushed slightly... - Page 121 Cliff sensor Stow the steering handle ( ⇒ see "Steering Handle") Hold the lift handle with one hand, and hold the steering handle down with another hand. Please operate with two people. Holding the lift handles with both of your hands, gently lay the machine on its side so that the side with the dustbin is up When the machine is laying on its side, it is supported by the rubber pad.
- Page 122 Wipe the Cliff sensors with the micro-fiber cloth...
-
Page 123: Storing The Machine
Whiz Operational Manual Storing the Machine Once cleaning is complete, move the machine manually to its predetermined place of storage. When not using the machine, store it with its power turned off. If not using the machine for a long time, turn off the Secondary Battery Power Button (⇒see "Secondary Battery Power Button"). - Page 124 Hold the lift handles and place the machine into the inner box Align the direction of the cushioning material and the inner box Insert the cushioning material Cover the inner box with the outer box Cover the outer box as the same direction as the cushioning material inside the inner box.
- Page 125 Attach the locking tab to the outer box There are 4 locking tabs on the outer box. Press the locking tab lock until you hear a “click” Locking tab will lock. Make sure the locking tab will not come off from the outer box...
-
Page 126: Change/Reset The Pin Code
Whiz Operational Manual Change/Reset the PIN Code Change or reset the PIN code used to unlock the touch display. Change the PIN Code Tap “PIN CODE” on the SETTINGS screen Tap “CHANGE PIN CODE” Enter the current PIN code... - Page 127 Enter a new PIN code Enter again the new PIN code to confirm...
-
Page 128: Reset The Pin Code
Reset the PIN Code Tap “PIN CODE” on the SETTINGS screen Tap “RESET PIN CODE” Enter the default PIN code The default PIN code corresponds to the last 6 digits of the RIN (serial number) of the machine. The RIN can be checked by tapping “ ”... - Page 129 Tap “YES - RESET” The PIN code is reset.
-
Page 130: Troubleshooting
Whiz Operational Manual Troubleshooting Stopping/Pausing the Machine On the back of the machine, press the autonomous clean start/stop button The machine stops. To restart machine operation, press the autonomous clean start/stop button again. To stop auto cleaning, tap “CANCEL ROUTE” on the touch display. -
Page 131: Emergency Stop
Emergency Stop If an emergency occurs, press the emergency stop button and immediately stop the machine. Only use the emergency stop button in an emergency. To pause the machine during autonomous cleaning, use the autonomous clean start/stop button (⇒see “Autonomous Clean Start/Stop Button”). Stopping the Machine in an Emergency Press the emergency stop button The machine will stop and an alert will be notified on the notification pager (⇒see "Notification pager"). - Page 132 Releasing the Machine from Emergency Stop Check the safety of the machine and surrounding area before releasing the machine from emergency stop. Turn the emergency stop button to the right Check that the button springs up. Press the autonomous clean start/stop button Autonomous cleaning resumes.
- Page 133 Checking Machine Alerts During an autonomous operation, if the machine encounters an obstacle, senses danger or if the battery is low, there will be a notification alert on the touch display (⇒see “Touch Display”). If you see an alert, please follow the instructions on the touch display.
- Page 134 Whiz Operational Manual Machine Specifications 474mm × 455mm × 653mm 18.6 in ×17.9 in × 25.7 in Machine size (length × width × height) Machine weight Approx. 30 kg 66 lbs 35 kg 77 lbs Machine weight (battery installed) 360 mm 14 in...
- Page 135 (⇒see “Autonomous Clean Start/Stop Button”). Group Function It is a function that multiple robots can share cleaning routes (⇒see “Group Function and Cleaning Routes”). Need to create a group in advance through the Whiz Connect Portal, and assign robots to the group.
- Page 136 Terminology Description Grounding chain Chain for channeling the machine’s electrical charge (static electricity) to the ground. Before using the machine, check that the grounding chain is in contact with the floor. HEPA filters High-performance exhaust filters located at the exhaust of the machine for removing dirt and particles (⇒see “HEPA Filters”).
- Page 137 (⇒see “Touch Display”). Vacuum power button Button for starting/ending vacuuming (⇒see “Vacuum Power Button”). Whiz Connect app App for checking current robot operation and alerts. Whiz Connect Portal Portal site allowing management of current robot operation and alerts as well as...
Need help?
Do you have a question about the Whiz and is the answer not in the manual?
Questions and answers