SoftBank Whiz Operation Manual
Hide thumbs
Also See for Whiz:
- Operational manual (147 pages) ,
- Operation manual (100 pages) ,
- Manual (15 pages)
Table of Contents
Advertisement
Quick Links
Advertisement
Table of Contents

Subscribe to Our Youtube Channel
Related Manuals for SoftBank Whiz


Summary of Contents for SoftBank Whiz
- Page 1 Operation Manual...
-
Page 2: Table Of Contents
TABLE OF CONTENTS TABLE OF CONTENTS ......................... i Introduction ............................. 1 Safety Precautions ........................... 2 About safety Precautions ..........................2 • • • • Description of Symbols ............................ 3 • • • • Description of Pictorial Indications ........................3 • • • • Handling the Machine, Battery Charger, Battery and Notification Pager (Common) ........ - Page 3 Secondary battery power button ........................38 • • • • LED Lights ..............................42 • • • • Touch Display ..............................44 • • • • Indications on the Touch Display ............................44 Vacuum Power Button ..........................46 • • • • Max Power Mode Button ..........................
- Page 4 Maintenance and Safety ........................86 About Maintenance and Safety ............................86 Brush ....................................87 HEPA Filters ..................................93 Dustbag ..................................... 94 Hopper Tray ..................................99 Battery Charger ................................101 Sensors .................................... 102 Storing the Machine ............................ 105 • • • • Packaging the Machine ..............................
-
Page 5: Introduction
Whiz Operational Manual Introduction Whiz is an industrial-purpose robot vacuum machine developed by SoftBank Robotics and which features onboard BrainOS. It is able to clean in two different modes (autonomous cleaning mode/manual cleaning mode). In autonomous cleaning mode, the machine cleans automatically, controlled by the BrainOS. Simply setting the machine’s main power switch on/off allows the machine to use the latest version of its... -
Page 6: Safety Precautions
Whiz Operational Manual Safety Precautions About safety Precautions Precautions presented here are intended to prevent harm to the user and other persons as well as damage to property. Always observe them. S oftBank Robotics shall not be liable for any damages incurred by the user or any third person as a result of the malfunctioning, misoperation, trouble, etc. -
Page 7: Description Of Symbols
Description of Symbols The following symbol categories explain the level of harm or damage that will occur if indications are not observed and equipment is used incorrectly. Read the guide after thoroughly understanding the indications. Indicates a “probability of immediate danger of death or serious injury* ”... -
Page 8: Handling The Machine, Battery Charger, Battery And Notification Pager (Common)
Modification of the machine is a violation of the Radio Law, and is subject to penalty. Servicing, disassembly, and repair is not possible by persons other than by SoftBank Robotics or service staff approved by SoftBank Robotics and having received prescribed training. -
Page 9: Handling The Machine
WARNING Do not allow liquid (tap water, refreshment beverage, seawater, pet urine, etc.) any electric conducti ve foreign objects (pencil lead, anything metal, metal necklaces or hairpins, etc.) to touch the chargi ng terminals or external connection terminals or to enter the equipment. May result in short-circuiting and cause in fire, burns, malfunction, etc. - Page 10 WARNING Do not use the machine with the grounding chain not in contact with the floor. If the grounding chain breaks or comes off, contact customer support. If the Secondary battery is off/low, do not remove the battery with the main power switch on the mach ine on. May cause the machine to malfunction.
- Page 11 The Dustbag, brush, battery, HEPA filters, and notification pager are designed specially for the ma chine. Do not use other products. May cause the machine to break or malfunction. When installing or removing the battery, be careful not to get your fingers caught while working. Not doing so may cause injury.
-
Page 12: Handling The Battery Charger
Handling the Battery Charger DANGER Before using the battery charger, receive instruction from SoftBank Robotics or a contracted firm and thoroughly understand the battery charger’s guide for correct operation. Do not use the battery charger at or near a place with dust, salt, corrosive gas, or flammable gas. - Page 13 If the battery charger is not operating normally, takes a longer time to recharge than normal, or if it produces sparks, smoke, odor, etc., immediately unplug it form the outlet, and contact customer support. If thunder is audible, unplug the battery charger from the outlet. Not doing so may damage it.
-
Page 14: Handling The Notification Pager
Handling the Notification Pager DANGER Do not drop or throw. Subjecting it to strong impact may cause the battery pack in the notification pager to leak, overheat, rupture, or ignite, and may cause fire, electric shock, malfunction, etc. WARNING Do not place the notification pager or notification pager charger in a cooking device (microwave oven , etc.) or high-pressure container (pressure cooker, etc.), or on top of an electromagnetic cooking dev ice (IH cooktop). -
Page 15: Handling The Battery
Handling the Battery DANGER Use the equipment within an ambient temperature range of 0°Cto 45° C. Also store in a dry environme nt with no dust in an ambient temperature range of 0° Cto 45° C. Do not place objects on top of the battery. Do not smoke in the vicinity of the battery or place objects near it that may be the cause of flames or sparks. -
Page 16: Handling Near Electronic Medical Devices
Handling near Electronic Medical Devices DANGER If wearing an implanted cardiac pacemaker or implanted defibrillator, maintain a distance of at least 15 cm from the location of the implant. Electric signals may affect the operation of the pacemaker or defibrillator. Do not use in a healthcare environment or near electronic medical devices. -
Page 17: Pictorial Symbols
Pictorial Symbols Refer to the labels on each product (the machine, battery charger, battery). Each is compliant with the Japanese Electri Incorporates a specified wireless system as cal Appliances and Material Safety Act defined by Japanese law (TELEC or JATE-cer (Spec ified Electrical Appliances and tified). -
Page 18: Supplied Accessories
Whiz Operational Manual Supplied Accessories Items Bundled with the Machine at Delivery All accessories beside the brush are stored in the accessory box inside the battery compartment (⇒see "Names of Parts"). Brush×1 Notification Pager×1 Notification pager Charger×1 Micro USB cable×1 Micro-fiber cloth×1... -
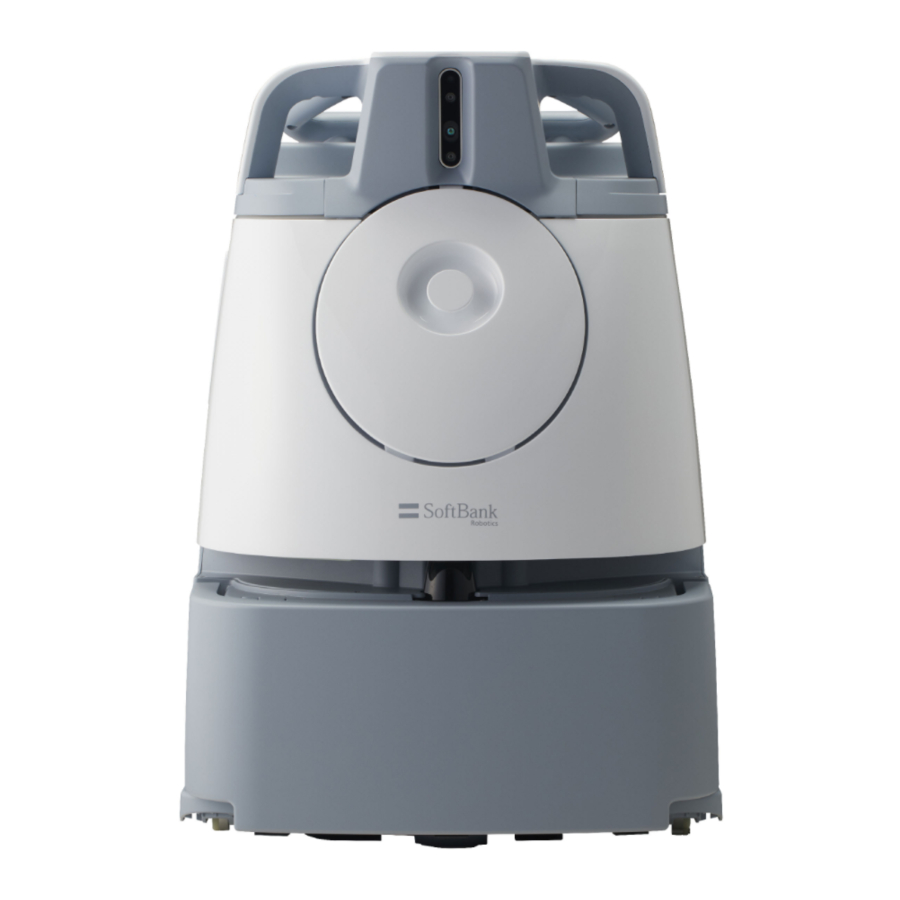
Page 19: Names Of Parts
Whiz Operational Manual Names of Parts Machine Front/Side, Back Item Lift handle LED light Pager compartment Wheel 2D/3D camera (sensor) Dustbin LIDAR sensor Bumper Steering handle Main power switch Filter cover Battery compartment Rubber pad... - Page 20 Machine Top, Bottom Item Emergency stop button Touch display Max power mode button Autonomous clean start/sto p button Vacuum power button Front wheel Brush compartment Hopper tray Secondary battery power button Rear caster Grounding chain Cliff sensor...
-
Page 21: Machine Setup And Parts Installation
Whiz Operational Manual Machine Setup and Parts Installation Removing the Machine from Its Packaging Unpack the machine. As a safety precaution, be sure to unpack with at least two persons. Check that the packaging box is not damaged; if damaged, immediately contact customer support. - Page 22 Remove the package cushioning placed on top of the machine. Remove the packaging box containing the brush Remove the 4 supports...
- Page 23 Remove the packaging material in the middle Remove the packaging material at the bottom center Remove the plastic wrap If a plastic bag is stuck in between the machine and the packaging box, hold the lift hanfle and remove the plast ic by lifting the machine.
- Page 24 Remove the polystyrene foam on top of the machine (under the steering handle) With two persons, hold the lift handles, and remove the machine from its packaging box Here, also remove the packaging material at the bottom. Remove the packaging material on both sides of the machine on its bottom sides...
- Page 25 Check that supplied accessories (⇒ ⇒ ⇒ ⇒ see “Supplied Accessories”) are all present Holding the machine by the lift handles (1) or using the steering handle (⇒ ⇒ ⇒ ⇒ see “Steering Handle”) (2), transport the machine to the cleaning area As a safety precaution if holding the machine by the lift handles, carry with two persons.
-
Page 26: Preparing To Use The Machine
Whiz Operational Manual Preparing to Use the Machine Check the Emergency stop button Checking that the Emergency Stop Button is not pressed. If pressed, turn it (red) to the right to release. -
Page 27: Check The Dustbag
Check the Dustbag Be sure to check that the Dustbag is properly attached. If it is not properly installed or if the dustbin does not close, follow the steps for attaching the Dustbag (⇒see “Dustbag”). Hold the dustbin access handle and pull down Remove the cover towards you... - Page 28 Check that the dustbin pin is afloat If the Dustbag is correctly set, the pin will float. Insert the catches at the bottom of the cover in the bottom of the dustbin ① ① and close the cover ① ① while pushing down on the dustbin access handle ②...
-
Page 29: Check The Hepa Filter
Check the HEPA Filter Checking that the HEPA filter is properly installed. If the HEPA filter is not properly installed, follow the steps for installing the filter (⇒see “HEPA Filters”). With fingers in the holes in the filter cover, turn to the left to remove Check that the HEPA filter is properly installed Attach the filter cover to the machine, and turn to the right until it clicks to close Check the other HEPA Filter with the same procedure... -
Page 30: Check The Hopper Tray
Check the Hopper tray Check that the Hopper Tray is correctly installed. If it is not installed correctly, reinstall the Hopper Tray (⇒See 'Hopper Tray'). From the back of the machine, check if the Hopper tray is installed correctly... -
Page 31: Installing The Brush
Installing the brush Stow the steering handle (⇒ ⇒ ⇒ ⇒ see 'Steering handle') Hold the lift handle with one hand, and hold the handle down with another hand. Please operate with two people. - Page 32 Gently lay the machine down so that the dustbin faces upward. The Rubber pad will support and stabilize the machine. Please be cautious so the handle does not stick out of the machine. Take care not to let the machine fall forcefully or to turn. A concrete or other hard surface will scratch the machine;...
- Page 33 Check the marks on the left and right ends of the new brush The mark on the left The mark on the right When the machine is layed down with the front side facing upwards, you will see the sockets of the Brush compartment, both right and left, have the same marks as the brush.
- Page 34 Press the brush to the right, and pull the left end out toward you to remove Spin the brush and check that the marks on the left and right side of the brush are installed correctly in the socket. Hold the lift handle with one hand, and hold the handle down with another hand. Please operate with two people.
- Page 35 Holding the lift handles by both hands, gently raise the machine Please be cautious so the handle does not stick out of the machine.
-
Page 36: Charging The Battery And Installing It To The Machine
Charging the battery and installing it to the machine Charge the battery(⇒ ⇒ ⇒ ⇒ see "Recharging the Battery") Pull the bottom left of the battery door toward you to open Remove the accessory box from inside the battery compartment. Insert a fully charged battery as far as it can go The battery will lock, and you will hear a click and it will jump out. - Page 37 Check that the battery is locked Close the battery door...
-
Page 38: Removing The Protective Film
Removing the protective film Remove the protective film on 2D/3D Camera (sensor) Please be careful not to damage the sensor when removing the film. -
Page 39: Turning The Notification Pager Power On
Turning the notification pager power On Before turning the power On, check that the notification pager is fully charged. If the notification pager battery is low, charge the battery fully before using the pager. (⇒See 'Recharging the Notification Pager'). Turn the notification pager On. (⇒ ⇒ ⇒ ⇒ See 'Turning the Notifiation Pager On/Off') After turning notification pager On, pair the pager. -
Page 40: Connecting To Robot Operations Center (Roc)
Connecting to Robot Operations Center (ROC) Connect the machine to the network in advance when turning the main power switch Off. When turning the main power switch On again, the machine will automatically connect to the network and Robot Operations Center (ROC). Press the main power switch (I/O) to set it on (I) After turning the power on, a screen indicating the machine is loading appears. -
Page 41: Operation
Whiz Operational Manual Operation Main Power Switch Turning the Power On Press the main power switch (I/O) to set it on (I) After turning the power on, a screen indicating the machine is loading appears. Home screen will be displayed when the Power button is turned On. Do not turn the power Off until the Home s creen is displayed. -
Page 42: Secondary Battery Power Button
Secondary battery power Button After setting the Secondary battery power button on, you can remove the battery without turning the machine off. When the battery level is low, you can replace the battery with a fully recharged one while the main power switch is still on, allowing you to continue using the machine to teach a cleaning route or carry out autonomous cleaning. - Page 43 Stowing the steering handle(⇒ ⇒ ⇒ ⇒ see "Steering Handle") Hold the lift handle with one hand, and with another hand, hold down the handle. Please operate with two persons.
- Page 44 Hold the lift handles with both hands, and gently lay the machine on its side so that the side with the dustbin is up The Rubber pad will support and stabilize the machine. Please be cautious so the steering handle does not stick out of the machine. Take care not to let the machine fall forcefully or to turn.
- Page 45 Holding the lift handles by both hands, gently raise the machine...
-
Page 46: Led Lights
LED Lights The LED lights notify you about the state of the machine, error information, etc. The LED lights on the front and back of the machine light in different colors and patterns. Color and pattern Appearance Description Lighting in each color (blue, gree n, red, The machine’s system is starting up. - Page 47 Color and pattern Appearance Description The left or right LED light is flashi ng orange Indicating direction during autonomous cleaning. rapidly The machine turns in the direction that the LED light is flashing in. The machine beeps as it turns. Rear LED light is flashing white The Cliff sensor was activated during autonomous cleaning, an d the machine is going backward (traveling...
-
Page 48: Touch Display
Touch Display You can check battery level, connection to the Robot Operations Center, error messages, and other information on the touch display. Creation and selection of cleaning routes necessary for performing autonomous cleaning ( ⇒ see “Autonomous Cleaning (Robot)”) are also done from the touch display. - Page 49 Error message screen Item Description Notification Appears at upper left of the touch display. For alerts concerning machine compone nts, follow instructions on the touch display to remedy problems. Alert screen Touching the notification described at “4” causes an alert to appear, allowing you to check alerts such as while charging.
-
Page 50: Vacuum Power Button
Vacuum Power Button Press the vacuum power button to start vacuuming. Press the button again to stop vacuuming. Pressing the vacuum power button stops vacuuming in either normal mode or max power mode. Max Power Mode Button Press the max power mode button to change the cleaning mode from normal mode to max power mode. To clean in max power mode, check that the vacuum power button is on, and press the max power mode button. -
Page 51: Steering Handle
Steering Handle Use the steering handle to move and change the direction of the machine during manual cleaning, to teach cleaning routes, and to transport the machine. Observe the following when using the steering handle. Check if the steering handle is unstable (not firmly attached). Avoid abruptly turning with the steering handle. -
Page 52: Using The Steering Handle
Using the Steering Handle Extend the steering handle to move the machine forward and to change directions. To extend the steering handle, hold by both hands and pull it straight up. Once the joint at the base of the steering handle is visible, lower the steering handle toward you. Stowing the Steering Handle To stow the steering handle, hold by both hands and raise it forward at an angle, and push it in to its original position. -
Page 53: Notification Pager
Notification Pager If the machine stops operating during autonomous cleaning or the battery becomes low, the notification pager (⇒see “Notification Pager”) is alerted by the machine, and the notification pager emits an alert and vibrates to notify the operator. -
Page 54: Autonomous Clean Start/Stop Button
Autonomous Clean Start/Stop Button Press the autonomous clean start/stop button to start autonomous cleaning mode (⇒see “Autonomous Cleaning (Robot)”), pause the machine, or restart cleaning. The autonomous clean start/stop button is used only in autonomous cleaning mode. Press the autonomous clean start/stop button Autonomous cleaning starts. -
Page 55: Inspection Before Operating The Machine
Whiz Operational Manual Inspection before Operating the Machine Before starting manual cleaning mode/autonomous cleaning mode, be sure to perform the following inspection. Inspecting the Machine Check that the emergency stop button is not pressed Check that the grounding chain on the bottom of the machine is in contact with the floor Check that the Secondary battery power button on the bottom of the machine is on (⇒see “Secondary battery power button”) -
Page 56: Autonomous Cleaning (Robot)
Whiz Operational Manual Autonomous Cleaning (Robot) Overview The machine is capable of automatically cleaning on a saved cleaning route (autonomous cleaning mode). To clean in autonomous cleaning mode, you must first teach a cleaning route (⇒see “Teaching a New Cleaning Route”) and with the machine read a Home Location Code (⇒see “Home Location Codes and Cleaning Routes”). -
Page 57: Home Location Codes And Cleaning Routes
Home Location Codes and Cleaning Routes Home Location Codes are markers indicating where cleaning routes start and stop. They are used for establishing the machine’s home location, and according to the size of the cleaning area, one or several Home Location Codes are used (6 cleaning routes can be saved for 1 Home Location Code). -
Page 58: Locations For Placing Home Location Codes
Locations for Placing Home Location Codes Place Home Location Codes on walls, columns, etc. in a bright location and distanced approximately 60 cm from the floor and approximately 80 cm from the machine. Do not place Home Location Codes where they may be hidden, such as walls behind furniture or shelves. Do not let Home Location Codes lean or turn;... -
Page 59: Scanning Home Location Code
Dividing the machines into groups allows 6 cleaning routes each to be saved for the same Home Location Code number. For details, see the help file for the Whiz Connect Portal*. -
Page 60: Checking Precautions When Teaching A Cleaning Route
A passageway of more than 80cm in width is needed in order for Whiz to operate autonomously at an optimum speed. *If the width of the passageway is below 80cm, the machine may recognize as an obstacle and the speed may decrease or the machine may stop. -
Page 61: Cleaning Routes
Cleaning Routes When teaching a cleaning route, divide the area into zones using floor material and stepped portions as boundaries. The recommended cleaning route area per one cleaning is about 500 m2. A cleaning route of over 500 m2 may have obstacles that could cause the machine to stop during autonomous cleaning or that could prevent the machine from saving the cleaning route. -
Page 62: Teaching A New Cleaning Route
Teaching a New Cleaning Route Planning a Cleaning Route Teach a route that will allow the cleaning area to be cleaned the most optimally and efficiently, taking into consideration its layout and size (area). During autonomous cleaning, the machine will operate at a relatively low speed for safety. Time from start to completion of autonomous cleaning will be longer than the time required to teach the cleaning route. -
Page 63: Teaching And Saving A Cleaning Route
Teaching and Saving a Cleaning Route Before teaching a cleaning route, check “Checking Precautions when Teaching a Cleaning Route”. Pull the steering handle up as far as it will go, and lower it toward you Move the machine to the Home Location Code where cleaning is to be carried out (⇒ ⇒ ⇒ ⇒ see “Home Location Codes and Cleaning Routes”) Press the main power switch (I/O) to set it on (I) A screen appears on the touch screen (⇒see “Touch Display”) for selecting “TEACH ROUTE/RUN ROUTE/SETTINGS”. - Page 64 On the touch display, tap “TEACH ROUTE” A screen for reading a Home Location Code (⇒see “Home Location Codes and Cleaning Routes”) appears. Place the machine so that the machine’s sensor and the Home Location Code are parallel, and read the Home Location Code When the machine has read the Home Location Code correctly, a green frame appears.
- Page 65 Select for where to save cleaning route The selected spot is assigned to the new cleaning route. Once the number of saved routes has reached the limit, either delete existing cleaning routes (⇒see “Deleting Cleaning Routes”), or read a different Home Location Code. Press the vacuum power button (⇒...
- Page 66 Use the steering handle to move the machine, and clean the entire cleaning route (teaching route) Changing between normal mode and max power mode (⇒see “Max Power Mode Button”) is also learned in a cleaning route. Teaching a cleaning route with few detours allows the machine to travel with fewer decreases in speed for more efficient cleaning.
-
Page 67: Deleting Cleaning Routes
Deleting Cleaning Routes On the touch display, tap “SETTINGS” The settings menu appears. Tap “ROUTES” A list of saved Home Location Codes appears. Select the Home Location Code with the routes to delete A list of cleaning routes appears. - Page 68 Tap “DELETE” The selected cleaning routes are deleted.
-
Page 69: Carrying Out Autonomous Cleaning
Carrying Out Autonomous Cleaning Select a cleaning route that has already been created (⇒see “Teaching a New Cleaning Route”) and carry out autonomous cleaning. Before carrying out autonomous cleaning, always make an inspection (⇒see “Inspection before Operating the Machine”). Carry out autonomous cleaning at a time with the fewest number of persons passing through and the least nu mber of objects nearby. - Page 70 Read the Home Location Code The Home Location Code turns green when the machine recognizes it correctly, and a screen for selecting a route appears on the touch display. On the touch display, select the cleaning route Stow the steering handle...
- Page 71 Remove the notification pager from the machine (⇒ ⇒ ⇒ ⇒ see “Notification Pager”) Press the autonomous clean start/stop button (⇒ ⇒ ⇒ ⇒ see “Autonomous Clean Start/Stop Button”) Autonomous cleaning begins. Remove the notification pager (⇒see “Notification Pager”) from the machine and carry it with you. During autonomous cleaning, the LED light indicating the direction the machine is moving in flashes orange 2 ti mes (example: when the machine is going to detour right, the right LED light will light).
-
Page 72: Manual Cleaning
Whiz Operational Manual Manual Cleaning Clean by operating manually. In areas along a wall or the like, that cannot be cleaned autonomously, clean in manual mode. Before carrying out manual cleaning, be sure to check “Inspection before Operating the Machine”... - Page 73 Use the vacuum power button and max power mode button to start cleaning (⇒ ⇒ ⇒ ⇒ see “Vacuum Power Button”, “Max Power Mode Button”) The machine is designed to be moved forward to clean floors; do not move the machine backward. During cleaning, do not bring the machine near slopes, platforms, elevators/escalators, or other obstacles.
-
Page 74: Notification Pager
Whiz Operational Manual Notification Pager Notification Pager Functions Notification pager will notify the operator (Sound/Vibration) when irregular occur during autonomous cleaning or when the machine encounters obstacles. When using the notification pager for the first time, please take the pager out of the battery box and charge the pager. - Page 75 Item Description Display The battery level icon and mute icon appear at the left of the display, and alerts appea r at the right of the display.(⇒see "Alert display and its notification timing") Pager mute switch To set the notification pager only to vibrate for alert notifications, set the pager mute switch on.
-
Page 76: Notification Pager Functions & Usage
Notification Pager Functions & Usage When the machine detects danger or detects an obstacle, an alert will be displayed on the notification pager(⇒see "Alert display and its notification timing")and it notifies the operator by emitting an alert and vibrating. It emits an alert and vibrates for 15 seconds then stops for 5 seconds, which it repeats for 10 minutes. -
Page 77: Alert Display And Its Notification Timing
Alert display and its notification timing Appearing on display Description Appearing on display Description Standby (within the communi Autonomous cleaning complet cation range/paired) Machine battery level low No machine battery remainin Dustbag full Connected for wireless comm unication Connection for wireless com Error alert munication not possible ・... -
Page 78: Turning The Notification Pager On/Off
Turning the Notification Pager On/Off When using the notification pager for the first time, use the supplied pin to turn the power On. Turning the Notification Pager On Insert the supplied pin in the power button on the side of the notification pager Keep the inserted pin pressed until the notification pager vibrates. -
Page 79: Turning The Notification Pager Off
Turning the Notification Pager Off Insert the supplied pin in the power button on the side of the notification pager The display goes out. Press the pager main button, and check that nothing appears on the display... -
Page 80: Paring The Notification Pager
Paring the Notification Pager In order to receive the alert on the notification pager, the pager must be paired with the machine itself. Turn On the notification pager and the machine Check if the machine is connected to the Robot Operations Center (ROC) Please check your mobile phone cellular connection in advance. - Page 81 Press the button on the notification pager for at least 5 seconds The message "Wireless connection in process" will be shown on the pager's display. Attach the pager on to the pager holder on the side of the machine Carry out autonomous cleaning and check if you will recieve the alerts (⇒see "Carrying Out Autonomous Cleani ng").
-
Page 82: Recharging The Notification Pager
Recharging the Notification Pager If notification pager battery is running low, charge the pager fully before using it. Insert the Micro USB plug on the cable in the terminal on the back of the notification pager charger Connect the USB plug on the cable in the USB AC adapter, and plug the adapter into an outlet The customer must purchase a USB AC adapter themselves. -
Page 83: Battery And Recharging
Whiz Operational Manual Battery and Recharging About Battery and Recharging The battery operates for about 3 hours when cleaning in normal mode. About 4 hours are required for the battery to fully recharge. Use only batteries designed for the machine. -
Page 84: Recharging The Battery
Recharging the Battery Before using the machine, set the main power switch on the machine off, remove the battery, and recharge the battery in the charger. When replacing with a fully charged battery, check that the Secondary battery power button (⇒see “Secondary battery power button”) is off, and that no error for low battery level appears on the touch display (⇒see “Touch Display”). - Page 85 Open the battery door by pulling its bottom left toward you Hold the grip on the battery in your right hand, and press the battery lock with your thumb Pull the battery out toward you as you release your thumb from the lock Be careful not to let your thumb get caught.
- Page 86 Hold the grips, and pull the battery out Be sure to hold the grips with both hands when pulling the battery out. Insert the battery straight into the charger all the way Recharging starts when the battery is properly inserted in the charger. Slide the battery gently into the charging slot.
- Page 87 Once the battery is recharged, pull it straight out of the charger and then lift it up Slide the battery out of the charging slot. Be sure to hold the grips with both hands when pulling the battery out. Insert the battery all the way in the battery compartment, and close the battery door Insert the battery in the battery compartment by its terminal first.
-
Page 88: Light
Light Charging status is indicated by the light on the charger. Status Charge light Battery capacity light Recharging Battery capacity: less Lit orange One lit green than 5% Battery capacity: 5 to Lit orange Two lit green Battery capacity: more Lit orange Three lit green than 95%... -
Page 89: Maintenance And Safety
(⇒see “Main Power Switch”). Brush (⇒see “Brush”) HEPA filter (⇒see “HEPA Filters”) Hopper tray (⇒see “Hopper Tray”) Machine repair should only be carried out by technical staff approved by SoftBank Robotics. -
Page 90: Brush
Brush Remove the brush, and remove any dirt or hair caught in it as necessary. If the brush is damaged, replace with a new brush following the steps below. When cleaning the brush, do not pull the brush forcefully. Doing so may damage the brush. If the bottom of the machine is dirty, wipe with a dry cloth. - Page 91 Hold the lift handle with one hand, and hold the handle down with another hand. Please operate with two people. Gently lay the machine down so that the dustbin faces upward. Rubber pad will support and stabilize the machine. Please be cautious so the handle does not stick out of the machine. Take care not to let the machine fall forcefully or to turn.
- Page 92 Press the brush to the right, and pull the left end out toward you to remove Remove the right end of the brush...
- Page 93 Mounting a new brush Check the marks on the left and right ends of the new brush The mark on the left The mark on the right When the machine is layed down with the front side facing upwards, you will see the sockets of the Brush compartment, both right and left, have the same marks as the brush.
- Page 94 Push the brush in on the right, and attach the left end of the brush in the socket with the matching marking Turn the brush, and check that both ends of the brush are securely attached in the sockets. Hold the lift handle with one hand, and hold the handle down with another hand. Please operate with two people.
- Page 95 Holding the lift handles by both hands, gently raise the machine Please be cautious so the handle does not stick out of the machine.
-
Page 96: Hepa Filters
HEPA Filters Check that dirt has not accumulated in the HEPA filters and that they are not damaged. If dirt has collected or they are damaged, replace them with new filters following the steps below. Do not wash the HEPA filters with water. With fingers in the holes in the filter cover, turn to the left to remove Hold the HEPA filter by the tab in the middle and remove Install the new HEPA filter, replace the filter cover, and turn to the right to close... -
Page 97: Dustbag
Dustbag Replace with a new Dustbag when it gets full. Remove the Dustbag Hold by the dustbin access handle and pull down Pull the cover toward you to remove... - Page 98 Pull out the attachment sheet for the Dustbag inside the dustbin Remove the used Dustbag from the dustbin...
- Page 99 Attach the new Dustbag Spread the new Dustbag out and inflate Please be careful not to rip the Dustbag. Hook the left of the attachment sheet for the new Dustbag on the catch on the left of the suction duct Follow the illustration on the Dustbag and make sure that the side of the illustration faces upwards.
- Page 100 Align the opening in the attachment sheet with the suction duct, and push the right of the attachment sheet in firmly Be careful not to pinch your fingers. Check that the dustbin pin is afloat If the Dustbag is attached properly, the stopper in the dustbin is raised away as shown below. If the paper ba g is not attached properly, the stopper will prevent the dustbin cover from being closed.
- Page 101 Insert the catches at the bottom of the cover in the bottom of the dustbin (1), and close the cover while holding the dustbin access handle down (2)
-
Page 102: Hopper Tray
Hopper Tray Empty the hopper tray after every cleaning. Remove and replace the hopper tray following the steps below. The hopper tray is shaped as below, and is located on the bottom of the machine (⇒see “Names of Parts”). Do not remove the hopper tray while the machine is laying on its side. Doing so will allow dirt in the hopper tray to scatter. Be careful not to injure yourself when removing the hopper tray. - Page 103 Pull the hopper tray out on the left (direction of arrow) The hopper tray cannot be pulled out on the right. To ensure adequate space for pulling the hopper tray out, orient the rear caster backward as shown. Discard any dirt in the hopper tray Wash the hopper tray with water if soiled.
-
Page 104: Battery Charger
Battery Charger Before recharging the battery, check that no dust or dirt is present in the air vents on the charger. Remove any dust or dirt from the air vents Check visually for anything abnormal (discoloration, corrosion) and for any abnormal sound, etc. from inside the charger... -
Page 105: Sensors
Sensors If dust or dirt is on the sensor, remove by using a mico-fiber cloth. 2D/3D Camera (sensor), LIDAR sensor Wipe the 2D/3D camera (sensor) and LIDAR sensor with the micro-fiber cloth Check that nothing is caught in the gaps around the bumper, and that the machine moves back several centimeters when the bumper is pushed slightly... - Page 106 Cliff sensor Stow the steering handle(⇒ ⇒ ⇒ ⇒ see "Steering Handle") Hold the lift handle with one hand, and hold the handle down with another hand Please operate with two persons.
- Page 107 Holding the lift handles with both of your hands, gently lay the machine on its side so that the side with the dustbin is up When the machine is laying on its side, it is supported stably by the Rubber pad. Please be cautious so the handle does not stick out of the machine.
-
Page 108: Storing The Machine
Whiz Operational Manual Storing the Machine Once cleaning completes, move the machine manually to its predetermined place of storage. When not using the machine, store it with its power turned off. If not using the machine for a long period (approx. 2 months), set the Secondary battery power button (⇒see “Secondary battery power button”) off. -
Page 109: Packaging The Machine
Packaging the Machine If not using the machine for a long time, follow the steps below to pack the machine. As a safety precaution, always work with at least two persons. Before packing the machine, be sure to remove the battery (⇒see “Battery and Recharging”). Pack the notification pager and brush in the special packaging box. - Page 110 Insert packaging material at both sides of the machine on its bottom Insert polystyrene foam at the top of the machine (under the steering handle) Wrap the machine in plastic...
- Page 111 Insert the front packaging material Stuff extra plastic into the top of the machine Place the middle packaging material...
- Page 112 Insert the 4 supports Place the top packaging material With two persons, place the outer box...
- Page 113 Open the top of the box, and insert the corrugated cardboard sleeve Insert the white packaging material Close the box...
-
Page 114: Troubleshooting
Whiz Operational Manual Troubleshooting Stopping/Pausing the Machine On the back of the machine, press the autonomous clean start/stop button The machine stops. To restart machine operation, press the autonomous clean start/stop button again. To stop auto cleaning, tap “CANCEL ROUTE” on the touch display. -
Page 115: Emergency Stop
Emergency Stop If an emergency occurs, press the emergency stop button and immediately stop the machine. Only use the emergency stop button in an emergency. To pause the machine during autonomous cleaning, use the autonomous clean start/stop button (⇒see “Auton omous Clean Start/Stop Button”). -
Page 116: Releasing The Machine From Emergency Stop
Releasing the Machine from Emergency Stop Check the safety of the machine and surrounding area before releasing the machine from emergency stop. Turn the emergency stop button to the right Check that the button springs up. Press the autonomous clean start/stop button Autonomous cleaning resumes. -
Page 117: Checking Machine Alerts
Checking Machine Alerts During an autonomous cleaning, if the machine encounters an obstacle and senses danger or if the battery is low, an alert will be notified on the touch display (⇒see “Touch Display”). If an alert is displayed, please follow the instructions on the touch display. Tap the alert appearing at the upper left of the touch display Follow the instructions on the screen If the machine stops moving and notifies the operator with an alert at the same location several times, check t he... -
Page 118: Machine Specifications
Whiz Operational Manual Machine Specifications Machine size (length × width × height) 474mm × 455mm × 653mm Machine weight Approx. 30 kg Machine weight (battery installed) 35 kg Cleaning width 360 mm Maximum inclination 0% (during auto cleaning) Battery Lithium-ion battery Battery output voltage 25.2 V... -
Page 119: Glossary
Whiz Operational Manual Glossary Terminology Description Accessory box The box includes notification pager, notification pager charger, pin and micro-fiber cloth. Upon arrival, accessory box will be stored inside the battery box. Autonomous clean Use to start autonomous cleaning mode or to pause/resume autonomous cleaning. The start/stop button autonomous clean start/stop button (⇒see “Autonomous Clean Start/Stop Button”) can only... - Page 120 Terminology Description HEPA filters High-performance exhaust filters located at the exhaust of the machine for removing dirt and particles. (⇒see “HEPA Filters”) HEPA filter covers Removable covers on the machine’s exhaust. (⇒see “HEPA Filters”) Home Location Code Code used for having the machine learn where cleaning start/end points are in autonomous cleaning mode.
- Page 121 Vacuum bag for collecting vacuumed dirt and dust. (⇒see “Vacuum Bag”) Vacuum power button Button for starting/ending vacuuming. (⇒see “Vacuum Power Button”) Whiz Connect app App for managing current robot operation and alerts. Whiz Connect Portal Portal site allowing management of current robot operation and alerts as well as downloading of operation reports.
- Page 122 1. This device may not cause harmful interference. 2. This device must accept any interference received, including interference that maycause undesired operation. Body worn operation The device complies with RSS 102, RF specifications when used near your ear or at a distance of 20 cm from your body (20 cm RF exposure safety distance).
- Page 123 FDD B7 2500MHz -2690MHz ± FDD B8 880MHz -960MHz ± FDD B20 830MHz -860MHz ± TDD B28 703MHz -748MHz ± This product can be used across EU member states. Softbank Robotics Softbank Robotics corp. corp. Softbank Robotics Softbank Robotics corp. corp.
Need help?
Do you have a question about the Whiz and is the answer not in the manual?
Questions and answers