SoftBank Whiz Operation Manual
Hide thumbs
Also See for Whiz:
- Operational manual (147 pages) ,
- Operation manual (123 pages) ,
- Manual (15 pages)
Table of Contents
Advertisement
Quick Links
Advertisement
Table of Contents

Subscribe to Our Youtube Channel
Related Manuals for SoftBank Whiz


Summary of Contents for SoftBank Whiz
- Page 1 Operation Manual...
-
Page 2: Table Of Contents
TABLE OF CONTENTS Introduction Safety Warnings About Safety Warnings Description of Symbols Description of Pictorial Indications Handling the Machine, Battery Charger, Battery and (Common) Handling the Machine Handling the Battery Charger Handling the Battery Handling near Electronic Medical Devices Lasers and Infrared Light Sensor Detection Range Pictorial Symbols Machine Disposal and Recycling... - Page 3 Operation Main Power Switch Turning the Power On Turning the Power Off LED Lights Touch Display Indications on the Touch Display Vacuum Power Button Max Power Mode Button Steering Handle Using the Steering Handle Stowing the Steering Handle Autonomous Clean Start/Stop Button Inspection Before Operating the Machine Inspecting the Machine Inspecting the Cleaning Area...
- Page 4 Recharging the Battery Maintenance and Safety About Maintenance and Safety Brush HEPA Filters Dustbag Hopper Tray Charger Sensors Storing the Machine Packaging the Machine Troubleshooting Stopping/Pausing the Machine Emergency Stop Stopping the Machine Urgently in an Emergency Releasing the Machine from Emergency Stop Kill Switch Checking Machine Alerts Machine Specifications...
-
Page 5: Introduction
Whiz Operational Manual Introduction Whiz is an industrial-purpose robot vacuum machine developed by SoftBank Robotics and which features onboard BrainOS. It is able to clean in two different modes (autonomous cleaning mode/manual cleaning mode). In autonomous cleaning mode, the machine cleans automatically, controlled by the BrainOS. -
Page 6: Safety Warnings
Whiz Operational Manual Safety Warnings About Safety Warnings I MPORTANT SAFETY INFORMATION: READ AND UNDERSTAND THESE SAFETY WARNINGS AND ALL INSTRUCTIONS PRIOR TO UNPACKING AND USING THE MACHINE. Warnings presented here are intended to warn the user of potential harm to the user and other persons as well as damage to property. -
Page 7: Description Of Symbols
Description of Symbols The following symbol categories explain the level of harm or damage that can occur if warnings are not observed and the machine or related equipment is used incorrectly. Please be sure you understand these symbols and their correlating meanings before reading the remainder of this manual. - Page 8 Servicing, disassembly, modification, soldering, replacement or other repair work may not be undertaken by persons other than by SoftBank Robotics or other authorized service staff. Use only the battery charger and battery that came with the machine when recharging the machine.
-
Page 9: Handling The Machine
Handling the Machine DANGER Use the machine within an ambient temperature range of 5°C to 40°C, humidity of 10% to 80%. Also, store in a dry environment with no dust in an ambient temperature range of 5°C to 40°C. Failure to do so may result in fire, injury, electric shock, damage, malfunction, overheating, leakage, chemical explosion, or other damage to the machine, battery charger, battery or . - Page 10 WARNING Do not use the machine with the grounding chain not in contact with the floor. If the grounding chain breaks or comes off, contact customer support. Failure to do so may cause electric shock or injury to the operator or damage to the machine. Recharge the battery for the machine using only the battery charger that came with the machine.
- Page 11 CAUTION If the machine has fallen over, press the emergency stop button and then turn off the main power switch on the machine. Failure to do so may result in malfunction of the machine or damage or injury to property, individuals or the machine.
-
Page 12: Handling The Battery Charger
Handling the Battery Charger DANGER Do not use the battery charger at or near a place with dust, salt, corrosive gas, or flammable gas. Using the battery charger at or near a place with dust, salt, corrosive gas or flammable gas could cause fire, injury, electric shock, damage, malfunction, chemical explosion, or other damage to the machine, battery charger, battery or surrounding individuals or property. - Page 13 The battery charger is specifically for being placed sideways. Do not use it placed standing or upside down. Doing so may cause fire, injury, electric shock, damage, malfunction, overheating, leakage, chemical explosion, or other damage to the machine, battery charger, battery or . Always unplug the battery charger from the outlet if not using it for a long time or when carrying out maintenance on it.
-
Page 14: Handling The Battery
Handling the Battery DANGER Use the machine within an ambient temperature range of 5°C to 40°C. Also store in a dry environment with no dust in an ambient temperature range of 5°C to 40°C. Failure to do so may cause fire, injury, electric shock, damage, malfunction, overheating, leakage, chemical explosion, or other damage to the machine, battery charger, battery or . -
Page 15: Handling Near Electronic Medical Devices
Handling near Electronic Medical Devices DANGER If wearing an implanted cardiac pacemaker or implanted defibrillator, consult with the manufacturer of such medical device to confirm a safe operational distance from the machine. Electric signals may affect the operation of the pacemaker or defibrillator. Do not use in a healthcare environment or near electronic medical devices. -
Page 16: Pictorial Symbols
DISCLAIMER SOFTBANK ROBOTICS CORP. ("COMPANY") DISCLAIMS ANY AND ALL LIABILITY ARISING FROM THE USE OF THIS DOCUMENT AND DOES NOT GUARANTEE THAT ANY INFORMATION CONTAINED HEREIN IS ACCURATE OR COMPLETE. -
Page 17: Supplied Accessories
Whiz Operational Manual Supplied Accessories Items delivered with / inside the accessory box All accessories besides the brush are stored in the accessory box inside the battery compartment ( see "Names of Parts"). Brush×1 Items delivered separately charger Home Location Codes×10 Depending on your contract details, Home Location Codes may be bundled with the machine. -
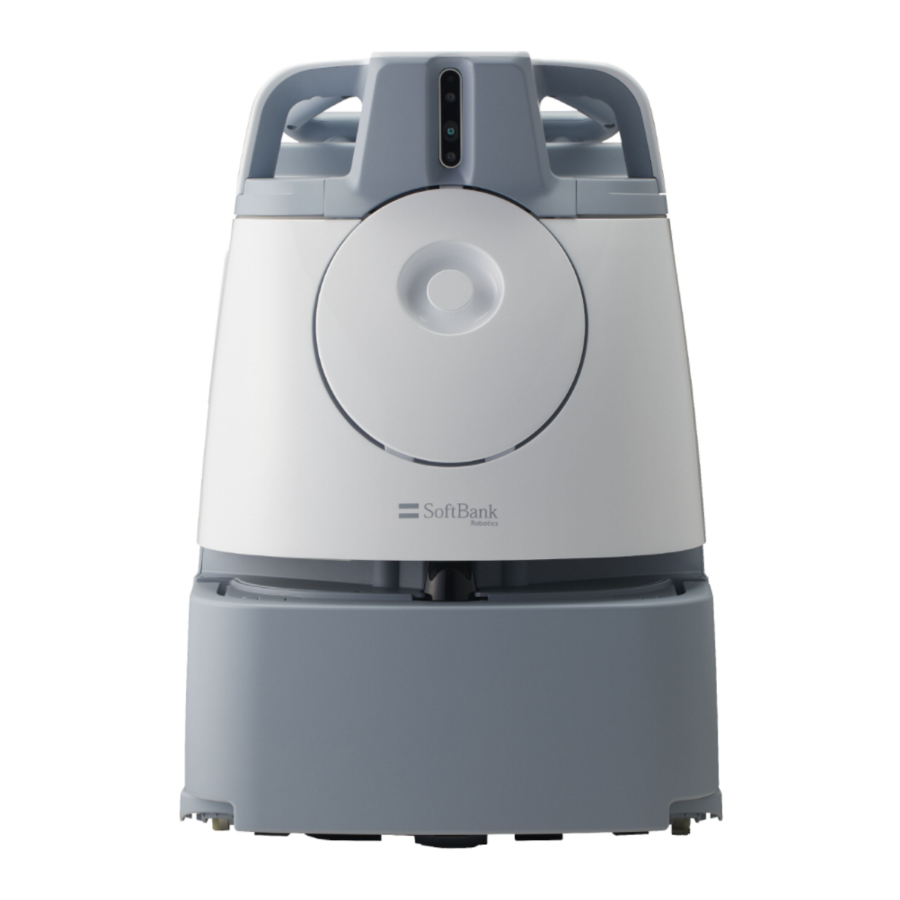
Page 18: Names Of Parts
Whiz Operational Manual Names of Parts Machine Front/Side, Back Item Lift handles LED light Wheel 2D/3D camera (sensor) Dustbin LIDAR sensor Bumper Steering handle Main power switch Filter cover Rubber pad... - Page 19 Machine Top, Bottom Item Emergency stop button Touch display Max power mode button Autonomous clean start/stop button Vacuum power button Front wheel Brush compartment Hopper tray Rear caster Grounding chain Cliff sensor...
-
Page 20: Machine Setup And Parts Installation
Whiz Operational Manual Machine Setup and Parts Installation Unpacking the Machine For your safety, work with more than two people when unpacking the machine. Check that the packaging is not damaged; if damaged, immediately contact customer support. Do not discard the packaging box or packing material, and store it safely. - Page 21 Remove the outer box. Also remove the brush that is attached inside the outer box. Remove the cushioning material. Take the machine out of the inner box.
- Page 22 Remove the plastic bag. Remove the cushioning material between the bumper and the machine . Either hold the lift grip or use the steering handle to bring the machine to the cleaning location.
-
Page 23: Preparing To Use The Machine
Whiz Operational Manual Preparing to Use the Machine Check the Emergency Stop Button Check that the Emergency Stop Button is not pressed. If pressed, turn it to the right to release. -
Page 24: Check The Dustbag
Check the Dustbag Make sure the dustbag is properly installed to the machine. If it has not been properly installed or if the dustbin cover does not close, reinstall the dustbag by following the dustbag installment procedure. ( see “Dustbag”). Pull the cover towards you to remove Check that the dustbin pin is afloat If the dustbag is correctly set, the pin will float. -
Page 25: Check The Hepa Filter
Check the HEPA Filter Make sure the HEPA filter is properly installed to the machine. If they have not been properly installed, reinstall the filters by following the HEPA filter installment procedure. ( see “HEPA Filters”). Remove the cover by turning it to the left. Check that the HEPA filter is properly installed. -
Page 26: Check The Hopper Tray
Check the Hopper Tray Check that the Hopper Tray is properly installed. If it is not installed properly, reinstall the Hopper Tray ( See 'Hopper Tray'). From the back of the machine, check if the Hopper tray is installed correctly. -
Page 27: Installing The Brush
Installing the Brush Stow the steering handle (see “Steering Handle”). Hold the lift handle with one hand, and hold the steering handle down with another hand. Please operate with two people. - Page 28 Gently lay the machine down so that the dustbin faces upward. The Rubber pad will support and stabilize the machine. Please ensure that the steering handle is not sticking out of the machine. Take care not to let the machine fall forcefully or to turn. A concrete or other hard surface will scratch the machine;...
- Page 29 Push the brush in to the right, and attach the left end of the brush to the socket while aligning the same marks. Spin the brush and check that the marks on the left and right side of the brush are installed correctly in the socket.
-
Page 30: Charging
Charging About Battery and Recharging The battery operates for about xx hours when cleaning in normal mode. About 4.5 hours are required for the battery to be fully recharged. Do not use a power cable or AC adapter other than the one supplied with the machine. Only use the power cable that the country label of Japan (country name) is affixed. - Page 31 Open the charger cover Press the green button to turn on <Switch OFF> <Switch ON>...
- Page 32 Check the direction of the positive and negative terminals on the charger plug Insert the charger plug into the machine until it clicks When the battery is recharged correctly, the charge light flashes in green. Recharging is completed when the charge light lights in green.
- Page 33 Charge light Charging status is indicated by the light on the battery charger. Charging Status Charge Light Description Recharging Lit orange Recharged Lit green 100% Lit red The charger/ machine is running hot Recharging Temporary communication error has occurred paused Failure Flash red “Battery disconnect switch”...
-
Page 34: Removing The Protective Film
Removing the Protective Film Remove the protective film on 2D/3D Camera (sensor) Please be careful not to damage the sensor when removing the film. -
Page 35: Connecting To Robot Operations Center (Roc)
Connecting to Robot Operations Center (ROC) When turning the main power switch On, the machine will automatically connect to the network and Robot Operations Center (ROC). Press the main power switch (I/O) to set it on (I) Loading screen will be shown on the touch display. Check the Robot Operations Center indicator at the top right of the touch display ( see “Touch Display”) If the ROC indicator is not displayed, move the machine to an area where the network can be connected. -
Page 36: Operation
Whiz Operational Manual Operation Main Power Switch Turning the Power On Press the main power switch (I/O) to set it on (I) Loading screen will be shown on the touch display. Home screen will be displayed when the Power button is turned On. Do not turn the power Off until the Home screen is displayed. -
Page 37: Led Lights
LED Lights The LED lights notify you about the state of the machine, error information, etc. The LED lights on the front and back of the machine light in different colors and patterns. Color and pattern Appearance Description Lighting in each color The machine’s system is starting up. - Page 38 Color and pattern Appearance Description Rear LED light is flashing white The Cliff sensor was activated during autonomous cleaning, an d the machine is going backward (traveling backward). Flashing bright red rapidly Emergency stopped. Flashing red rapidly An alert has occurred on the machine. (For instance, this can occur if the machine has been lifted while the system is starting up)
-
Page 39: Touch Display
Touch Display You can check battery level, connection to the Robot Operations Center, error messages, and other information on the touch display. Teaching and selection of cleaning routes necessary for performing autonomous cleaning ( see “Autonomous Cleaning (Robot)”) are also done from the touch display. -
Page 40: Indications On The Touch Display
Indications on the Touch Display Main menu screen Item Description ROC indicator A few minutes after turning the power on, the machine automatically connects to the Robot Operations Center. If the machine is connected successfully, the ROC indicator will be displayed. ROC indicator Robot Operations Center (ROC) display... - Page 41 Error message screen Item Description Notification Appears at upper left of the touch display. For alerts concerning machine components, follow instructions on the touch display to remedy problems. Alert screen You can check the alert by tapping on the notification in “4”. If there are several alerts, tap “>”...
-
Page 42: Vacuum Power Button
Vacuum Power Button Press the vacuum power button to start vacuuming. Press the button again to stop vacuuming. Pressing the vacuum power button stops vacuuming in either normal mode or max power mode. Max Power Mode Button Press the max power mode button to change the cleaning mode from normal mode to max power mode. To clean in max power mode, check that the vacuum power button is on, and press the max power mode button. -
Page 43: Steering Handle
Steering Handle Use the steering handle to move and change the direction of the machine during manual cleaning, to teach route, and to transport the machine. Observe the following when using the steering handle. Check if the steering handle is unstable (not firmly attached). Avoid abruptly turning with the steering handle. -
Page 44: Autonomous Clean Start/Stop Button
Autonomous Clean Start/Stop Button Press the autonomous clean start/stop button to start autonomous cleaning mode ( see “Autonomous Cleaning (Robot)”), pause the machine, or restart cleaning. The autonomous clean start/stop button is used only in autonomous cleaning mode. Press the autonomous clean start/stop button Autonomous cleaning starts. -
Page 45: Inspection Before Operating The Machine
Whiz Operational Manual Inspection Before Operating the Machine Before starting manual cleaning mode/autonomous cleaning mode, be sure to perform the following inspection. Inspecting the Machine Check that the emergency stop button is not pressed Check that the grounding chain on the bottom of the machine is in contact with the floor Check the HEPA filters, and replace with new HEPA filters if especially dirty ( see “HEPA Filters”) -
Page 46: Autonomous Cleaning (Robot)
Whiz Operational Manual Autonomous Cleaning (Robot) Overview The machine is capable of automatically cleaning on a saved cleaning route (autonomous cleaning mode). To clean in autonomous cleaning mode, you must first teach a cleaning route ( see “Teaching a New Cleaning Route”) and with the machine scan the Home Location Code you have created ( see “Home Location Codes... -
Page 47: Home Location Codes
Home Location Codes Home Location Codes are markers indicating where cleaning routes start and stop. They are used for establishing the machine’s home location, and according to the size of the cleaning area, one or several Home Location Codes are used (6 cleaning routes can be saved for 1 Home Location Code). In a building with several floors, a Home Location Code specific to each floor must be placed. -
Page 48: Locations For Placing Home Location Codes
Locations for Placing Home Location Codes Place Home Location Codes on walls, columns, etc. near areas that are frequently cleaned. The back of Home Location Codes is sticky, allowing them to be placed directly on walls, etc. Replace with new Home Location Codes if they have lost their stickiness. Depending on the wall material, the coating may peel where Home Location Codes are placed. -
Page 49: Group Function And Cleaning Routes
The machine communicates with the Robot Operations Center (ROC) and taught cleaning routes are saved to the cloud. By assigning multiple robots to the same group through the Whiz Connect Portal*, the robots can share the cleaning routes. When one robot scans the Home location code, all the robots display the same cleaning route. -
Page 50: Precautions When Teaching A Cleaning Route
A passageway of more than 80cm 2.6ft in width is needed in order for Whiz to operate autonomously at an optimum speed. *If the width of the passageway is below 80cm 2.6ft , the machine may recognize an obstacle and the speed may decrease or the machine may stop. - Page 51 Please do not include any of the following locations in the cleaning route. If there are any obstacles, please remove them in advance. Prohibited locations Specific Examples Areas with steps higher than 1.5 cm Grooves between floors, drainage lids, gratings Around elevators or escalators Braille blocks or thick rugs Angled surface...
-
Page 52: Robot Operations Center (Roc)
If the cleaning area is exposed to direct sunlight or strong light, close curtains and blinds to block out light. Use manual cleaning in the vicinity of automatic doors, window glass, and reflective products such as mirrors. * An error may occur if autonomous cleaning is used. Some objects laying on a floor may not be detected as obstacles depending on their size (slippers, cords, retracting electrical outlets). -
Page 53: Teaching A New Cleaning Route
Teaching a New Cleaning Route Planning a Cleaning Route Teach a route that will allow the cleaning area to be cleaned the most optimally and efficiently, taking into consideration its layout and size (area). During autonomous cleaning, the machine will operate at a relatively low speed for safety. Time from start to completion of autonomous cleaning will be longer than the time required to teach the cleaning route. -
Page 54: Teaching And Saving A Cleaning Route
Teaching and Saving a Cleaning Route Before teaching a cleaning route, check “Checking Precautions when Teaching a Cleaning Route”. Hold down the unlock buttons and unlock the upper handle from the machine Pull the steering handle straight up while holding down the buttons on the left and right of the upper handle, and step on the blue pedal to adjust the position. - Page 55 Move the machine to the Home Location Code where cleaning is to be carried out ( see “Home Location Codes and Cleaning Routes”) Press the main power switch (I/O) to set it on (I) A screen appears on the touch screen ( see “Touch Display”) for selecting “TEACH ROUTE/RUN ROUTE/SETTINGS”.
- Page 56 Place the machine so that the machine’s sensor and the Home Location Code are parallel, and scan the Home Location Code When the machine has scanned the Home Location Code correctly, a green frame appears. Otherwise, a red frame appears. Check that the Home Location Code is placed in the correct location ( see “Home Location Codes and Cleaning Routes”), or that the Home Location Code and machine are distanced about 80 cm 2.6ft apart.
- Page 57 Select for where to save cleaning route The selected spot is assigned to the new cleaning route. Once the number of saved routes has reached the limit, either delete existing cleaning routes ( see “Deleting Cleaning Routes”),or scan a different Home Location Code. Press the vacuum power button ( see “Vacuum Power Button”) If the floor is in a very bad condition, use Max power mode see “Max Power Mode Button”...
- Page 58 Use the steering handle to move the machine, and clean the entire cleaning route (teaching route) Changing between normal mode and max power mode ( see “Max Power Mode Button”) is also learned in a cleaning route. Teaching a cleaning route with few detours allows the machine to travel with fewer decreases in speed for more efficient cleaning.
- Page 59 Return to the Home Location Code scanned at procedure 5 Scan the Home Location Code The cleaning route is saved. The saved route appears in the “RUN ROUTE” menu.
-
Page 60: Deleting Cleaning Routes
Deleting Cleaning Routes On the touch display, tap “SETTINGS” The settings menu appears. Tap “ROUTES” A list of saved Home Location Codes appears. Select the Home Location Code with the routes to delete A list of cleaning routes appears. - Page 61 Tap “DELETE” The selected cleaning routes are deleted.
-
Page 62: Carrying Out Autonomous Cleaning
Carrying Out Autonomous Cleaning Select a previously taught cleaning route to start autonomous cleaning ( see “Teaching a New Cleaning Route”) and carry out autonomous cleaning. Before carrying out autonomous cleaning, always inspect the machine ( see “Inspection Before Operating the Machine”). Carry out autonomous cleaning at a time with the fewest number of people passing through and the least number of objects nearby. - Page 63 Scan the Home Location Code When the Home Location Code is recognized correctly, it will turn green, and a screen for selecting a route appears on the touch display. On the touch display, select the cleaning route Stow the steering handle (see “Steering Handle”)
- Page 64 Press the autonomous clean start/stop button ( see “Autonomous Clean Start/Stop Button”) Autonomous cleaning begins. During autonomous cleaning, the LED light flashes orange twice in the direction the machine is turning. (example: when the machine is going to turn right, the LED light on the right side will flash). During autonomous cleaning, the machine travels somewhat away from the edges of walls at a certain distance so as not to scratch walls, etc.
-
Page 65: Manual Cleaning
Whiz Operational Manual Manual Cleaning In order to clean areas that cannot be cleaned in autonomous mode, (along a wall, etc), you can use manual mode. Before carrying out manual cleaning, be sure to check “Inspection Before Operating the Machine”... - Page 66 Hold down the buttons on the left and right of the upper handle and raise the upper handle towards you. Use the vacuum power button and max power mode button to start cleaning ( see “Vacuum Power Button”, “Max Power Mode Button”) The machine is designed to be moved forward to clean floors;...
-
Page 67: Machine Battery; Recharging The Machine's Battery
Whiz Operational Manual Machine Battery; Recharging the Machine’s Battery About Battery and Recharging The battery operates for about 3 hours when cleaning in normal mode. About 4.5 hours are required for the battery to be fully recharged. Do not use a power cable or AC adapter other than the one supplied with the machine. -
Page 68: Recharging The Battery
Recharging the Battery Before using the machine, turn the main power switch on the machine off, and recharge the battery in the battery charger. Insert the plug of the power cable into an outlet Turn off the main power switch Open the charger cover... - Page 69 Press the green button to turn on <Switch OFF> <Switch ON> Check the direction of the positive and negative terminals on the charger plug.
- Page 70 Insert the charger plug into the machine until it clicks. When the battery is recharged correctly, the charge light flashes in green. Recharging is completed when the charge light lights in green. Charge light Charging status is indicated by the light on the battery charger. Description Charging Charge Light...
-
Page 71: Maintenance And Safety
( see “Main Power Switch”). Brush ( see “Brush”) HEPA filter ( see “HEPA Filters”) Hopper tray ( see “Hopper Tray”) Machine repair should only be carried out by technical staff approved by SoftBank Robotics. -
Page 72: Brush
Brush Remove the brush, and remove any dirt or hair caught in it as necessary. If the brush is damaged, replace with a new brush following the steps below. When cleaning the brush, do not pull the brush forcefully. Doing so may damage the brush. If the bottom of the machine is dirty, wipe with a dry cloth. - Page 73 Gently lay the machine down so that the dustbin faces upward. Rubber pad will support and stabilize the machine. Please ensure that the steering handle does not stick out of the machine. Try to avoid letting the machine fall or turn over on its side. A concrete or other hard surface will scratch the machine;...
- Page 74 Mounting a new brush Check the marks on the left and right ends of the new brush The mark on the left The mark on the right When the machine is laid down, with the front side facing up, you will see the sockets of the brush compartment.
- Page 75 Hold the lift handle with one hand, and hold the steering handle down with another hand Holding the lift handles by both hands, gently raise the machine Please ensure that the steering handle does not stick out of the machine.
-
Page 76: Hepa Filters
HEPA Filters Check that dirt has not accumulated in the HEPA filters and that they are not damaged. If dirt has collected or they are damaged, replace them with new filters following the steps below. Do not wash the HEPA filters with water. Place your fingers in the holes of the filter cover and turn to the left to remove Hold the HEPA filter by the tab in the middle and remove Install the new HEPA filter, replace the filter cover, and turn to the right to close... -
Page 77: Dustbag
Dustbag Replace with a new dustbag when it gets full. Remove the dustbag Pull the cover towards you to remove Pull out the attachment sheet for the dustbag inside the dustbin Remove the used dustbag from the dustbin... - Page 78 Attach the new dustbag Spread the new dustbag out and inflate Please be careful not to rip the dustbag. With a new dustbag, hook the left side of the attachment sheet to the catch on the left side of the suction port Follow the illustration on the dustbag and make sure that the side of the illustration faces upwards.
- Page 79 Align the opening in the attachment sheet with the suction duct, and push the right of the attachment sheet in firmly Be careful not to pinch your fingers. Check that the dustbin pin is afloat If the dustbag is attached properly, the stopper in the dustbin is raised away as shown below. If the dustbag is not attached properly, the stopper will prevent the dustbin cover from being closed.
-
Page 80: Hopper Tray
Hopper Tray Empty the hopper tray after every cleaning. Remove and replace the hopper tray following the steps below. The hopper tray is shaped as below, and is located on the bottom of the machine ( see “Names of Parts”). Do not remove the hopper tray while the machine is laying on its side. - Page 81 Slide the hopper tray into the bottom of the machine from the left Press the hopper tray all the way in...
-
Page 82: Charger
Charger Before recharging the battery, check that no dust or dirt is present in the air vents on the charger. Remove any dust or dirt from the air vents Check visually for anything abnormal (discoloration, corrosion) and for any abnormal sound, etc. from inside the charger... -
Page 83: Sensors
Sensors If dust or dirt is on the sensor, remove by using a micro-fiber cloth. 2D/3D Camera (sensor), LIDAR sensor Wipe the 2D/3D camera (sensor) and LIDAR sensor with the micro-fiber cloth Check that nothing is caught in the gaps around the bumper, and that the machine moves back several centimeters when the bumper is pushed slightly... - Page 84 Cliff sensor Stow the steering handle (see “Steering Handle”) Hold the lift handle with one hand, and hold the steering handle down with another hand. Please operate with two people.
- Page 85 Holding the lift handles with both of your hands, gently lay the machine on its side so that the side with the dustbin is up When the machine is laying on its side, it is supported by the rubber pad. Please ensure that the steering handle does not stick out of the machine.
-
Page 86: Storing The Machine
Whiz Operational Manual Storing the Machine Once cleaning completes, move the machine manually to its predetermined place of storage. When not using the machine, store it with its power turned off. Store the machine where it will not be a hindrance to fire doors, stairs, or firefighting equipment. -
Page 87: Packaging The Machine
Packaging the Machine If not using the machine for a long time, follow the steps below to pack the machine. As a safety precaution, always work with at least two people. Before packing the machine, be sure to remove the battery ( see “Machine Battery; Recharging the Machine's Battery”). - Page 89 Insert the cushioning material Cover the inner box with the outer box Cover the outer box as the same direction as the cushioning material inside the inner box. Attach the locking tab to the outer box There are 4 locking tabs on the outer box.
- Page 90 Press the locking tab lock until you hear a “click” Locking tab will lock. Make sure the locking tab will not come off from the outer box...
-
Page 91: Troubleshooting
Whiz Operational Manual Troubleshooting Stopping/Pausing the Machine On the back of the machine, press the autonomous clean start/stop button The machine stops. To restart machine operation, press the autonomous clean start/stop button again. To stop auto cleaning, tap “CANCEL ROUTE” on the touch display. -
Page 92: Emergency Stop
Emergency Stop If an emergency occurs, press the emergency stop button and immediately stop the machine. Only use the emergency stop button in an emergency. To pause the machine during autonomous cleaning, use the autonomous clean start/stop button ( see “Autonomous Clean Start/Stop Button”). -
Page 93: Releasing The Machine From Emergency Stop
Releasing the Machine from Emergency Stop Check the safety of the machine and surrounding area before releasing the machine from emergency stop. Turn the emergency stop button to the right Check that the button springs up. Press the autonomous clean start/stop button Autonomous cleaning resumes. -
Page 94: Kill Switch
Kill Switch The switch for turning the main battery on/off. Keeping the kill switch off when not using the machine for a long time, etc. reduces the battery consumption. Press the green button to turn on and the red button to turn off. The kill switch is off to reduce the battery consumption at delivery. -
Page 95: Checking Machine Alerts
Checking Machine Alerts During an autonomous operation, if the machine encounters an obstacle, senses danger or if the battery is low, there will be a notification alert on the touch display. ( see “Touch Display”) If you see an alert, please follow the instructions on the touch display. -
Page 96: Machine Specifications
Whiz Operational Manual Machine Specifications Machine model A00041301 Machine size (length × width × height) 474mm × 455mm × 653mm 18.6 in ×17.9 in × 25.7 in Approx. 30 kg 66 lbs Machine weight Machine weight (battery installed) 35 kg... -
Page 97: Glossary
Group Function It is a function that multiple robots can share cleaning routes. ( See “Group Function and Cleaning Routes”) Need to create a group in advance through the Whiz Connect Portal, and assign robots to the group. Grounding chain Chain for channeling the machine’s electrical charge (static electricity) to the ground. - Page 98 Terminology Description HEPA filters High-performance exhaust filters located at the exhaust of the machine for removing dirt and particles. ( see “HEPA Filters”) HEPA filter covers Removable covers on the machine’s exhaust. ( see “HEPA Filters”) Home Location Code Code used for having the machine learn where cleaning start/end points are in autonomous cleaning mode.
- Page 99 ( see “Touch Display”) Vacuum power button Button for starting/ending vacuuming. ( see “Vacuum Power Button”) Whiz Connect app App for checking current robot operation and alerts. Whiz Connect Portal Portal site allowing management of current robot operation and alerts as well as...
- Page 100 Softbank Robotics corp.
Need help?
Do you have a question about the Whiz and is the answer not in the manual?
Questions and answers