Sign In
Upload
Download
Table of Contents
Contents
Add to my manuals
Delete from my manuals
Share
URL of this page:
HTML Link:
Bookmark this page
Add
Manual will be automatically added to "My Manuals"
Print this page
×
Bookmark added
×
Added to my manuals
Manuals
Brands
Passap Manuals
Sewing Machine
ELECTRONIC 8000
Operating manual
Passap ELECTRONIC 8000 Operating Manual
Hide thumbs
1
2
3
4
5
6
7
8
9
10
11
12
13
14
15
16
17
18
19
20
21
22
23
24
25
26
27
28
29
30
31
32
33
34
35
36
37
38
39
40
41
42
43
44
45
46
47
48
49
50
51
52
53
54
55
56
57
58
59
60
61
62
63
64
65
66
67
68
69
70
71
72
73
74
75
76
77
78
79
80
81
82
83
84
85
86
87
88
89
90
91
92
93
94
95
96
97
98
99
100
101
102
103
104
105
106
107
108
109
110
111
112
113
114
115
116
117
118
119
120
121
122
123
124
125
126
127
128
129
130
131
132
133
134
135
136
137
138
139
140
141
142
143
144
145
146
147
148
149
150
151
152
153
154
155
156
157
158
159
160
161
162
163
164
165
166
167
168
169
170
171
172
173
174
175
176
177
178
179
180
181
182
183
184
185
186
187
188
189
190
191
192
193
194
195
196
197
198
199
200
201
202
203
204
205
206
207
208
209
210
211
212
213
214
215
216
217
218
219
220
221
222
223
224
225
226
227
228
229
230
231
232
233
234
235
236
237
238
239
240
241
242
243
244
245
246
247
248
249
250
251
252
253
254
255
256
257
258
259
260
261
262
263
264
265
266
Table Of Contents
267
page
of
267
Go
/
267
Contents
Table of Contents
Bookmarks
Table of Contents
Important Safeguards
Index
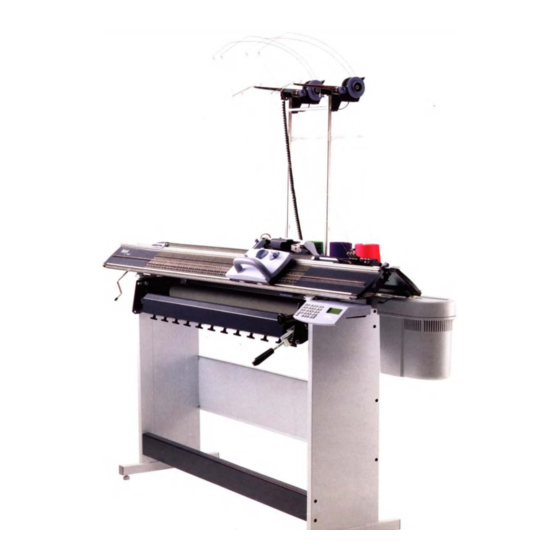
The Machine
The Cam Boxes
The N-X Lever
The Pattern Selector Dial
The Jack Positions
Rest Position
The Jack Slider
The Color Changer
Threading the Color Changer
The Feeder Allocation
Knitting with One Color
The Motor
Stop at the End of the Row
Change of Direction
The Fabric Takedown
Locking the Fabric Takedown Unit
Opening the Fabric Takedown
Setting of the Fabric Takedown
The Screws for the Pressure Rollers
The Control Unit
The Display
Correlating Displays
Example of a Display Group
The Keyboard
Ent
Cursor
Help
Clr
Res
Program Structure
The 1 0 Pattern Sectors
Information from the Row Counter
Knitting Instructions
The Meaning of the Knitting Instructions
Handle up
Handle down
Select the Zero Pattern Sector for Knitting
Knitting a Pattern Sector
The Preparation Rows
The Color Display
Cam Box Setting
Changing to Another Pattern Sector
Meaning of the Input Fields
Loading the Complete Sector from the Memory
Front Bed Pattern
Back Bed Pattern
How to Alter the Pattern
Examples of How to Enter Pattern Repeats
Programming of a Placed Motif
Inverting Front to Back
N um B E R of Colors
The Color Sequence
Reasons for a Color Sequence Change
The Pre-Knitting Rows
Row Counter
The Transition Rows
To Release the Knitting
Programming a Single Stop
Changing the Knitting Width
The One Time Feeder Change
Al Location of Feeder Functions
Changing the Drive Power
First Line
Changing the Error Preventing
Second Line
Save
The Electronic Clock Settings
The Casting on
Cast-On with Racking for Knit
Single-Bed Tuck Stitch Pattern, Plain
Color Stripes for Stocking Stitch
Single-Bed Stuck Stitch Pattern, Plain
Single-Bed Tuck Stitch Pattern in Two Colors
Slip Stitch Pattern, Plain
Tubular Tuck Stich Pattern
Slip Stitch Pattern, Tubular
Tuck-Stitch Pattern, Double-Bed
Tuck Stitch Pattern, Double Bed
Tuck Stitch Pattern Double Bed
Pintuck Pattern
Racking Pattern
Racking Pattern with Long Stitch on Front Bed
Racking Pattern with Tucks
Tuck Stitch Pattern with Racking
Tuck Stitch Pattern with Racking, Two Colors
Zig-Zag Pattern
Fairisle, Knits All Stitches O N Back Bed, 2 Colors
Fairisle, Knits All Stitches on Back Bed, 2 Colors
Tubular Fairisle
Single-Bed Fairisle
Error Messages
Unravelling Rows
Wrong Cam Box Position
Position Error
Start Position Wrong
Wrong Direction
Yarn Break
Overheat
Motor Blocked
Feeder Error
Technique Invalid
V Pattern
Too Many Colors
Feeders Blocked
Pattern Erron Eous
Color Error
No Entry
Pattern Is Active
V Edges
A Edges
Key Not Active
Data Not Existing
Module Error
Not Enough Space
Wrong Cam Box Pos.
Patterns with Asterisks in the Pattern Book
Pattern Drawings
The Measurements
Pattern Data
Pattern Data
Pattern Erroneous
Pattern Drawings for Lacy Patterns
Pattern Drawings for Fairisle Patterns
Advertisement
Quick Links
1
Tubular Tuck Stich Pattern
Download this manual
E BODO
Operating Manual
•
•
Table of
Contents
Previous
Page
Next
Page
1
2
3
4
5
Advertisement
Table of Contents
Need help?
Do you have a question about the ELECTRONIC 8000 and is the answer not in the manual?
Ask a question
Questions and answers
Related Manuals for Passap ELECTRONIC 8000
Sewing Machine Passap E8000 Series Mounting Instruction
(28 pages)
Sewing Machine Passap E 8000 Operating Manual
(267 pages)
Sewing Machine Passap SwissKnitter Selectomat Manual
(51 pages)
Sewing Machine Passap Vario Knitting Manual
Passap vario knitting machine manual (25 pages)
Sewing Machine Passap alinea Directions For Use Manual
(20 pages)
Sewing Machine Passap 20 Instruction Book
(97 pages)
Sewing Machine Passap monomatic 20 Manual
(48 pages)
This manual is also suitable for:
E 8000
E8812vh
Table of Contents
Print
Rename the bookmark
Delete bookmark?
Delete from my manuals?
Login
Sign In
OR
Sign in with Facebook
Sign in with Google
Upload manual
Upload from disk
Upload from URL


Need help?
Do you have a question about the ELECTRONIC 8000 and is the answer not in the manual?
Questions and answers