Table of Contents
Advertisement
Quick Links
U.S.A.
: KUBOTA TRACTOR CORPORATION
1000 Kubota Drive, Grapevine, TX 76051
Telephone : 888-4KUBOTA
Canada
: KUBOTA CANADA LTD.
5900 14th Avenue, Markham, Ontario, L3S 4K4, Canada
Telephone : (905)294-7477
France
: KUBOTA EUROPE S.A.S
19-25, Rue Jules Vercruysse, Z.I. BP88, 95101 Arɡenteuil Cedex, France
Telephone : (33)1-3426-3434
Italy
: KUBOTA EUROPE S.A.S Italy Branch
Via Grandi, 29 20068 Peschiera Borrome (MI) Italy
Telephone : (39)02-51650377
Germany
: KUBOTA BAUMASCHINEN GmbH
Steinhauser str, 100, 66482 Zweibrucken Rheinlandpfalz Germany
Telephone : (49)6332-4870100
U.K.
: KUBOTA (U.K.) LTD.
Dormer Road, Thame, Oxfordshire, OX9 3UN, U.K.
Telephone : (44)1844-214500
Australia
: KUBOTA AUSTRALIA PTY LTD.
25-29 Permas Way, Truɡanina, VIC 3029, Australia
Telephone : (61)-3-9394-4400
Malaysia
: KUBOTA MALAYSIA SDN. BHD.
No.3 Jalan Sepadu 25/123 Taman Perindustrian Axis,
Seksyen 25, 40400 Shah Alam, Selanɡor Darul Ehsan Malaysia
Telephone : (60)3-736-1388
Philippines : KUBOTA PHILIPPINES, INC.
232 Quirino Hiɡhway, Baesa, Quezon City 1106, Philippines
Telephone : (63)2-422-3500
Taiwan
: SHIN TAIWAN AGRICULTURAL MACHINERY CO., LTD.
16, Fenɡpinɡ 2nd Rd, Taliao Shianɡ Kaohsiunɡ 83107, Taiwan R.O.C.
Telephone : (886)7-702-2333
Thailand
: SIAM KUBOTA CORPORATION CO., LTD.
101/19-24 Moo 20, Navanakorn Industrial Estate, Tambon Khlonɡnuenɡ, Amphur Khlonɡluanɡ,
Pathumthani 12120, THAILAND
Telephone : (66)2-909-0300
Japan
: KUBOTA Corporation
Farm & Industrial Machinery International Operations Headquarters
2-47, Shikitsuhiɡashi 1-chome, Naniwa-ku, Osaka, Japan 556-8601
PRINTED IN JAPAN
S
S
V
6
5
·
S
S
V
7
English ( Australia )
5
Code No. V1312-5822-4
©
KUBOTA Corporation 2018
OPERATOR'S MANUAL
KUBOTA
SSL
MODELS
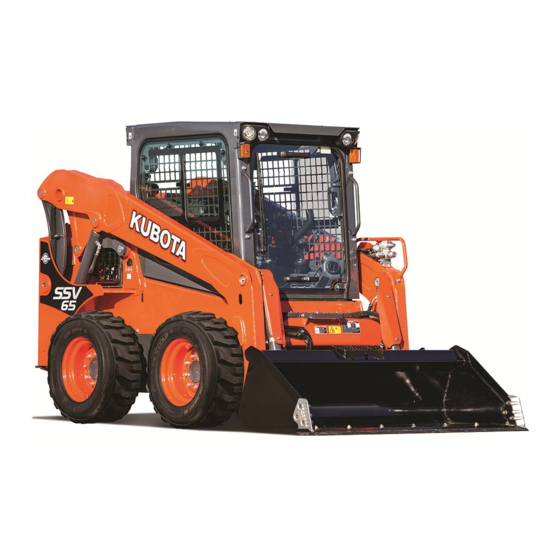
SSV65
SSV75
READ AND SAVE THIS MANUAL
Skid
Steer
Loader
1BCAAAAAP4430
Advertisement
Table of Contents

Related Manuals for Kubota SSV65


Summary of Contents for Kubota SSV65
- Page 1 SSV75 Telephone : (60)3-736-1388 Philippines : KUBOTA PHILIPPINES, INC. 232 Quirino Hiɡhway, Baesa, Quezon City 1106, Philippines Telephone : (63)2-422-3500 Taiwan : SHIN TAIWAN AGRICULTURAL MACHINERY CO., LTD. 16, Fenɡpinɡ 2nd Rd, Taliao Shianɡ Kaohsiunɡ 83107, Taiwan R.O.C. Telephone : (886)7-702-2333 Thailand : SIAM KUBOTA CORPORATION CO., LTD. 101/19-24 Moo 20, Navanakorn Industrial Estate, Tambon Khlonɡnuenɡ, Amphur Khlonɡluanɡ, Pathumthani 12120, THAILAND Telephone : (66)2-909-0300 Japan : KUBOTA Corporation Farm & Industrial Machinery International Operations Headquarters 2-47, Shikitsuhiɡashi 1-chome, Naniwa-ku, Osaka, Japan 556-8601 · 1BCAAAAAP4430 English ( Australia ) Code No. V1312-5822-4 READ AND SAVE THIS MANUAL © PRINTED IN JAPAN KUBOTA Corporation 2018...
- Page 2 Occupational Safety and Health Administration Pressure Limiter Positive Crankcase Ventilation ROPS Roll-Over Protective Structure Revolutions Per Minute Revolutions Per Second Society of Automotive Engineers, USA Suction Control Valve Slow Moving Vehicle Skid Steer Loader SSV65/SSV75 English (Australia) AY. A. 4-5. 0. K...
- Page 3 UNIVERSAL SYMBOLS As a guide to the operation of your machine, various universal symbols have been utilized on the instruments and controls. The symbols are shown below with an indication of their meaning. Caution Parking Brake Engine, Electrical Preheat Front Working Light Engine Lubricating Oil Pressure Rear Working Light Coolant Temperature...
- Page 4 FOREWORD You are now the proud owner of a KUBOTA SSL. This machine is a product of KUBOTA quality engineering and manufacturing. It is made of fine materials and under a rigid quality control system. It will give you long, satisfactory service. To obtain the best use of your machine, please read this manual carefully.
-
Page 5: Table Of Contents
CONTENTS SAFE OPERATION .................... DEALER SERVICE...................... 1 TECHNICAL DATA...................... 3 DESCRIPTION OF MACHINE PARTS................ 4 INSTRUMENT PANEL AND CONTROL ELEMENTS..........5 CHECKS BEFORE START ..................8 DAILY CHECKS....................... 8 CHECKING THE SWITCHES .................. 8 Hydraulic Unlock Switch ....................8 OPC Switch ........................8 Parking Brake Switch...................... - Page 6 CONTENTS CHECKING THE SAFETY DEVICES ..............21 Emergency Exit....................... 21 Armrests Function......................21 OPC Function ......................... 21 Forced Lift Arms Lowering Device.................. 21 Lift Arm Stopper......................22 DOOR AND WINDOWS..................23 Opening/Closing of Cab Door (Closed cab model)............23 Opening/Closing of Side Cab Window (Closed cab model) ........... 25 AIR-CONDITIONER....................
- Page 7 CONTENTS Parking on an Incline ...................... 43 Prohibited Actions......................43 LIFTING THE MACHINE ................... 44 TRANSPORTING THE MACHINE ................45 LOADING THE MACHINE ON A TRANSPORT VEHICLE........45 TOWING AN OPERABLE MACHINE ..............47 TOWING AN INOPERABLE MACHINE..............47 MAINTENANCE......................48 MAINTENANCE INTERVALS ................
- Page 8 CONTENTS Cleaning Fresh Air Filter ....................67 Cleaning Recirculation Air Filter ..................67 EVERY 250 SERVICE HOURS ................68 Checking Radiator Hoses and Clamps................68 Checking Fuel Line and Intake Air Line ................68 Adjusting V-belt Tension....................69 Cleaning Inside of Main Frame..................69 Checking Drive Chain Tension ..................
- Page 9 CONTENTS Replacement of Diesel Particulate Filter (DPF) Differential Pressure Sensor Rubber Piping (Front and Back) ....................80 Replacement of Suction pipe downstream the AFS (Air Flow Sensor) ......80 Replacement of Boost Sensor Pressure Rubber Piping..........80 Replacement of EGR Cooler Hose................. 80 SERVICING AS REQUIRED..................
- Page 11 Structure/Falling Objects Protective Structure) with a 7. Do not operate the machine while under the influence seat belt is installed by KUBOTA. Always use the seat of alcohol, medication, controlled substances or while belt when the machine is equipped with the ROPS/ fatigued.
- Page 12 17. Do not modify the machine, otherwise it could lead to unforeseen safety problems. 18. Make sure attachments, particularly those utilizing the quick-hitch, are securely mounted. Use only KUBOTA authorized attachments.
- Page 13 SAFE OPERATION 7. Never remove any of the safety features on the 18. Avoid performing any work with the machine when it is machine. on an incline, which could cause it to become A Make sure all safety features, including guards, unbalanced and rollover.
- Page 14 SAFE OPERATION 25. Never attempt to undercut a high embankment. C Safety for children Always carefully check the area for conditions that Tragedy can occur if the operator is not alert to the could cause the ground to cave-in. presence of children. Children generally are attracted to A Never operate in areas where there is a possibility of machines and the work they do.
- Page 15 When inflating the tire, use a self-holding chuck and a remotely-operable shut valve as well. Keep blowing up the tire away from it. Have it done by your KUBOTA dealer or a qualified tire repair service.
- Page 16 SAFE OPERATION 8. Always maintain the correct tire pressure. Do not 15. Use a face mask or eye protection to protect the eyes inflate tires above the recommended pressure shown and respiratory system against dust and other foreign in the operator's manual. particles.
- Page 17 SAFE OPERATION 24. Be sure to place blocks around the machine and place protection where components could fall. A Always make sure the bucket is at the lowest possible position or on the ground before performing any maintenance or repairs under the machine. A Make sure the tires are securely blocked off.
- Page 18 SAFE OPERATION 28. Use care when refueling. 30. Fire prevention A Never smoke cigarettes or permit the use of fire while Skid Steer Loader and some attachments have refueling or in the vicinity of refueling. components that are at high temperatures under A Always make sure the engine is off and cool before normal operating conditions.
- Page 19 SAFE OPERATION 31. Take care when working around hot and pressurized 34. Waste material components. A Always make sure any material and waste products A Always allow the engine to cool sufficiently before from the repair and maintenance of the machine are performing any maintenance, inspection or repairs.
- Page 20 SAFE OPERATION 6. DANGER, WARNING AND CAUTION LABELS...
- Page 21 SAFE OPERATION...
- Page 22 SAFE OPERATION...
- Page 23 SAFE OPERATION...
- Page 24 SAFE OPERATION...
- Page 25 SAFE OPERATION...
- Page 26 2. Clean danger, warning and caution labels with soap and water, and dry with a soft cloth. 3. Replace damaged or missing danger, warning and caution labels with new labels from your KUBOTA dealer. 4. If a component with danger, warning and caution label(s) affixed is replaced with new part, make sure new label(s) is (are) attached in the same location(s) as the replaced component.
-
Page 27: Safe Operation
DEALER SERVICE DEALER SERVICE Your KUBOTA dealer is always ready to help so that your machine offers the best performance. After having carefully read these instructions, you will realize that much of the routine maintenance can be done by yourself. - Page 28 DEALER SERVICE (1) Engine serial No.
-
Page 29: Technical Data
TECHNICAL DATA TECHNICAL DATA KUBOTA SSL (Skid Steer Loader) Model name SSV65 SSV75 Type Open Cab Closed Cab Open Cab Closed Cab Operating weight (including operator's weight) 3080 3200 3700 3820 Type Water cooled 4 cycle diesel engine with 4 cylinder EPA Tier 4... -
Page 30: Description Of Machine Parts
DESCRIPTION OF MACHINE PARTS DESCRIPTION OF MACHINE PARTS DEPICTED CONTENTS (1) Bucket (4) Front working light (7) Lift arm stopper (10) Rear working light (2) Tilt cylinder (5) Cab (Open cab / Closed cab) (8) Fuel tank cap (11) Hydraulic tank cap (3) Armrest (6) AUX supply port (9) Lift arm cylinder... -
Page 31: Instrument Panel And Control Elements
INSTRUMENT PANEL AND CONTROL ELEMENTS INSTRUMENT PANEL AND CONTROL ELEMENTS B Switch DEPICTED CONTENTS (1) Horn switch (2) Ride control switch (Option) (3) AUX electrical control switch (4) Travel speed switch (5) AUX electrical control switch (6) AUX port variable switch (7) AUX hold switch (Left) (8) AUX hold switch (Right) (9) Float switch... - Page 32 INSTRUMENT PANEL AND CONTROL ELEMENTS B Control Pedals, Levers and Electrical Outlet DEPICTED CONTENTS (1) Left control (traveling) lever (2) Right control (front operating) lever (3) Armrest (4) Seat (5) Engine speed control dial (6) Accelerator pedal (7) Electrical outlet...
- Page 33 INSTRUMENT PANEL AND CONTROL ELEMENTS B Instrument Panel DEPICTED CONTENTS (1) Speed indicator lamp (11) Engine oil pressure warning lamp (2) Parking brake lamp (12) Battery charge lamp (3) Hydraulic lock lamp (13) Warning lamp (4) AUX operation lamp (14) Engine rev up warning lamp (5) Ride control (KSR) lamp (15) Fuel gauge indicator &...
-
Page 34: Checks Before Start
CHECKS BEFORE START CHECKS BEFORE START DAILY CHECKS CHECKING THE SWITCHES In order to avoid damage, it is important to check the BHydraulic Unlock Switch condition of the machine before starting. To avoid personal injury or death: To avoid personal injury or death: A Do not operate the left control (traveling) lever, A Do maintenance work on the machine only on immediately after the hydraulic unlock switch... -
Page 35: Parking Brake Switch
CHECKS BEFORE START BParking Brake Switch BAUX Port Switch This switch is used to enable the AUX port. Press the switch once, and the AUX port is unlocked and the " " mark on the instrument panel lights up. By To avoid personal injury or death: pressing the switch again, the AUX port now gets locked. -
Page 36: Aux Port Switch (High-Flow Model Only)
CHECKS BEFORE START BAUX Port Switch (High-Flow model only) BWorking Light Switch This switch is operative with the starter key in the ON position. The switch has 3 positions. When positioned on the lower [High-Flow model only] side, the lights stay off. Move the switch to the middle To avoid personal injury or death: position to turn on the front working light, the front corner A Be... -
Page 37: Interior Lamp Switch
CHECKS BEFORE START BInterior Lamp Switch The interior lamp is operative when the starter key is in the "RUN" position. (1) Travel speed switch (2) Speed indicator light A When activating the travel speed switch, it must be (1) Interior lamp switch pressed completely. -
Page 38: Aux Port Variable Switch
CHECKS BEFORE START BAUX Port Variable Switch BAUX Electrical Control Switch (Option) With the AUX port unlocked, the hydraulic oil flow rate With the AUX port switch unlocked, this switch serves to varies depending on the tilt angle of the switch. feed electrical power to attachments. -
Page 39: Float Switch
CHECKS BEFORE START A [START] Turn the key from the "RUN" position another click to BFloat Switch the "START" position. The starter motor is then activated to get the engine started. Release your hand from the key, and the key returns To avoid personal injury or death: itself to the "RUN"... -
Page 40: Hydraulic Quick-Hitch Switch (Option)
CHECKS BEFORE START BWiper/Washer Switch (Closed cab model) BHydraulic Quick-Hitch Switch (Option) To start the wiper, press the upper side of the switch when the starter key is in "RUN" position. (Press further and The switch is used to attach and detach an attachment by hold for washer fluid.) activating the hydraulic quick-hitch. -
Page 41: Four-Way Flasher / Turn Signal Switch (Option)
CHECKS BEFORE START CHECKING THE LAMPS AND INDICATORS BFour-way Flasher / Turn Signal Switch BFuel Gauge Indicator (Option) Press the upper side of the switch to turn lights on. Press the lower side of the switch to turn lights off. To avoid personal injury or death: A Before adding fuel, be sure to stop the engine. -
Page 42: Remaining Fuel Warning Lamp
CHECKS BEFORE START BCoolant Temperature Gauge A If the fuel gauge indicator is near the "E", add fuel as soon as possible. If the indicator is near "E" and the machine runs on a slope, the engine may run out of To avoid personal injury or death: fuel and get interrupted. -
Page 43: Parking Lamp
If the lamp stays on with the engine running, stop the warning and other information. engine and check the engine oil level. A If the red warning lamp lights up, consult your local KUBOTA dealer immediately. (1) Engine oil pressure warning lamp (1) Warning lamp... -
Page 44: Battery Charge Lamp
CHECKS BEFORE START BBattery Charge Lamp BHour-Meter This battery charge lamp lights up if the charging system Indicates the total operating hours of the machine. fails with the engine running. When the starter key is turned in "RUN" position with the How the indicator works engine off, the lamp lights up and when the engine starts, A The meter advances one hour after an hour of... -
Page 45: Diesel Particulate Filter (Dpf) Regeneration Indicator
CHECKS BEFORE START BDiesel Particulate Filter (DPF) BAir Cleaning Warning Indicator regeneration indicator If the air cleaner is clogged, the air cleaner warning indicator on the instrument panel will light up. As PM (Particulate Matter) builds up inside the DPF, the If this should happen at high engine rpm, stop the engine DPF regeneration cycle starts automatically to burn away and clean the air cleaner element. -
Page 46: Exaust Aftertreatment Devices
A The DPF regeneration cycle only starts in the following C DPF regeneration system conditions. If any of the conditions are not met, the On the Kubota SSL, the ECU prompts DPF-regeneration DPF regeneration cycle may be interrupted. cycle. When starting the engine, Auto Regeneration Mode (1) Coolant temperature above 65 C is set by default. -
Page 47: Checking The Safety Devices
CHECKS BEFORE START CHECKING THE SAFETY DEVICES 11. Raise the right armrest. Make sure that the hydraulic lock lamp on the instrument panel lights up. 12. Move the right control (front operating) lever and make sure that the lift arms and bucket do not get activated. To avoid personal injury or death: A Place the machine on a firm, flat and level BOPC Function... -
Page 48: Lift Arm Stopper
CHECKS BEFORE START 7. Slowly raise the lift arms to the maximum height and stop the engine. BLift Arm Stopper Operator must stay in the operator seat with the seat belt fastened. 8. The second person must install the lift arm stopper. To avoid personal injury or death: Place the top of lift arm stopper upward and cover the A Never work on a machine with the lift arms up... -
Page 49: Door And Windows
CHECKS BEFORE START C Removing 1. The operator should be in the operator's seat with the seat belt fastened. 2. Start the engine and set the parking brake switch to the parking position. 3. Slowly raise the lift arms to the maximum height and stop the engine. - Page 50 CHECKS BEFORE START 4. After opening, lock in place by moving both lock pins 4. When leaving the machine, always lock the cab door. to outside to prevent door from inadvertently falling. C To open the cab door from inside, follow the steps below.
-
Page 51: Opening/Closing Of Side Cab Window (Closed Cab Model)
CHECKS BEFORE START BOpening/Closing of Side Cab Window [Rear air outlet port] (Closed cab model) 1. Pull the grip to release the lock and pull side window open to the rear. 2. To close the side window, slide it forward until the lock snaps in at the window frame. -
Page 52: Air Control Vent
CHECKS BEFORE START [Rear air outlet port] BAir Control Vent C Air outlet The air outlet ports can be independently adjusted as required. To defrost the windshield, rotate the air outlet ports toward the windshield. [Front air outlet port] (A) "CHEST AREA" (B) "WINDSHIELD"... -
Page 53: Control Panel
CHECKS BEFORE START BControl Panel BOperation C Heating 1. Adjust the blower (1/2/3) switch and the temperature control lever to achieve the desired temperature level. A In summer when the heater is not used, keep the temperature control lever at the "COOL" (rightmost) position. -
Page 54: Operation Of The Engine
OPERATION OF THE ENGINE OPERATION OF THE ENGINE STARTING THE ENGINE To avoid personal injury or death: A To avoid danger exhaust fume To avoid personal injury or death: poisoning, do not operate the machine in a A The operator should not depend solely on the closed building without proper ventilation. -
Page 55: Checkpoints After Starting The Engine
A Exhaust is black. A Warning lamp for engine oil lights up during operation. A In these cases, the machine must be checked and serviced by your local the KUBOTA dealer. (1) Engine oil pressure warning lamp (2) Battery charge lamp... -
Page 56: Starting The Engine Under Cold Conditions
OPERATION OF THE ENGINE STARTING THE ENGINE UNDER COLD BObserve Following Guidelines when CONDITIONS Starting with an Auxiliary Battery 1. Bring the helping machine with the same battery voltage as near as possible to the machine. To avoid personal injury or death: THE MACHINES MUST NOT COME IN CONTACT A Make sure that the armrests are in the "Raised"... -
Page 57: Operation Of The Machine
OPERATION OF THE MACHINE OPERATION OF THE MACHINE RUNNING-IN OF THE MACHINE A Make sure the machine is equipped with a lighting system that is adequate for the job The operation and care of the new machine influences its conditions. life span. -
Page 58: Seat Belt
OPERATION OF THE MACHINE BSeat Belt BArmrest Move the armrests to the "RAISED" position to lock out the hydraulic and electric systems. To avoid personal injury or death: A Always use the seat belt with a ROPS/FOPS protection structure. Adjust the seat to the optimal position and buckle up. -
Page 59: Traveling
If the machine does not remain A Make sure the bucket or attachment is lowered stationary with the left control (traveling) lever in sufficiently. neutral position, consult your local KUBOTA dealer. BPivot Turn BForward and Backward Travel C To turn forward to the left: The control lever is on the left side in front of the seat. -
Page 60: Spin Turn
OPERATION OF THE MACHINE BSpin Turn To avoid personal injury or death: C To spin left: A Do not exceed the rated operating capacity of Tilt the left control (traveling) lever to the left. the unit. If loads exceed this operating C To spin right: capacity, the unit can experience a hydraulic Tilt the left control (traveling) lever to the right. -
Page 61: Auxiliary Hydraulic Control
OPERATION OF THE MACHINE AUXILIARY HYDRAULIC CONTROL C Disconnecting 1. Push the quick couplers tightly and hold for a few seconds, the pressure is relieved automatically. (Pressure relief system) To avoid personal injury or death: 2. Detach the couplers. A Stop the engine and relieve pressure before connecting or disconnecting lines. -
Page 62: Auxiliary Hydraulic Control Operation
OPERATION OF THE MACHINE [High-Flow model only] BAuxiliary Hydraulic Control Operation 1. Start the engine (refer to "OPERATION OF THE ENGINE" and "OPERATION OF THE MACHINE" To avoid personal injury or death: section). A Be careful High-Flow 2. Press the hydraulic unlock switch. incompatible attachment in the High-Flow 3. -
Page 63: Attachment Control Device (Option)
OPERATION OF THE MACHINE ATTACHMENT CONTROL DEVICE C 14-pin coupler harness connection chart (OPTION) REF. REMARKS Port This option is used to feed electrical power for an attachment (to drive a valve, for instance). With the AUX port ready for use, power can be supplied. AUX 1st func. -
Page 64: Mechanical Quick-Hitch
OPERATION OF THE MACHINE MECHANICAL QUICK-HITCH 1. To mount an attachment, pull the levers of the quick- hitch lock pins to the "UNLOCKED" position. The BAttaching Attachments quick-hitch levers must be all the way up to ensure that the lock pins are fully retracted. This machine utilizes a quick-hitch for easy connection 2. -
Page 65: Detaching Attachments
OPERATION OF THE MACHINE 5. When the attachment is properly seated in the saddle and against the front of the quick-hitch mounting plate, turn off the engine and set the parking brake. Push the quick-hitch levers to the fully "LOCKED" position. Verify both lock pins are completely engaged in the base of the attachment. -
Page 66: Hydraulic Quick-Hitch (Option)
OPERATION OF THE MACHINE 2. Position the machine squarely in front of the HYDRAULIC QUICK-HITCH (OPTION) attachment and tilt the quick-hitch forward with the tilt cylinders. BAttaching Attachments A Attachments should be located on a level, firm surface when attaching and detaching them from the quick- hitch. -
Page 67: Detaching Attachments
OPERATION OF THE MACHINE 5. When the attachment is properly seated in the saddle and against the front of the quick-hitch mounting plate, push and hold the hydraulic quick-hitch switch in locked position until the levers are fully in locked position. -
Page 68: Important Information On Machine Operation
A Never allow the main body of the machine to become of tires. submerged in water or sand. Contact your Kubota A Never exceed the operating capacity of the machine. Dealer or Service Outlet if the main body of the A Never use the machine to move material or perform machine is exposed to water. -
Page 69: Parking On An Incline
OPERATION OF THE MACHINE A Never approach an incline horizontally or diagonally. Always return to a flat surface and redirect the BParking on an Incline machine. A It is best to park the machine on firm, level ground A Beware of unstable and slippery surfaces such as using the parking brake but if you must park the grass, leaves, wet metal or ice. -
Page 70: Lifting The Machine
KUBOTA dealer. manual carefully before lifting. The Single-Point Lift, supplied by KUBOTA, is designed to A Select a firm level surface, lower the working lift and support the KUBOTA loader without affecting equipment to the ground, stop the engine, set arm rest... -
Page 71: Transporting The Machine
TRANSPORTING THE MACHINE TRANSPORTING THE MACHINE 3) Use mounting brackets to secure ramps properly to the truck or trailer. 4) Determine and use the correct length of ramps To avoid personal injury or death: to avoid a steep angle of approach as shown A Make sure the ramps load capacity is greater below. - Page 72 TRANSPORTING THE MACHINE 9) Once the machine is loaded, lower the bucket 12)Depending on the attachment installed, the or attachment completely. loader arms may not come in contact with rest 10)Stop the engine, remove the key and set the stop; therefore it may be necessary to use the parking brake.
-
Page 73: Towing An Operable Machine
After disengaging hydraulic drive system, tow the machine following the below steps. (1) Chain or strap (A) Rear tow and tie-down points Contact your KUBOTA dealer more information. A Tow only from both rear tie-downs as shown in the figure to the left. -
Page 74: Maintenance
MAINTENANCE MAINTENANCE To avoid personal injury or death: A Before doing maintenance work on the machine, place the machine on a firm, flat and level surface, lower the lift arms slowly to the ground, stop the engine. Whether the machine is properly lubricated and maintained directly determines the trouble frequency and service life of the machine. - Page 75 MAINTENANCE Hour meter indicator Ref. Check points Measures Interval page 1000 1500 2000 3000 check every 250 hrs Fuel line and intake air line replace every 2 years Drive chain tension check every 250 hrs Inside of main frame clean every 250 hrs Engine oil filter cartridge replace...
- Page 76 *3 Consult your local KUBOTA dealer for this service. A The items listed above (@ marked) are registered as emission related critical parts by KUBOTA in the U.S.EPA non- road emission regulation. As the engine owner, you are responsible for the performance of the required maintenance on the engine according to the above instruction.
-
Page 77: Opening And Closing Of Components
MAINTENANCE OPENING AND CLOSING OF COMPONENTS BRear Door To avoid personal injury or death: A When opening the rear door, open it firmly to the locked position. A When opening and closing the rear door, be careful not to get your hands or other parts of your body caught. -
Page 78: Radiator And Oil Cooler
MAINTENANCE BWhere to Keep Operator's Manual (1) Rear upper cover (A) "Pull out" (1) Operator's manual storage box BRadiator and Oil Cooler BUtility Box To avoid personal injury or death: A Always stop the engine and remove the key before checking the radiator, oil cooler and fuel cooler. -
Page 79: Tilting Up The Cab
MAINTENANCE C Raising (Tilt up) 1. Select a firm, level surface, lower the lift arms fully to the ground, and stop the engine. If the lift arm must be up while raising the operator cab, install the lift arm support device. (See "Lift Arm Stopper"... - Page 80 MAINTENANCE 4. Slowly raise the cab until the cab is all the way up and C Lowering (Tilt down) the stopper latching in engages. 1. Set the stopper lock to the release position. A The required force to lift the cab is affected by the temperature.
-
Page 81: Discharging Mud From Operator Room And Main Frame
MAINTENANCE DISCHARGING MUD FROM OPERATOR 5. After discharging mud, return the hydraulic hoses at ROOM AND MAIN FRAME rear frame as illustrated bellow. BOperator room 1. Remove the floor mud outlet. 2. Discharge mud on the floor to the hole. (1) Hydraulic hose (service port) (2) Hydraulic hose (arm cylinder rod (RH)) (3) Hydraulic hose (arm cylinder bottom (LH)) -
Page 82: Daily Checks
Open the tank cap and fuel to the tank. (See "Fuel Gauge Indicator" in "CHECK BEFORE START" (1) Recovery tank (A) "FULL" section.) (B) "LOW" SSV65 96 L Fuel tank capacity SSV75 102 L A Do not fill the recovery tank over the "FULL" marking. -
Page 83: Checking Engine Oil Level
MAINTENANCE BChecking Engine Oil Level BChecking Hydraulic Oil Level To avoid personal injury or death: To avoid personal injury or death: A Stop the engine and remove the key before A Stop the engine and remove the key before checking the oil level. checking the oil level. -
Page 84: Lubrication Points
MAINTENANCE BLubrication Points 1. Check if the fins and ribs are clogged. If so clean with compressed air or steam. 2. Check the rubber hoses for damage and replace if cracked or old. Check if the hose clamps are tight To avoid personal injury or death: enough. -
Page 85: Checking V-Belt
MAINTENANCE BChecking V-belt To avoid personal injury or death: A Stop the engine and remove the key before checking the V-belt. A Check the V-belt for cracks and proper tension. (See "Adjusting V-belt Tension" in "REGULAR CHECKS MAINTENANCE WORK" section.) BWashing Whole Machine (1) Rear grills A Do not wash the machine with the engine running. -
Page 86: Checking Evacuator Valve
MAINTENANCE A As water is collected, the red float goes up. When the float has reached the specified line, immediately drain the water separator. A In reattaching the water separator, be careful to keep off dust and dirt. A Be sure to purge the fuel system before getting the machine restarted. -
Page 87: Checking Washer Liquid (Closed Cab Model)
MAINTENANCE BChecking Washer Liquid (Closed cab model) To avoid personal injury or death: A Never remove the vent caps while the engine is If the window washer is switched on with the washer liquid running. tank empty, the motor may be damaged. Always keep the A Keep electrolyte away from eyes, hands and tank filled. -
Page 88: Checking Air-Conditioner Condenser
MAINTENANCE C How to read the indicator 2. A boost charge is only for emergencies. It will partially Check the battery condition by reading the indicator. charge the battery at a high rate and in a short time. When using a boost-charged battery, it is necessary to State of indicator display recharge the battery as early as possible. -
Page 89: Cleaning Fuel Tank Cap (Vent Hole)
(4) Ground level (1) Fuel tank cap (2) Tank cap filter (3) Gasket Pressure Type (4) Vent holes SSV65 SSV75 Tire Standard 414 kPa BChecking of Tires 10 x 16.5 8ply 4.14 bar If the air pressure in the tire is too high or too low, the life... -
Page 90: Regular Checks And Maintenance Work
REGULAR CHECKS AND MAINTENANCE WORK REGULAR CHECKS AND MAINTENANCE WORK BChanging Tires To avoid personal injury or death: A Before doing maintenance work on the machine, place the machine on a firm, flat and level surface, lower the lift arms slowly to the ground, stop the engine. -
Page 91: Mounting The Tires
REGULAR CHECKS AND MAINTENANCE WORK C Removal A Once every 250 hours or after every sixth cleaning, 1. Loosen the wheel nuts each by one turn on the wheel whichever comes first, replace the air cleaner with the tires still resting on the ground to be removed. elements. -
Page 92: Cleaning Evacuator Valve
REGULAR CHECKS AND MAINTENANCE WORK C Cleaning with compressed air BCleaning Evacuator Valve Pressure of compressed air must be under 205 kPa (2.1 kgf/ ), and the element should be blown clean from the inside to the outside until the dust deposits are noticeably To avoid personal injury or death: reduced. -
Page 93: Cleaning Fresh Air Filter
REGULAR CHECKS AND MAINTENANCE WORK BCleaning Recirculation Air Filter BCleaning Fresh Air Filter Remove the fresh air filter, and blow air from the direction opposite to the filter's normal air flow. To avoid personal injury or death: Pressure of compressed air must be under 205 kPa (2.1 A When removing and attaching the filter, apply kgf/cm ). -
Page 94: Every 250 Service Hours
REGULAR CHECKS AND MAINTENANCE WORK A Do not hit the filter. If the filter becomes deformed, dust may enter into the air-conditioner, which may cause damage and malfunction. (1) Radiator hose (2) Hose clamps BChecking Fuel Line and Intake Air Line (A) "AIR CONDITIONER AIRFLOW"... -
Page 95: Adjusting V-Belt Tension
REGULAR CHECKS AND MAINTENANCE WORK BAdjusting V-belt Tension A If the engine is run with a loose V-belt, the belt could slip and cause insufficient battery charging. Check V- belt tension regularly. To avoid personal injury or death: A Should the V-belt break or jump off, the indicator light A First stop the engine and remove the key. -
Page 96: Checking Drive Chain Tension
To tighten the chains slide the front axle-hubs forward and rear axle-hubs rearward. Tightening torque: 167 to 196 N-m (A) Allowable movement SSV65 0.4 to 12 mm Allowable movement SSV75 0.3 to 12 mm... -
Page 97: Replacing Air Cleaner Element
(A) Slide for the DPF (3000 hours) can’t be followed. (2) Bolts A Use KUBOTA genuine inner and outer element. A Do not blow air to clean the case inside. It allows dust come into the inner element. A Clean up the case inside with clean wet cloth. After... -
Page 98: Replacing Engine Oil Filter Cartridge
A Always check the oil level after having exchanged the (1) Oil filling port (A) Required oil level range filter. (2) Engine oil dipstick SSV65 7.5 L Engine oil volumes (with engine oil filter) SSV75 10.0 L... -
Page 99: Every 500 Service Hours
DPF (3000 hours) will be reduced and the DPF longevity will be shorter than expected. (1) Oil filling port (2) Drain plugs (3) Oil check port SSV65 20.5 L each Hydraulic oil volume SSV75 28.0 L each... -
Page 100: Changing Return Filter (First Filter Change: 250 Hours)
REGULAR CHECKS AND MAINTENANCE WORK BChanging Return Filter (First filter change: 250 hours) BReplacing Hydraulic Oil Filter (First filter change: 50 hours) See "Hydraulic Oil Change (Including Replacing Suction Filter in the Hydraulic Tank and Return Filter)" in "EVERY 1. Raise the cab. (See "Tilting the CAB" in "OPENING 1000 SERVICE HOURS"... -
Page 101: Replacing Water Separator Filter Element
REGULAR CHECKS AND MAINTENANCE WORK EVERY 1000 SERVICE HOURS BReplacing Water Separator Filter Element Do all 50, 250 and 500 hour servicing at the same time. 1. Set the water shutoff-valve to the "CLOSE" position. 2. Loosen and remove the cup properly and replace the BHydraulic Oil Change (Including filter element. -
Page 102: Hydraulic Oil Check With Hydraulic Hammers
REGULAR CHECKS AND MAINTENANCE WORK 2. Remove the drain plug from the oil drain hose and 8. Retighten the drain plug. drain all oil. (1) Breather filter (5) Return filter (2) Bolt (6) Suction filter (1) Drain plug (3) Cover (7) Oil filling port (2) Oil drain hose (4) Set bolt... -
Page 103: Adjusting Engine Valve Clearance
(1) Body BAdjusting Engine Valve Clearance (2) Oil separator element (3) O ring Consult your local KUBOTA Dealer for this service. (4) Cover EVERY 1500 SERVICE HOURS Do all 50, 250 and 500 hour servicing at the same time. BChecking PCV (Positive Crankcase... -
Page 104: Annual Servicing
Leakage and Mounting Screw) A Observe all relevant environmental protection Consult your local KUBOTA Dealer for this service. regulations when disposing of anti-freeze. A Anti-freeze if swallowed is poisonous to people, animals and birds. -
Page 105: Replacing Fuel Hose
REGULAR CHECKS AND MAINTENANCE WORK 4. Close the drain plug and fill the radiator and the recovery tank with coolant fluid. Let the engine idle for SSV65 6.8 L about 5 min., stop the engine and remove the key. Radiator 5. -
Page 106: Replacement Of Radiator Hoses
REGULAR CHECKS AND MAINTENANCE WORK BReplacement of Closed Breather Related Rubber Piping Consult your local KUBOTA Dealer for this service. BReplacement of Diesel Particulate Filter (DPF) Differential Pressure Sensor Rubber Piping (Front and Back) Consult your local KUBOTA Dealer for this service. -
Page 107: Other Adjustments And Replacements
OTHER ADJUSTMENTS AND REPLACEMENTS OTHER ADJUSTMENTS AND REPLACEMENTS PURGING OF THE FUEL SYSTEM BChecking of Tires 1. Fill up the machine with fuel. See "Checking of Tires" in "DAILY CHECKS" in 2. Turn the starter key to the "RUN" position. 3. -
Page 108: Fuse Capacities And Circuits
OTHER ADJUSTMENTS AND REPLACEMENTS BFuse Capacities and Circuits BElectrical Outlet Max power is less than 120 W. If you need another auxiliary electric, contact your KUBOTA dealer for details. AUX electrical power Engine elements [5A] [15A] (1) Electrical outlet Alternator [5A]... -
Page 109: Slow Blow Fuse
(1) Slow blow fuse case cap [Open cab model] (2) Cover (3) Bolt Protected circuit Fuse type (4) Bolted slow blow fuse Main [60A] Bolted Alternator [SSV65: 80A] Bolted [SSV75: 100A] CRS [30A] Plug-in Glow CAB [60A] Plug-in [Closed cab model] Protected circuit... -
Page 110: Troubleshooting
TROUBLESHOOTING TROUBLESHOOTING If the machine does not perform as expected, or if trouble arises, refer to the table below undertake the appropriate measures. Trouble Cause Countermeasure * Check fuel tank and filter. Fuel is too viscous. * Remove impurities and water. * If necessary, replace filter. - Page 111 TROUBLESHOOTING Trouble Cause Countermeasure Hydraulic oil level too low * Add oil. Leakages of hoses and / or * Replace hose or joint. joints Lift arms, bucket, Hydraulic drive unit power is Armrest is in "Raised" position. * Lower the armrests. System too low.
-
Page 112: List Of Error Code Numbers
TROUBLESHOOTING List of Error Code Numbers : Sure to happen : May happen Machine condition Engine performance Provisional measure Error Code Problem or Failure Number Accele- Engine Machine performance Correction Engine ration output stopped limited limited Immediately contact your local E: 001 CAN communication dealer. - Page 113 TROUBLESHOOTING Machine condition Engine performance Provisional measure Error Code Problem or Failure Number Accele- Engine Machine performance Correction Engine ration output stopped limited limited auxiliary hydraulic Auxiliary hydraulic control control system is not turned Immediately contact your local E: 019 system (Solenoid valve for dealer.
- Page 114 TROUBLESHOOTING Machine condition Engine performance Provisional measure Error Code Problem or Failure Number Accele- Engine Machine performance Correction Engine ration output stopped limited limited Float mode selector The float solenoid fails to Immediately contact your local E: 032 solenoid cable broken or function and the float mode dealer.
- Page 115 TROUBLESHOOTING Machine condition Engine performance Provisional measure Error Code Problem or Failure Number Accele- Engine Machine performance Correction Engine ration output stopped limited limited Immediately contact your local E: 9101 Fuel or rail pressure system dealer. Immediately contact your local E: 9102 SCV system dealer.
- Page 116 TROUBLESHOOTING Machine condition Engine performance Provisional measure Error Code Problem or Failure Number Accele- Engine Machine performance Correction Engine ration output stopped limited limited Stop the engine and check and drain the fuel filter. E: 9120 Fuel filter water warning If this error code number still appears, immediately contact your local dealer.
- Page 117 TROUBLESHOOTING Machine condition Engine performance Provisional measure Error Code Problem or Failure Number Accele- Engine Machine performance Correction Engine ration output stopped limited limited Check the fuel level and see if the fuel filter is clogged. E: 9303 Engine fuel system (SCV) If this error code number still appears, immediately contact your local dealer.
-
Page 118: Operation Under Cold Weather Conditions
OPERATION UNDER COLD WEATHER CONDITIONS OPERATION UNDER COLD WEATHER CONDITIONS PREPARATION FOR OPERATION IN COLD PROCEDURE AFTER COMPLETION OF WEATHER WORK 1. Replace engine oil and hydraulic oil with those of Clean the machine thoroughly after work and wipe dry. viscosities suitable for cold weather. -
Page 119: Long Storage
LONG STORAGE LONG STORAGE To avoid personal injury or death: A Do not clean the machine with the engine running. A To avoid the danger of exhaust fume poisoning, do not operate the engine in a closed building or any areas without proper ventilation. - Page 120 DPF differential pressure sensor rubber piping 4000 hours (Front and Back) Suction pipe downstream the AFS (Air Flow Sensor) Boost sensor pressure rubber piping Intake air line To prevent serious damage to the hydraulic system, use only a KUBOTA genuine hydraulic hose.
-
Page 121: Recommended Oils
RECOMMENDED OILS RECOMMENDED OILS 1. Before delivery the hydraulic oil used was Idemitsu Daphne Super Hydro 46ST. 2. Use engine oil API service classification CJ-4 or CK-4. 3. Use SAE 90 (API, GL-4, GL-5) as drive unit oil for all seasons. Application Viscosity Shell... - Page 122 RECOMMENDED OILS C Engine Oil: A Oil used in the engine should have an American Petroleum Institute (API) service classification and Proper SAE Engine Oil according to the ambient temperatures. Above 25 SAE 30 or SAE 10W-30, SAE 15W-40 to 25 SAE 20 or SAE 10W-30, SAE 15W-40 Below 0 SAE 10W or SAE 10W-30...
-
Page 123: Biodiesel Fuel (Bdf)
Consequently, fuel filter performance may be reduced, particularly during cold weather conditions. 8. The KUBOTA Warranty, as specified in the Owner's Warranty Information Guide, only covers defects in product materials and workmanship. Accordingly, any problems that may arise due to the use of poor quality fuels that fail to meet the above requirements, whether biodiesel or mineral oil based, are not covered by the KUBOTA Warranty. - Page 124 Fuel line Replace every 1 year Consult your local KUBOTA Dealer for this service. C Long Term Storage: 1. BDF easily deteriorates due to oxygen, water, heat and foreign substances. Do not store B6 through B20 longer than 1 month and B5 longer than 3 months.
-
Page 125: Appendices
2345 2503 Turning radius from center-machine rear 1364 1435 A Above dimensions are based on the machine with KUBOTA standard bucket. A Above dimensions are based on the machine with KUBOTA standard tire. A Specifications subject to change without notice.
Need help?
Do you have a question about the SSV65 and is the answer not in the manual?
Questions and answers
My Kabota ssv65 has been rolled onto its top. It is back on its tires but the engine is hydro-locked. How do I remove the glow plugs so that I can hand crank it over to clear the hydro-lock?